NOTE: This article discusses an outdated version of Capture One. To learn more about our latest version, click here.
In a time where almost everyone can call themselves photographers, it’s always about finding ways to stand out as a professional. A very tangible way to stand out is delivering your best work in print.
Enabling you to do this, we have together with L.Type prepared a great offer to all first time L.Type customers, to get the highest quality print. Below L.Type, ambassador Jonathan Glynn-Smith shares why he turned to print again, and we’ve made a step by step guide to get your captures ready for print with Capture One.
Jonathan Glynn-Smith – The Importance of Printing
I’ve been a photographer and director for over twenty years. Like many photographers, I used to have printed portfolios to show to clients, and then with the advent of digital moved to the web and my iPad to show off my work. I just stopped printing regularly.
Ever since I discovered L.Type, printing has become integral to my work again. There is so much that a finished print can show that simply doesn’t come across on a screen. All the subtle details of light and shade and color work together to bring the captured moment to life. The image has a sense of being in the paper not on it.
I became so used to seeing my images on screen that I had forgotten the joy of holding a print in my hand. A print is something you can examine closely, revealing details that you missed as you composed the image. A print is something you can share – whether passing it across a table or putting it up on a wall. Most of all, a print brings images to life, adding texture and emotion that a screen can never capture. Now, whenever I shoot a project, I aim to share at least part of it with the client in print.
Jonathan Glynn-Smith on the importance of printing
We all have thousands of images trapped in computer storage or the Cloud. Recovering them to print can be time-consuming, but I find that if you build it into your workflow then setting aside images for print is easy. I’ve used Capture One for years to manage all my workflow, and its Export Recipes allow me to process my favorite images for printing as I work – and then to print them all easily when I am ready.
For me, the most critical aspect is that with an L.Type you can hold a print that does justice to the image in both color and black and white.
Optimizing the process in Capture One
Watch the tutorial or follow the steps written below
Exporting an image for print that will print perfectly in terms of cropping, sharpness and quality can often be a troublesome experience. Process Recipes in Capture One offer a repeatable consistent way to prepare your images for print.
In this blog post I will show how to create a Process Recipe designed to export a final image to send to a printing service, in this case L-Type.com. However, the principles can be applied to any other print service.
Creating a new Process Recipe
Process Recipes are built in the Process Recipes tool found in the Output tool tab.
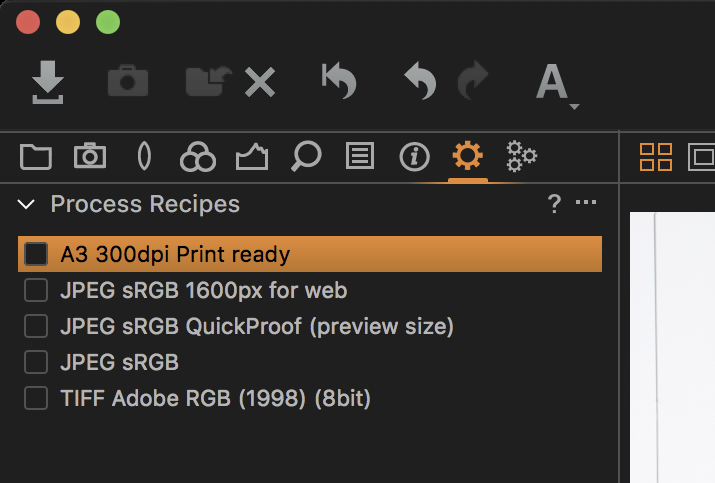
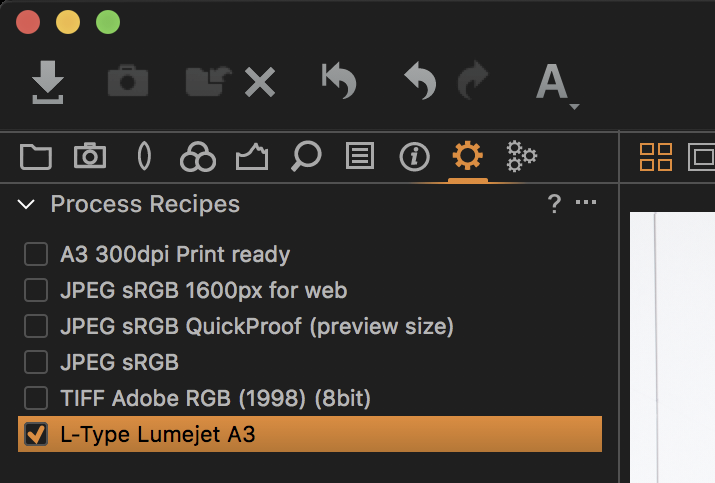
To create my new Process Recipe, I click on the ‘plus’ icon and give the Recipe a sensible name. In this case, my Recipe is going to create an A3 Print, to the L.Type specification.
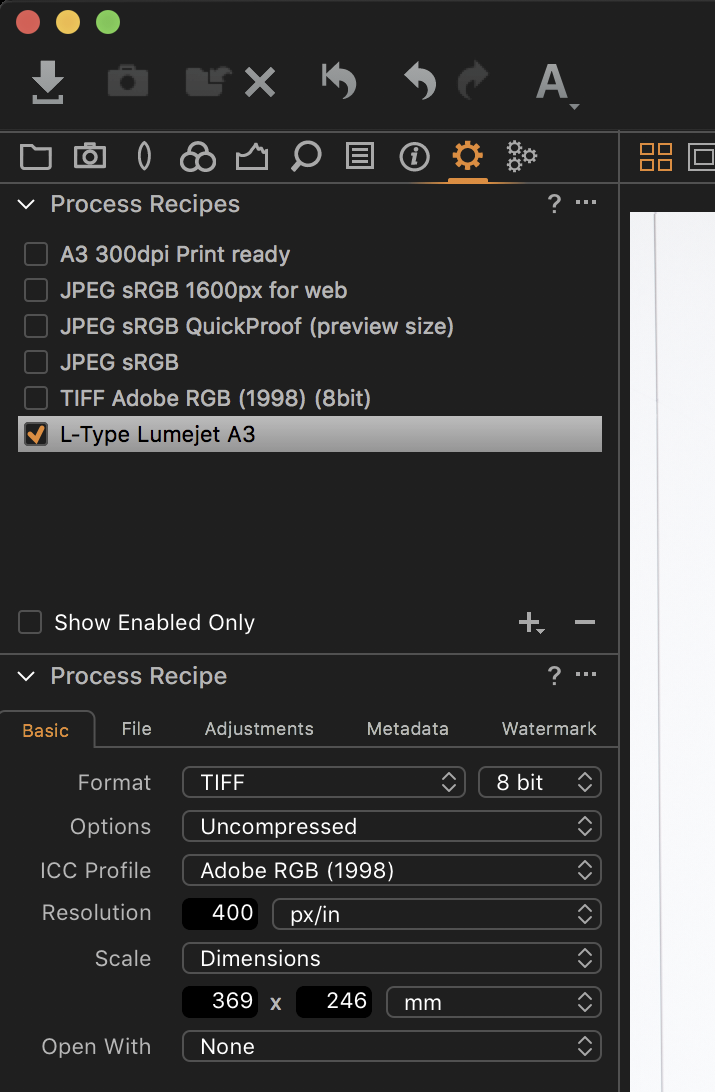
In the Process Recipe tool, I have to fill in the parameters for the output I want. In this case the format that L.Type requires is either TIF or JPEG. As I am a quality junky, I will go with TIF to be on the safe side. I’m using 8-bit TIF because 16-bit just makes for much larger files with no quality benefit for prints. The ICC profile can be left at Adobe RGB (1998) for optimal colors.
L.Type prints use a unique high-resolution process, and as I am going to export to a particular size in millimetres, it’s really important I get the correct Resolution value which is 400 px/in.
Finally, I want to set my Scale to Dimensions and use 369mm x 246mm which is the exact size L.Type will output a print at for the print size, A3 with a 25.5mm border, I will choose when ordering. Why am I so picky about setting this exact size? For one it will allow me to crop accurately but more importantly it means L.Type will not have to resize my image before printing.
You might be thinking, well surely, I just send them the biggest file I can squeeze out my camera and it will look great! But the hard fact is that reducing an overly large image to a smaller size might have a negative impact on quality and sharpness in the same way as having to increase an image in size can. You want to be in control of this process. This way, I ensure the best quality I can, to send to print.
Cropping to Output Size
There is nothing worse than sending an image to print and having something cropped out of your control. In this case, L.Type never crop your images, but that may mean uneven borders instead. In reality that’s your own fault, so be prepared and send exactly the right dimensions as described above! If my image was already cropped, then I might need to tweak the crop to fit into the aspect ratio of my freshly created Recipe. Fortunately, there is a super simple way to do that in Capture One.
Long pressing on the Crop cursor tool means I can choose Output in the drop-down menu.
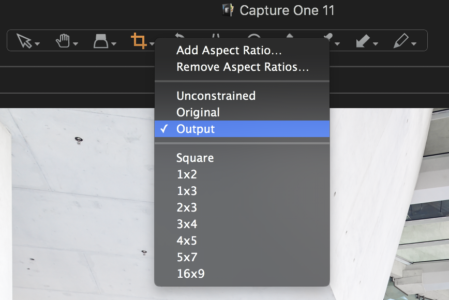
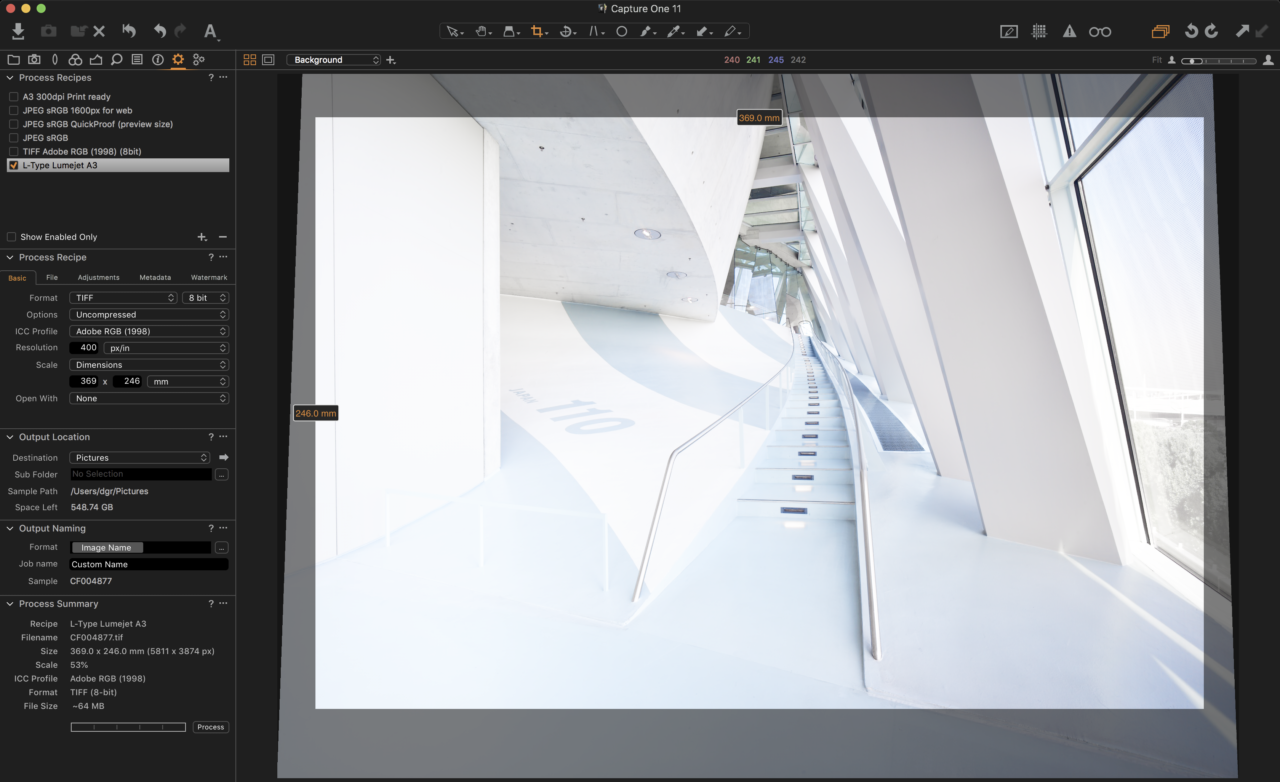
When I go to crop my image or adjust the current crop it will snap exactly to my dimensions in the currently selected Process Recipe. In this case, 369mm x 246mm.
Output Sharpening for Print
With the crop, size and aspect ratio in place, I want to control the sharpening. This is a crucial step when exporting to print.
In the Adjustments tab, I choose Output Sharpening for Print in the Sharpening dropdown menu.
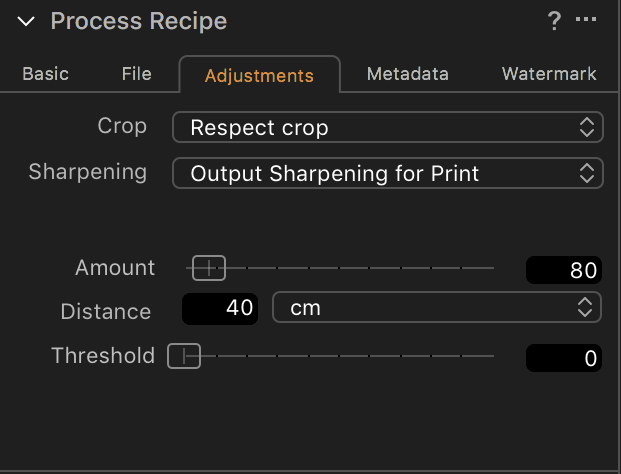
I control the sharpening amount by setting Viewing Distance to approximately 40cms, as these images are going to be viewed in a portfolio at an arm’s length. L.Type’s print resolution is specifically intended for close viewing, but if you are printing larger prints with another service, you might well want a longer viewing distance.
Capture One will then calculate the amount of sharpening required, based on my scaling and viewing distance. Sharpening is very much a personal preference or subject dependant, but I have found the default amount of 80 to work well on a variety of subjects. If I feel the image quality is less than perfect, perhaps slightly missed focus or some motion blur, I might back it off a little to 60.
Proofing the Recipe
To take the guesswork out of exports, there is a very neat feature that will simulate the selected Recipe in the viewer. Recipe Proofing will simulate the scaling and output sharpening for this Recipe.
First of all, I need to zoom my image to 100%, and then click on the spectacles icon in the toolbar.
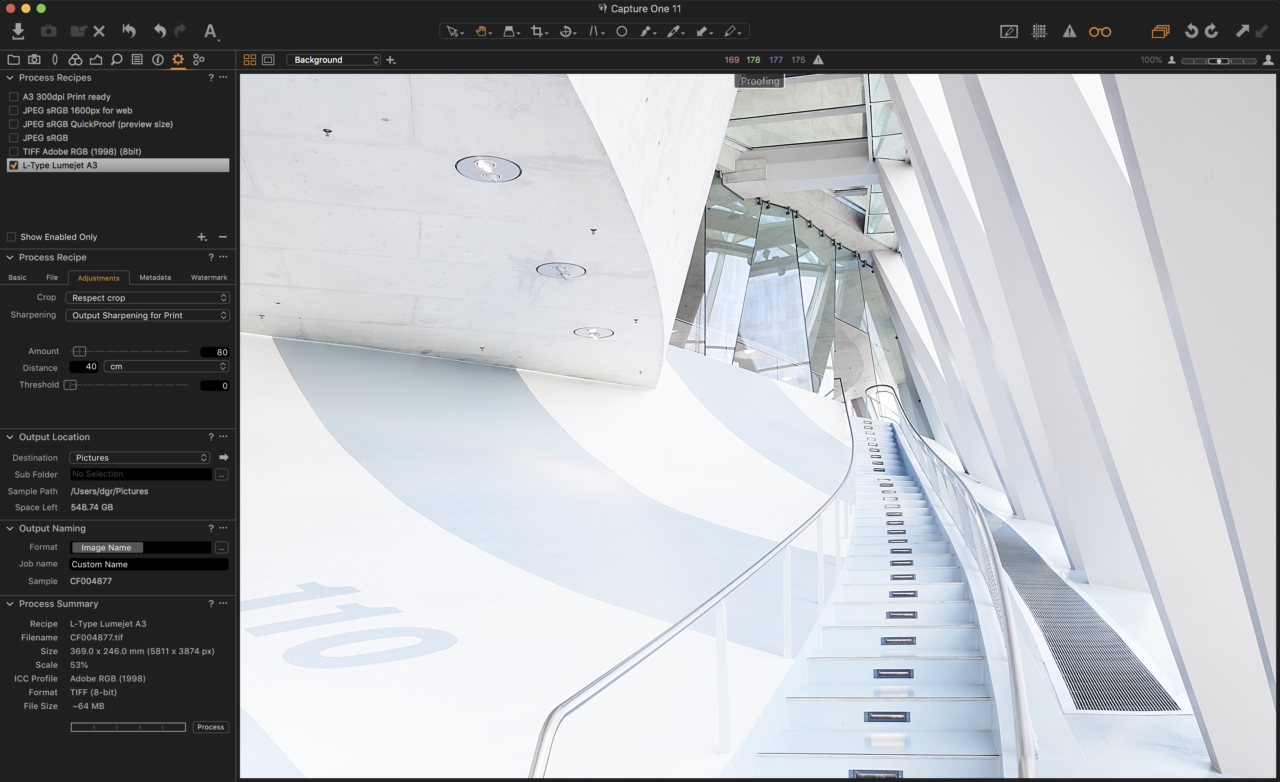
Immediately the image will be resized and sharpened. Don’t be alarmed if the image looks a little over sharpened if you are going to print! But if you are really concerned or want to nail your own personal preference, you can always send 2-3 prints to your chosen service to see what works best for you. As I said earlier, the default of 80 at a viewing distance of 40cm has been working well for me.
Output Location
Last but not least, Process Recipes can also have unique export locations.
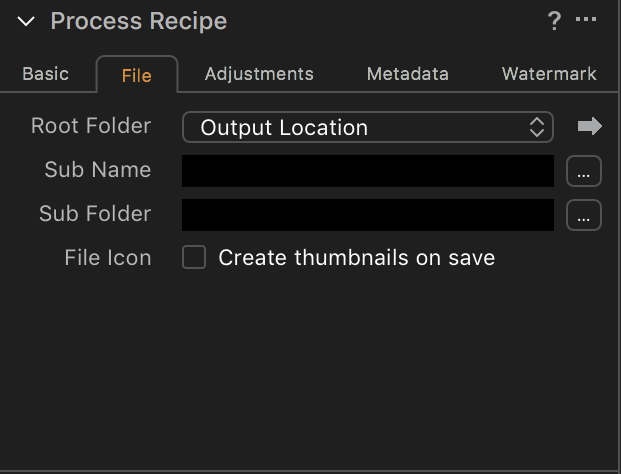
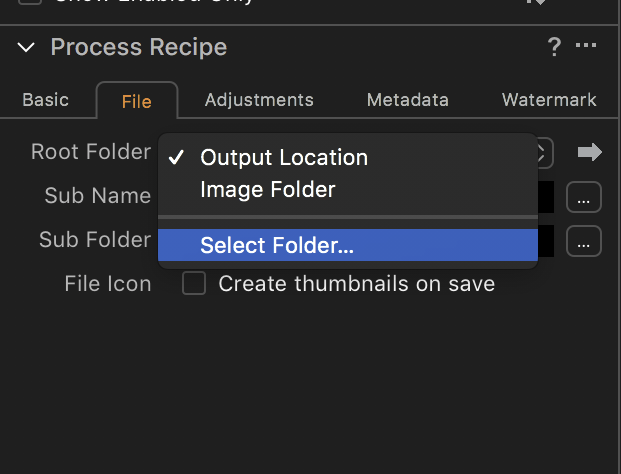
By default, the output location is decided in the Output Location Tool as indicated in the Root Folder of the File tab. However, I want my Process Recipe to have a unique location.
Therefore, I change the Root Folder to a Dropbox folder which is already linked to my L.Type account. This way, Capture One exports directly to Dropbox, so I can simply order prints on L.Type.com or easily on their iOS app.
This avoids any additional upload or file management steps.
Exporting
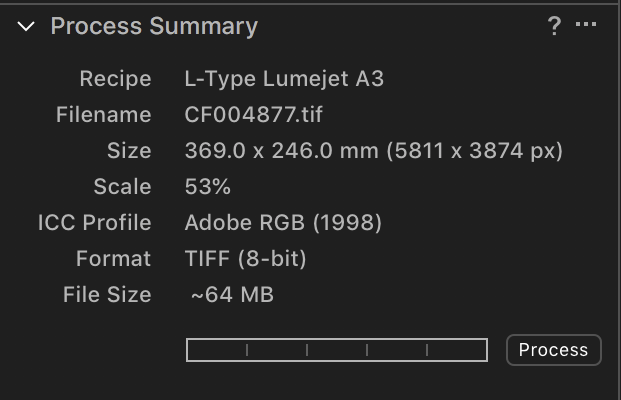
To export my image, I click on the Process button in the Process Summary tool.
Tip – Don’t forget you can process multiple images at once and even use more than one Process Recipe simultaneously. Simply check the box next to your Process Recipes to activate them.
Conclusions
The steps outlined above can be applied to any kind of output, whether that is for print or screen. Remember, having your own set of Process Recipes leads to consistent and repeatable output. Not only that, you will save time with Capture One doing the heavy lifting.
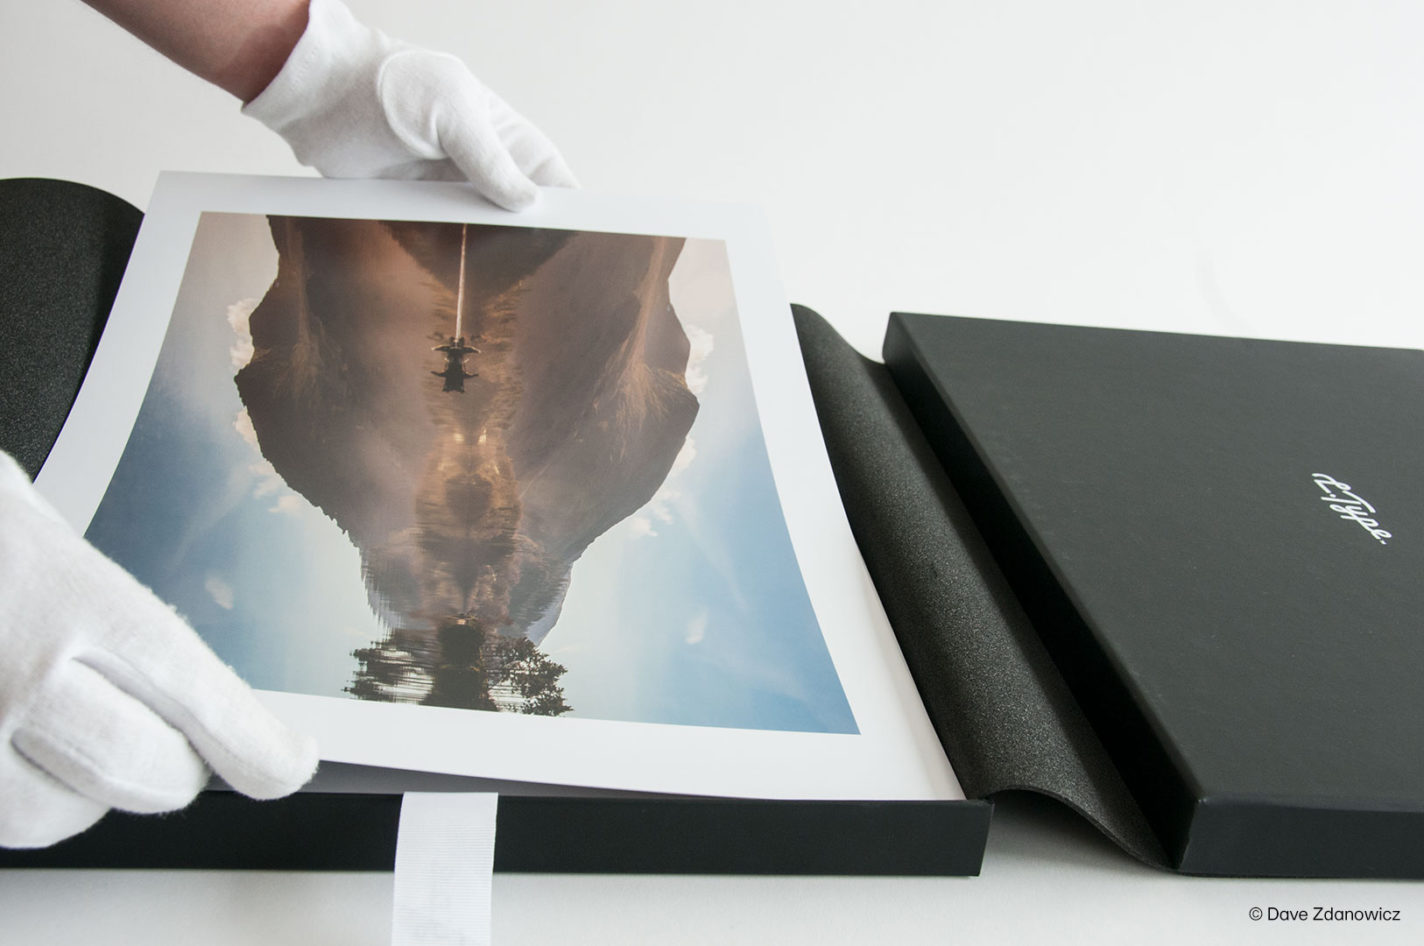
The Quality of L.Type Prints
L.Type exclusively produce the world’s only 400ppi true continuous tone prints. Having designed their own printers, they apply the 21st century digital technology to expose traditional silver halide (”C-Type”) paper to a previously unachievable level of accuracy. Featuring their patented technology, L.Type can reveal all the detail that a human eye can see at arm’s length.
Hope this has inspired you to get some of your favorite captures printed. Now it’s time to act.