NOTE: This article discusses an outdated version of Capture One. To learn more about our latest version, click here.
You have just been out shooting for eleven hours and filled up a couple of cards with hundreds and hundreds of wedding images. Everything from preparation to midnight snacks is captured. Now it’s time to import, select, edit, finalize and deliver your stunning images in different subfolders for the convenience of your customers.
How do you approach this huge task? I will show you my typical workflow for this. Photographers are different and I don’t expect everyone to work like me. I simply hope you can take home at least one tip from reading this blogpost that will improve your workflow.
Session-based workflow
Personally, I like to create a new Session for every wedding I shoot. This way I have complete control of my images and I can utilize the benefits of the Session structure. I have a physical folder for all the RAW images and I can split them up into virtual Albums within the Session – without moving the files physically.
So, how does this work?
Recommended: To take full advantage of James Johnson’s expertize on Sessions in Capture One, we highly encourage reading one or more of his related blog posts:
Step 1 – Creating and setting up a session for weddings
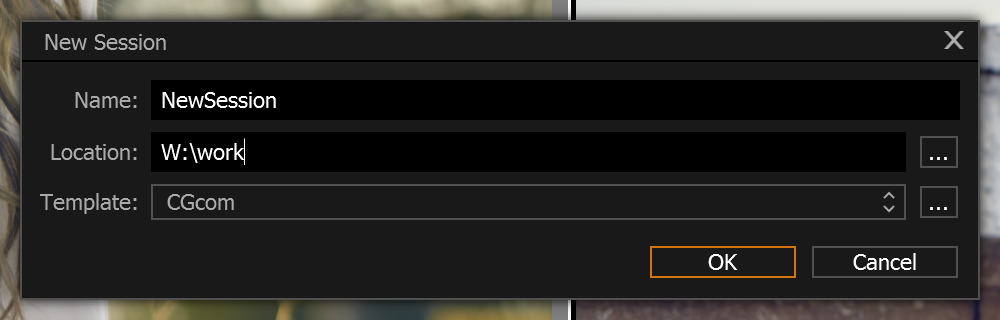
Open Capture One and go to File > New Session. A dialog appears where you can select the location of your session among other options. I name my wedding Sessions corresponding to the names of the couple, for example, ‘Angelica&James’ (the Session name is important when using Tokens later in the workflow). I have my wedding Sessions sorted by year and month, so the location would be something like ‘…/Images/Weddings/2017/February/’. Great, now hit OK!
Assuming you want to split up your images into virtual Albums within the Session – this could be ‘Preparation’, ‘Ceremony’ etc. – you need to create those under ‘Session Albums’. Click the small plus-icon and select ‘Album’. I usually create the following, which corresponds to a typical Danish wedding:
- Preparations
- Ceremony
- Reception
- Portraits
- Dinner
You can always add, change, and remove Session Albums as you see fit. Remember, Session Albums are ‘virtual Albums’, meaning that they are only visible from within your Session, and images can be in multiple Albums at the same time. I simply use Albums to navigate my images more easily than browsing through an enormous batch of images. Using Session Albums will also help you when exporting your images using Tokens – we will get back to that later.
Step 2 – Importing and sorting your images
Now it’s time to plug in your memory cards and transfer the images into your Session. Depending on your settings, an Import dialog might show up when inserting the memory card. If not, hit the ‘Import images’ icon in the top left, or choose File > Import.
Import from
This is the location you are importing from. Choose the folder containing your images and click ‘Open’. If the import dialog automatically popped up when you insterted your memory card, the correct folder should already be chosen.
Import to
I like to use ‘Capture Folder’ as Destination for wedding Sessions. This way all my images are in one logical location.
Backup to
Here you can copy your images to a second destination for backup. I do manual backup via a NAS server, so I don’t use this feature.
Naming
Remember in step 1 that I mentioned Tokens? Now’s the time to use these. Click the button next to Format to open the Naming Format dialog. Under Group, open the drop-down menu and select ‘General’. Now you have a selection of general Tokens available. Double click ‘Document Name’, which will then show up in the ‘Format’ field (Document is a shared term for a Session or a Catalog). Click in the Format field after the Token to manually input an underscore, ‘_’, to separate it from the next Token, which will be a counter. Click the small arrow in the ‘1 Digit Counter’ to change it to ‘3 Digit Counter’ and then double click that Token. You now have a fully functional Naming Format, utilizing Tokens.

Metadata
Fill in Copyright and Description if needed.
Adjustments
I usually never do any adjustments to my images during import, so leave this as default.
Now click ‘Import All Images’. Repeat for all your memory cards.
Pro-tip: If you’re shooting with more than one camera, make sure your cameras’ clocks are synchronized, even in seconds. This way, after you have imported all images, you can sort by ‘Date’ for then to batch rename (select all images, right click > Batch Rename) and use the Naming Format with Tokens to rename your images chronologically across all cameras.
Remember the Session Albums from the beginning? On to those! While in your Capture Folder showing all your images, select the ones shot during preparations. Hold down Shift to select multiple images. Now drag those images on top of the ‘Preparations’ Album to the left. They will now appear within that Session Album while physically still be in your Capture Folder. Repeat for the rest of the images, cleverly dividing all your images into smaller chunks.
Step 3 – Selecting the good stuff
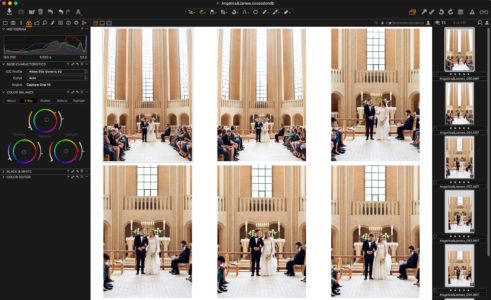
On to finding the nuggets among your pile of RAW images! Go through each Session Album and star rate your images using the keyboard. Many photographers I know rate their images in two or three rounds, effectively giving higher and higher ratings for the good ones in each round. Personally, I find this way too time consuming for wedding photography. I have one rating I use, 5 stars. This rating is given to any image that might be good enough to deliver to the customer. My reason for doing this – and not multiple rounds of selecting – comes down to two aspects: 1; it’s faster, and 2; sometimes I find it hard to discard images without evaluating them with a specific color grading or handful of adjustments. Effectively, I usually end up with ~80-90% of my initial selects.
When all images in every Session Album have been evaluated, you can utilize the built-in Smart Album called ‘Five Stars’. Smart Albums are dynamic albums which populate according to certain criteria for the album; the built-in Five Stars album includes every 5-star rated image in the Session. Therefore, changing the rating of an image within the ‘Five Stars’ Smart Album with anything other than five stars will remove the image from the Smart Album – but the image will remain in its respective Session Album. This way I can quickly discard images that don’t meet my standards of final delivery.
Photographers are different in their way of working, and selecting through many images can be done in numerous ways within Capture One Pro. This is just one of them. Read the Sessions 103 Blogpost for more inspiration on how to effectively do selects.
Step 4 – Copying the first touch
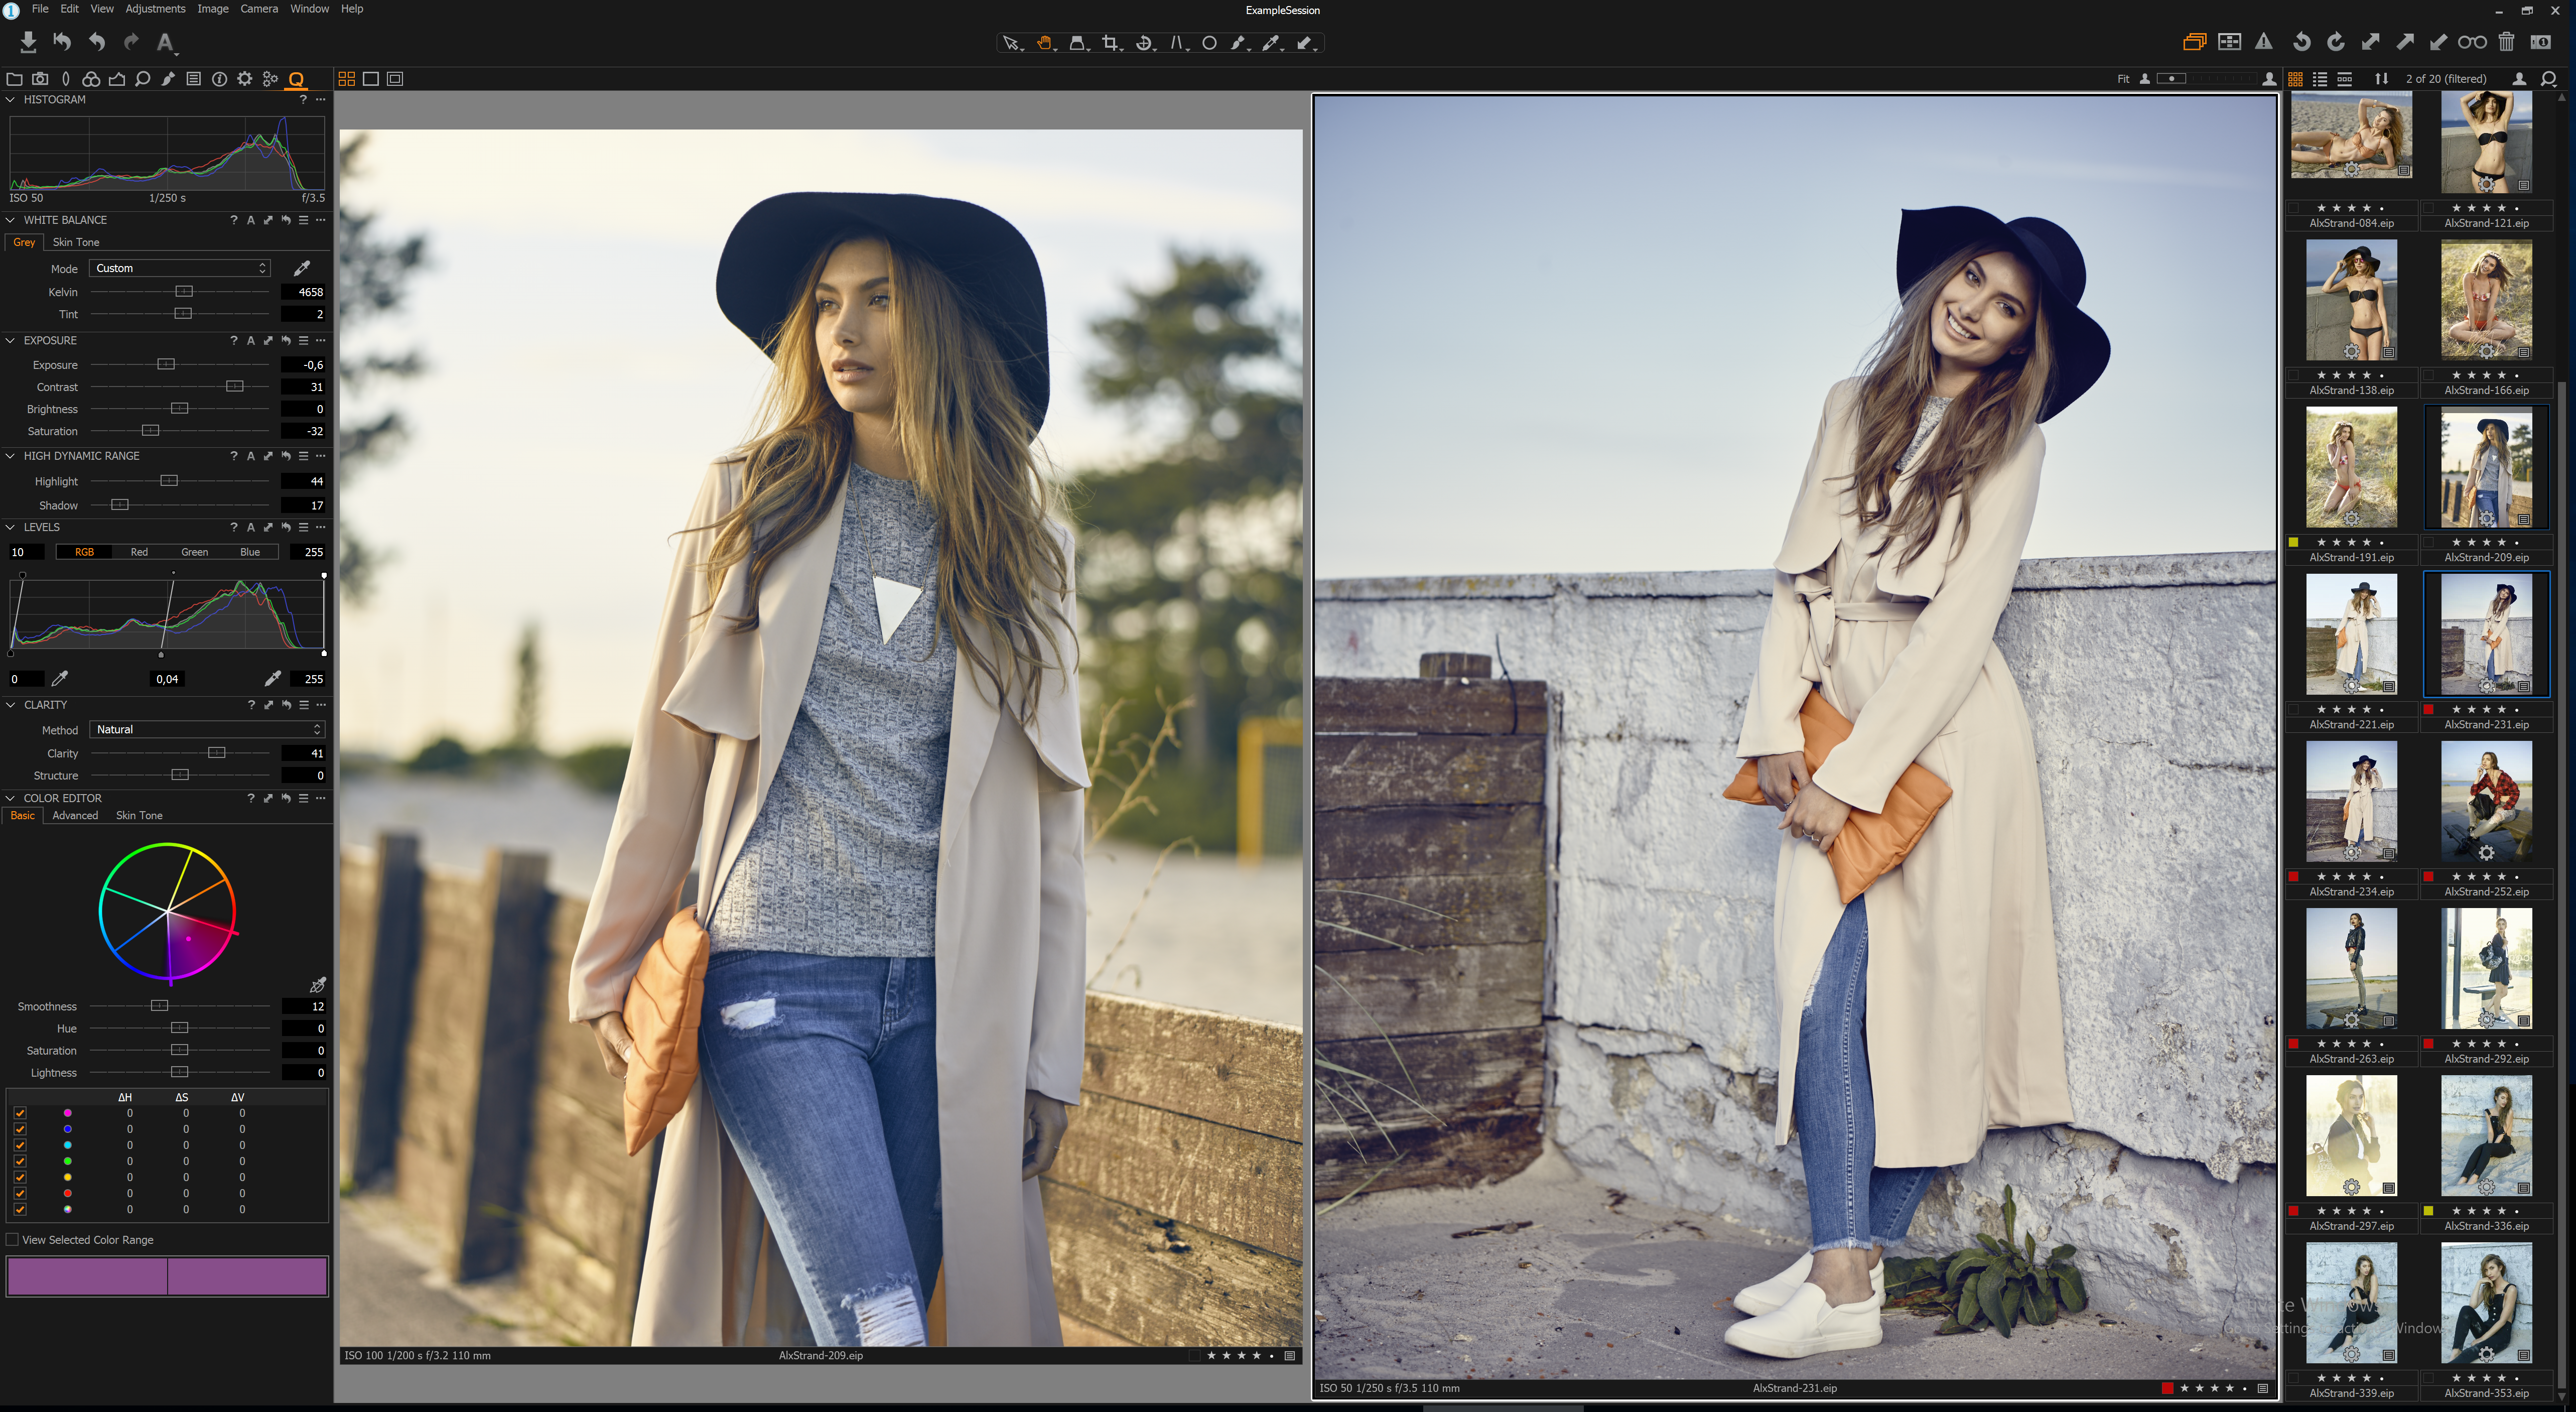
My wedding editing workflow is equal amounts of conveyor belt work and individual fine tuning. I want my images to have the same feel to them while making every single one of them shine to stand alone if needed. This workflow requires a good knowledge of how to copy and apply settings from image to image. But first; we need something to copy!
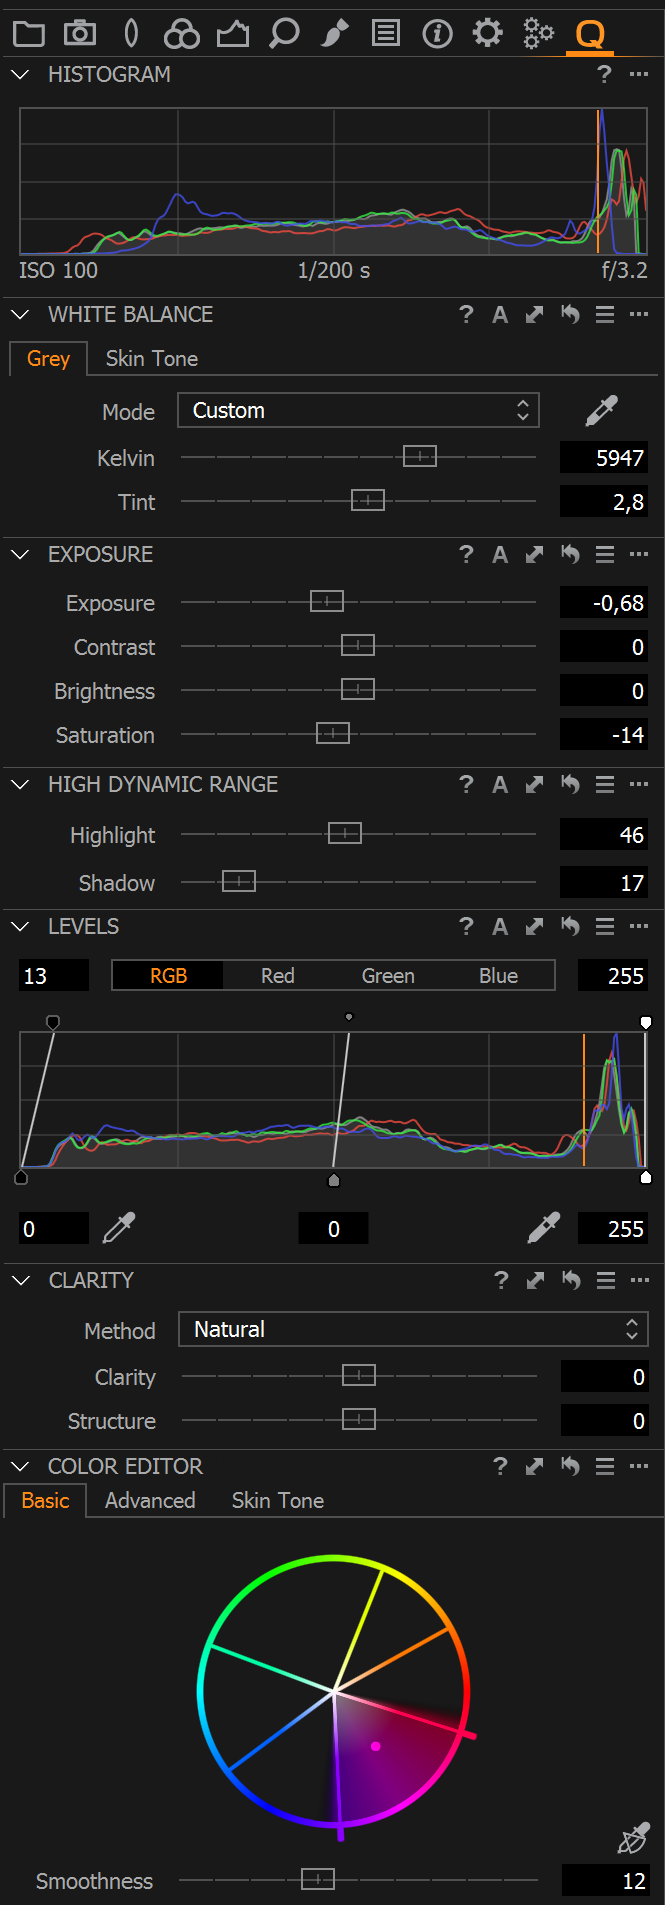
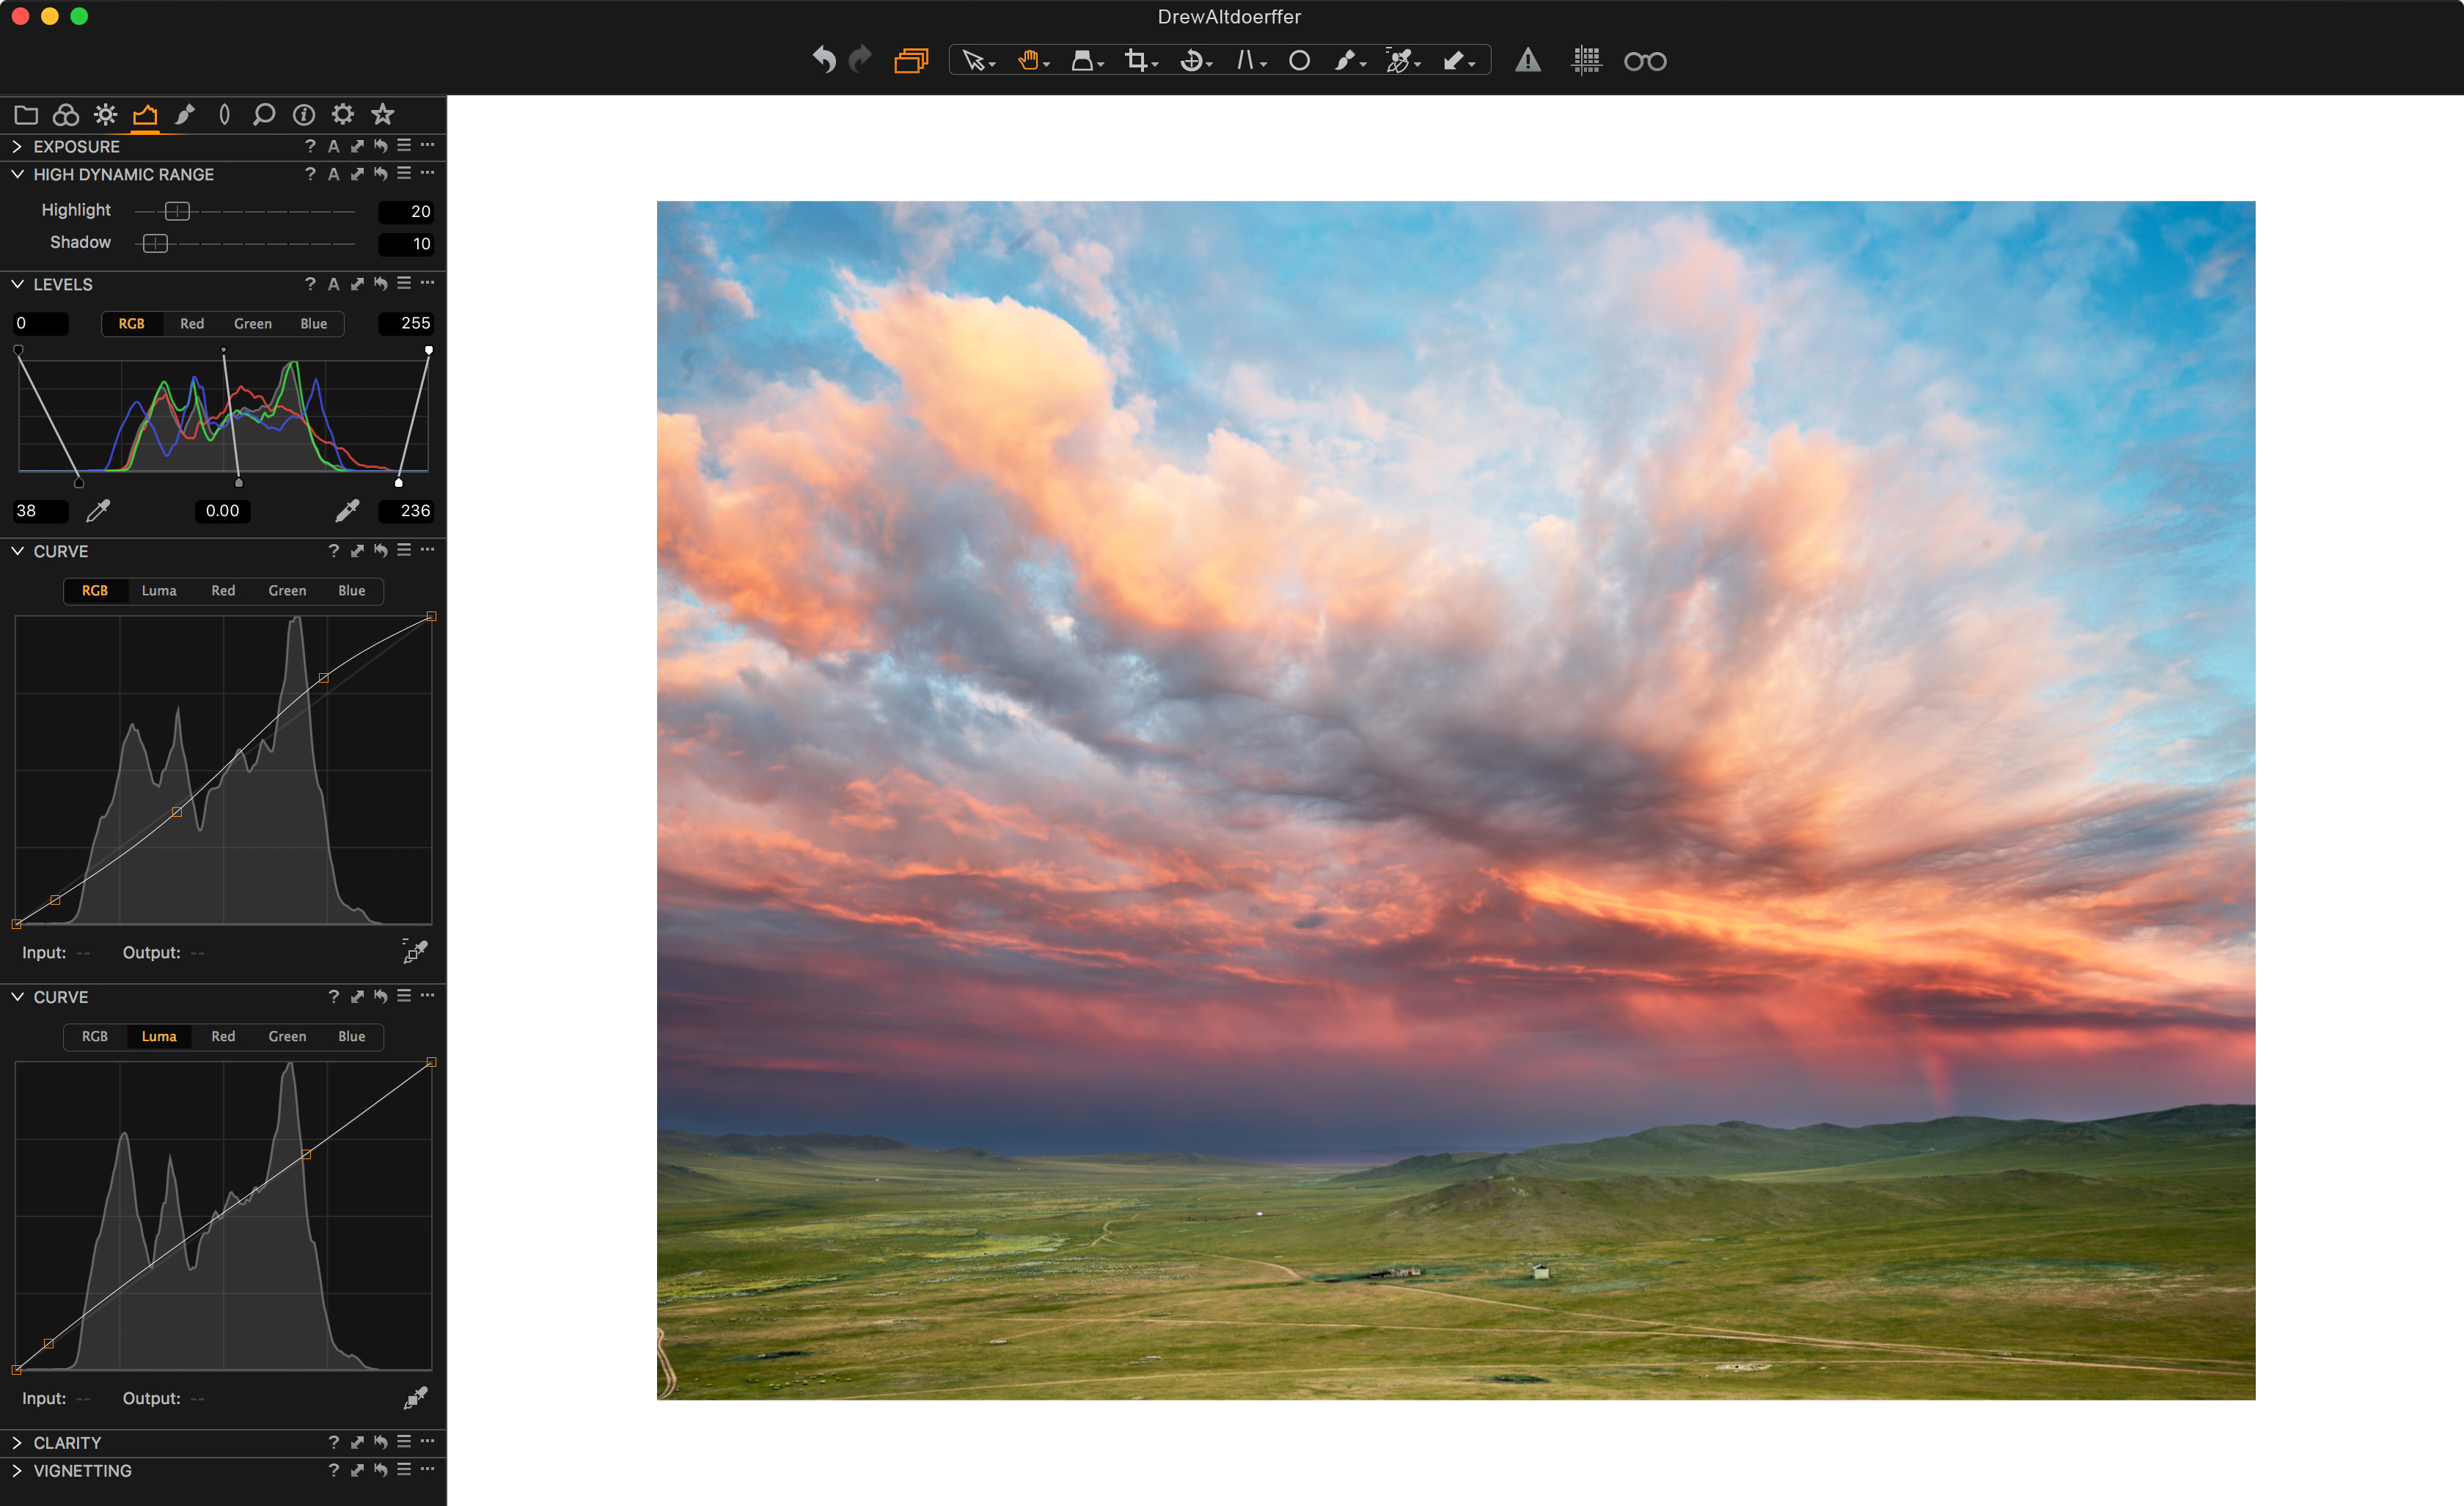
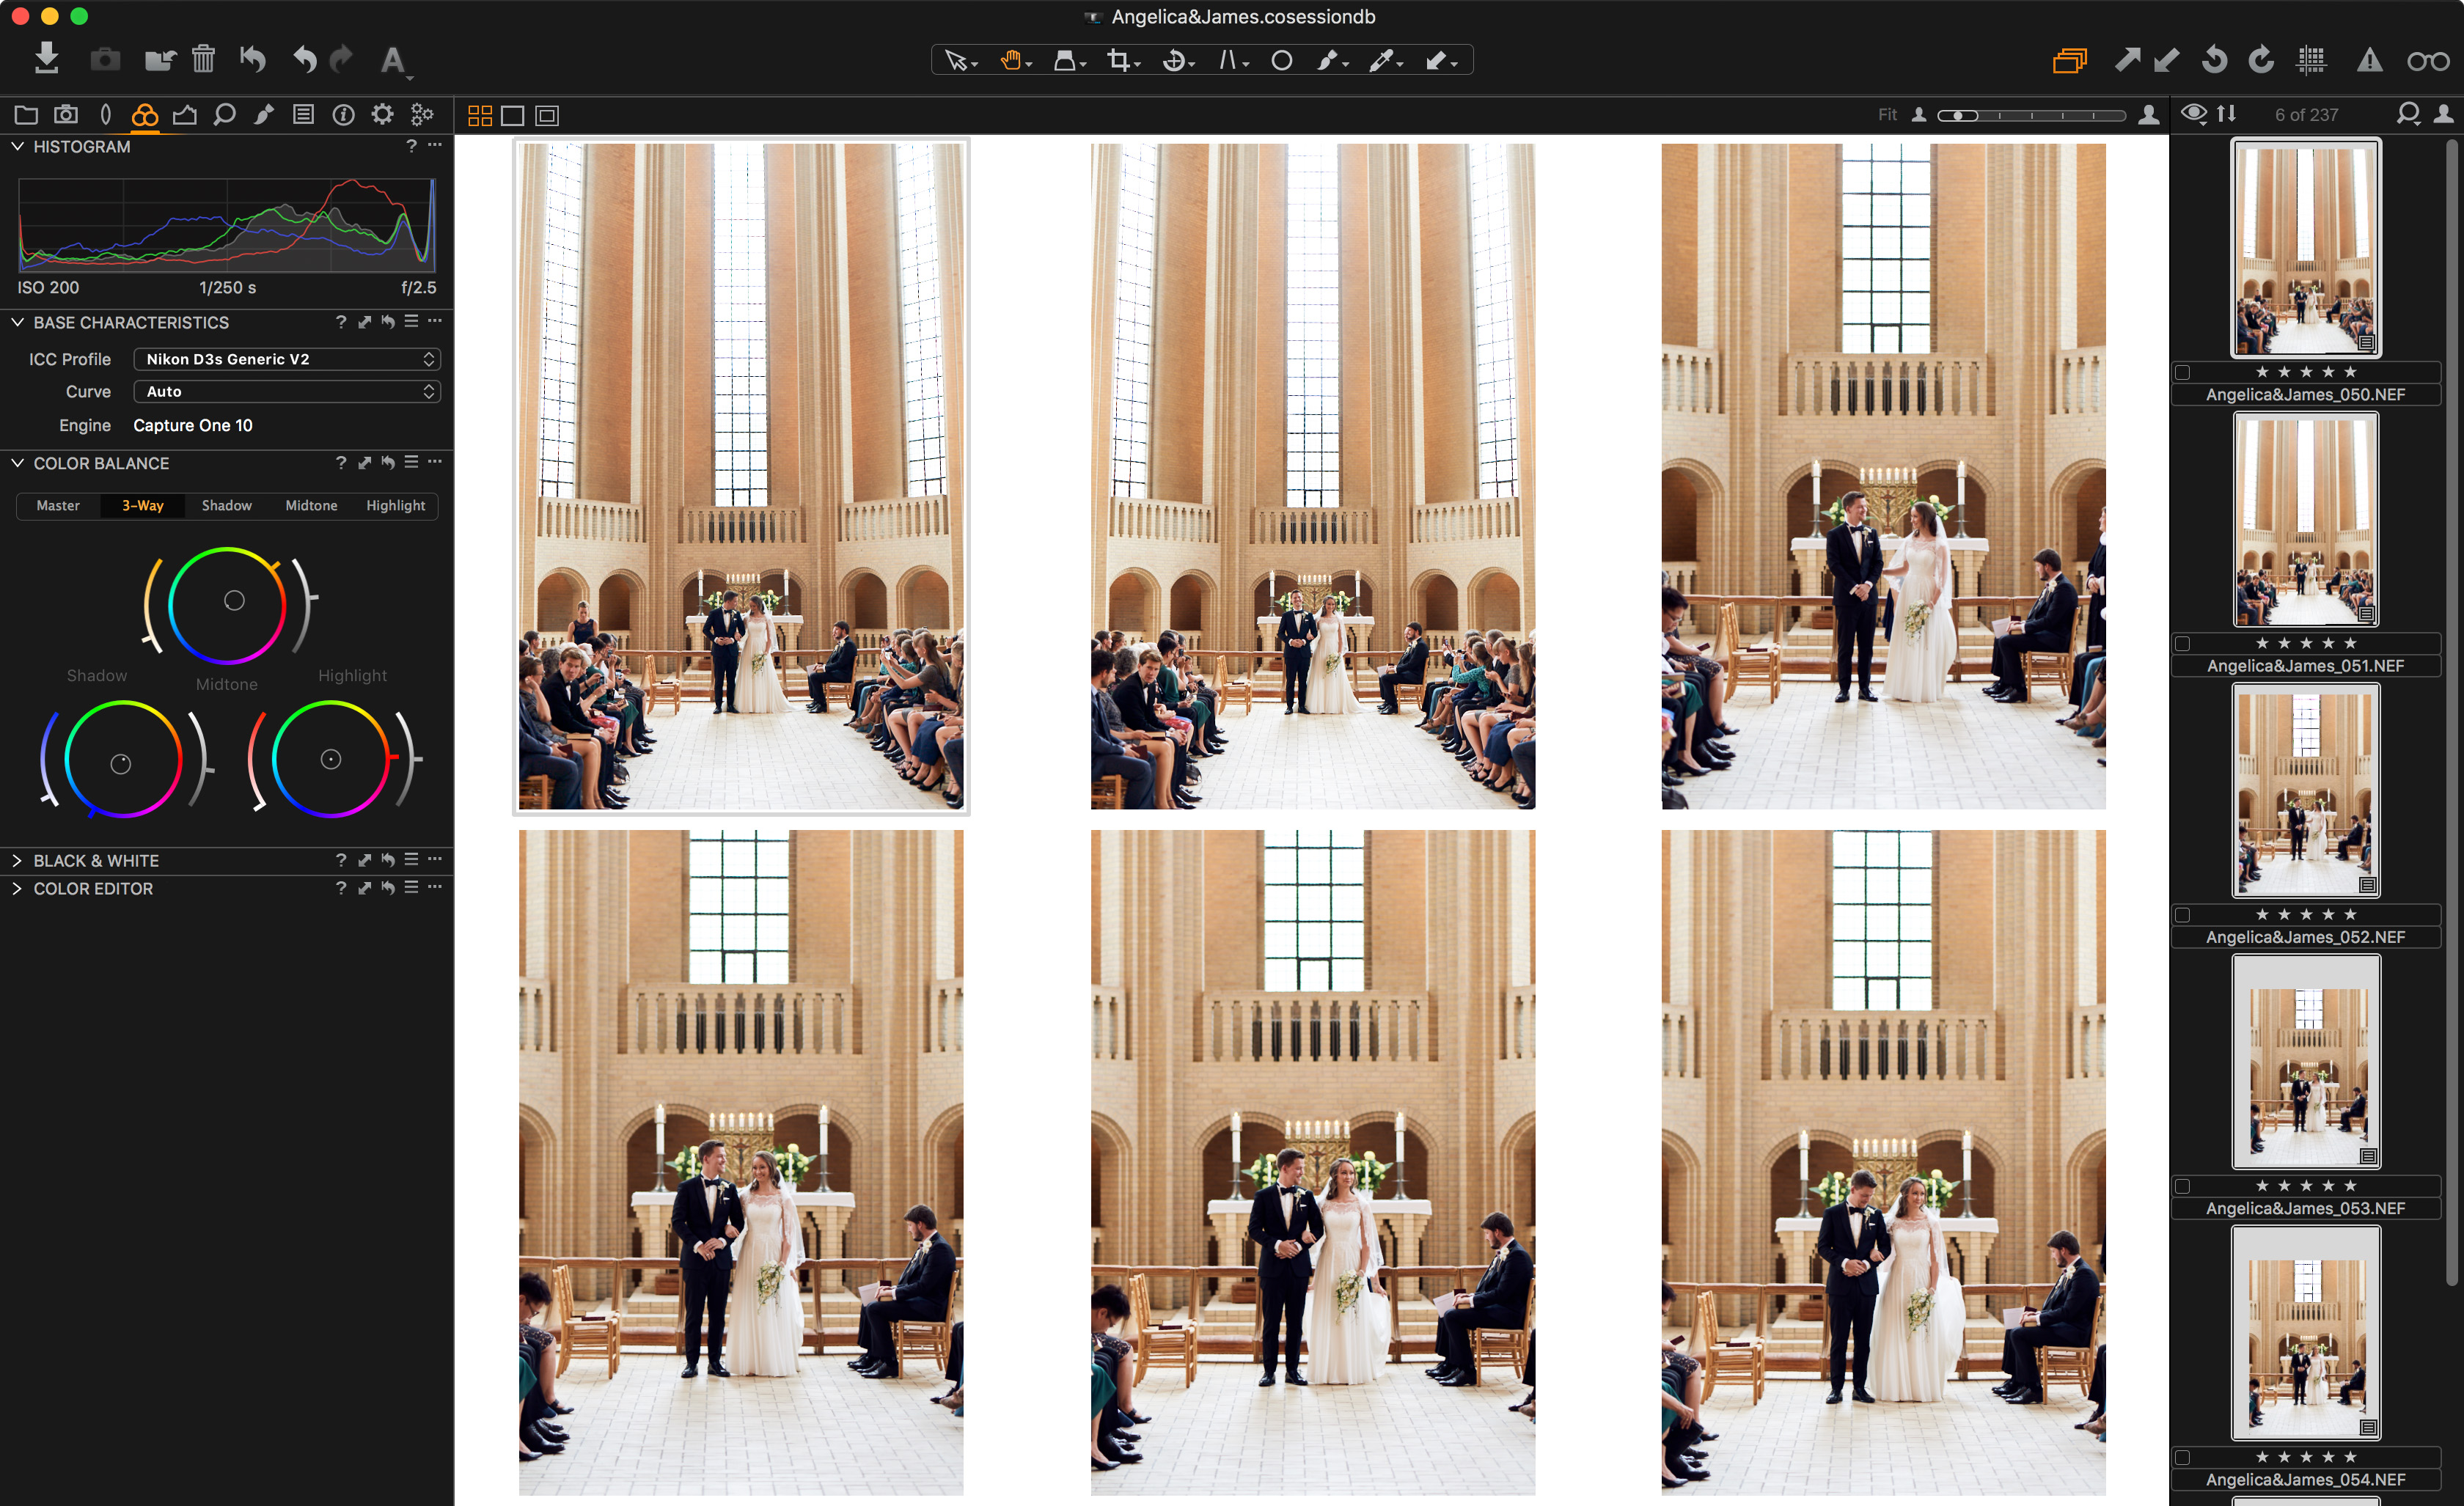
From within the Five Stars album, start with one of the first images. I usually add some contrast, desaturate slightly and play with Color Balance for my initial look. Color grading with the Color Balance tool is a quick and easy way of giving your images an interesting look. This part is very subjective, as every photographer has their style.
When you’re satisfied with the look of your first image (you can always do more adjustments later), it’s now time to transfer the adjustments to more images. There are several ways to do this in Capture One. One way is to click the Up-arrow in the top right corner to copy all adjustments from your selected image (shortcut: Ctrl/cmd + shift + c). Now you can select the next image and click the Down-arrow to apply the adjustments (shortcut: Ctrl/cmd + shift + v). But whoops, Capture One copied everything, including the crop you might have made for the image before. Undo! Ctrl / Cmd + Z!
So now the question is: How do you avoid copying the crop or other specific elements of your adjustments?
And the answer: Enter the Clipboard tool tab!
Step 5 – Controlled, lightning fast copying
The Clipboard tool tab allows you to see which tools have been copied to the clipboard. This is the place where you can deselect the tools you don’t want applied. For example, after copying your adjustments from one image, deselecting the Composition part of the clipboard will avoid any changes in those tools when applying.
Now it’s time to apply it to multiple images at a time. This is simply done by selecting multiple images and making sure ‘Edit > Edit All Selected Variants’ is ticked.
This sort of mass copy/apply method is best for images with a similar raw look. What if you want to be even more specific in what you copy? Let’s say you only want to copy Color Balance adjustments. Not to worry, you don’t have to deselect everything from the clipboard.
Every tool in Capture One has a copy/apply function built into the interface – a small double-sided arrow. I often use this to copy and apply adjustments from a single tool, and only that tool, onto multiple images in a matter of seconds. This is done by first selecting all the images you want to adjust, plus the ‘donor’ image i.e. the image with adjustments you want to copy from. The ‘donor’ image (or Primary variant in Capture One speak) should be the one with the border around it. Next, hold down the Shift key, and click on the (very small) double sided arrow on the required tool. Now your adjustments from that single tool are copied and applied to the rest of your selection.
This effectively means that you can tweak and adjust all your images with individual contrast, crops, exposure, white balance, etc. for then to apply a specific Color Balance (or another tool) across all images in a matter of seconds. Without affecting other tools.
Using these two methods of copying and applying adjustments across images, I find myself switching back and forth between large selections of images, copying and applying adjustments to eventually have hundreds of images tweaked to my liking with a similar feel to them. With some practice and use of keyboard shortcuts, you can speed up your process tremendously for a more efficient workflow.
This blogpost will not go into detail about how to adjust individual images with specific adjustments. It is instead aimed at speeding up your workflow, allowing you to do more in less time.
Step 5a – Duplicating for B&W
Sometimes I want to deliver a group of images in both color and black/white. The easiest way to do this is to select your adjusted target images, right click > Clone Variants. This will create new variants with similar adjustments of the images, suitable for further black/white adjustments. Variants are virtual and exist only inside Capture One; there is still only one physical RAW file on your disk.
It’s a good idea to tag the new variants for later filter management, and the easiest method for me is a simple color-tag. Select all new variants by right clicking one of them, Select By Same > Variant Position (2). With a selection of images and ‘Edit All Selected Variants’ ticked, now press ‘+’ on your keyboard to tag the images.
Use the Black & White tool along with levels and/or curves for exposure and contrast. Copy the settings using the single copy method from previous step to apply to all your new variants. When the desired look has been created on one image, applying to the rest is done within 30 seconds.
Step 6 – Exporting
When I export images for digital delivery to a wedding client, I want to make it easy for them to share the images with friends and family. I also want them to be able to make large prints of the files. This requires two different sizes of each picture with different amounts of sharpening and different ICC profiles. For convenience, I also want to split up the exported images into subfolders, just like I divided my RAW files in the beginning.
Now, here comes the sheer beauty of Process Recipes.
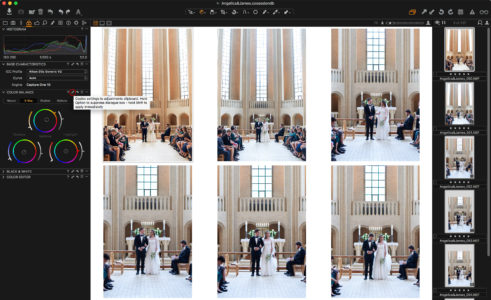
I can select my images in each Session Album, click ‘Process’ (shortcut: ctrl/cmd + d), and Capture One now does all of this for me automatically. How did I achieve this? By setting up my Process Recipes to my exact needs using Tokens.
The Process Recipes are found in the Process Recipe Tab. I have two I use for weddings; ‘Wedding Print’ and ‘Wedding Resized’. Create a new recipe by clicking the plus-icon and name it what you want. Let’s go through the setup for both (I will ignore Metadata and Watermark for now):
‘Wedding Print’
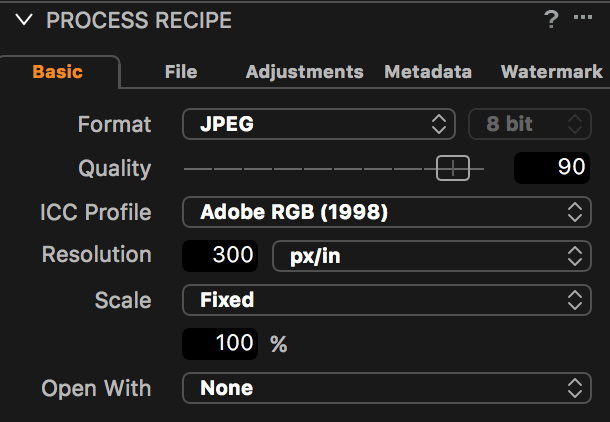
Basic
I use 90 in Quality for wedding exports, which will slightly decrease the file size without affecting visual quality.
ICC Profile is Adobe RGB and images are exported to 100% of their original file size.
Resolution is 300 dpi for print.
 File
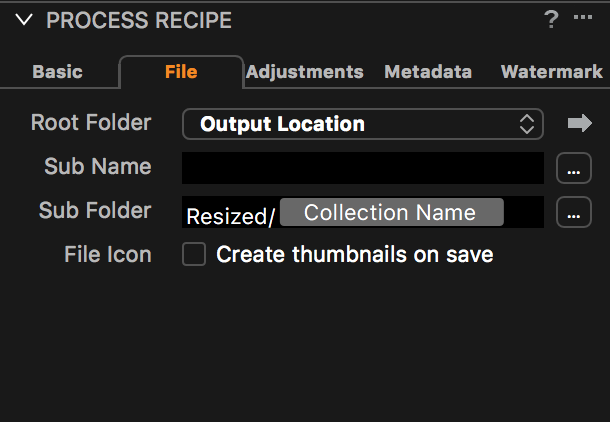
File
Root Folder is set to Output Location, which will match the tool below (Output Location). This should, by default, have ‘Output’ chosen as folder. This is the Output folder in your session. You can always click the arrow to check.
Sub Folder is set to ‘Print/[Collection Name]’ where ‘Print/’ is manually written and [Collection Name] is a Token from the Token list, similar to when we imported images.
 Adjustments
Here I add ‘Output Sharpening for Print’. Using the Recipe Proofing (glasses icon top right), you can see the effect of your sharpening amount of your selected recipe in the viewer. This way you can tweak it to your liking before doing any exports.
To sum up the first recipe; ‘Wedding Print’ will create a full-size JPG file in Adobe RGB, add a little sharpening to it, put it into a folder matching the name of the Session Album it’s processed from, and that folder is put inside a parent folder called Print.
Similarly, I want to create a resized version for sharing on social media or other fast applications.
‘Wedding Resized’
 Basic
Basic
I turn down Quality to 80 for this recipe to minimize file size without affecting quality. ICC Profile is now sRGB for web-based applications and Scale is set to 2000 pixels Long Edge.
With today’s retina displays and high-resolution smart phones, anything less might look pixelated.
File
The only difference from my ‘Print’ recipe here, is that I change ‘Print’ to ‘Resized’ in the Sub Folder format.
This creates a new parent folder for all resized images.
 Adjustments
Here I use ‘Output Sharpening for Screen’ instead, giving me a simple setup for adding sharpening for my resized images.
The amount of sharpening is subjective, and you should use recipe proofing to make sure you nail it. The image should look sharp and crispy without being overly sharpened. Too much sharpening kills images!
Make sure you have only the two selected Wedding Process Recipes enabled now.
When exporting using ‘Collection Name’ as a Token, make sure you are in the correct Session Album when clicking ‘Process’. Images can be in multiple Albums, and Capture One only knows the name of the collection you’re currently in. Therefore, go to ‘Preparations’ from the Library Tab, Filter by five stars, select all images and process using ctrl/cmd + d. Repeat for the four other Session Albums.
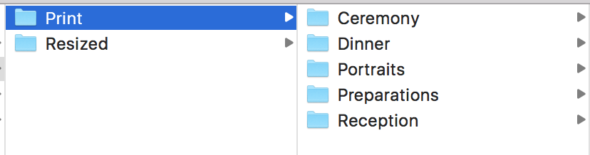
The result is all your exported images are put into a total of ten subfolders, distributed in two parent folders, both within the Session Output folder. Print files are full-size JPGs with ‘print sharpen’ and Resized are 2000 pixels long edge with ‘screen sharpen’. Voilá!
Step 7 – Conclusion
If you found this way of working interesting, try it out and create a Session yourself. You can even save the Session setup as a template, so you don’t have to create the Session Albums every time. This is done from ‘File > Save as Template…’ which is then available when creating new Sessions.
When doing this workflow consistently for weddings, you will have your RAW files as well as exported images neatly sorted in subfolders of each wedding for later use. All your files, including RAW files, are also easily accessible without opening Capture One.
As a last mention – and I can’t stress this enough – the only correct workflow in Capture One is the workflow that works for you. There are numerous ways of doing almost anything in this software, so I highly recommend exploring the features. You might be surprised by its capabilities.
Craving expert knowledge? Read more about the tools and workflows used in this blog post by visiting our User Guide:
Working with Sessions
Color Balance Tool
Black & White Tool
Processing Files