Latest Posts

Photographers on using Capture One for the first time

NOTE: This article discusses an outdated version of Capture One. To learn more about our latest version, click here.

Thinking of making the switch to Capture One Pro?

Lukas Piatek, photographer and founder of photography community LOOKSLIKEFILM, says that once you get the hang of Capture One’s photo editing software, there’s no going back.

“I am making the switch to Capture One right now after spending years in Lightroom,” says Piatek. “It is undoubtedly overwhelming once you start Capture One for the first time, but once you get the hang of​ it, the power of Capture One is undeniable.”

While Piatek is primarily a wedding photographer, his community of close to 50k followers was founded to share inspiring, fantastic work across all fields and foster the photography journey. He asked a few members to play around with Capture One and share their first impressions of how the photo editing software works for their images and helps them achieve their unique looks and visions.

First impressions


“There is a learning curve for sure, but the interface was pretty easy. I have a pretty well established personal preset I use in Lightroom, so I had to work for these edits to get them pretty close to my typical style. Presets are huge in my workflow, so having that capability will be so much easier once established in Capture One” – Vicki Moyer


Capture One:

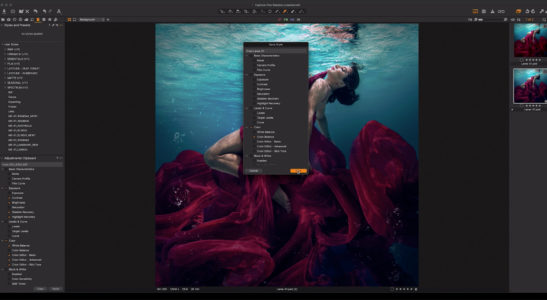
We know that consistency is key to the work of many photographers, and presets makes this much easier! In Capture One, presets are known as Styles. They function in a similar way with Preview and Apply features, and you can even apply Styles as layers to tweak opacity. Build your own, or purchase Styles from us or other Style creators. There are packs for every look and vision.

“I really loved using Capture One. The handling of color and grain seems much better than in Lightroom. Levels and especially auto levels are fantastic. Highlights and shadows seem to be controlled in a much more intuitive way as well. I am tempted to switch so my biggest question is Capture One confident enough that I could process just as fast as in Lightroom once I learn the platform.” – John Barwood


Capture One:

There’s always a learning curve with software – with Capture One we’re confident that you’ll be up to speed in no time. Capture One was originally designed for large-volume studio photographers and has since evolved into a highly customizable software built to accommodate any photographer’s workflow. You can create your own, intuitive interface with only the tools you need and set up keyboard shortcuts to make your workflow faster. You’ll be surprised at how much you can customize for a super-efficient, accelerated workflow.

“I use multifunction​ peripherals, so I essentially have 30 buttons at my fingertips over both my hands and have these all bound to a specific control in Lightroom which allows me to process very quickly. Can I do this in Capture One? ” – John Barwood


Capture One:

Yes! In Capture One you can set your own shortcuts or edit existing ones. Palette Gear and Tangent Panels are also supported, providing endless options for additional controls of Capture One.

“Is there a way to copy only certain adjustments and paste them onto a whole batch? Say, for instance, I want to synchronize the photos just on White Balance, even though I have already changed the exposure for them individually? This would be a major thing for me, as I am doing mostly batch editing. Looking forward to playing around with Capture One more! Thank you for giving me the opportunity to broaden my horizons when it comes to digital photo editing! ” – Martjin Roos


Capture One:

Sure thing. Besides the adjustments clipboard where you can select which adjustments you want to copy and apply, there is a little double-sided arrow in the top right of each tool. That is the tool-based copy function. If you click it, it opens a dialog where you can select which parts of the tool you want to copy. However, the easiest way to synchronize a single tool adjustment across multiple images is to do the following:

1. Select all images you want to synchronize, including the one you are synchronizing from

2. Make sure the image you want to synchronize from is highlighted in the selection of images (it should have a thicker border, otherwise just click on it)

3. Hold down shift and click the little double-sided arrow

All adjustments from that tool alone are now applied to all the images

For this to work you need to make sure that ‘Image > Edit All Selected Variants’ is enabled. It is by default, but sometimes users turn this off by mistake.

“I’ve been thinking about switching from Lightroom to C1 for quite some time, and a few times I tried to fall in love with C1 as I heard so many positive things about it. Somehow, it never worked out. With C1 Pro 12 I tried again, and finally, I’m seeing why so many photographers love to edit in C1 – it feels to me like I can edit colors in a way more detailed way. I still find it hard to get my look from Lightroom carried over, but I’ll do my best and try. What I love a lot about C1 already is how fast I can export all the several versions of an image that I need for my clients, my website, social media. All in one step, that’s such a game changer when it comes to time.
Something I still have to deal with is getting my colors exactly the way I want them to, but as in LR, I think this just takes time. I wonder if there’s an easy way of migrating looks over from Lightroom to C1?” – Björn Lexius


Capture One:

Because of the different algorithms behind the tools, there is no direct way of precisely migrating Presets from Lightroom to Capture One. If you’re using the HSL tool in Lightroom a lot, you may find our Color Editor similar – just with different color ranges. We have a Preset available for the Color Editor, which adds the same eight ranges you are familiar with from the HSL tool in Lightroom.

Once you have imported the Preset, it’s available from the hamburger menu (three lines) in the top right of the Color Editor. When applied, the eight ranges are available from within the Advanced part of the Color Editor. Then you can simply tweak Hue, Saturation and Lightness for each range, just like you’re used to in Lightroom.

“One concern I’m still having is how do I cull images in C1 the fastest? In LR I used to work with the spray paint can tool and could quickly do my first selection. I haven’t found anything comparable in C1 and I’m quite sure I’m just not seeing the best option to cull yet. I’d love to have any ideas about this.” – Björn Lexius


Capture One:

What may confuse new users of Capture One about culling is that there are so many different ways you can do it. The fastest way is definitely by using keyboard shortcuts, either for color tags or star ratings, then simply using the arrow keys to navigate. If you need to view a lot of images in a grid view, you can hide the viewer (View > Viewer) which will show a large browser instead. Besides regular filtering, Capture One also has Smart Albums, which work like Smart Collections in Lightroom. You can set up different criteria to filter on images depending on rating, color tag or something completely different. There are many tutorials available on the Capture One Learning Hub about how to manage large amounts of images in Catalogs – check learn.captureone.com.

“At first glance, I was a bit confused on how to navigate in Capture One, but I quickly found out how to change the workspace layout to ‘Migration’ which is a more similar layout to Lightroom, which I usually use. This is actually the first thing I really like about Capture One: Being able to customize my workspace. I can set up my workspace however I want, add and remove the tools that I use in my editing and decide where I want my tools to be on the screen, my filmstrip, etc. Also, Capture One seems super fast.
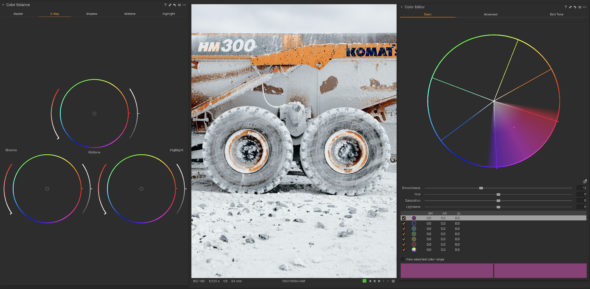
I started off getting my ‘Curves’ right, which is pretty straight forward. Once that was done I had to figure out how to use the rest of the tools to match my usual editing style. Here I found the ‘Color Editor’ and ‘Color Balance’ tool extremely interesting. It’s more complicated than Lightroom’s “HSL” sliders and “Split Toning” – but only because you can do so much more than in Lightroom. Forget about just having ‘Hue,’ ‘Saturation’ and ‘Luminance’ for eight color controls, in Capture One it seems like the possibilities for color control are endless. By using the ‘Advanced’ color editor, you’re able to single out the exact color that you want to adjust – you can decide how big the color range is, that you want to edit. I found this extremely clever. It’s a little tricky to master at first, and I am sure I have much to improve, but I loved the possibilities the Color Editor ‘Advanced’ tab provides. The fact that Capture One works with layers + masks is also surprising when it comes to adjusting the colors. By brushing over certain areas and creating a mask, I could control the colors of a specific area without it affecting the rest of the image.
Will there be more presets coming out for Capture One like the Mastin Presets or maybe some converter for Lightroom presets? ” – Carolina Segre


Capture One:

Though we can’t share any details just yet, we hope to see many more high-end creators contributing Styles for Capture One, just like Mastin Labs. A preset converter for Light Room isn’t ideal because presets often have very precise color grading and even small changes can throw off an entire look  – it seems there is too big a difference between how the tools work. The algorithms are simply not that easily converted between the two.

“I always use Split Toning in my photos when I work in Lightroom. In Lightroom, you can change the highlights and shadows, but in Capture One, you can adjust the midtones as well. I love this. Like with the Color Editor tool, this gives me much more control over my images.
I know there is so much more to explore with Capture One, but for my first go at it, I am really impressed. I’ve wanted to try Capture One for a long time, and I have to say it didn’t let me down. It’s not easy switching from one software to another. However​, Capture One feels like a merge between Photoshop and Lightroom and I think if I spend the time to learn this software really well, it could be a real asset to my workflow. I am definitely intrigued! ” – Carolina Segre


Capture One:

We are really happy to hear you you are impressed with Capture One. We know that it takes time to pick up a new software but, switching over is made much easier with the resources available in our learning hub. Check out learn.captureone.com for hundreds of webinars, tutorials, blogposts and more.

f you dont already have Capture One, you can download a free 30 day trial and try it out.

Sign up for the webinar

10 Wedding trends to watch in 2019 

Welp. Here we are, well into 2019, and we think it’s the perfect time to explore some of the trends we’re seeing out there across the wedding industry, both in how couples are celebrating and the ways we creatives are documenting it all. It’s a lot to keep up with, so let’s dive in.  

First, a lot of what we’re seeing could fit squarely into the ‘less is more’ category. After all, like Leonardo Da Vinci said, “Simplicity is the ultimate sophistication.” We see couples feeling that vibe for sure. 

1. Smaller and more intimate weddings  

More and more couples are opting for smaller, more intimate weddings. There are fewer expectations around throwing a huge wedding or the idea that a wedding has to be some grand affair for all to attend. Granted, MeeMa’s probably expecting all of the grandkids and cousins to be invited and Uncle Cliff might be ready to party all night, but is it their wedding? No. Is family about the most important thing in life? Definitely. And that’s why couples are striking a balance – immediate family and closest friends at a magnificent venue are just the thing, especially when what newlyweds want is the simple, unalloyed joy of celebrating their union with their loved ones by their side. It’s not like they’ve chosen the nuclear option instead – to elope.

2. Elopement

Elopement is becoming a very popular way to tie the knot.  

And really, what’s not to love? Just you, your boo, an officiant, maybe your kids or your besties or your mom and dad gathered at some super gorgeous location to celebrate all the awesomeness. Really, the appeal of this is hard to ignore. How many times have we heard couples, knee-deep in the long slog that is wedding planning, fantasizing out loud about eloping? Sure, MeeMa might be miffed for a bit, but, again, whose wedding is it? Exactly.  

Plus, bank balances really like this option. Enough said.

3. Adventure sessions

Adventure sessions are the crazy, freewheelin’ cousin of elopement. She says, “Let’s throw tradition to the wind, climb a mountain, sail to a virtually uninhabited island, or, better yet, helicopter to some sun-drenched, snow-capped summit, and make these nuptials as epic as love will allow.”  

Argue with that. Go ahead. 

The point is: sometimes a wedding isn’t a wedding at all. It’s an experience never to be forgotten. A vision quest. A rite of passage. A story to be told by only those who could tell it.

Increasingly, this is how couples are choosing to get hitched, and, honestly, we’re okay with this.  

All of these dialed-down wedding alternatives often free up a couple’s budget from the onerous constraints of booking a venue, feeding 100-plus guests, and the rest. That means they often have more scratch to dedicate to photography. And that’s what we call a win-win.

4. Documenting authentic moments

Everyone who earns their living by documenting weddings has their own approach and aesthetic.  

But what they all have in common is the good fortune of spending days with couples on what is one of the best days of their lives. Days punctuated by moments of joy and tenderheartedness. Being there, capturing that – that’s what couples are putting a high premium on these days. We’re hearing from a lot of couples that they’re less interested in getting that epic shot that’ll break the internet and are looking instead for creatives with a documentarian’s eye, someone who knows how to anticipate and capture well those genuine moments of celebration and love.  

That said, photographers are always looking for ways to stay creative and so we’re definitely going to see more of the following three techniques:

5. Double exposures

Double Exposures are seriously challenging. They take a lot of trial and error and problem solving to get ‘em just right, particularly in-camera. But when done well, they’re some of the most eye-popping art out there. Seriously. And now that more camera makers are adding in-camera inlays to their menus, we’re certain you’ll be seeing tons more of these. Take a look! 

6. Drones 

Much like the internet, we’re pretty sure drones are here to stay. So expect to hear more of that tell-tale buzzing from above. Because drone shots are ridiculously cool and a relatively easy way to add some eye candy to any couple’s wedding gallery or video, they’re going to be an ever-increasing addition to any creative’s toolbox. Feast thine eyes on these exemplary images! 

7. Pano-Shots 

Panos, aka Brenizers, stitching together multiple images, especially taken with telephoto lenses, are a great way to render a wide-angle image with an insanely shallow depth of field. And the results are just magnificent. So, yeah, have a look. See what we mean? More, please! 

8. Breaking with tradition 

You know what fewer couples are into these days? A lot of the traditional reception shenanigans we’ve all seen a gazillion times. Bouquet and garter tosses? Meh. Cake cutting? How about . . . no. Toasts? Oh, yeah, no, we’re keeping the toasts. Because, hysterical. But we can all but guarantee that we’ll be seeing fewer garters and bouquets sent skyward.  

9. A change of color 

Now this trend is somewhat new, but we’re definitely seeing more of it: white bridesmaids dresses. It’s true, and to this we say, “Well, why the hell not!?” It makes sense, given the fairly well-established trend from the past few years of non-traditional bridesmaid dresses in eclectic designs or colorsPhoto editing software can make these non-traditional color palettes really come alive in the wedding album – Capture One calibrates the most authentic and precise selection of colors, so we creators can capture every nuance.   

10. Furry friends

And last, but definitely not least: dogs!

Okay. Confession time. We can’t say with any real certainty that dogs attending weddings is a legit trend, per se, but we sure hope it is. Dogs inhabit and enrich so much of our lives as humans, so it’s only fitting that they should most definitely be included in weddings. So, it is our fervent wish that our furry friends are seen sitting alongside guests and newlyweds with increasing frequency in the months and years to come. May it be so.  

So, yeah, if even just half of these trends flourish in the coming months and years, it’s going to make for tons more gorgeousness and tenderness and joyousness in the wedding industry and beyond.  

And we’re going to do our damn hardestto play our part in it all. How about you?

If you don’t already have Capture One, you can download a 30-day trial and try it out.

Sign up for the webinar

Kirk Mastin talks optimal editing workflow with Styles

NOTE: This article discusses an outdated version of Capture One. To learn more about our latest version, click here.

Hi everyone, It’s Kirk Mastin from Mastin Labs!  

As you may have heard, Mastin Labs is bringing our well-known film looks to Capture One – starting with the Kodak Everyday Style Pack. In this post, I’ll be sharing my optimal editing workflow for Capture One. 

Our Kodak Everyday Style Pack is ideal for tropical landscapes, road trips off the beaten path, authentic moments with your friends, and anywhere life takes you on your everyday journey. In our community, we’re seeing the Kodak Everyday Style Pack used for wedding, family and portrait photography. This style pack is one of the most versatile packs we’ve ever created. 

The Kodak Everyday Styles pack has three distinct looks, Kodak Ektar 100 is bright and vivid. This film was originally made for colorful lush landscapes. Kodak Gold 200 will give you instant feelings of nostalgia with the warm tones of this widely used film.  Kodak Tri-X 400 is a grittier black and white film with roots in photojournalism. 

Now that you are more familiar with this pack, let’s get started! 

Installing a Style Pack in Capture One is easy. Just double click on the Style Pack icon and it will self-install into Capture One. You may need to restart Capture One after installation for the new Style Pack to appear in your Styles panel. We’ve created an optional Mastin Labs workspace that you can install into Capture One that provides you with only the tools you need to get a consistently beautiful edit, organized in a logical and easy-to-follow layout. Now that you’ve installed the Style Pack and Mastin Labs workspace, you’re ready to edit your first image. 

Our styles work in an efficient system that will get you a film look in very few steps. In the styles section, you will see Film, White Balance, Tone, Lens Correction, and Grain. To get the best edit, just work your way down this list from top to bottom, adding what you like to get the look that you love 

Film 

This is where you choose the film look for your image. In many cases, this is the only selection you need to get a beautiful edit. The following settings are meant to enhance this base film look. 

White Balance 

We’ve included several white balance settings that will get you in the ballpark of correct temperature and tint. Since the color of light can vary from environment to environment so much, these settings will not always provide you with a perfect color balance. 

Tone 

These settings mimic the highlight and shadow retention settings of the Fuji Frontier SP3000 film scanner from which these styles were emulated from. Highlight Soft, for example, will recover highlight detail without affecting the rest of the image. Highlight hard, on the other hand, will increase contrast in the highlights for a punchier look. The same applies to shadow controls such as Shadow Hard and Shadow Soft. These Tone settings are a great way to solve tricky lighting situations such as high contrast lighting, or to dial in a personal look. 

Lens Correction 

Many lenses, when shot at very wide apertures such as f1.8 and f2 exhibit strong vignetting. If the lens is a wide angle it will also have noticeable distortion. Lens Correction fixes these issues and gives you an image with even lighting across the frame and no distortion. This tool is not necessary for a film look, but I added it because it made matching my digital images to my medium format film images much easier. Many of the lenses I use for my medium format film cameras are better corrected than 35mm camera lenses, so by using lens correction, I can get a better match to what I am used to with medium format film. 

Grain 

The last optional step is to add film grain. Capture One has incredible grain simulation options and I really love simulating authenticlooking film grain for this style pack. Kodak Gold and Ektar do not have grain built into the base preset, as many users do not like grain at all. But if you do want to add the characterof real film grain to your images, you have two choices: 35mm sized grain and medium format sized grain (which is based on a 645 ration medium format 120/220mm film size.)  

The Tri-X style has grain built in, as grain is a fundamental character of black and white film, and there it is attached to the style. 

Outside of these settings, the only tools you will need in Capture One are Exposure, Kelvin (temperature), and Tint. Since no film style can determine the amount or temperature of light you are shooting in, these settings must be set by the user, and usually involve a little tweaking to set correctly, just as you would in any edit. 

My editing process

A typical edit for me goes as follows: 

  1. Select Ektar as my film base.
  1. Adjust Exposure, Kelvin, and Tint as needed. (I may select a White Balance style as a starting point.)
  1. Add a tone profile to enhace my image or to fix a lighting issue.
  1. Select Lens Correction if I am going for a evenly lit, medium format look.
  1. Medium Format grain. (This is my personal favorite grain size.)
  1. Crop to 4X5 if the frame is vertical. (This goes back to my medium format film backgrounds and it’s a personal favorite aspect ratio for vertical shots.)
  1. Export edited image as JPG.

I really love the power and simplicity of Capture One and with our optional Mastin Labs workspace, you have just the tools you need and nothing more, making the editing experience fun and easy! 

Want more tips on editing your first image with Mastin Labs Capture One Styles? Watch this short video.

If you dont already have Capture One, you can download a free 30 day trial and try it out.

Sign up for the webinar

Wedding workflow with Style!

When I shoot weddings, my main goal is happy customers. They are happy when I deliver the images to the high quality they expect, and when I deliver them fast, so they can relive their special day as soon as possible.  
To achieve this goal and meet the customer needs, I have set up what for me is an efficient, fast and reliable work flow – and that is what I would like to share with you in this post.

I’m a wedding photographer with a documentary touch. I shoot the venue, the people and the weather as is and I don’t photoshop any of my images. All editing, culling and processing happen exclusively using photo editing software Capture One Pro.
Let’s get started! 

Collecting images

When I’m out at the wedding my main goal is to back up my images on the go. Whenever I fill up a memory card I put it into an external hard drive with a card reader – so now the images are both on the memory card and on the hard drive. 

I only have quite small 32GB memory cards, so if a card is damaged I will only lose a small percentage of my images – I also use two cameras at any given time, so there is minimal risk of losing an entire slot during the wedding. 

When I return to my office I back up the images on my computer. Then I go to sleep, ready to look at the images the next day with fresh eyes. 

Import and Culling

Before I start culling and rating images, I import the images into a Session. I could also choose to import them into a Catalog, but I like the way the folders are created and I can create smart albums for each individual stage or “chapter” of the wedding, for example:

– Preparation

– Ceremony

– Reception

– Portraits

– Dinner

– Dance

This way, I easily have an overview and there is an advantage when it comes to editing but we will get back to that.

I then import to the Capture Folder. I don’t use of the Back up to functions, because I have an automatic cloud backup which detects any changes in the chosen folders and backs them up immediately. But you can choose to back up to an external hard drive, NAS, second folder or wherever you like.

In Naming you can choose between different Tokens, which will help you name the files. I usually name the files using the following tokens: “Job Name” then insert an underscore to divide the Tokens and “Image Name” – so I have the name of both the job and the original filename.

You will be shown a Sample, so that you know that the naming is correct, before you import an entire wedding.

This is the Dialogue box when you choose “Import images”. Note that you also have the “Import To” section – that’s where the images will be saved. This can be on the computer’s hard drive, RAID drive or anywhere you want.

In the menu Metadata, you can fill out metadata information if you want to. I usually don’t, because it’s already set in my camera.  

You can also choose to make initial adjustments during import. I prefer to do it afterwards, but some photographers like to auto adjust the white balance, for example. 

Culling 

Now the images are imported, it’s time to find all the gold shots 

I have quite a simple way of doing this. All the images that I want to edit are given a rating 1 – simply press 1 when you see an image that you want to take a closer look at.

In this way I save a lot of time, and I wait until I have edited the images before I make the final cut. Some images gain a lot after the right adjustments, so I only have one round of culling, and after edit I might cut some more images.

When the images are rated, I create a Smart Album, for example “Portraits”. I then drag all the images from the portrait session to the Smart Album. This will help me when I’m grading the different photos, because the look has to be consistent throughout the different “stages or “chapters” of the day.

There is a Focus Mask option which shows you which elements are in focus in the selected image. I don’t use that option because I choose an image based on its mood and not whether it’s razor-sharp.
However, I do know a lot of photographers who use the Focus Mask, and therefore I feel its worth mentioning

The green area shows which elements of the image are in focus.

Initial editing 

After the rating process, I will go through all the rated images. My main focus is on: the right crop, straightening up the image, adjusting the white balance, exposure, brightness, contrast, vignette and clarity. At this point ,I don’t focus on the color grading the images.

There are a couple of particularly useful tools I would like to highlight. The first is the Brightness slider – and how I use it in combination with the exposure slider.

Let’s take a look at an example: 

In the image to the left Exposure has been added. In the image to the right Brightness has been added, and Exposure has been decreased slightly.

Notice the difference in highlights and shadows. I think that when you lower the exposure and increase the brightness, the mood of the scene is preserved. 
 
Things tend to move fast at weddings. Sometimes the settings in the camera don’t provide you with the perfect output and this will take some adjustments. For me, one of the biggest struggles has been recovering highlights and lightening shadows. Capture One has a very strong tool. The Highlight and Shadow recovery features are very subtle and are perfect to add that bit of sky or details in dark areas. 

The image on the left is straight out of camera. The one to the right is after using the Highlight Recovery Slider , details in the dress show up, while the white church and the skies are more visible.

Styles 

First of all, I love Styles! (Or what is known as ‘presets’ in other photo editing software) It’s an easy, fast and sufficient tool to quickly get the color grading your images deserve. 

No matter how good your camera is, how well composed your image is – there will (almost) always something to gain by color grading to get the right mood for your images.

There are a number of ways to achieve this:

– Manual colorgrading. Capture One has a very powerful and amazing color editor where you can grade every aspect of the image as you want.

– Styles as a “one click fits all” solution. You choose a Style and apply it as is.

– Styles as a quick reference to the final look. Apply the Style you want, and then customize it to your liking. Any adjustment applied by the Style is visible and can easily be altered. You can even save the new look, as a new Style so you also have that for future images.

The image on the left is straight out of camera. I have applied a Mastin Labs Style to the image on the right in order to give the image that warm summer vibe and analogue film feel.

Quick batch editing

When you have a lot of images that need editing, it would take too long to edit and color grade every single image individually. So I prefer to Copy Adjustments and Paste Adjustments from images in similar lighting. That waym I get a consistent look and a fast way to edit.  
 
You can either use the icons shown below or on a mac: Shift + CMD + C for copy and Shift + CMD + V to apply. On a windows computer use: Shift + CTRL + C for copy and Shift + CTRL + V to apply.

The arrow going up is for Copy Adjustments and the arrow going down is for Apply Adjustment.

After it’s all done, I go through the photos one last time to make sure that every image is to my liking and has the look I want.   

B/W 

I always deliver the images in both color and black/white. It’s easy and not particularly time consuming to make a beautiful black/white conversion and still keep the color images as well. 
 
You can make a clone of your image or a new variant. If you right click on the image and choose New Variant, it will take your original image without any adjustments and make a new variant so you know you can begin cropping, changing exposure or making a black/white conversion – either manually or, again, by using a Style. 
 
If you choose Clone Variant. Then you will see an exact copy – you can now go to your Styles. Remove the Style, but it will keep all other adjustments. Then apply an amazing black/white Style to compliment the look of your image. Using this method will keep the two versions, color and black/white, as close to each other as possible. 

Exporting images

My good colleague, Alexander Flemming, wrote a great blog post last year about his Wedding Workflow. When I read it I realized that my way of exporting images could be done more efficiently and I adopted his Exporting technique. The Following excerpt is from his blog post, which can be read in full here.

When I export images for digital delivery to a wedding couple, I want to make it easy for them to share the images with friends and family.

I also want them to be able to make large prints of the files. This requires two different sizes of each picture with different amounts of sharpening and different ICC profiles.  For convenience, I also want to split up the exported images into subfolders, just like I divided my RAW files in the beginning. 

Proces Recipes are pure genius, and here is the reason behind it:  

I can select my images in each Session Album, click Process (shortcut: ctrl/cmd + d), and Capture One now does all of this for me automatically.

How did I achieve this? By setting up my Process Recipes to my exact needs using Tokens.

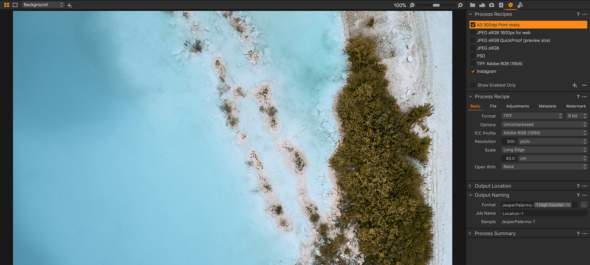
The Process Recipes are found in the Process Recipe Tab. I have two I use for weddings; Wedding Print and Wedding Resized. Create a new recipe by clicking the plus-icon and name it what you want. Let’s go through the setup for both (I will ignore Metadata and Watermark for now): 

Wedding Print 

Basic 

I use 90 in Quality for wedding exports, which will slightly decrease the file size without affecting visual quality.
 

ICC Profile is Adobe RGB and images are exported to 100% of their original file size. Resolution is 300 dpi for print. 

File 

Root Folder is set to Output Location, which will match the tool below (Output Location). This should, by default, have ‘Output’ chosen as folder. This is the Output folder in your session.
You can always click the arrow to check. 

Sub Folder is set to ‘Print/[Collection Name]’ where ‘Print/’ is manually written and [Collection Name] is a Token from the Token list, similar to when we imported images. 

Adjustments

Here I add ‘Output Sharpening for Print’. Using the Recipe Proofing (glasses icon top right), you can see the effect of your sharpening amount of your selected recipe in the viewer. This way you can tweak it to your liking before doing any exports. 

To sum up the first recipe; ‘Wedding Print’ will create a full-size JPG file in Adobe RGB, add a little sharpening to it, put it into a folder matching the name of the Session Album it’s processed from, and that folder is put inside a parent folder called Print. 

Similarly, I want to create a resized version for sharing on social media or other fast applications.

“Wedding Resized” 


Basic 

I turn down Quality to 80 for this recipe to minimize file size without affecting quality. ICC Profile is now sRGB for web-based applications and Scale is set to 2000 pixels Long Edge. 

With today’s retina displays and high-resolution smart phones, anything less might look pixelated. 

File

The only difference from my Print recipe here, is that I change Print to Resized in the Sub Folder format. 

This creates a new parent folder for all resized images. 

Adjustments

Here I use Output Sharpening for Screen instead, giving me a simple setup for adding sharpening for my resized images. 

The amount of sharpening is subjective, and you should use recipe proofing to make sure you nail it. The image should look sharp and crispy without being overly sharpened. Too much sharpening kills images! 

Make sure you have only the two selected Wedding Process Recipes enabled now. 

When exporting using Collection Name as a Token, make sure you are in the correct Session Album when clicking ‘Process’.

Images can be in multiple Albums, and Capture One only knows the name of the collection you’re currently in. Therefore, go to ‘Preparations’ from the Library Tab, Filter by five stars, select all images and process using ctrl/cmd + d. Repeat for the four other Session Albums.

The result is all your exported images are put into a total of ten subfolders, distributed in two parent folders, both within the Session Output folder. Print files are full-size JPGs with ‘print sharpen’ and Resized are 2000 pixels long edge with screen sharpen. Like I said, pure genius. 

This is what the folder structure looks like.


Workspace

I don’t want to fiddle around in too many menus and fewer clicks saves time. In Capture One everything is build in modules, and you can drag and drop them anywhere you want. So I have made my own workspace where I have all my essential edits collected in one menu. 

This is my Wedding Workspace – notice that you can see my saved workspace in the Workspace tab.

I have saved this as a “Wedding Workspace”, because the tools I need for editing weddings are different than when I’m shooting tethered or editing portraits.

Final thoughts

This was an introduction to my preferred workflow when editing weddings. This workflow might change as I continue to find new ways to reach my final goal. The great thing about Capture One is that there are several ways to achieve your desired end result.  

I’m always for the lookout for new paths to a faster, sleeker and more sufficient workflow.

If you are curious here is a link to my favourite Styles from Mastin Labs. 

Try Capture One Pro for 30 days – if you don’t have it yet, download here.

We love to share our passion and knowledge with you. All of our Blogs, Webinars and Tutorials can be found here in our Learning Hub.

What’s your best tip for editing weddings? 

Sign up for the webinar