NOTE: This article discusses an outdated version of Capture One. To learn more about our latest version, click here.
Capture One Pro is a funny thing.
Not in the comical sense, but in the sense that it seems to get better and better with time, anticipating the needs of its intended audience. That may seem like the obvious evolution of a software, incrementally improving the experience for its users, but I’m sure many of you feel that often it doesn’t seem to be the case with all technologies. It’s rather difficult to tell Microsoft after the fact, no thank you I don’t need a new default web browser, or to kindly point out to Apple that, indeed the removal of a USB port is rather inconvenient and I’m not particularly fond of carrying around a backpack of “dongles”.
The changes in Capture One Pro from the outside may seem small, but it’s the impact they have on my daily use that becomes monumental in terms of saving time. In the interest of full disclosure, it’s important to point out that the software team here at Phase One is, in fact, not clairvoyant. They had not anticipated or somehow sensed that the changes they were making would be so beneficial. The trigger for change was actually more rudimentary than that… they listened to the users!
In that sense, what I find funny about Capture One Pro and all its future versions, is that it’s comforting. Finding solace and comfort in a software is both embarrassing to admit and certainly a funny thought to express. But there it is.
Although Phase One does pay my rent (and I am without a doubt biased) I find comfort in the fact that the tools I depend on when not in the office, the tools that are essential to fulfill my love of photography, are created by a team that listens to the photographers who use their software and are certain to make a difference. Although I do not work for the software department, I do know that the team is dedicated to ensuring that any improvements they make are fully vetted with those that use Capture One Pro. That vetting process certainly occurs here, across the lunch table on a daily basis, but the lengths they go to outside of this office, working directly with full-time professional photographers, certainly makes a difference.
Efficient Workflow
To anyone reading this, I’m sure I don’t need to preach the importance of a well-choreographed and tirelessly executed workflow. It’s been said many times over, by anyone speaking about Capture One Pro, that it’s one of the few photographic tools that puts the power of customizing that workflow directly in the hands of the user.
Creating a customized workflow, tailored to your exact needs and wants, is one of its many strengths.
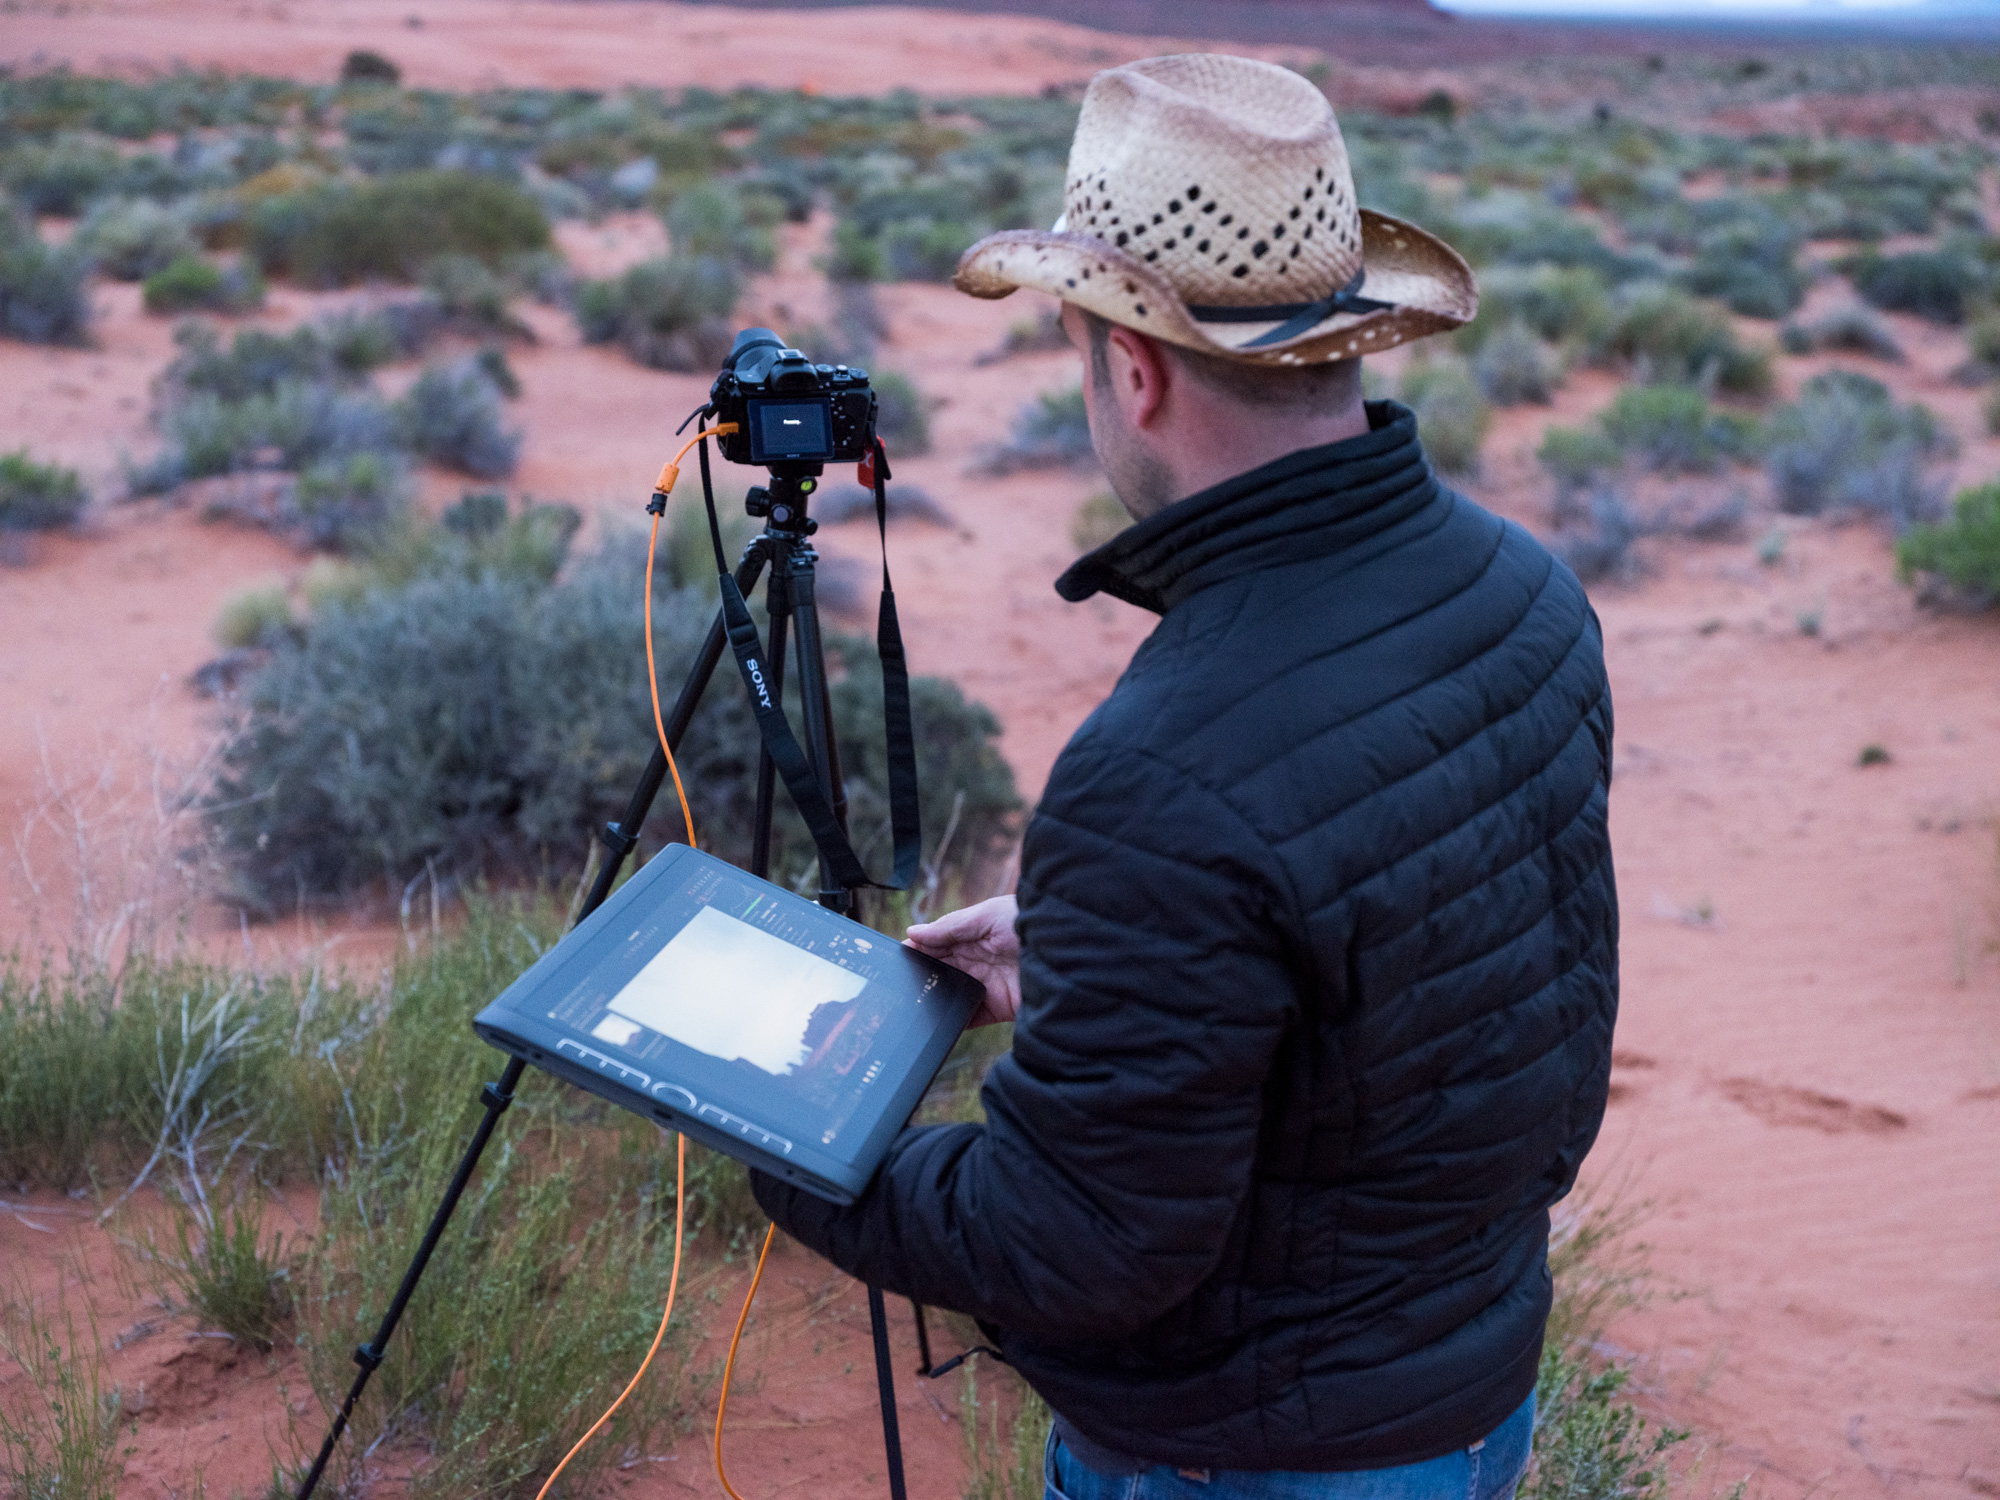
Stressing the importance of an efficient workflow is one thing, but following one personally is quite another. The old adage, “Those that can’t do, teach” comes to mind. I am far from a professional photographer and working with so many photographers, suggesting, adapting to and embracing their workflows as a matter of diligence becomes problematic when I put my own workflow into practice. Adapting to different workflows certainly affords me the opportunity to explore, but it does hinder my consistency.
The one thing that has remained consistent in my workflow for more than 15 years is the transition from RAW to PSD, and from PSD to TIFF/JPEG. I suspect that will never change.
Sessions or Catalogs come and go depending on the job. New Tools provide new editing opportunities. New layouts streamline the steps one can take to achieve a final image… but the transition of capturing a RAW, editing that RAW, processing to a PSD, editing that PSD, and then delivering a TIFF or JPEG is always a constant.
And when would that ever change? Well, it didn’t change with the release of Capture One Pro 10.1. But it did get a whole lot better.
The critical role of a PSD
A PSD is critical because, well, we’re photographers. And for photographers, Photoshop is critical. It’s a simple truth that Photoshop is an essential tool for every photographer. There have been attempts to replace it, clone it or avoid it, but at the end of the day there’s always something in an image that needs a tweak here or a touch there, and Photoshop is often the answer. It does some things better than anyone can, and likely ever will, but that list of advantages is shrinking.
The role of Photoshop in my workflow has certainly been reduced. At one time, my entire digital process revolved around it (with a brief and embarrassing stint in Lightroom), but now it acts almost like a Plug-in for Capture One Pro and not the other way around.
So, what is a PSD? To put it simply, it’s a TIFF file with some pizzazz. That’s of course not what the P stands for, but it’s close. It’s a file format of your image that is streamlined for Photoshop, compressed in a lossless format (like a RAW file) and puts quality, security and speed, above all else. So, it’s not exactly a TIFF, it’s so much more.
The number one enemy of image editing quality is compression. Bear with me here…
Compression is like packing a rucksack for a month of backpacking. The first time you pack it, it’s perfect. Everything is where it should be, and everything fits safe and snug… until the next time you re-pack it, and the next, and then the next. In the end, your backpack looks like it’s filled with empty beer cans and you’ve lost a tent pole. In digital editing, that type of compression is JPEG compression. By constantly packing and repacking, editing and saving, that JPEG eventually fails to resemble its original form. It may be small, but eventually it’s corrupted and you’ve lost a tent pole. A JPEG is perfect for a one-time, tight, snug, and small pack job, but not for constantly adjusting and resaving. So, for continuous editing, it’s a no-no.
A JPEG ready to deliver

The same JPEG after 25 Open/Save Cycles.. CORRUPT!
This is where a TIFF comes in. A TIFF has no compression and therefore there’s no fear of losing that tent pole. Keeping with the travel analogies, it’s a steamer trunk. It holds all your belongings in an organized way, safely and securely. But… it’s huge, heavy and no one can really afford to travel like it’s the 1920s on a first-class transatlantic voyage.
This is where a PSD comes in. It’s a hard-shell Samsonite suitcase with wheels. All the benefits of a TIFF in that it’s safe, secure and organized, and with some of the benefits of a JPEG in that it’s compressed – but in a good way. The file is quick in Photoshop, takes up slightly less space than a TIFF, and is secure for the foreseeable future. Your tent pole is exactly where you left it.
A PSD is the best of both worlds. In an industry constantly pressured by time, threatened by the unspeakable file corruption, it is without a doubt a vital format for a professional workflow. If you use Photoshop anyway.
Streamlining the Streamlined
So back to how great Capture One Pro is…
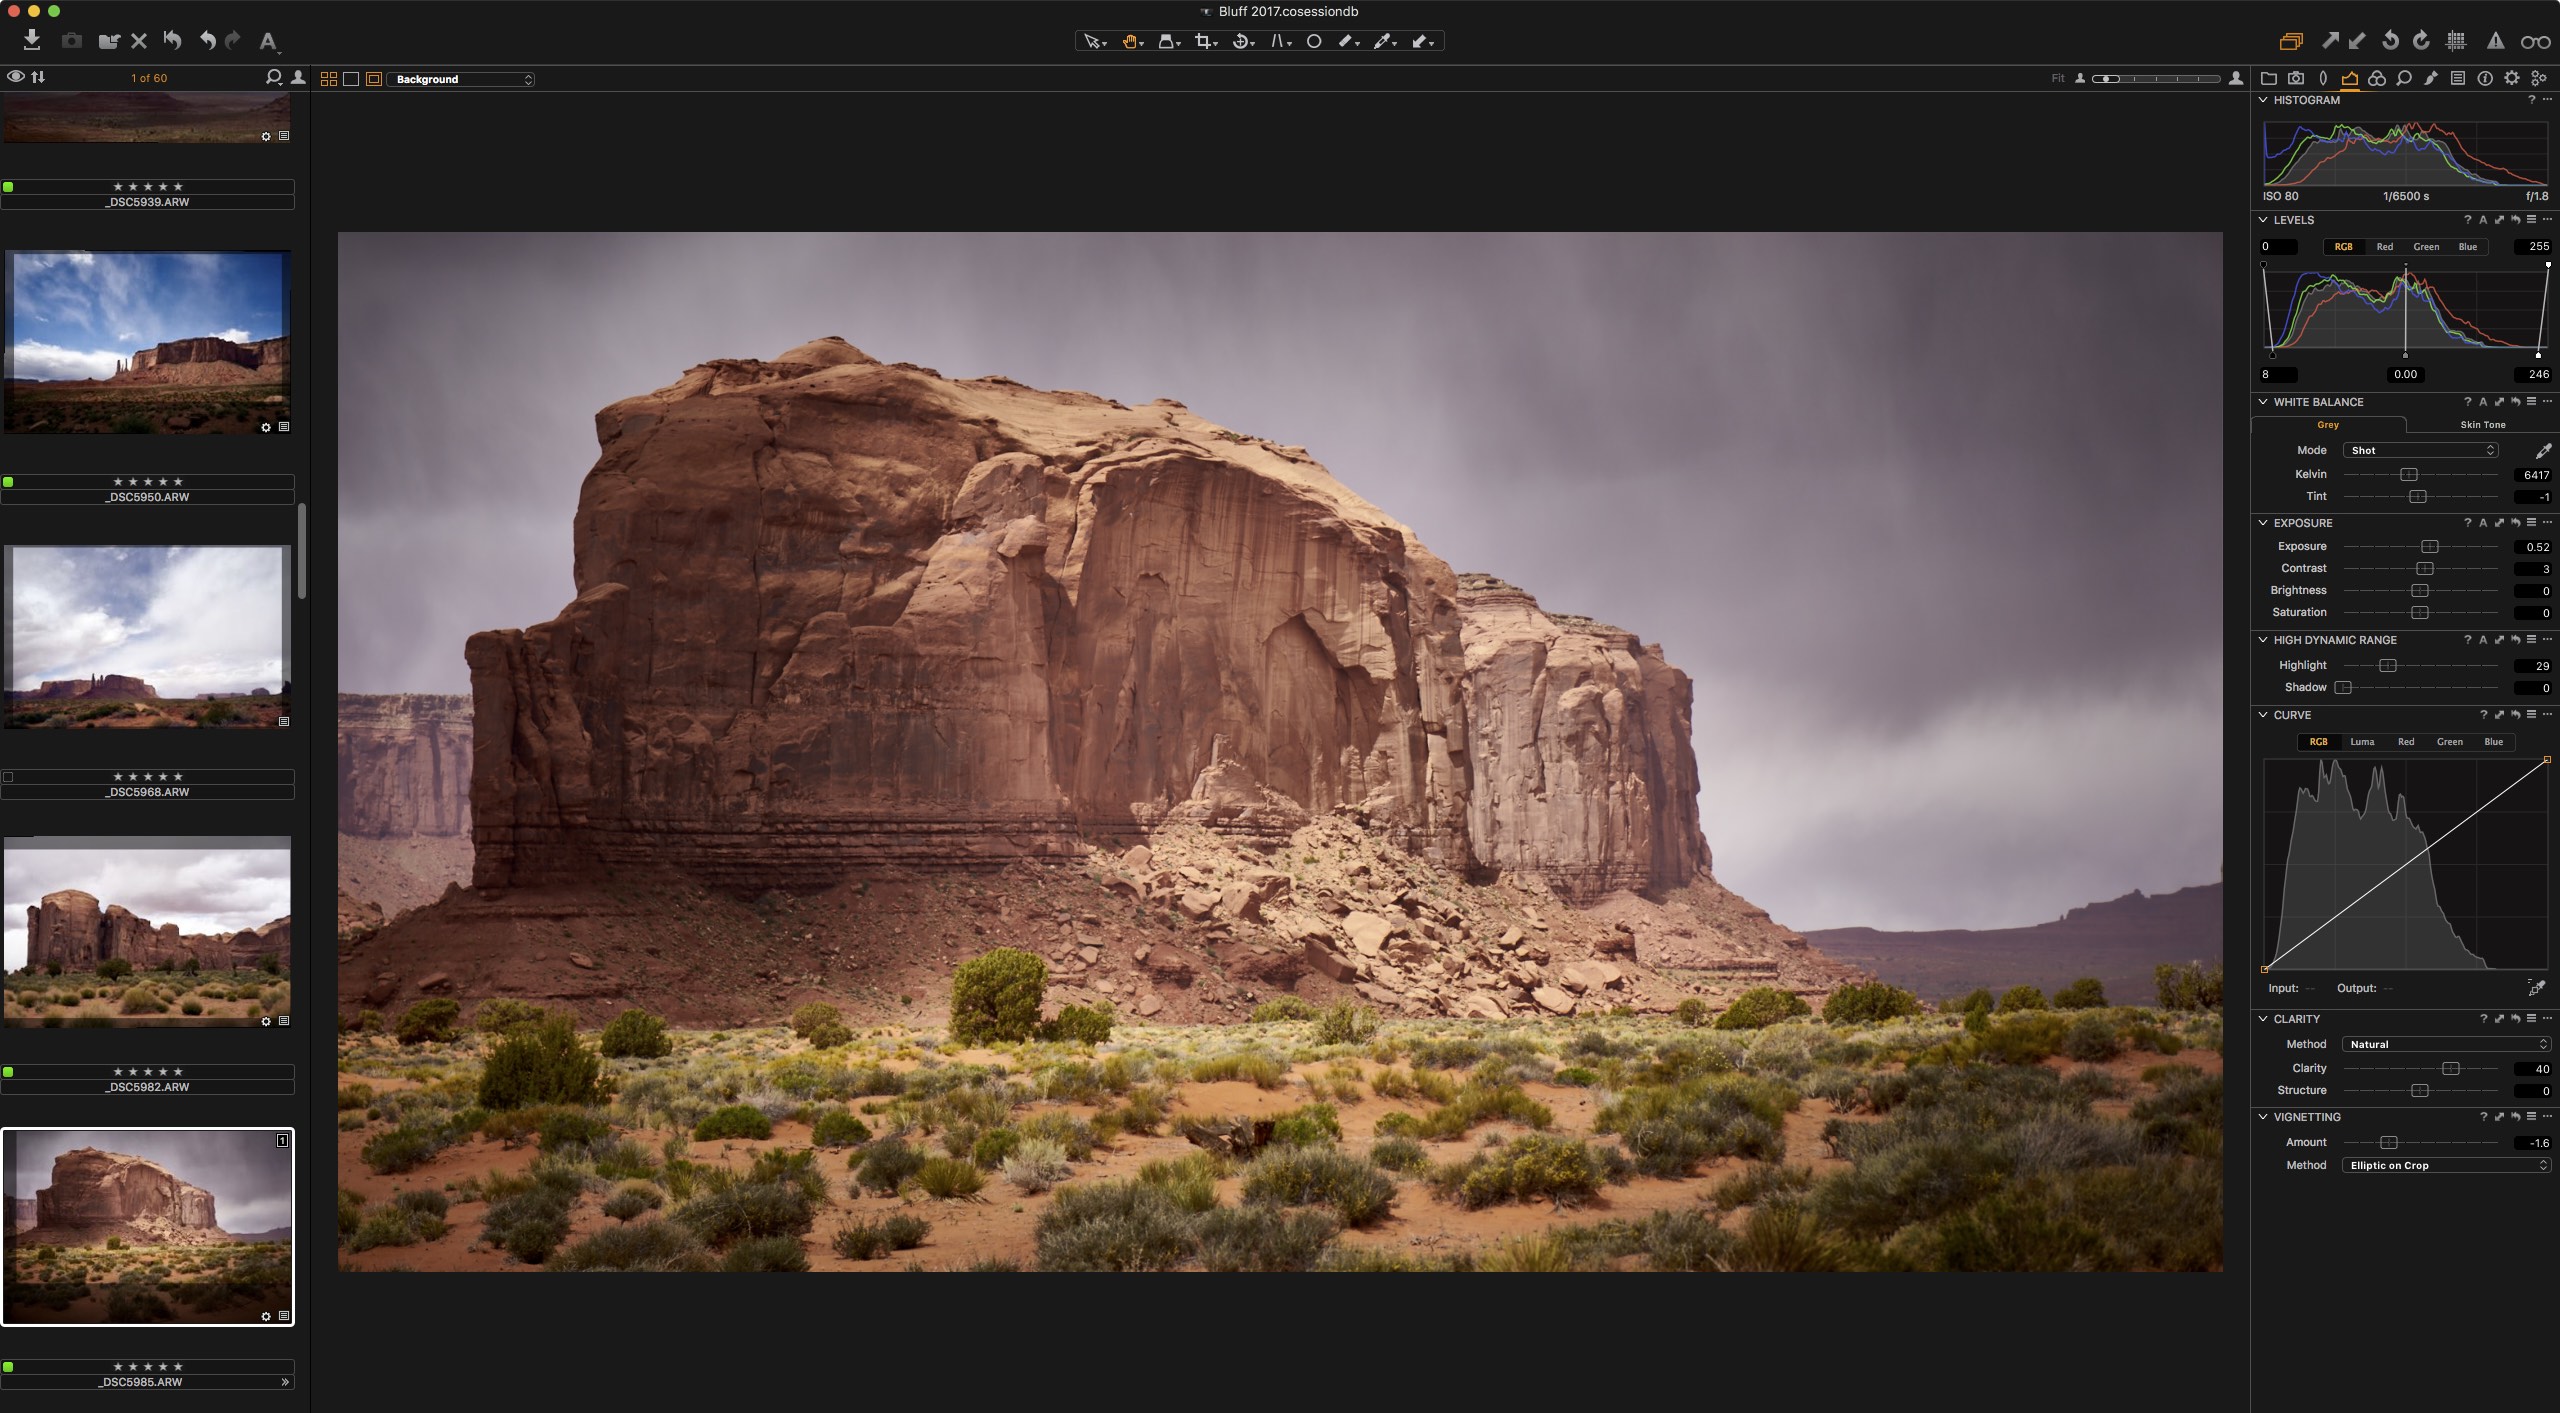
With the release of Capture One Pro 10.1 came a seemingly insignificant, but monumental benefit in that it improved PSD support. What is this improvement you ask? Layers! The pizzazz of the PSD.
Previously, Capture One Pro could see a PSD. It could recognize one in a collection of images (Session or Catalog) and it could see what the original file (or background layer) consisted of. However, if you were a diligent retoucher, you would of course have layers within that PSD that made significant, or subtle, changes to that background layer. So, in previous versions of the software, what you saw in Photoshop was not always what you got in Capture One Pro.
The improvements made it so Capture One Pro will not only see, honor and update the adjustments you make to the PSD in Photoshop, but it will allow you to process that PSD as if it were a normal RAW file. This seems small, but trust me, it’s huge.
For example, say you edit a RAW in Capture One Pro to near perfection and process that RAW to a PSD, and that PSD needs a bit of work via Photoshop to replace the model’s bad hair day with a silly hat. The work is done quickly and effortlessly in Photoshop and saved, still as a PSD. Opening that PSD in Capture One Pro now shows the PSD, silly hat and all.
Or, as a more practical example, you can have several RAW that you shot as a stitch, processed to PSD and stitched in Photoshop, then continue editing that stitched file in Capture One Pro. In hindsight I should have led with that example but the idea of a silly hat made me laugh.
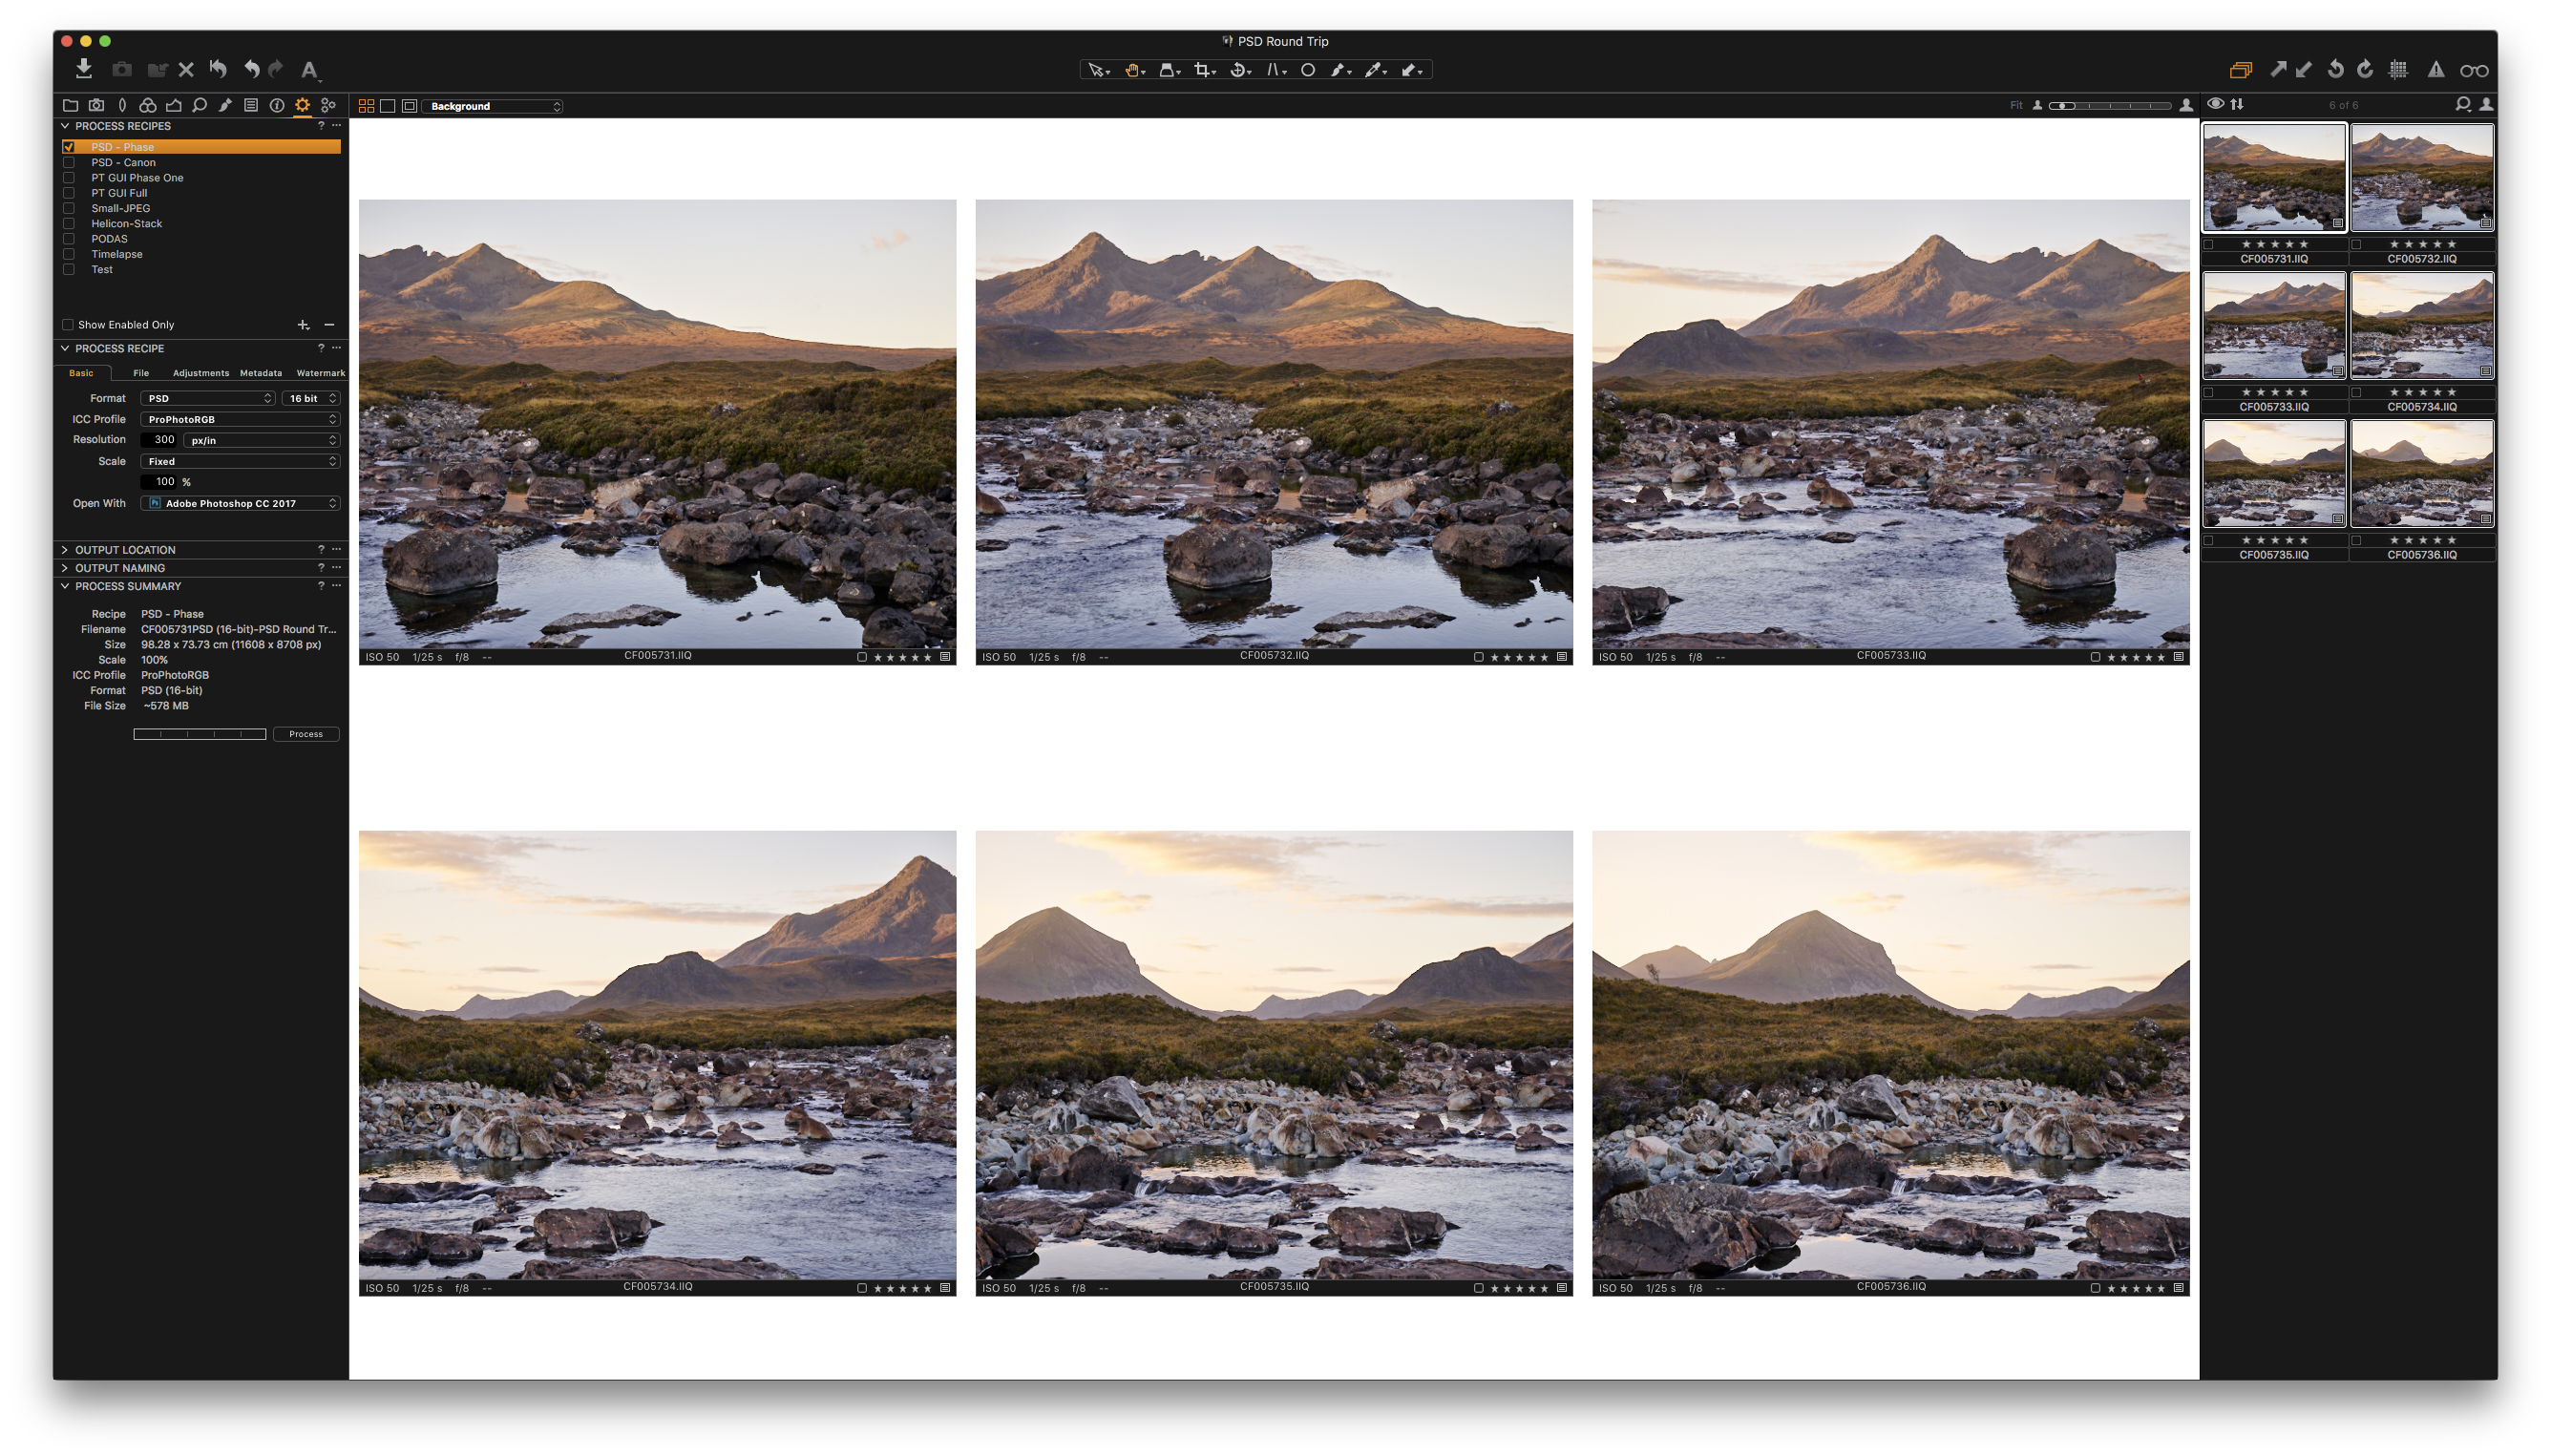
RAW’s in Capture One
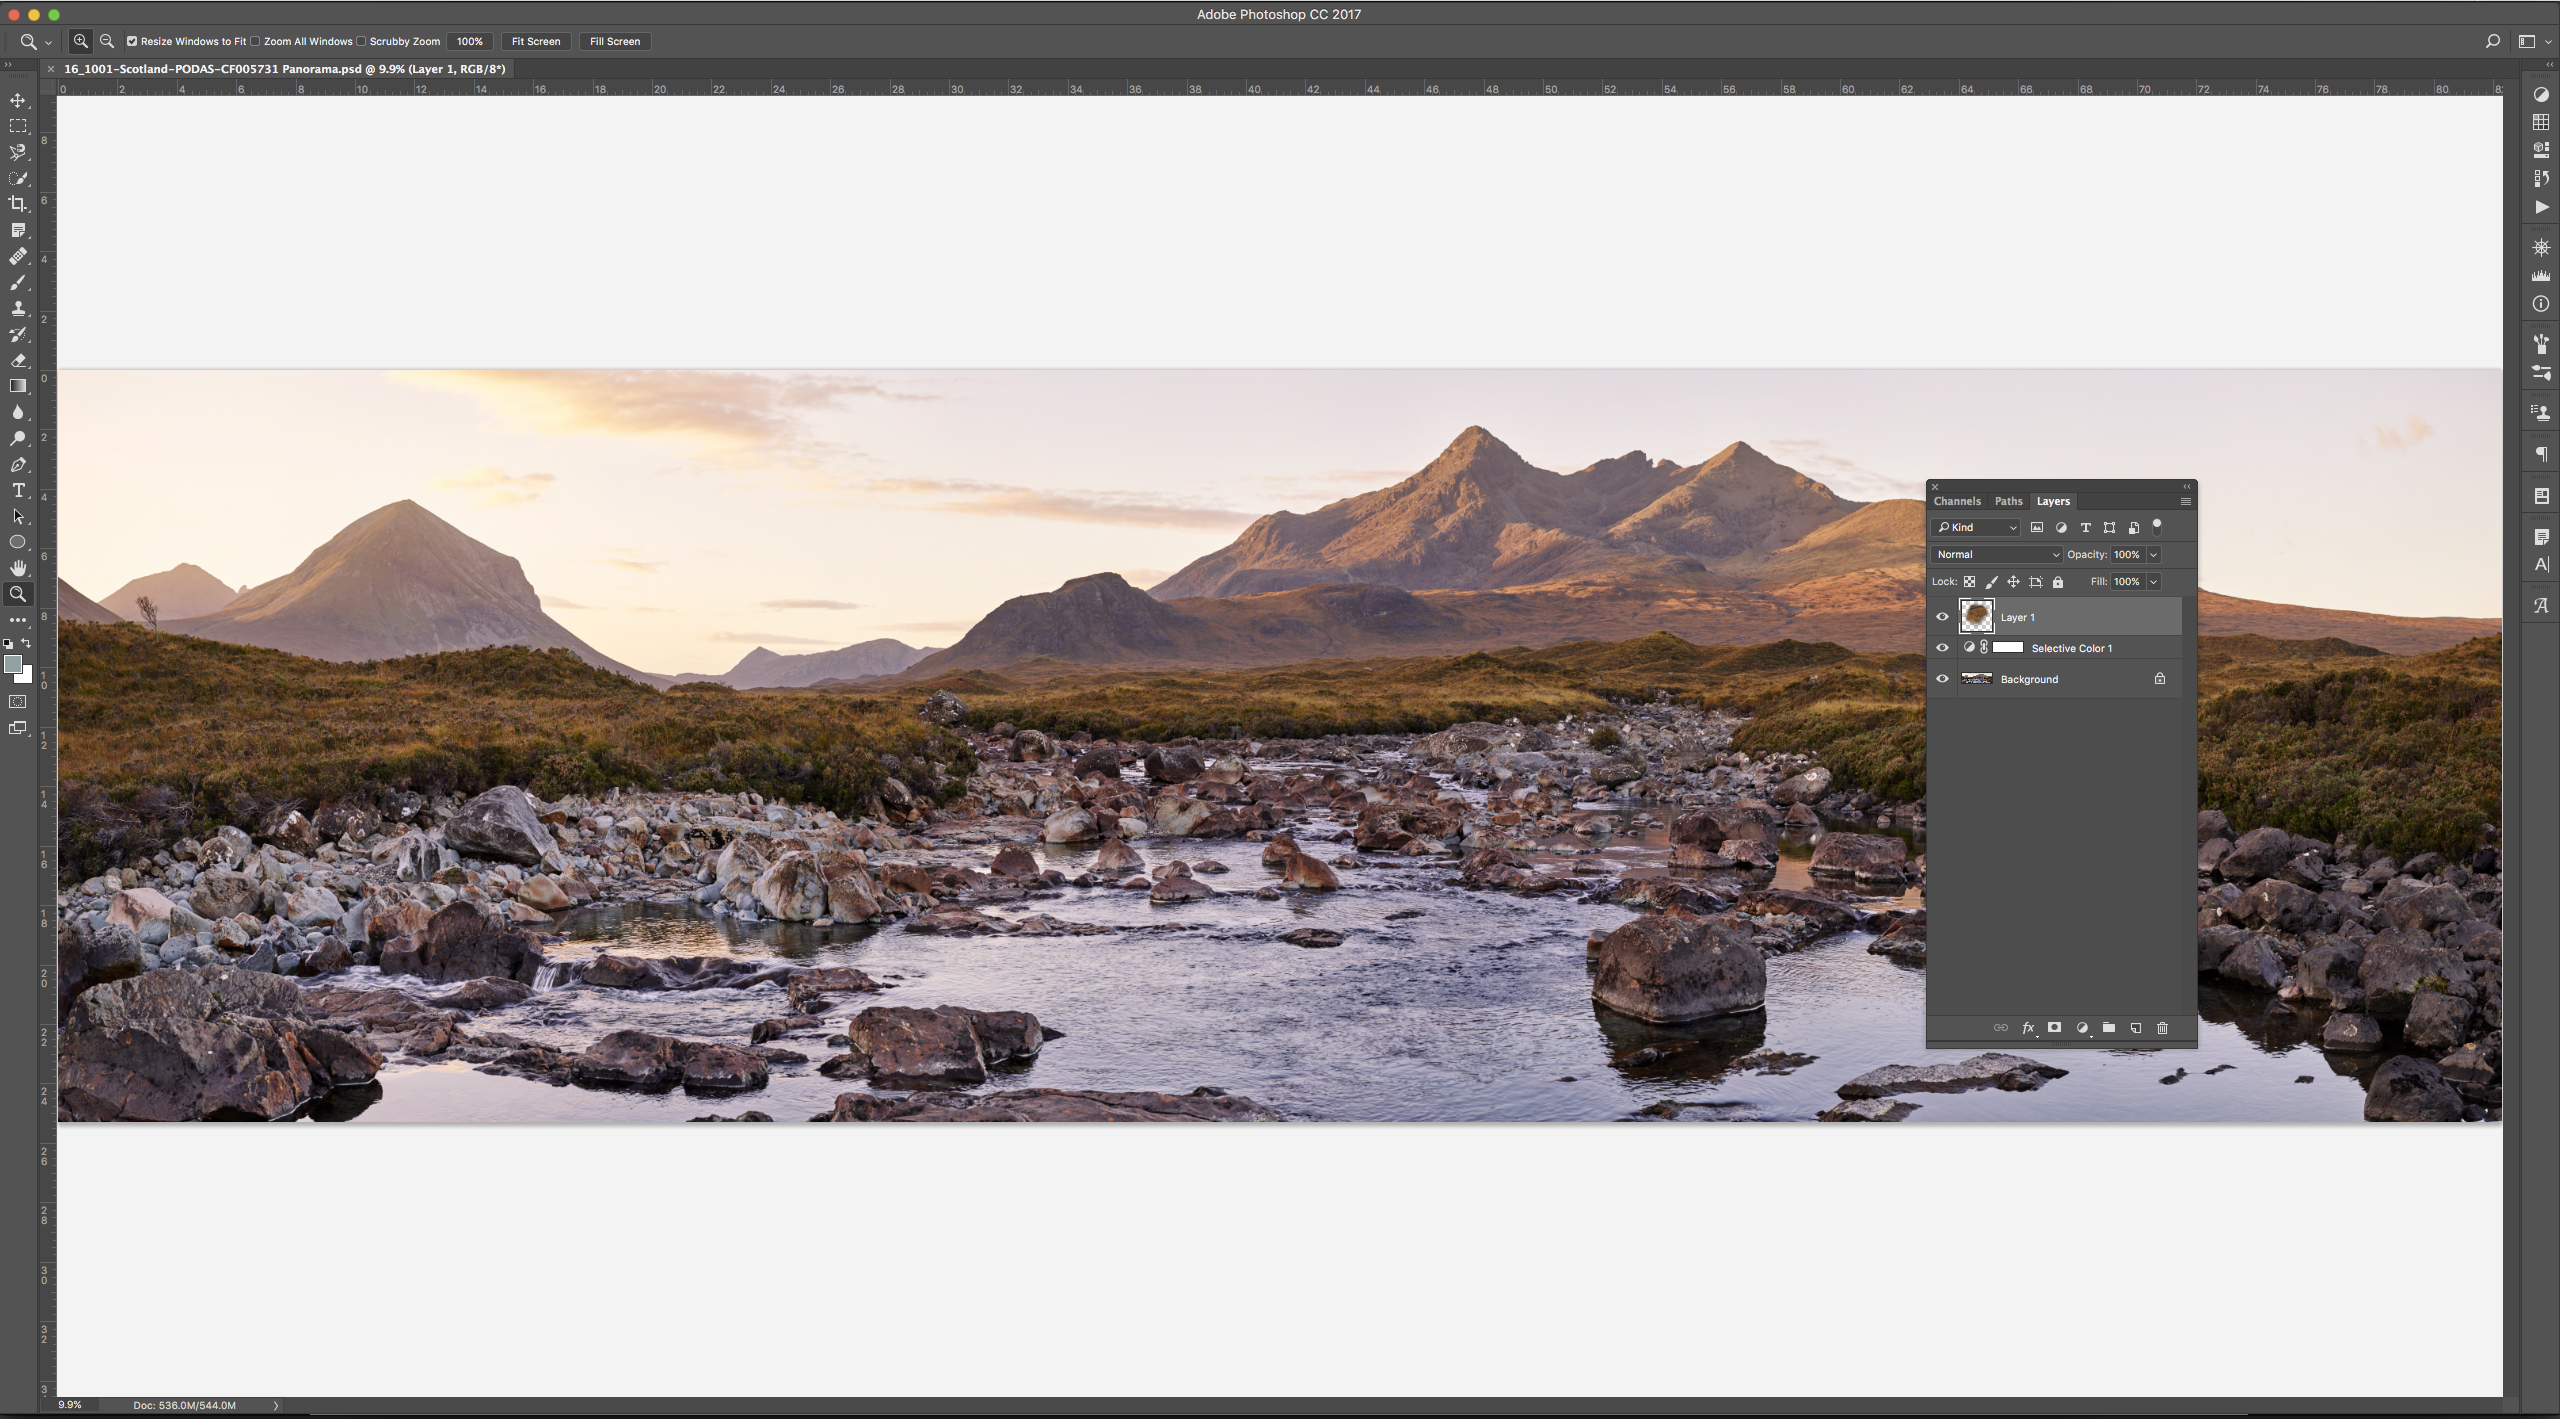
Files Stitched PSD in Photoshop
Edited PSD-Before

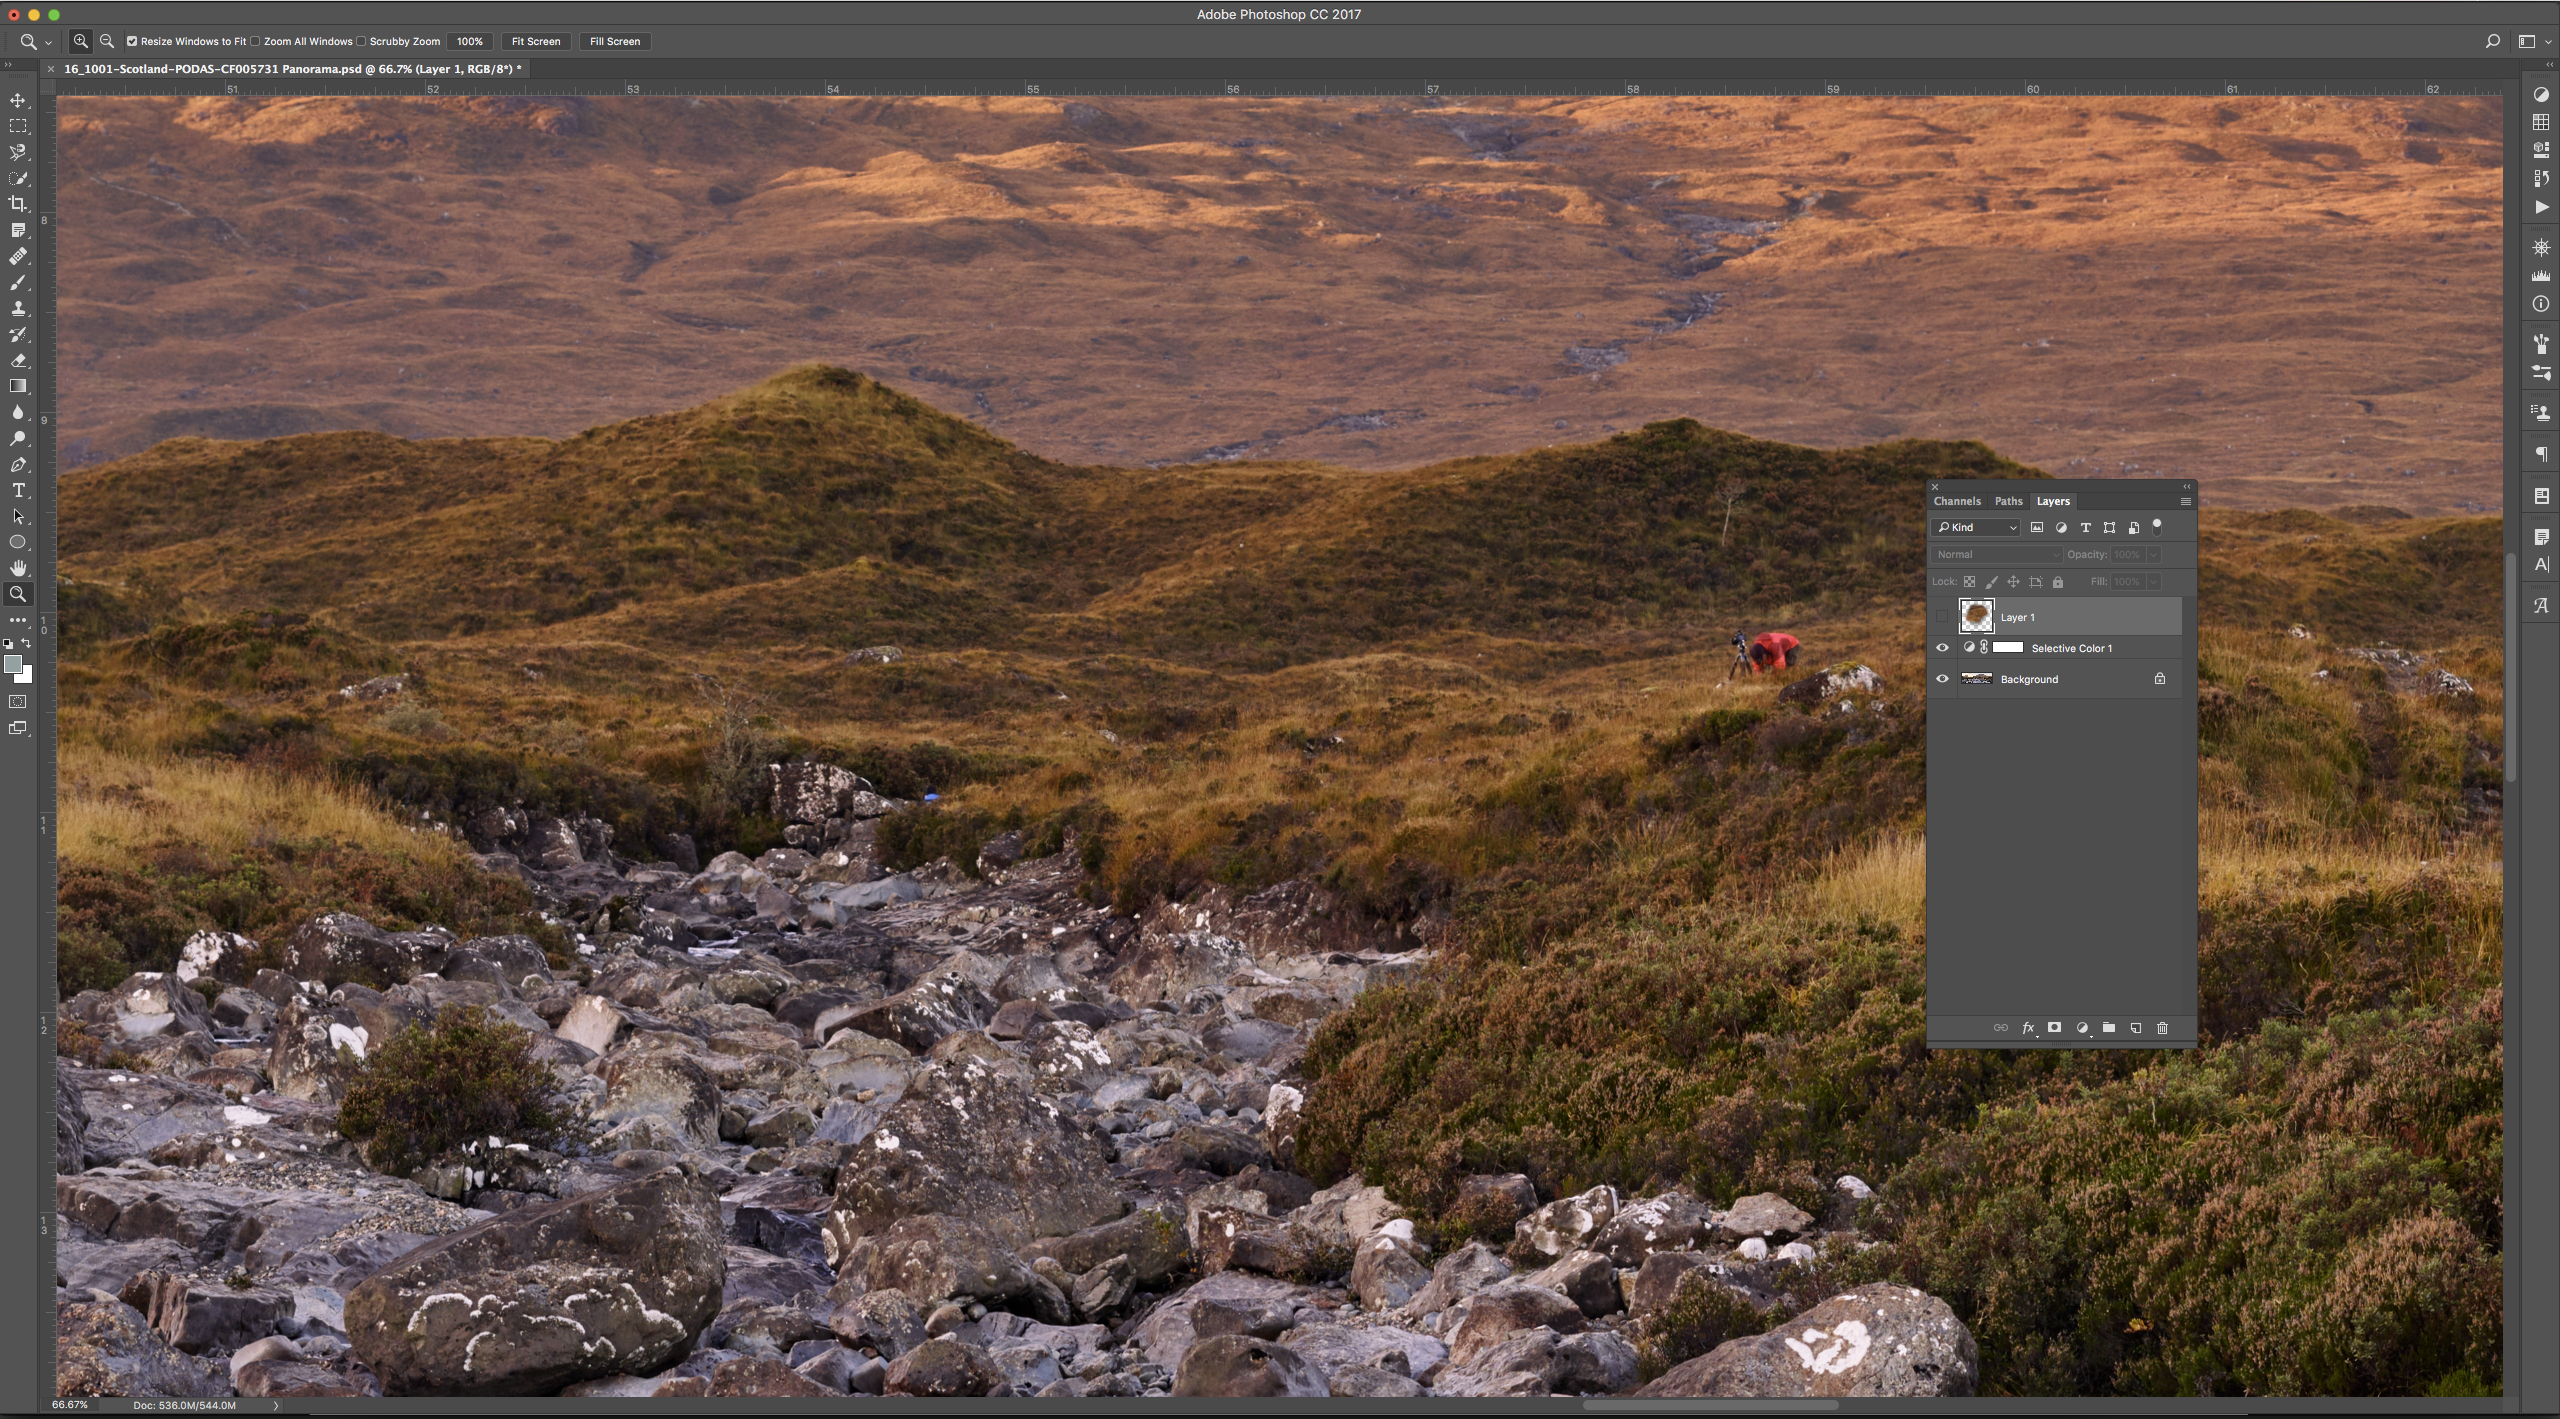
Edited PSD-After
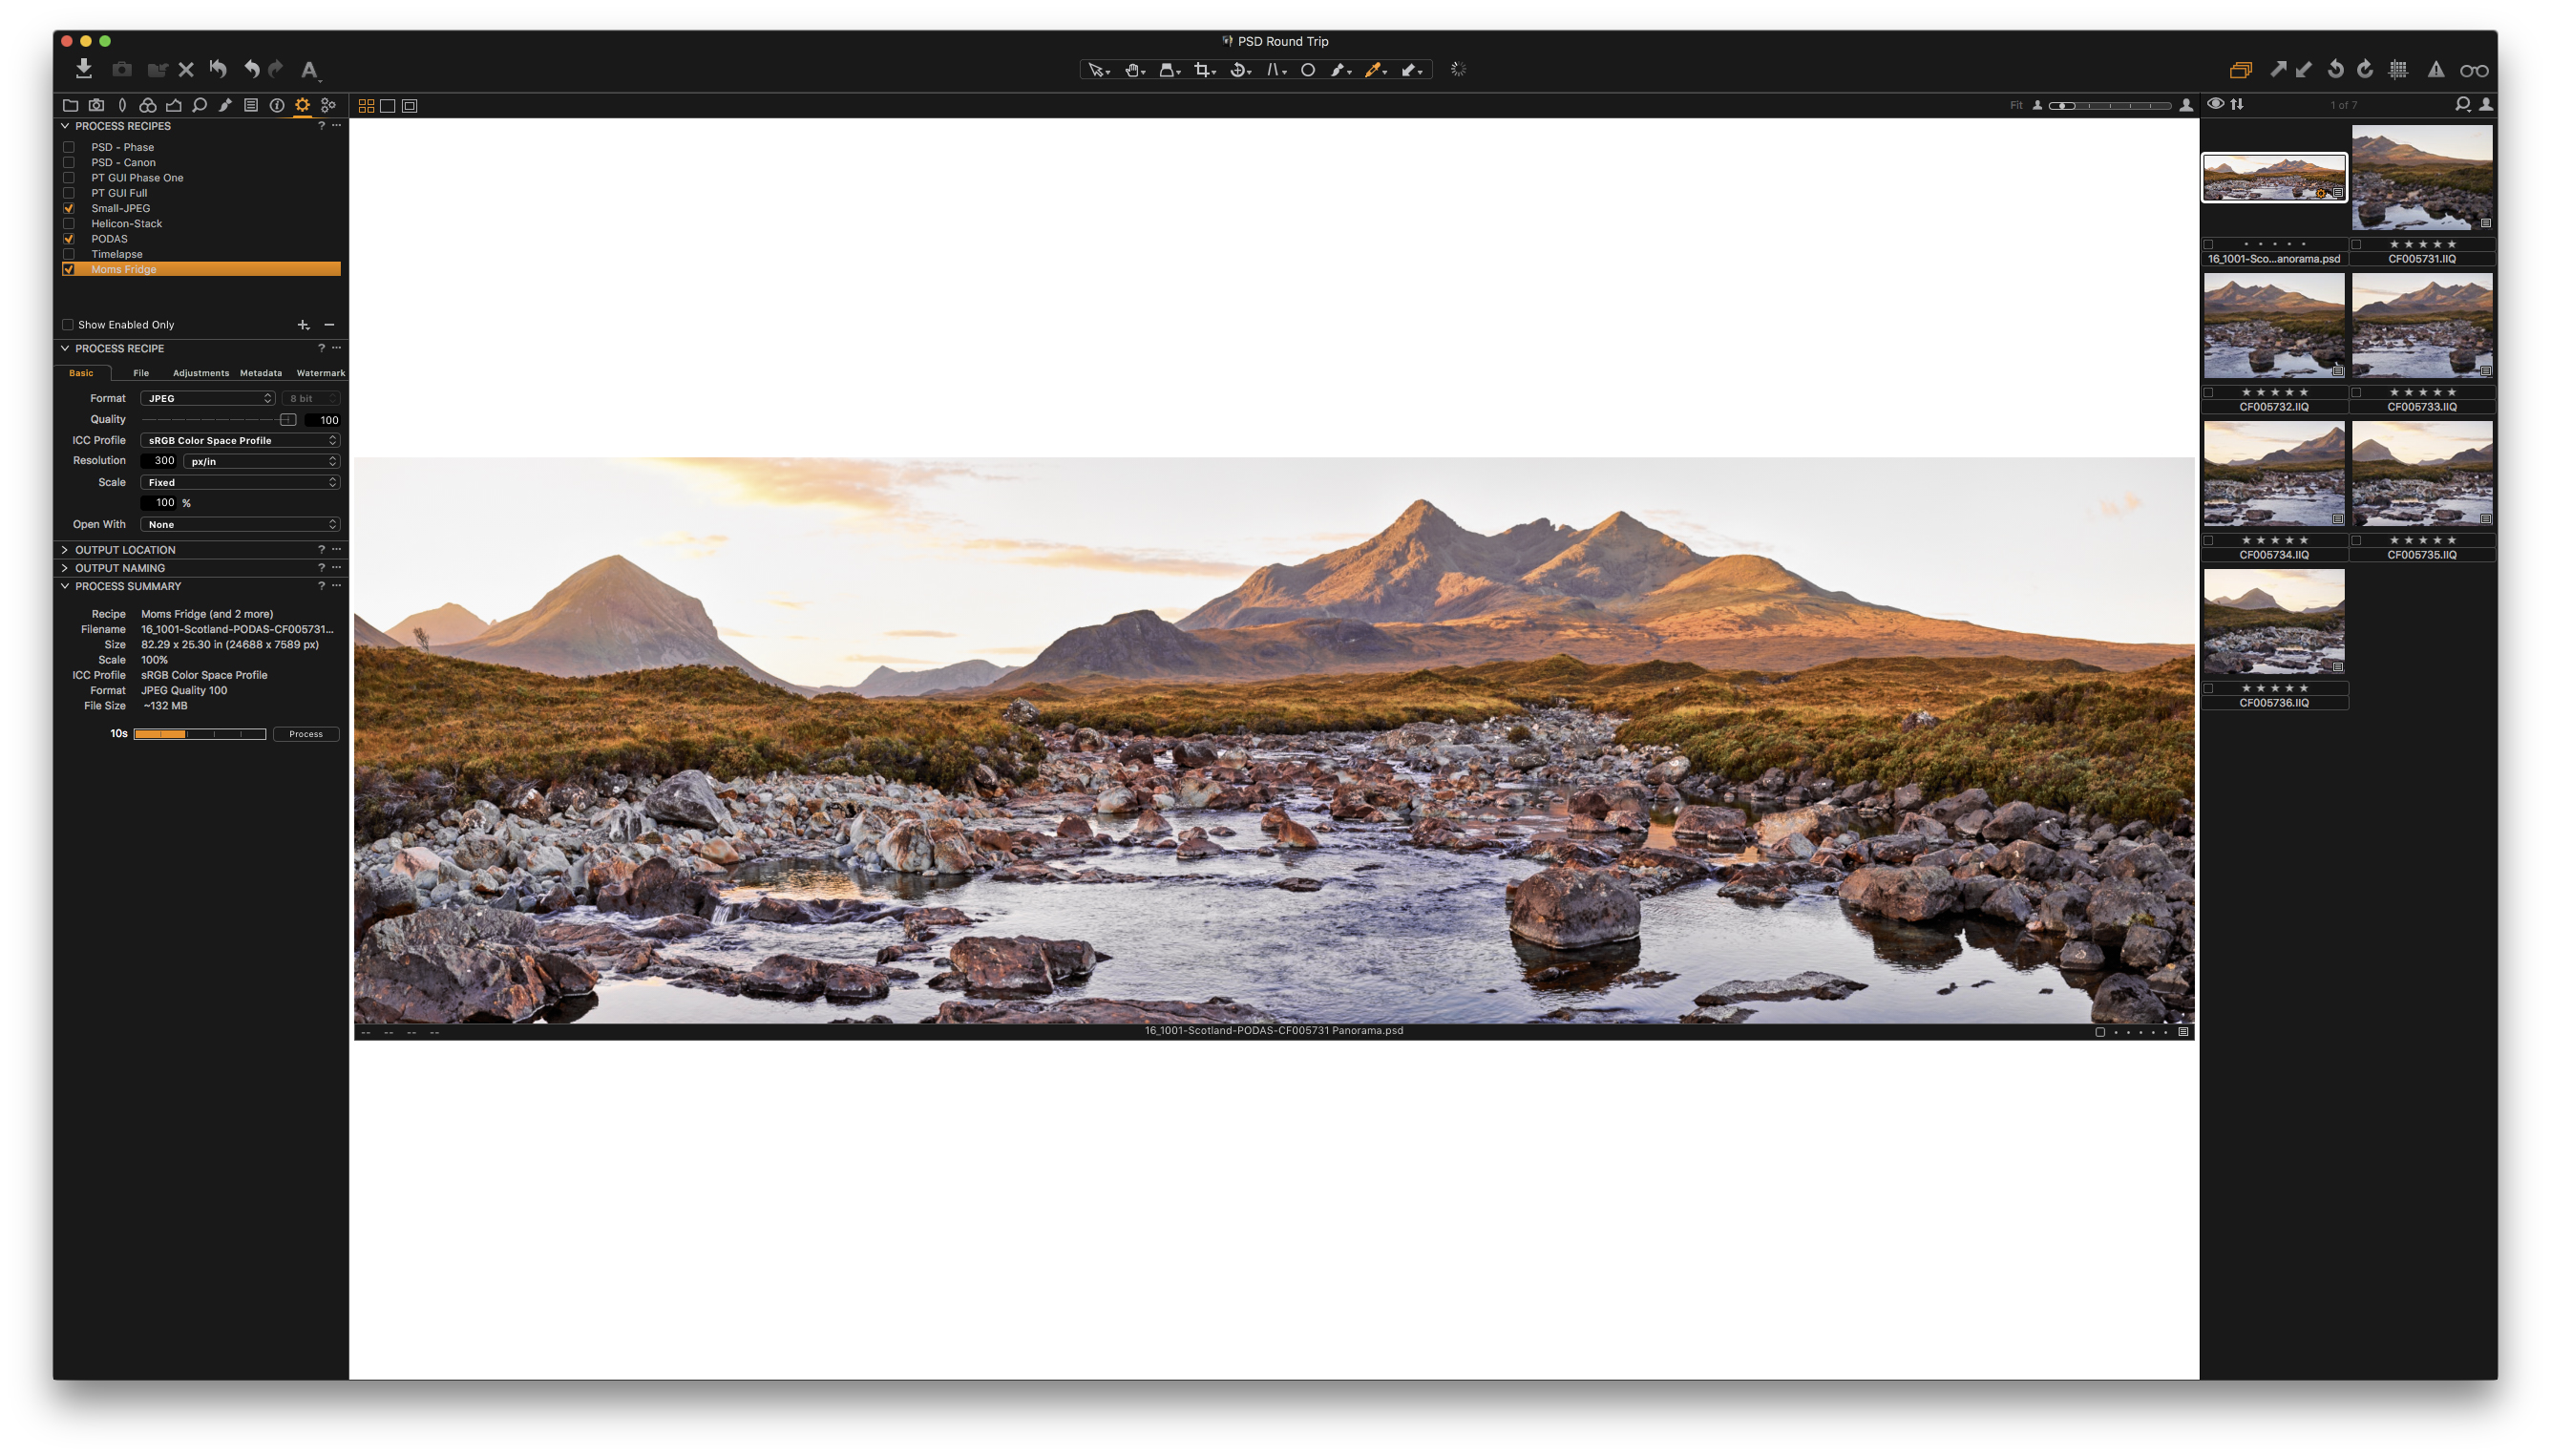
PSD imported to Capture One and ready to edit or process further
With this file, you can now edit it slightly (if need be) just as if it were a RAW. Just as if it were originally shot as a Panorama! Then, when the art director asks for 5 different image samples of this particular image, including multiple formats at multiples sizes and resolutions, a simply click in Capture One Pro exports the PSD to the desired formats referencing all of the Process Recipe’s you’ve applied.
Bing. Bang. Boom.
No more cumbersome resizing the original in Photoshop over and over. No more hunting for the PSD that matches the RAW, reprocessing and retouching again. Just once and done. Your previously excellent workflow has just become excellenter.
Small Feature, Substantial Change
What this new feature affords me is speed, consistency and peace of mind. My workflow, though not perfect, is quite efficient (#humblebrag). The introduction of this small change however, makes it effortless.
The time switching between Capture One Pro and Photoshop is nearly zero and the manual organization, locating and verifying that I have the most recent file, is a thing of the past. I can see my chosen and edited RAW file alongside my edited and final PSD. If I choose to further edit that PSD in Photoshop, everything remains consistent in Capture One Pro. And when it comes time to process that PSD to one or multiple formats (for Instagram, Photoshop, 500px, personal website, print house, moms refrigerator) it’s one click of the process button and all the files are quickly created, neat and tidy, done and done.
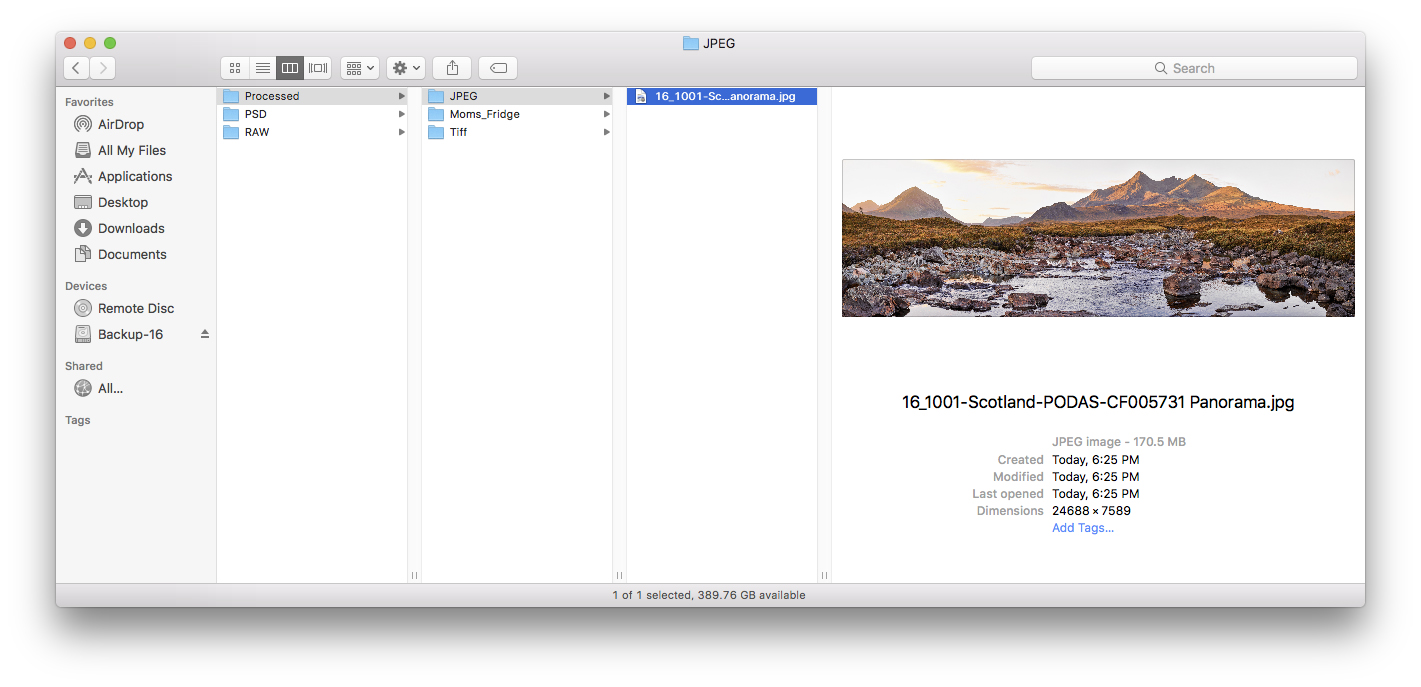
Processed files from the PSD
I know I said this was a seemingly small improvement – and it is – but the effect it has on my workflow is incredible.
So, just to summarize…
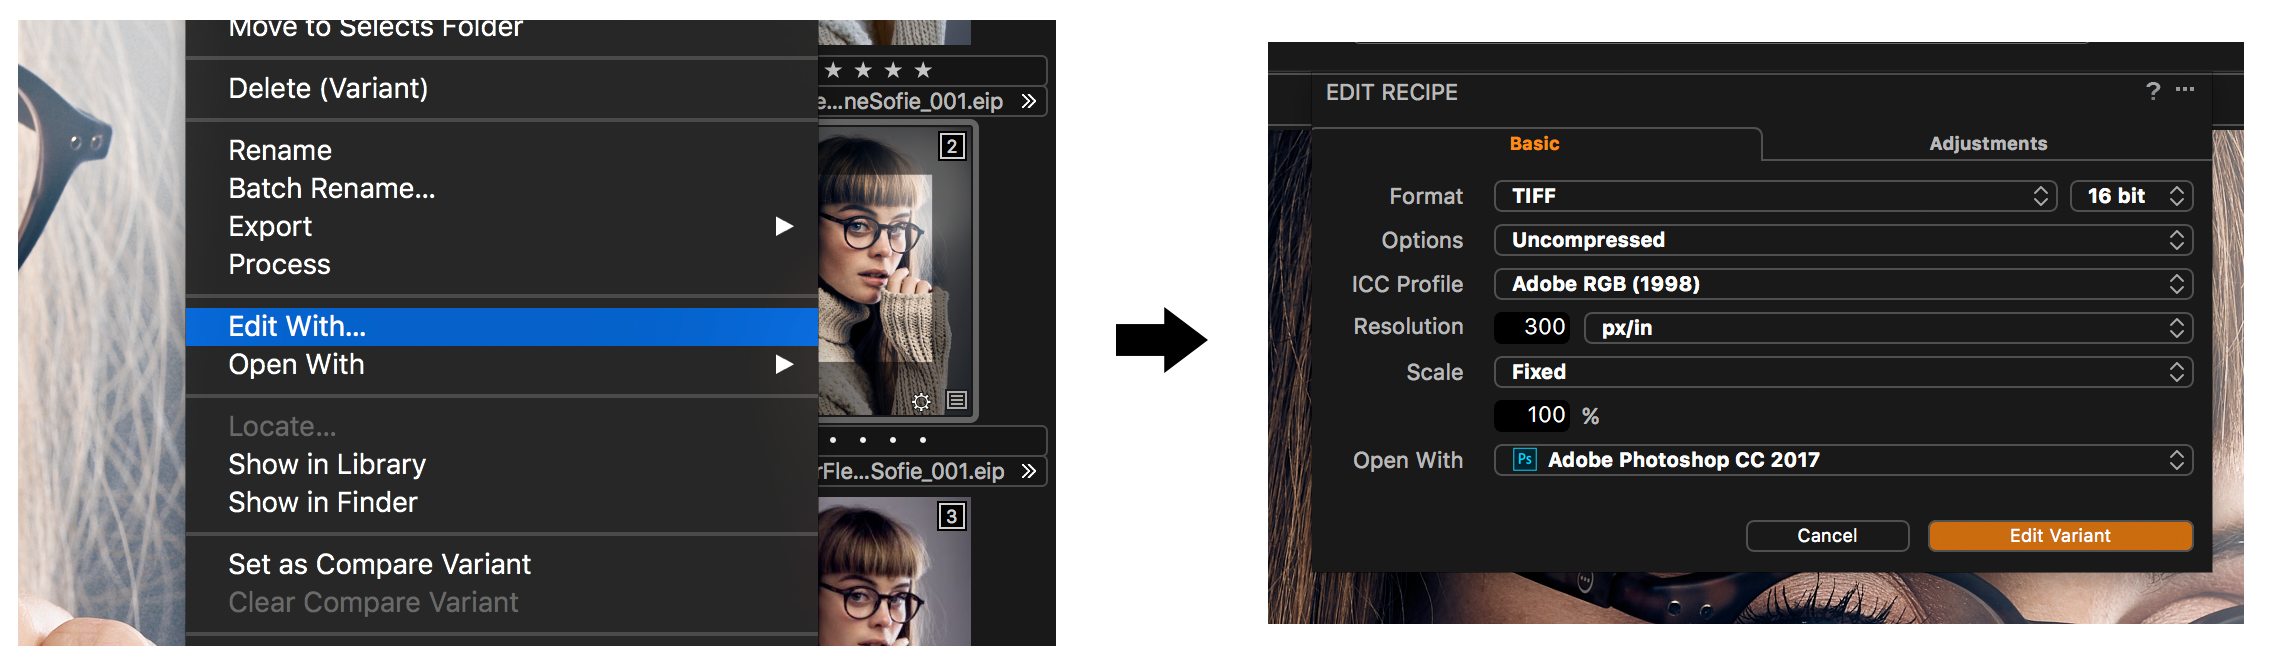
I can edit a RAW in Capture One Pro. I can then right click that RAW, when it’s ready to move to Photoshop, and choose Edit With… from the Right Click menu.
I edit the PSD in Photoshop, stitching, stacking, retouching, etc, and then save the PSD in the same folder as the RAW files.
I now have a PSD alongside my RAW’s that reflects my edits. I can choose to continue editing in Capture One Pro if I wish, but when I’m ready I simply process the PSD to the final formats I need (TIFF/JPEG) and I’m done. Simple and clean.
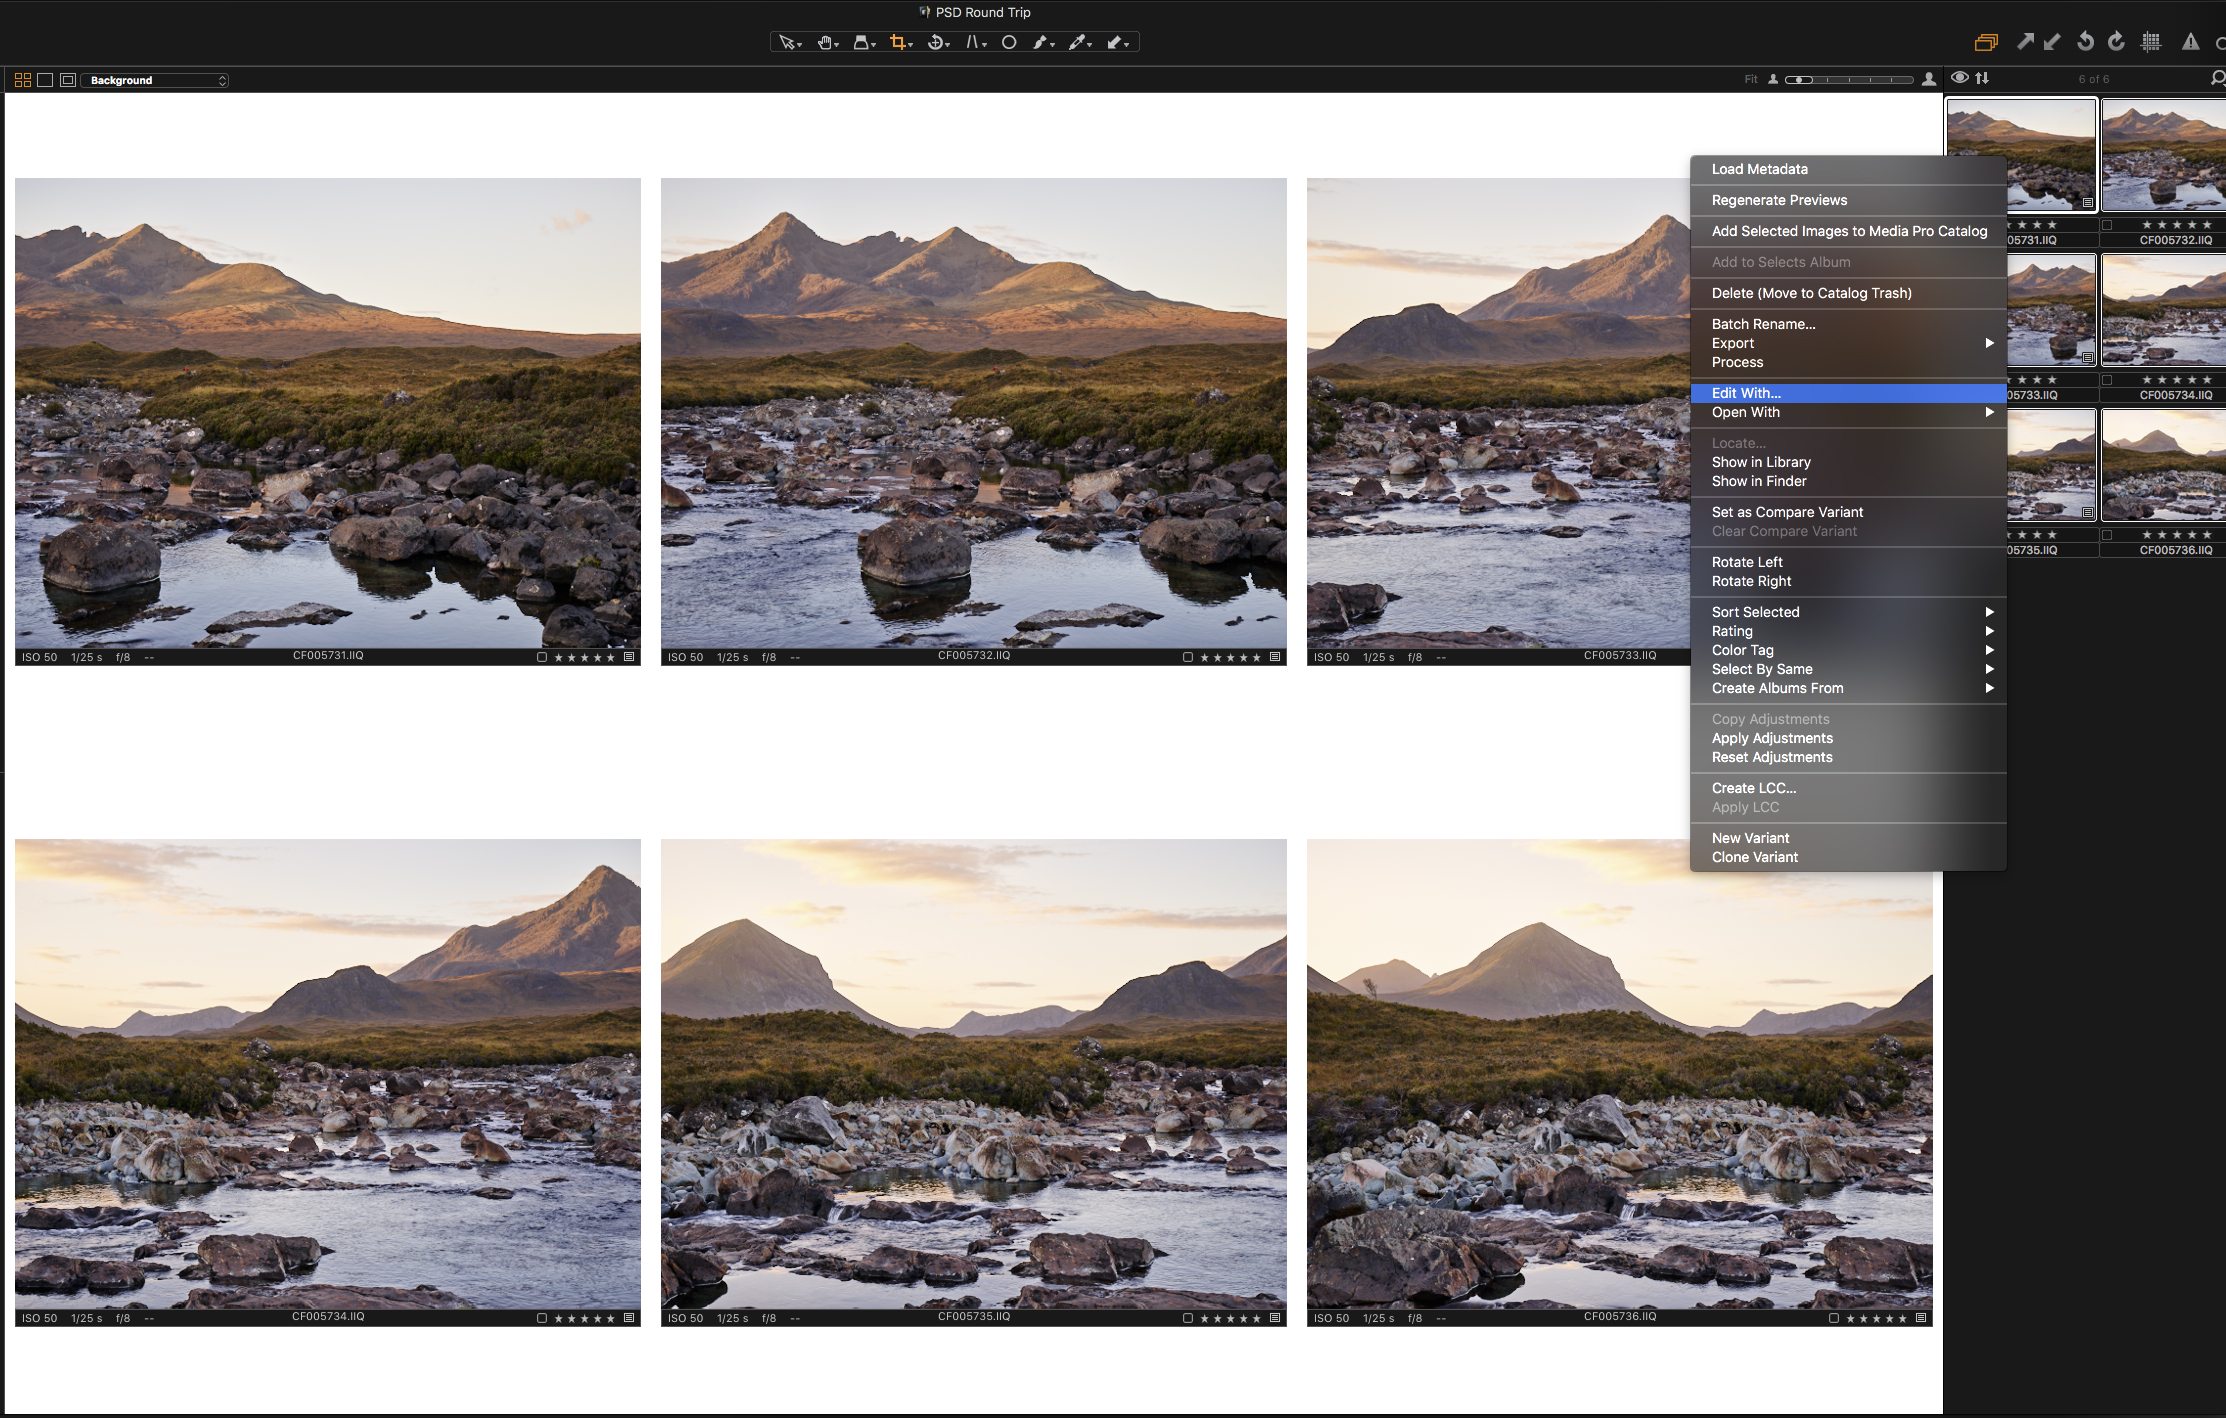
Edit With
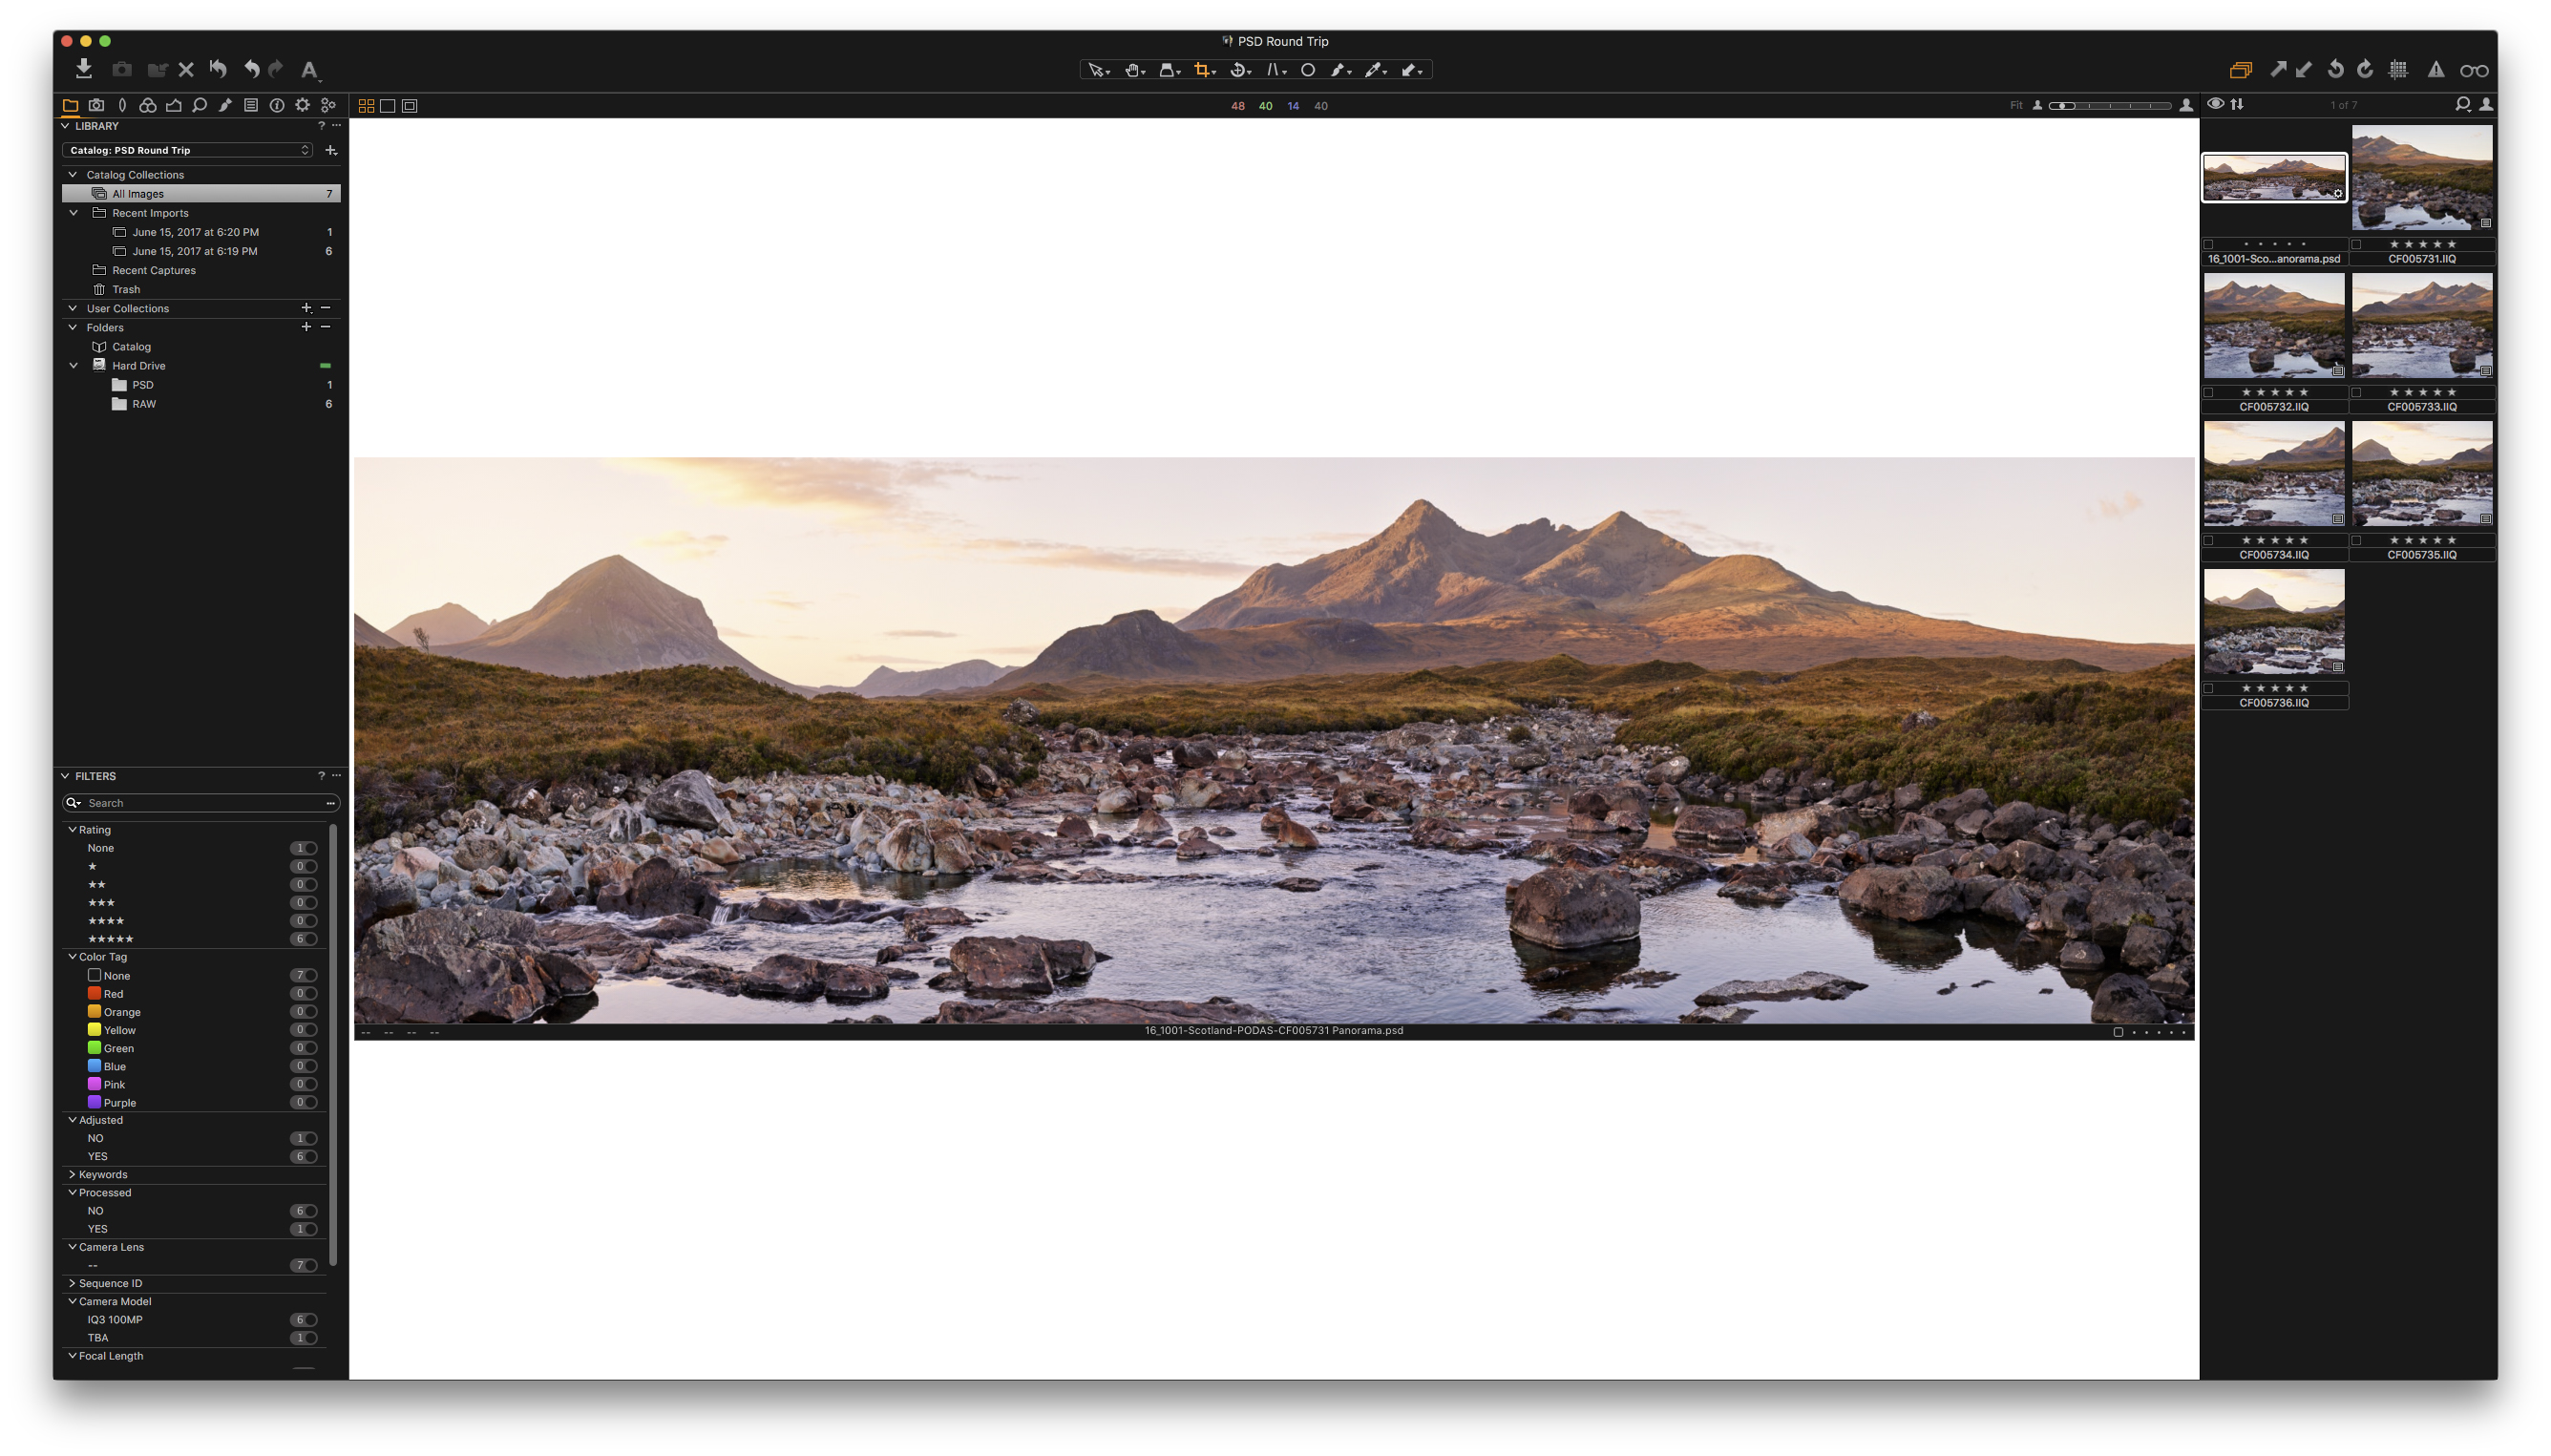
Final Capture One Pro structure after editing the PSD
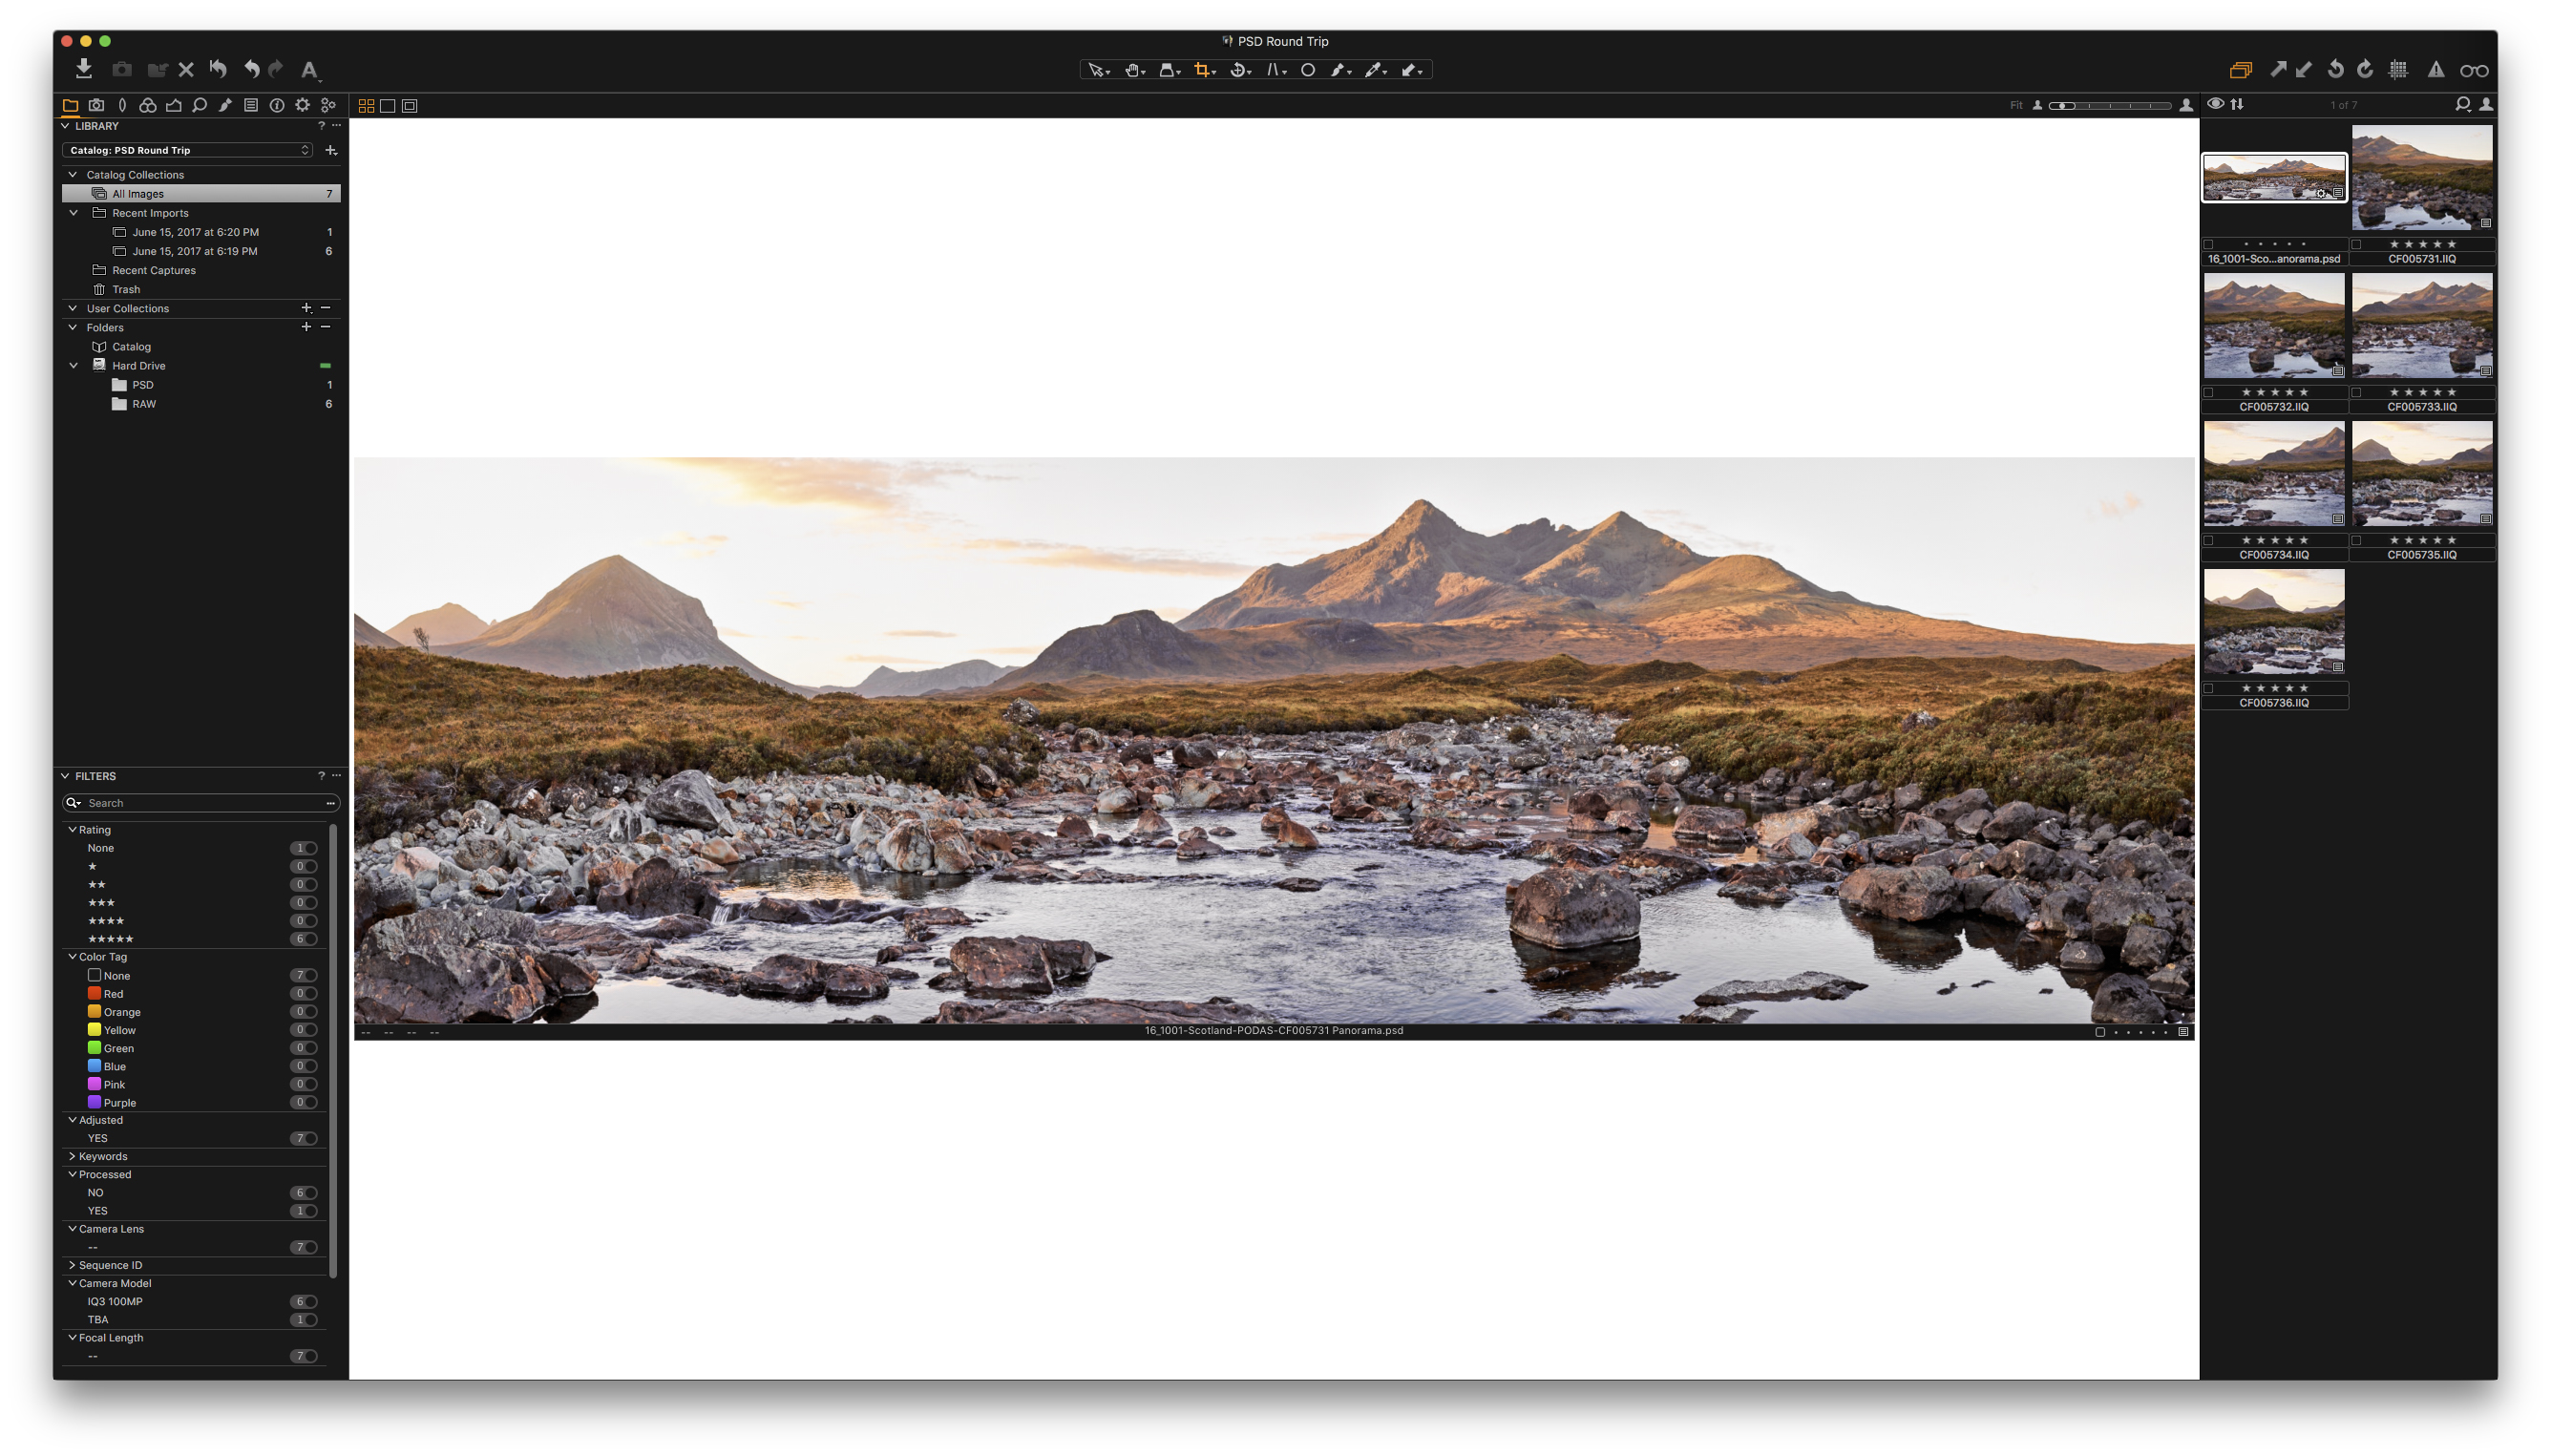
Final image after editing the PSD in Capture One Pro
The Importance of Professional Tools
In a way, Phase One is paying me to say this, but you’ll have to trust me when I tell you that they didn’t come to me to write about this change. I volunteered. I jumped at the opportunity to tell as many people as possible about the potential this small change has on a bigger, and common, workflow.
Capture One Pro is, without a doubt, a professional piece of software. Though it’s not for everybody, I firmly believe it should be. With the ability to customize a workflow to suite your exact needs, and the underlying features to make seemingly anything possible, it’s a software that has everything to offer a photographer and asks for nothing in return (aside from $299 USD).
It is designed and delivered by dedicated individuals who listen to the needs of photographers and it is built to help propel professional photographers the world over.
Ultimately… this is pretty great and I highly suggest you check it out.
Download a 30-day trial and see for yourself what Capture One can do for your workflow.