In addition to great image quality, if there is one other thing I look for in a software product, it is workflow efficiency and flexibility. Capture One has excelled in the former for quite some time now, and is the de-facto choice for working professionals processing their RAW files. But when it came to workflow, there was still a bit of room for improvement. With Capture One 11, that list of workflow “wants” has greatly diminished thanks to the addition and simplification of a few key features. With a focus on this latest version, I’ll give you a quick rundown of some of things that I feel make Capture One a great tool for photographers.
Download a 30-day trial of Capture One if you don’t already have.
Local Adjustments
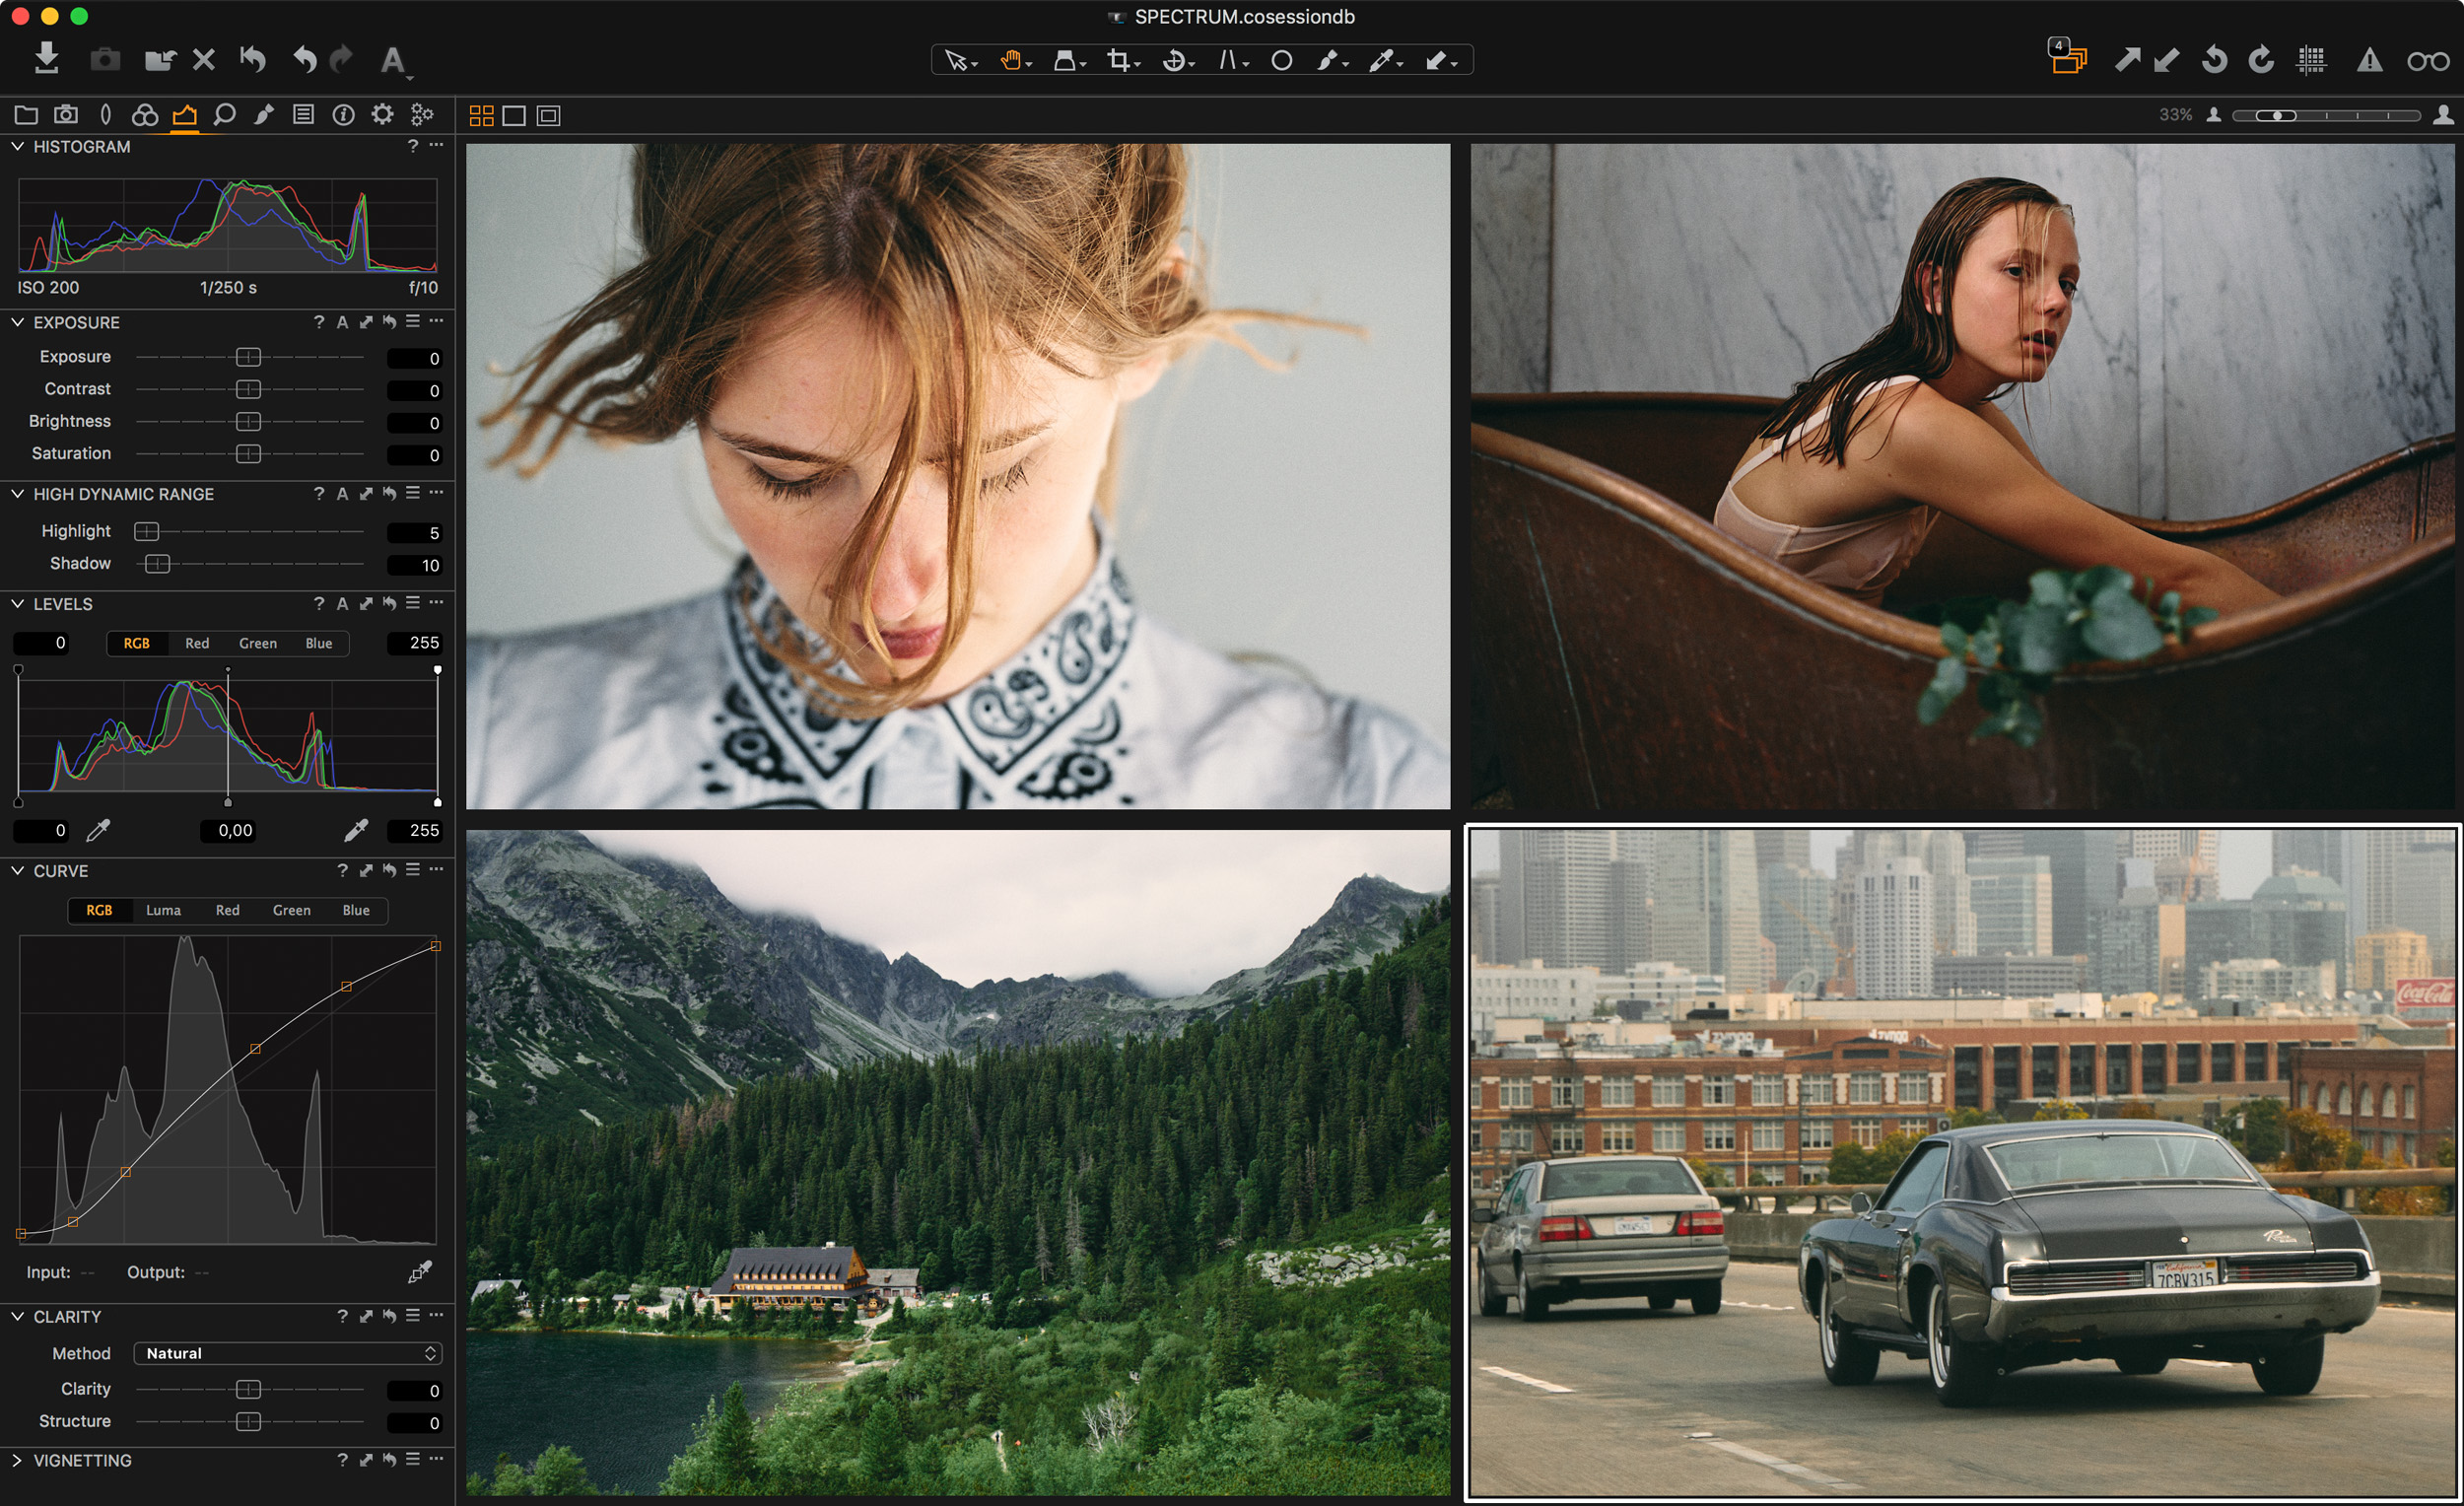
We’ve had what’s known as “local adjustments” in Capture One for some time now – since version 6 if I’m not mistaken – and it was one of those features that put Capture One ahead of a lot of its competitors. The ability to mask and adjust a portion of the image was a privilege reserved only for rasterized image manipulation tools like Photoshop, and having the ability to do this at the RAW level was a huge step forward. Despite its advantages, the local adjustment tab was often a source of confusion even for seasoned users such as myself. Certain tools were compatible with local adjustments while others weren’t. Often, I’d find myself working on a local adjustment layer unintentionally and frequently struggled to get well defined masks.
I’m happy to say that with Capture One 11, those problems are now a thing of the past as they have done away with local adjustments entirely. That’s right, gone, completely, no more local adjustments. Now, before you begin to have heart palpitations, I’ll tell you that the development team hasn’t gone crazy, they’ve merely simplified the concept down to something we are all familiar with – layers. Rather than living a lonely life in a dedicated local adjustments tab, our localized adjustments now live inside of layers that are displayed in a Layers panel that is visible across most of the tool tabs. Better still, we no longer have to wonder which tools are compatible with the layers themselves as almost all are. I say “most” because there are tools such as black and white conversion and film grain that still operate on the background layer – but I think we can all see why that might be. The key thing is that those core tools like levels, curves, color adjustments, etc. are now all accessible at the layer level.
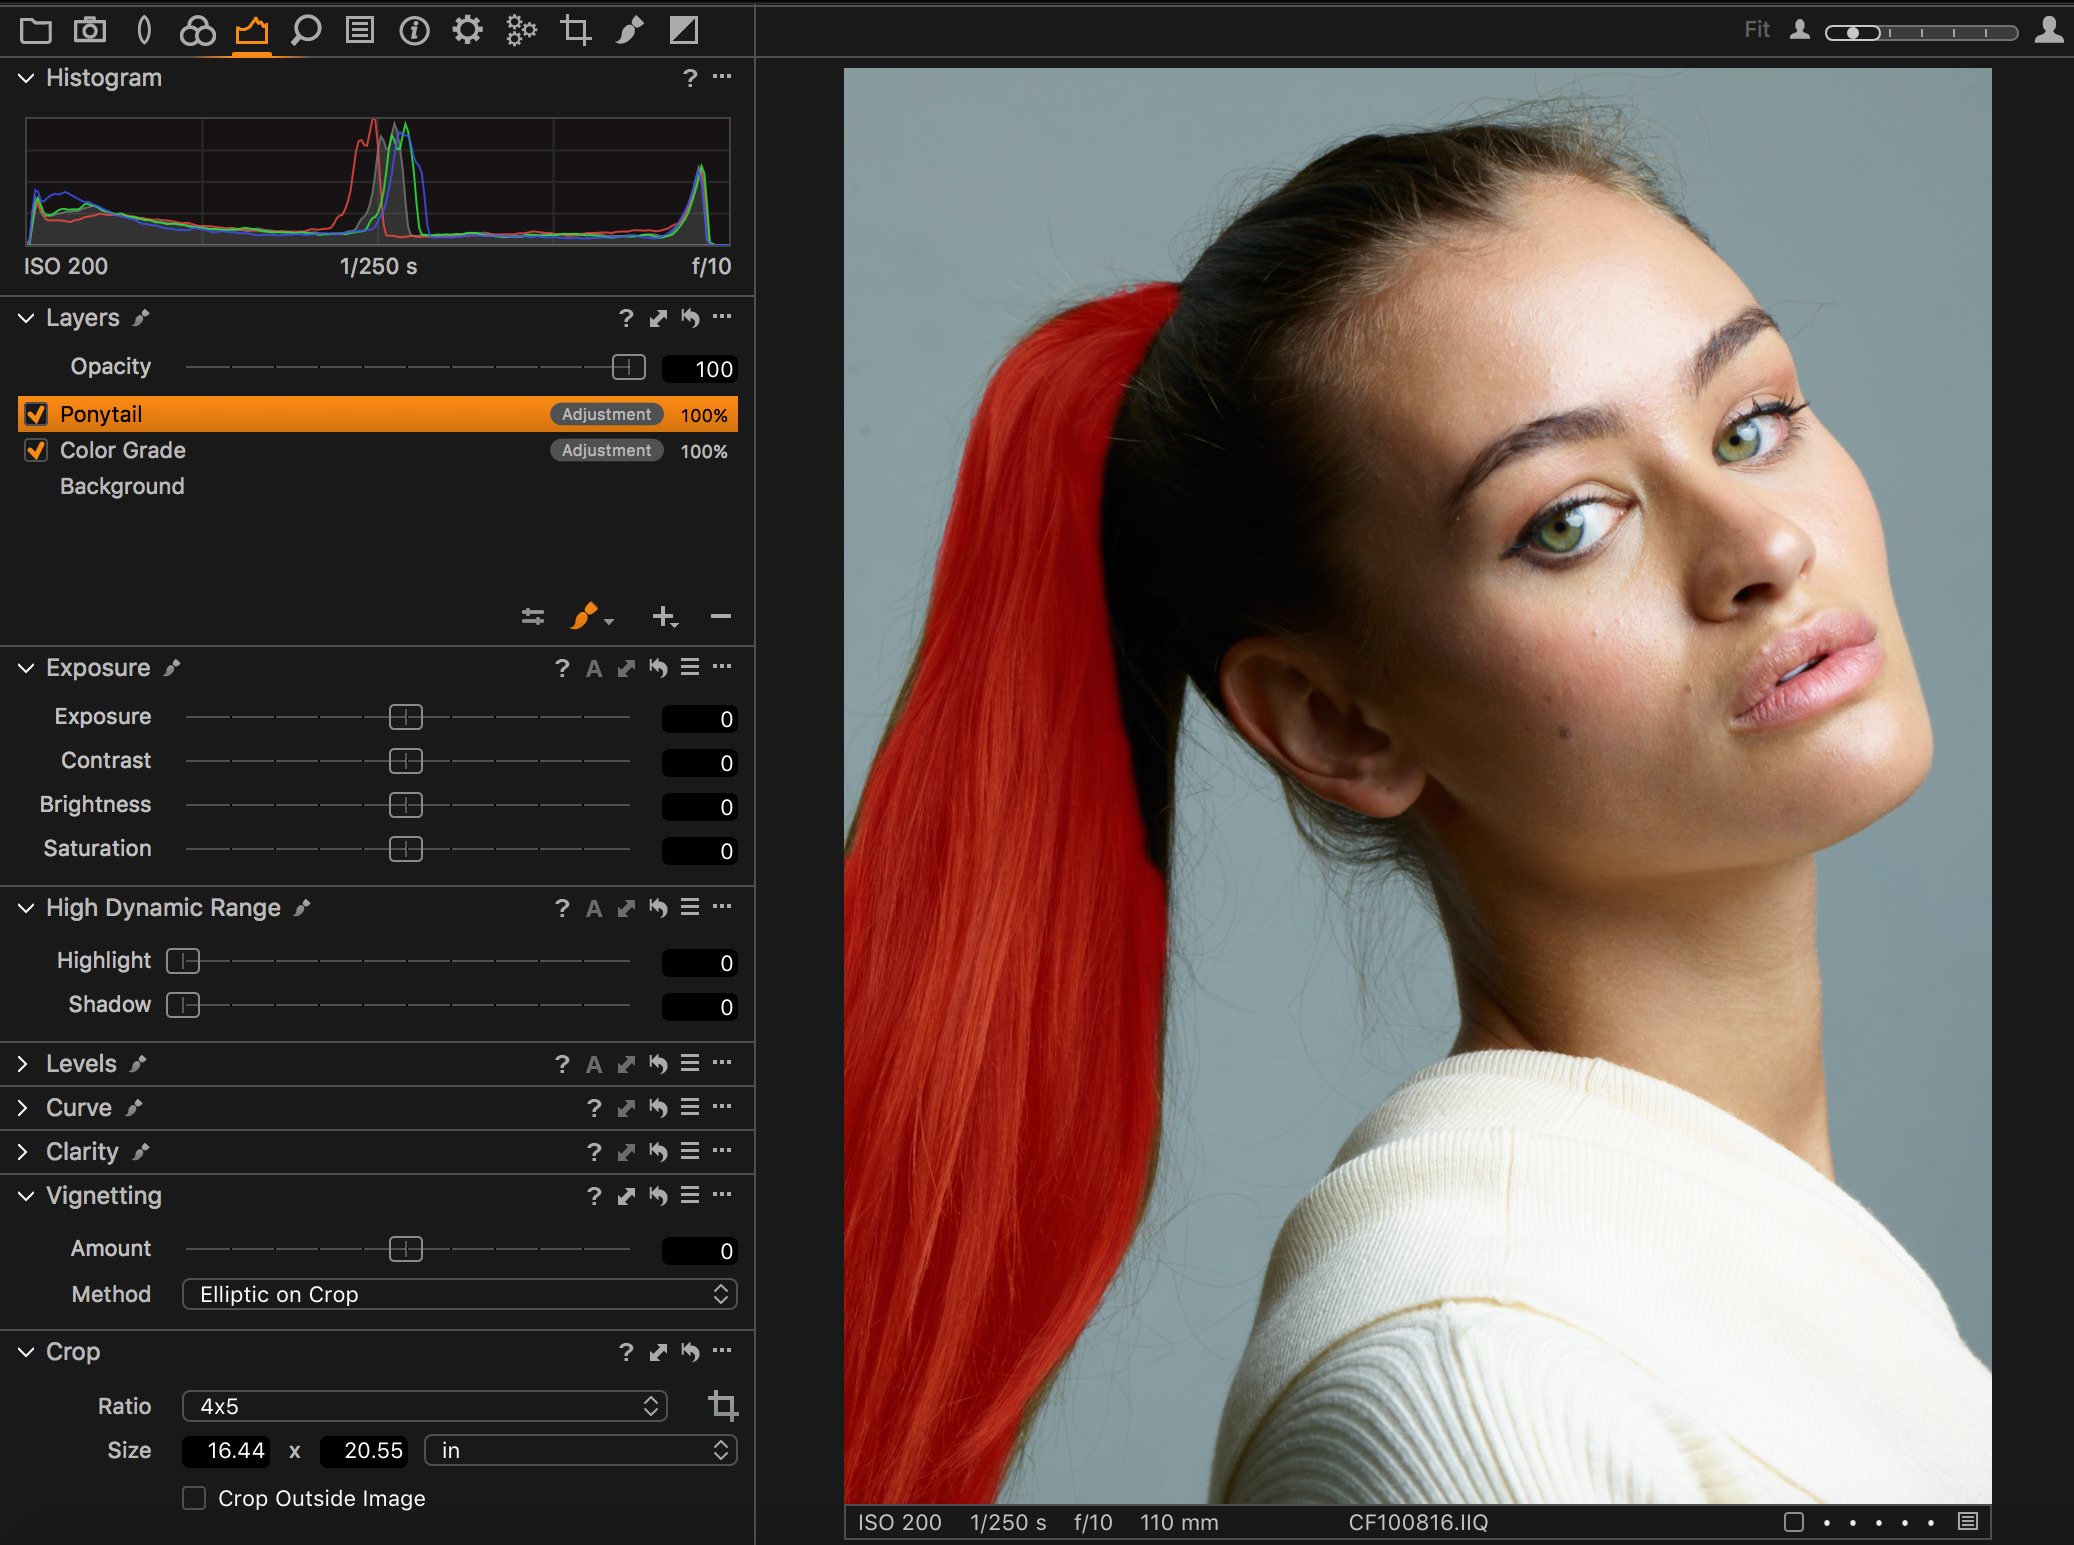
Layers, Layers, Layers!
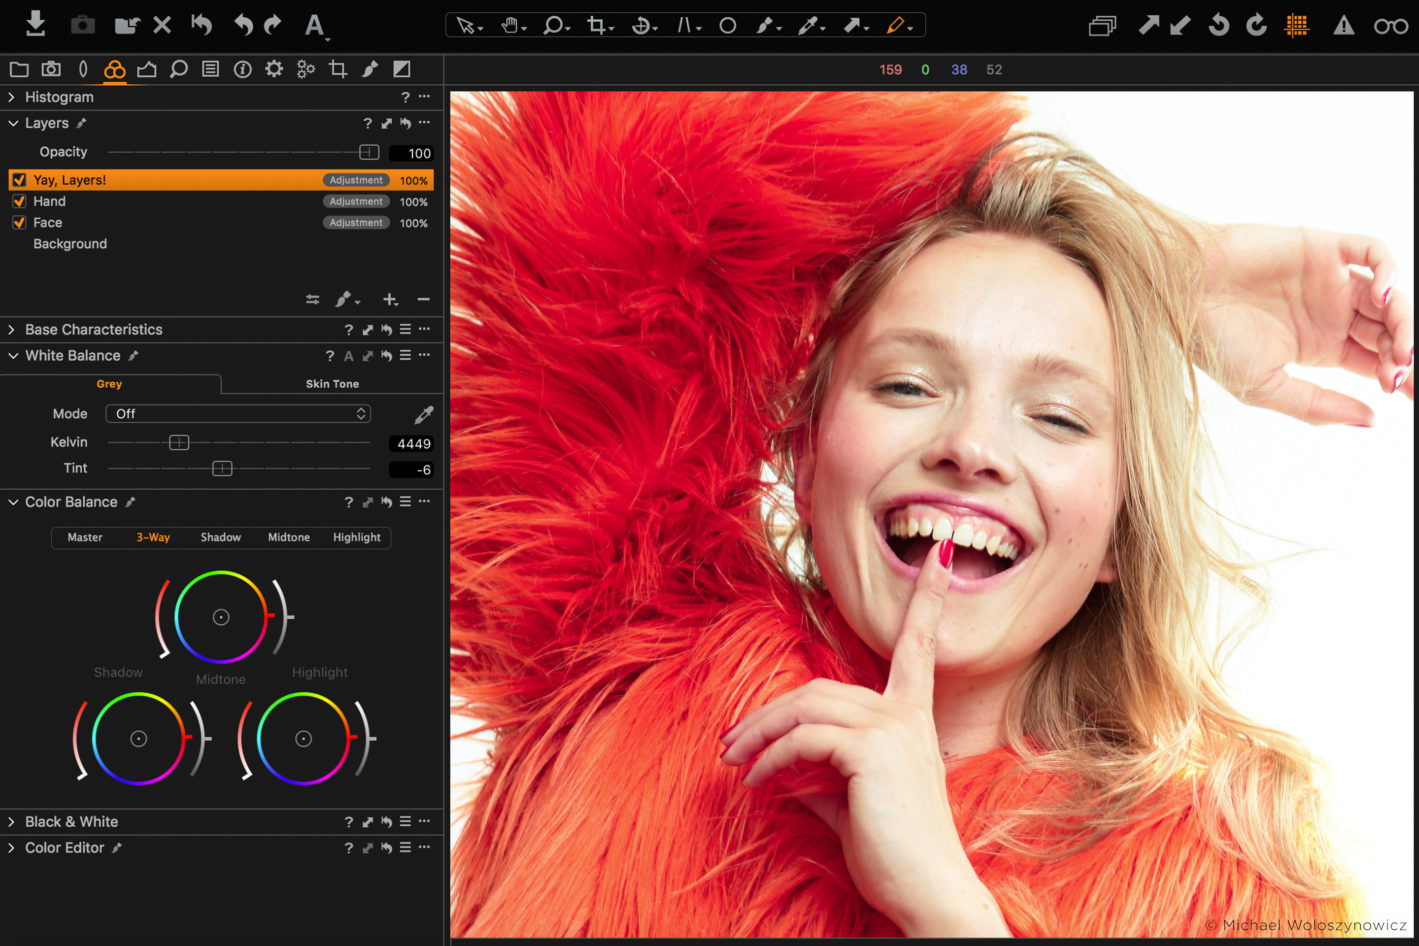
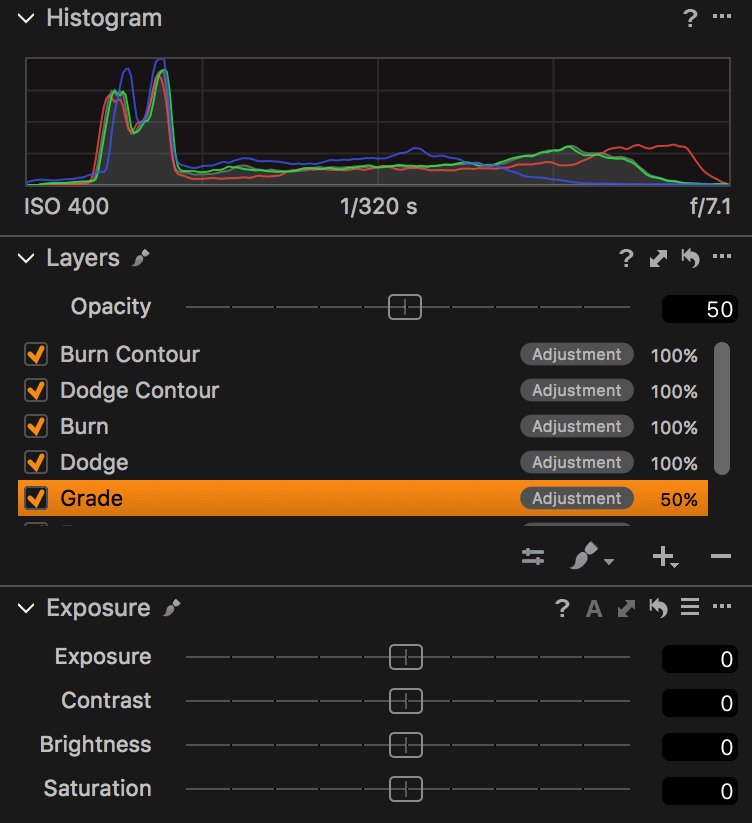
To emphasize just how important this change is, it actually finds its way into my list of favorite features twice, as this new change requires further elaboration. What’s great about having the ability to use all the adjustments at the layer level is that it allows us to separate things like color grading, exposure, contrast, etc. into their own respective layers, and can toggle them and fine tune them in an intuitive manner. Better still, Layers now offer an opacity setting so we can dial our adjustments up or down as needed. I personally like to start at 50% opacity and set my adjustments the way I want them, this way I can decrease or increase the intensity in both directions.
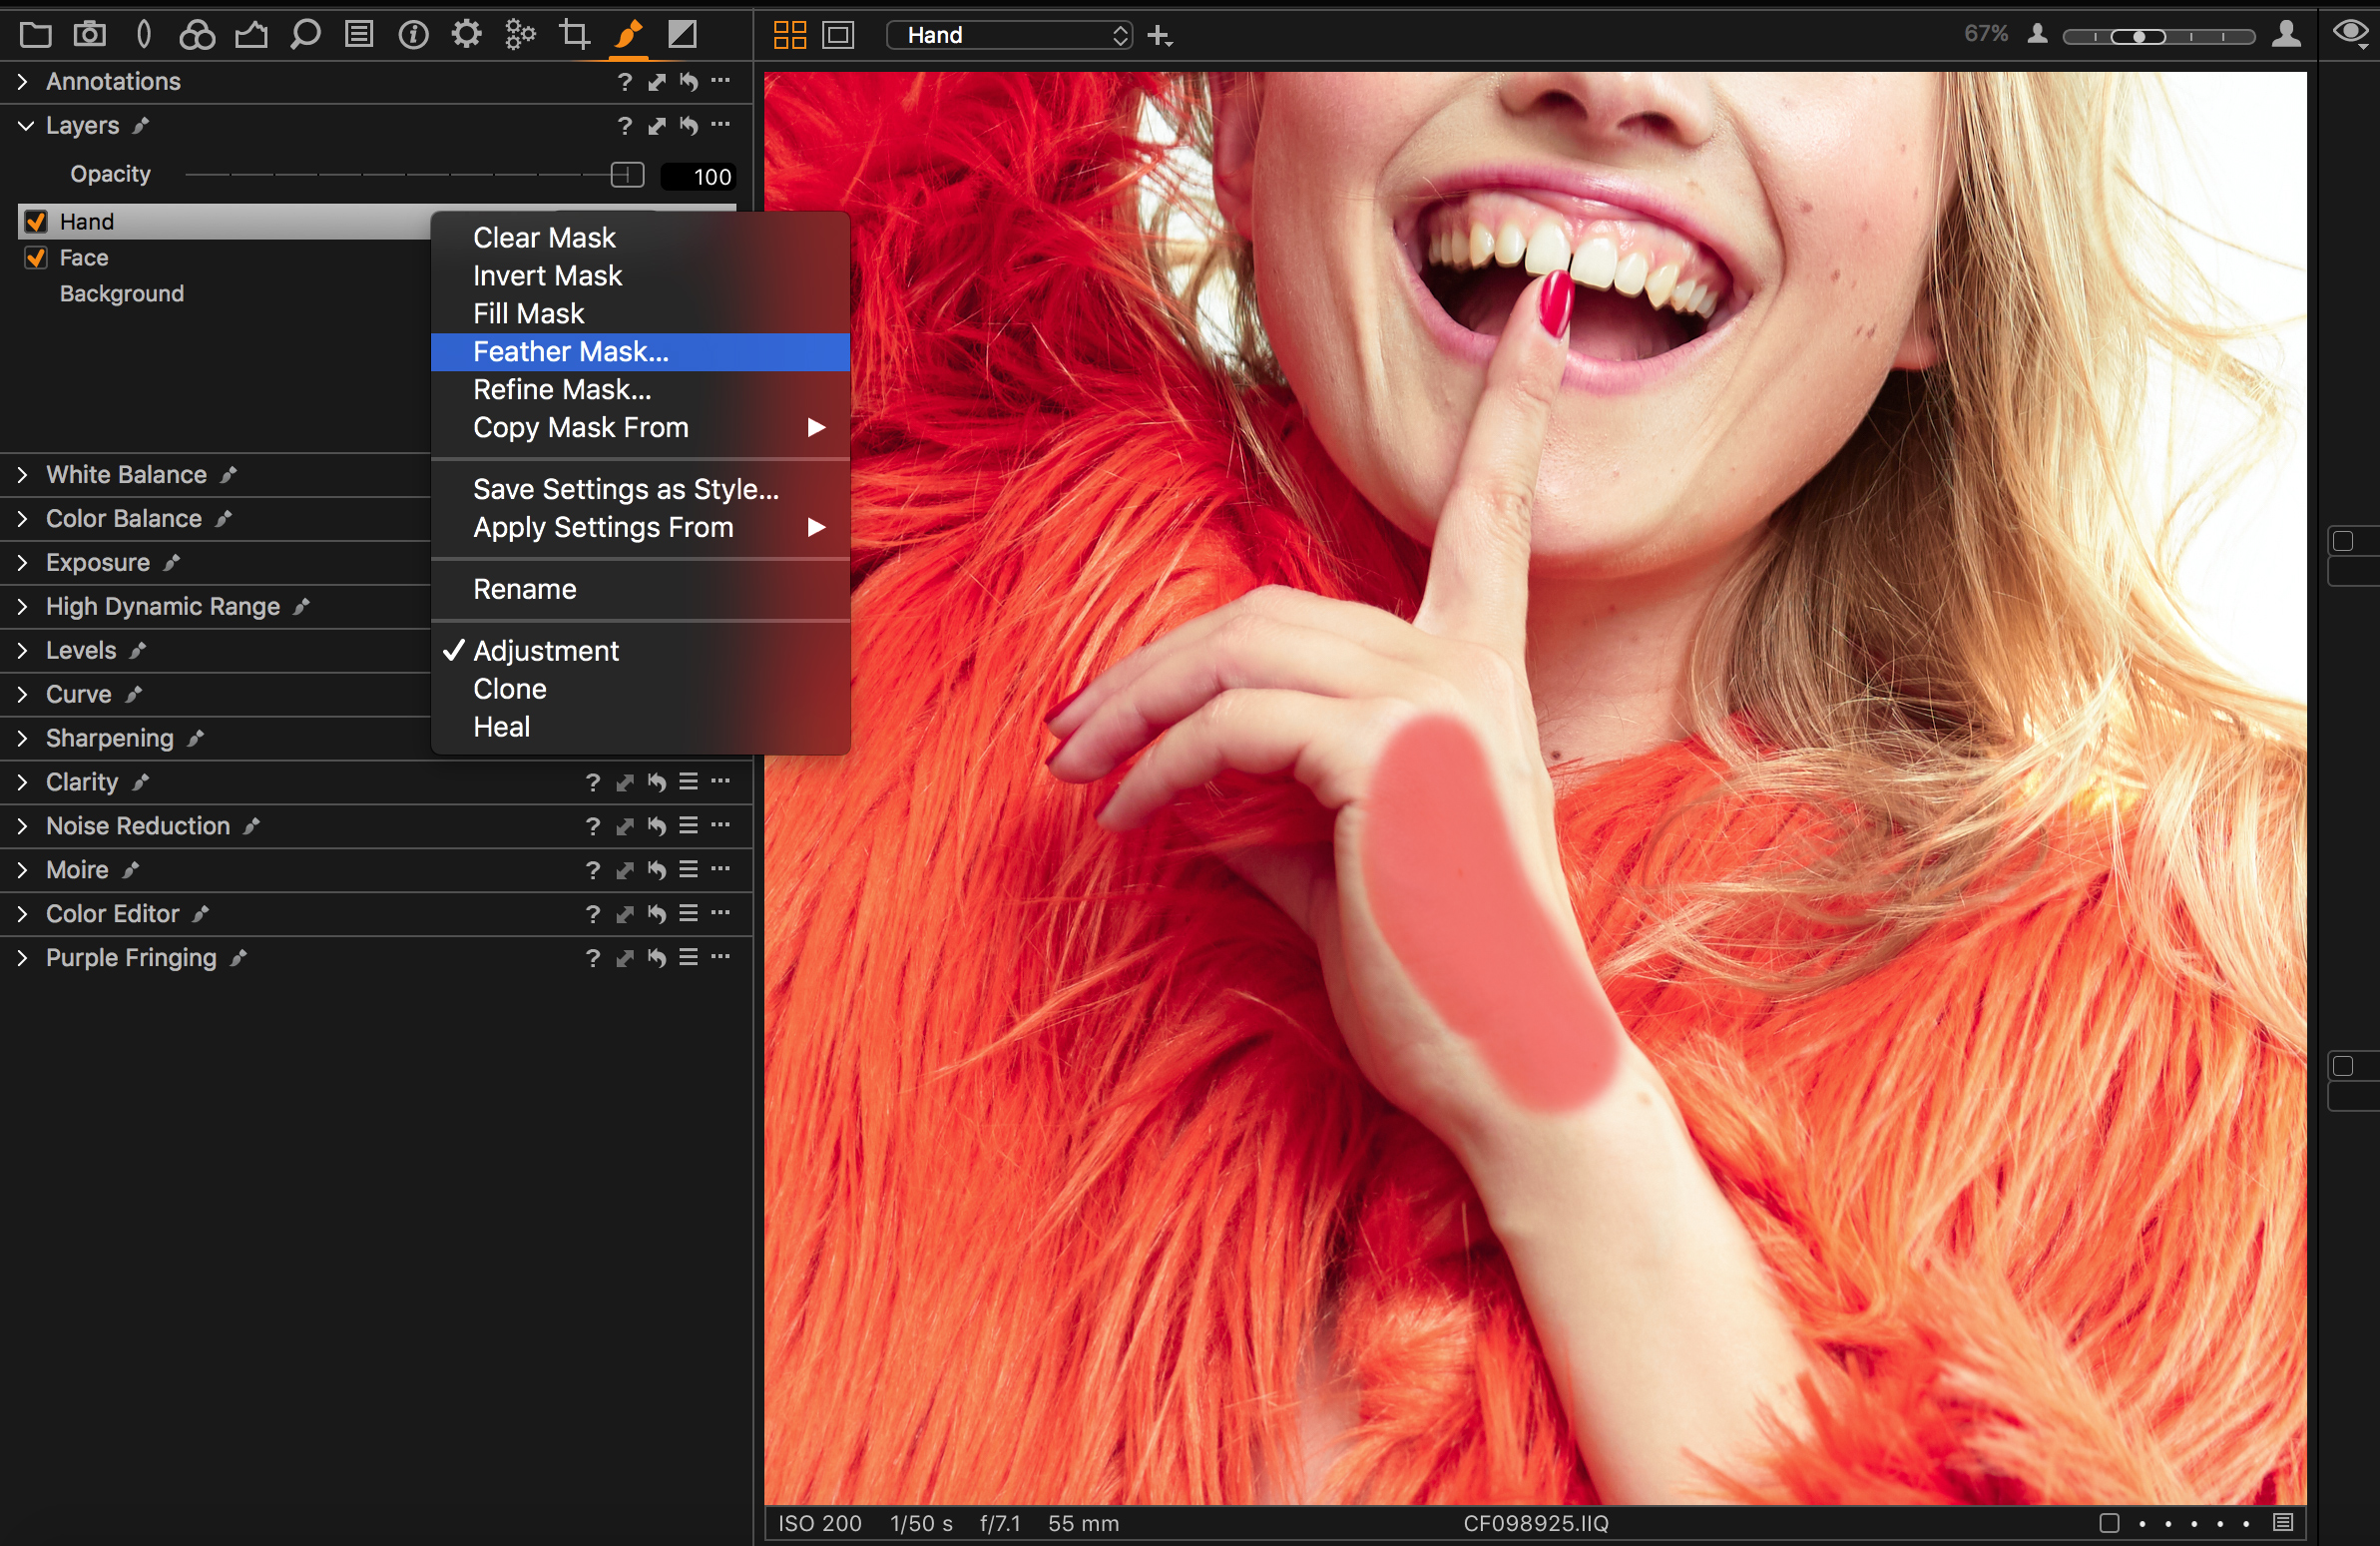
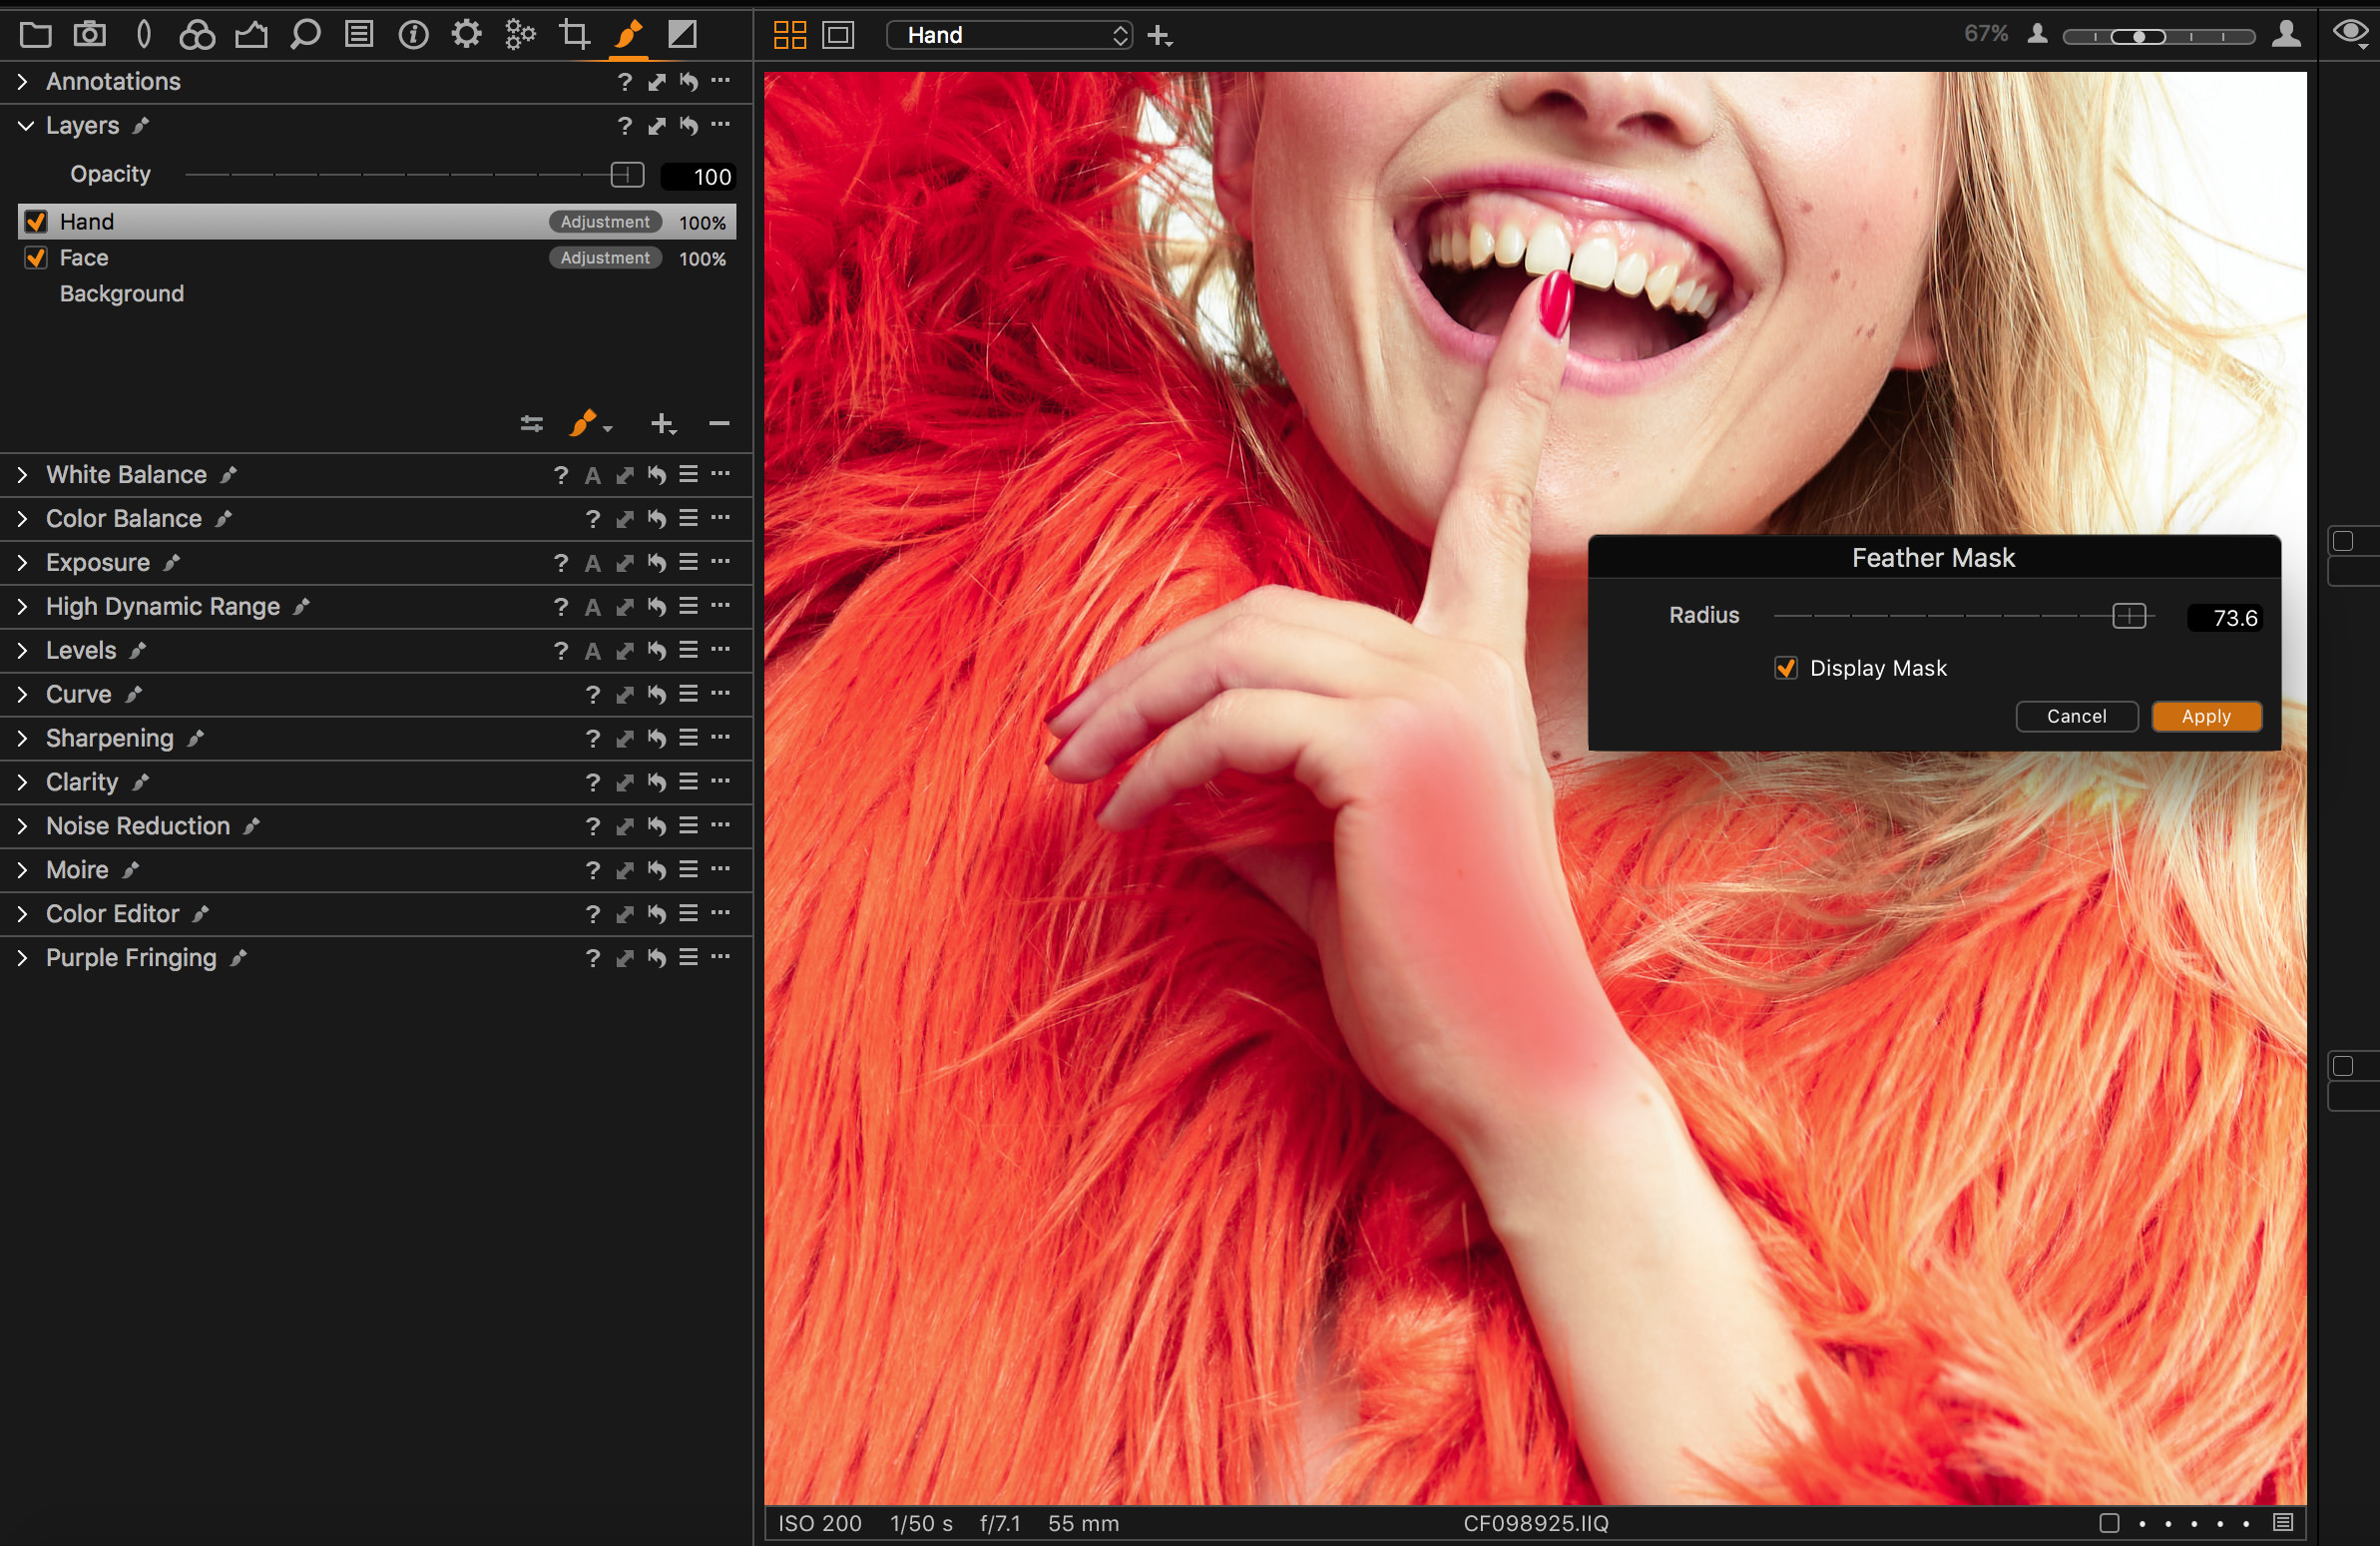
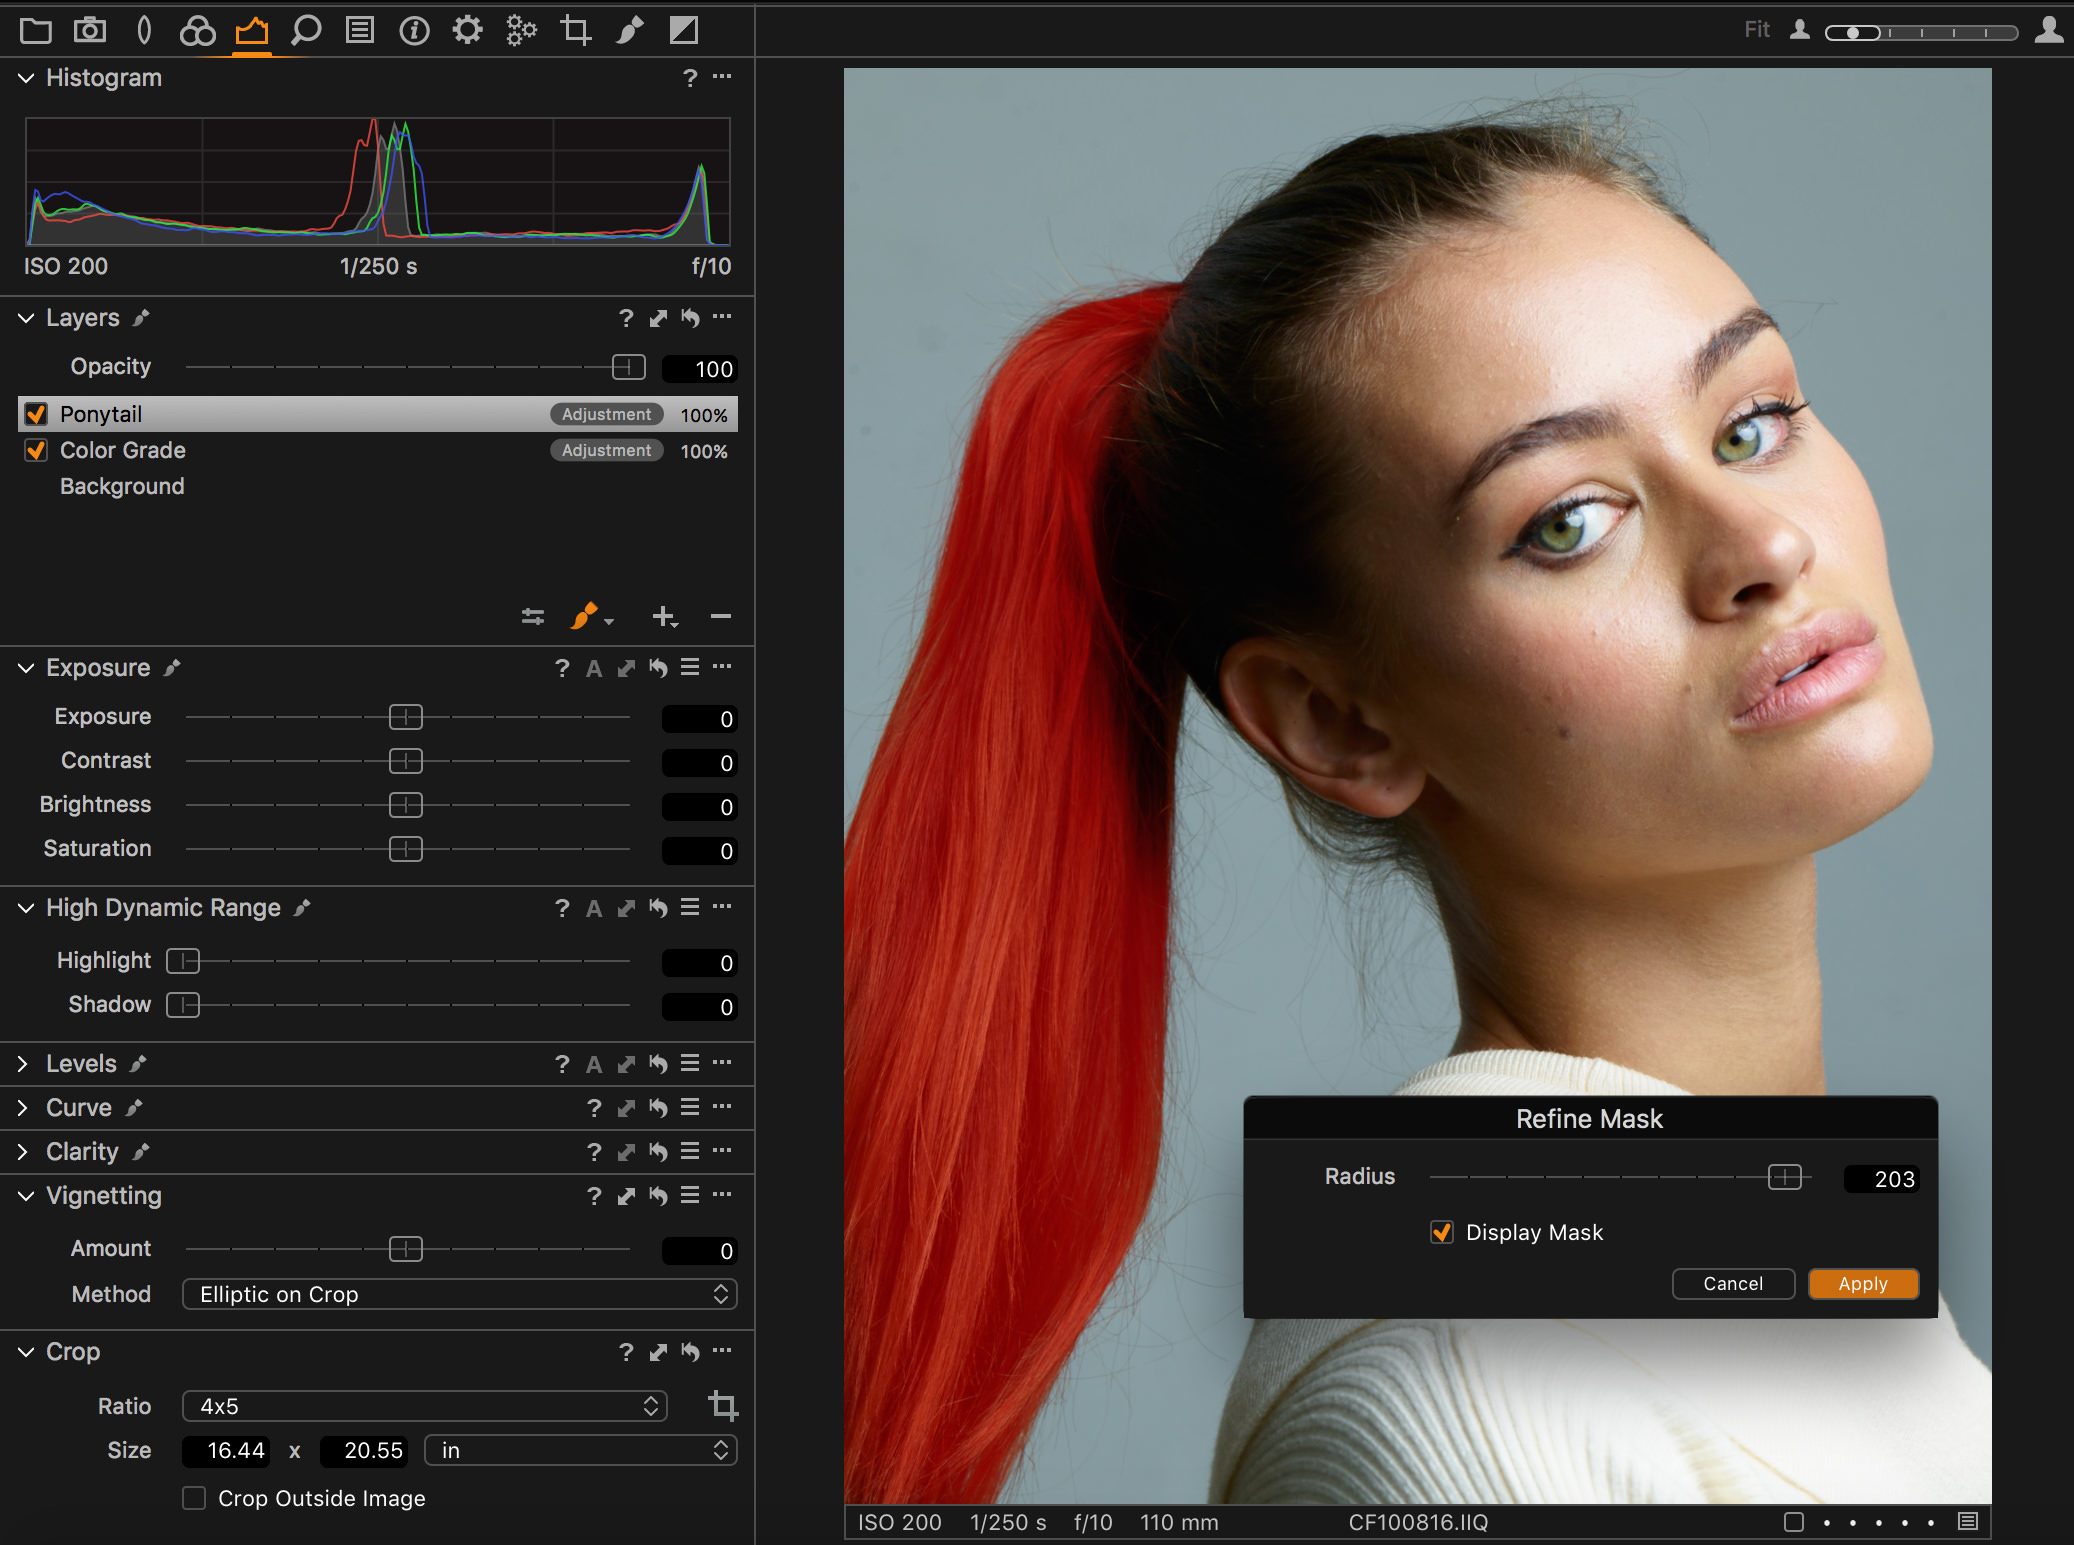
Masking
Closely tied to Layers is of course the concept of masking, which we’re all familiar with from Photoshop. Up until now, however, the Masking tools always felt a bit clunky and somewhat unintuitive, which made using them a bit of a challenge in certain scenarios. With version 10, we got some improvements in the way of new tools for controlling brush flow, but with version 11 we now have a full-featured masking interface. If you’ve ever used the “Quick Mask” tool in Photoshop, you’ll immediately feel at home with these new masking features, as there are many similarities between them. The two most notable enhancements are Feathering and Refining. We no longer have to pre-determine our brush softness in advance when selecting an area, but rather we can choose a harder edge, create our outline, fill the selection, and finally soften the edge visually using the feathering tool. Another pain point that has existed is when making selections around a subject’s face or hair, skies, etc. The best we could previously do was with a steady hand and strategically chosen brush softness. Instead we now have a tool that fine tunes our selection in an exceptionally simple and effective way.
Before/after
Before/after
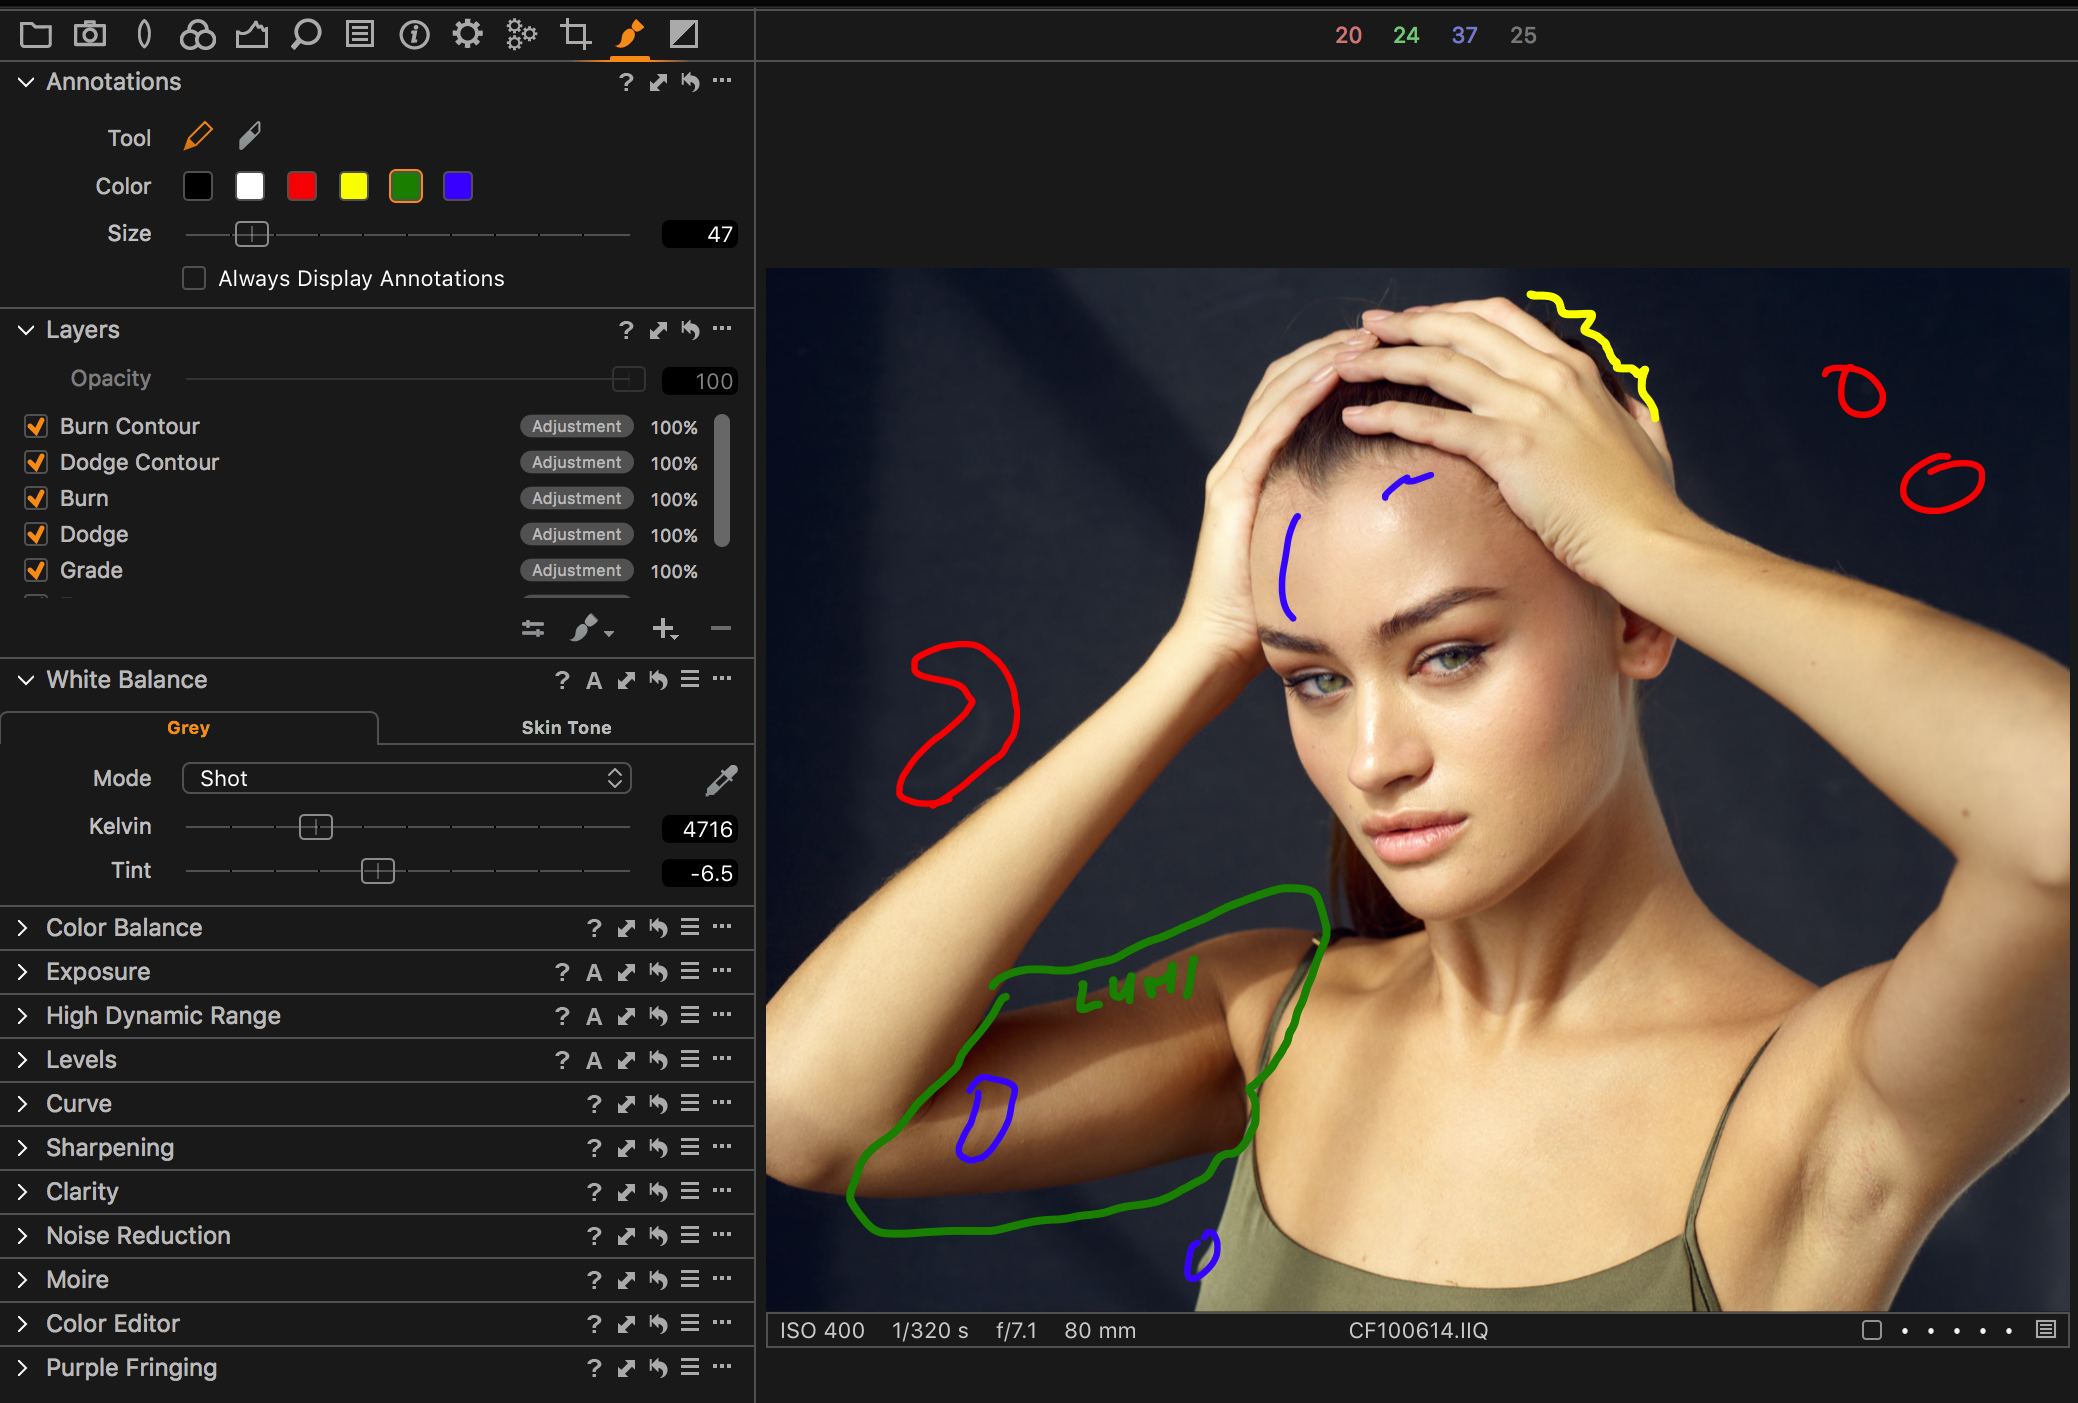
Annotations
While most photographers will complete the RAW processing of the photos themselves, they often have to work with retouchers to polish the images in a timely manner for their clients. Along with the image, we often supply a set of annotations to describe what needs to be fixed within the image. Previously, adding these annotations required us to export the image to a rasterized form, getting it into Photoshop, annotating and finally exporting. The multiple steps and time involved in this process was effectively time wasted. Capture One 11 now saves us the headache of moving into Photoshop by allowing us to perform the annotations directly within the application, and then using our process recipes to export them as needed.
Customizable UI
Being able to customize your UI may seem like a trivial thing, but being able to do so within a fine level of granularity is extremely important for a working professional. An effective interface for tethered capture, culling and RAW processing are very different from one another and so it’s crucial to be able to tailor the tools to each use-case. The most notable scenario is in the context of tethered capture. When shooting tethered, it’s not uncommon to have a main display such as your notebook serve as the control point, while a secondary large display positioned vertically displays just the image for your client.
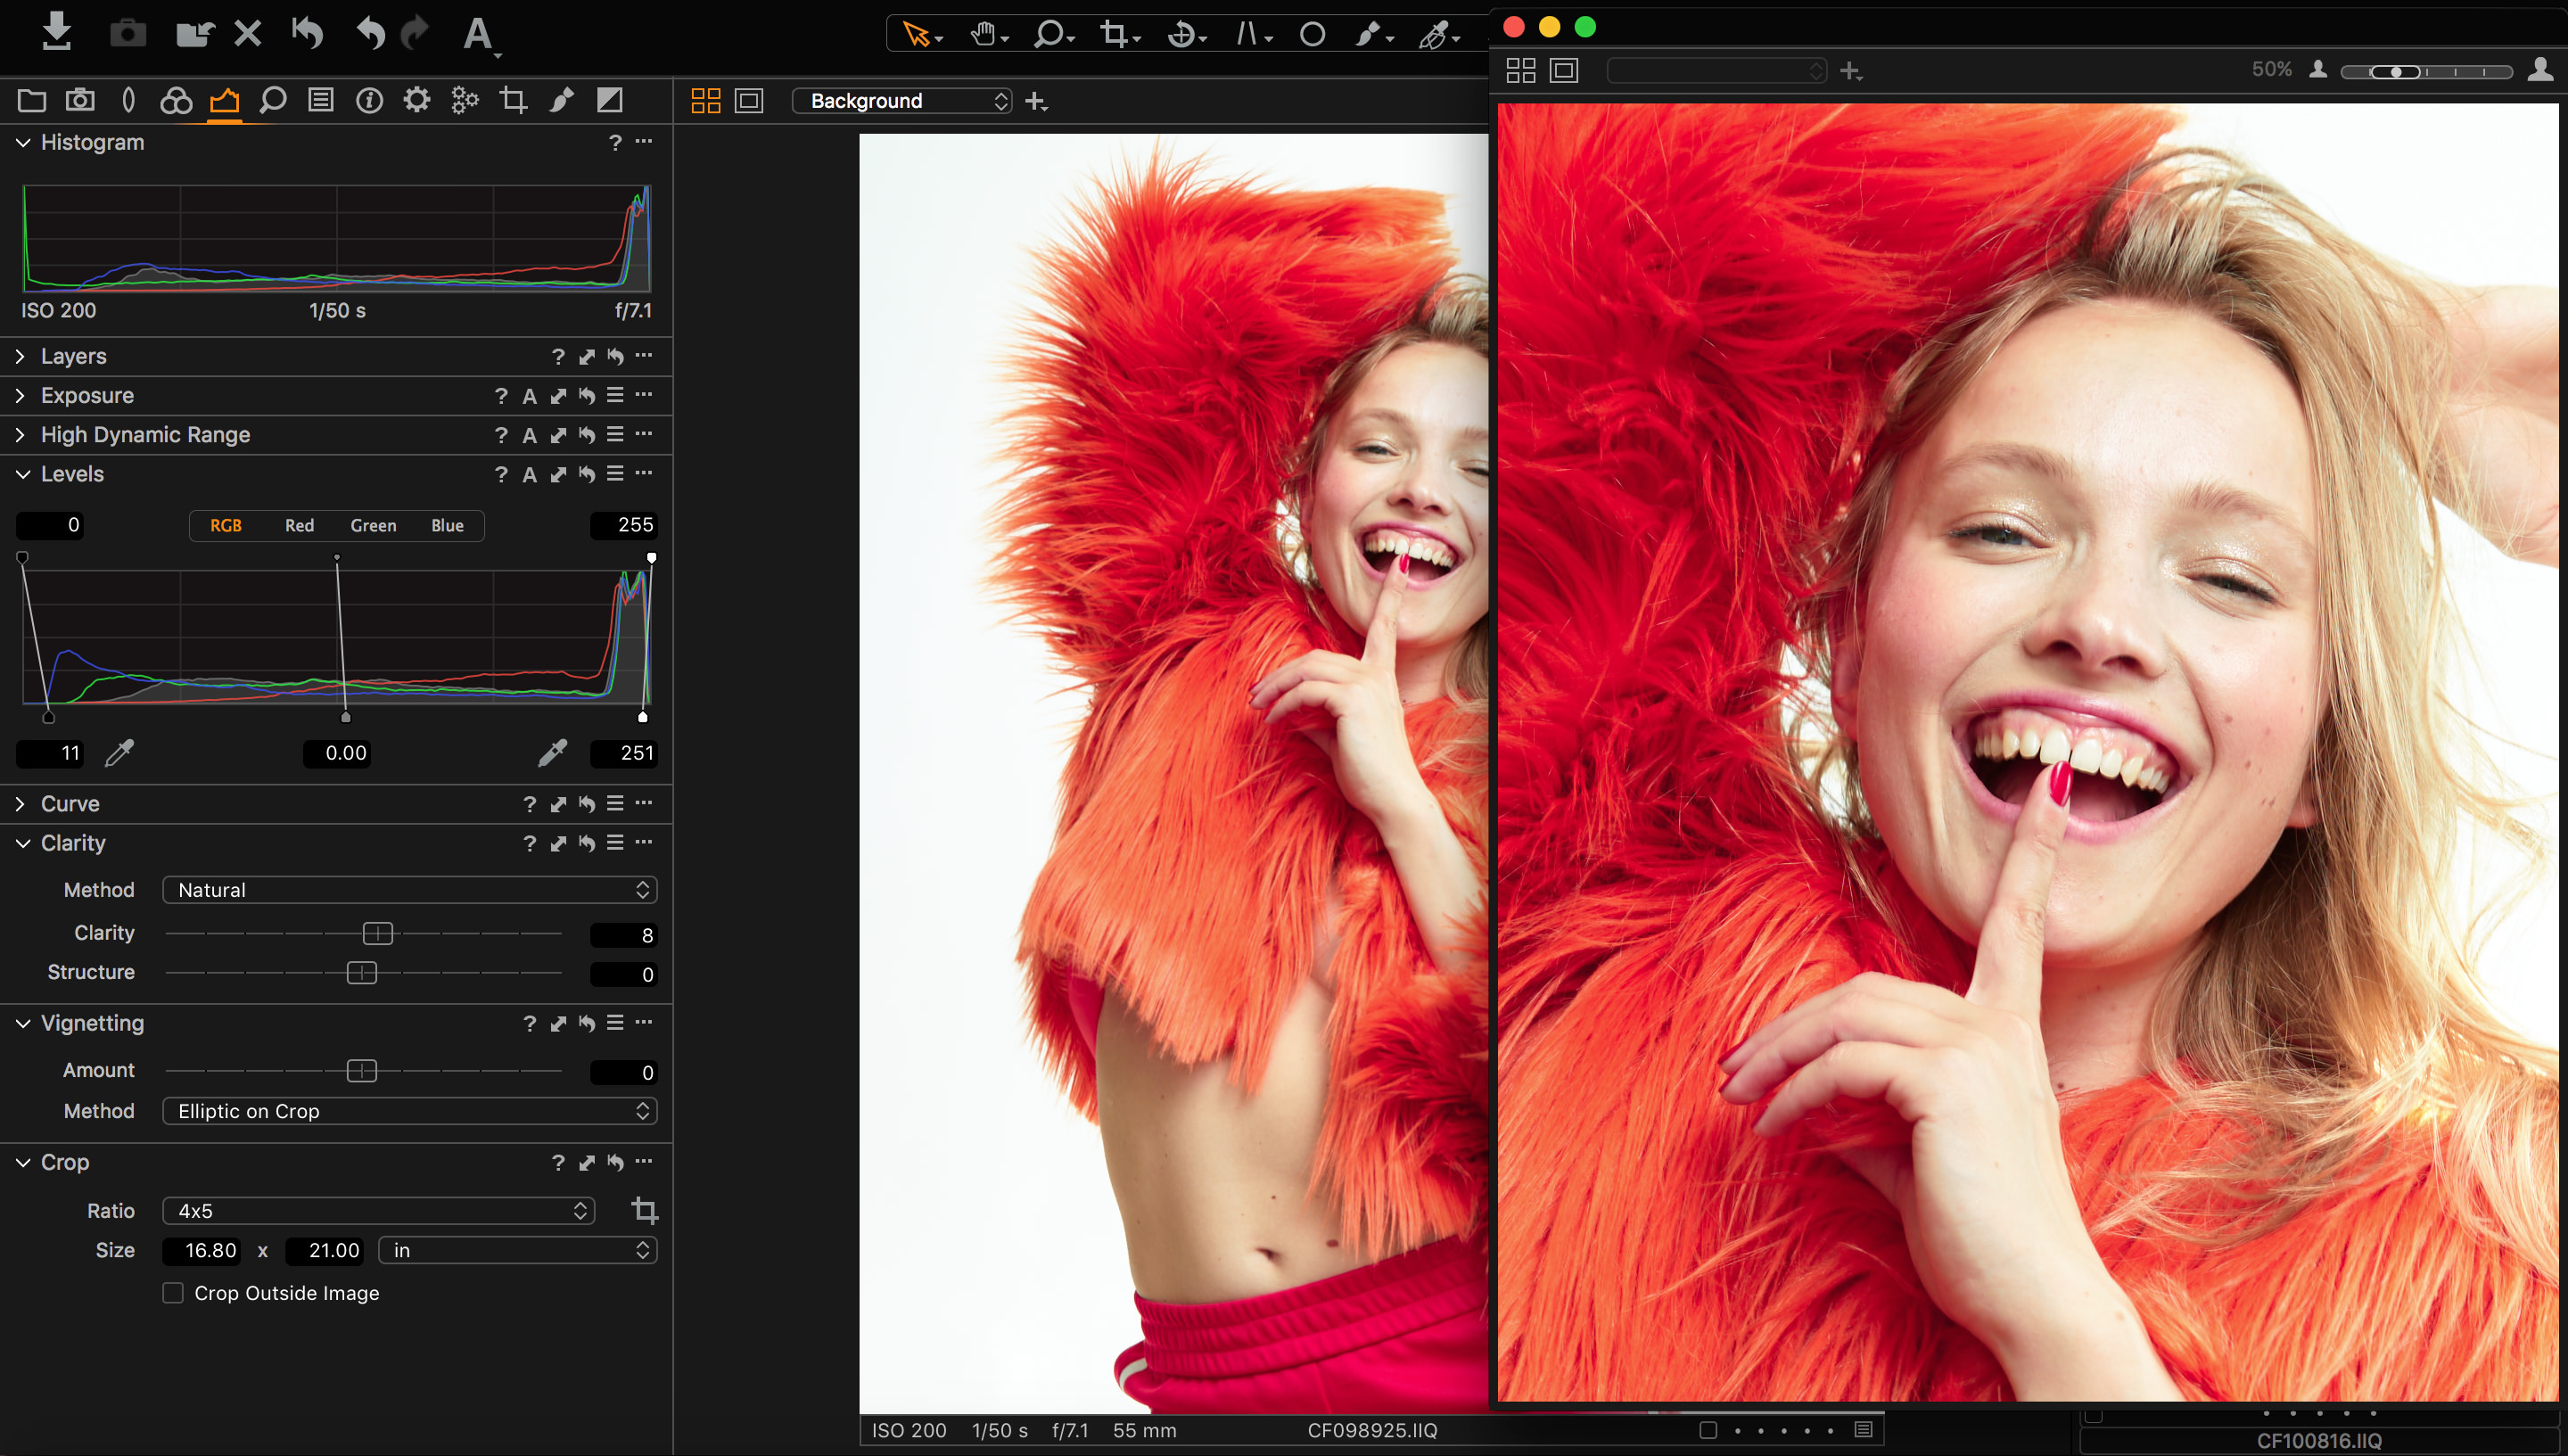
Each job is different, and so having the ability to save several layouts is an extremely powerful and helpful feature. It’s just one of the many reasons why Capture One is the de-facto choice for tethered image capture.
Round-trip Workflow
Added in version 10, the PSD round-trip has quickly become one of my favorite features. Supporting the PSD format is not without its challenges – given that it’s owned by a company that considers itself a competitor to Capture One – but thanks to Phase One’s perseverance, we now have a way to effectively manage the image workflow within Capture One from start to finish. What I particularly love about this feature is that it provides the means for me to complete most of my skin work within Adobe Photoshop, and then finalize the color grade, black and white conversion, film grain, or any other finishing steps within Capture One for maximum flexibility. This is particularly helpful when you have a series of images and wish to apply the same color grade across all of them.
Designed for Professionals
While it may seem logical that software be designed for the way we work, sadly that’s often not the case any longer. Certain companies – who will remain nameless – have lost touch with how professionals work, and instead have begun catering to the masses with trendy tools and technologies that simply don’t meet the demands of working photographers. Fortunately, Capture One has continued to work closely with artists at the forefront of the industry to deliver the features that add value for them and their clients; rather than working against them. Thanks to that we have a product that continues to improve and make our lives easier and reduce workload.
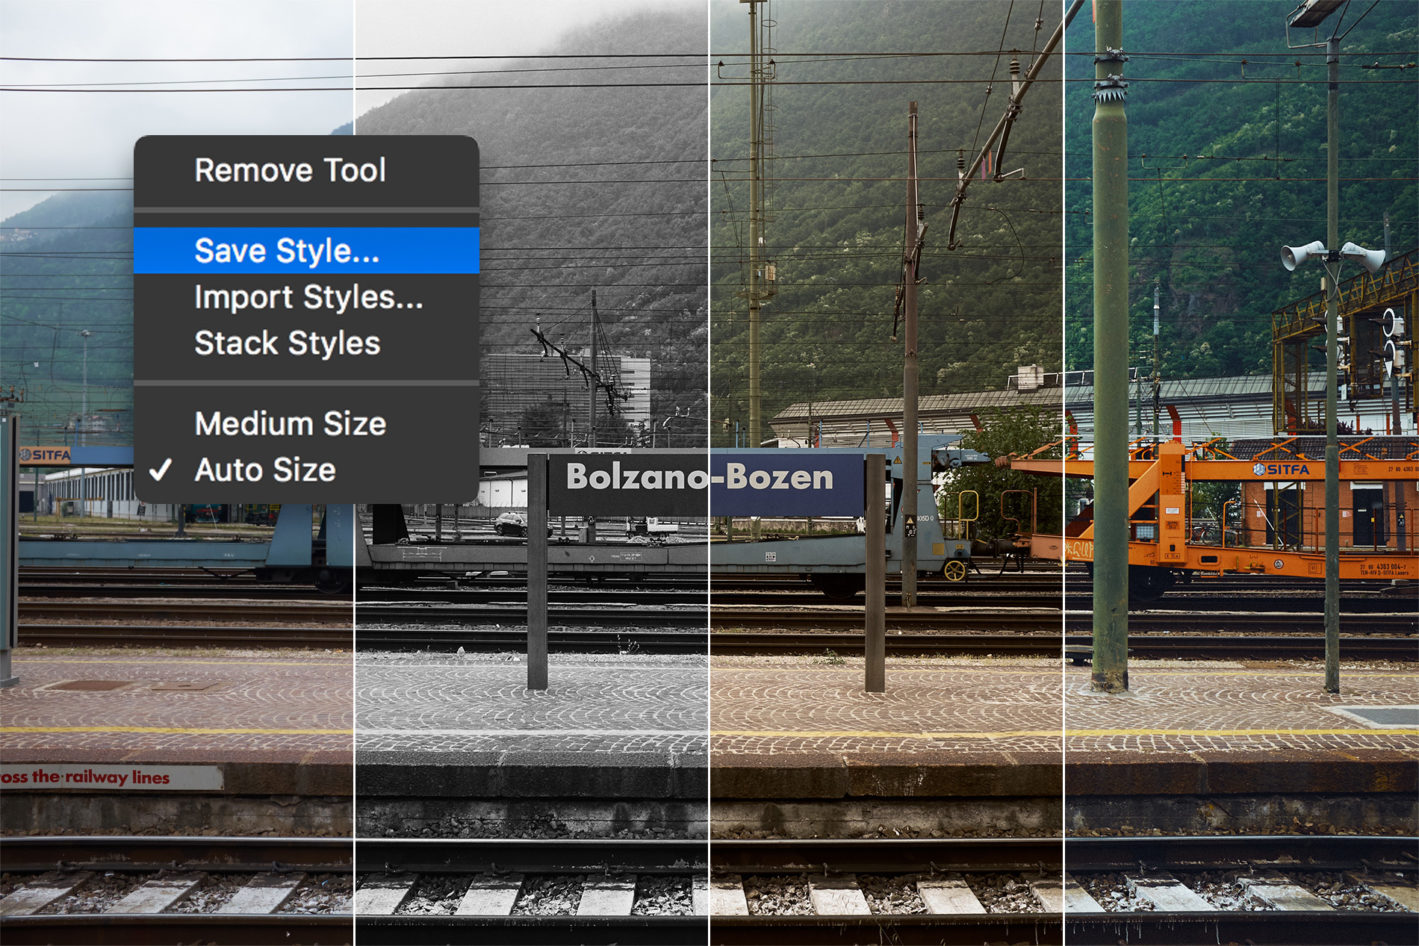
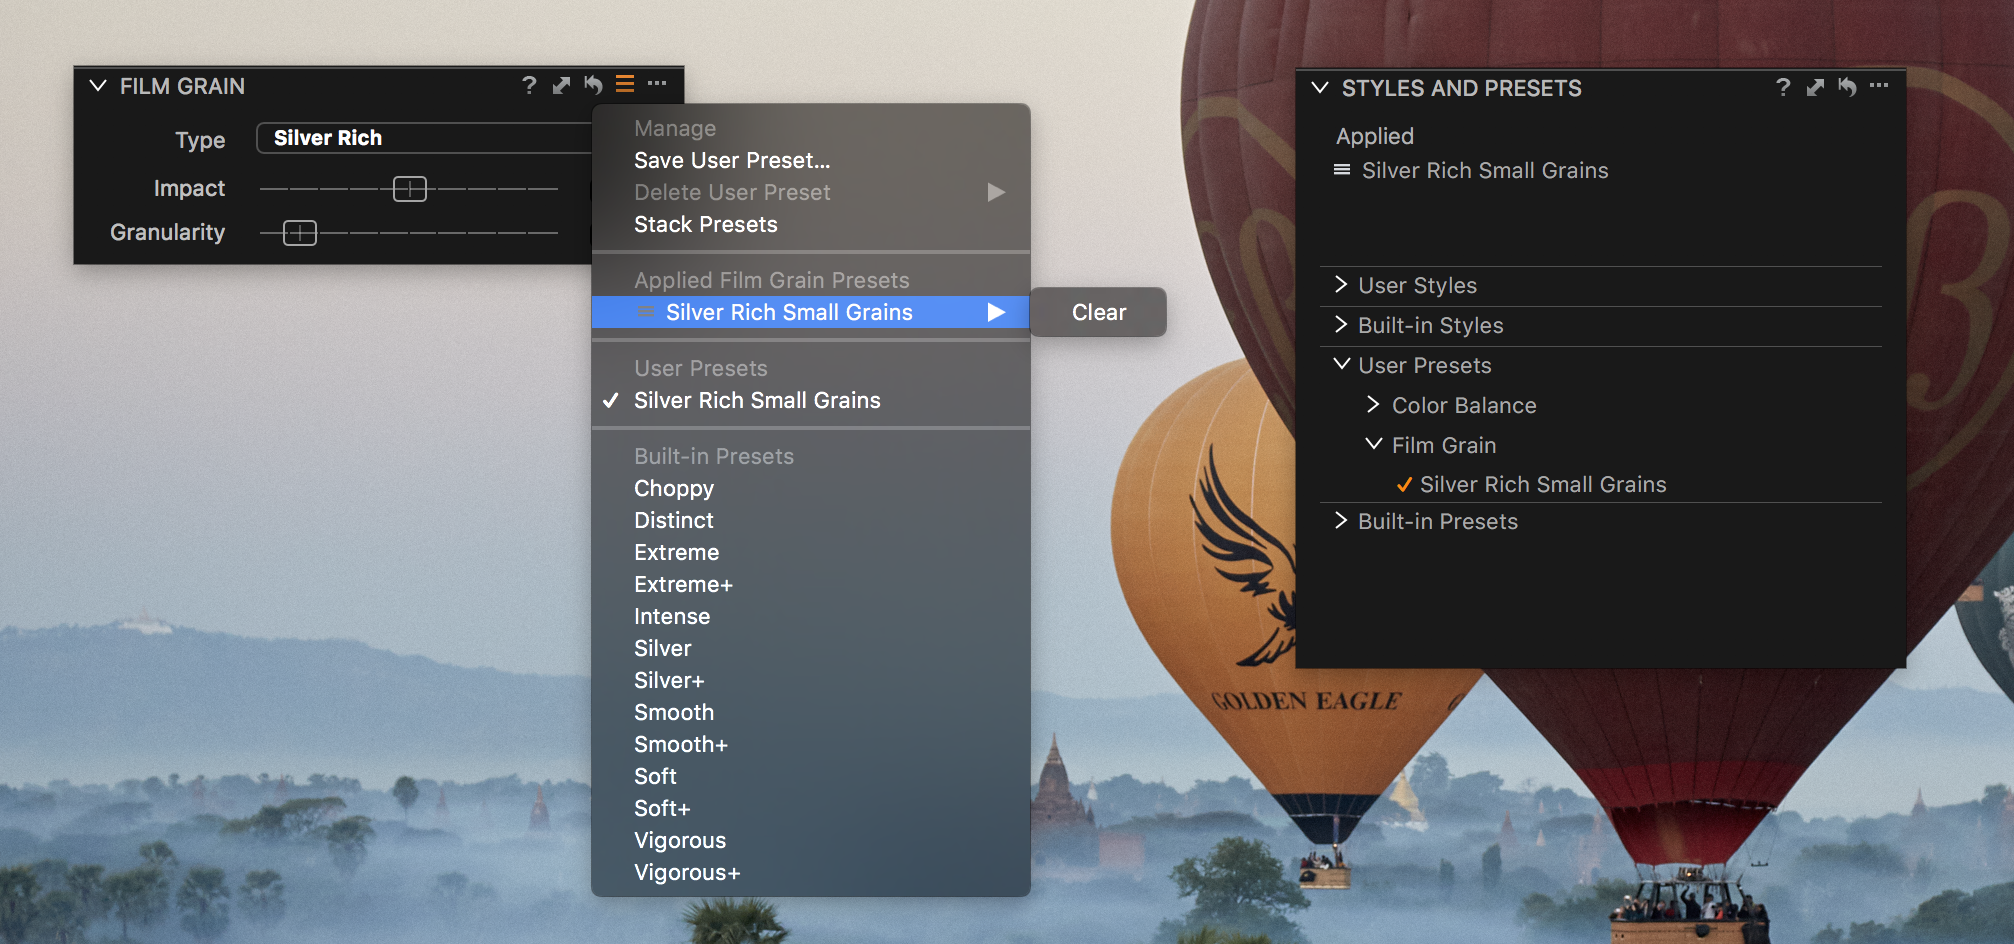
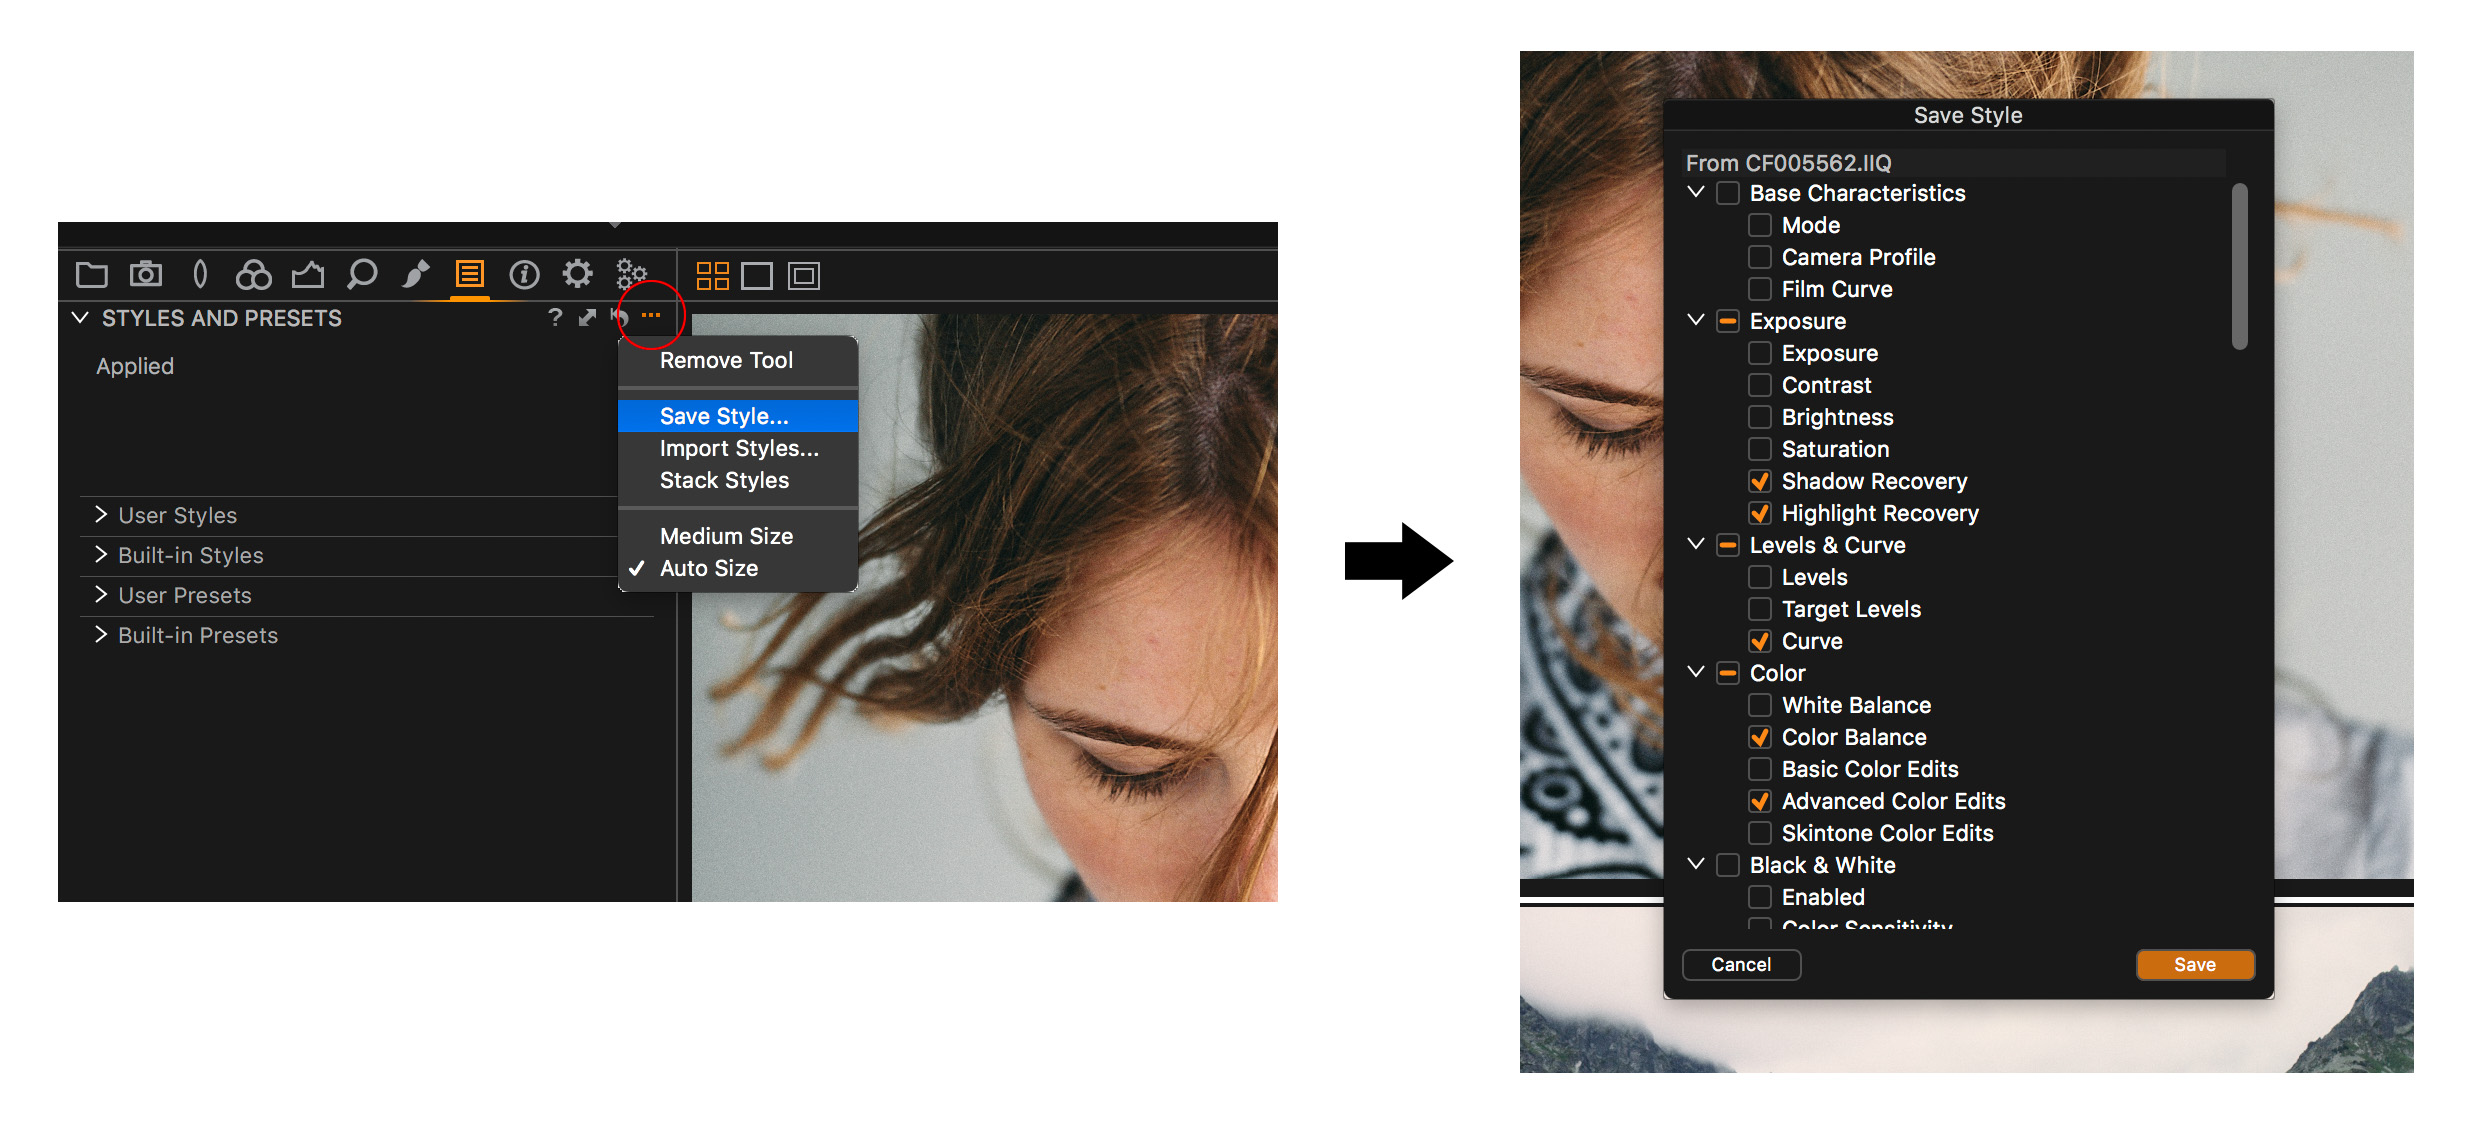
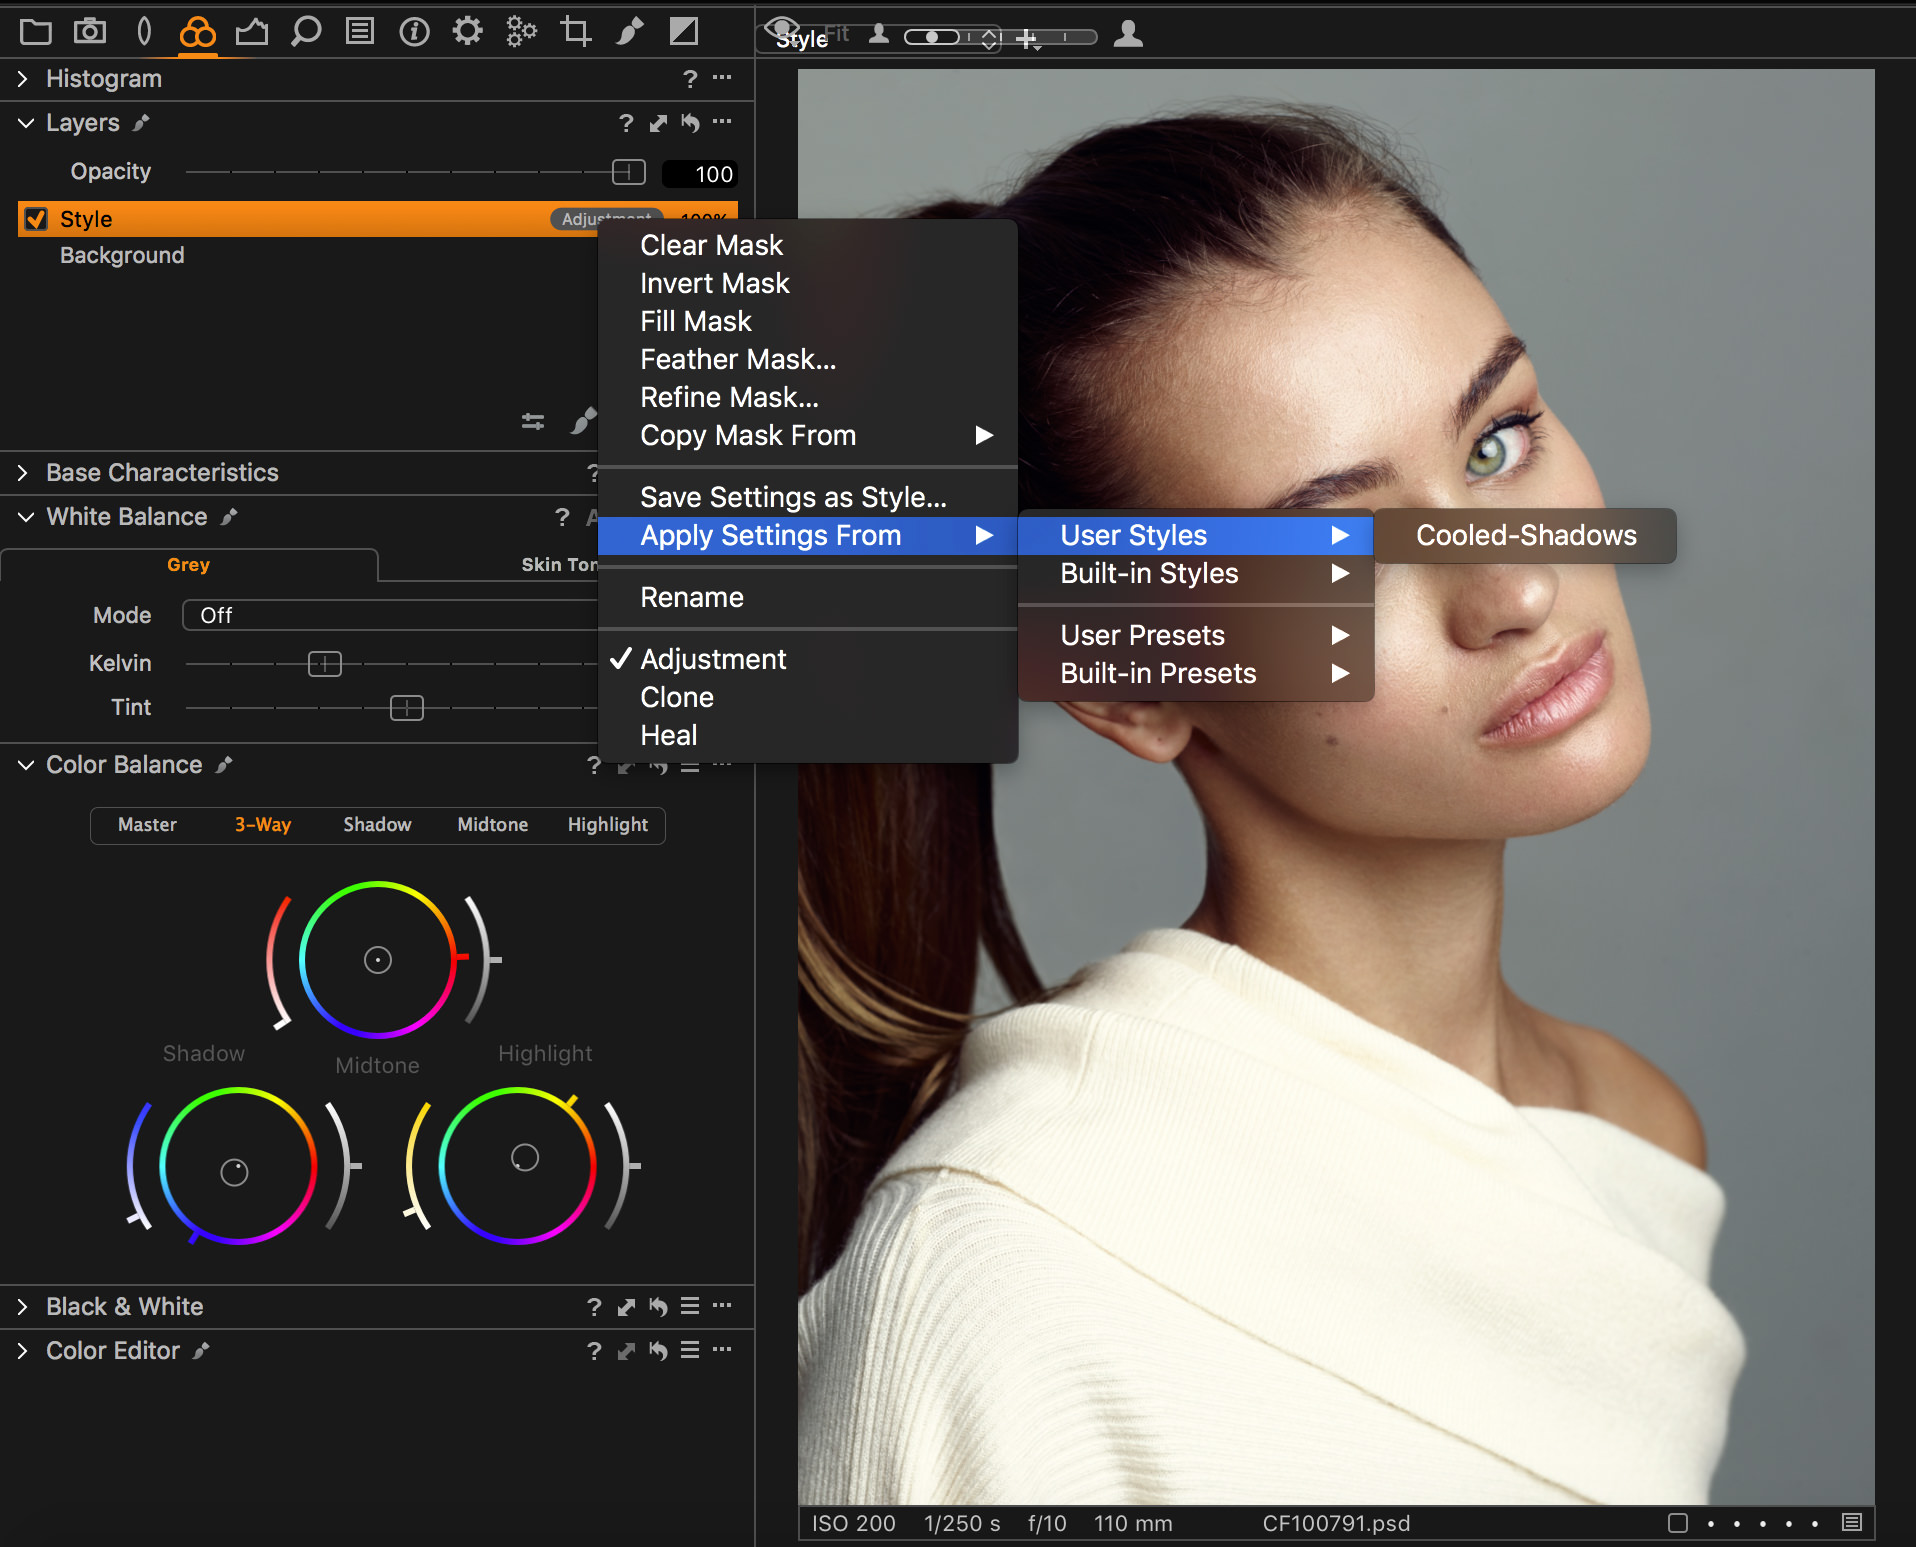
Styles as Layers
Styles are often a contentious issue among professional photographers, but they can certainly serve a useful purpose. They can provide a great starting point for color grading, as well as shorten the time spent making common contrast adjustments, lens corrections, etc. One of the biggest issues with them, however, was that Styles couldn’t be applied in combination and we couldn’t really dial in the degree of any one style. With the addition of Styles as layers, we can now separate color grading styles from contrast/exposure styles, apply them to separate layers, and lastly, fine tune the opacity of each to achieve our desired effect.
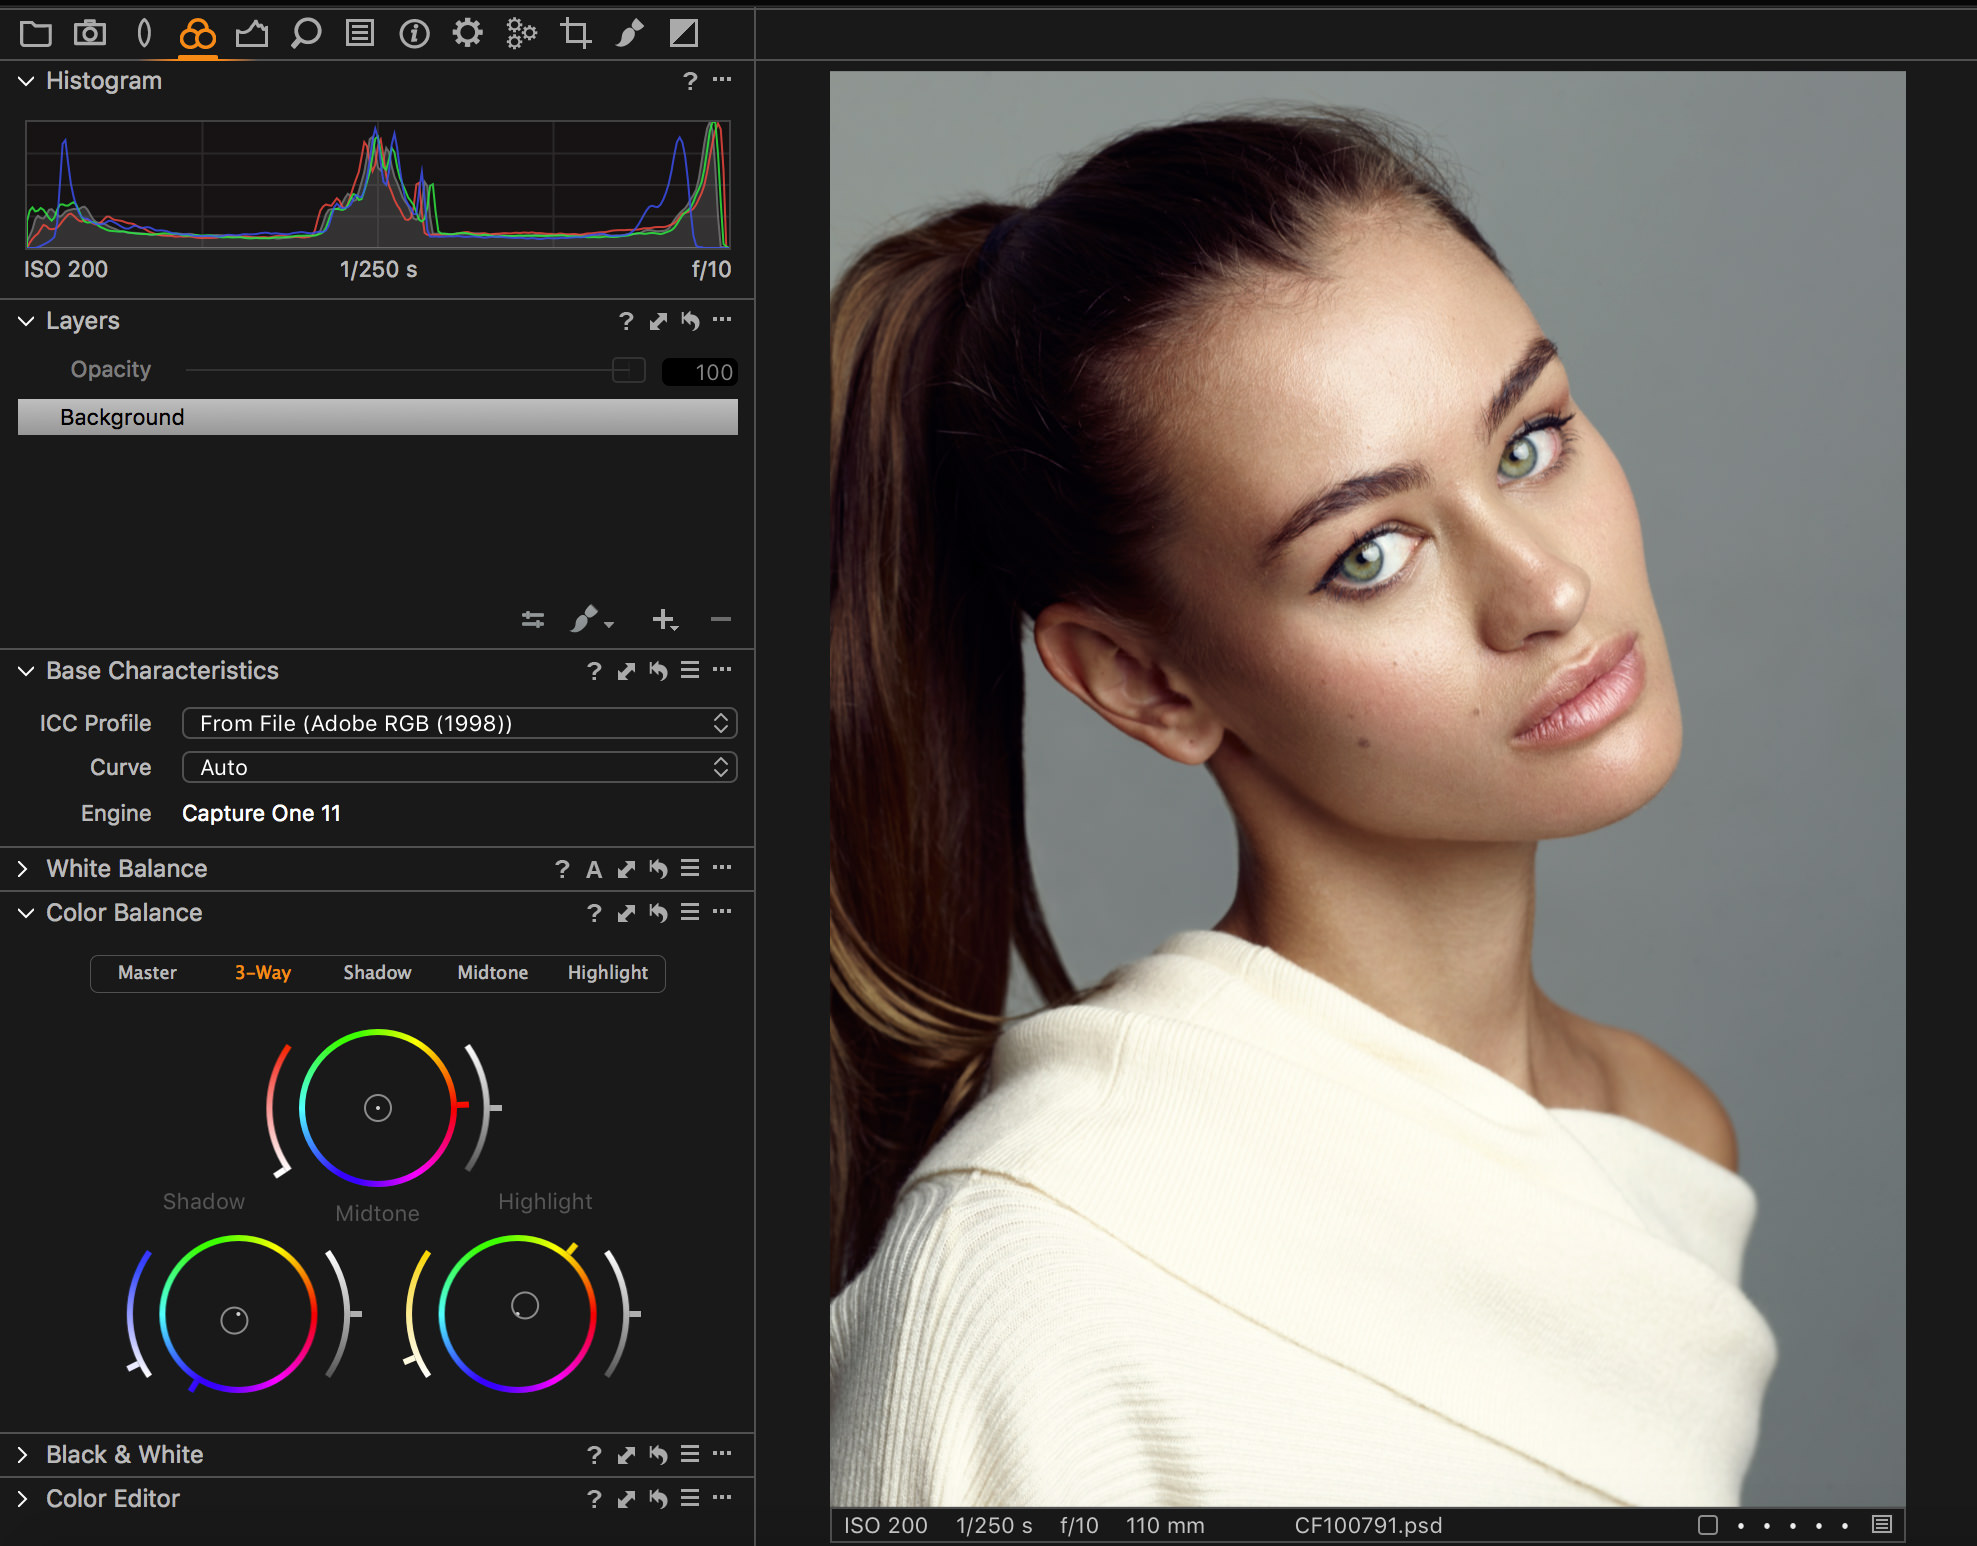
Broad Range of Color Adjustment Tools
As described above, having the ability to perform the color grading within Capture One has many benefits, particularly that of portability, but that would not be possible if the set of tools needed to make those adjustments was not available in the first place.
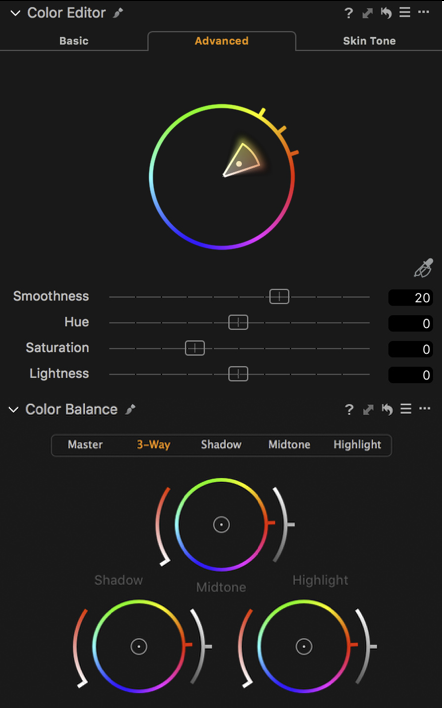
We’ve seen these tools improve gradually over the years to include all the following:
– Color Balance
– Color Editor
– Curves
– Levels
Thanks to these tools, we can color grade on both a targeted color and targeted luminosity basis. And now that’s taken even further with the added ability of using them within layers and combine masks.
For more details on how I work with these tools, see my article on Retouching Workflow in the Capture One Blog.
Conclusion
While most of the enhancements within Capture One 11 focus around Layers, it would be naive to dismiss these changes as minor. The move towards a layer-centric workflow is a huge step forward both in efficiency and usability. With its latest release, Capture One has finally become the product we’ve always wanted it to be and I’m excited to see what we can do with it now, and where it can go in the future.