NOTE: This article uses images from an older version of Capture One. To learn more about our latest version, click here.
Despite owning Capture One thanks to winning a license at a workshop, I let it sit on my computer mostly untouched. The few times I opened the program I was intimidated by the new and advanced interface. I started to use it for tethering and playing around with some basic adjustments- that was it. At the end of a photoshoot I would then import the photos into Lightroom and continue editing on the program I had been using since I was 15 years old.
I told myself I would eventually learn how to use Capture One. Each shoot I had to edit I would pause and think, “I should be importing into Capture One and learning how to use it- but I don’t have time right now. I’ll do it next time”. It continued that way for over a year.
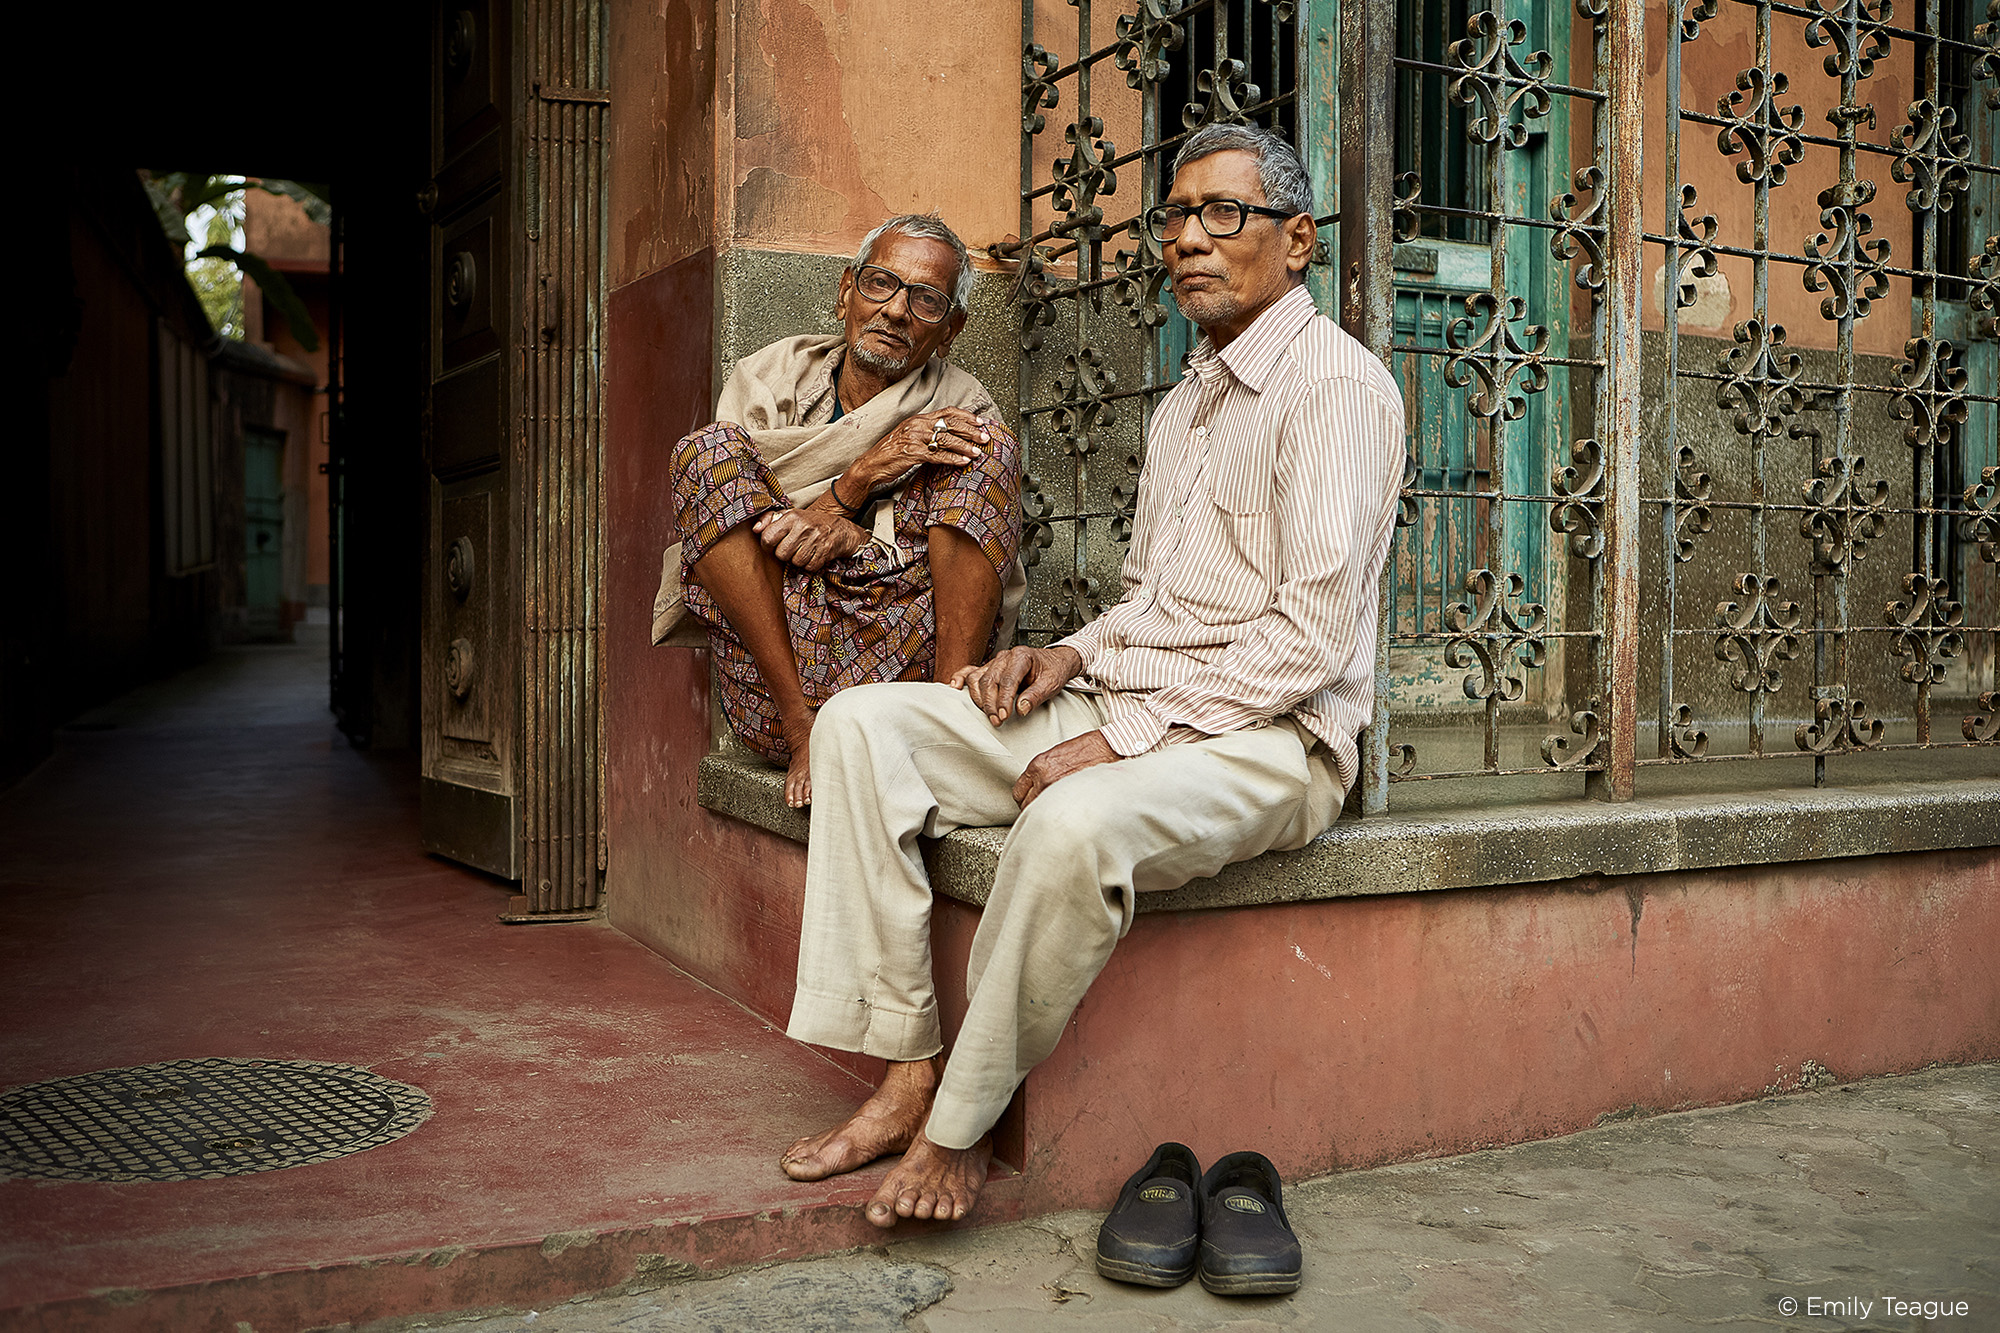
During my trip to India this past November I was really curious to see what I could do with my street photography in Capture One. There was no client, deadline, or expectation. I was free to play around.
Once I decided to force myself to use Capture One, the learning curve really wasn’t as intimidating as I had assumed. It became fun to troubleshoot; to find where things were and learn how to accomplish what I needed. Anytime I had difficulty figuring something out, I went to the Learning Hub on Capture One’s website. The free tutorials and webinars helped me solve any issue I encountered in a very simple and straightforward way. It became my go-to resource.
Within an hour of playing around, clicking anything I could, and using the Learning Hub- I felt that I could proficiently use Capture One. The moment I dedicated myself to learning the program, my intimidation was gone.
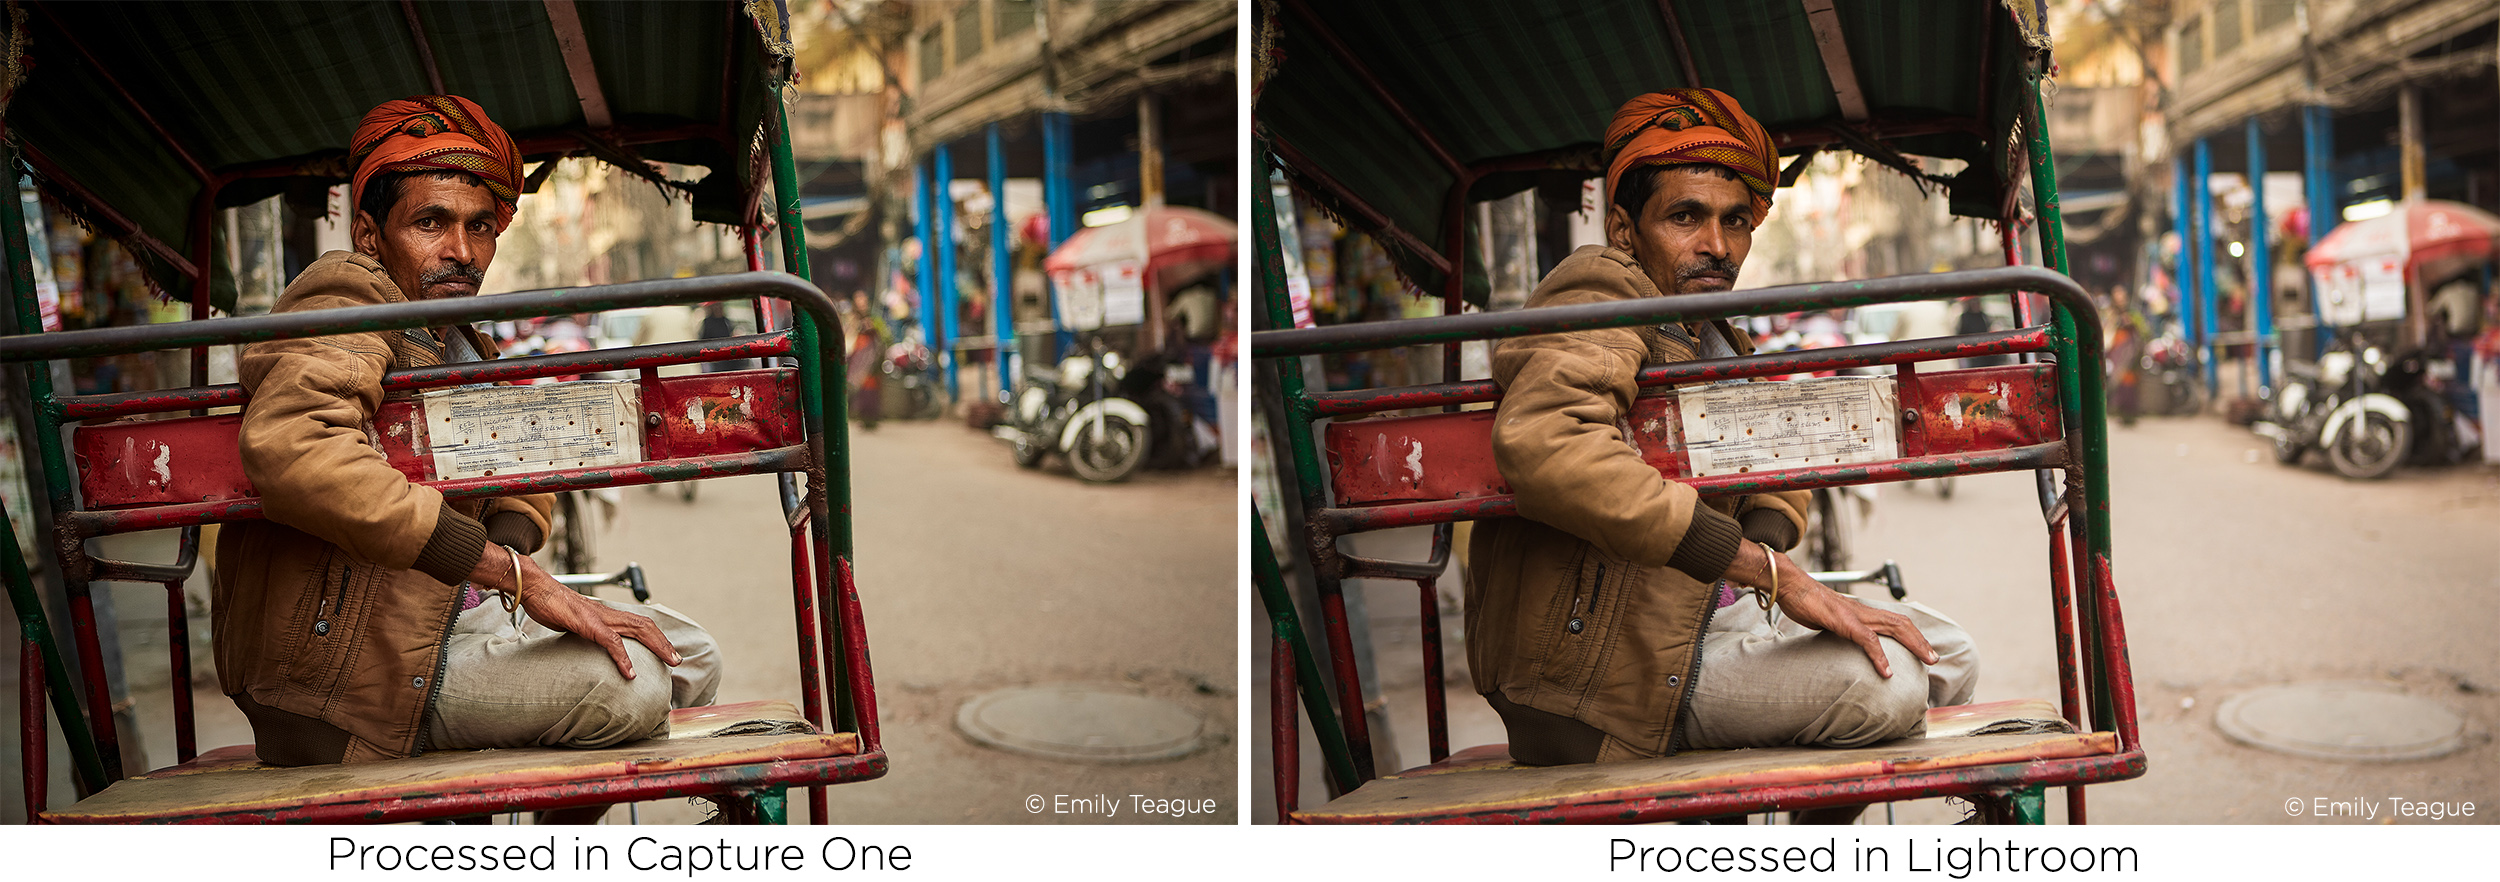
After figuring out how to use the program, I started editing a few photos to my liking and copy / pasting the settings to the rest of the images in the catalog. I then went into Lightroom and looked at some previous files I had edited the day before and compared the Capture One and Lightroom versions side by side. I was in love with how much the quality of the Capture One files had increased. The images were sharper without looking gritty, the color looked richer, and the highlights that I had taken down retained more detail.
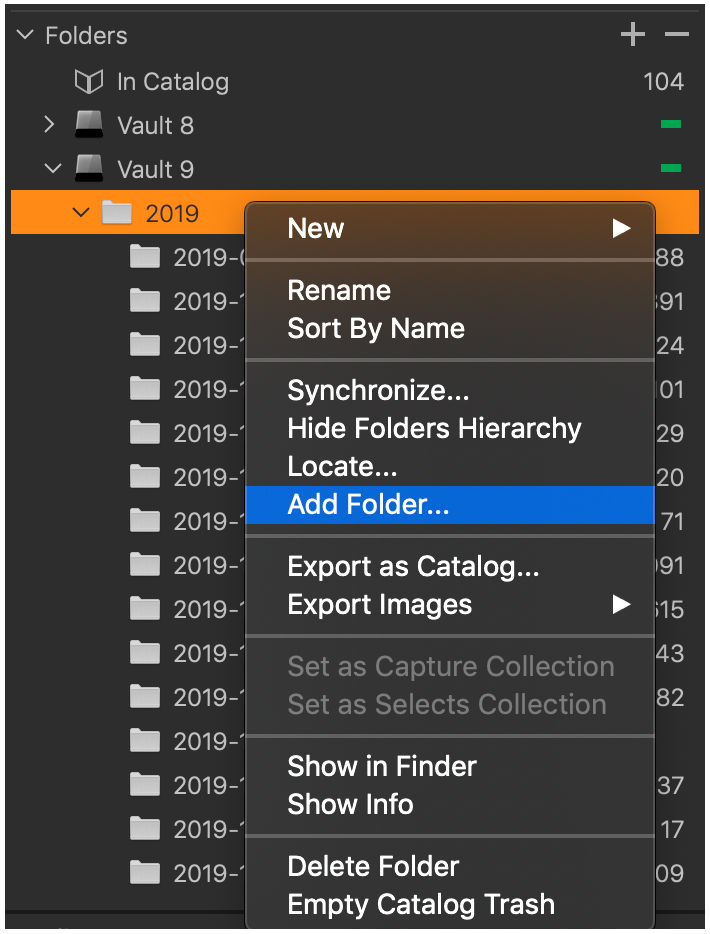
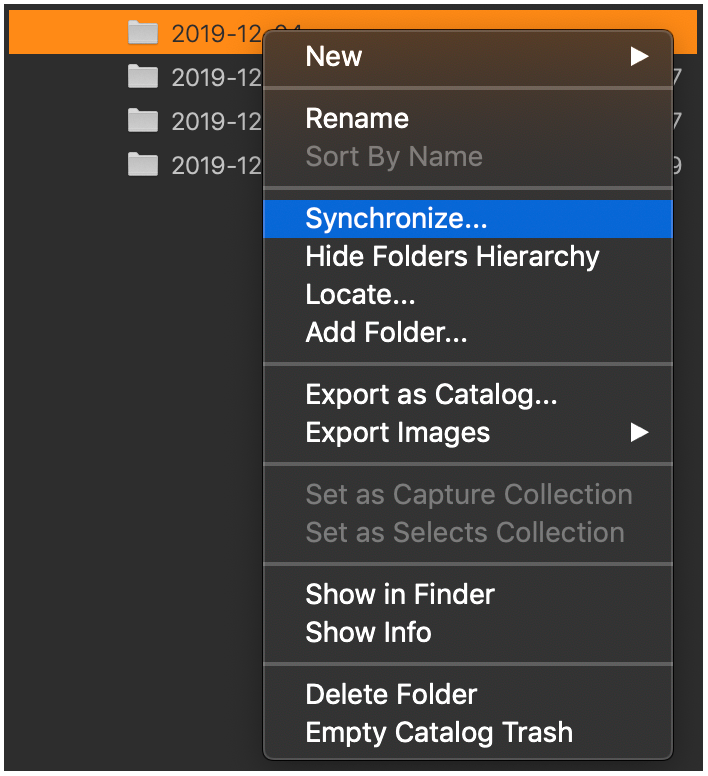
The Workspace
There are 8 workspaces to choose from depending on how you want the interface to look, and you can customize them all to your liking. One of the workspaces titled ‘Migration’ is especially helpful for people switching from Lightroom. It has a similar set-up where your images are displayed in the horizontal bar at the bottom of the screen and the tools are located on the right. For me, I got rid of several tools that weren’t necessary for my editing in order to simplify.
I organized the exposure tab for all my basic needs that will affect every image and also added white balance, vignetting, and styles (styles are similar to presets in Lightroom) to speed up my workflow. In addition, I’ve taken out and added tools within the toolbar at the top of the screen. You can add or remove spaces so everything is placed exactly where you want it.
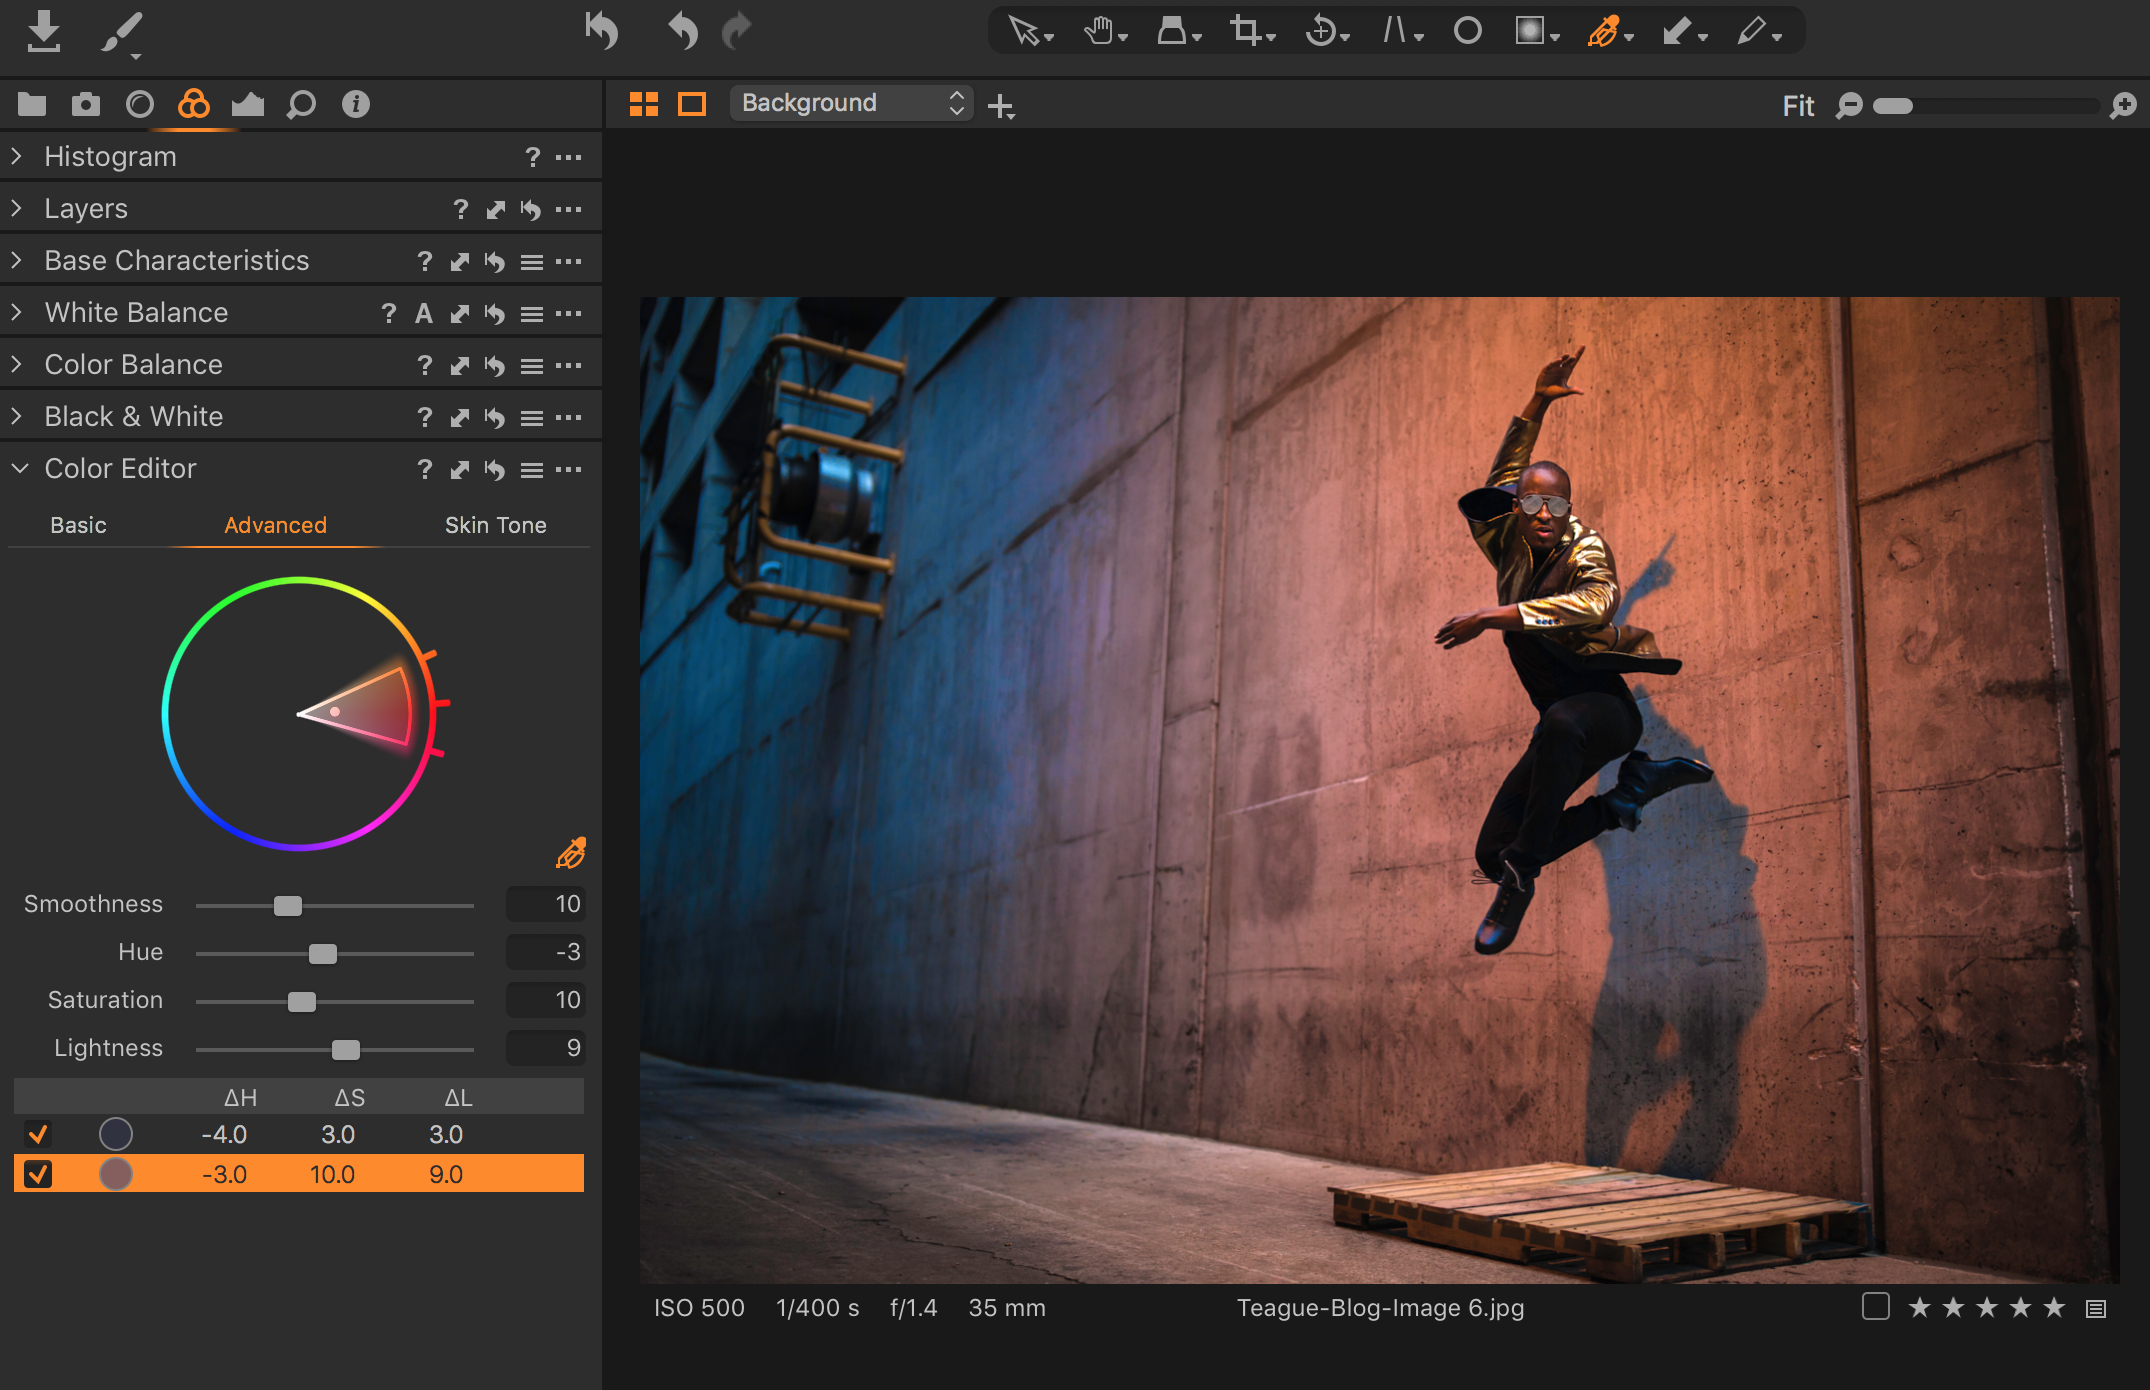
The Adjustments
I’ve noticed that the adjustments in Capture One seem to be a lot softer with more gradual shifts which I love. The two biggest comparisons for me are the clarity and highlight recovery tools. In Lightroom, if you push the clarity slider your image starts to look over processed and gritty, but that’s not the case with the clarity and structure sliders in Capture One.
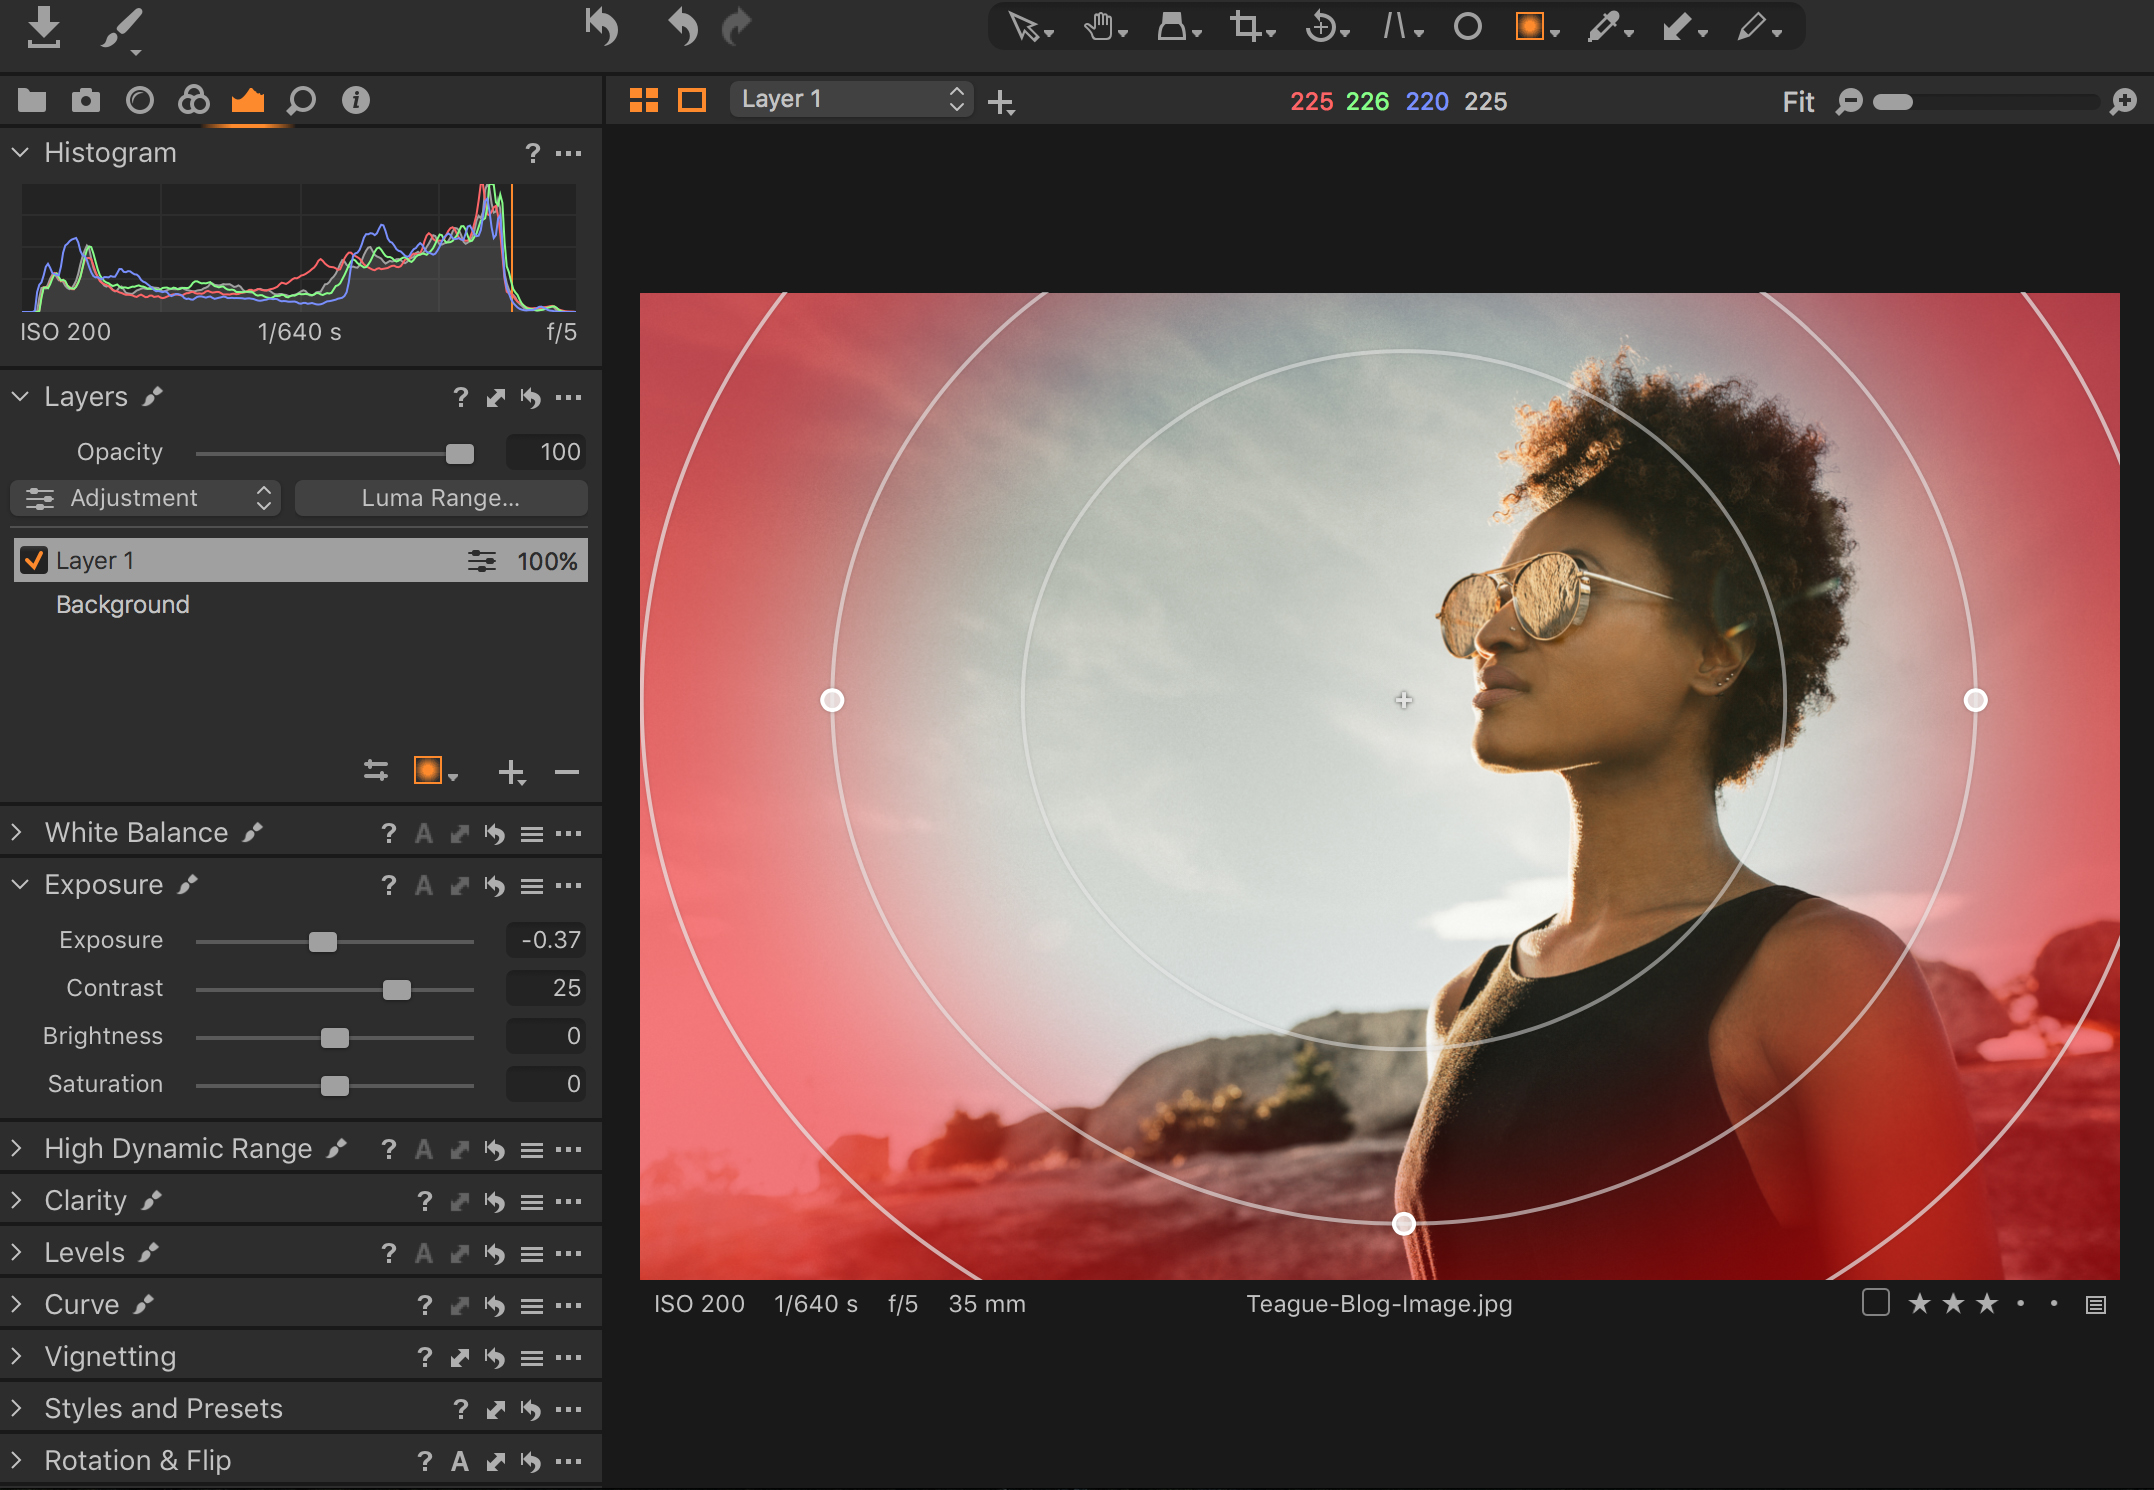
I also just adore the highlight recovery under the High Dynamic Range tool. I’m always impressed with how much detail can brought back- especially for my street portraits where I’m not in control of the light and my highlights are often getting blown out. This tool has saved me. In my old workflow with Lightroom, I would often drag the highlights down to -100 and still feel that it wasn’t enough or that my image was starting to look a bit lifeless, but I haven’t experienced that with Capture One. When I’ve tested it out, I get more recovery and find that it’s not bringing any of those negative effects.
My Favourite Things about the Transition
My favorite things about my transition to Capture One come down to a few things. First is the immediate difference I see in the color of my images when I first import into Capture One. Beyond that, the added tools that Lightroom doesn’t have, the incredible color editor which allows me to color grade entirely in Capture One, the luminosity masks, and the customizable radial and linear gradient masks are all extremely helpful. There’s also the customization of the workspace, the sleek design, and the overall quality improvement I’ve seen in my own images since making the switch.
Testing How Quick You Can Learn
For the past two months I’ve been subleasing an apartment in Brooklyn with fine art and portrait photographer, Brandi Nicole. When discussing Capture One she expressed to me that she felt the same intimidation that I originally experienced. She had been using Lightroom for 7 years and despite wanting to make the transition, she was hesitant because she was so accustomed to her workflow. I spoke with her about my own experience and we decided to test how quickly she could learn the program.
Within a couple hours of playing with images in Capture One and watching the introductory webinars on the Learning Hub, Brandi was able to go from never opening the program to becoming proficient. She found that most of the tools she had been using in both Lightroom and Photoshop were integrated into the program, offering a much more time efficient way to go through her workflow.
Here are a few of the questions I asked Brandi after she made her transition:
Why did you want to transition to Capture One?
“I had heard so much about tethering in Capture One being more robust, and that it offered advanced options to adjust colors, mask, and use layers within the program. These are also all the things I have had frustrations with in my workflow in Lightroom, so I figured it was time for an upgrade!”
What was your experience in getting started with Capture One?
“At first I was 100% intimidated; it seems as if there are infinite buttons, drop downs, and just tons to go through. After browsing the tabs and tools for even a couple minutes I found that most everything was very familiar. As a Lightroom user for many years, I found the Migration workspace to be very helpful to get to know the program.”
What is your best advice for other new users?
“I would say that in order to give it a fair shot, stick with it. It can be frustrating to learn your way around something new. I remember way back when I first was hesitant to use a Wacom tablet – that was a really difficult learning curve at the time, but now I can’t retouch without it. I am already certain it will be the same with Capture One.”
What was challenging and what helped with those challenges?
“The most challenging thing for me is re-learning shortcuts and the placement of the tools and options. But I already know that the customization, flexibility, and level of control in the tools will exponentially speed up my workflow. I use the Learning Hub and feel more confident and excited to go forward using Capture One in my workflow.”
In conclusion, I am really glad I put the small amount of time in to switch to Capture One. It was much less intimidating than I had made it out to be and I’ve been in love with seeing how the quality in my images has increased.
If you don’t already have Capture One, you can download a 30-day trial and try it out.