Latest Posts

Bringing the ocean depths to life

NOTE: This article discusses an outdated version of Capture One. To learn more about our latest version, click here.

Diving into the unknown

When I dive into the dark abyss, I never know what I will see, who I will meet and what new knowledge I will bring to the surface with my photography and photo editing. There is a vast, incredible world underwater – one that words alone can’t convey.

My name is Alexander Semenov and I lead the scientific diving team at the White Sea biological station of Moscow State University and search, shoot and collect live material for field practice. For the past 15 years, I have dived almost every day for months in a row. 12 years ago, I began practicing underwater photography to share the fantastic world that I get to see with my own eyes as a marine biologist.

Every dive for new photos is an adventure – one that cannot be compared with studio shooting or wildlife photography on land. My work is further complicated by the fact that I shoot subjects which only grow to a maximum of a few centimeters, or do not grow at all. They can be completely transparent, blend into the environment or disappear in the blink of an eye. As a marine biologist, however, I also know what to look for.

capture one raw image editor blogpost alexander semenov hyperia galba inside cyaneax transparent prawm like creature poking out from bright pink and purple coral

By capturing mesmerizing creatures in their natural habit, I bridge the huge gulf which has grown between science and photography.  In past centuries, naturalists would blend art and science, sketching plants and animals in close detail at different stages of their lives. Back then, observations formed the basis of science. Now, scientific methods are so complex and advanced that the practice of simply observing nature has fallen by the wayside. Many scientists do not devote enough time to this important and fundamental process. I find this strange, given that we live in an amazing era where you can get a detailed representation of nature at the touch of a button – something which would have taken naturalists days and weeks in the past.

Of course – it’s not nearly that simple. Especially when it comes to shooting underwater.

Risks and other challenges


capture one raw image editor alexander semenov underside of jellyfish with splayed multicolored tentacles

Underwater photography comes with its own unique set of challenges. You need to be quite an experienced diver, so you can hang in the water column without any movement, do your best not to breathe and focus your camera on the pixel-size black eyes above the tentacles of the transparent 1-centimeter jellyfish.  It’s hard work, but a lot of fun!

Because you’re concentrating so hard on achieving the perfect shot, your reflexes need to be strong to keep you safe underwater. Otherwise, you could plunge 40 meters or rise to the surface and risk barotrauma before you even realize what is happening. Or forget about air. Or forget about your body.

Secondly, underwater cameras, no matter how advanced they are, are constantly going crazy – almost all the automatic functions of the camera don’t work correctly. I only shoot in manual mode, with manual control of flash power and with manual focus. Although autofocus copes quite well with large objects, I am in the habit of shooting manual which saves me time and ultimately allows me to take more shots.

capture one raw image editor alexander semenov red algae gibsmithia bulbous fentacles on plant bedded in coral

Timing is another challenge. Dives usually take from 40 to 70 minutes. In that time, you need to reach the desired depth, adjust the camera and set the light, find your objects, shoot them from all sides with all possible light schemes, and then safely pop up with all the necessary safety stops. On average, you have 20-30 minutes of actual shooting per dive. Meanwhile, preparation and the journey to the dive site can easily take 2-4 hours. With luck, this is enough to get some truly great shots.

You can’t always count on visibility, either. In some seas, it reaches 50 meters and in others, you can’t see beyond your outstretched arm. Your shot could also be affected by suspended matter, which rises from the waves, wind, heavy rain or near the mouths of rivers, and water temperature – which in the Arctic seas can reach -2 degrees Celsius and your hands stop being able to feel buttons within half an hour.

capture one raw image editor alexander semenov nudibranchia coryphella polaris and coryphella nobilis green stalk with orange and transluscant tentacled creature almost flower like

With so many challenges, it all seems incredibly difficult at first. But once you get used to it, you feel at home.  Personally, I needed about 400 dives to feel confident (now I have more than 1500 dives under my belt.) Some might be comfortable after 100.

“You could never recreate these conditions in an aquarium”

So why put up with all these challenges? The animals are beautiful and unusual, and photos are great, but so what?

capture one raw image editor behind the scenes of a shoot/expedition diver with head and shoulders above surface of ice covered sea behind the scenes of a shoot/expedition diver with head and shoulders above surface of ice covered sea

The answer is simple: you simply can’t get this kind of information any other way. Underwater photos in their natural habitat is unique subject material with great value to science and education.  You could never recreate these conditions in an aquarium, and the animal would never behave naturally in a laboratory.

Some creatures can’t be placed in an aquarium at all: many of them are so gentle that one careless touch turns them into a shapeless blob of mucus, while others are so huge you couldn’t fit them anywhere – like the Lion’s mane jellyfish, which reaches 2.3m in diameter of the dome and grows tentacles up to 37 meters long, or the 42-meter long siphonophore.

The only way to truly study these animals is to go underwater with photo and video equipment. And the better your camera is and your images are, the more accurate the results.

With only a few unique photos, you already have enough material to publish an article in a high-ranking scientific journal and add something to collective global knowledge.

This is incredibly valuable content, and it’s totally worth jumping into the icy water at the edge of the world to create it.

Capture One Pro helps me pull every last detail from the ocean depths

Capturing the perfect shot is only half the battle. Processing and editing RAW files of underwater subjects can be a real challenge. You have to pull the creatures out of darkness, clean debris, bring back colors and contrast absorbed by seawater, adjust the white balance and above all – preserve the natural look.

screenshot capture one raw image editor clean up of underwater image

To achieve this, you need a good display and powerful photo editing software. I use a monitor from the EIZO CG series – it’s amazing how much the quality of editing and printing have changed after the transition to their displays. Capture One Pro can calibrate EIZO monitors at the touch of a button.

Capture One Pro is my choice of image editing software, of course. When I was starting out in photography, Capture One seemed daunting so I used Apple Aperture’s more basic functions. I then tried to switch to Lightroom, but gave up after the trial version. After that, I finally decided to master Capture One Pro – and I’ve never looked back. I’ve even convinced a few dozen photographers to make the switch to Capture One Pro.

Thanks to some internal software magic, Capture One Pro’s RAW conversion engine is much better than Adobe Camera RAW or any other RAW editor. I find basic tools like exposure correction, contrast and saturation give far more natural results in Capture One Pro.

Working with color in Capture One Pro is top level and very intuitive, while the ability to work with layers – where you can change as many parameters as you want – is just fantastic. I learned about Capture One Pro’s layers not too long ago and now I don’t know how to work without them. Want to bring out every detail along the tiniest of tentacles from the murky depths but darken the background at the same time? Make a messy red a beautiful red?  Recover colors from a completely dead green picture and make it look like a beautiful photo – easy!  Well, not necessarily always easy – but everything is possible in Capture One Pro.

screenshot capture one raw image editor jellyfish photograph being edited to mazimise detail

With the right tools, you can create amazing photos. Overall, my workflow in Capture One Pro is extremely fast and productive, and I’m really pleased with the results that I’m able to achieve now that Capture One Pro is my photo editing software. From time to time, I come across old archives of my photos from before I used Capture One and I always itch to rework my entire library in the new software. (If only I didn’t have the archives from the last 2 years, which I haven’t had time to process yet)

The most natural colors for scientific precision


capture one raw image editor alexander semenov 3 brightly colored molluscs collaged together with a varied array of tentacles against black background

The possibilities of Capture One Pro are so advanced that you can do absolutely anything – create any mood, shift the shadows and experiment as much as you want. This is great for advertising, landscape or fashion photography, but in scientific experiments the colors need to be as natural as possible.

Capture One Pro lets me edit photos in a way that preserves the natural colors, but the creatures look so juicy they could easily be used as fashion models in advertising (this happens to my photos sometimes!).

The underwater world is amazing in its diversity and there is so much hidden in its depths that scientists and photographers could spend their lives trying to capture it. The most important thing is to show them in the right way.

If you don’t already have Capture One, you can download a 30-day trial and try it out.

Sign up for the webinar

Michaela Hartwig food photographer tips on how to style food photography using capture one pro raw photo editor cake and slice taken from cake

How to style and edit food photography

There’s a lot that goes into crafting a mouthwatering photo of a delicious dish or decadent desert. Michaela Hartwig takes us behind-the-scenes with key tips on prepping food shoots, what to do on set, and how to achieve natural-looking images with the right tones using Capture One’s photo editing software.

MICHAELA’S TIPS

Preparation

Prep all the ingredients that you plan to use for your shoot. Sort the most beautiful herbs, fruit or vegetables. Place everything on a table nearby in separate bowls and plates so everything is ready when you need it. Provide a chopping board and a sharp knife, a scissor, some Q-Tips, tissues and a bowl with fresh water in case you need to clean something. When you’re shooting, you don’t want to waste time searching for a specific ingredient or tool. This prep will save a lot of time.

Michaela Hartwig food photographer tips on how to style food photography using capture one pro raw photo editor props on a table plus a styled photo of cake slice

Prepare your setting. Use a placeholder to make some test shots before you start with the food. Be aware of what kind of lighting you want. Place blackboards wherever you want to create shadows. Place whiteboards wherever you want to brighten up the image. Of course, you can add some shadows in Capture One Pro afterwards, but it’s always better to shoot the image as close to the desired result as possible.

michaela hartwig food photographer tips on styling food for photo shoot using capture one pro raw image editor behind the scenes at food photoshoot, lighting camera equipment with laptop on talbe

Don’t ever wash your salad or your herbs. If you want to have fresh-looking produce, use unwashed salad or herbs and just spray it with a bit of water just seconds before you press the shutter release.

Buy more ingredients than you need for the actual recipe. You will always need extra herbs, chocolate, flowers, etc to decorate around the plate and make the picture look more interesting and appealing.

michaela hartwig food photographer tips on styling food for photo shoot using capture one pro raw image editor a bowl of noodles with vegetables, chopsticks and crumbs on table

When on set:

Shooting tethered using Capture One Pro’s industry-leading tethering and keeping an eye on the Live View Screen helps immensely to get the styling on point when you’re working alone.

Style on Eye Level. If you are shooting a top down, style from above. If you’re shooting angled, style from the angle your camera is shooting from. This could hurt your back sometimes, but the end result will be better when you style from the camera’s perspective.

When you fill glasses or decorate creams on a plate, always use a piping bag or clean spoons for neat and clean arrangements with no spillage.

If possible and if you’re shooting with a tripod: try to show human interaction. This will always give a more vivid look to the image in comparison to a classic plate shot. Try to freeze actions like powdered sugar sprinkling on a cake or chocolate drizzling over the edge of a brownie.

Create foreground. Use some of the props, flowers, herbs, etc to create a foreground. It could be something as simple as a glass of wine just touching the edge of the image in the lower corner. Or perhaps a chair or a leaf close to the lens to create blur.

michaela hartwig food photographer tips on styling food for photo shoot using capture one pro raw image editor brownies piled up being dusted with cocao and chocolate cake decorated with real flowers

Editing and Color grading in Capture One Pro:

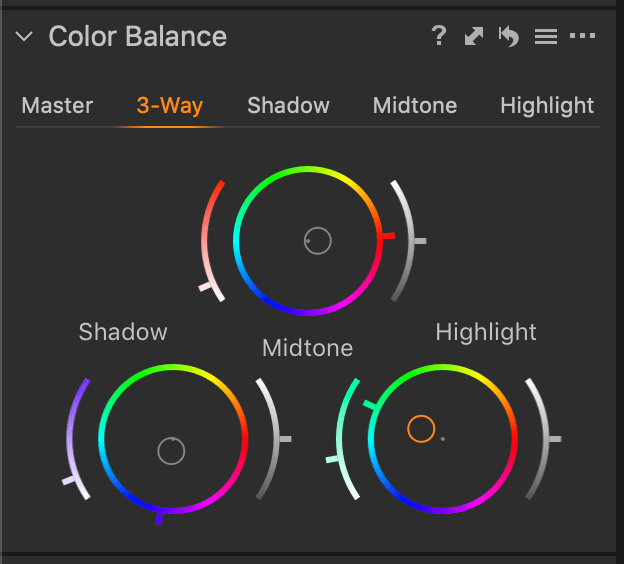
Color Grading is a difficult but exciting aspect of food photography and I rely on Capture One Pro’s RAW editor to achieve my desired look. The challenge is to create interesting color grading without changing the color of the food so it looks unnatural or unappealing. The intention of food photography is usually to make the viewer hungry. Therefore, the food has to look appealing and natural, not artificial. To achieve this, I like to give my shadows a cool tint and my highlights a warm toning using Capture One Pro’s advanced color tools. I also like to give the greens a blue toning.

michaela hartwig food photographer tips on styling food for photo shoot using capture one pro raw image editor before and after using color grading tools decorating meringue

Capture One Pro’s image editing software is a lifesaver when it comes to achieving these tones, because I can do any color grading I want on the backdrop, which will affect the plate or perhaps props like cutlery or flowers. But If the color grading affects the actual food too much, I can always erase parts of the mask, so the food itself preserves its natural color.

michaela hartwig food photographer tips on styling food for photo shoot using capture one pro raw image editor, capture one color grading tool

My pictures most commonly live in cool and blueish shadows, so in most cases it’s necessary to draw in warm tones on a separate layer to the food to make the overall photo more pleasing. However, this is subjective and varies from photo to photo.

I hope this helps you create delicious-looking photos. Good luck!


Sign up for the webinar

5 Advantages of Capture One Pro over Lightroom

NOTE: This article discusses an outdated version of Capture One. To learn more about our latest version, click here.

Food photographer and stylist Michaela Hartwig uses Capture One Pro to create sumptuous and mouth-watering photos. From color grading to the Layer tool, here are the five key advantages that sold her on Capture One’s photo editor:

The power of Layers

When I first started working with Capture One Pro, I quickly realized that it offers me the incredible lucidity in the library as I know it from Lightroom, combined with the power of Photoshop when it comes to layers.

You might be wondering – why are layers important? Can’t I just use the brush tool for local adjustments like I do in Lightroom? That’s certainly a workflow practiced by a lot of photographers and it works for them. But have you ever created several adjustments in Lightroom and then had difficulties finding the right one when you wanted to change it? This has never been easier than when applying those adjustments in Capture One Pro across separate layers.

Just to name a few advantages: You have a very clear overview over all the adjustments applied on the image. You can create radial masks and linear masks. You can fill masks over the whole layer but you can also erase parts of the mask. You can create masks by luminosity –>  you can apply adjustments to just the shadows or just the highlights of an image.

Raw image editing software capture one overview of adjustments applied to image

And to me the most important advantage: You can change the opacity of masks. Imagine this: You created a tone curve with a matte film effect and some blues and greens in the shadows, it took you quite a long time to find the right balance of colors. But when you’re done with editing you realize that the adjustments are too strong. Instead of now destroying your fine-tuned color tone curve, just turn town the opacity. This way you can still keep the desired color effect of the tone curve but with less of an effect.

opacity layers screenshot capture one raw image editing software

Maximum control over color grading

The color tools in Capture One Pro are incredibly versatile, powerful and there are many different ways to achieve your color goals. This was intimidating for me the first time I worked with Capture One Pro. But once you understand both the single tools and how they work together, you will love color grading with Capture One. You can use the levels tool or the tone curve, the color editor, the advanced color editor, the skin tone tool, the color balance. There are no rules and no borders. I particularly enjoy using the tone curve and the color balance tool to give my shadows, my mid tones and my highlights the specific color grading which my pictures are known for. The color balance tool in particular can have a huge effect on contrasts and colors in a very comprehensive way.

color tools screenshot capture one pro

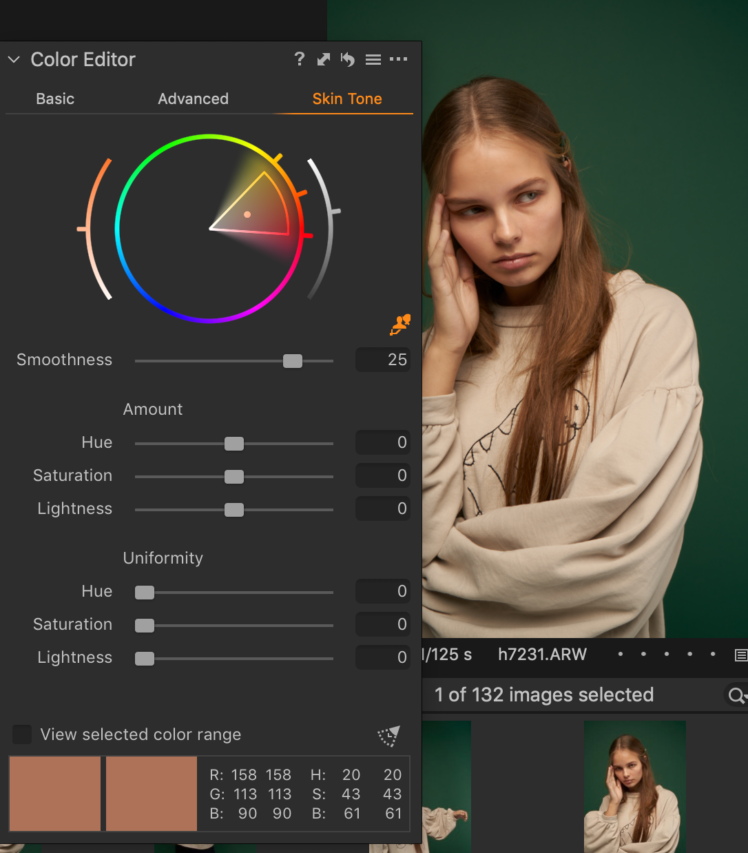
I also want to emphasize a specific color tool which you won’t find in Lightroom. It allows for modifications which would otherwise require tons of layers and a lot of effort in Photoshop: the Skin Tone Tool. I am not a beauty photographer or retoucher, but this tool is still incredibly helpful for food photography as well.

I want to show you how critical it is via the below picture. In this picture, I have several different tones of green. Some parts have a saturated, rich green and other parts have some yellow tones. With the skin color tool it’s possible to equalize those colors. I pick the color of my choice and by using the sliders in the red square I can adjust all colors in the marked color wheel to my desired color point in terms of hue, saturation and brightness. When I have several colors in my shadows, this can also have an uncomfortable effect on an image, so I use the skin tool for correcting. It’s incredibly helpful.

capture one pro screenshot color adjustmentGreens before

capture one pro screenshot after color adjustmentGreens after

Sessions over catalog-based workflows

Catalog-based workflows – equivalent to catalogs in Lightroom, is possible in Capture One Pro. But when working on current projects, I always prepare my work with Sessions. Here are the top 3 benefits from working with Sessions:

  • It’s easily accessible. You don’t have to search within a catalog for a specific project or shot. Just go into your PC structure folder, double click on the desired session and Capture One will open your files within that session automatically.

Catalog-based workflows in capture one pro screenshot

  • Capture One Pro creates an automatic folder structure within the session. It creates four default folders once you start a new session: Capture, Selects, Output, Trash. The Capture Folder contains all the images that were shot tethered or imported from your SD card. Once you make a selection of your favorite images in Capture One Pro, they will automatically be moved to the Selects Folder. If you want to delete specific images, these will be moved to the Trash folder by default, but they are not gone. You can easily move them back. And the Output Folder is the folder where your exported variants will be sent unless you choose a different folder.

automated folder structure' creations screenshot capture one pro raw image editing software

  • Similarly to Lightroom’s Collections, you can create Session Albums and move your desired images from several folders on your hard drive to a favorite session folder, without physically moving them. This is especially helpful when you want to build up your portfolio.

Session Albums screenshot capture one pro raw image editor

Working with Styles / in combination with Layers

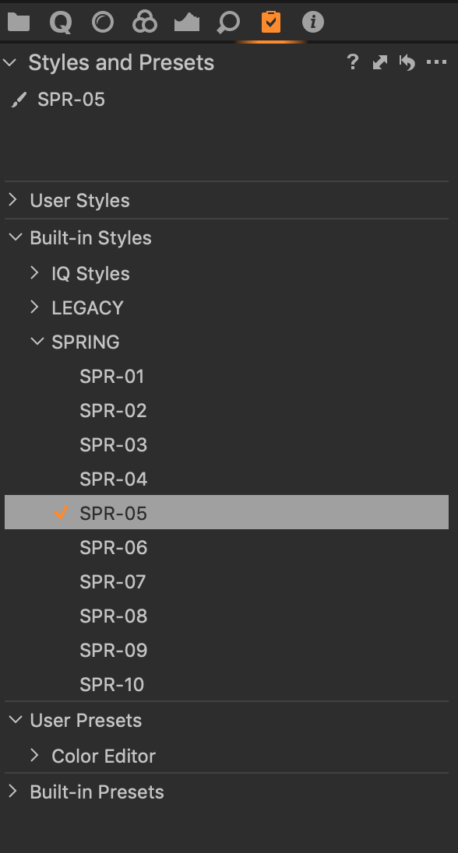
I’ve never been a fan of Presets in Lightroom, because most of the time all the adjustments of a specific preset just did not match my image. That’s where Styles in Capture One  become important. If you’re working on the background layer, it’s possible to combine several Styles just by clicking on them.

screenshot capture one pro raw image editor combining styles with layers

However, this is what I would recommend: Apply your styles as new layers if you want to combine with another layer.

For example, you can apply a Style as a layer with one specific adjustment, i.e. a specific tone curve you’ve created before and then combine it with another layer containing other adjustments.

This method helps you develop your specific retouch style, but it’s still highly subjective depending on different images. As mentioned before, you can adjust the opacity of those layers so that you can make the Style match to your image without changing the Style itself.

Tethering

When I first started to use Lightroom for tethering, I couldn’t be more frustrated. It was so incredibly slow, so I preferred to use live view on my phone. However, identifying mistakes on such a small screen and getting the sharpness right was difficult, or even impossible, to achieve. This was the first feature from Capture One Pro to become critical to my workflow: Tethering.

I don’t normally use it when shooting private scenes where layout and details are not that important. But I use it every time I do a product or recipe shot for a client to make sure I get sharpness and composition on point. Capture One Pro’s photo editing software provides fast and easy tethering with a lot of options.

Migrating from Lightroom to Capture One: Practice practice practice!

Export a high res file from Lightroom into your desired Capture One Pro Session and try to recreate the look.

The sliders in Capture One Pro work differently from the ones in Lightroom – you have to get used to them. For example, when using the HSL tool in Lightroom, you will need to use the color editor in Capture One Pro to achieve similar results. But I personally think that the brightness option doesn’t bring you the same result as the luminance slider in Lightroom. therefore, the options for selecting and changing colors and re-editing them in the Advanced Color Editor Tab of Capture One Pro gives you many more possibilities to modify your colors than Lightroom could ever do.

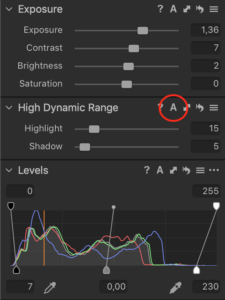
Also, in Capture One Pro you don’t have that section of blacks/darks/lights/whites which can save your shadows and highlights in lightroom. I work with the HDR tool & brightness tool at the same time to achieve similar effects.

screenshot HDR tool capture one pro raw editing software

When it comes to the clarity, you will find the biggest difference to Lightroom. Capture One Pro offers you 4 varieties of clarity. The one I use is called “natural” and that is exactly what it’s called. It gives you a subtle contrast of the mid tones, in combination with structure you get a crisp and sharpened result without the artificial look of the clarity tool in Lightroom. Almost every food photographer relies on the clarity slider in Lightroom, resulting in a very specific look.

You won’t have that exact same clarity effect in Capture One Pro. It is different, but in my view, it’s better.

screenshot clarity tool in capture one pro raw image editor

Give it a go and edit some of your favorite images in Capture One Pro. You will need to go through a few images until you like the result of the edit. It’s very important that you don’t give up too early! The Capture One Blog and webinars found on Youtube are really helpful when starting out. In particular, the resources which focus on color grading tools like the Advanced Color Editor, the Skin Tone Tool and the Color Balance are highly valuable. You will be surprised by the possibilities!

If you don’t already have Capture One, you can download a 30-day trial and try it out.

Sign up for the webinar

Recreating Lightroom color grading in Capture One Pro

NOTE: This article discusses an outdated version of Capture One. To learn more about our latest version, click here.

Introduction

I’ve always loved creating conceptual portraits and I am partial to shooting them in actual locations. Although the process is quite demanding resource-wise and largely dependent on weather, it is a uniquely satisfying experience when everything just works out. 

 Of course, the creative process doesn’t just stop when you press the shutter. You need an effective software when moving on to the next phase of file management and post-processing. In my case. I have found a reliable partner – Capture One Pro. 

 I understand that learning a new software can get frustrating and time consuming but critical when trying to enhance your output.  I have found it beneficial to migrate to Capture One Pro because it is fast, customizable to my needs, and boosts my overall productivity 

 For this edition of my exploration with Capture One Pro, I will share my workflow for creating what I call “ethereal portraits”. In my experimentations with conceptualizing, shooting, and post-processing various types of portraits, my preference for simulating etherealother-wordly or “heavenly” images has intensified. You will notice this in my recent creations.  

 Below, I have shared my process for recreating a previous photo I made in Lightroom into an “ethereal grade” image in Capture One.  My gear and the settings for shooting the image I use as reference were as follows: 

  • Fujifilm GFX50s with a GF32-64mmF4 lens at 35mm
  • SS 1/60th
  • F/4.0
  • ISO 200
  • One Paul C. Buff Einstein 640 with a 47″ Octa powered by a Vagabond VLX battery.

RAW Image

Above is the RAW image that we will be working on. Below is the image that I edited using Lightroom.  

Lightroom Graded Image

First off, we need to know the settings that I made in Lightroom.

Adobe Lightroom Settings

Lightroom Basic Exposure

A bump in the Exposure around a stop +1.10Hightlights of -73 and opened the Shadows to +57.

Lightroom HSL

Next, I shifted the Hue on the Yellow to -100 and Green to -100. Took the Saturation back. Red -5Orange -11Yellow -51 and Green -45Luminance remained untouched.

For the Split toning, I shifted Highlights to a Cyanish tone of 183 Hue and a little Saturation of 18Shadows to an Brownish tone of 48 and Saturation of 25.

That’s about it for the Lightroom adjustments. Now, let’s move on to recreating this to Capture One Pro.

Capture One Pro Settings

Let’s start in the Color Tab. I assume you already exported your image to Capture One.

Capture One Pro – Color Tab

In the Base Characteristics Tool, I chose Fujifilm PRO Neg. Std in the Curve dropdown to apply my favorite Fujifilm Film Simulation.

Base Characteristics Tool

Capture One Pro – Color Editor Tool

I proceeded in the Color Editor Tool and color picked the leaves part of the image using the Color Picker Tool. Adjusted the HSL values to Hue -20Saturation -17.9. Again, my adjustments here are based on just eyeballing the color. To get it as close as possible to the Lightroom version, I exported a .TIF of the Lightroom graded file and just kind of switching back and forth to see if I am close enough with my adjustments. I noticed that I was not selecting enough yellow and greens so I switched to the Advanced Tab to add more yellow and green to the selection and adjust the HUE to match.

Capture One Pro – Exposure Tab

Next is the Exposure Tab. This is where we adjust tonal and luminance values.

Still eyeballing, I recovered Highlight first in the High Dynamic Range Tool then proceeded to adjust the Levels lifting a bit of Shadow to 5Mids to -0.13 and Highlights to 203. Then lastly adjusted the Exposure to -0.77. Everything is looking pretty close but I feel the white on the dress is duller  than our reference so I used the Luma Range Maska new tool in Capture One Pro 12 

Capture One Pro – Layers Tool / Luma Range

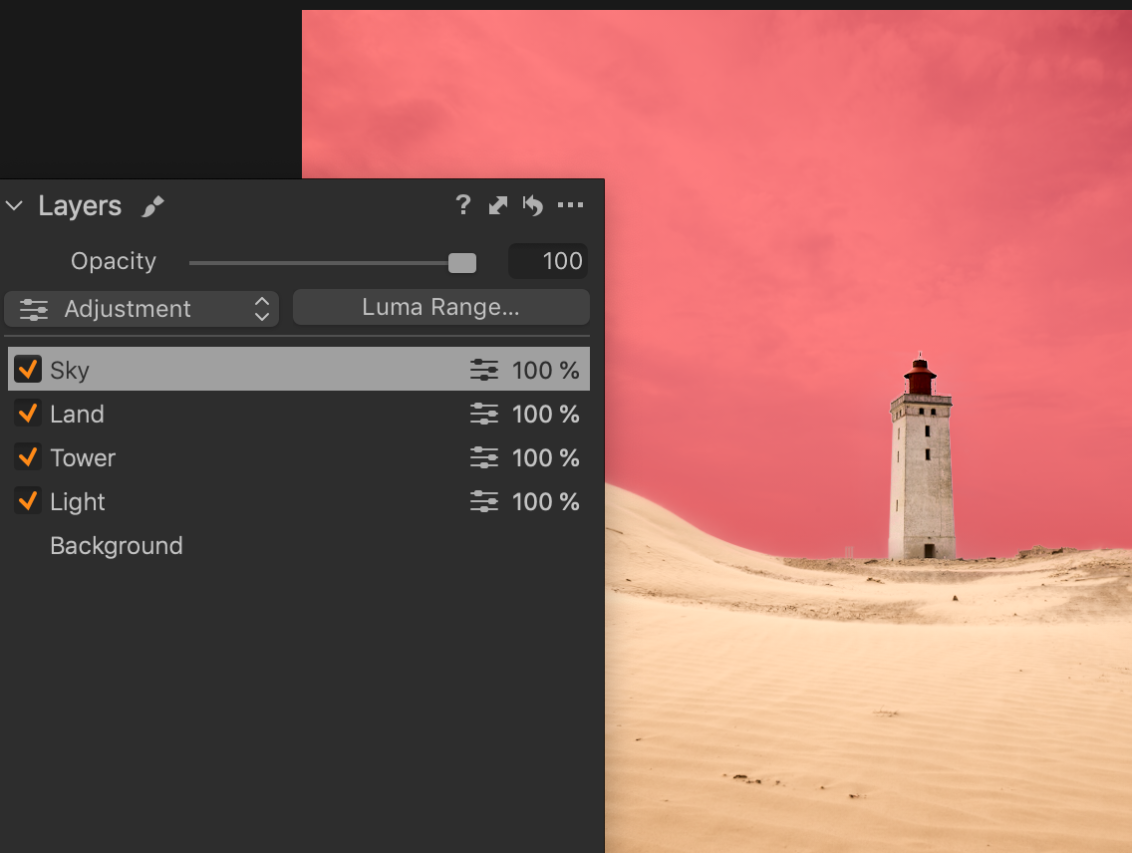
I created an adjustment layer (Layer 1) and used Luma Range to select the dress part. When you do this, you may find that some aspects of the images that have same luminance also get selected. I can fine tune the mask by selecting the (E) Erase mask tool and remove the unwanted mask area around the dress, ultimately leaving only the dress selected.

Back on the Layers Tool, I selected Layer 1, the adjustment layer we just created and applied the Luma Mask to and ever slightly bumped Brightness to 12.

Capture One Pro – Layers Tool

And there you go. Final image color graded through Capture One Pro 12.

Final Image Processed through Capture One Pro 12

I will end this blog by emphasizing my essential reason for choosing to switch to Capture One Pro. 

As a Fujifilm X shooter, I value the “film simulation” capability of my mirrorless cameras. With Capture One Pro, I am able to optimize this feature because it is compatible with my own color preference and ambitions for post processing, in this case  creating ethereal images. 

Sign up for the webinar