NOTE: This article discusses an older version of Capture One. To learn more about our latest version, click here.
My switch to Capture One has been a long time coming. I was first blown away when my friend – retoucher Pratik Naik – showed me the difference in quality between a RAW file processed by Capture One and a RAW file opened in Lightroom. The skin colors and clarity was simply amazing in Capture One compared to Lightroom.
Out of habit, I continued with my old photo editing software as I was hesitant to go all-in on a change. It felt kind of like being a painter – even though you know oil paint is more beautiful and allows for more creativity, you continue with acrylic paints because you think it will be easier.
Still, over the last few years, I noticed that the wedding photographers I admired were all switching to Capture One. Once, at the Legacy workshop in Portugal, the founders from Muse and Mirror (Victor and Ronja) showed us how they make the most wonderful art in Capture One – it was an eye-opener for me and made me realize how easy it was to batch a whole wedding in Capture One.
One of my concerns was losing all my presets and actions – but it turned out I could have the same in Capture One, plus much more. Once I started with the photo editing software, my only regret was that I didn’t start sooner.
Heal and Clone tools
The new Heal and Clone tools in the latest Capture One Pro 20 update are next level, compared to anything I’ve ever tried before.
As a wedding photographer, I don’t work a lot on retouching skin that’s up-close, but I know all about stains on a wedding dress, or objects ruining the background of a shot. Thanks to the new tools, I can remove them quickly and with ease.
Capture One Pro is so intelligent that when I use the Heal Brush it automatically opens a new layer called Heal layer (Clone layer when you use the Clone Brush.) The two tools complement each other perfectly. The Heal Brush automatically decides a source target to lift from and blend your spot, while the Clone tool puts you in charge and lets you manually find the area you want to clone.
The tools are so intuitive, and the healing tool removes big objects in an impressive and precise way, and saves me a lot of time. You can also heal or clone as many spots as you want on one layer. It’s super fast and doesn’t slow down the performance of my Macbook Pro at all.
Layers and Masks
I know a lot of wedding photographers cringe when they hear the word “layers.” They think it’s complicated and that “less is more” when you’re editing 700-1000 photos.
But in an era where “everyone” is a photographer with their smart phone, professionals need to stand out. I believe layers is the easiest way to do wonders with my photos.
The beauty of layers is that I’m in full control of my editing process, and I can hide and show the filters I want. I also have a lot of different options when it comes to my layers, and my favorites are Clear Mask and Fill Mask. When I use clear mask, I just brush the area I want to edit and nothing else gets affected. This is perfect for when I dodge and burn, for example. I simply use Fill Mask when I want the whole layer to be affected, for example when I use exposure and contrast. Then it’s easy to just erase the areas I don’t want affected by adjustments.
And I also have to mention that you can always use the opacity on your layers, so you get just the amount of effect you need.
Linear and Radial Gradients
I’m completely in love with these two tools. The Linear Gradient Mask is perfect when I want the sky darker and / or warmer. It’s perfect gradient from full cover to zero, so I get these blending and natural transitions. The Radial Gradient Mask does the same thing, allowing me to circle in the area that I want to be darker or brighter. I can also invert the gradients, and as always opacity is your best friend.
Styles (Presets)
When I was working in Photoshop, presets and actions were very important for my workflow, and it was important for me to still be able to get different looks in just one click. So I was so pleased to discover Styles – Capture One’s instant looks. My friends at DVLOP have created a range of Styles for Capture One, as well as other renowned preset creators like Mastin Labs.
Capture One also has a wide range of own Styles made by some of the best photographers in the world.
It’s also easy to make your own Styles by mixing elements from your favorite Styles or by saving your favorite settings and creating a unique Style just for you.
Color Balance
Say hello to perfect colors! I have been a photographer since I was a teenager, and back in the days when I shot on film (analog) I didn’t have much control when it came to colors. If I chose Fujifilm or Kodak, the greens were still really green, so I opted black and white film because of these limitations.
These days a color can look any way you want. Capture One Pro’s color editor is, by far, the best I have ever used. Now I get my greens just how I want them, and it couldn’t be any easier. With the latest software update there are now eight basic colors to start with, while the Color Editor is divided into a Basic Color Editor, Advanced Color Editor and Skin Tone mode.
It also includes rad tools like the Color Picker. If you hold the Color Picker and move it horizontally across the screen you’ll automatically adjust the Hue. If you move it vertically you adjust the Saturation, and if you hold down Alt+horizontal you adjust the Lightness.
The Color tools make it so easy to discover a whole new world of colors.
Before and After
I love checking on my before and after during my photo editing process and with the new Before / After tool, I get different ways to compare my RAW file and edited image. You can choose between a Full View or Split View slider. Another cool option is that I can still work on my photo and see the changes I’m making while keeping the “before” image up on my screen for comparison. Simply press Y on your keyboard, or go to the toolbar.
Customizable interface
It’s not easy to pick a favorite Capture One feature, but the ability to customize my toolbar is high up on my list.
It’s a total dream situation to be able hide the tools I hardly use, and make more room for the ones I use all the time. I can also pin my favorites at the top and have the rest scrolling under for a smoother photo editing workflow.
I can also decide at what side I want my tools and photos. You can even make it look like the toolbar you had in Lightroom, if that’s easier for you to start out with.
The possibilities are endless, and this is really a huge advantage for me. Let’s face it; we spend a lot of time in front of our screens, and this option makes my whole workflow much easier and it looks the way I always wanted it to.
A few other favorites
I also wanted to give a shout out to a few other handy features that I love using – like the customizable shortcuts that speed up your workflow by a ton. The noise reduction in Capture One is the best I have ever seen and a lifesaver for us wedding photographers, who often struggle with bad light.
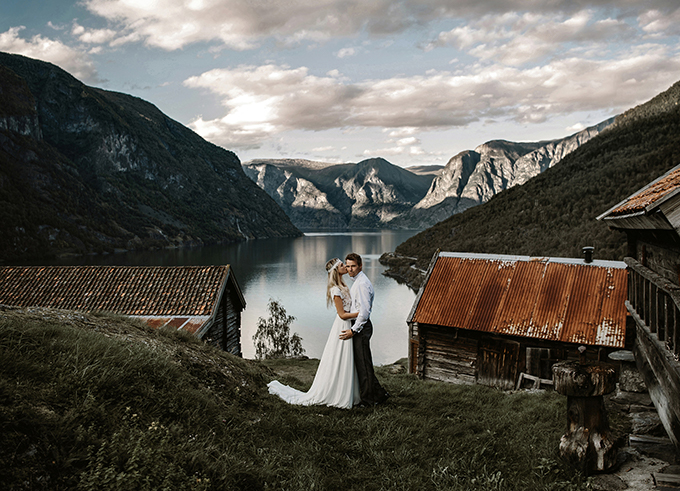
As a destination wedding photographer, I also travel a lot, and it was the biggest joy when I realized I can work with my photos offline, and Capture One will recognize the location when I get back online and add my edits.
My photography looks better than ever
Capture One truly is the perfect photo editing software for wedding photographers. Both my photography and my workflow have never been better, and this makes me more creative. When I can create the final result I envisioned in my head when I took the picture, it’s the best feeling in the world.
I’m convinced that Capture One – together with my gear – are the biggest part of my creative process.
If you’re curious to learn more, download the free 30-day trial or visit the Learning Hub for free webinars, tutorials and help from experts.
Are you new to Capture One? Get a free 30-day trial here.


