In our workshops we often show people how to set colors using only the Levels tool. For many it is an awakening experience. For us it is the most natural and yet powerful method of manipulating color in Capture One. We like to think of it as a selective White Balance tool. Let’s dive into the details.
The very first step in our post production workflow is to analyze the image and try to decipher what it means and what we want it to mean. How our eyes perceive it, what parts of the image we want to draw attention to and which colors will represent the emotion in the pose and story.
These first thoughts give us a base and a direction towards which we will start manipulating the image, taking into account any comments from the client.
At this stage we very often turn to the Levels tool, which we think is the most underrated tool by the majority of users.
Calibrating the white and black points
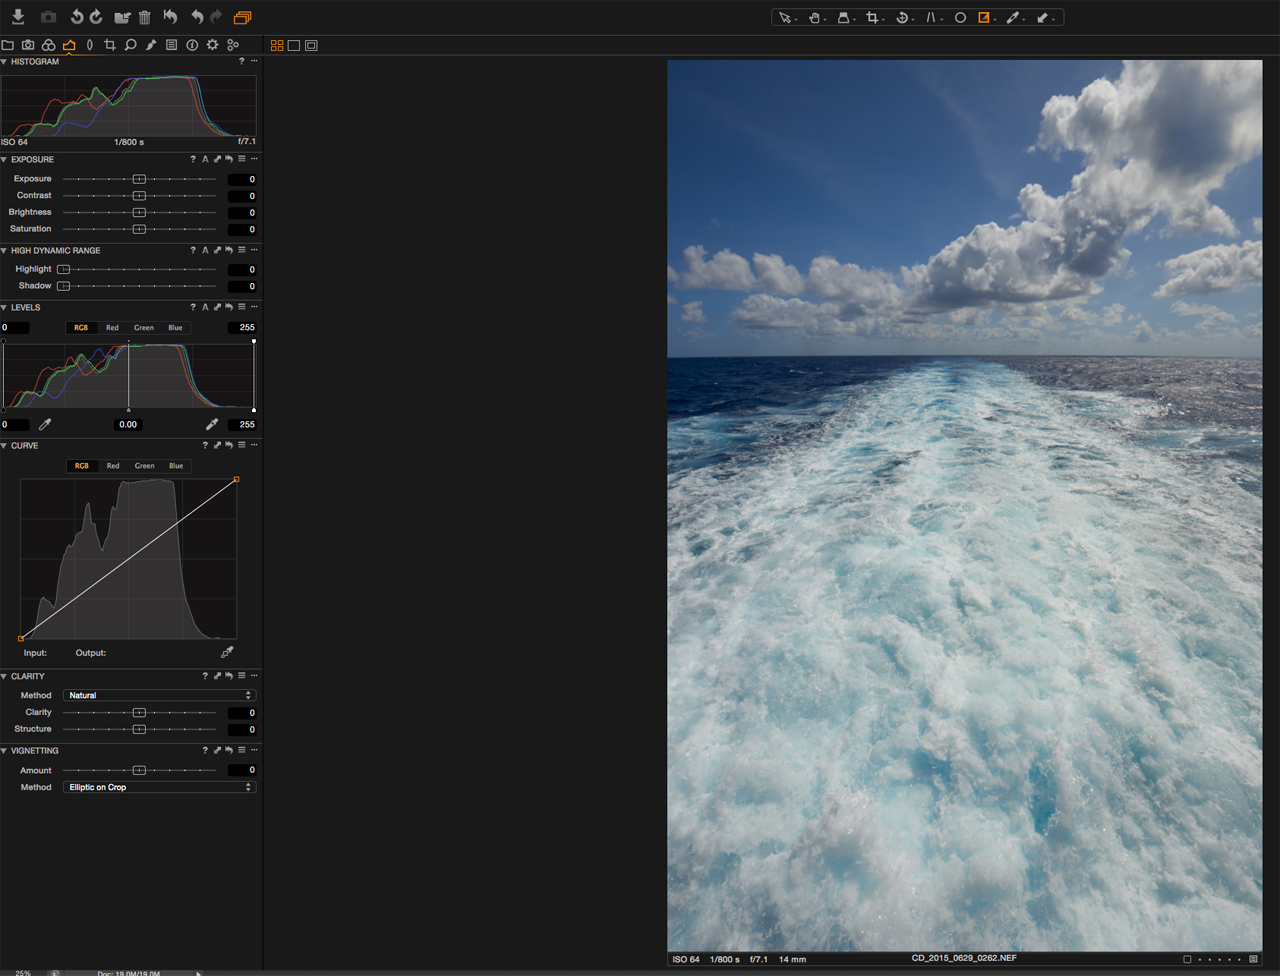
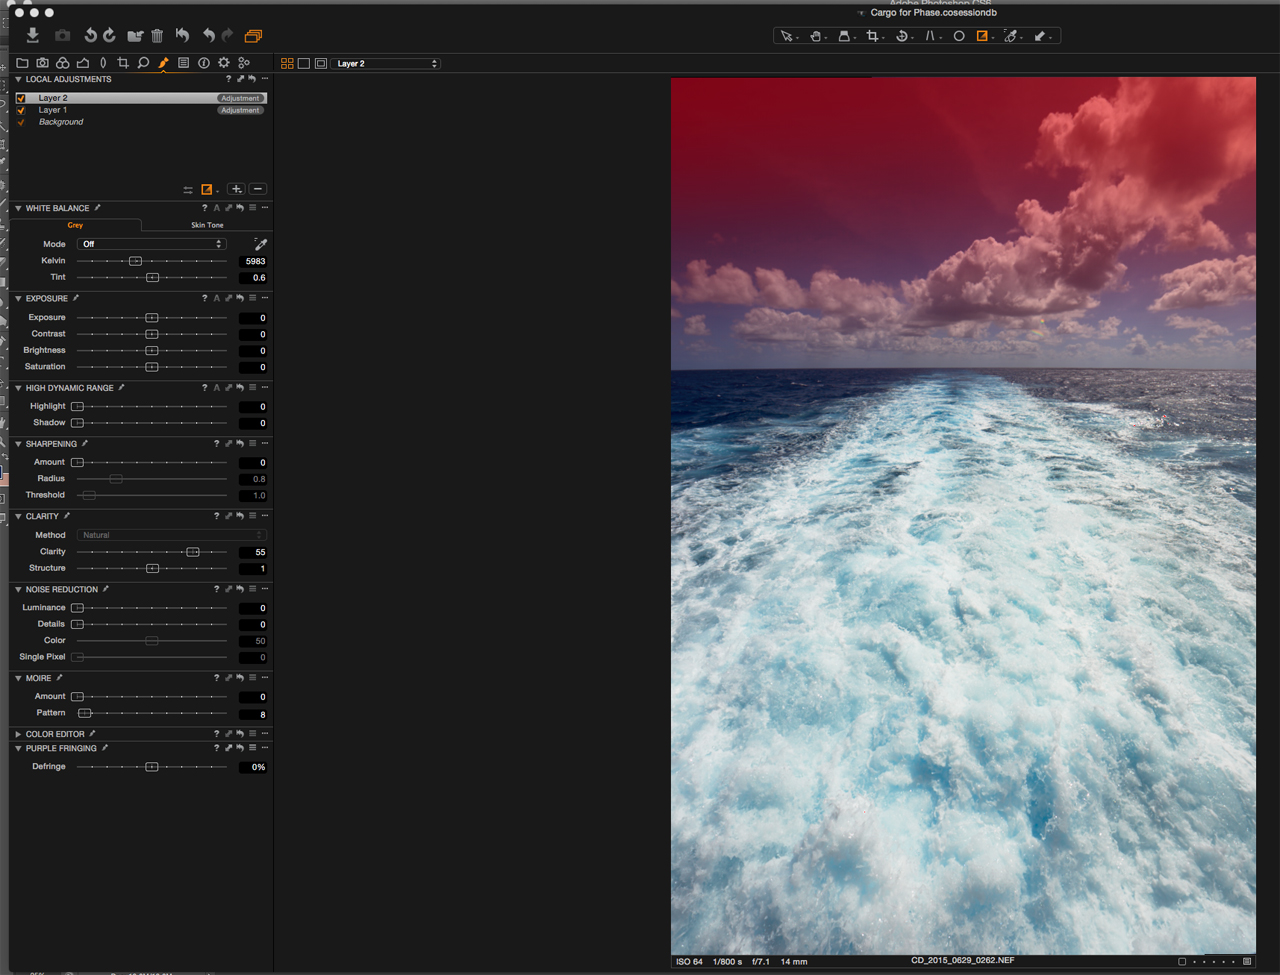
There are many ways to use the Levels tool. The most common might be to calibrate the temperature of blacks and whites in a shot. For example if we were to leave the white balance off and try to correct it using only Levels, we will get to a very different spot.
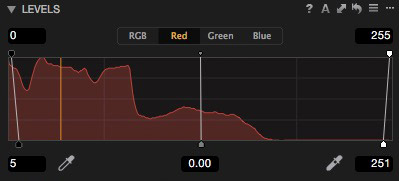
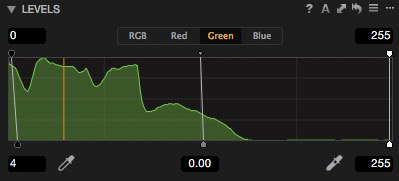
As long as the changes we make are not too strong and only delicately adjust the temperature of the shadows and highlights to our liking, nobody will even tell that such an adjustment has been made. Here I wanted to make the blacks colder and give the highlights a less yellow and more magenta look. From left to right is the RAW and the corrected image.
All it took was moving a few points on the red and green channel. The correction is marginal yet visually appealing.
Limiting for safer output
Another standard usage is limiting the maximum RGB values. What we gain through such a manipulation is a file that will be much safer when being used in a wide variety of media (which we will have no control over). If your image ends up on anything from smartphone to wall-sized print all over the world it is often a good idea to limit the whites and blacks assuming it does not harm the look of the image.
Of course we do not want a dull-looking image, but on the other hand harsh cut-offs from over-contrasty regions might be just as harmful. Just as in life, retouching to a “golden mean” is often the best solution.

If contrast is reduced too much by such a correction, then we can still try to regain it by increasing individual channel contrast and still benefiting from the safe highlight and shadow limits.
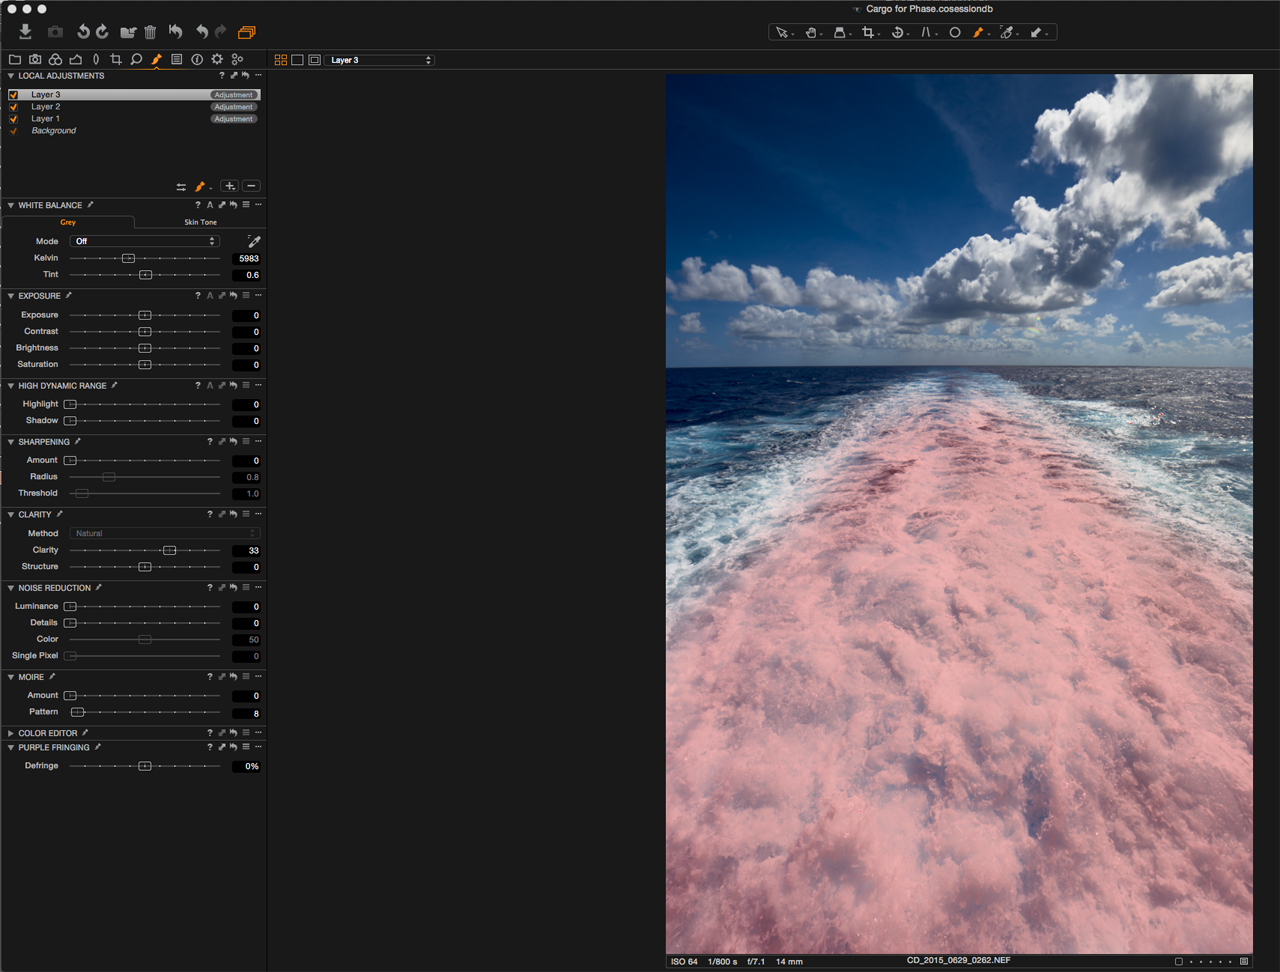
Strong toning
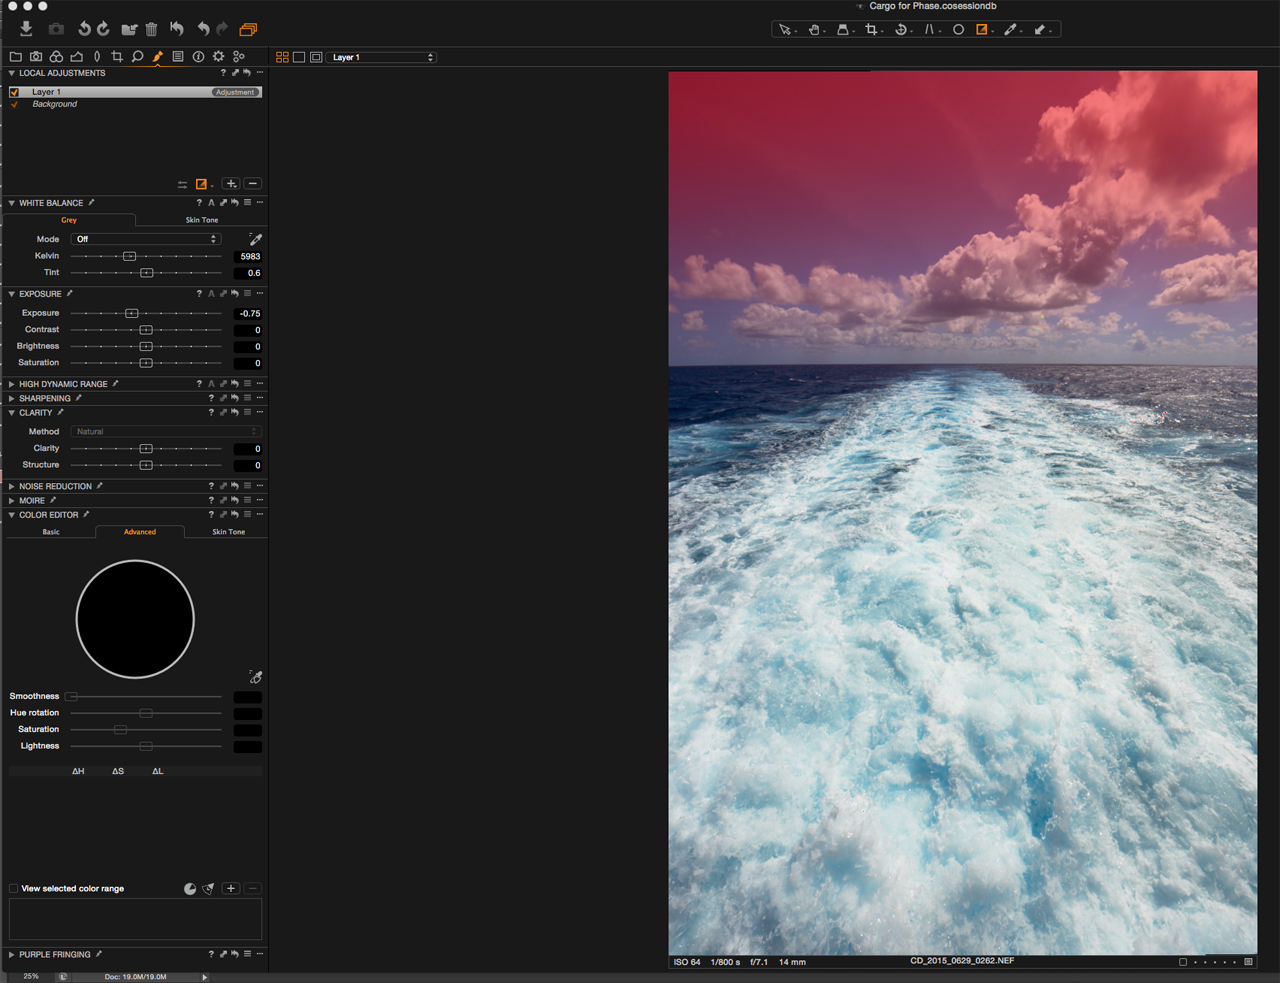
Although it is very easy to achieve quite unrealistic color by changing the value of endpoints of separate color channels, the outcome to us usually looks quite analog especially in comparison to the 3-way Color Balance tool, or strange white balance settings. It is often a good idea to make these color adjustments taking into account the colors of objects, which are in the frame.
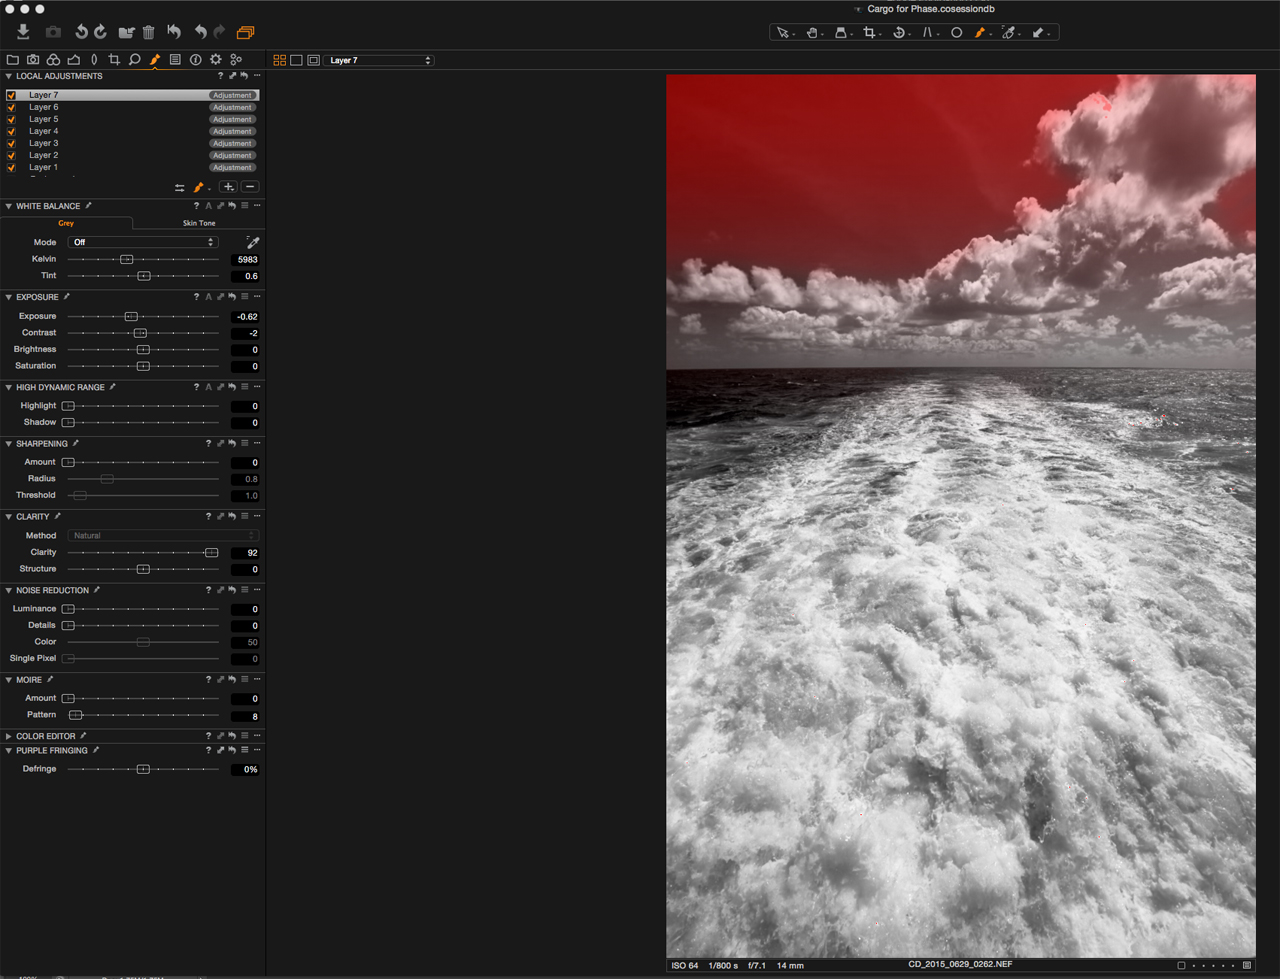
Here are a few stronger color-toning examples made using only the Levels tool. The first one again being the ungraded RAW image.
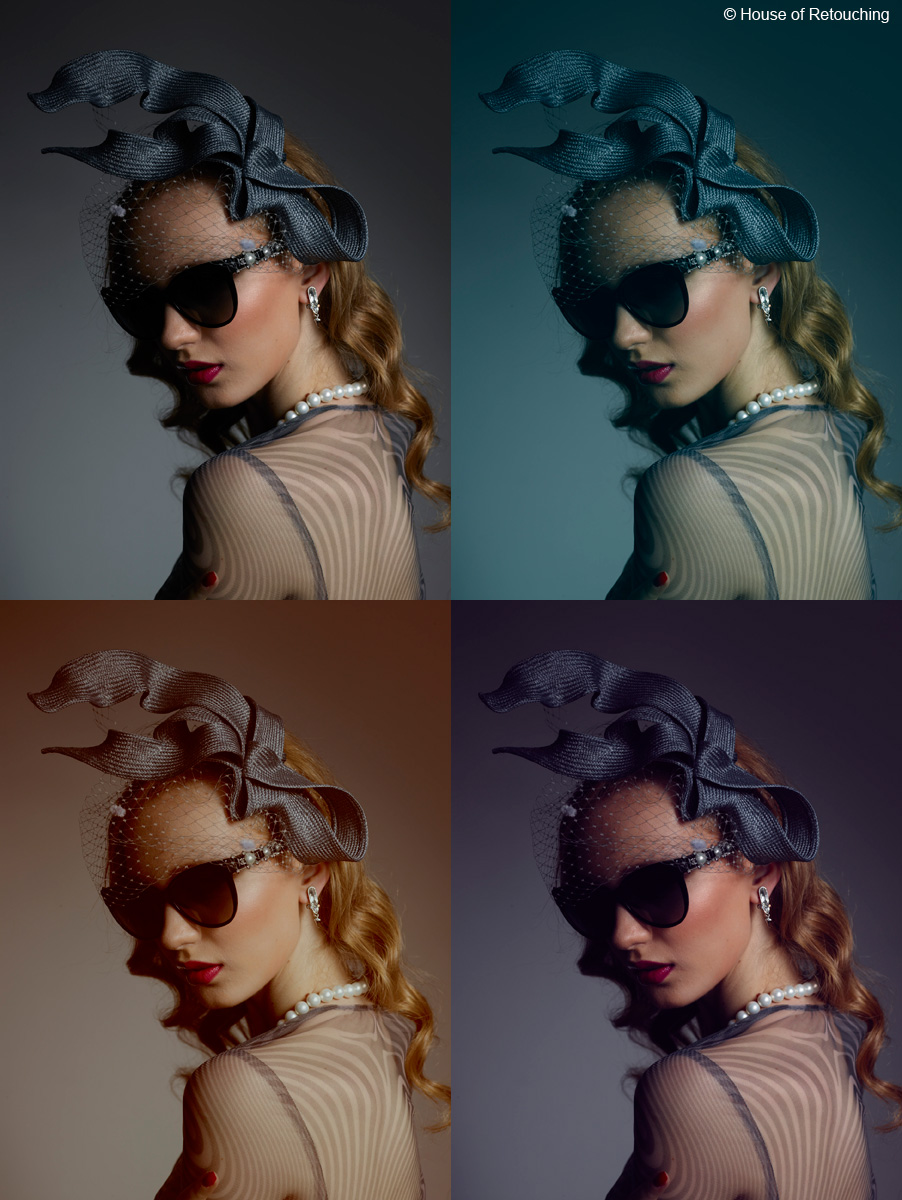
Of course in the examples above it is obvious that the colors are off, but does it look artificial or plastic? Color preferences are absolutely subjective and yet the vast majority of people tend to accept strong grading effects done by the Levels tool quite easily, if they are done with taste; I dearly hope this will be the case here.
Grading
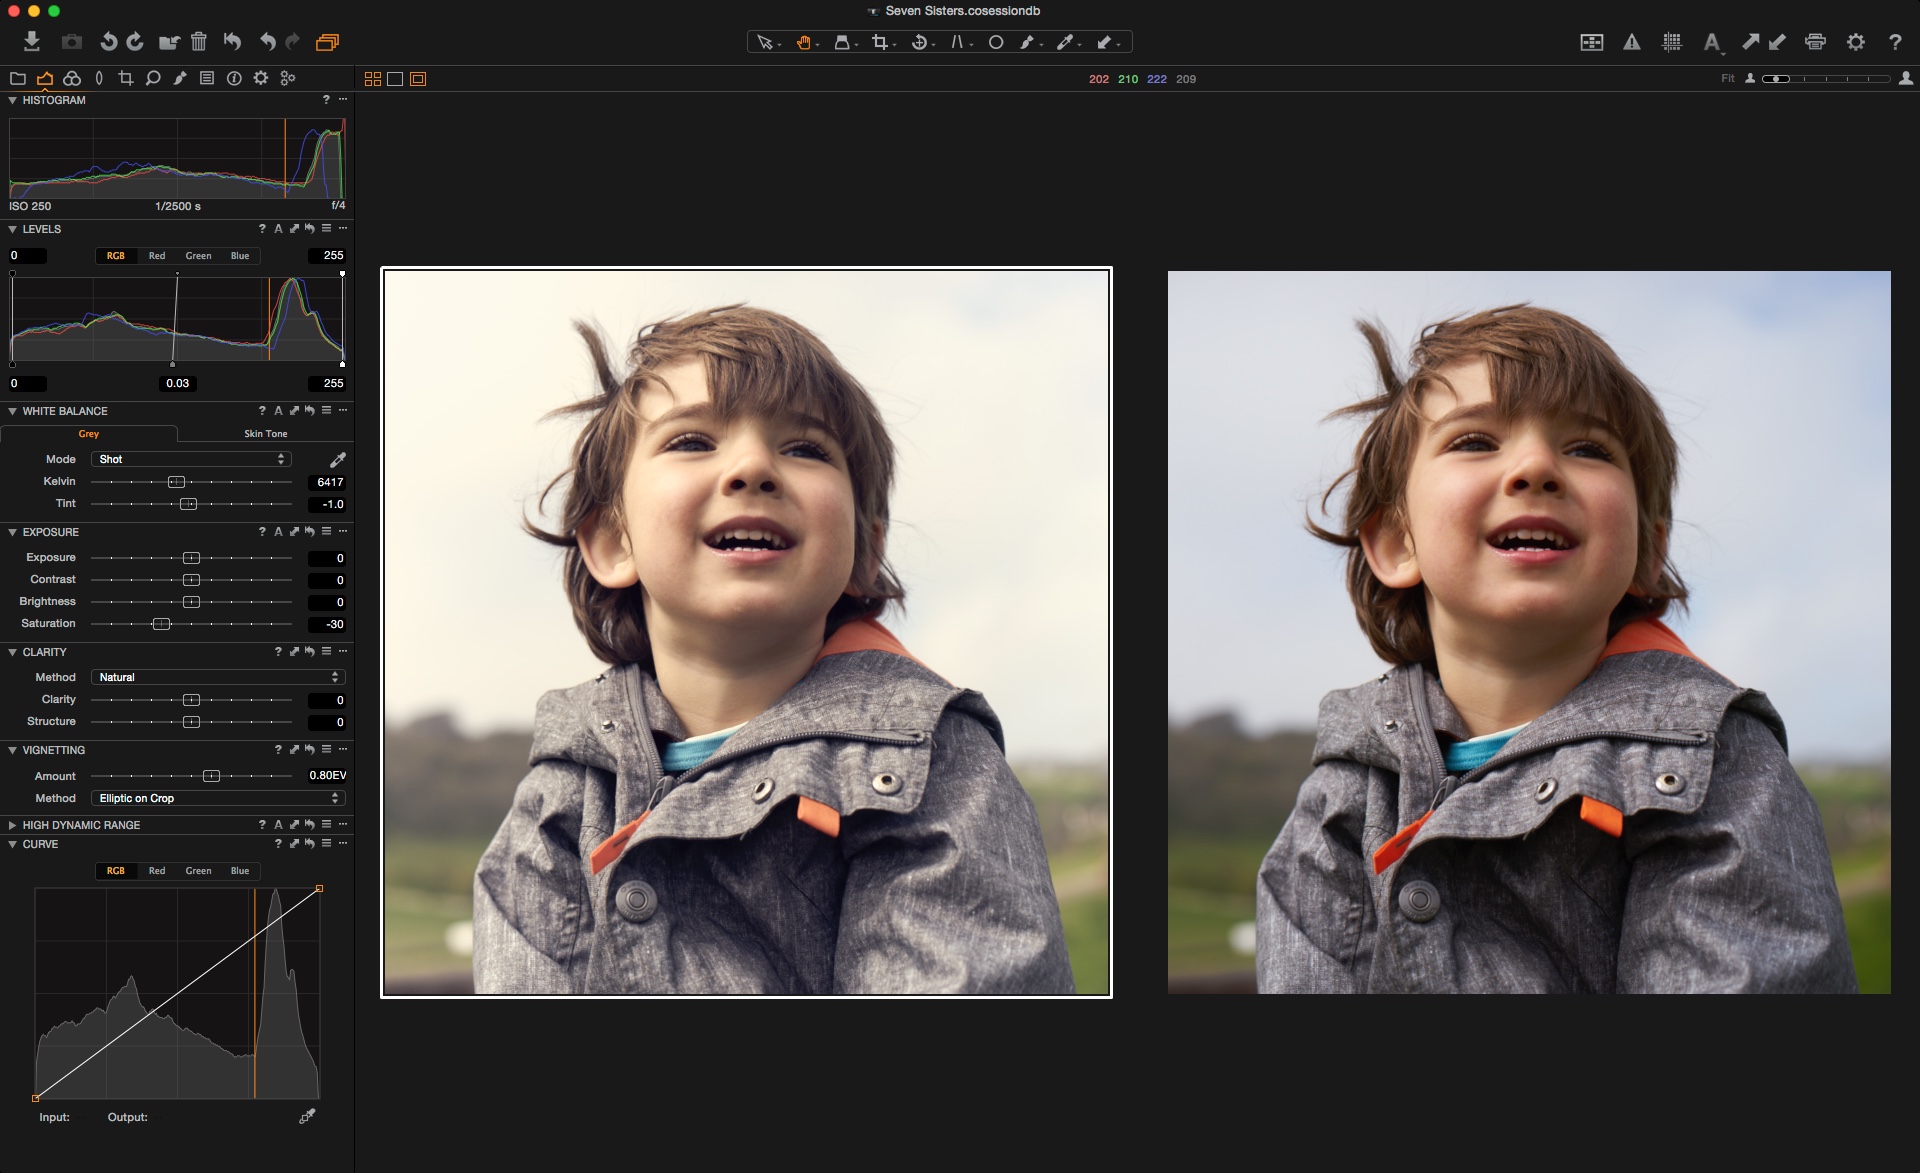
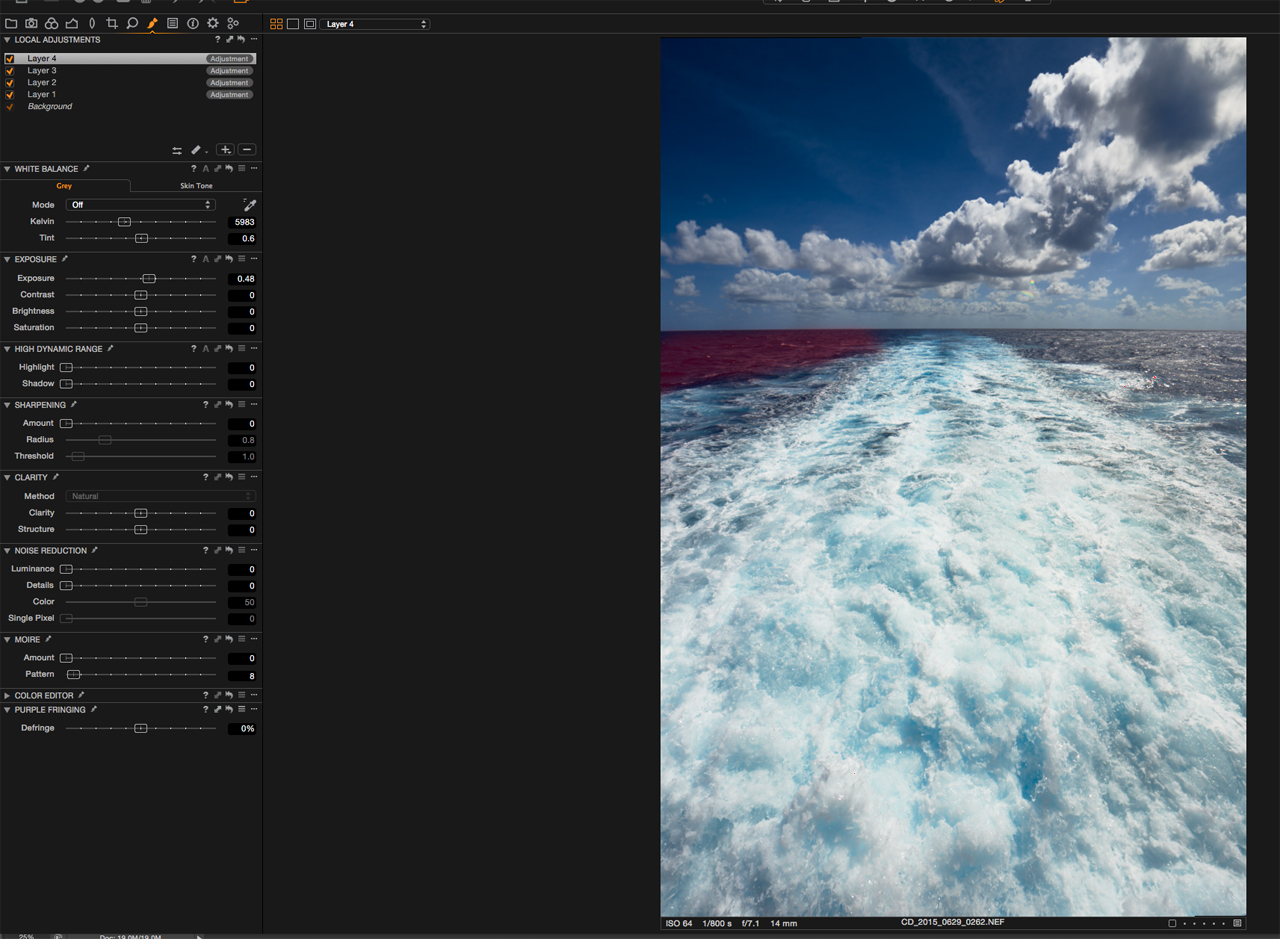
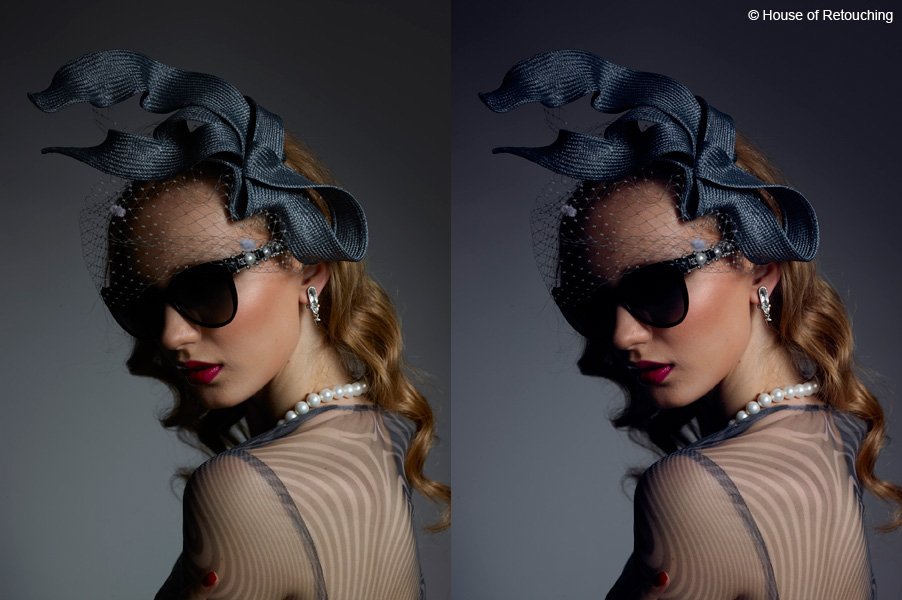
Let’s now compare how much of the style, which we set in the end for this image, was done with the Levels tool and what other things we decided to alter in order to fulfill our vision. Underneath on the left only Levels are applied, on the right also other corrections. The photograph in this state is ready for processing and then on to our retouching workflow in Photoshop.
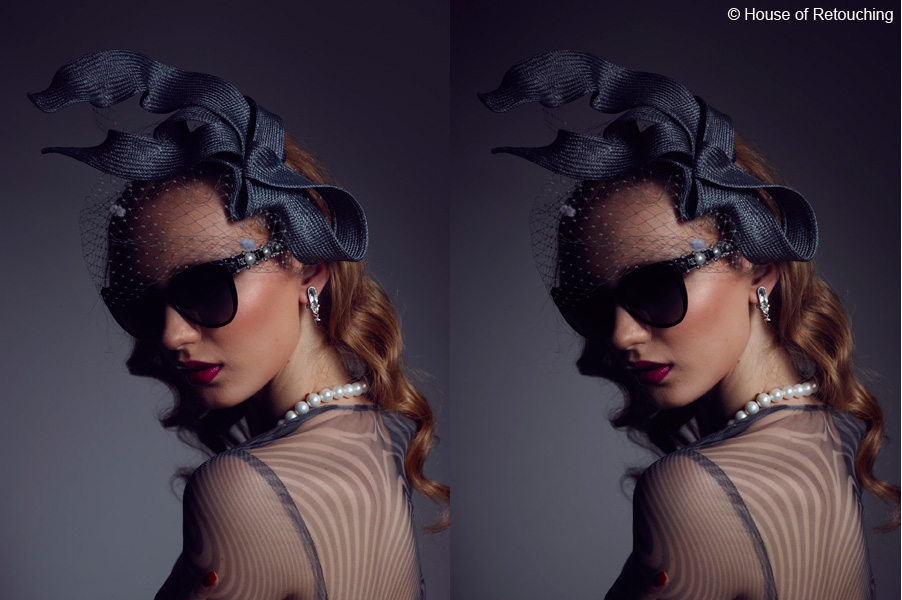
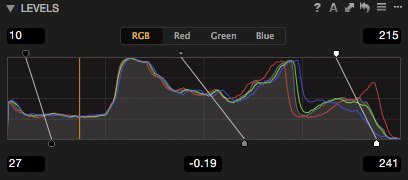
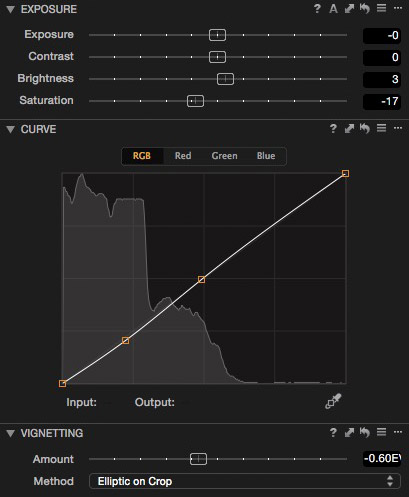
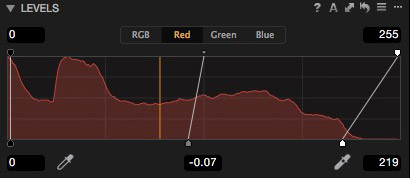
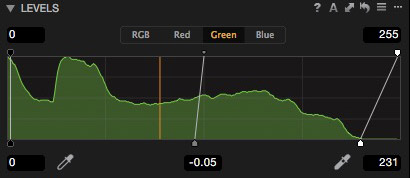
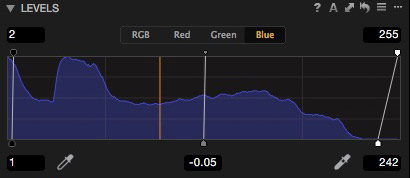
It is obvious that the majority of the look of the image was done in Levels. Here are the settings:
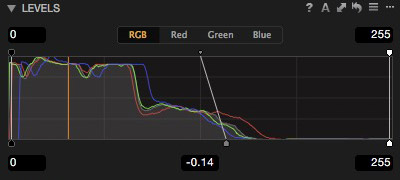
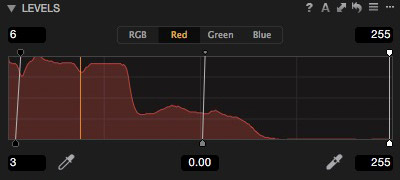
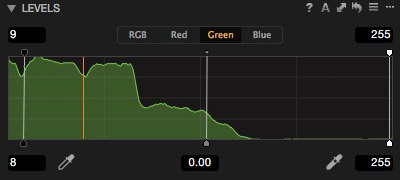
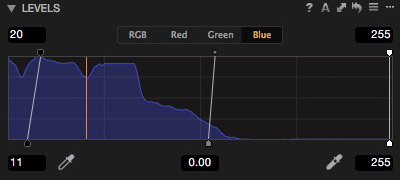
We left the highlights untouched in this case and concentrated on giving the blacks proper density, so as not to only shift color. The brightness and contrast also change while playing with endpoints. This gives Levels a different effect to the 3-way Color Balance tool, which was specifically designed not to affect contrast. The algorithms for both tools are thus very different producing different looks – which one works best is matter of taste however we feel most at home with the classic look from the Levels.
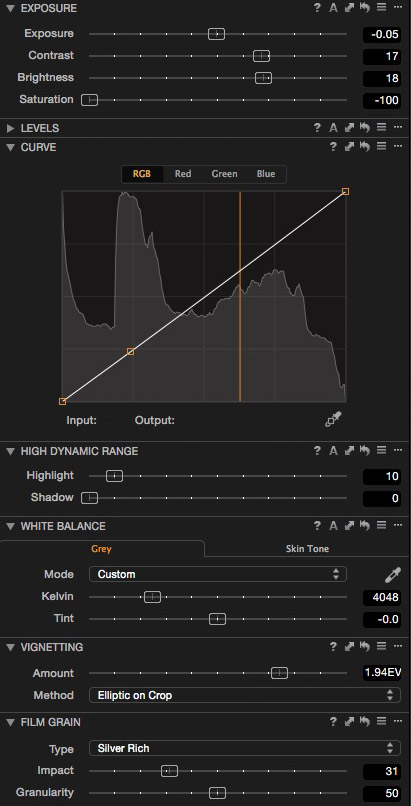
Other corrections applied were brightness and desaturation, a slight curve, and vignetting.
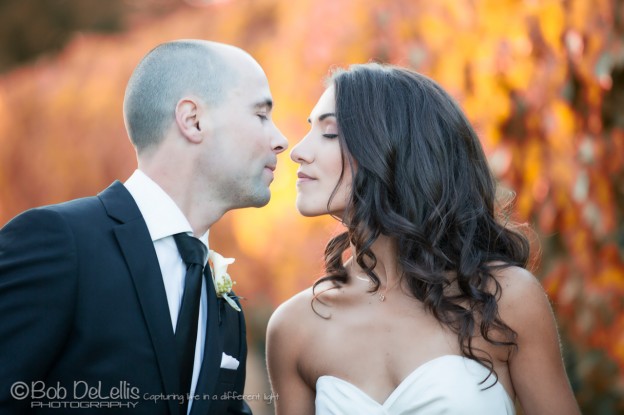
 And here is the image after retouching.
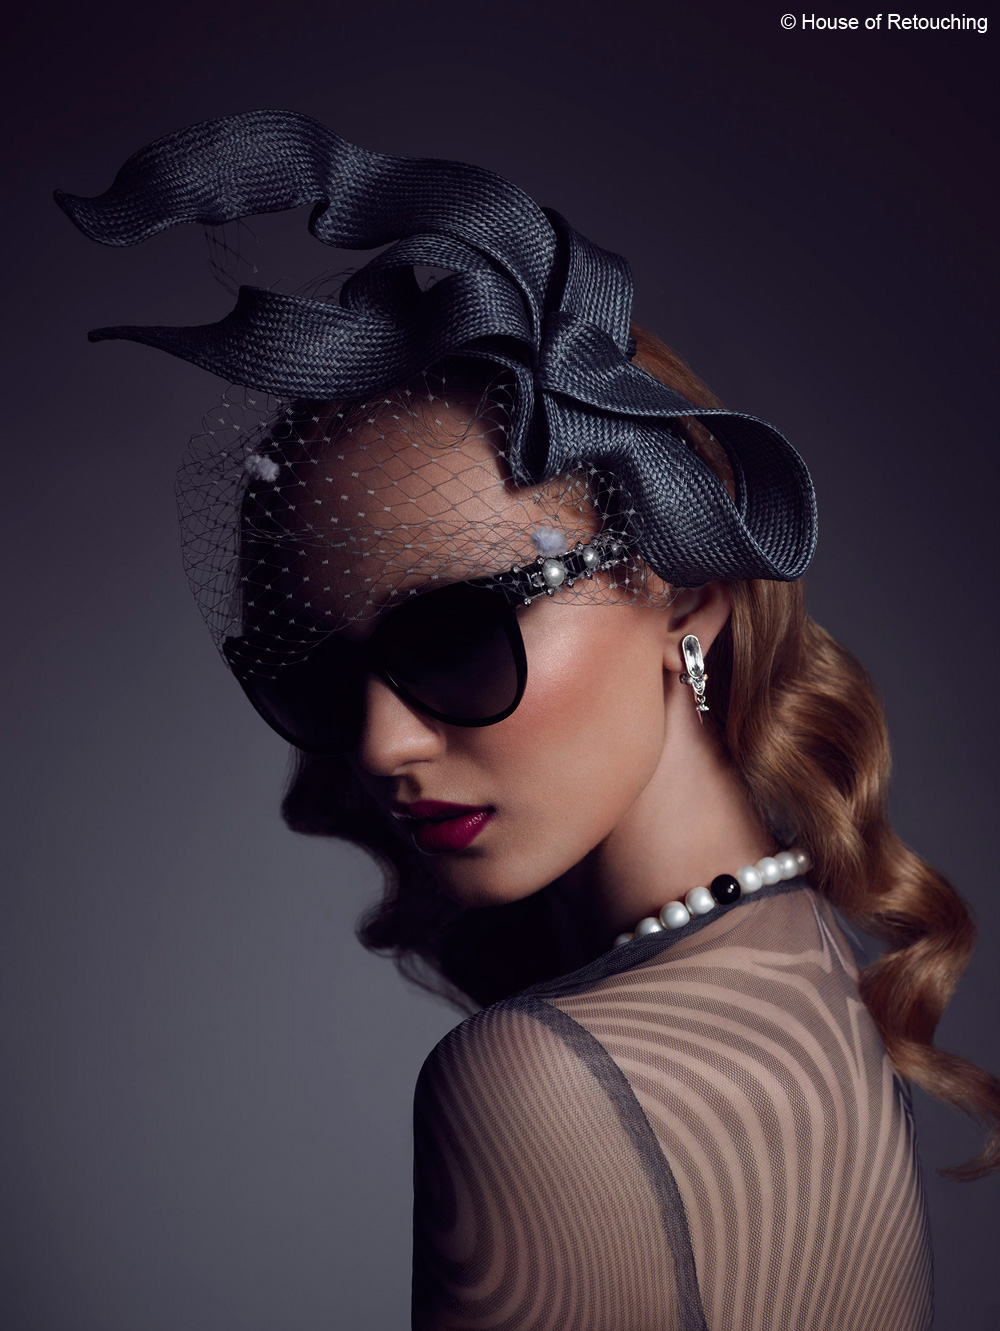
Looking at it from a grading point of view, the change done in Photoshop is marginal. The vast majority of the mood was created before processing and this is the reason why we put such a strong emphasis on proper grading in Capture One.
When working from the RAW file we have access to a very broad range of information (in this case it was 16bit RAW from the magnificent Phase One IQ280 digital back), and so the information is much more flexible. This approach of getting color right in Capture One has proven to give us better quality than when grading in Photoshop.
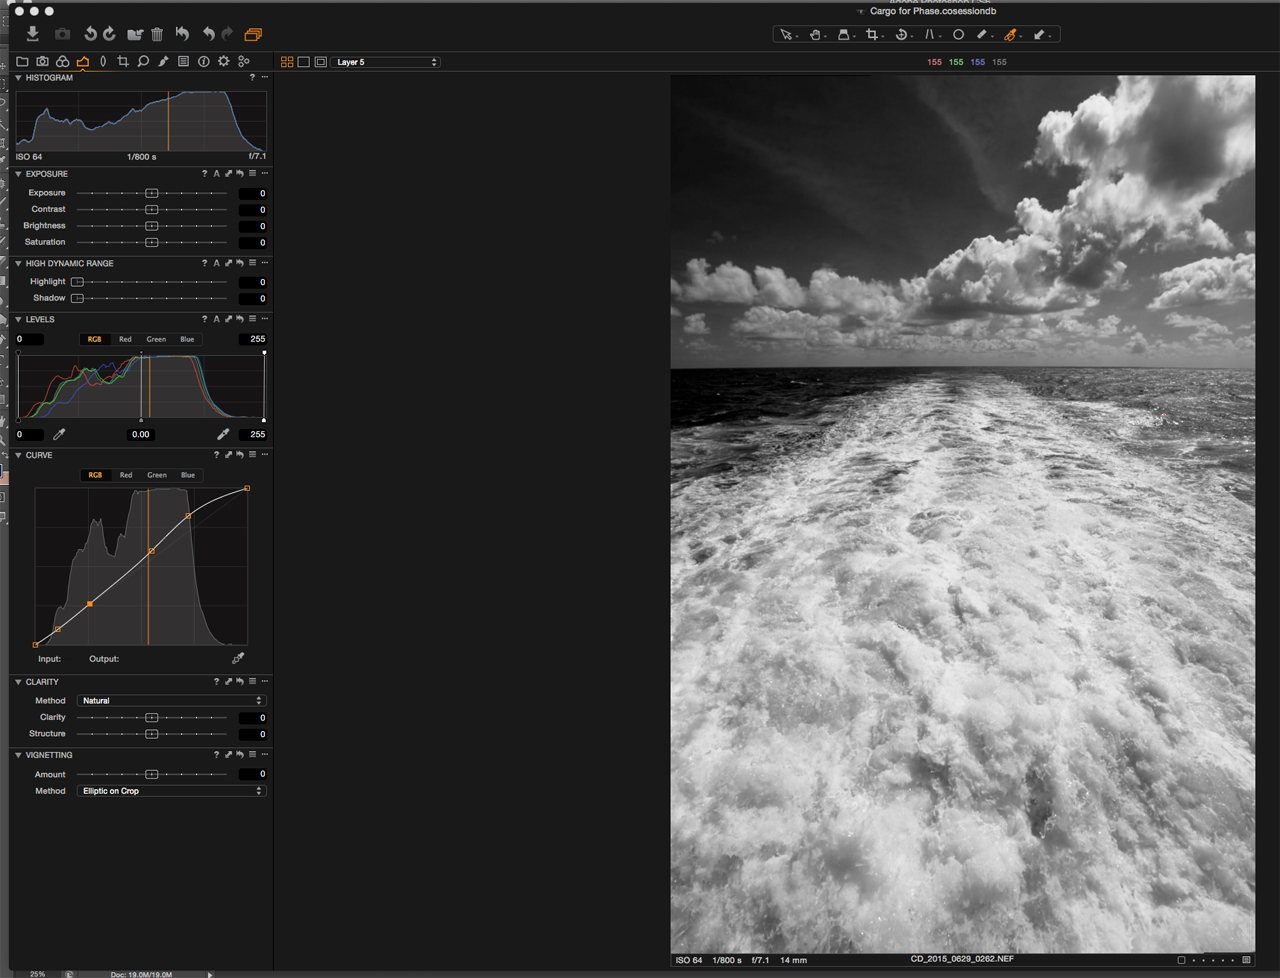
Black and white grading with Levels
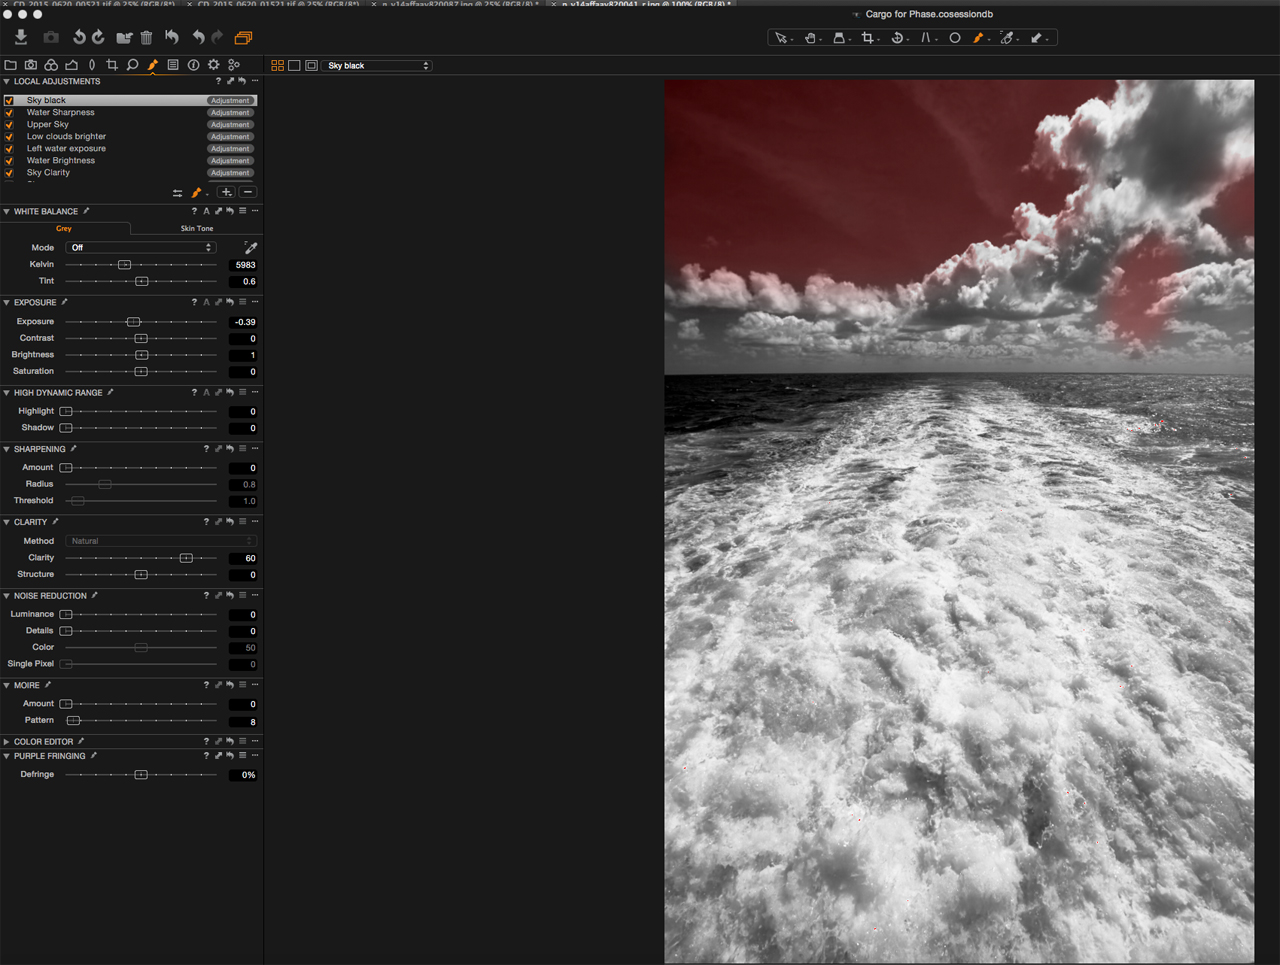
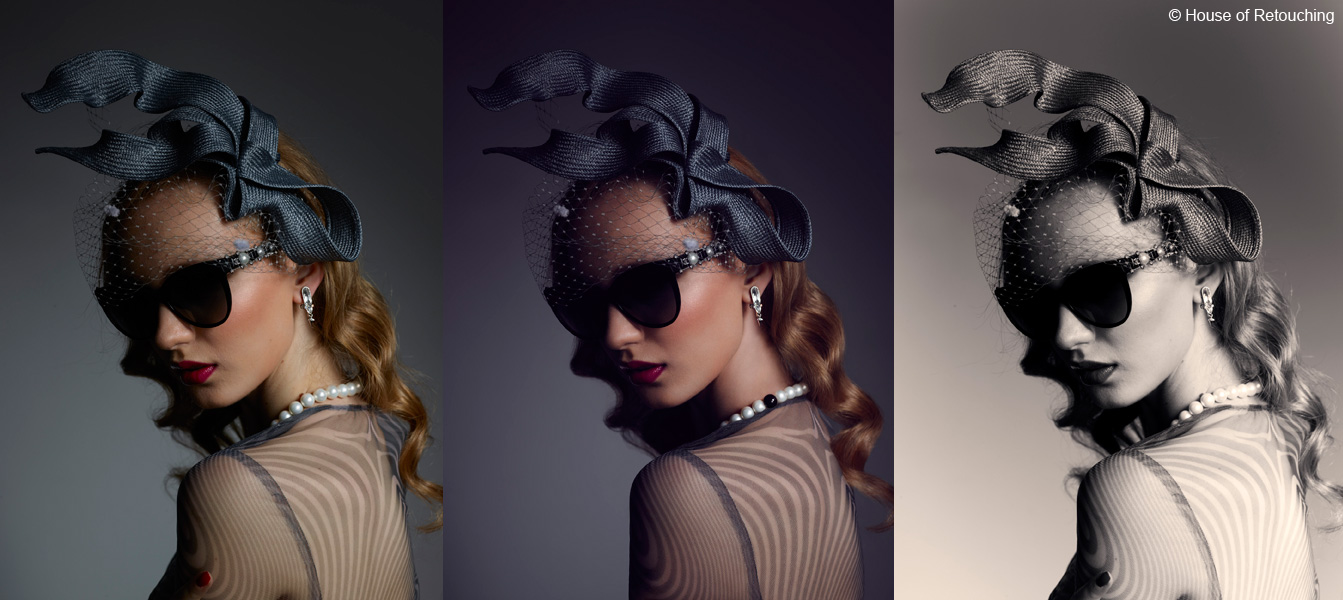
Let’s now look at another direction into which the image could have gone. We are big fans of doing black and white directly in Capture One. There are endless looks you can create when working on the RAW file. In this example we will again work with Levels in order not only to alter brightness and contrast, but also to add toning to our image.
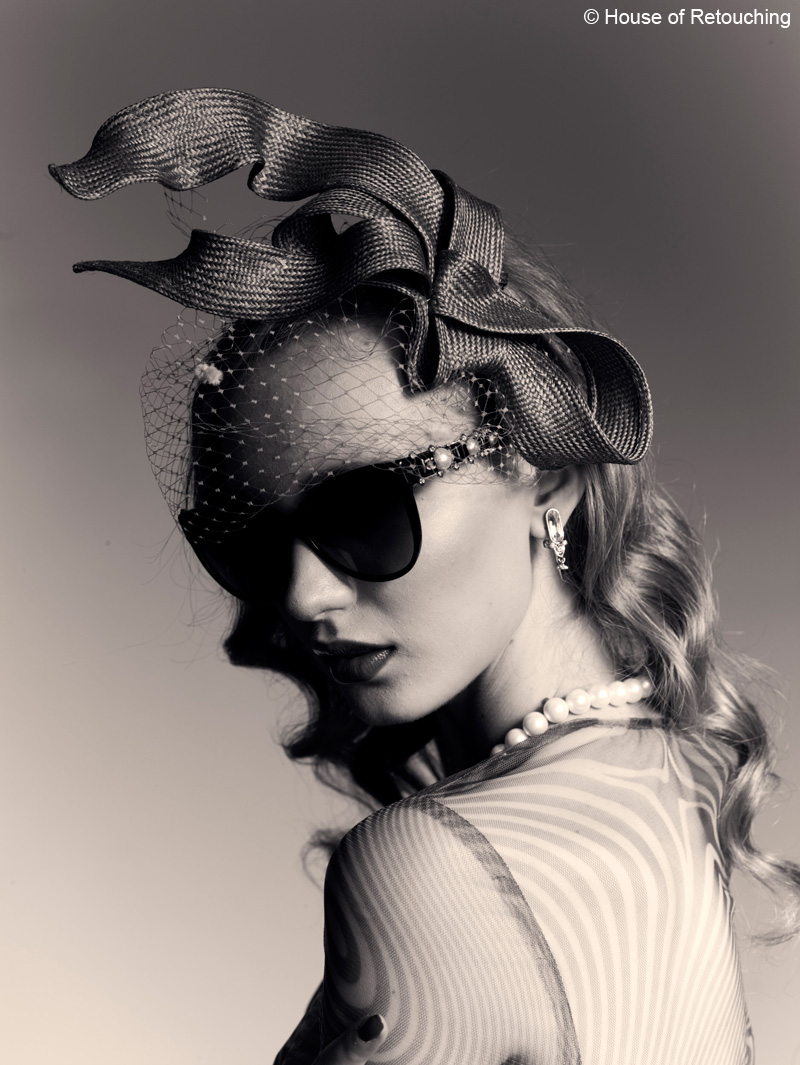
In this case the Levels are quite different as we are mainly altering the highlights to give the black and white photograph a more crispy look with more punch.
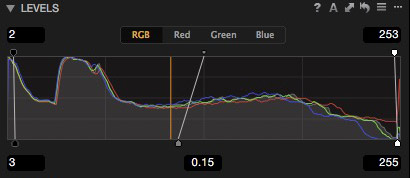
Apart from altering the black and white points in the main RGB controls we’ve also played around with the individual channels (which apart from changing contrast) gave us the ability to tone the image. This of course would not be possible if we would have had the black and white panel turned on, so we decided not to use it and only de-saturate using the standard slider.
Below you can see all other corrections used.
The possibilities of Capture One are endless when we combine the whole toolset, but limiting your options usually produces better results. As you saw we mainly used Levels for this image and yet the results are really varied.
Don’t be afraid to experiment and push your work in new directions. Make a number of Variants and experiment with different looks. Take a break, walk away from your screen for a few minutes and then pick the one that best suits your style (or delete them all and start again).
One more tip from our experience is to set colors in the morning. Later on in the day when the brain is tired we are never able to achieve the same result. We know that if you are new to Levels it might be a bit hard at the beginning, but it’s really worth it. We promise 😉
Best regards
Tomasz & Krzysztof
House of Retouching