There are numerous great reasons to make the switch from Adobe Lightroom to Capture One Pro, like the powerful tethering and session workflow or the superior color editing features. Luckily, there is no reason to worry about it being a time-consuming transition, because many key concepts are very familiar. With this two-part fast-track guide, you will learn about the most important differences and be ready to enjoy Capture One Pro from day one.
In the grand scheme of things, Capture One Pro and Lightroom work the same. All changes to your images are done non-destructively by saving the edits in a database and keeping track of where your original photos are stored. This familiarity makes it easy to import your existing Lightroom catalog into a new Capture One Pro-native catalog so that you can continue to work on your image collection right away.
Importing your Lightroom catalog is easy.
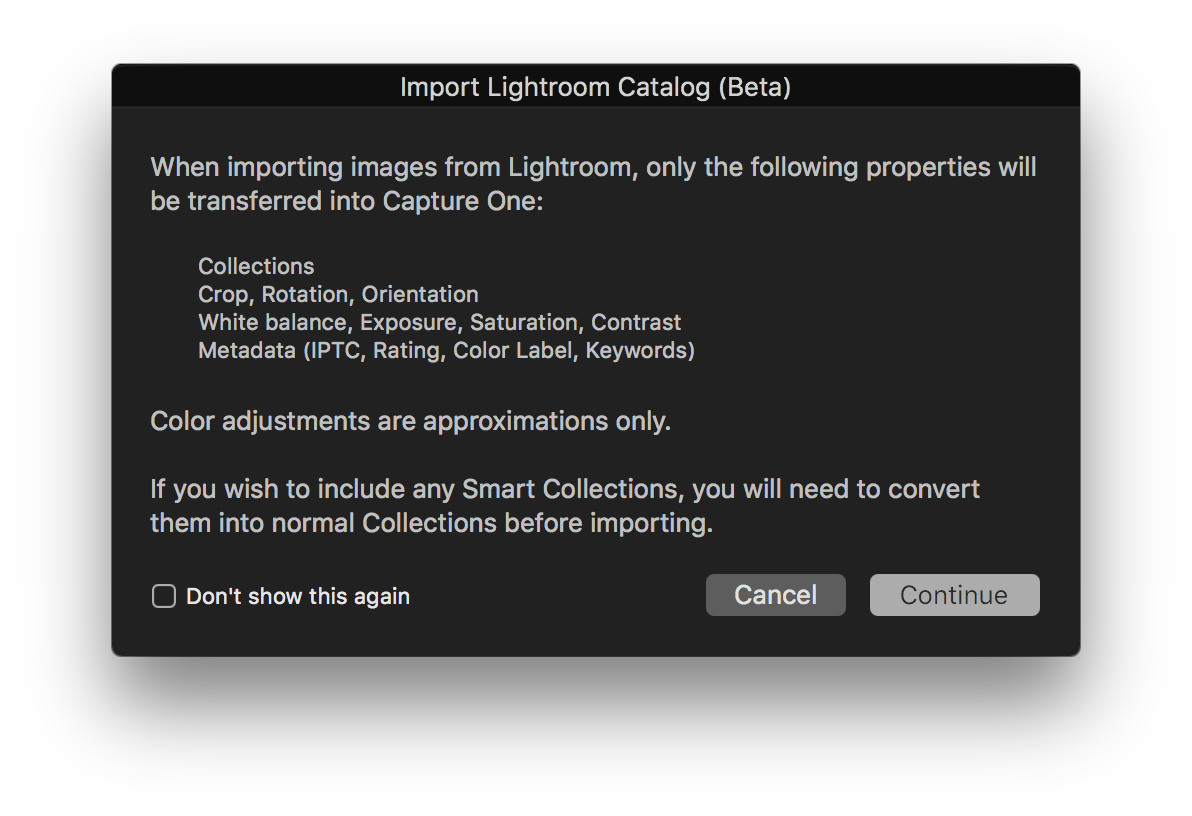
Just select File > Import Catalog > Lightroom Catalog…. Capture One Pro will import key metadata like Rating, Color Label, Keywords and IPTC data and some basic image editing like White Balance, Exposure and Saturation.
Working with a Session instead of a Catalog.
Unlike Lightroom, you also have the option of working with a Session instead of a Catalog. Sessions is the preferred workflow for a lot of photographers when working on a project, because a Session by default comes with a portable and autonomous folder structure.
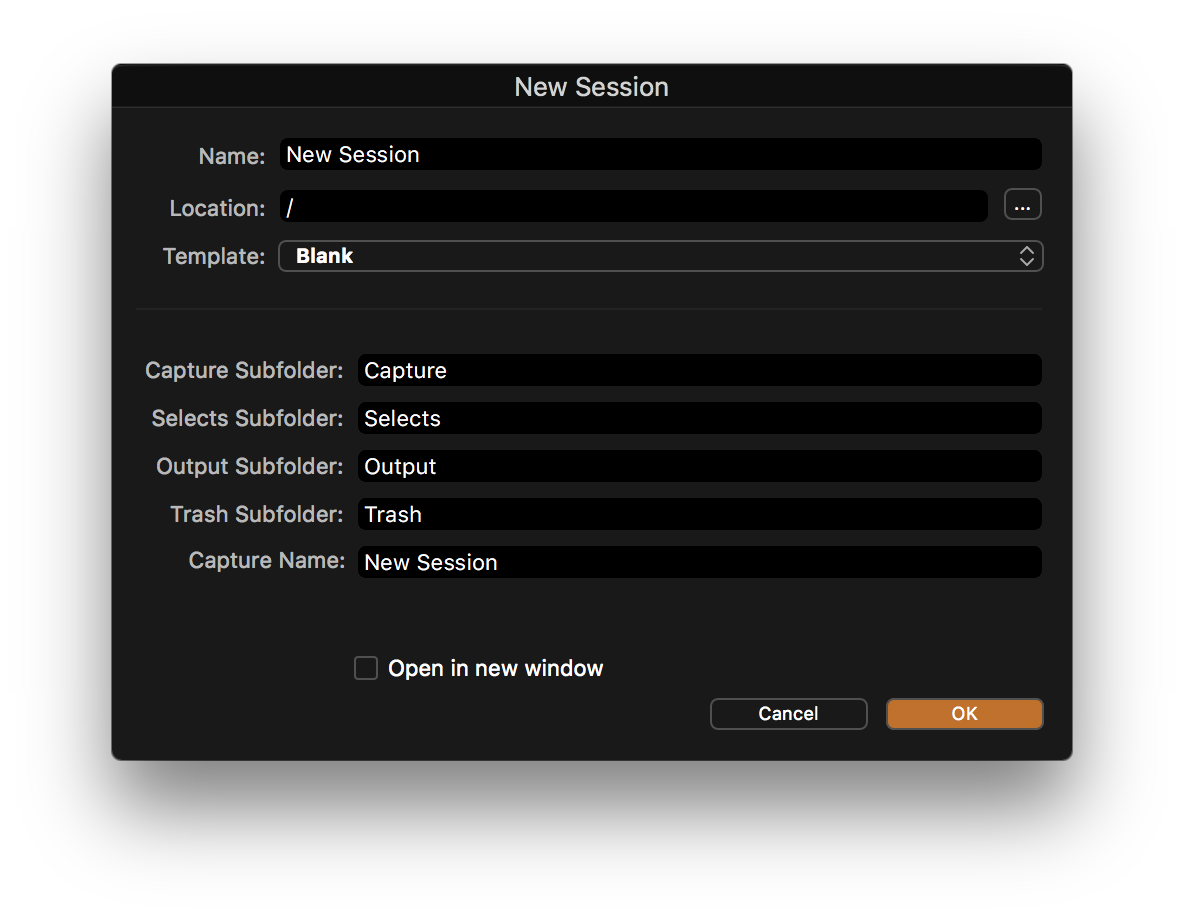
The key advantage is that everything from captured images to exported files are kept within the same main folder, and since all edits are stored in a database, you can import a Session into your main Catalog. That way you get the best of the fast Session workflow and the grand portfolio overview of the Catalog. It is also worth mentioning that you can have more than just one Catalog or Session open at any given time, giving you full flexibility.
Customize to your heart’s content
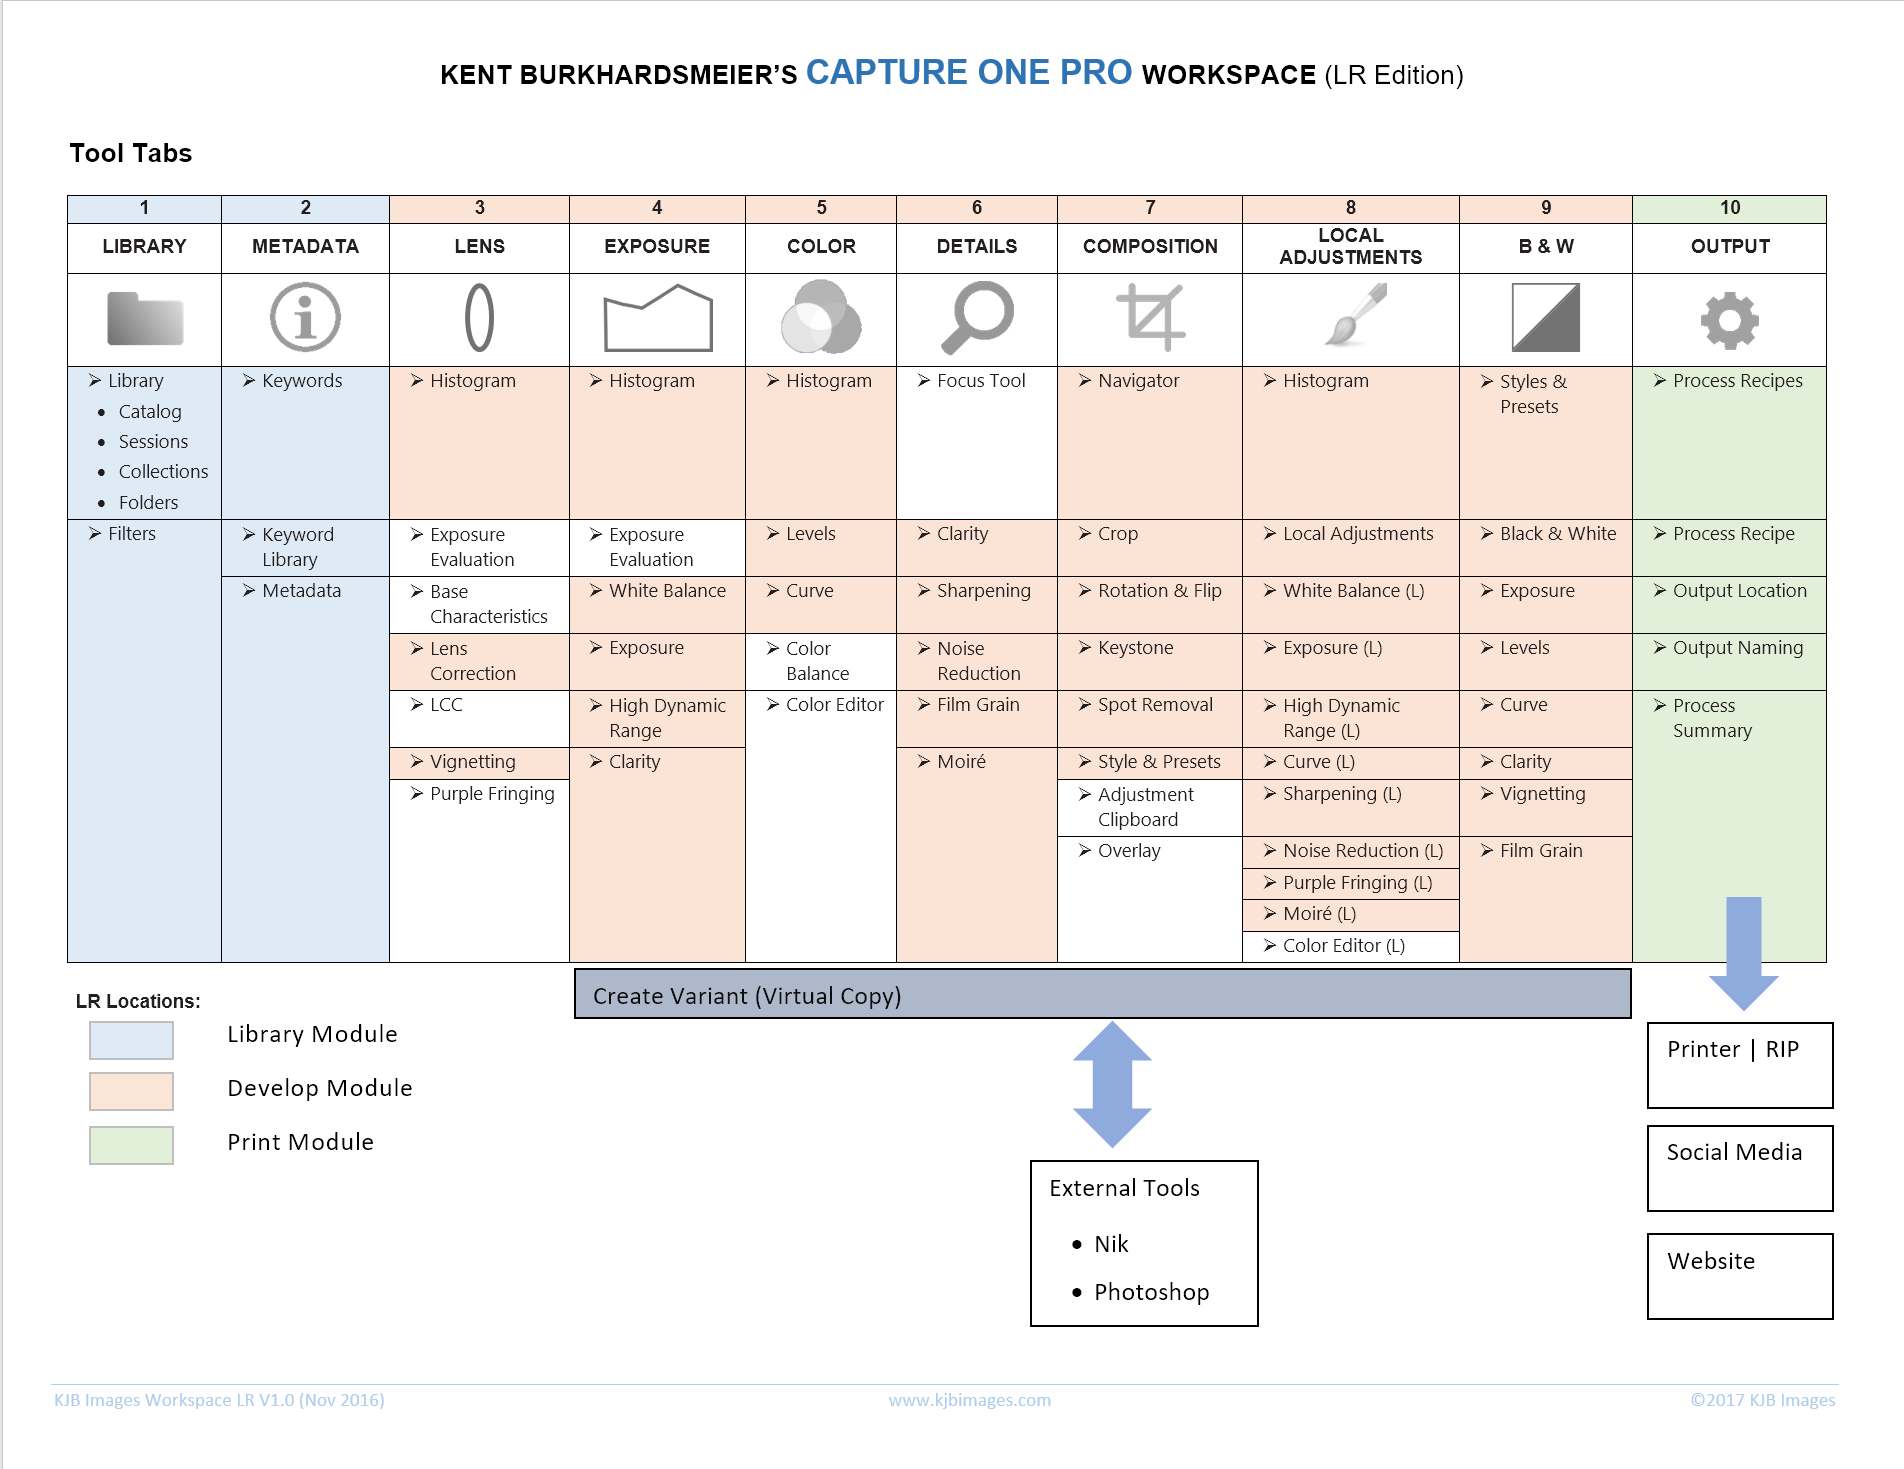
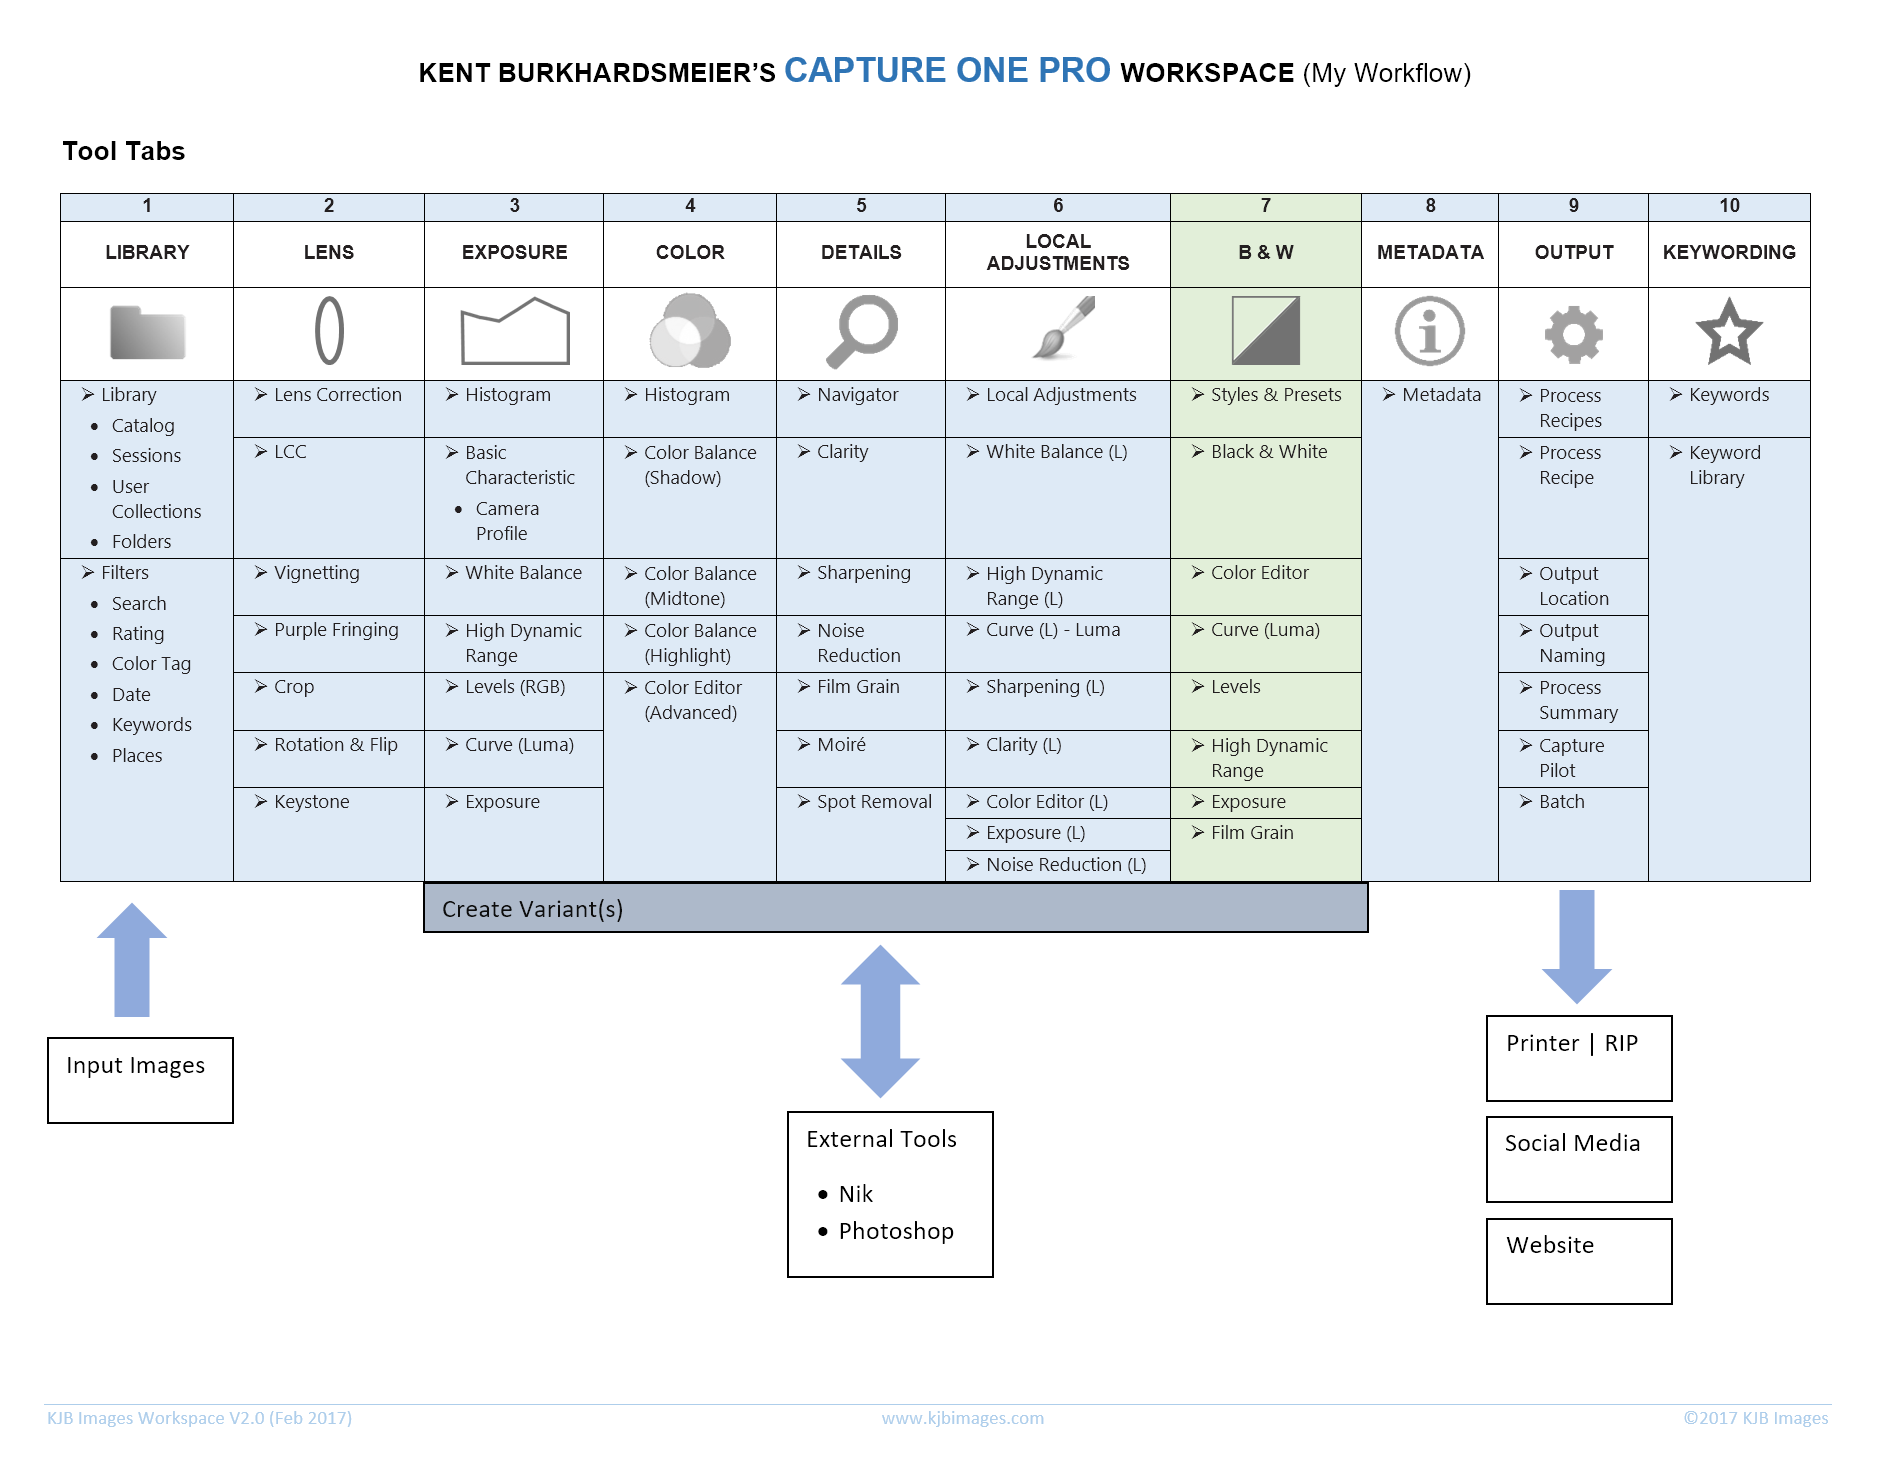
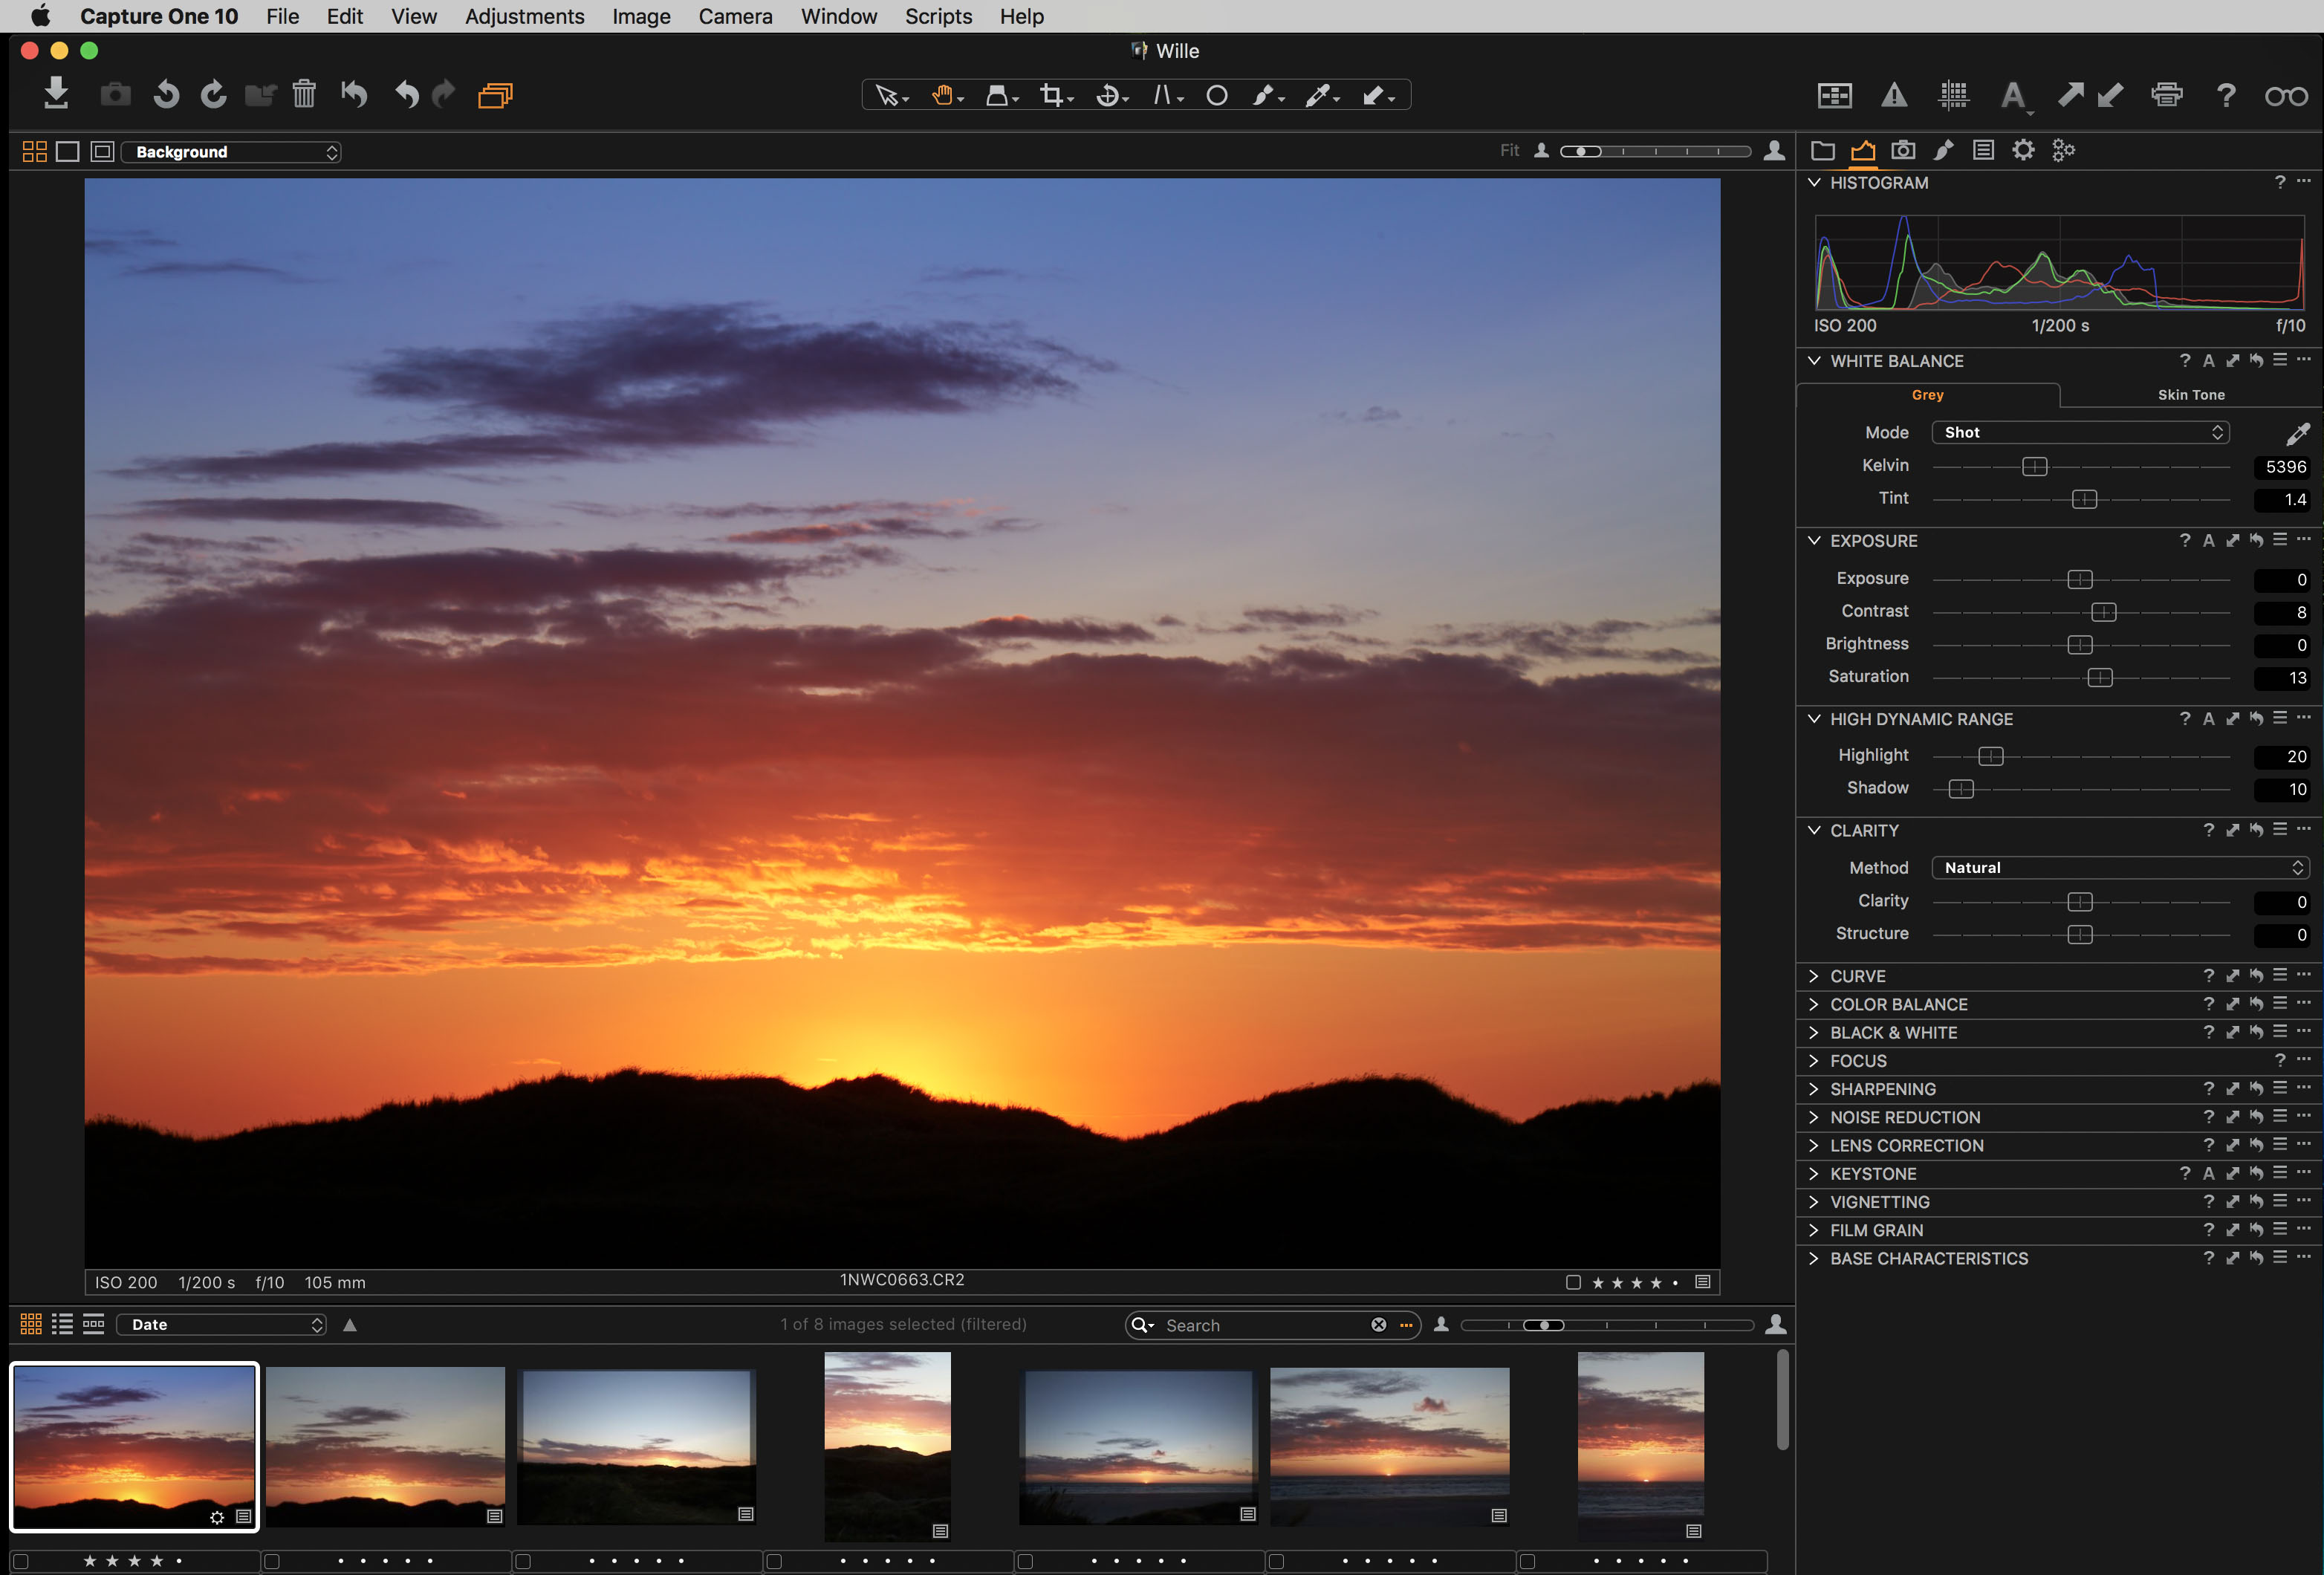
The biggest change that you will experience as a former Lightroom user is arguably the user interface. Gone are the different modules like Library and Develop where you can only do specific things. In Capture One Pro you have the freedom to do everything you want to do on the selected images because all Tools can be used at any given time.
Think of the way Photoshop is handling things with a toolbar and several selectable panels, and you get the idea. In Capture One Pro, panels are called Tools, and they are grouped in several Tabs to keep them organized.
If you want to get a quick and smooth transition, Phase One has built a Workplace that will make you feel right at home as a former Lightroom user. Just select Window > Workspace > Migration.
Feeling right at home with the Migration Workspace
The cool thing to keep in mind about Capture One Pro is that all the Tools can be moved around as you wish. This gives you the possibility to set up a Tab with only those Tools you use the most. For example, you might want to move the White Balance Tool to the top of the Exposure Tab to mimic the way Lightroom is setup. Just right-click within a given Tab to add or remove Tools. It gets even better than that, because you can open any Tool as a floating palette, just go to Window and Create Floating Tool – or simply drag any Tool out from the Tool Tab.

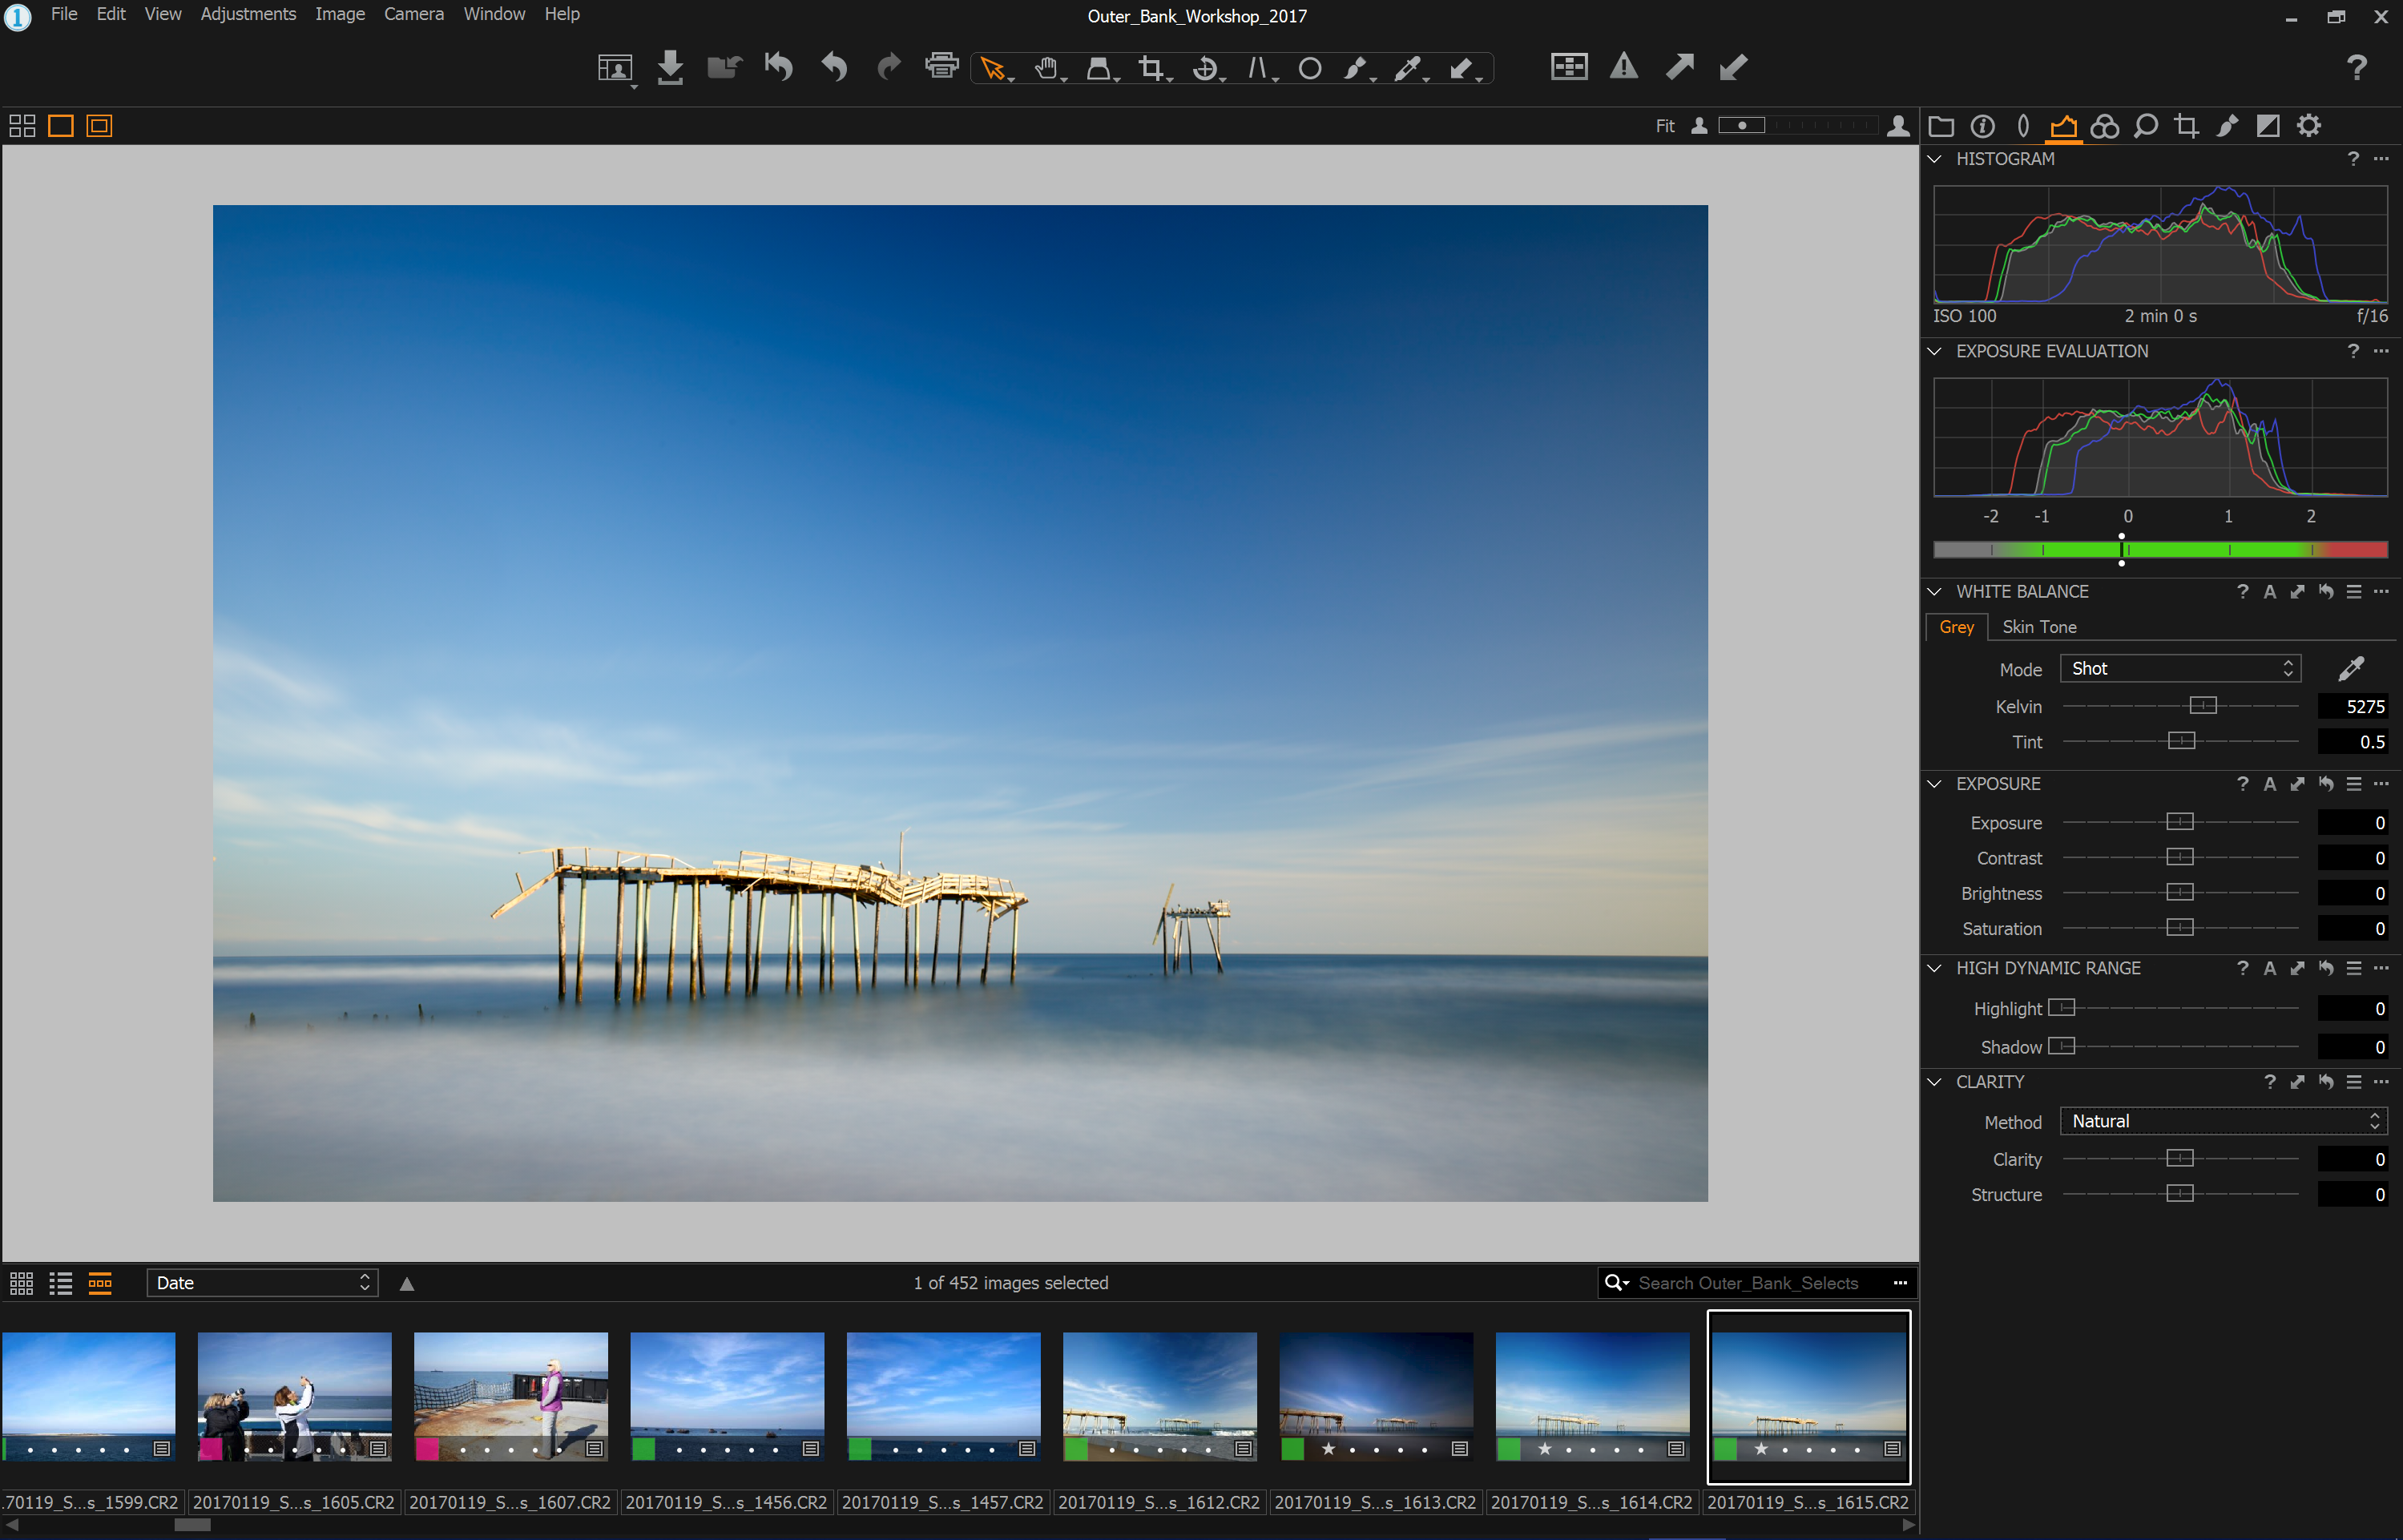
A floating Tool gives you precise control over subtle adjustments.
This can be an extremely useful feature, because any Tool can be sized larger. Just imagine working with the precise control a bigger Curve Tool or Color Editor Tool will grant you. The flexibility also gives you the option to have more than one version of the same Tool open, so you can, for example, have access to the Red, Green and Blue channels on the Curve Tool or Levels Tool simultaneously. As a nice little bonus, you can choose to place the Tabs with Tools in either the left or right side of the screen. You find that option in the View Menu, which will also show you the shortcut keys to show and hide the Browser and the Viewer amongst other commands.
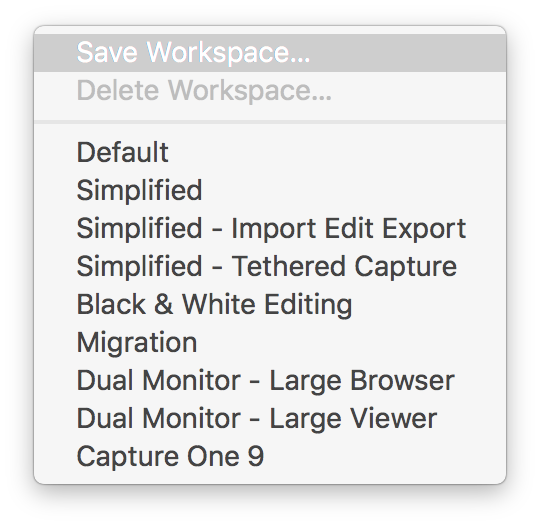
Save the Workspace that suits you.
Once you can have customized Capture One Pro to your liking, you should take advantage of the ability to save your personal workspace under Window > Workspace.
One last, but very nice feature, is the ability to customize keyboard shortcuts. So, if you have trouble giving up on certain shortcuts from the Lightroom days, you might want to check whether those can be applied to an equivalent command in Capture One Pro.
Organize and sorting
By default, Capture One Pro always has the Viewer window open, so if you want to have the equivalent to the grid of thumbnails in the Library module from Lightroom, just hide it by pressing Alt + Command + V on the Mac or Alt + Control + V on Windows.
You need to be aware that Capture One Pro does not use the Pick or Reject commands, so it is recommended to use Color Tags instead. Most use Green for Pick and Red for Reject.
Another minor difference that might confuse people coming from Lightroom is that Capture One Pro doesn’t differentiate between an original imported file and a Virtual Copy of it – all images are called a Variant. They are the same, the wording is just different. When you want to create a virtual copy in Capture One Pro, you can either create a New Variant (without any adjustments) or a Clone Variant that copies all the adjustments from the selected image.
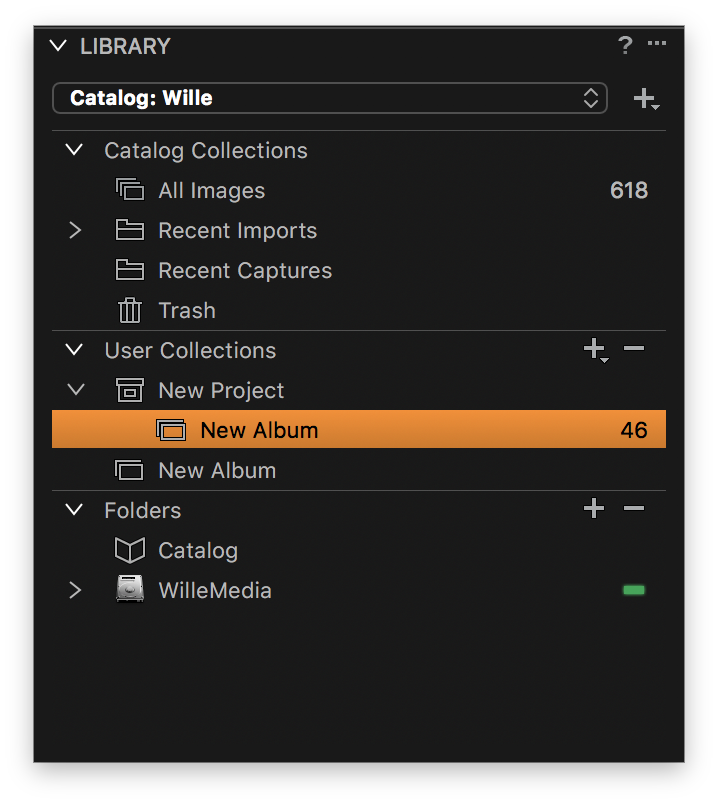
A Project needs an Album to contain images.
You have the same ability to organize your images in Album and Smart Album under User Collections in the Library Tab. The Project feature needs a bit of an explanation, however. It is a sort of a container that you create when you want to limit any search and filtering to images that are contained within that specific Project. Note that it cannot hold any images itself, you must create an Album or Smart Album first it put your collection into. Otherwise you can use a Group if you just want to organize many Albums.
There is one cool feature that you don’t want to miss out on when you are doing your initial assessment of your images. If you select View > Show Focus Mask, Capture One Pro will analyze the images and mark the areas in focus with a color. This will make it a breeze to reject those photos that are out of focus.
At first glance, the ability to filter through your collection of images based on metadata might seem a bit limited with the Filters Tool. Don’t despair, as there actually are a long list of filter options to choose from.
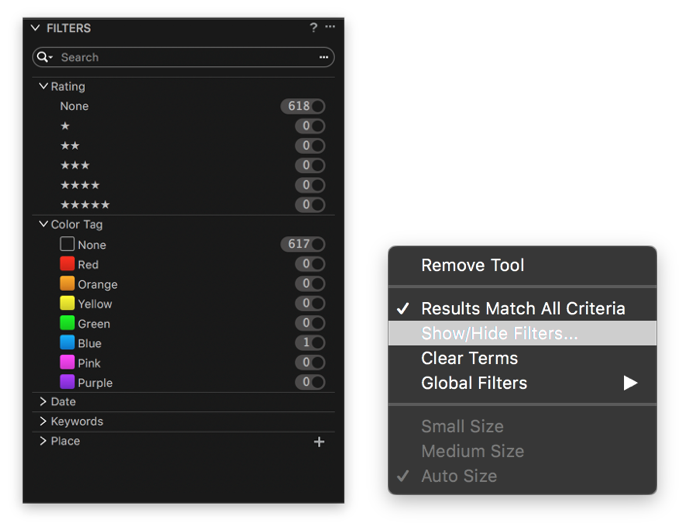
Adding additional Filters.
Just click on the three dots, select Show/Hide Filters… and mark any criteria that you want to add to the Filters tool. If you want to select more than one criteria in the Filters Tool – like a certain star rating from a certain date – just hold down Command (Mac) or Control (Windows) to enable several simultaneously.
Likewise, the Advanced Search dialogue box has a very large list of search criteria that makes it easy to narrow down exactly what you’re looking for. A very convenient feature that you should know about is the ability to create a Smart Album based on the chosen search criteria, or an Album based on the selected images right from the dialogue box.
The Compare View and Survey View from Lightroom are straightforward to enable. If you select more than one image, they will all be displayed in the Viewer. It can display up to eleven photos at once.
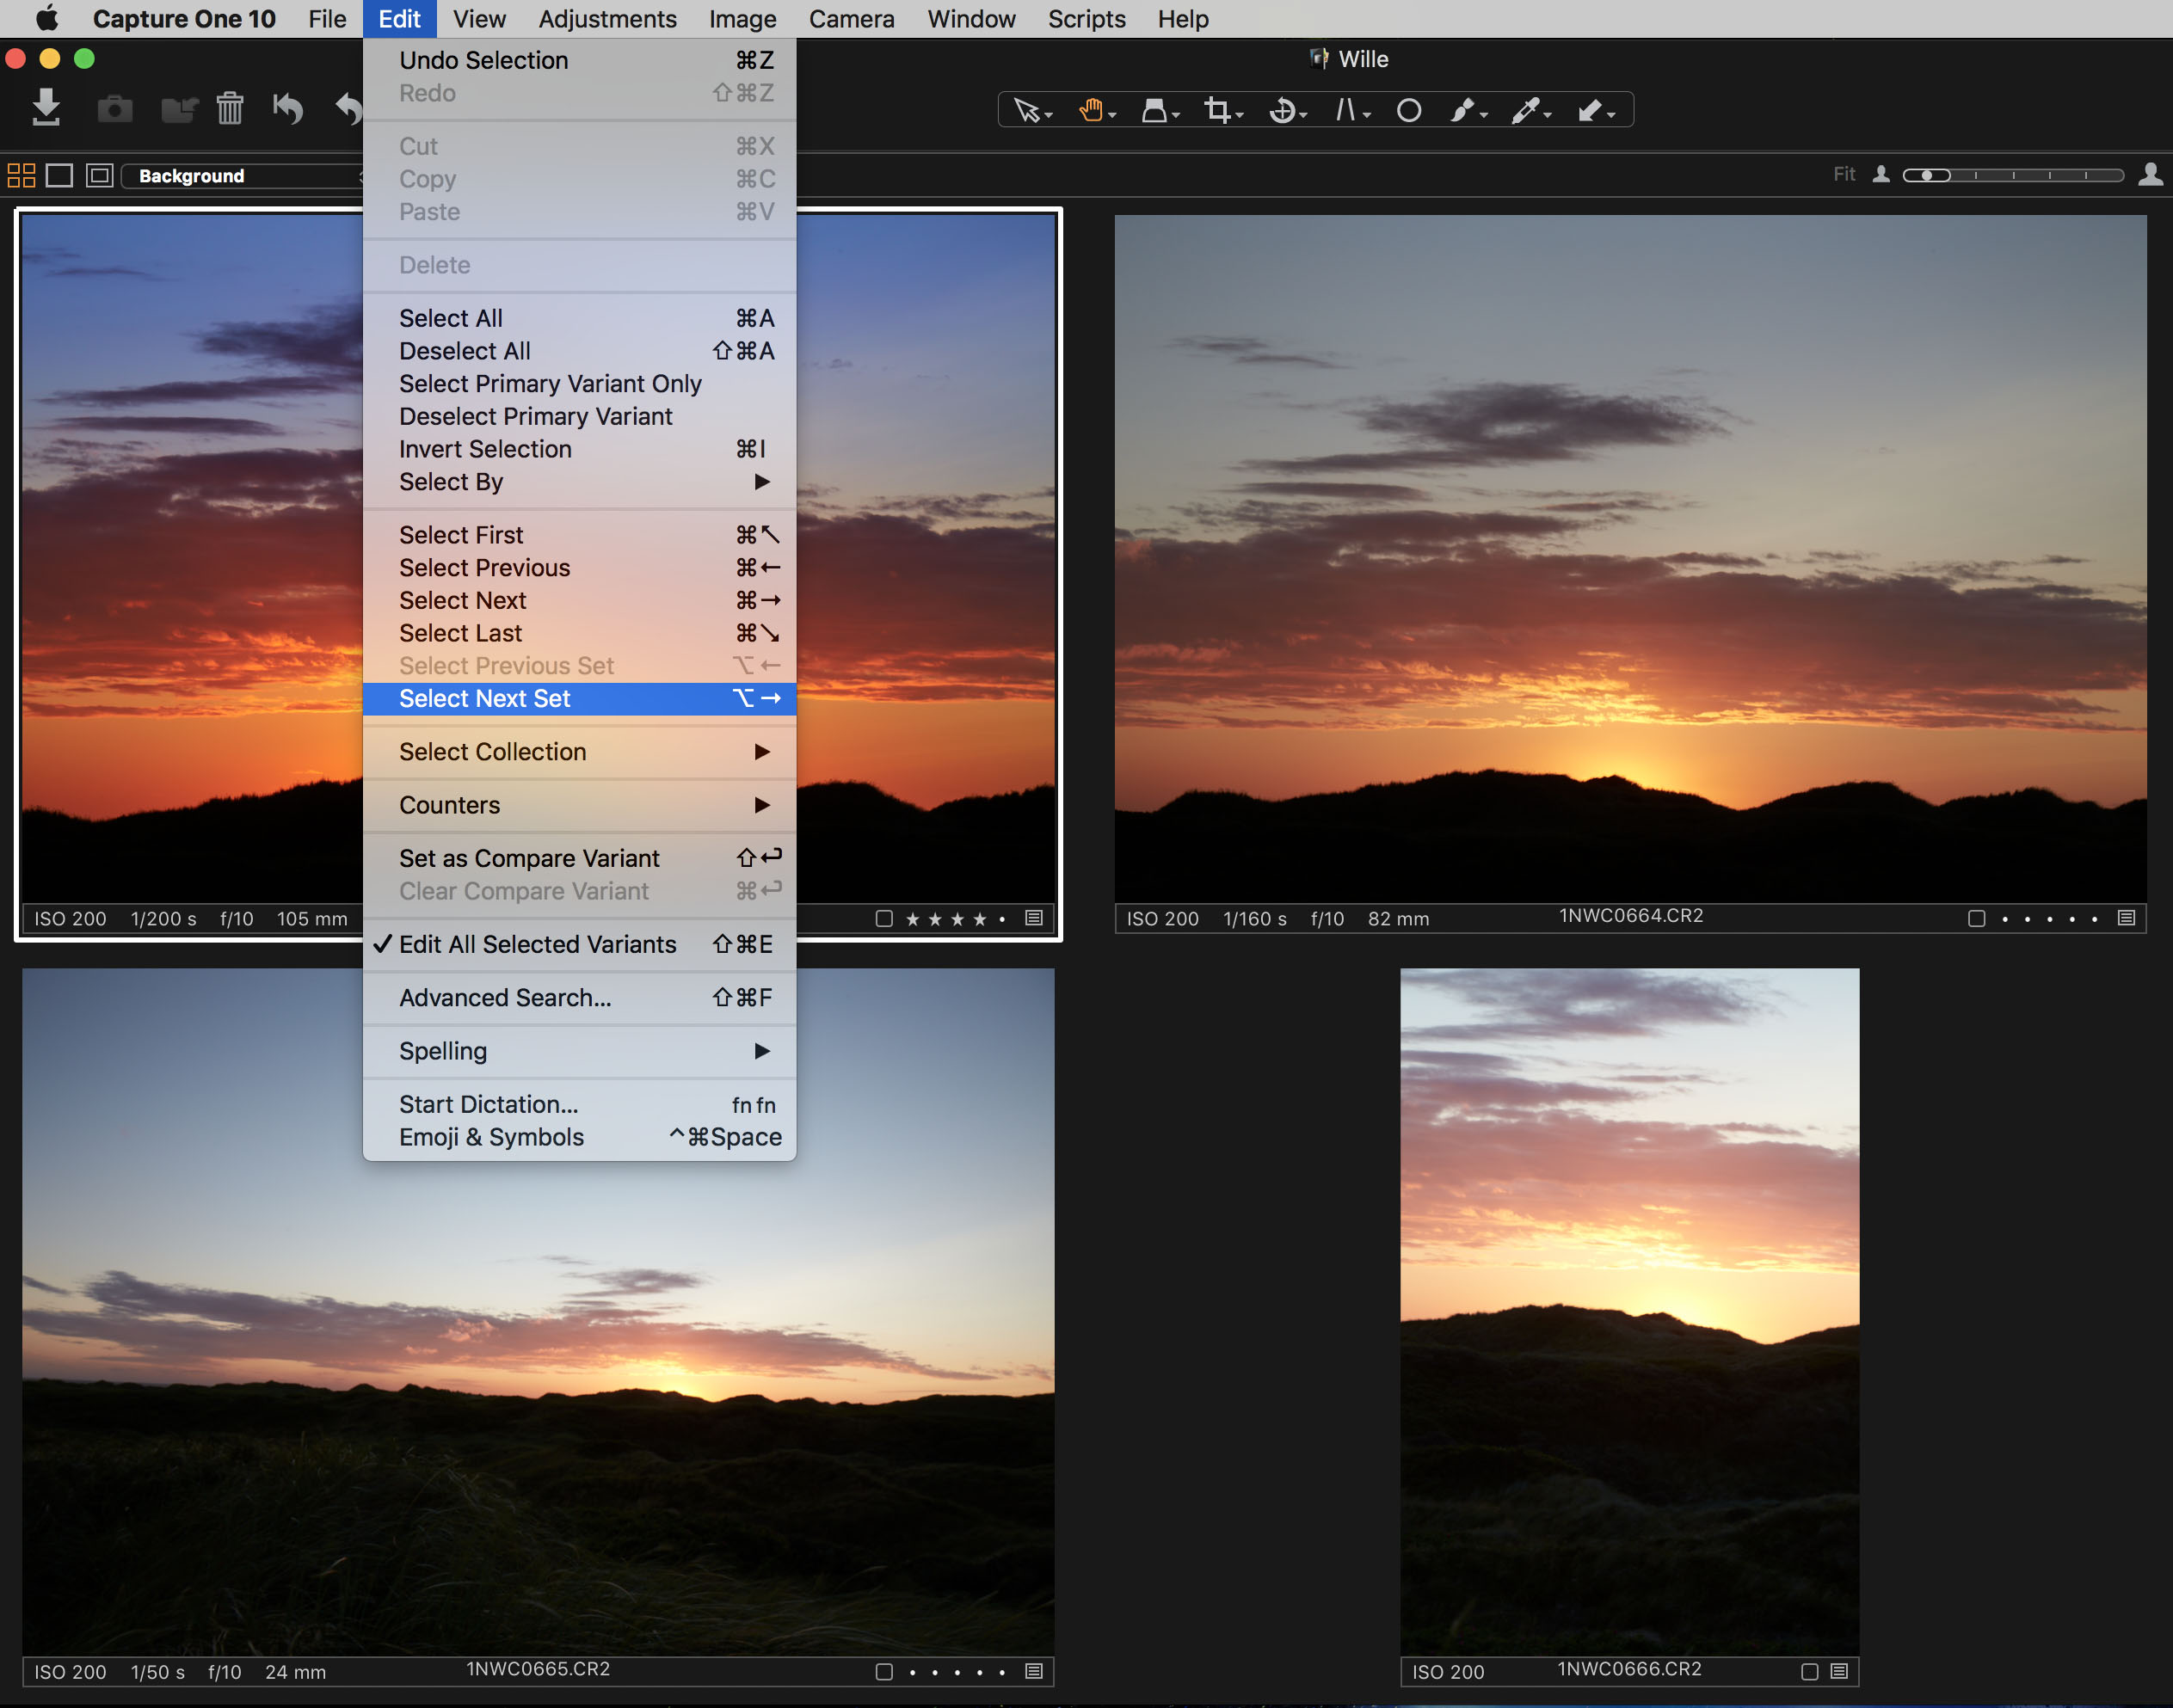
Taking advantage of the Next Set feature.
A nice little feature is that you can select, for example, four images and move to the next set of four images by selecting Edit > Select Next set. That is very handy way of assessing many images. If you instead want to select one favorite image to compare other candidates against, you simply select Edit > Set as Compare Variant.
Adjustments, Presets and Styles
Capture One Pro has the same expansive ability as Lightroom to copy metadata and image adjustments from one image to several other images. But there are a couple of subtle differences you need to know. The most important one is that you need to enable the option Edit All Selected Variants in order to make adjustments to all of the selected images and not only the primary selected image. You do this by either selecting Edit > Edit All Selected Variants, or by clicking on the Edit Selected variants icon so it turns orange.

Need to know: The Edit Selected Variants Toggle.
If you want to copy the Adjustments from a certain Tool, you click on small double arrow on top row. You then click Apply to copy the selected adjustments to the other images.
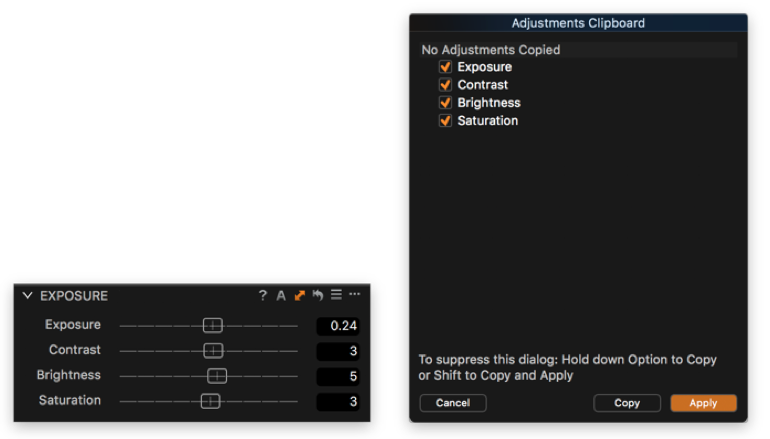
Copying specific Adjustments.
If you instead want to copy adjustments from several Tools, then click on Copy and they will be transferred to the Adjustment Clipboard which is probably more familiar to you as a Lightroom user. Under the Adjustments Tab you can select which Adjustments you want to copy, and then hit Apply to copy them all to the selected images.
You also have the option to save certain adjustments for later use, but it’s important to note that Capture One Pro distinguishes between Presets and Styles. A Preset is saved per Tool, while you can think of a Style as a collection of several Presets.
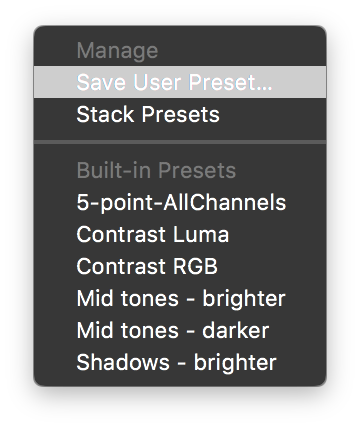
If you want to save the adjustments from a Tool, just click on the three lines icon and choose Save User Preset…. In the same sub-menu, you will also find built-in Presets depending on the Tool in question.
In Part II of the Fast track guide from Lightroom to Capture One Pro, we will look at all the key differences there are regarding image editing. You’ll also get a few tips on how to get the best out of some of the most interesting Tools on Capture One Pro.