NOTE: This article discusses an outdated version of Capture One. To learn more about our latest version, click here.
Introduction
In today’s world where images are output to a variety of media and client changes are commonplace, an efficient and flexible workflow is just as important as the quality of your final image. My goal with this post is to give you an overview of the steps I take at various points in the image workflow – from tethered shooting down the final image export – and to explain where and how Capture One Pro fits into each of them. At a high level, my workflow typically follows four steps:
- Tethered capture into Capture One Pro
- Raw processing in Capture One Pro
- Skin retouching in Adobe Photoshop
- Image output using PSD roundtrip in Capture One Pro
The overall workflow will vary depending on the nature of the images being shot, but we’ll note those differences as we work through each of these steps.
You might want to follow along in Capture One as you read through. Download a free 30-day trial of Capture One if you don’t already own it.
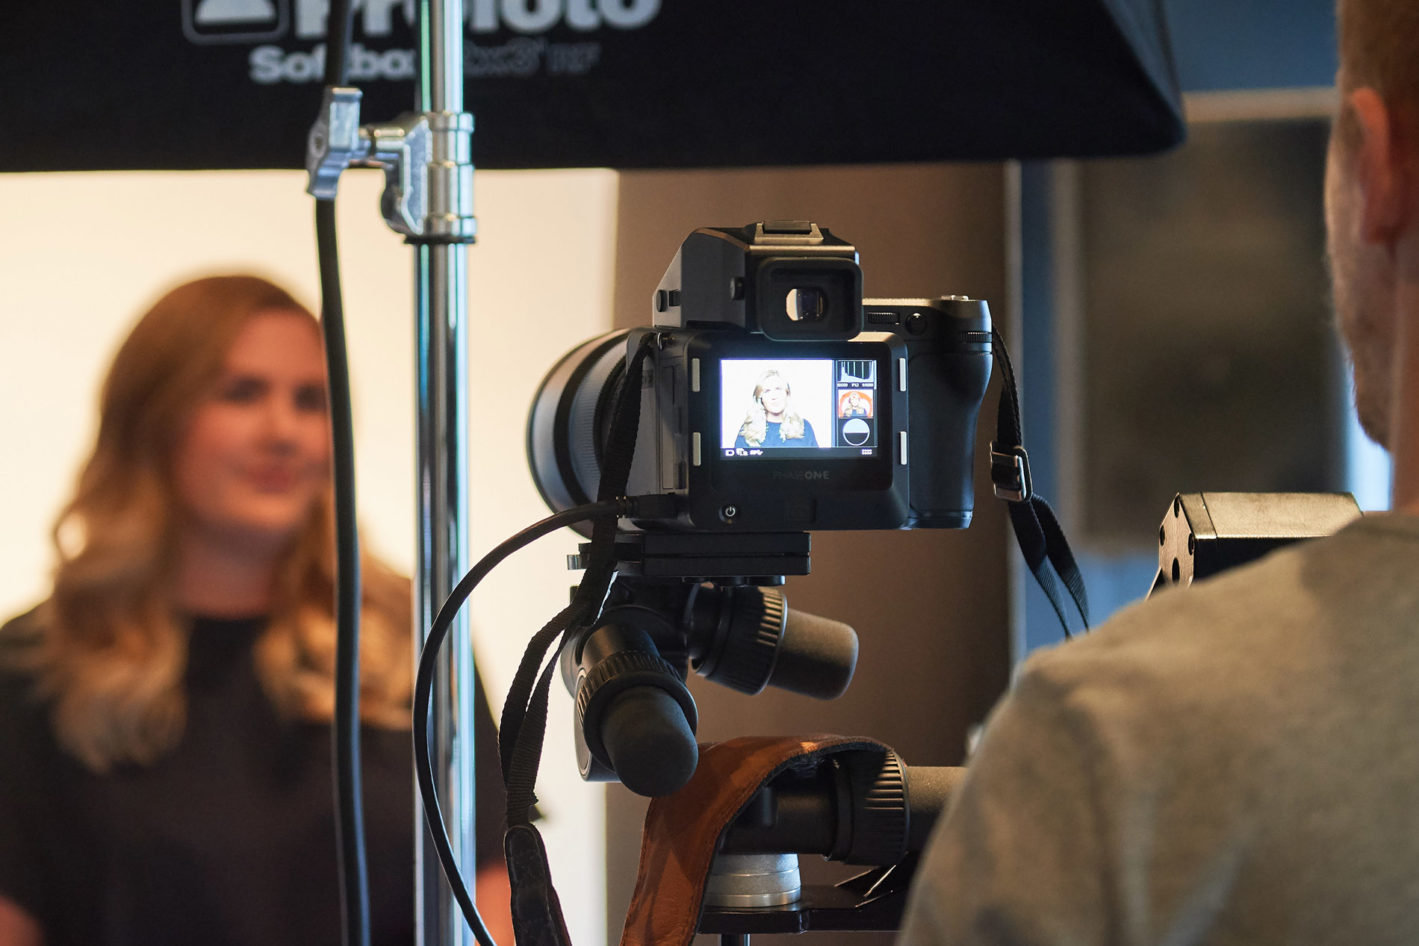
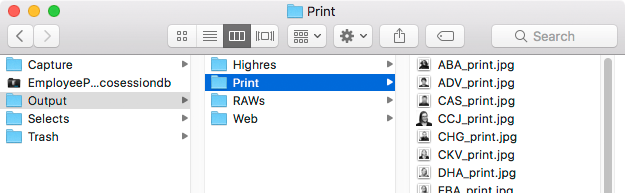
Tethered capture
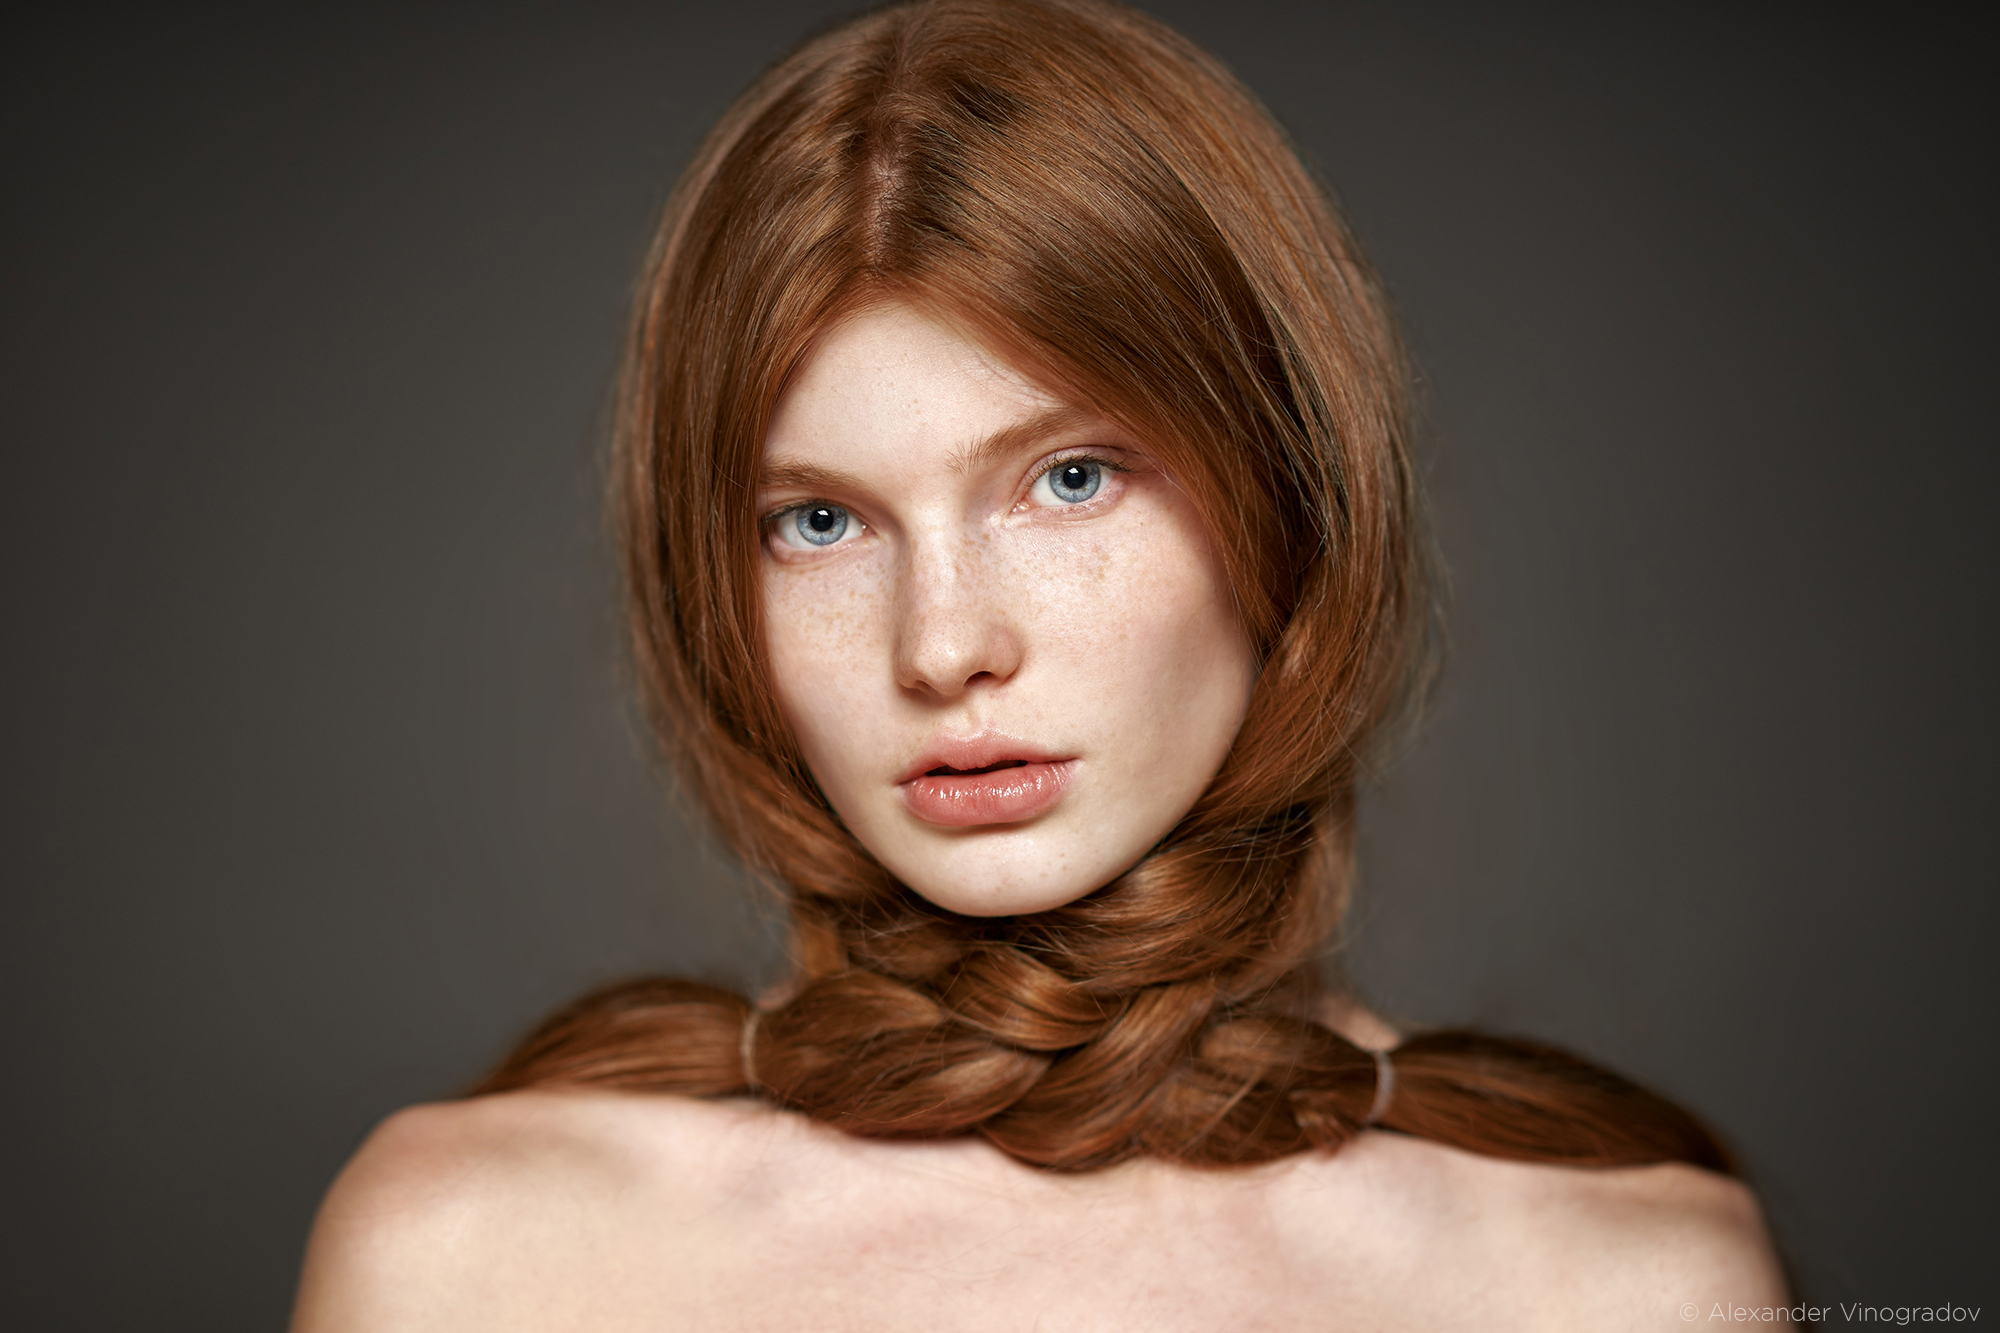
There are cases where I shoot tethered and cases where I don’t. For model tests or quick portrait sessions I usually shoot to the card and import and backup at the end of the shoot, while for commercial, e-commerce, or editorial work I almost always shoot tethered. For tethered shooting, my adjustments are geared towards achieving a look that as closely resembles the final output as is possible – excluding of course the actual skin retouching portion of the work. The idea at this stage is allowing the team to see your vision for the final image and also get a sense that your lighting, the styling, makeup, etc. are reading in camera the way the team wants them to. It’s also a great check for image cohesion if you’re shooting an editorial as it allows you to place images from different looks side by side and ensure that the look is consistent across the shoot. Naturally, since we’re working with a series of images, the adjustments you make can’t be overly localized, as subject position or composition will vary from frame to frame, so the adjustments we make need to work off of reference colors or luminosities. At the tethered stage, I tend to use a rather wide gamut of tools, so a strong familiarity with Capture One Pro is quite important here – and one of the reasons why a digital tech on set is beneficial – so I’ll focus on just the most common ones I use.
Exposure and High Dynamic Range
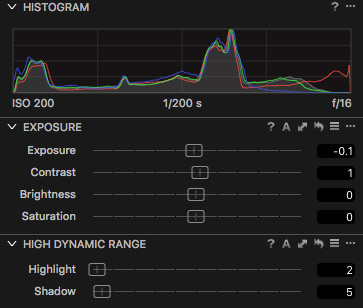
As a first step, I generally want to dial in my exposure to give the desired baseline luminosity level that sets the mood of the image. Most of this will be done in camera, but I’ll make small adjustments where needed. For example, if I’m shooting something that has deep shadows, I may over expose by 1/3 of a stop and reign in the highlights with Capture One Pro to retain more shadow detail if I need it. One of the advantages of shooting tethered is that it allows you to experiment a bit with such scenarios and ensure that you have the detail in the highlights and shadows you require. I may also play with the shadow and highlight sliders although, for portrait work, they should be used sparingly or it can result in a look that’s not overly natural. If you need to push these values greatly one way or the other, then odds are some lighting adjustments should instead be made.
White Balance
As expected, along with exposure comes the adjustment of the white balance as this can have a profound effect on the look of the image and our perception of the image. Often, once the white balance is adjusted – particularly drastic adjustments – I’ll find myself going back to the exposure section to make some further refinements. White balance is best taken off a gray card although I sometimes specify a custom white balance if I’m going for a cooler look or working with gels.
Levels and Curves
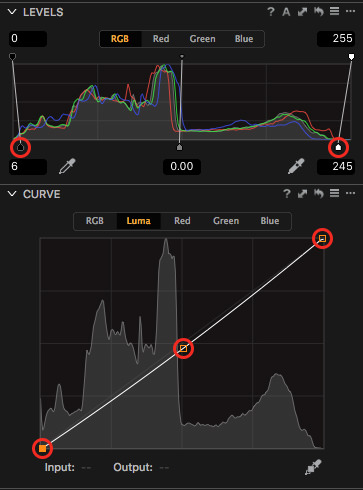
Once I’ve verified that my baseline color and exposure are correct and I have the necessary dynamic range, I can then begin to style the image. For adjusting contrast, I tend to omit the contrast slider and work with the levels and curves tools instead. For levels, I frequently grab the points on the highlight and shadow ends and bring them inwards to stretch the histogram outwards. This deepens the shadows and makes the highlights pop nicely. Similarly (or in combination) we can play with the points along the Luma curve to darken or brighten mid-tones or adjust the highlights or shadows as desired. I also frequently use the curves tool for performing color based grading by targeting reds, greens or blues and adjusting points along the curve.
Color Editor
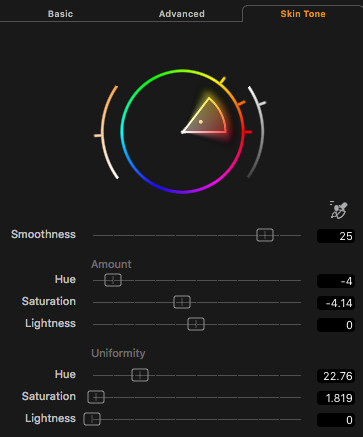
I make fairly extensive use of the color editor during tethered shooting as it allows me to make precise and targeted adjustments on specific color ranges. The most common way I use it is in the Skin Tone tab to target and adjust the model’s skin. Using the Uniformity sliders allow me to balance out the skin tone across the image while the hue and saturation sliders let me dial it to the tone I want. The degree of the hue uniformity adjustment varies from shoot to shoot, but I would refrain from pushing this too far as it can start to blend lip tones, clothing or other makeup colors that are close to the skin tone. The saturation uniformity slider should be used sparingly, as saturation will naturally vary depending on luminosity so drastic changes can lead to a flat looking image.
Another great way to take advantage of the tool is in the Basic and Advanced tabs which allow me to target specific colors and adjust them to my liking. If for example, I have a light blue seamless background, I can use the advanced tab to sample the background color and make adjustments to the hue and saturation of it to give me something more pleasing.
Color Balance
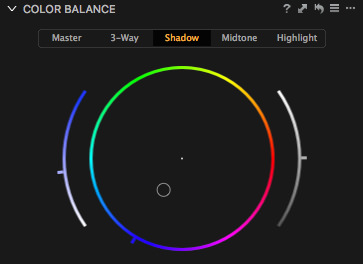
The color balance tool is somewhat similar to adjusting luminosities within the various curve channels but in a much more user-friendly and controlled interface. It allows me to target a specific luminosity range – be it shadows, highlights or mid-tones – and inject a particular color into it. From here I can control the extent to which that color is applied to the luminosity range as well as adjusting the black point within it. I typically focus only on the highlight and shadow ranges and apply complementary colors between them.
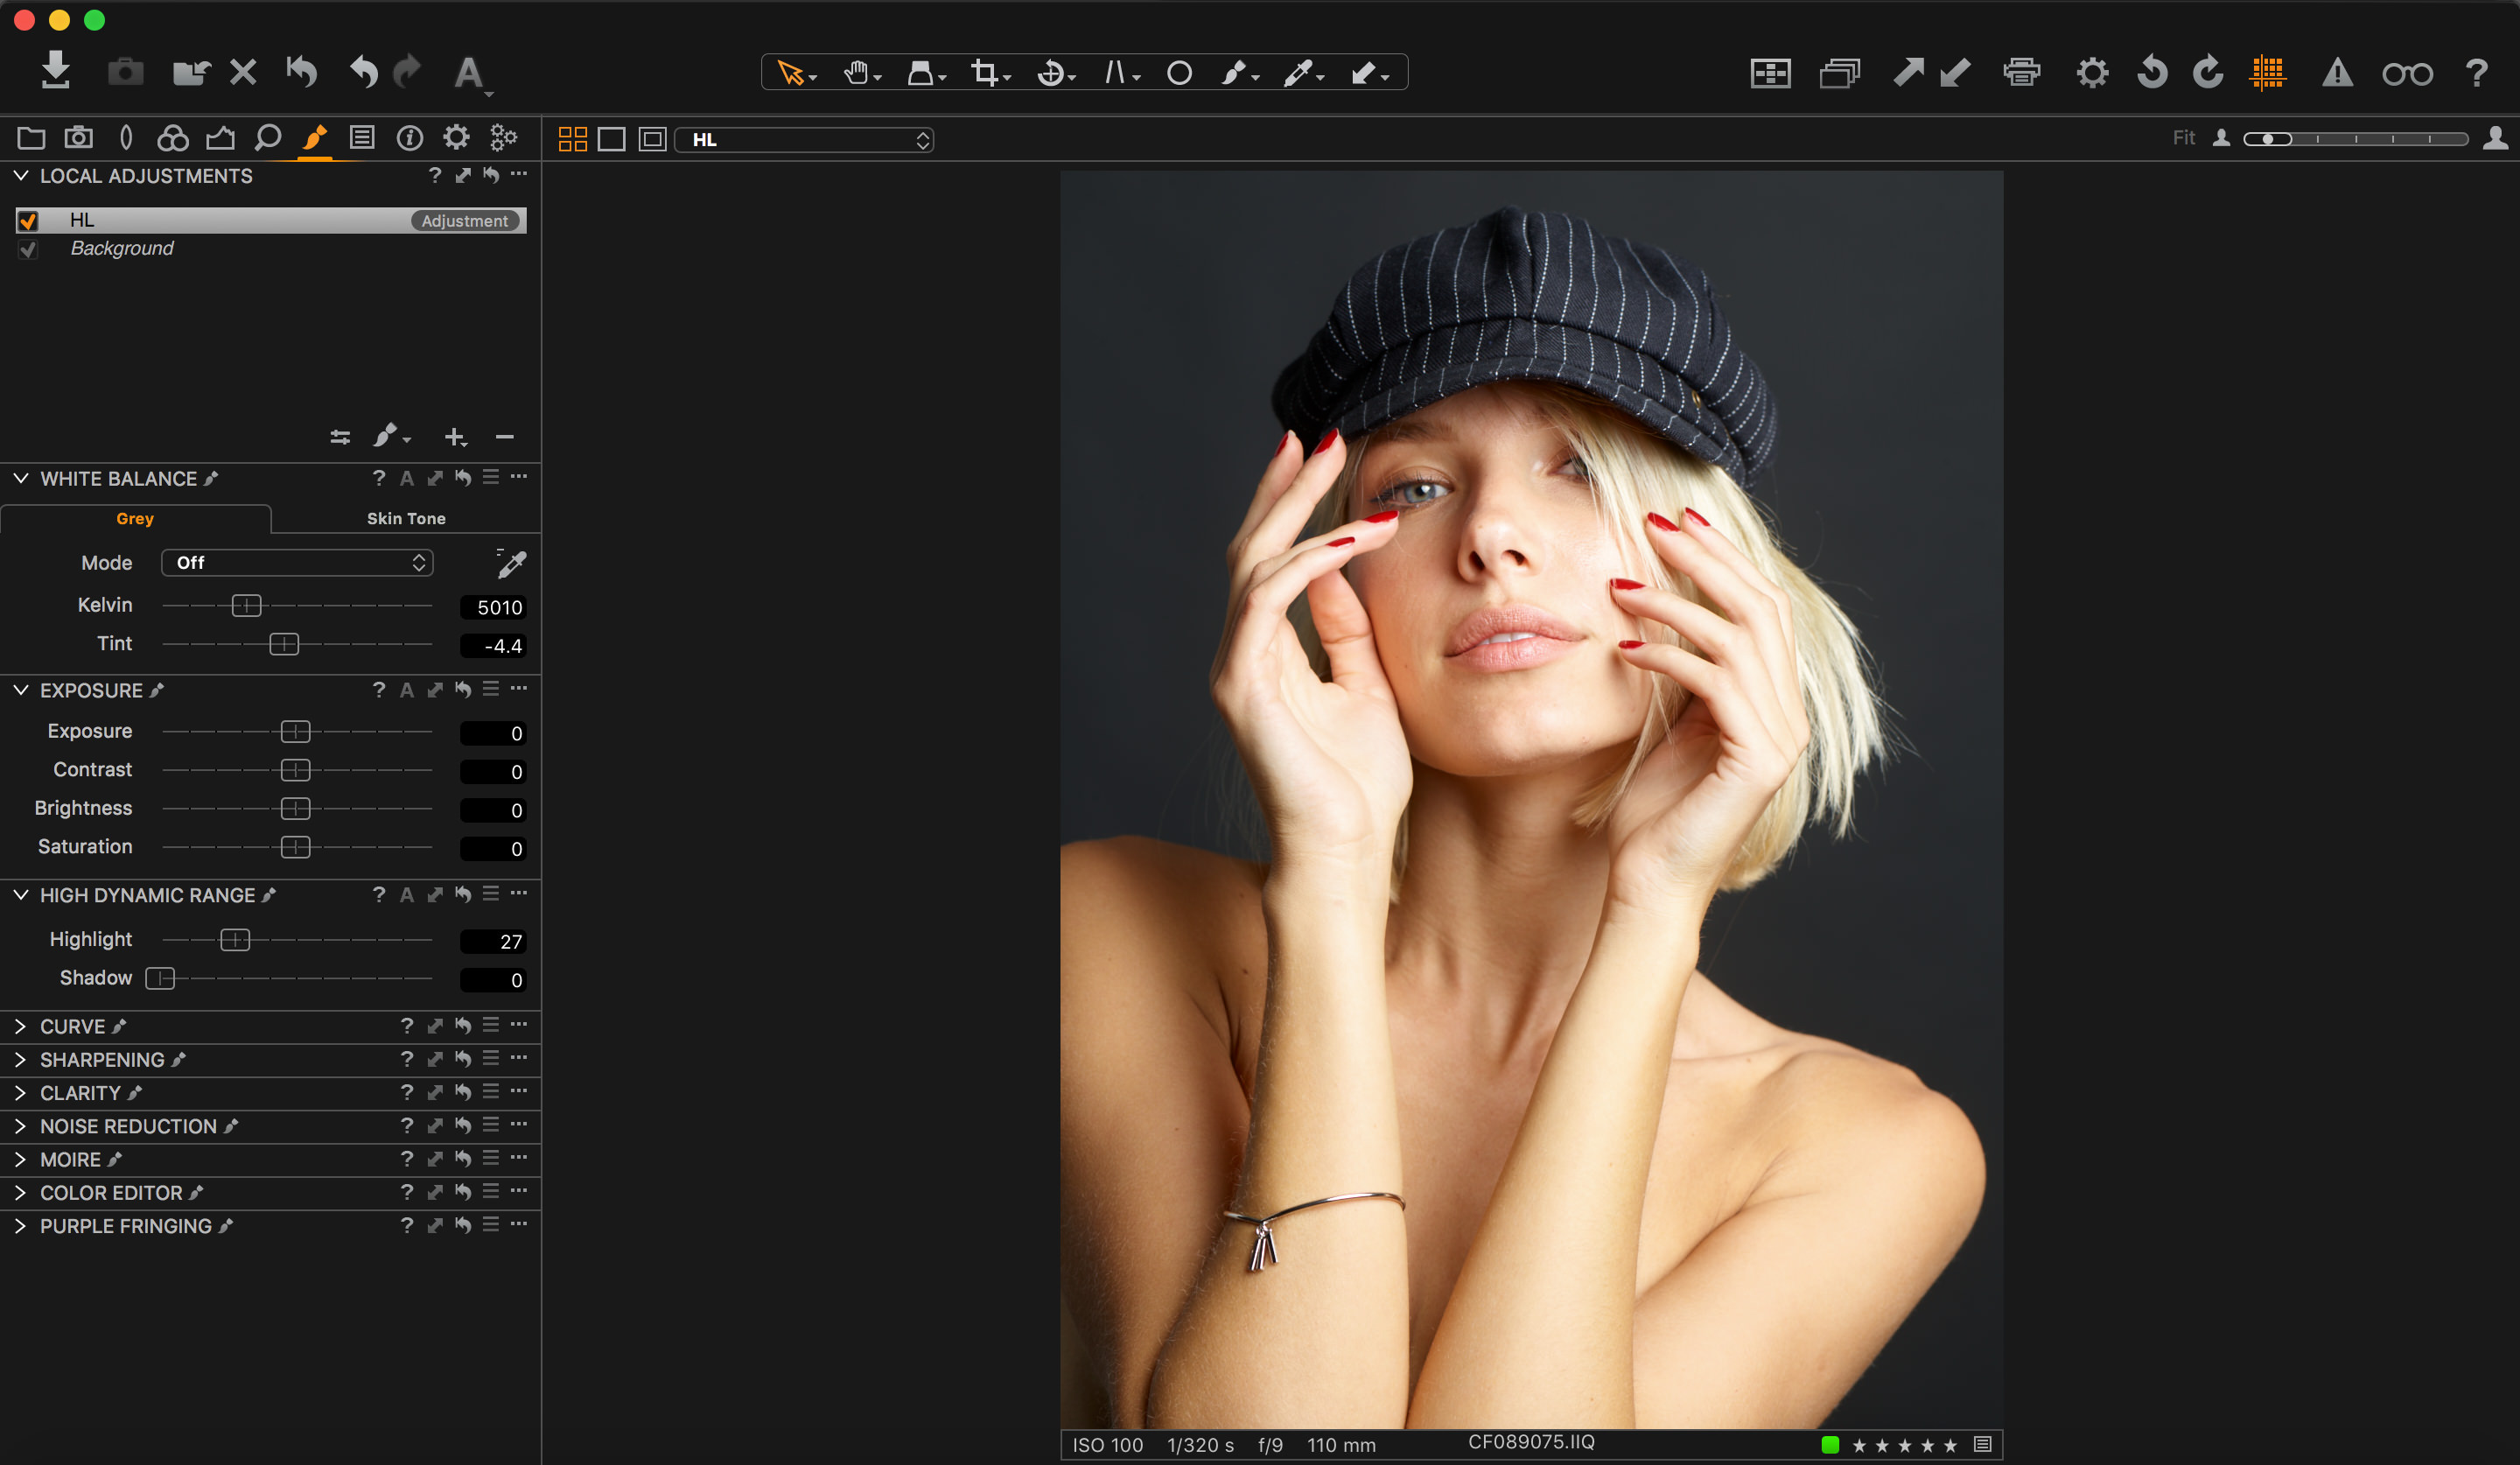
Local Adjustments
While I don’t often apply local adjustments at the tethered stage, there are situations such as e-commerce where the camera is stationary on a tripod, and the model is centered in the frame with little movement from their queue position. In this case, I may apply a gradient adjustment to one area of the frame to darken or lighten the area slightly.
Other Adjustments
The above tools represent the core of what I use for tethered shooting, but there are a few miscellaneous tools that I use as well. One of those is the lens correction tools where I may try to eliminate vignetting or sharpness fall-off or the vignetting tool itself to add a slight darkening vignette. I also use the clarity slider on natural mode to give the image a bit more mid-tone contrast. The value for portraiture should typically be under 6 or 7, or the results can begin to look somewhat harsh.
Raw Processing
Where the adjustments at the tethered stage were fairly bold and geared towards a final look, at the raw processing stage, the goal is a much more subtle and neutral set of adjustments. Now note that when I describe the raw processing stage, I’m referring to preparation for output to Photoshop, and not achieving a complete retouch inside of Capture One Pro. In some cases such as a model test shoot, I may do the entire retouch inside of Capture One Pro, but this is not typically the case. If you do wish to see a more complete retouch purely within Capture One Pro, I do have various tutorials on my YouTube channel as well as a webinar recording of this exact topic on Capture One’s YouTube channel.
In preparation for Photoshop, I want to make my image as well rounded as possible from an exposure standpoint while not being overly flat. Much like with the tethered adjustments, I begin with exposure and white balance adjustments. I want to adjust exposure and high dynamic range values to ensure that my overall image luminosity is close to the final level that I want, without losing any shadow or highlight detail. For white balance, I either want it to be neutral off of a gray card or adjusted close to the final look if the adjustment is very drastic. For example, if I’m going for a very cool look, it’s best to do so in the raw file rather than off the PSD in Photoshop.
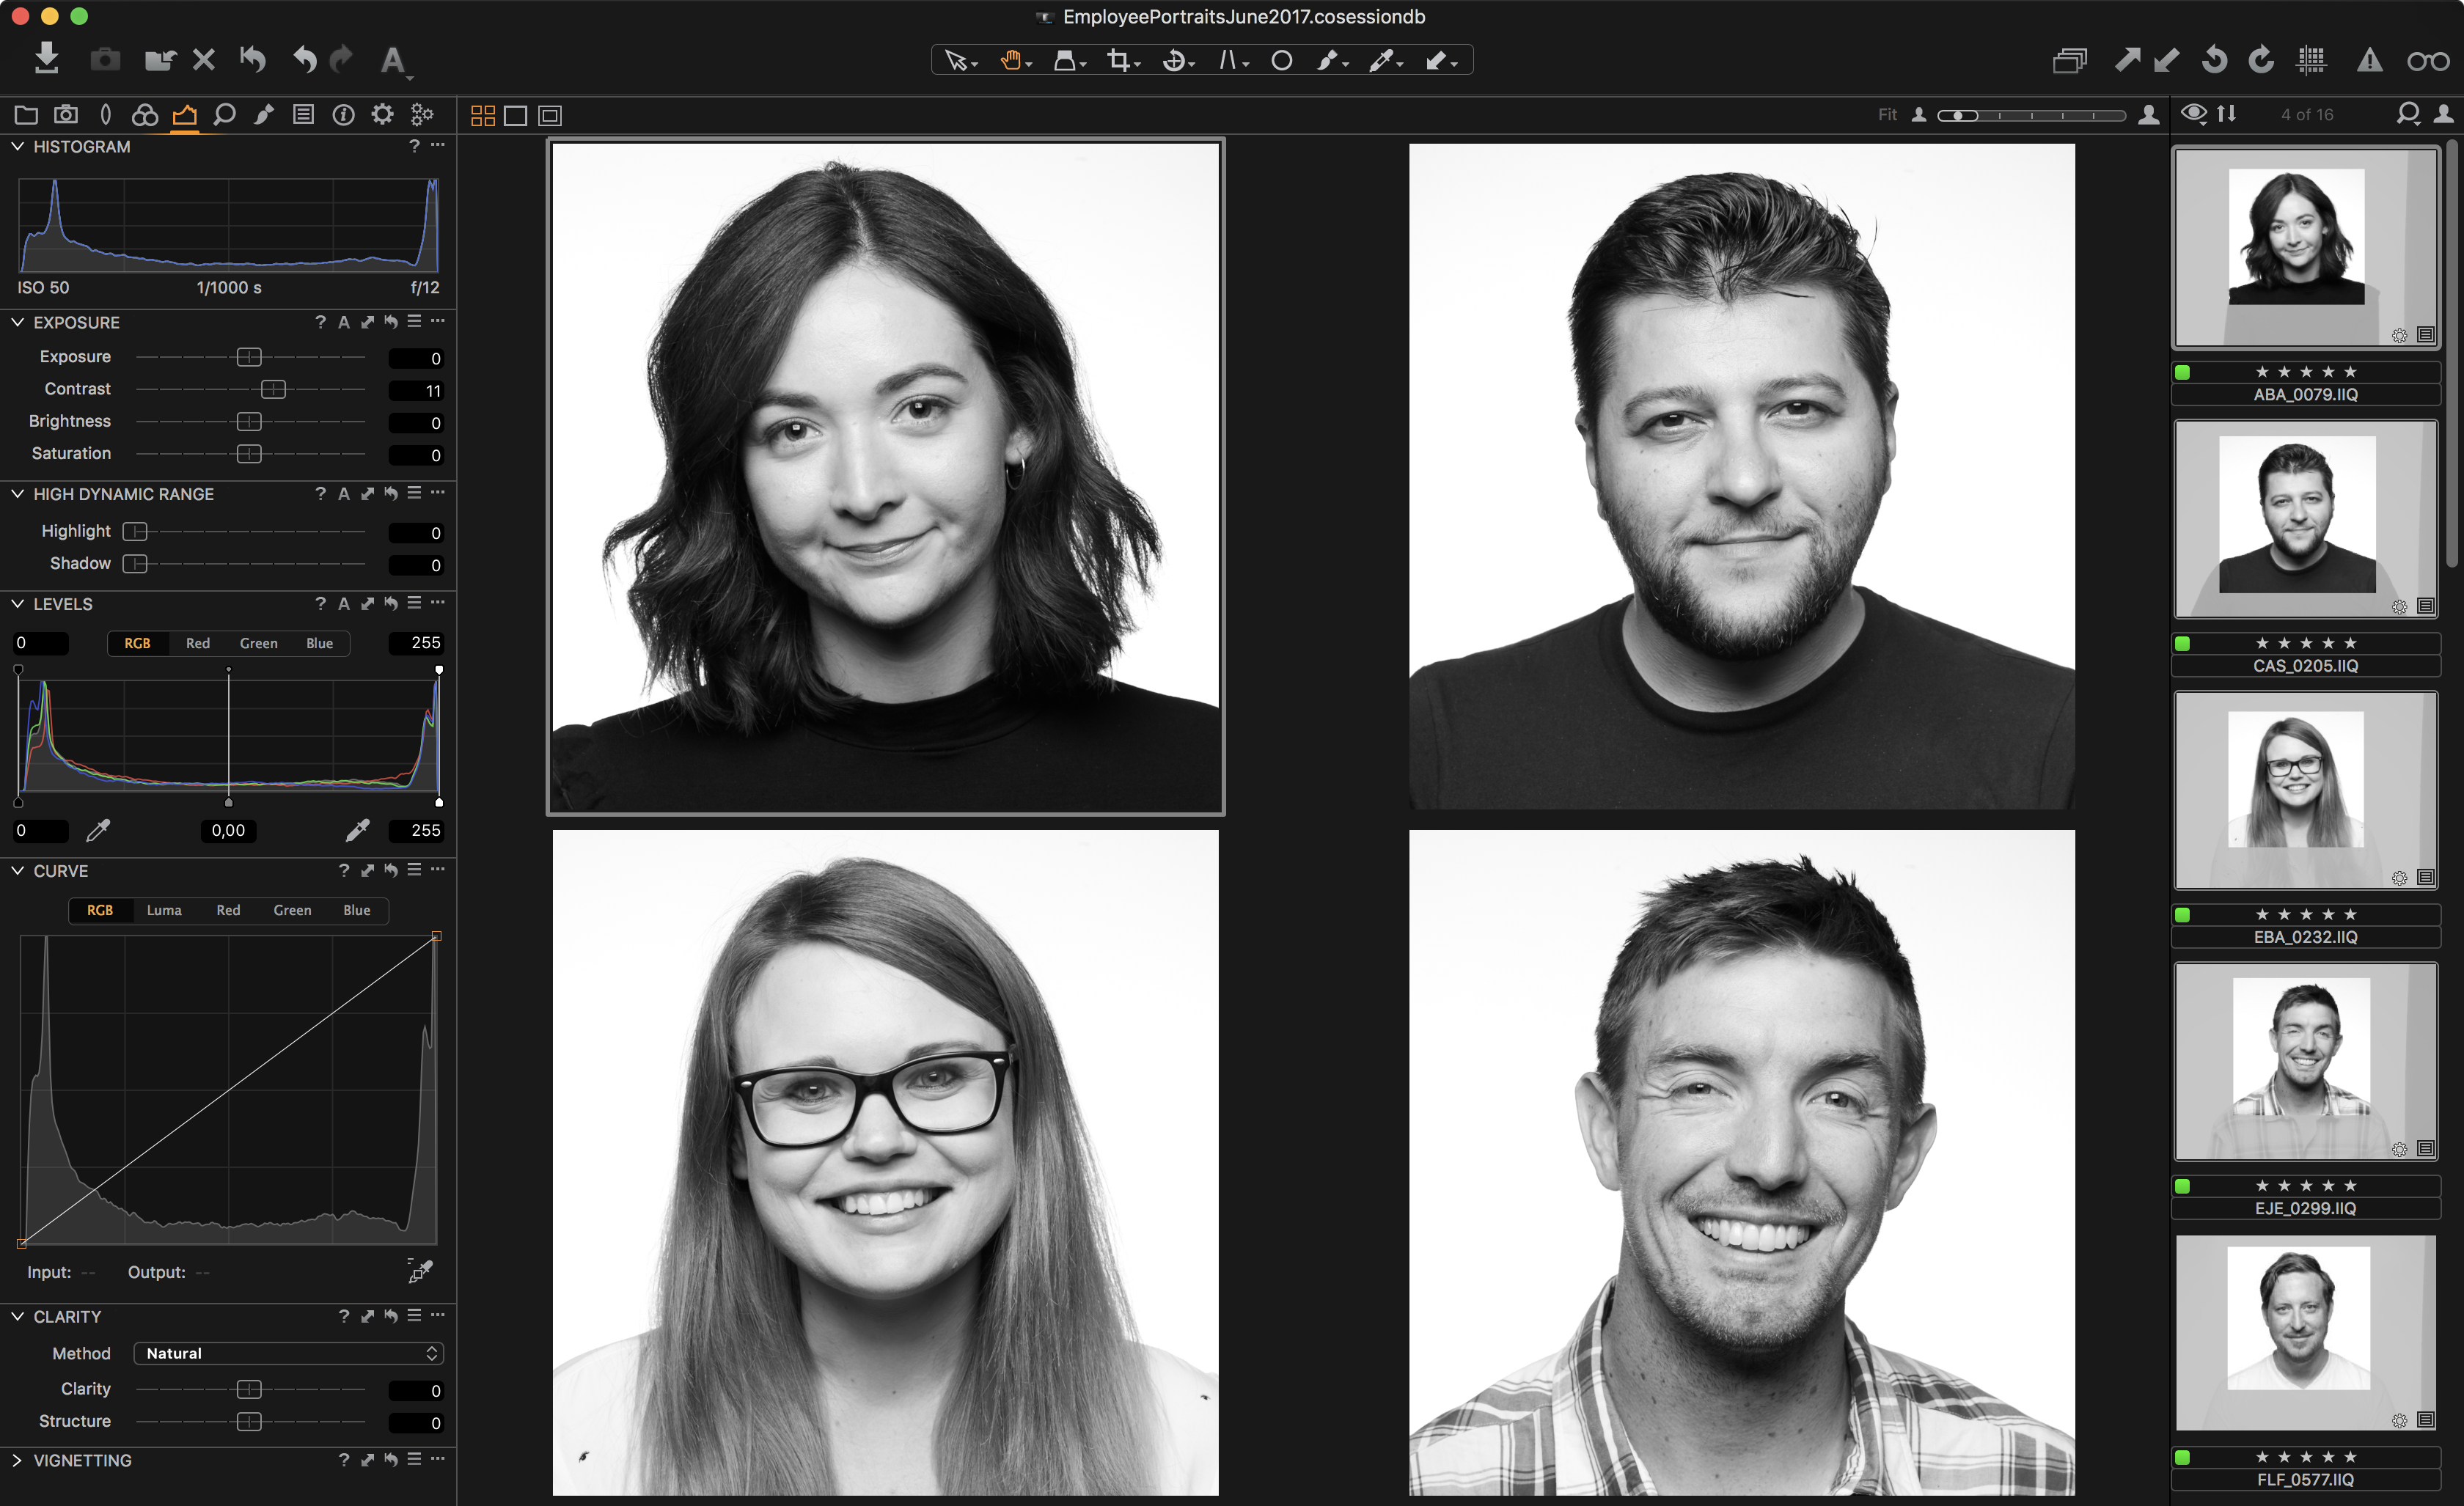
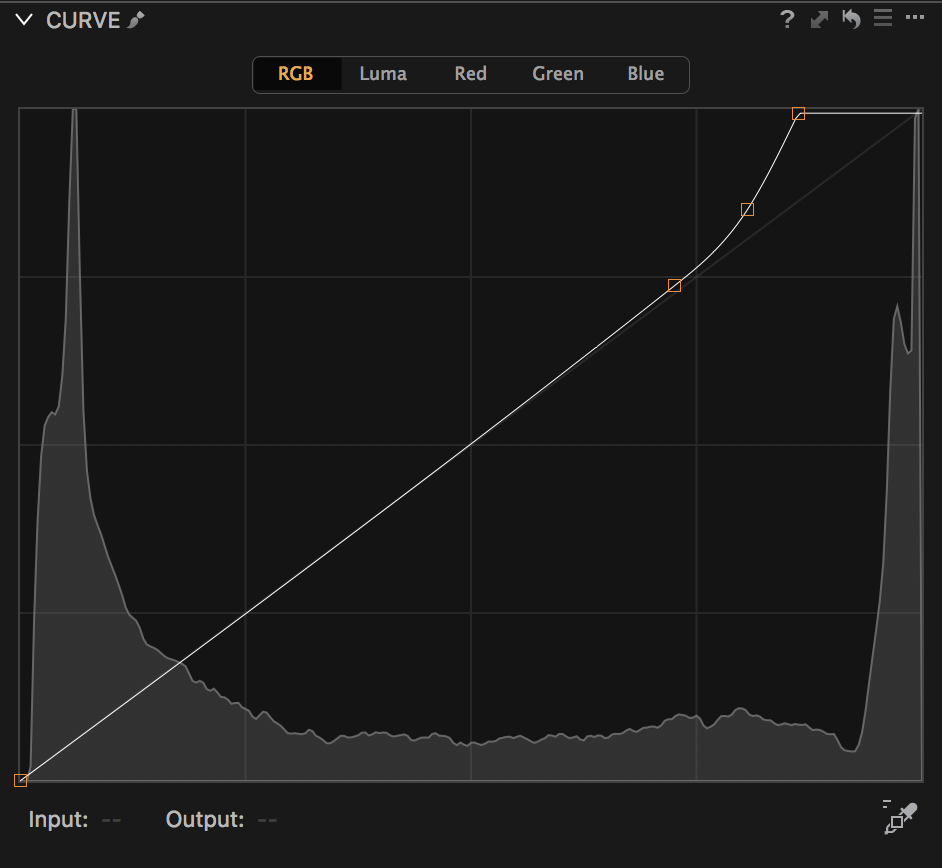
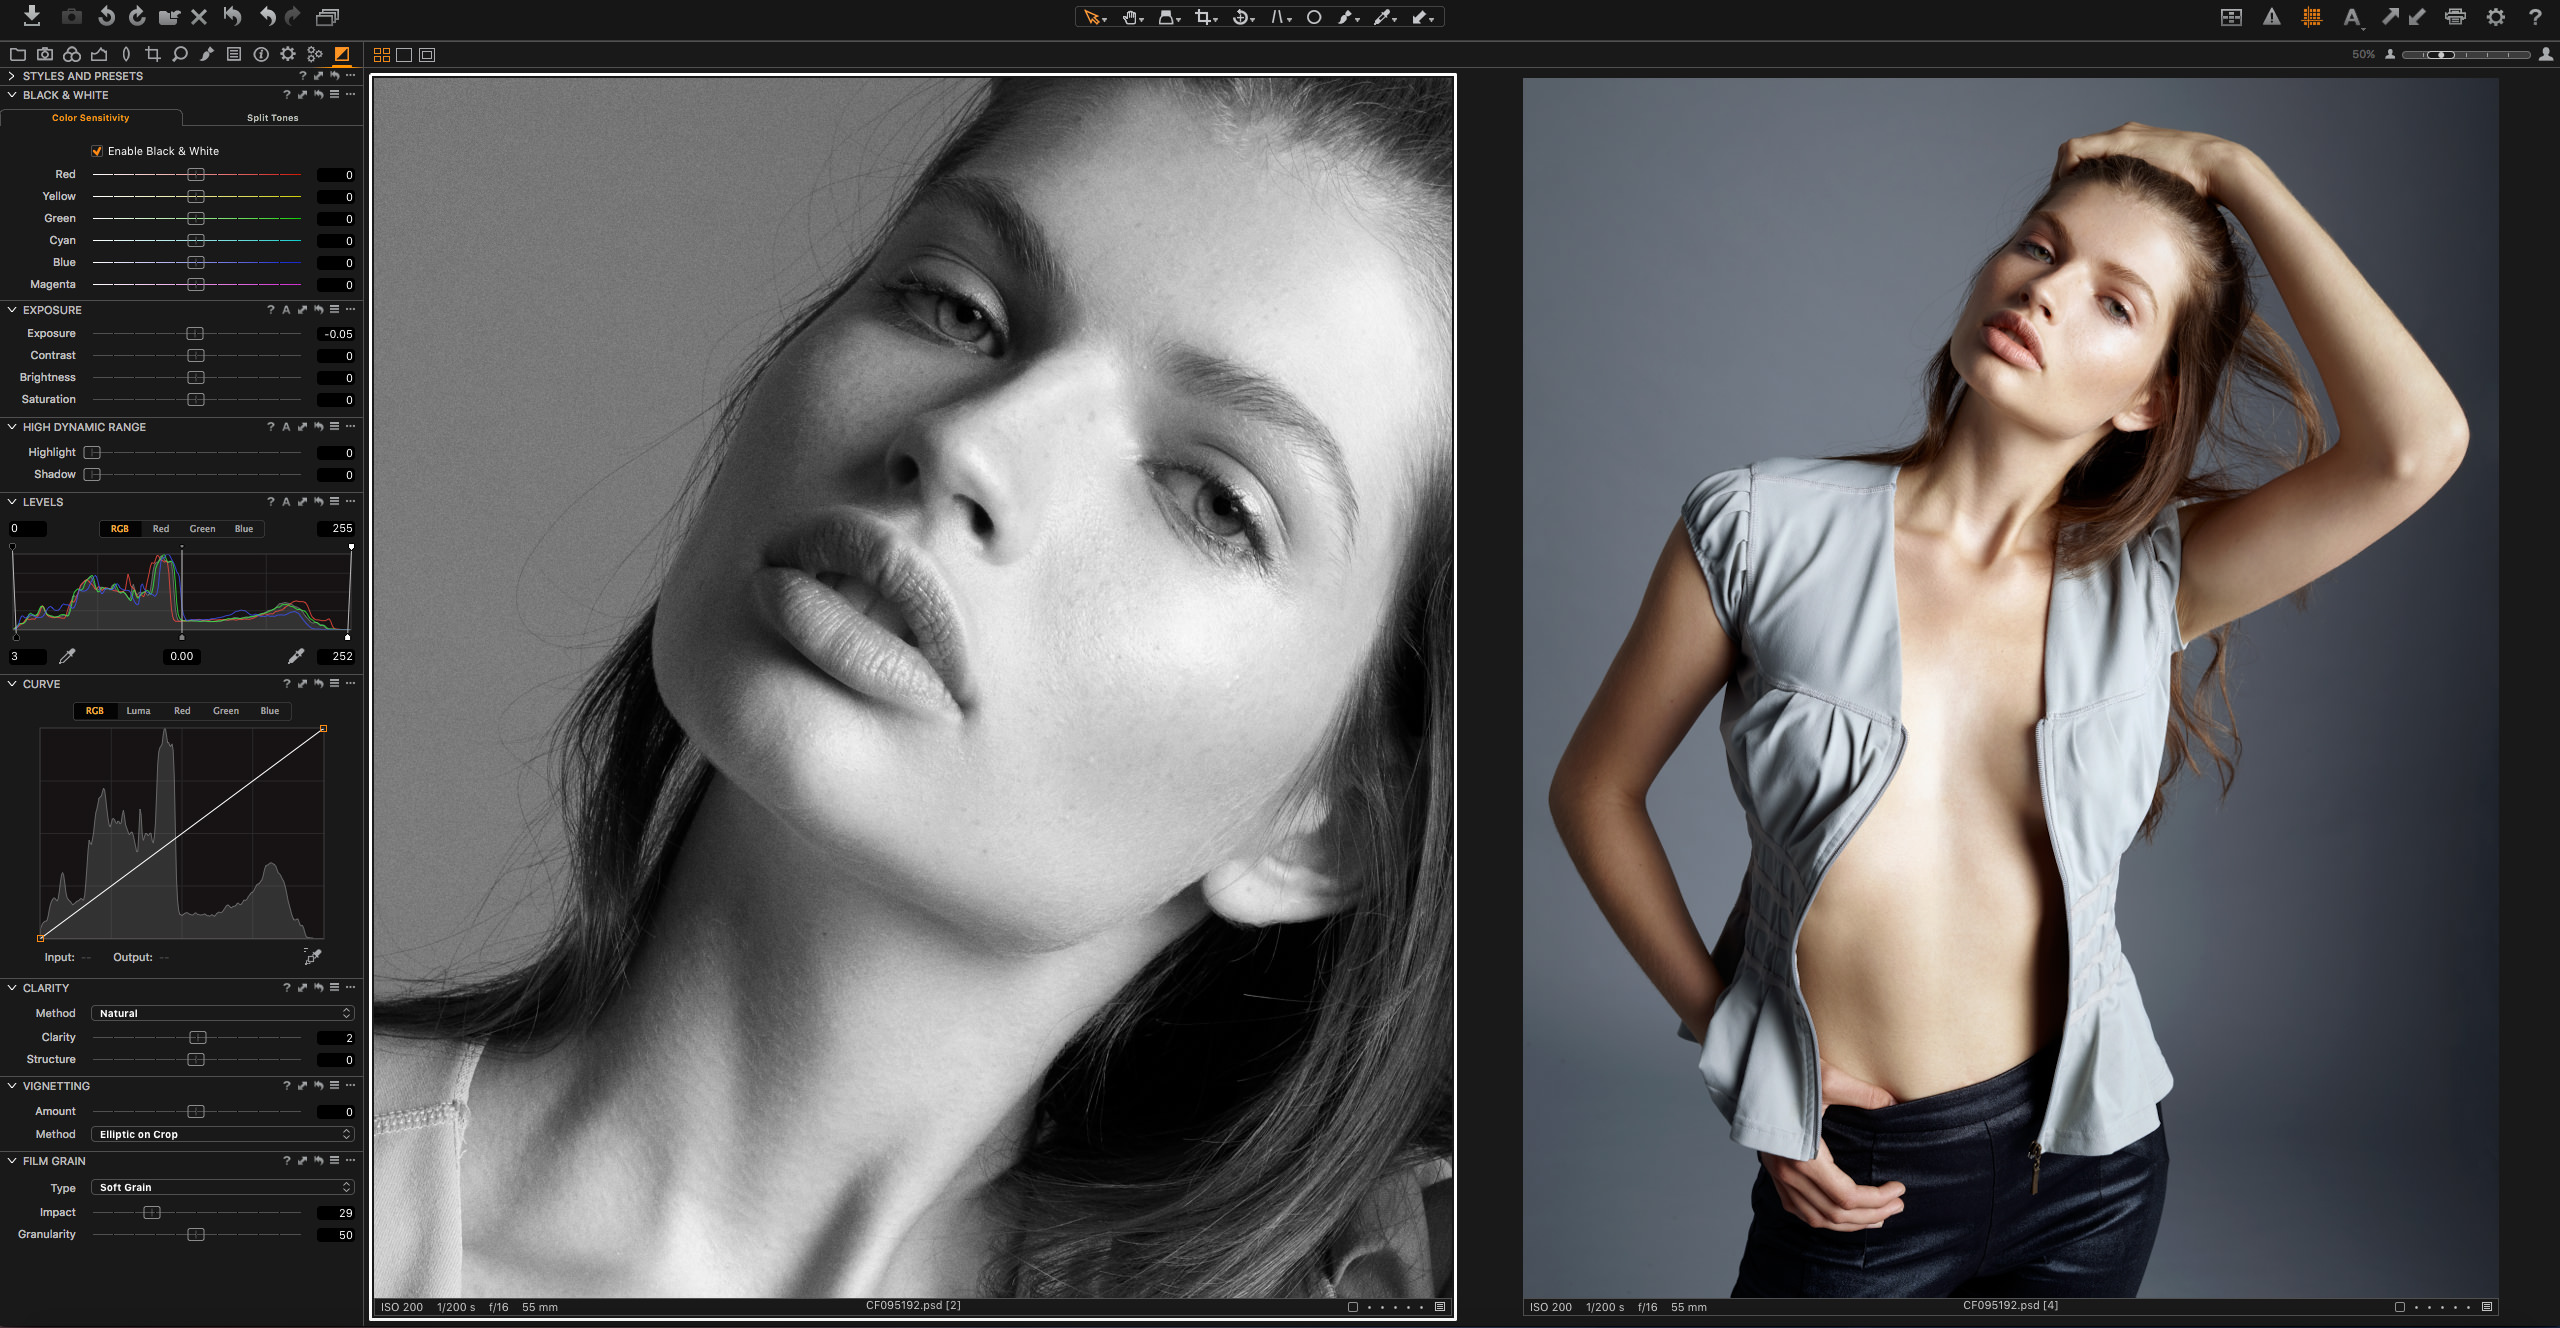
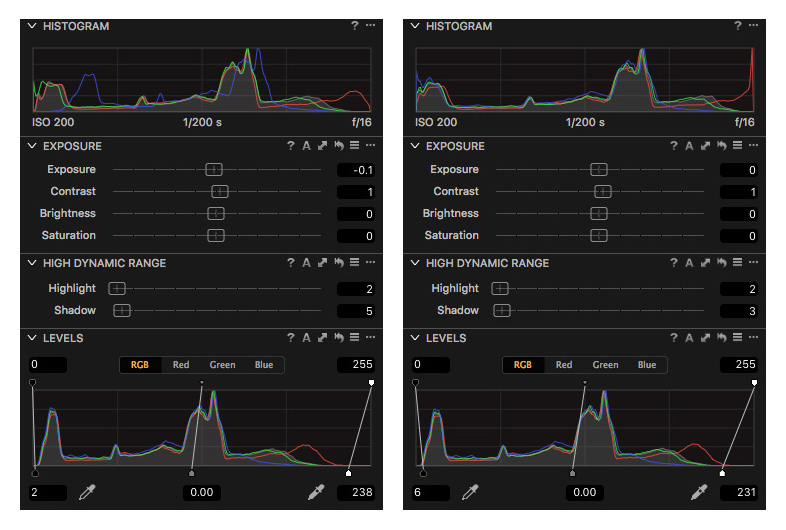 Next, I move on to the levels and curves adjustments and proceed in the same manner as with tethered shooting. In this case, I want to punch up the highlights and deepen the shadows but only to the extent that they are not clipping either end of the histogram. The images above demonstrate this, whereby the histogram on the left is the desired range, while that on the right pushes the highlights and shadows too far and begins to clip them. Visually the adjustment on the right may look good on the image, but for working off of in Photoshop, the one on the left is much more desirable. One thing I often do is drive down the center point of the curve, or the exposure level and heavily bring in the lower right handle of the levels adjustment (as shown above) until the histogram once again stretches out. This gives a moody and contrasting look where the highlights have a good deal of punch, but the overall image is darker. If I find that after these adjustments, there are areas of the skin that are too bright or too dark; I’ll use the local adjustment tools to mask those areas and use the exposure and highlight/shadow recovery to reign them in. A good check is to enable the highlight warnings in Capture One Pro to help you identify any areas that need to be locally adjusted.
In most cases, I’ll adjust the skin tones using the color editor and skin tone uniformity as described above – but at this stage, we’ll keep the adjustments much more subdued. Once again we need to be mindful not to encroach on makeup or clothing colors as we could inadvertently alter them if they are close in color to the skin tone. My goal here is to get the skin tone a bit more pleasing using the hue and saturation adjustments and a bit more uniform using the hue uniformity. Once again, subtly is the name of the game as we want to minimize our work in Photoshop, but not to the extent where we begin to lose information in the image. Another option – and one I use often – is to perform the skin tone adjustment within a local adjustment layer. If a portion of the skin (for example the lower half) has a different tone, I may add a gradient mask to an adjustment layer and operate on that portion only.
I leave the color grading to the final PSD round trip stage. Lens corrections should also be made to achieve a clean neutral look, which typically involves the removal of any vignettes and/or adjusting keystone.
The last step is the cropping of the image. I typically like to give myself a little wiggle room, particularly since my camera shoots in a 3×4 crop ratio, but Instagram requires a 4×5 ratio to fit. Given that, I prefer not to crop too tightly and then be forced to crop further to fit the image for social media. As a result, I’ll typically crop at 4×5 from the outset since this also works well for magazines, or if this crop is not optimal, I’ll leave it as the original and crop at the output stage. The key consideration to make is whether or not we are leaving lots of things in the frame that we know we’ll crop out for sure; regardless of the crop ratio. If so, then remove it in advance to save yourself the time of retouching that area in Photoshop.
Of course, when this is all done, we have to get the file into Photoshop, at which point we need to decide on 8 bit or 16 bit color. I typically use 16 bit for anything editorial or commercial or anything that has very subtle gradations, and 8 bit for anything else.
Retouching in Photoshop
I won’t go into too much detail about Photoshop, as this would be a series of articles in and of itself. My steps for this are well covered in the various courses that I have as well as on my YouTube channel, so I’ll merely point out the key things that I do.
- The first step is to clean up the image using the healing brush or clone stamp tool, removing any skin imperfections, stray hairs, sensor spots, etc.
- Next, I often extract the subject from the background using the quick select and refine edge tools if I find it advantageous to do so.
- I then move on to dodging and burning the skin to create smooth tonal transitions using curves adjustment layers and masks
- Once the corrective portion of the dodge and burn is done, I contour the image through further dodging and burning of the highlight and shadow areas respectively – once again with curves adjustments and their masks
- With the luminosities of the image fixed, I then perform any color corrections where the skin tones don’t blend well or are mismatched. I do this with adjustment layers such as hue/saturation and selective color using feathered masks.
- With the image effectively completed from a retouching standpoint, I can finish off with color grading. The color grading can be drastic, or more subtle depending on my goal. As we’ll discuss in the PSD roundtrip section, we can choose to leave part of the color grading to be completed in Capture One Pro, or we can do it all within Photoshop.
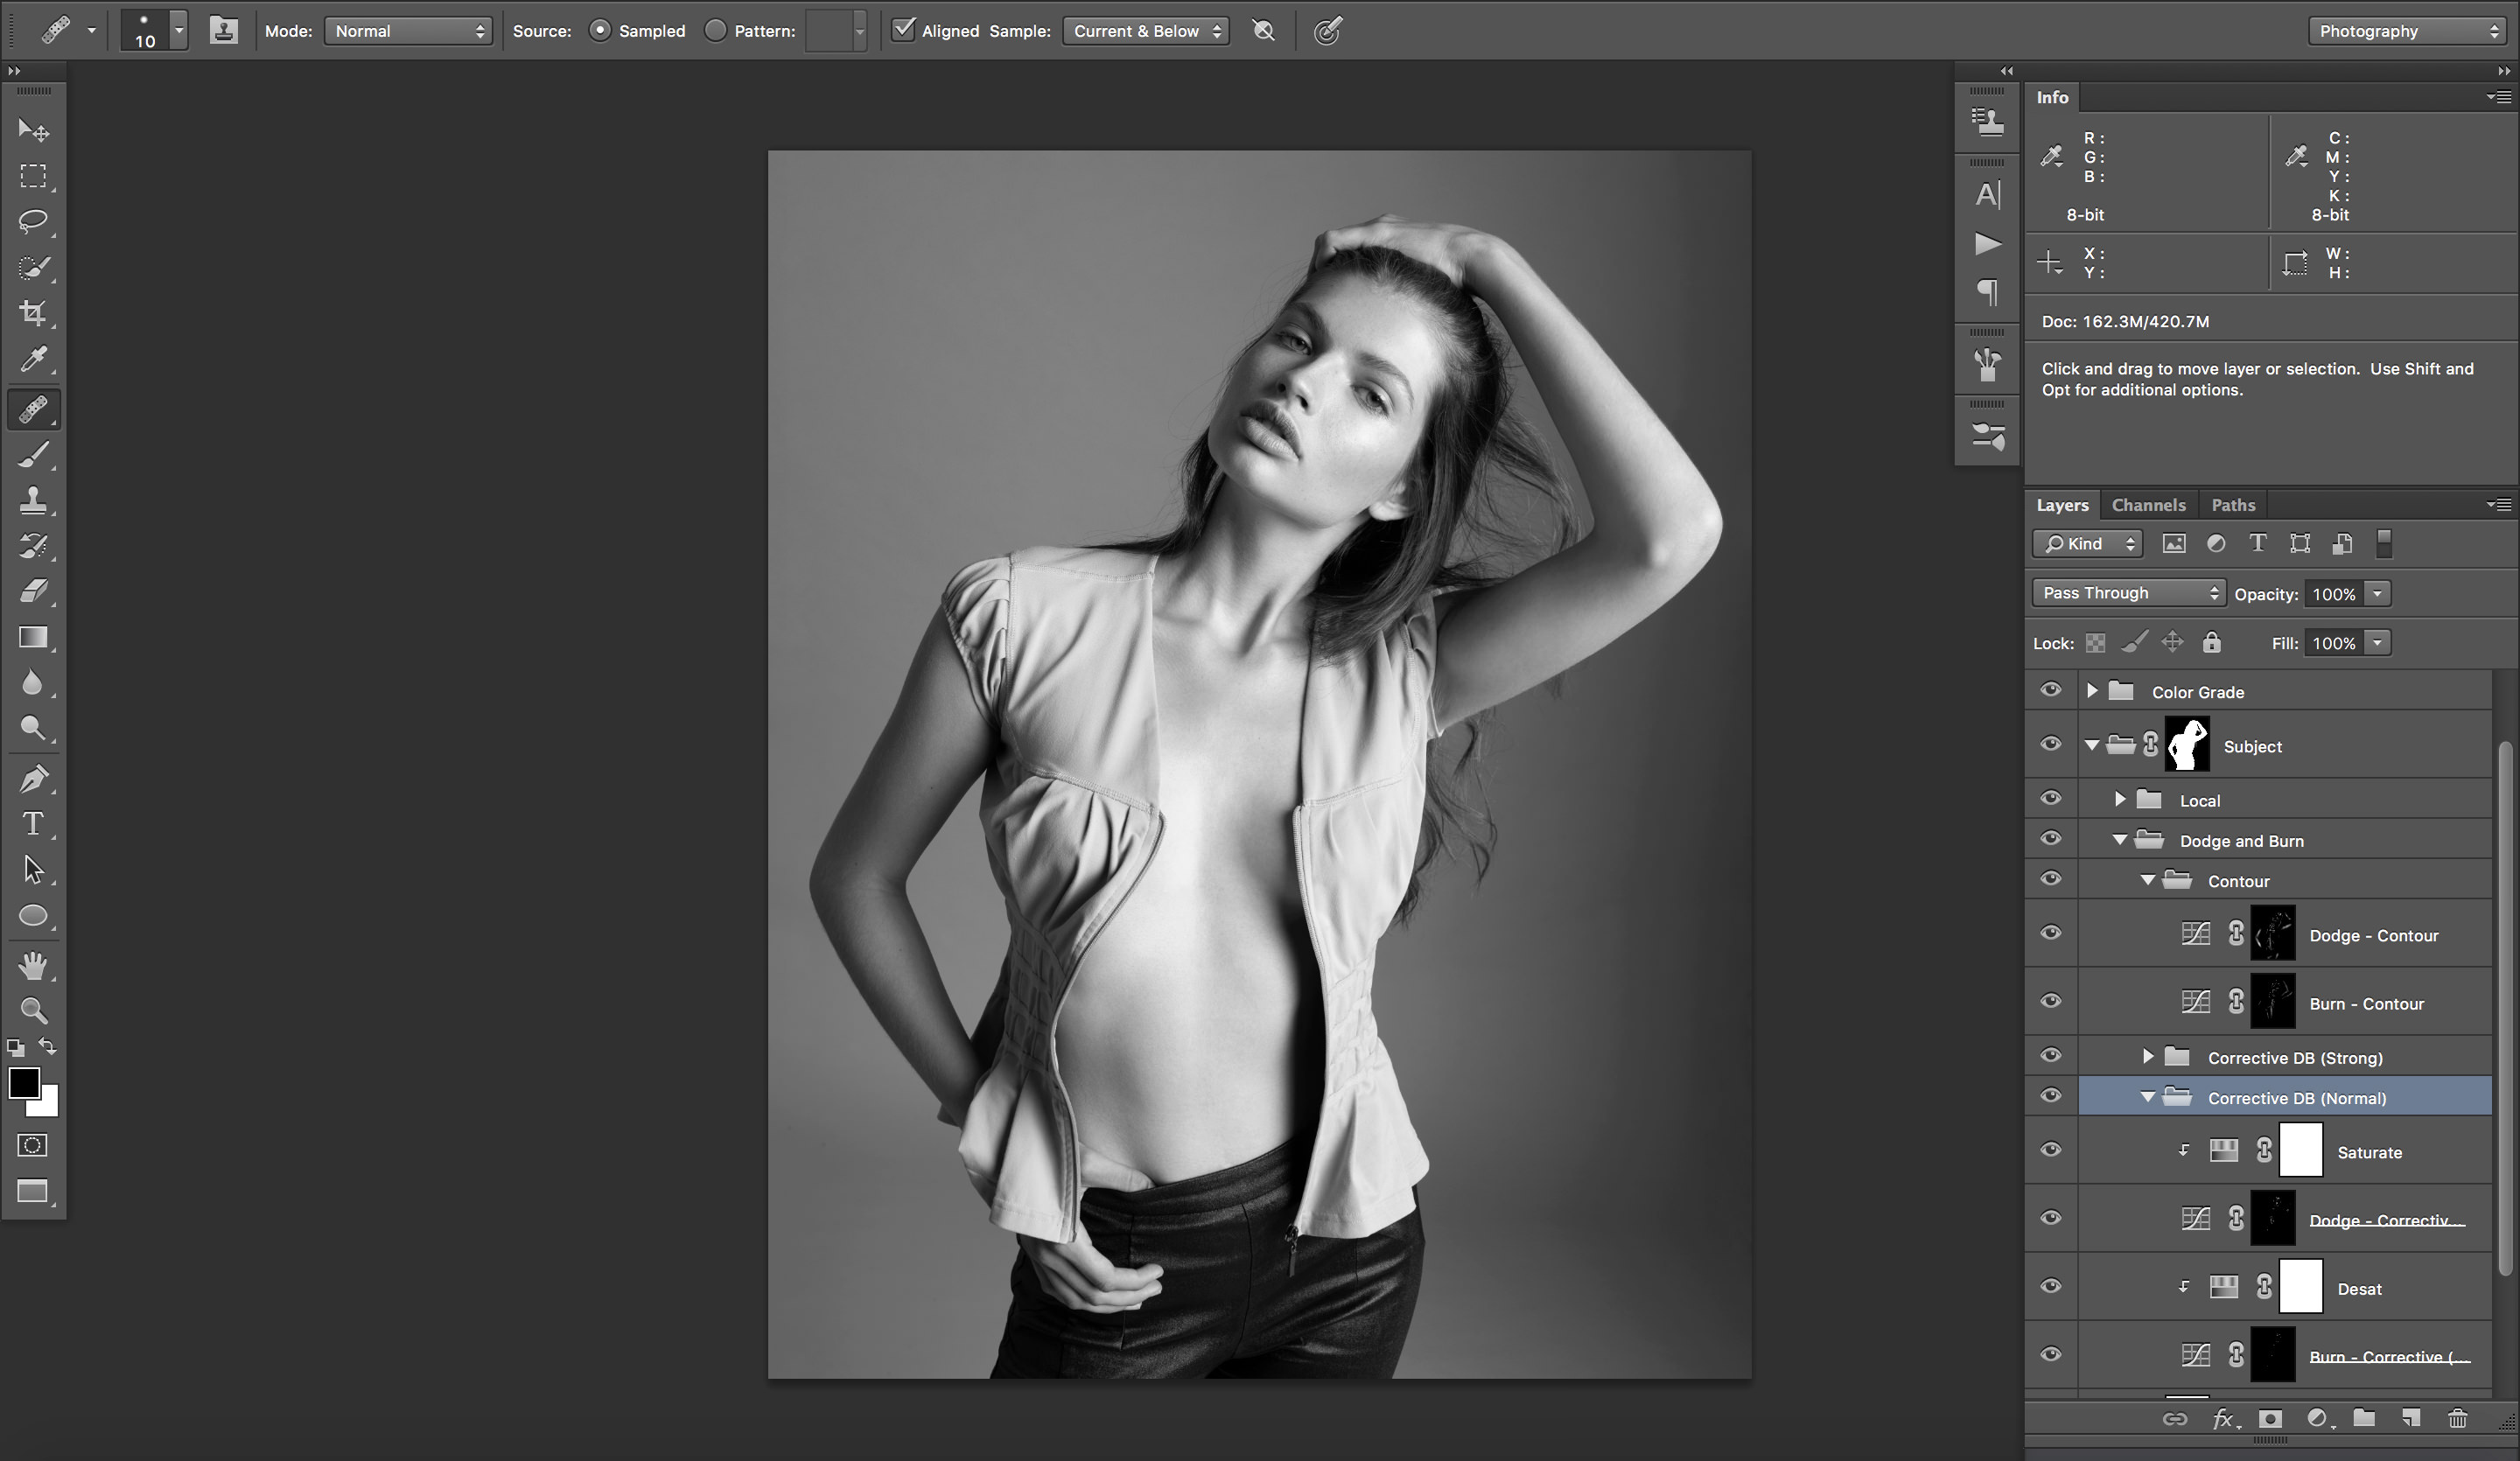
Photoshop retouching is an in-depth skill that requires a great deal of practice and learning, so the above list is merely a guide to what I do with a typical image. The key thing to focus on within your workflow is flexibility. Perform all your raster/pixel based adjustments at the outset on separate layers with all adjustment layers placed above those. This allows you to easily make changes based on client requests without re-doing a great deal of your work. If you stamp out your layers or make pixel based adjustments above your adjustment layers, you can no longer go back and alter various parts of your image and may be forced to start over. In the next step, we describe the PSD roundtrip back to Capture One Pro which further enforces a maximum degree of flexibility.
PSD Roundtrip
Initially, one might think that the completion of the retouch in Photoshop marks the end of the image workflow; but this is typically not the case. There is a whole set of operations that I frequently perform on any given image at the output stage – most of which are not well suited for the likes of Photoshop. The PSD roundtrip feature in Capture One Pro 10.1 simplifies these steps and unifies the entire workflow by giving you the full gamut of tools that you normally have on a raw file for your retouched PSD.
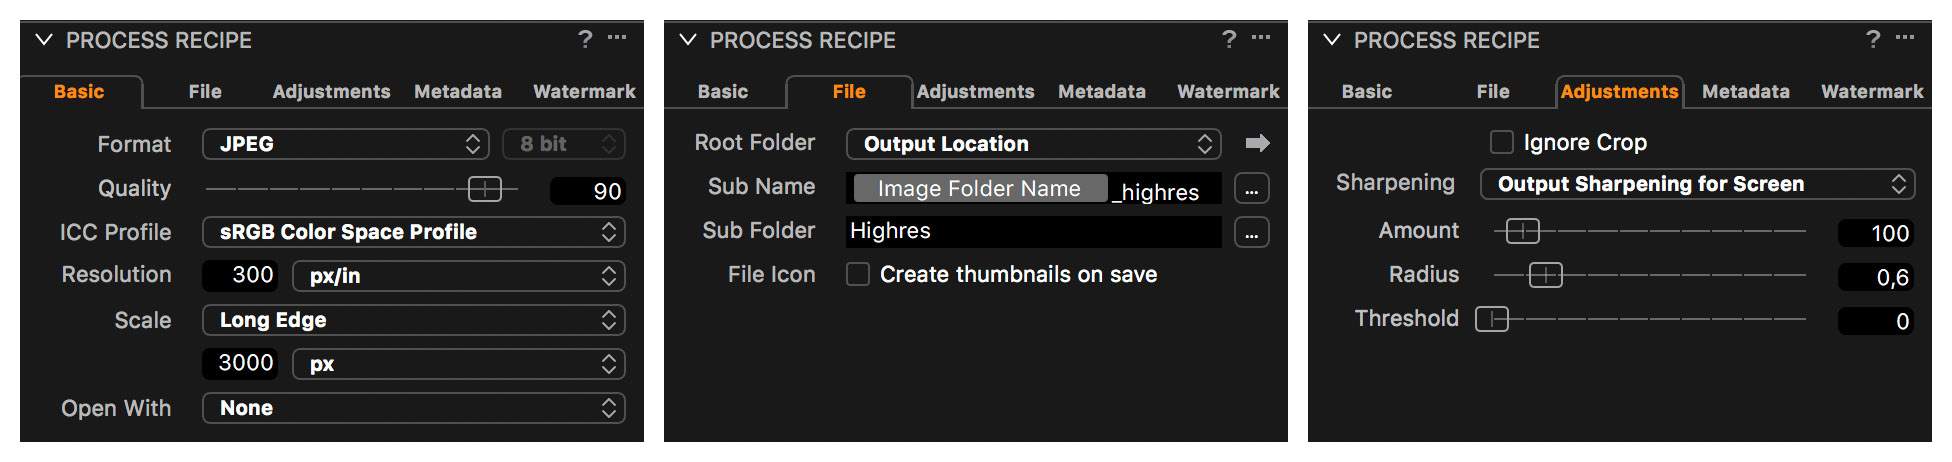
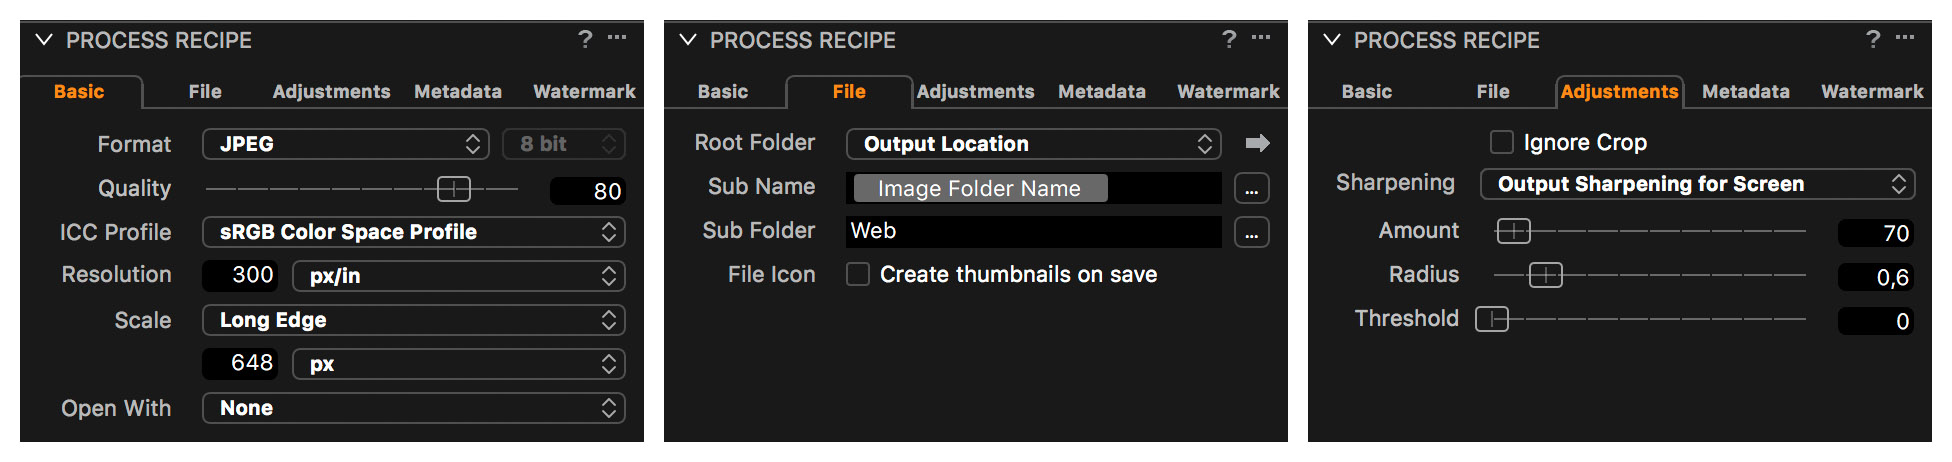
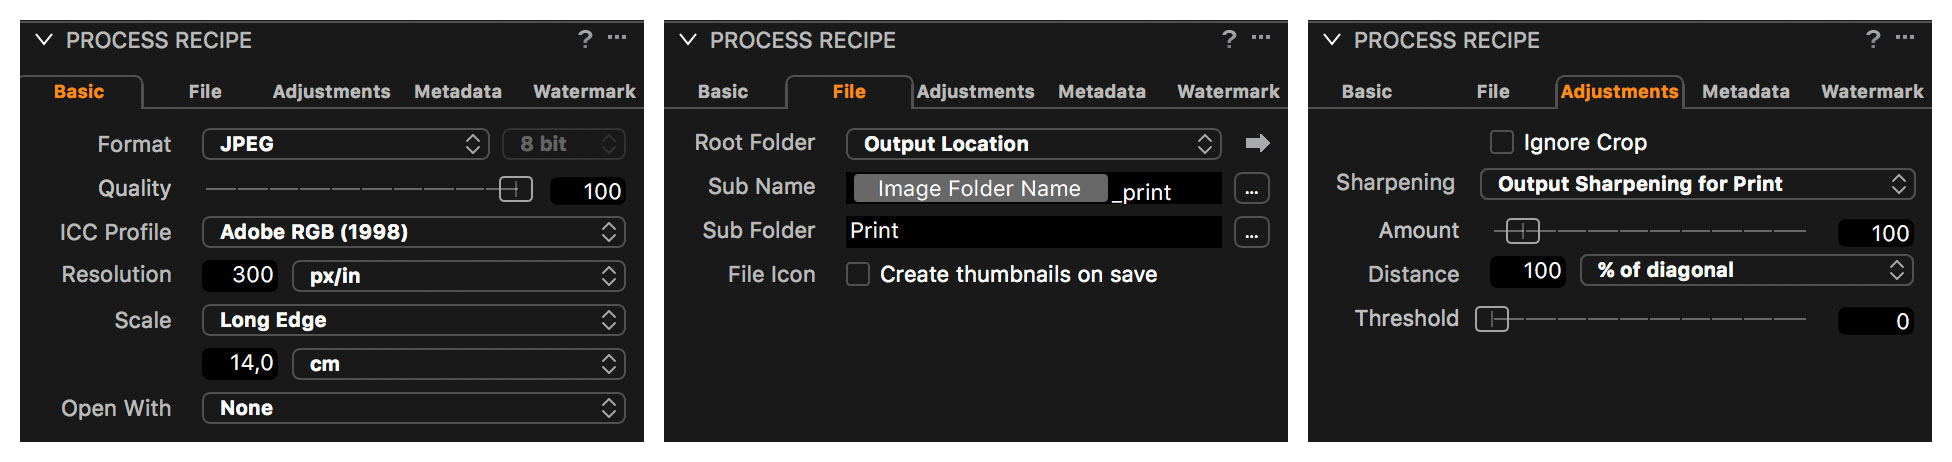
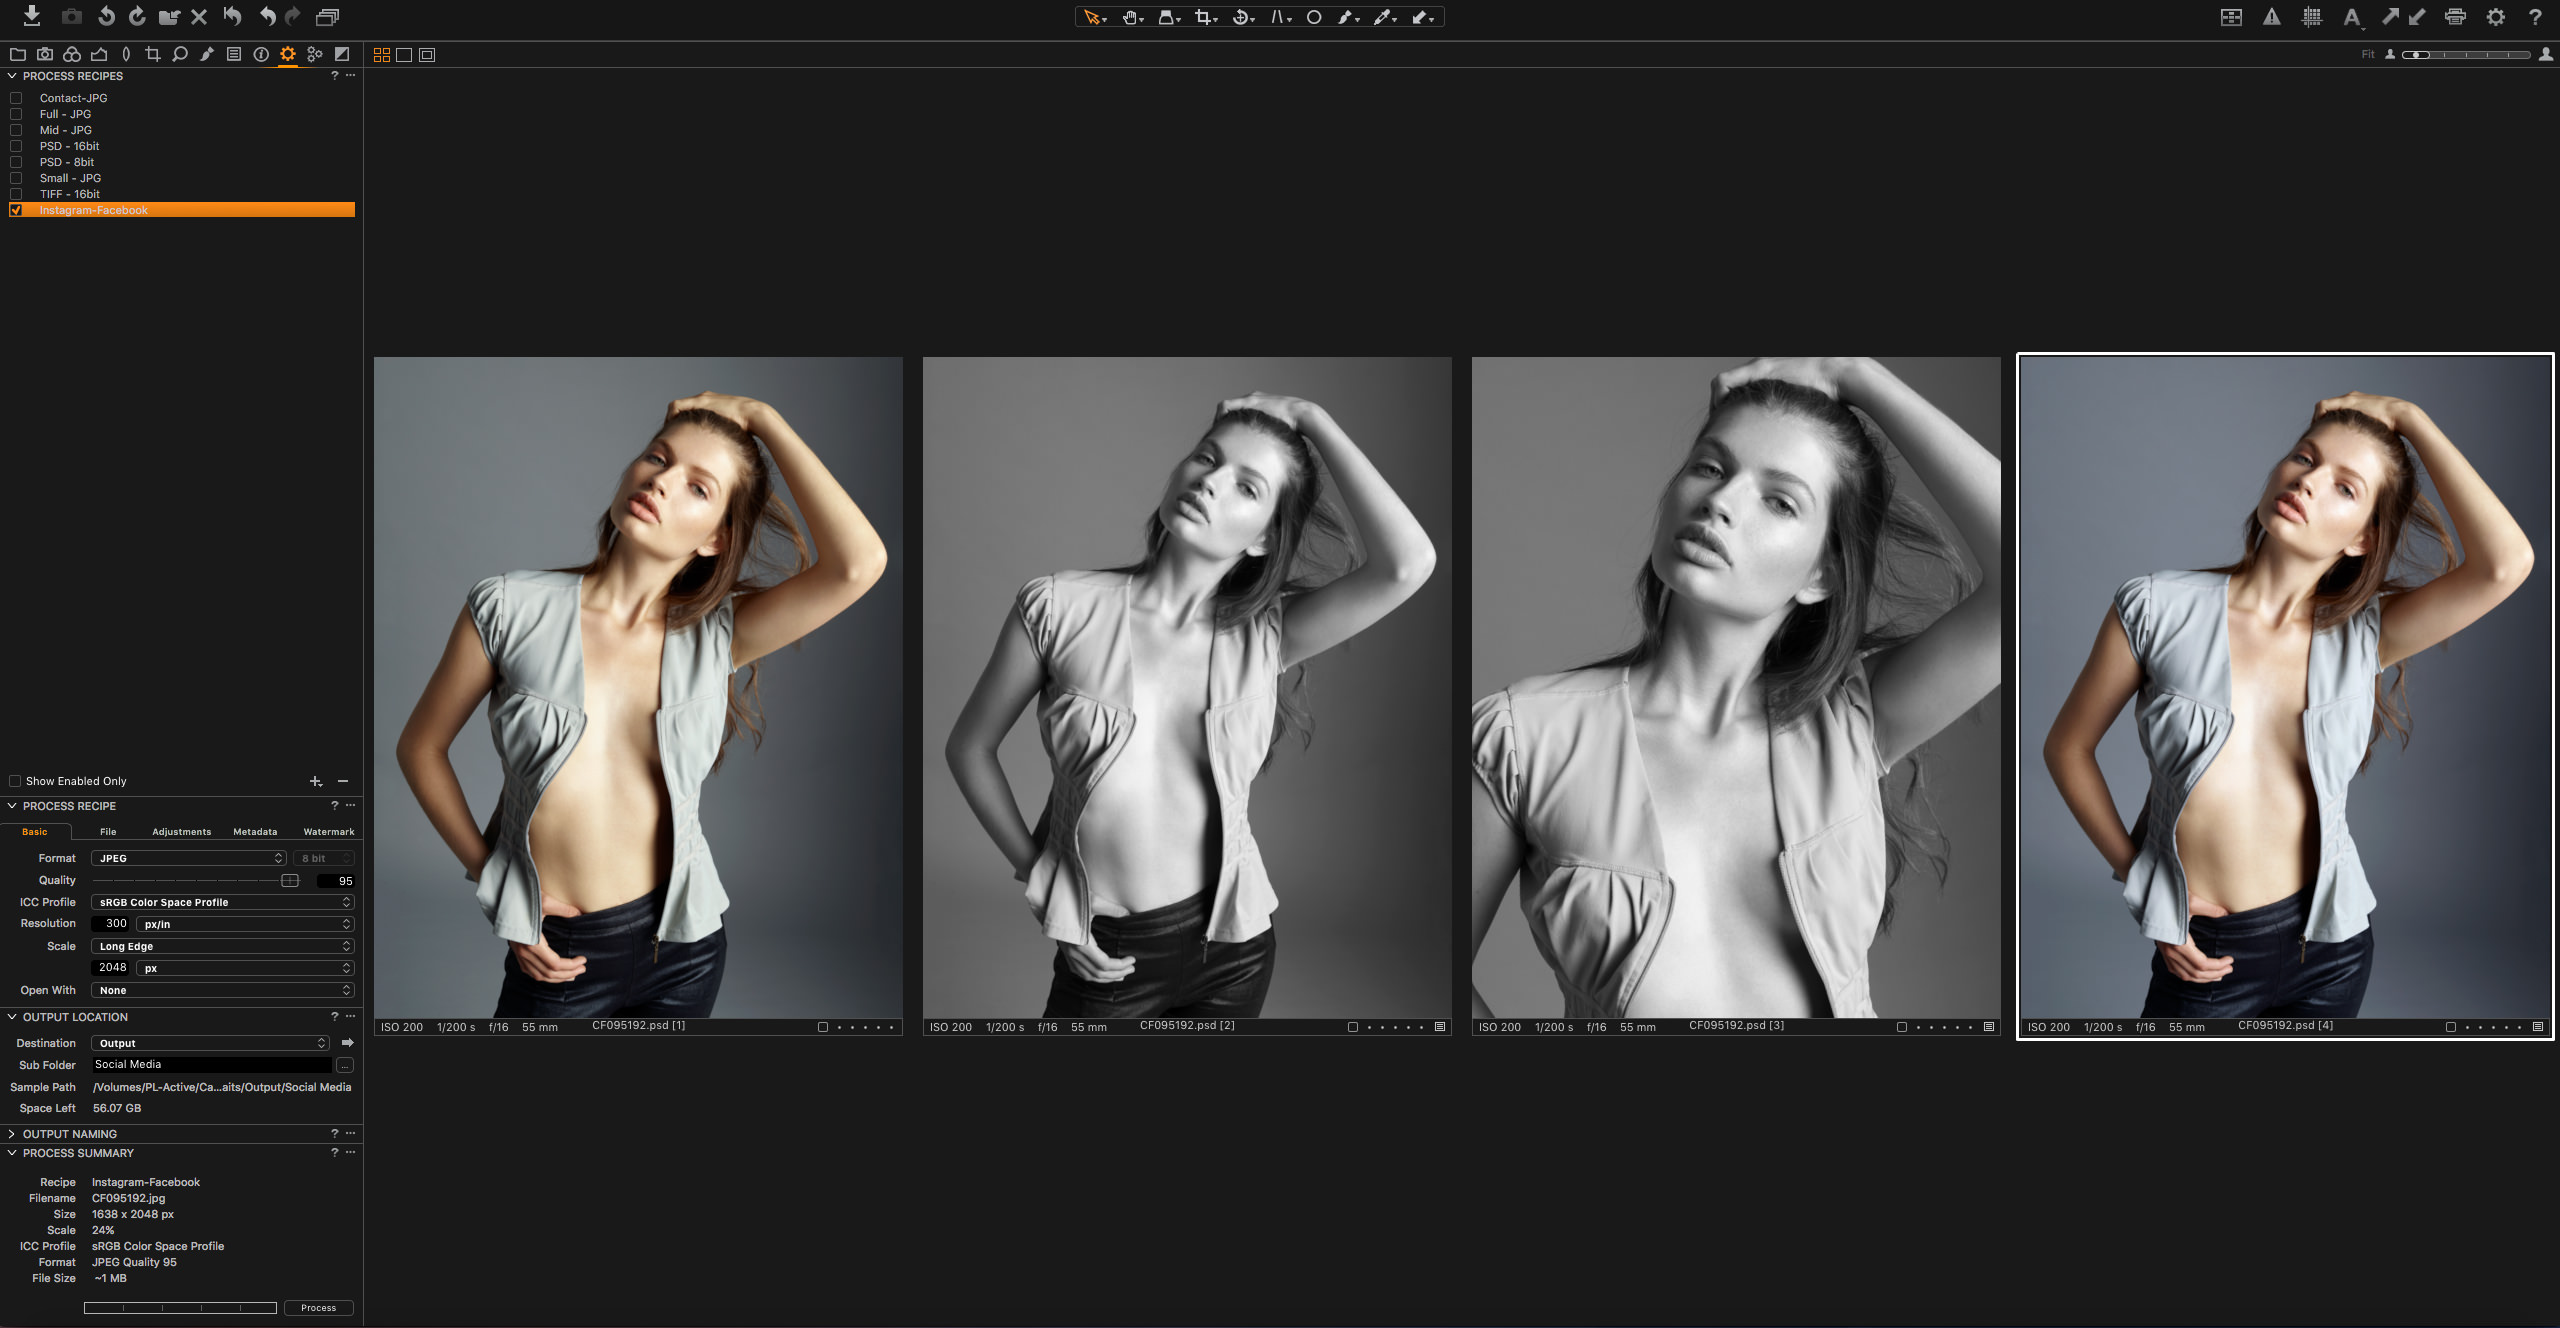
At the most basic level, we have the seemingly simple process of exporting the image into a portable format like JPG; which turns out to not be quite so simple at all. Take for example an editorial image for a print publication. The retouched image is typically in its original crop of 3×4 at a high resolution of over 8000px on the long edge, while the print publication requires 8.5×11 at 300dpi in TIFF format with a specific color profile. For this image, we’ll likely also want to share it on Instagram which requires a 4×5 crop and a long edge size of 2048px as a JPG. Furthermore, the model’s agency wants it 9×12 at 300dpi for use in their portfolios, and for good measure they’d like the option of color and B&W. In fact, they later also request a tighter crop of the photo for use as the model’s comp card photo. Managing all of this inside of Photoshop is incredibly tedious and impractical.
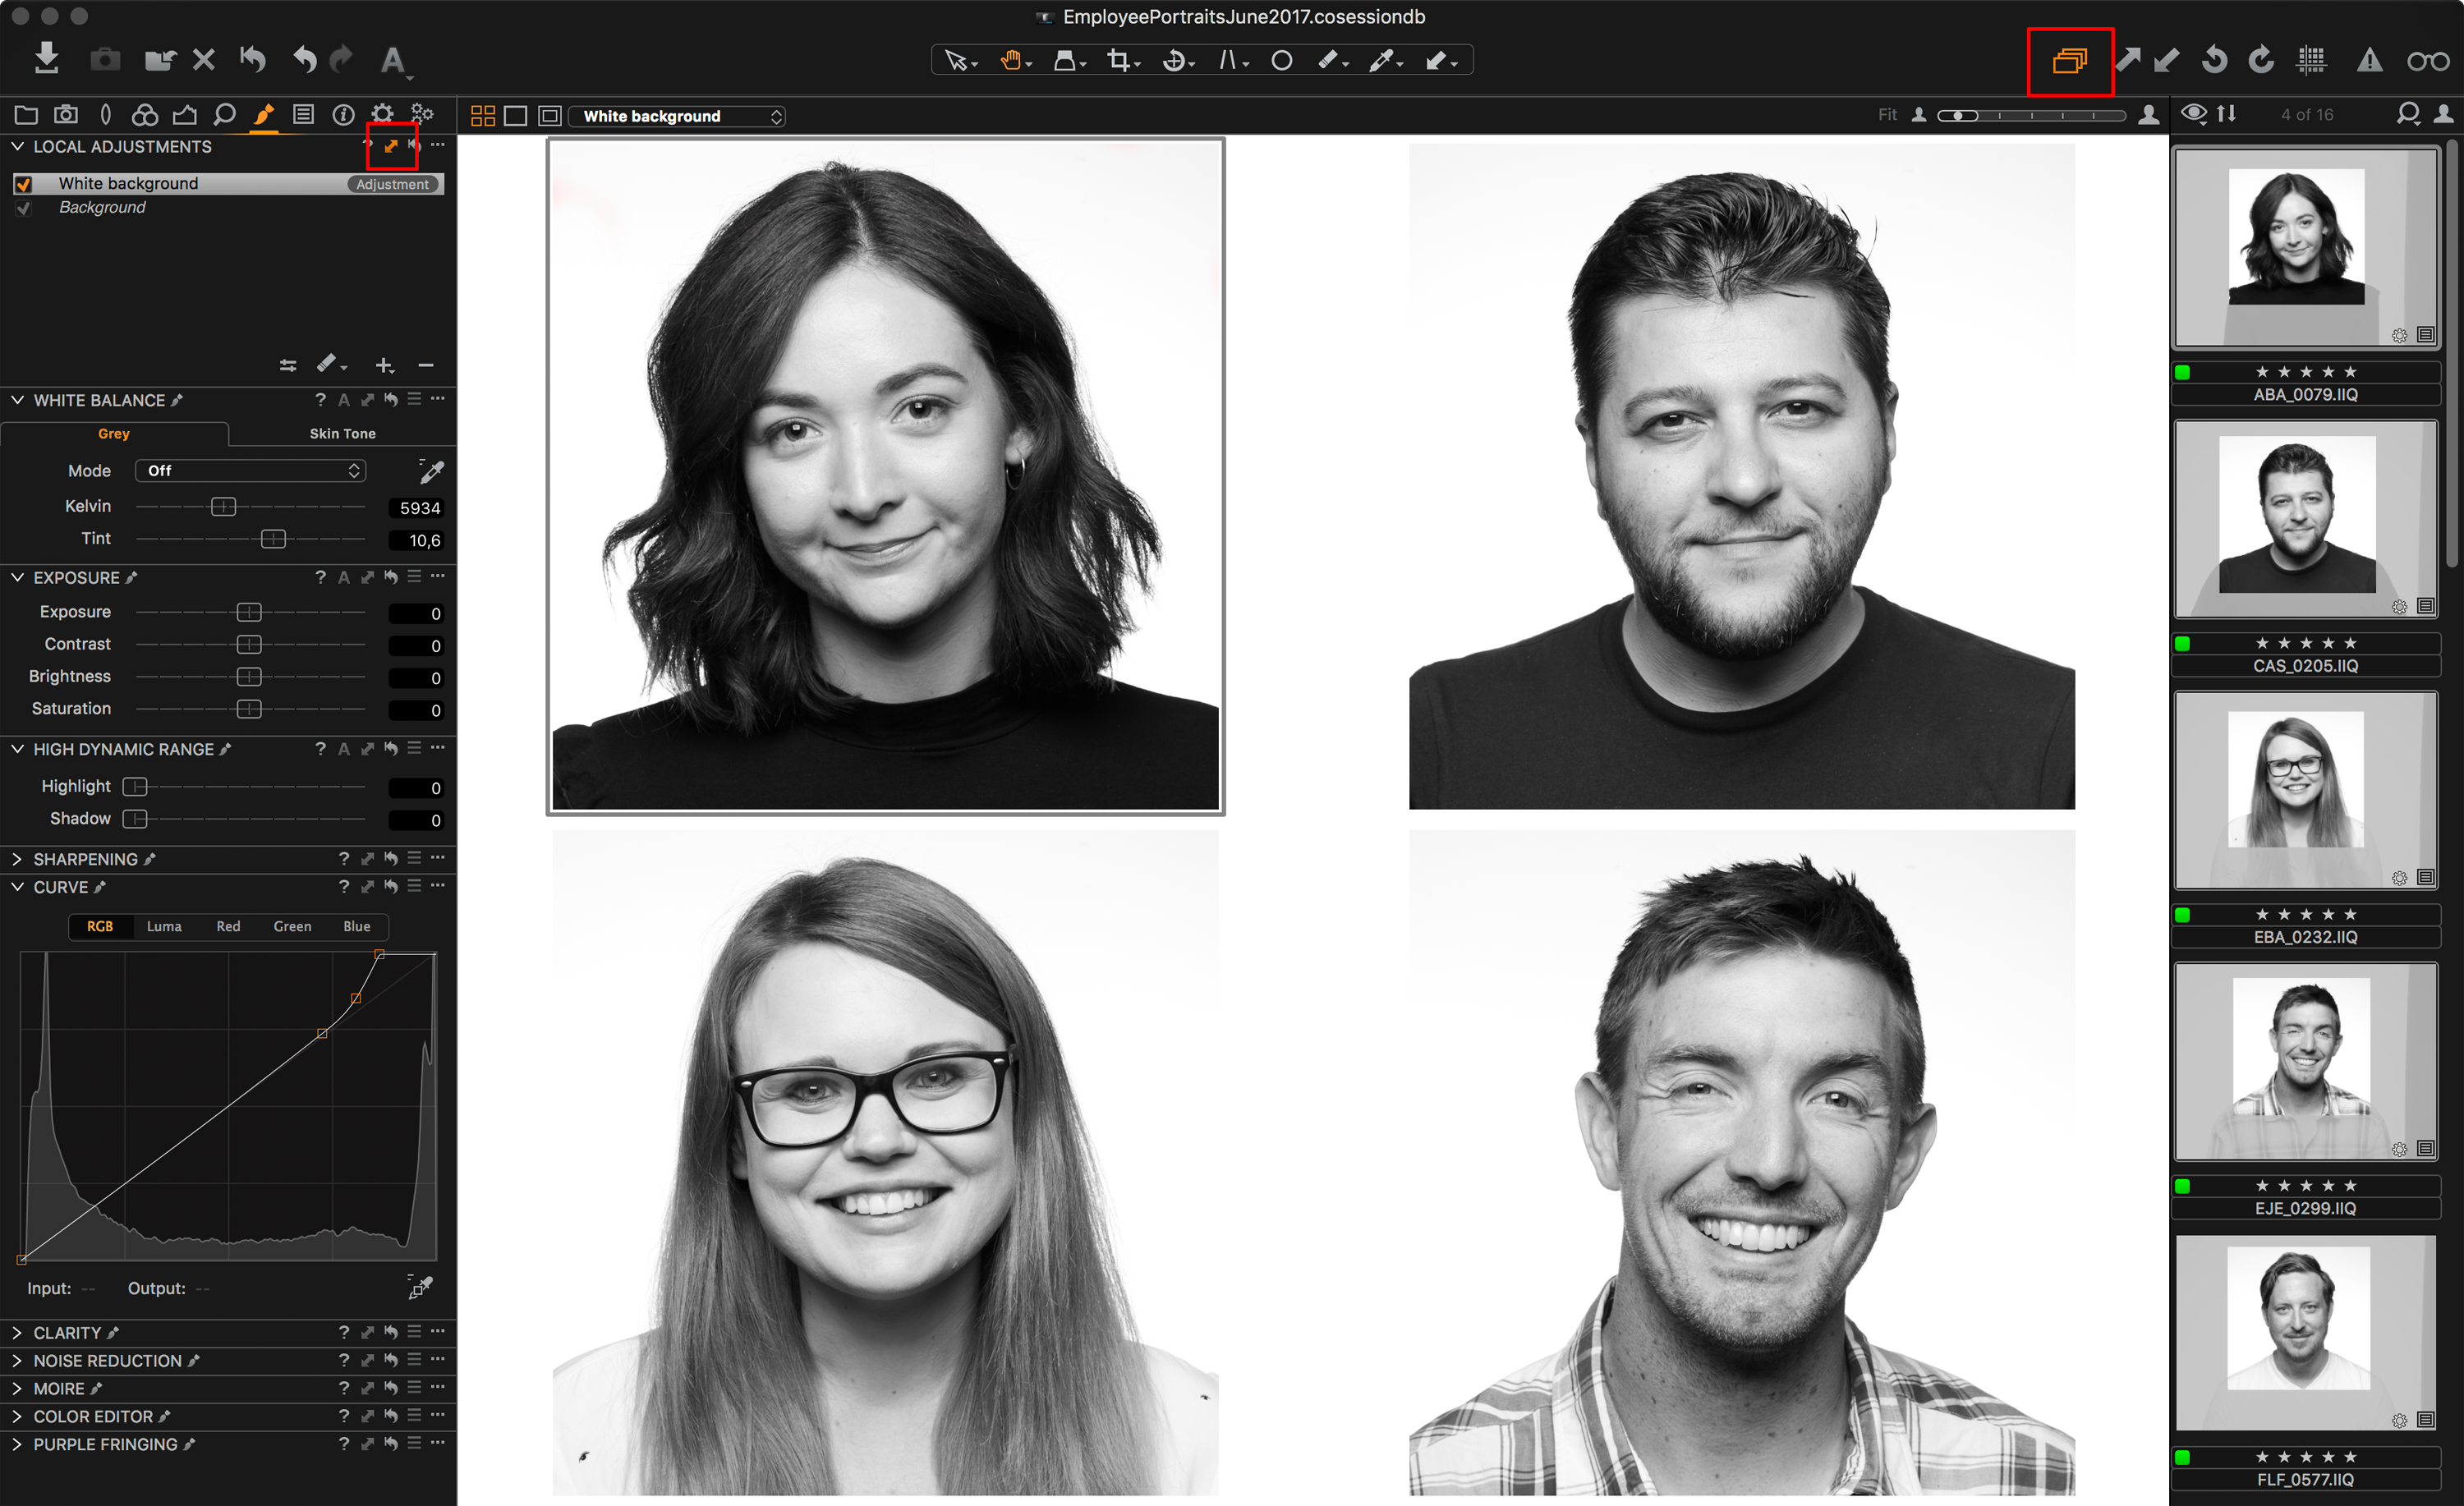
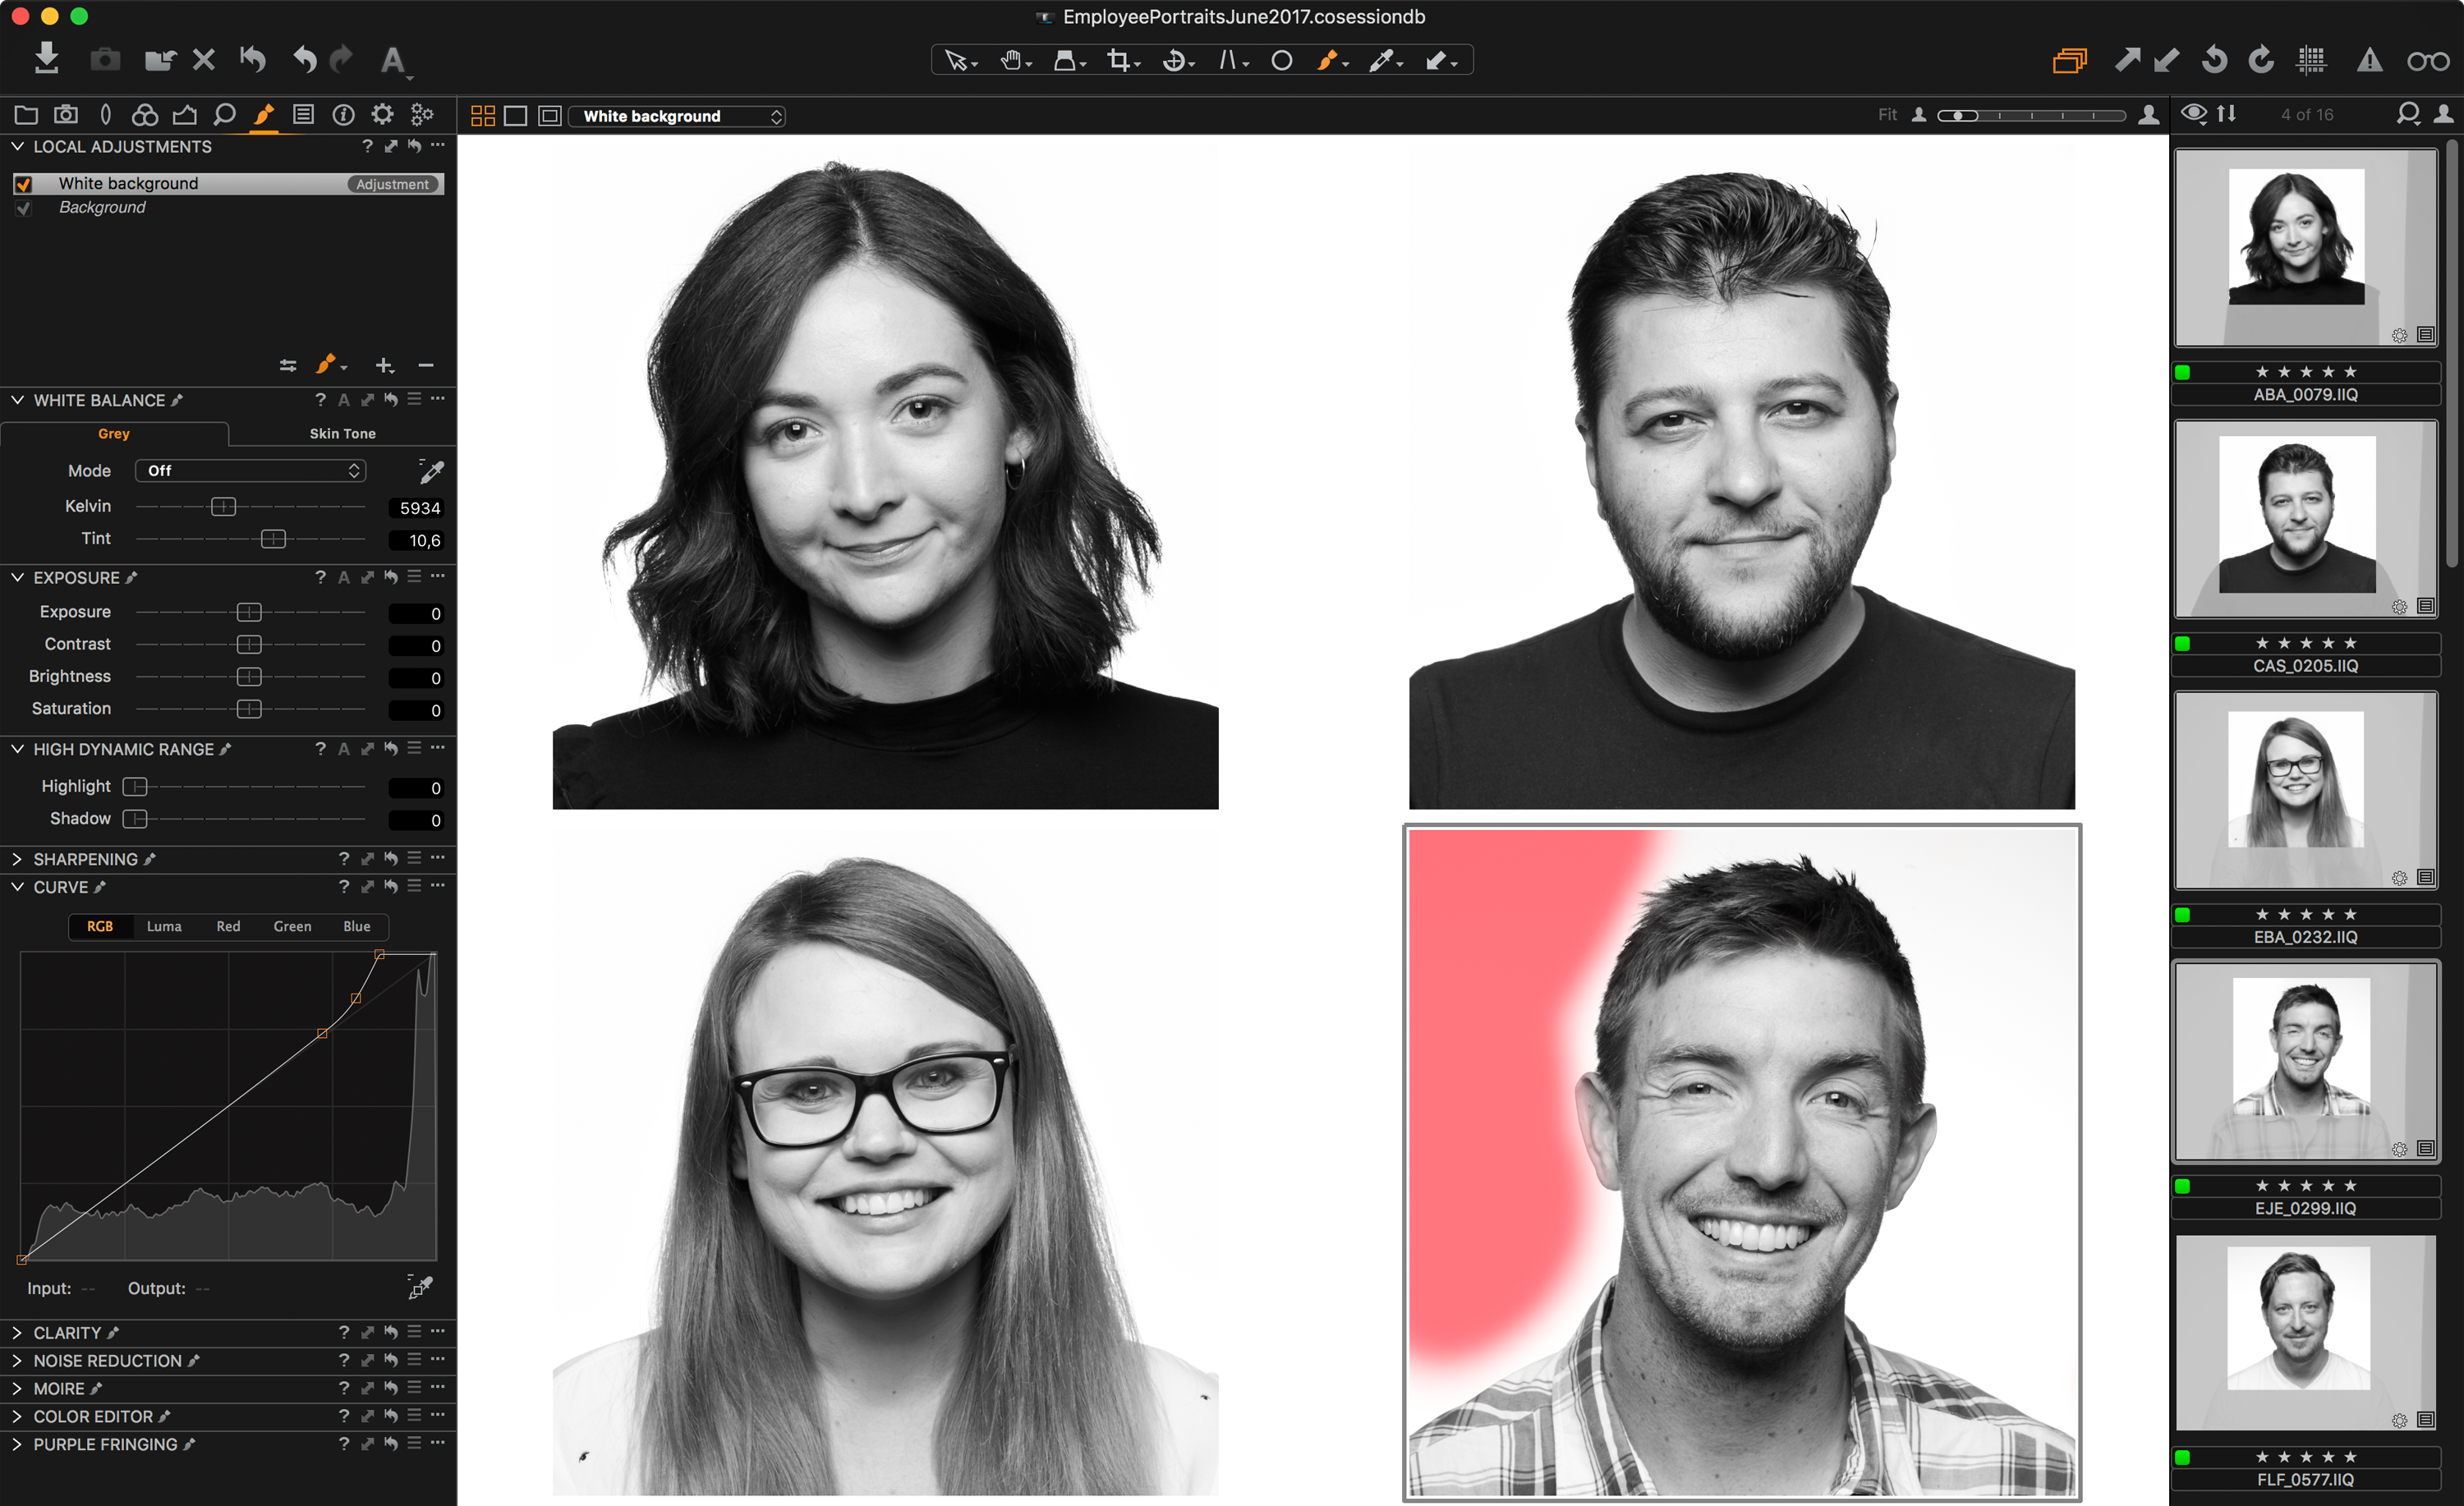
With the roundtrip feature in Capture One Pro, however, we can use the ability to create variants for just this task. Much like a raw file, we can create a new variant of any PSD file which creates a low footprint copy of the image without duplicating the actual PSD. From here we can adjust the crop on each variant, change the color grade, convert to black and white and use our process recipes to export any of them to the desired output format.
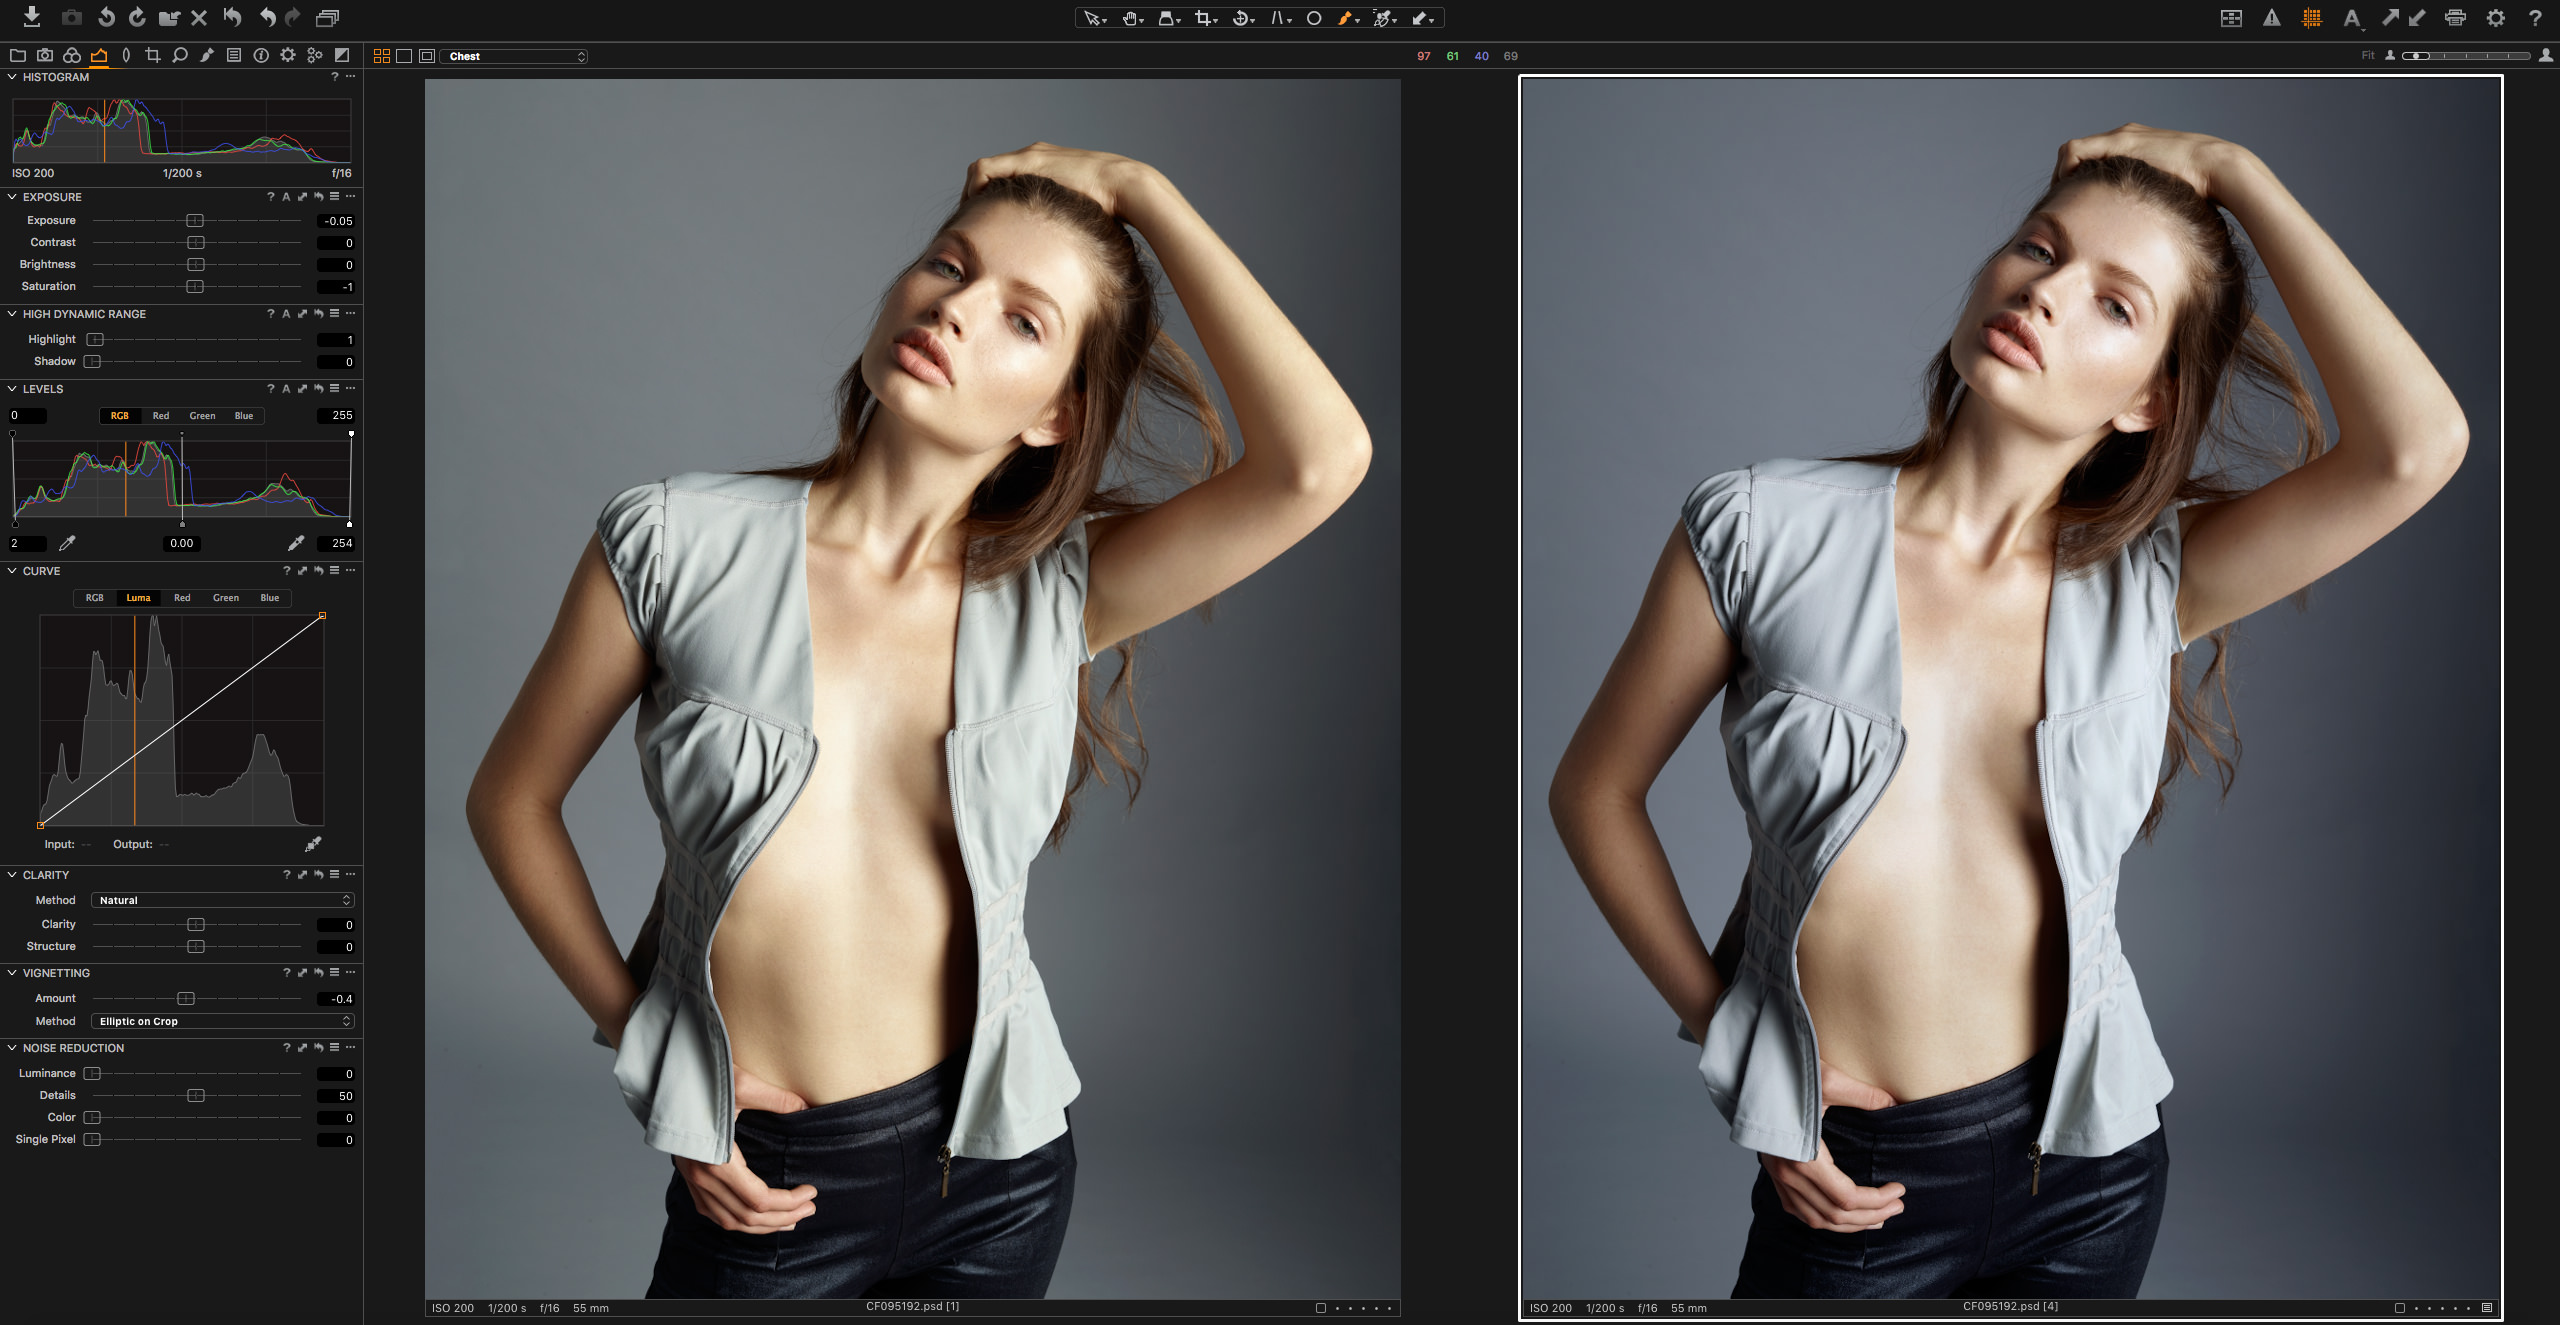
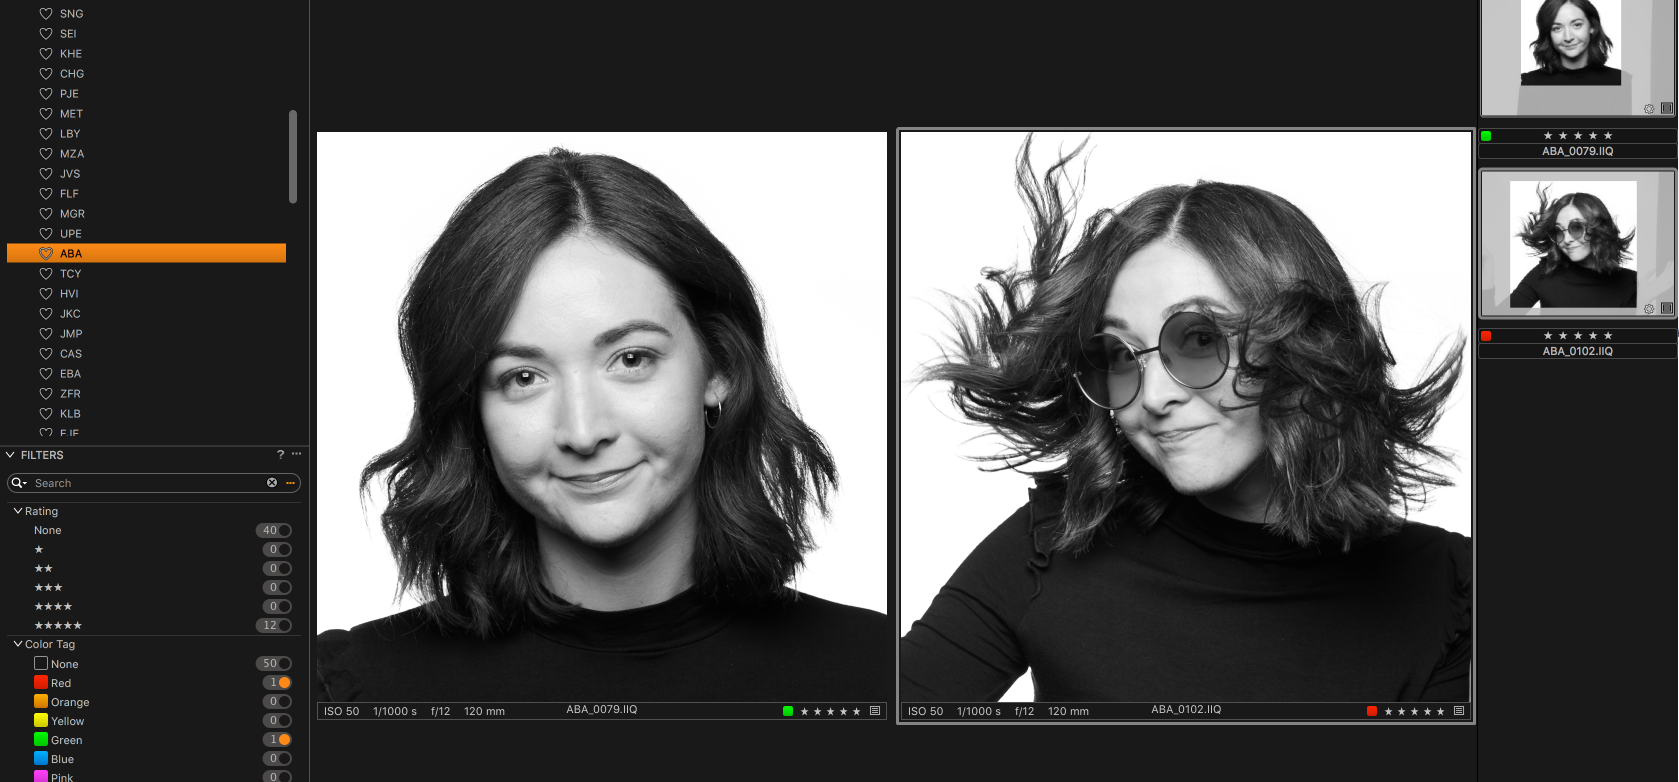
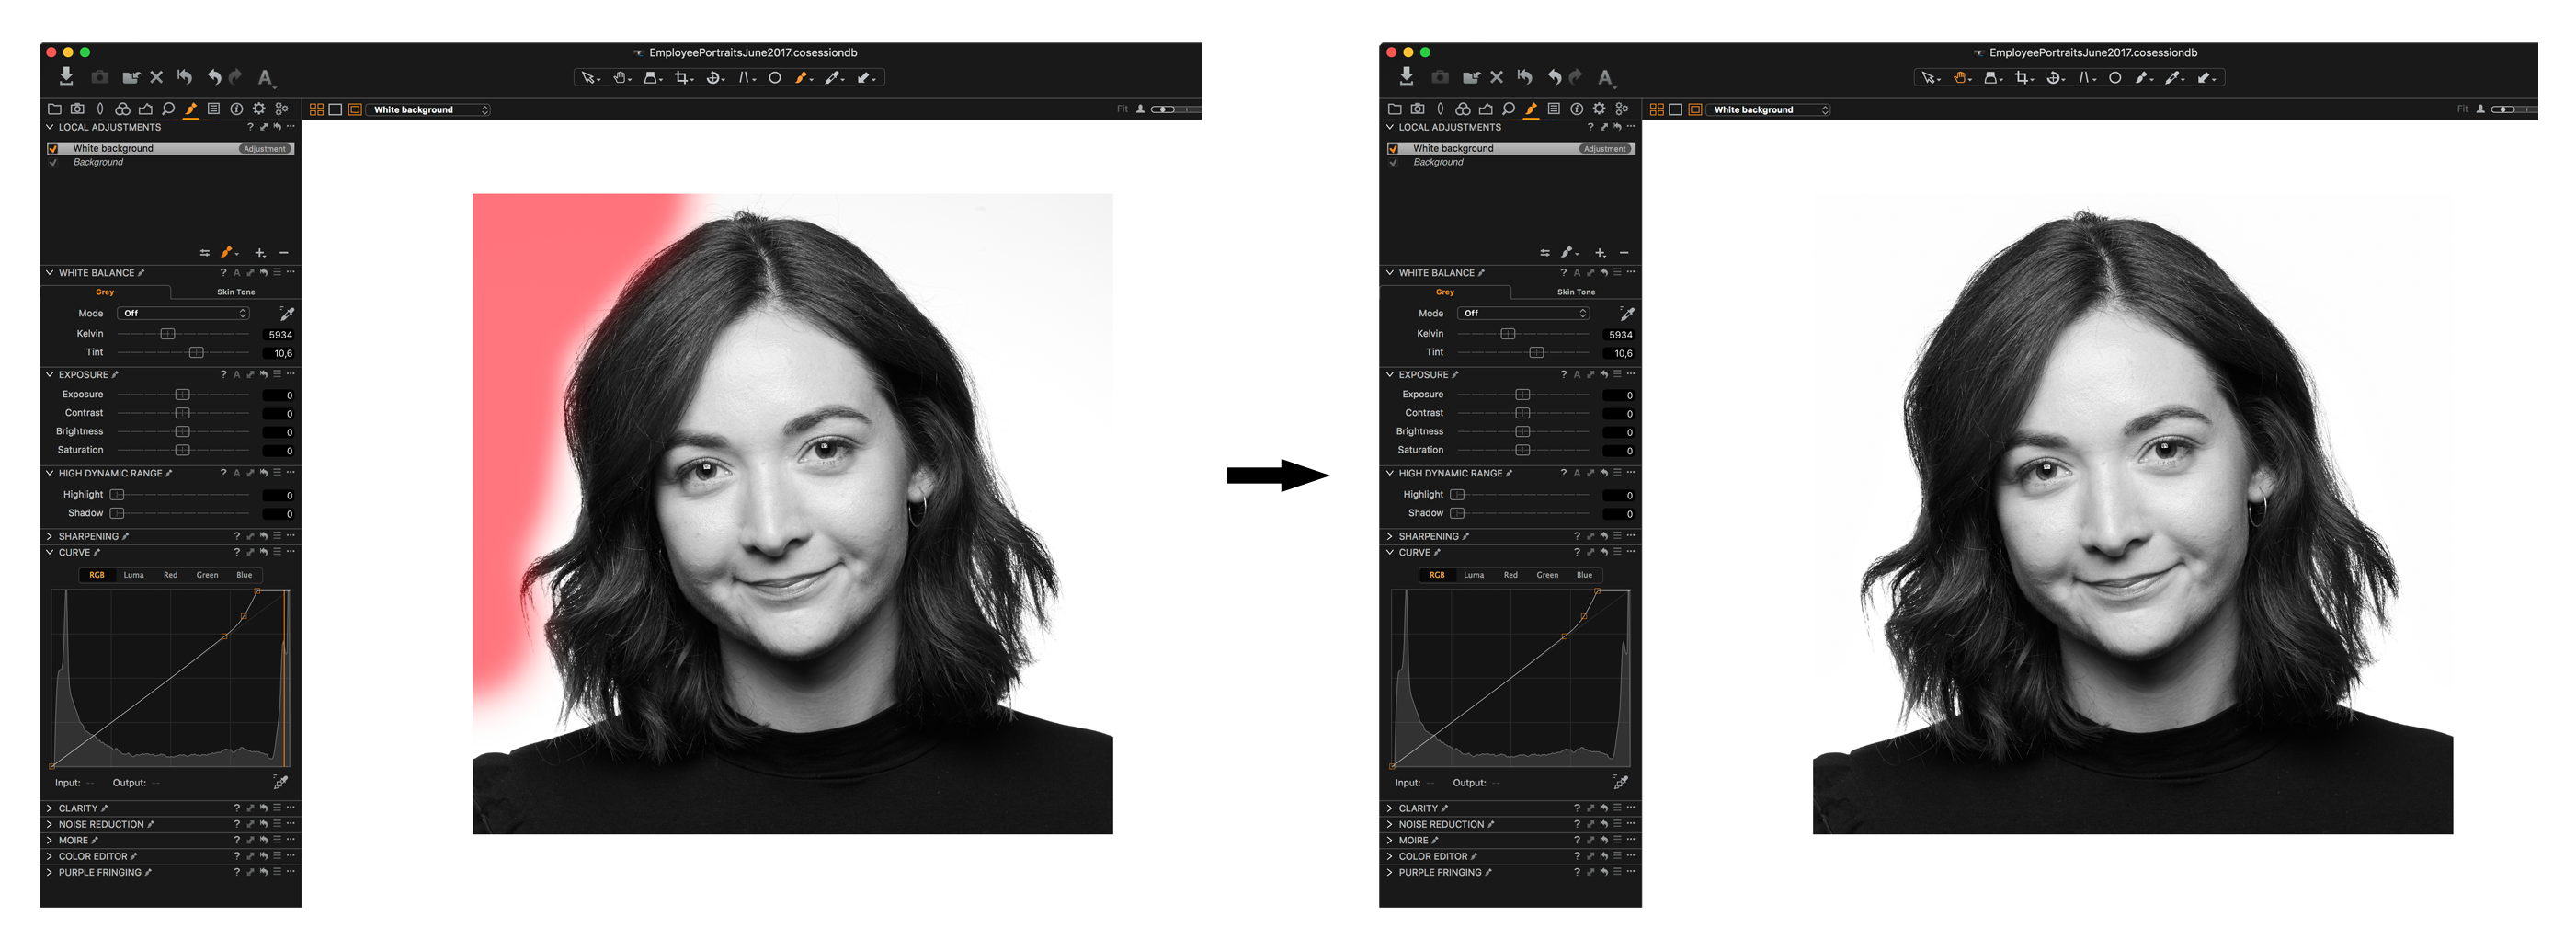
Often, once I finish the retouch in Photoshop I’ll immediately create a new variant of the image and perform some final color adjustments. An example of this can be seen in the above screenshot where the image on the left is the original while the one on the right has had some color and contrast adjustments made to it via the tools we discussed above. If I’m dealing with a series of images, I copy this adjustment from my first image across to all the other looks. I then select all the cloned variants from each of the looks and make some final adjustments to the color to ensure that they all match together. For a final check, I can also take these selections into a single contact sheet and print them to verify how they read on paper. From here, I may also duplicate the original and create a B&W version as well as various crops such as 4×5 for Instagram or 8.5×11 for printing.
Other finishing tools we may use include adding a slight vignette, using the natural clarity slider (in the range of 1-4) to add some final mid-tone contrast, as well as film grain. Grain is one thing I always like to add to the final image, but it’s not something I want in my base PSD file. The amount of grain I add will vary depending on output size as well as the display media, and I typically add much more grain to a B&W shot than I will a color one. All these things can easily be achieved by creating various style presets in Capture One Pro that provide you with a good starting point. The below image demonstrates the addition of film grain to a B&W variant. When adding grain, I strongly recommend zooming in quite close to get a better feel for just how much grain is being added. Be sure to experiment with the various grain types to find the effect you want, but in general, you’ll find that Capture One Pro produces very natural looking grain across the board.
One of the greatest things about this sort of workflow is that it’s flexible. If at this stage I discover that I have a stray hair that is bothering me, or the client requests a change, I can easily go back to Photoshop, make the change and have all my variants automatically updated to reflect it. This is effectively an extension of the adjustment layer approach we discussed at the Photoshop retouching stage, which ensures that as little as possible is rasterized and that flexibility is maintained until the very end.
As an absolute final step, we have to output the image into the appropriate size and format. For this you can set up various process recipes to create the desired output. One of my favourite tools for this is Recipe Proofing.
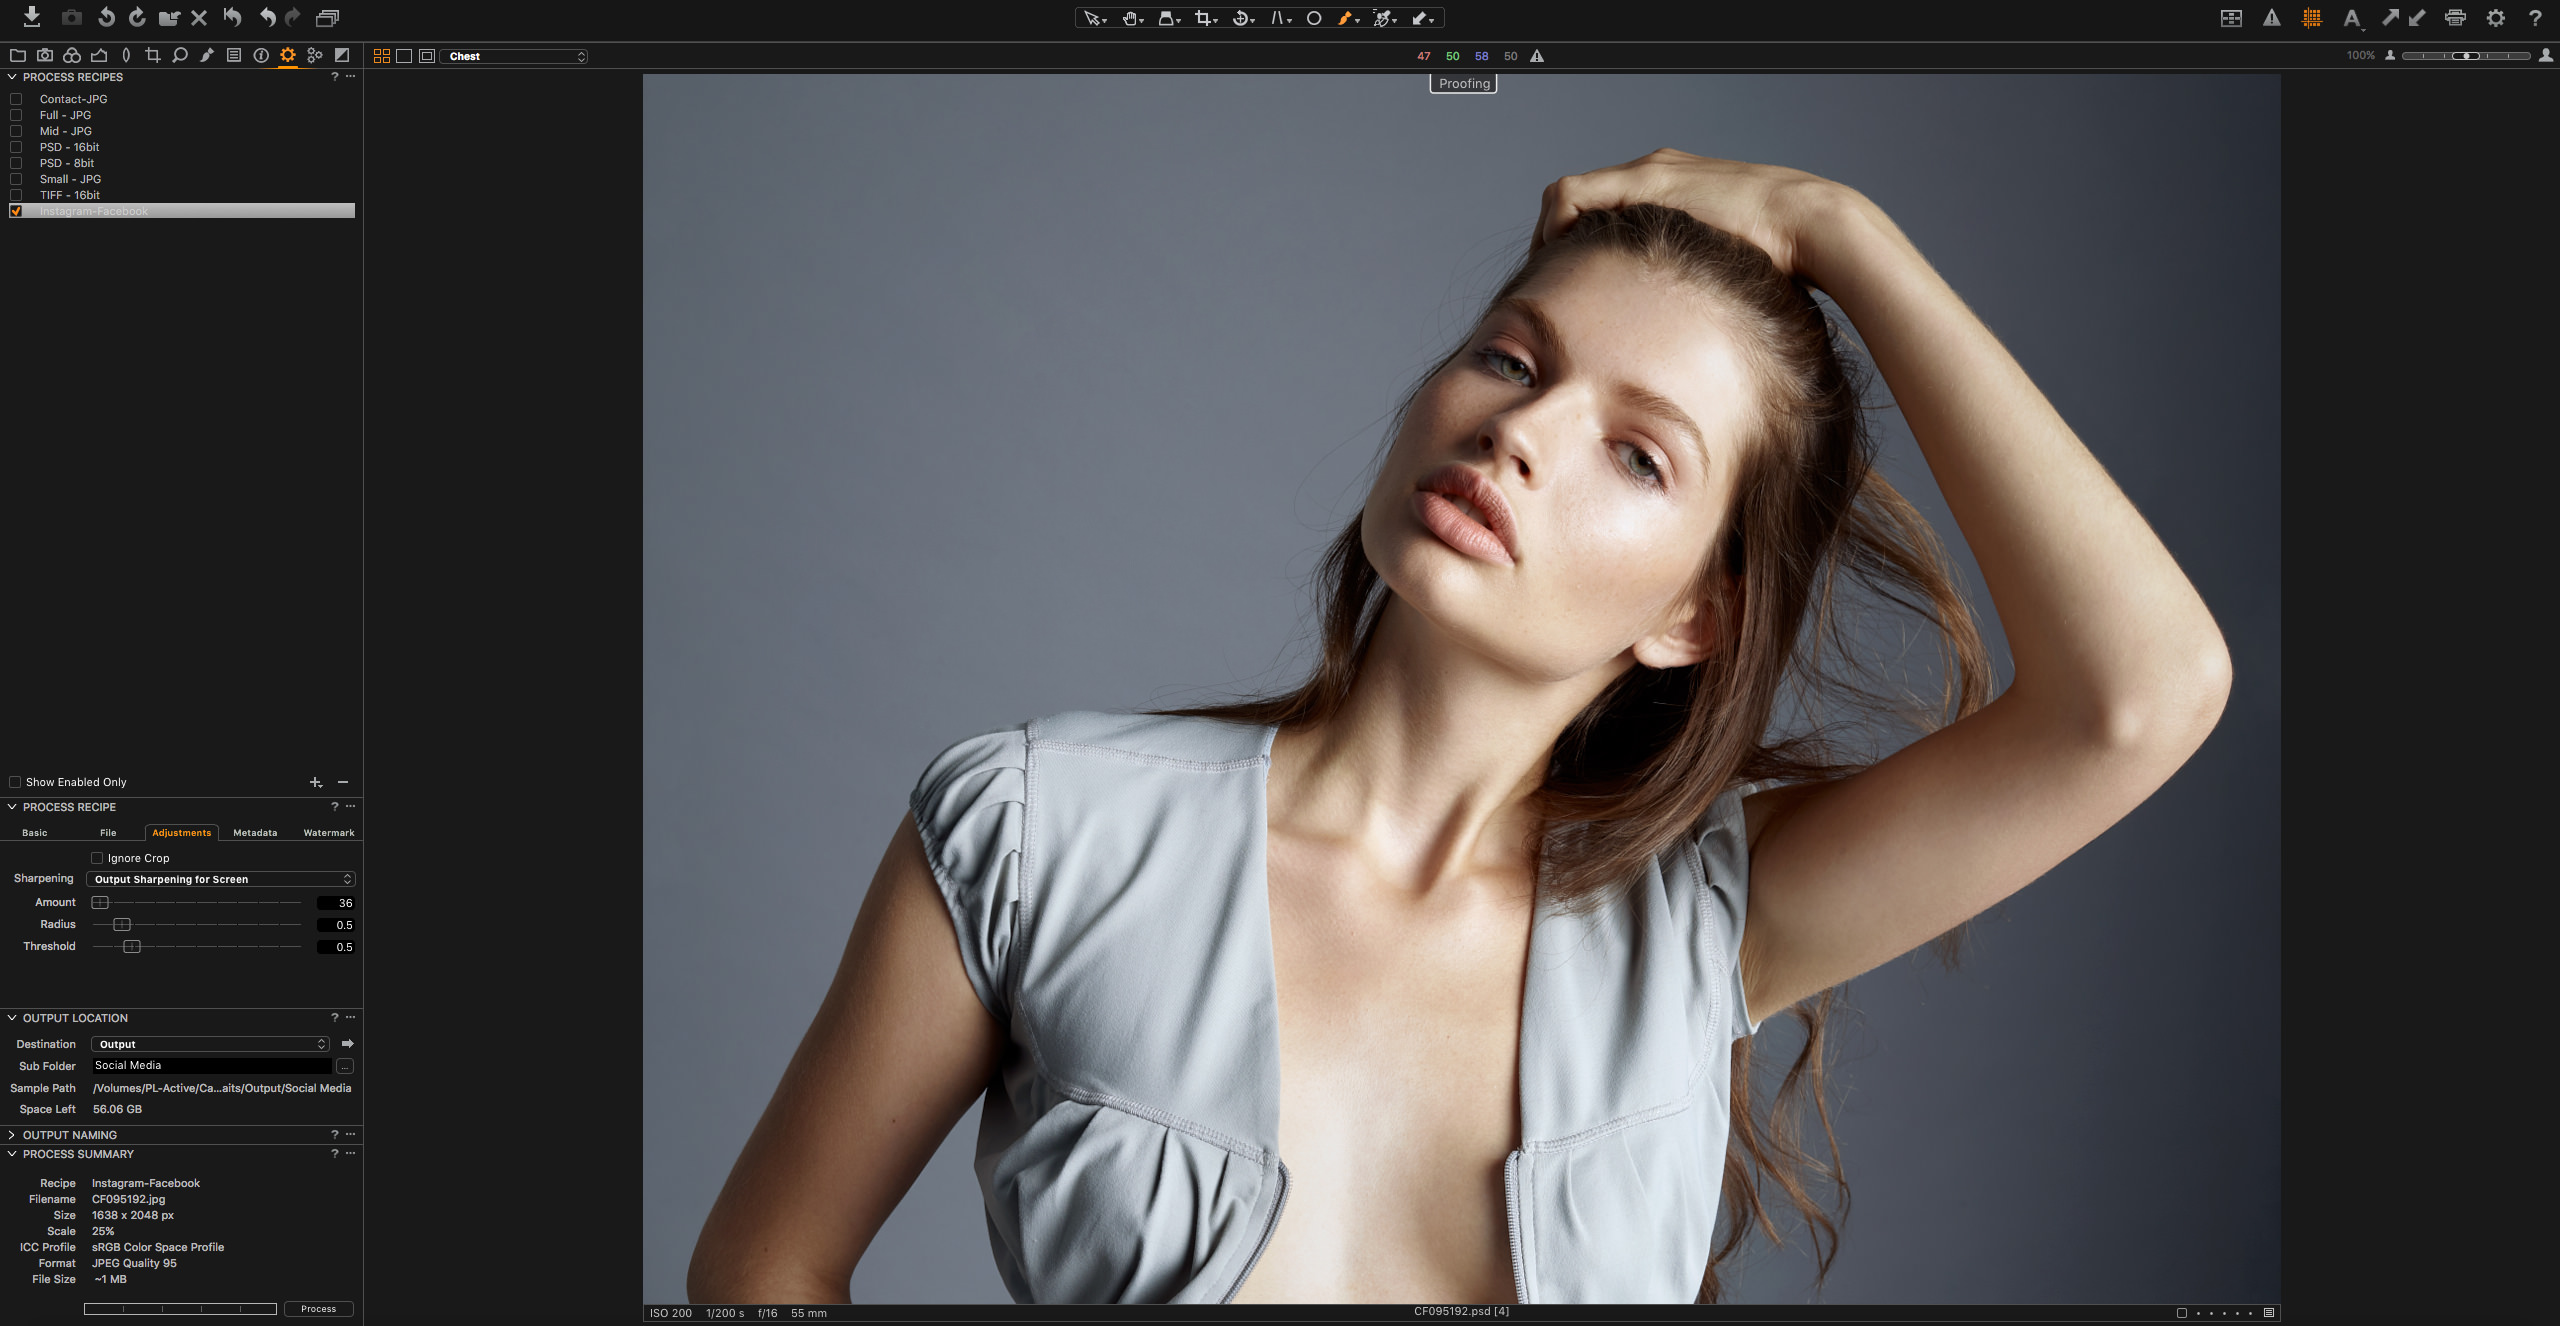
Recipe proofing can be enabled via the View menu and clicking on Show Recipe Proofing. This will give you an on-screen view of what your final output will look like under the process recipe settings. This is particularly useful for sharpening as well as the application of print color profiles. Capture One Pro does a nice job of sharpening the image, and the ability to visually adjust the amount is extremely helpful. When applying sharpening, be sure to zoom in to 100% to start and then scale back to ensure that you’re not overdoing it. Adding ICC profiles to your output – if you’re exporting a TIFF for a print publication for example – is where proofing really shines. If I’m exporting a TIFF with a specific color profile, I’ll typically do this with a newly cloned variant so that I can make some more adjustments to it. Once the ICC profile is applied, you immediately see the effects on the image, and under the proofing view, you can go back and make further adjustments to the contrast or color to make it more suitable to that particular profile. Once again, whatever adjustments I apply to one look can easily be copied across to other looks from the same series.
With the myriad of media that an image is displayed in these days, simplifying the last stage in the image workflow can yield hours of time savings each week and allows you to respond to client requests that much faster. We often obsess over the actual retouch of the image and concentrate most of our time to master elements of skin retouching, while image management falls by the wayside. As you develop in your photography career, an efficient and flexible workflow becomes more and more essential, so be sure to give each step in the process equal respect, and you’ll find that not only will you save time, but the quality and consistency will improve as well.
If you want to learn more about the different topics mentioned in this blog post, visit our User Guide:
Tethered Capture
Exposure and Contrast
Color Balance Tool
Using External Editors
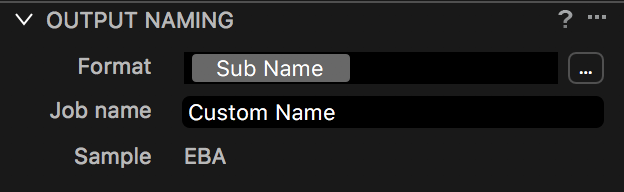
Process Recipes
Recipe Proofing