When I shoot weddings, my main goal is happy customers. They are happy when I deliver the images to the high quality they expect, and when I deliver them fast, so they can relive their special day as soon as possible.
To achieve this goal and meet the customer needs, I have set up what for me is an efficient, fast and reliable work flow – and that is what I would like to share with you in this post.
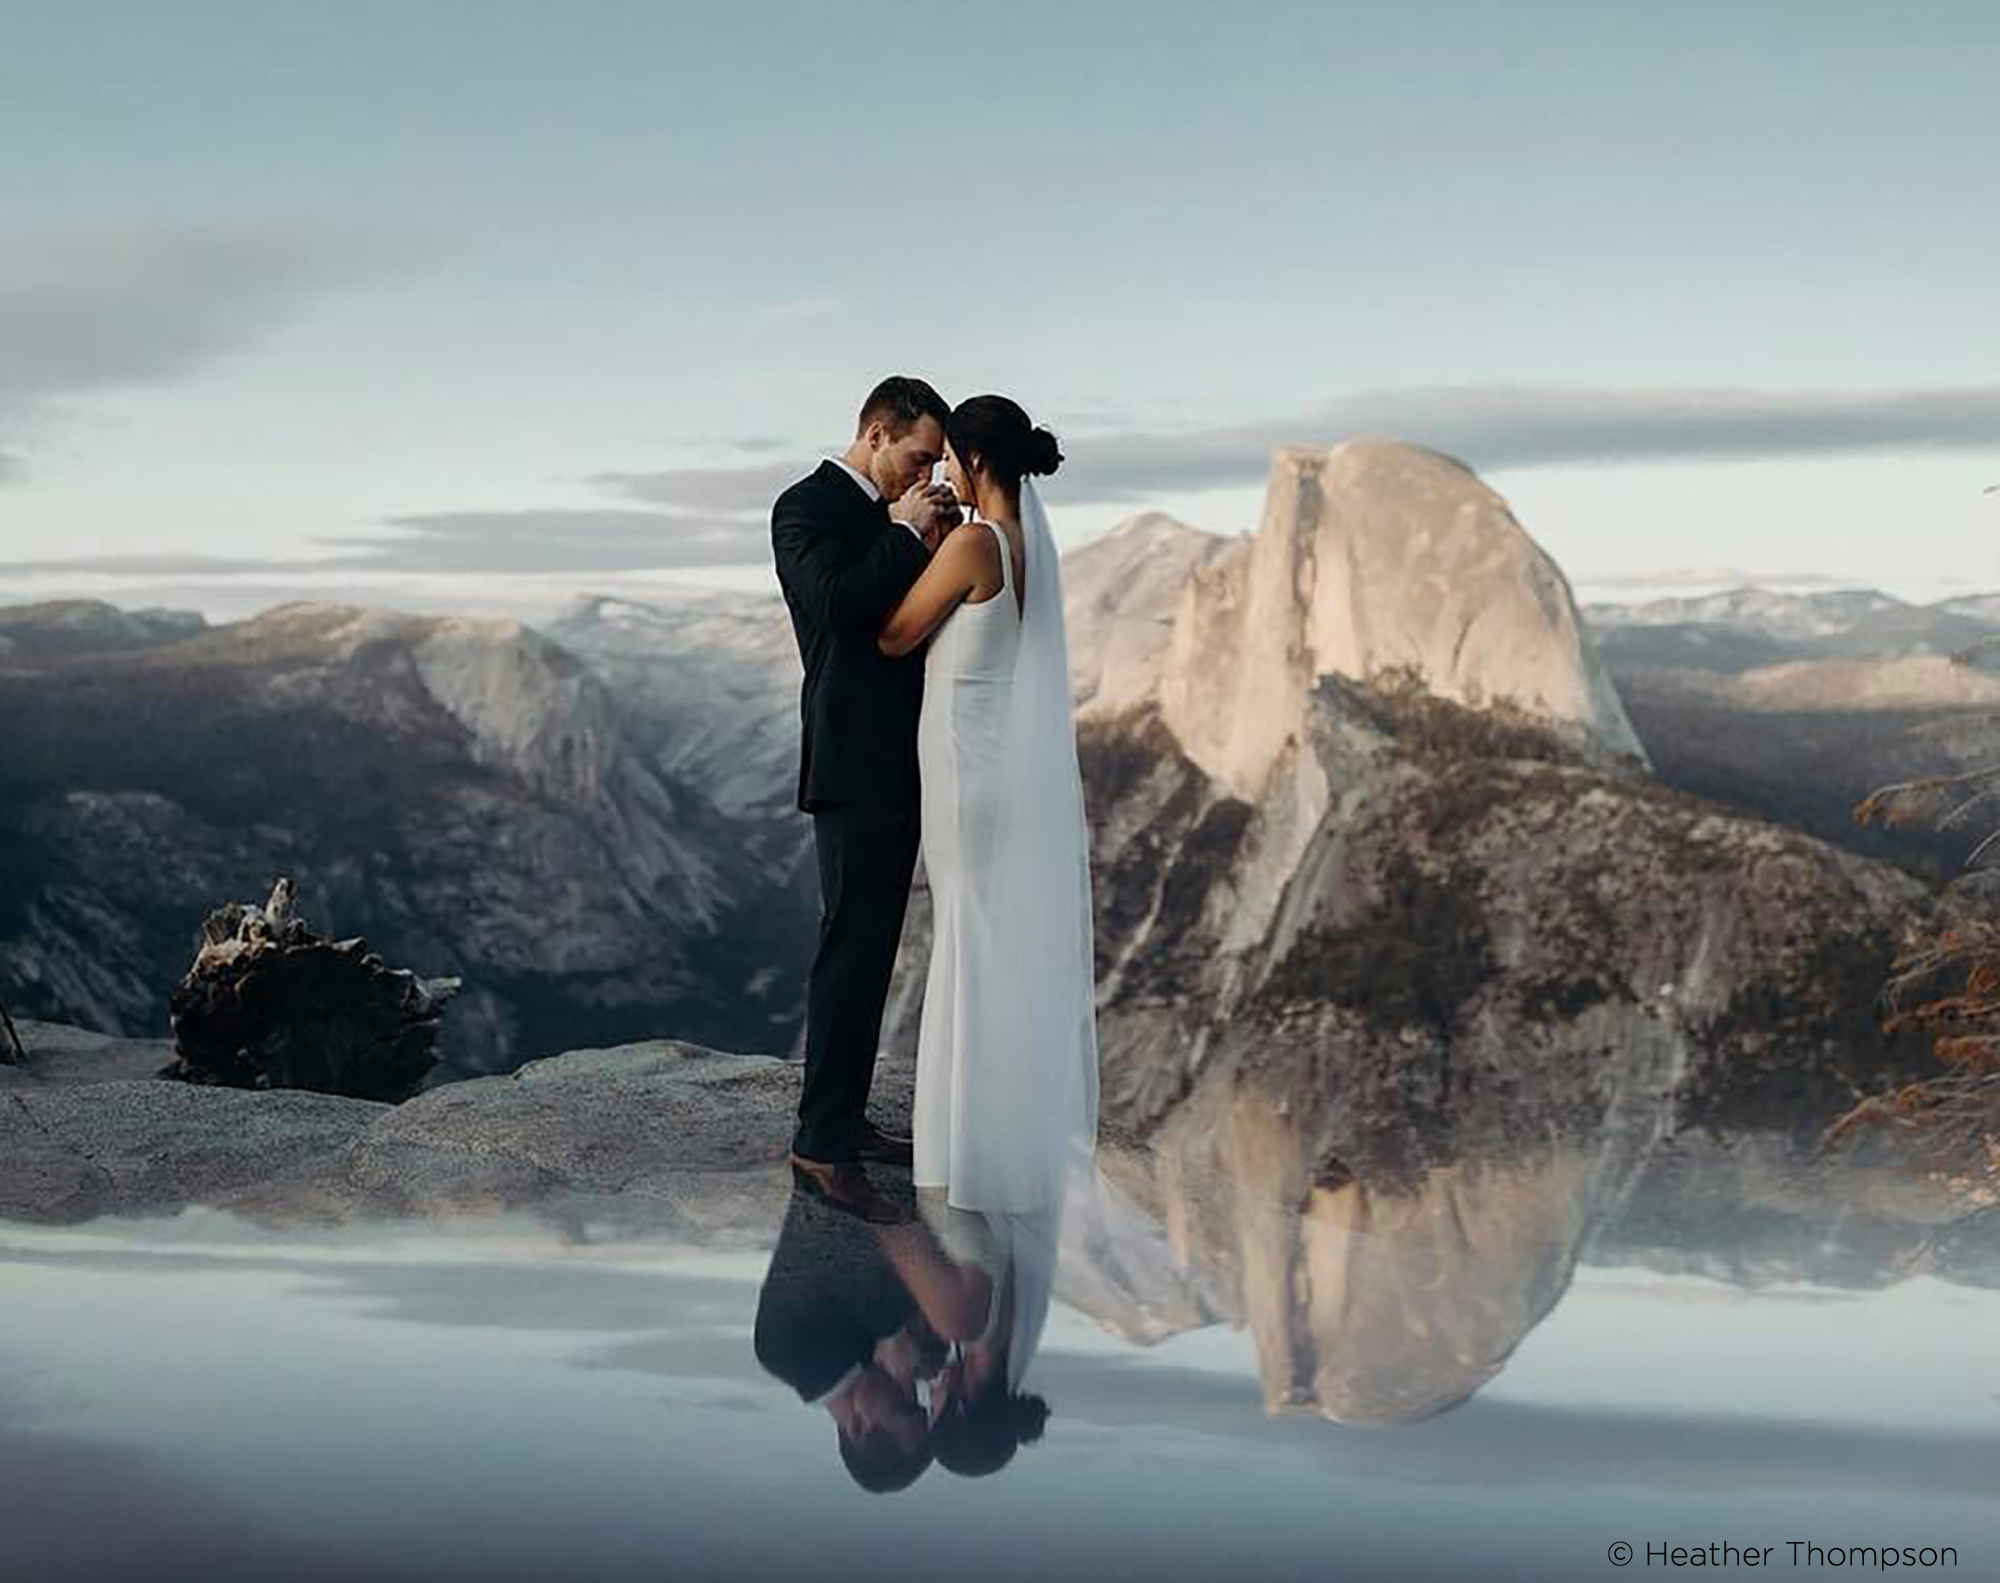
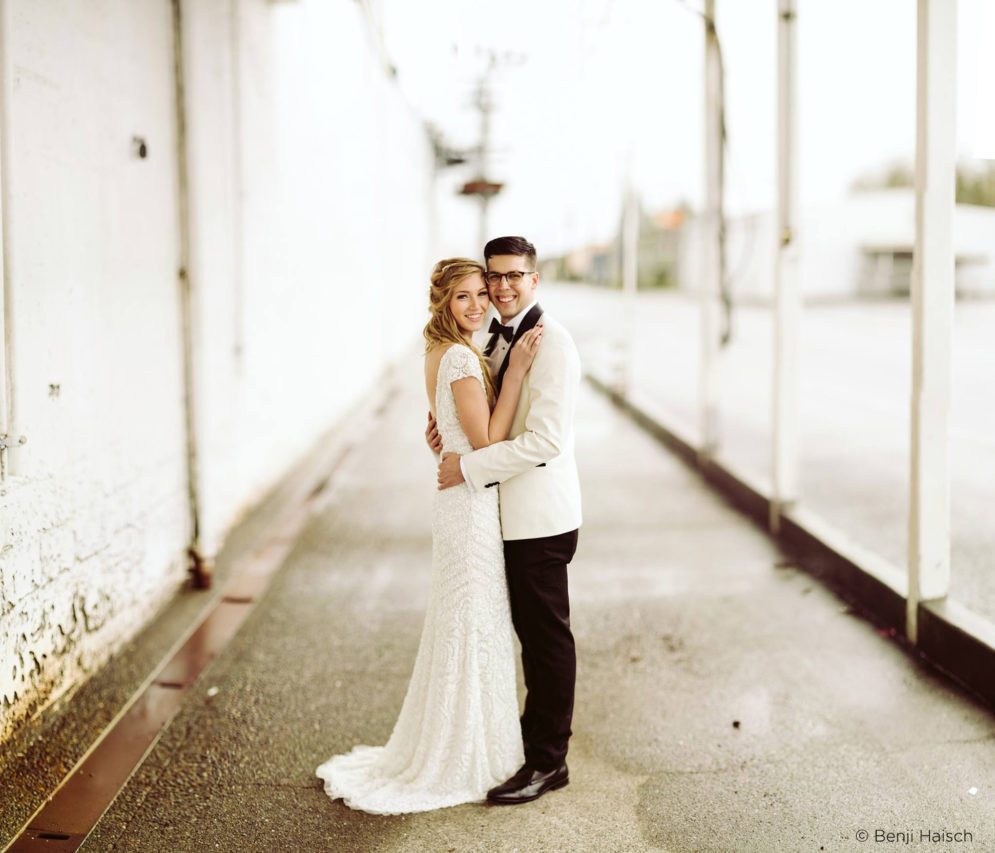
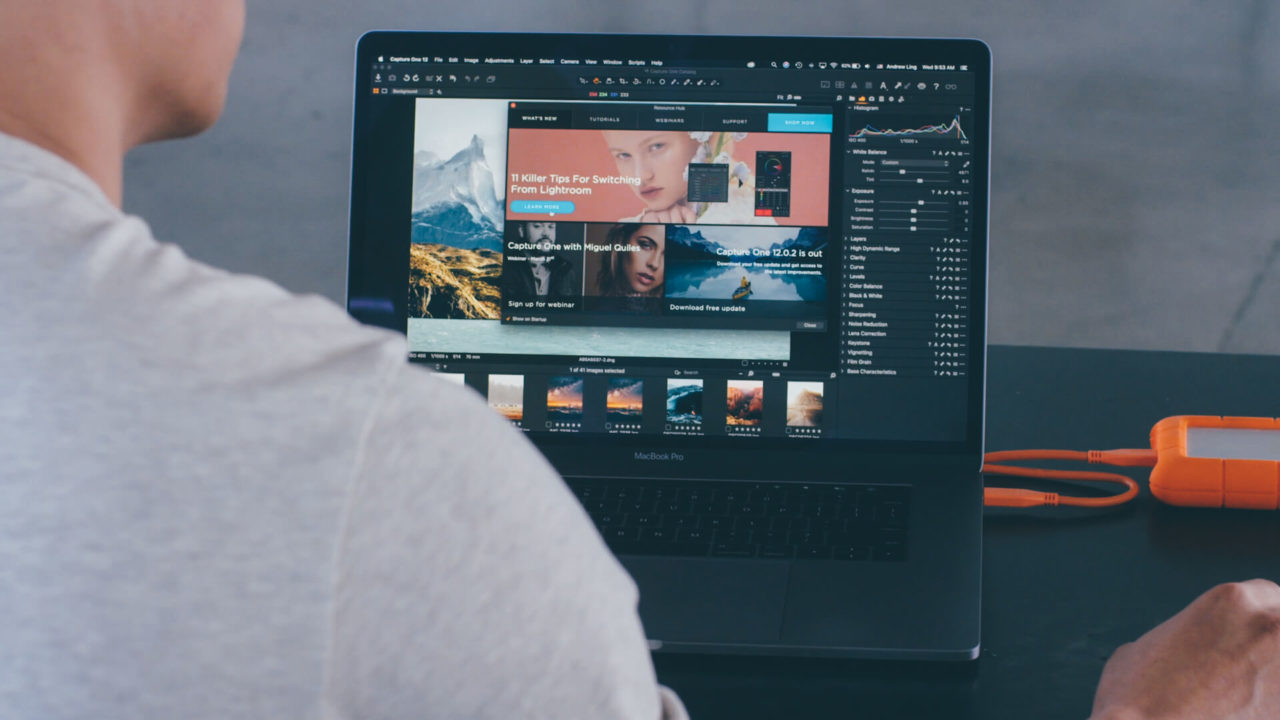
I’m a wedding photographer with a documentary touch. I shoot the venue, the people and the weather as is and I don’t photoshop any of my images. All editing, culling and processing happen exclusively using photo editing software Capture One Pro.
Let’s get started!
Collecting images
When I’m out at the wedding my main goal is to back up my images on the go. Whenever I fill up a memory card I put it into an external hard drive with a card reader – so now the images are both on the memory card and on the hard drive.
I only have quite small 32GB memory cards, so if a card is damaged I will only lose a small percentage of my images – I also use two cameras at any given time, so there is minimal risk of losing an entire slot during the wedding.
When I return to my office I back up the images on my computer. Then I go to sleep, ready to look at the images the next day with fresh eyes.
Import and Culling
Before I start culling and rating images, I import the images into a Session. I could also choose to import them into a Catalog, but I like the way the folders are created and I can create smart albums for each individual stage or “chapter” of the wedding, for example:
– Preparation
– Ceremony
– Reception
– Portraits
– Dinner
– Dance
This way, I easily have an overview and there is an advantage when it comes to editing – but we will get back to that.
I then import to the Capture Folder. I don’t use of the “Back up to” functions, because I have an automatic cloud backup which detects any changes in the chosen folders and backs them up immediately. But you can choose to back up to an external hard drive, NAS, second folder or wherever you like.
In Naming you can choose between different Tokens, which will help you name the files. I usually name the files using the following tokens: “Job Name” then insert an underscore to divide the Tokens and “Image Name” – so I have the name of both the job and the original filename.
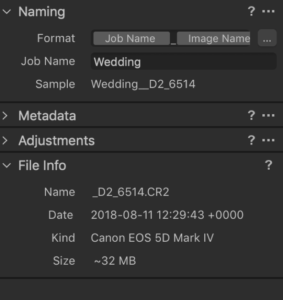
You will be shown a Sample, so that you know that the naming is correct, before you import an entire wedding.
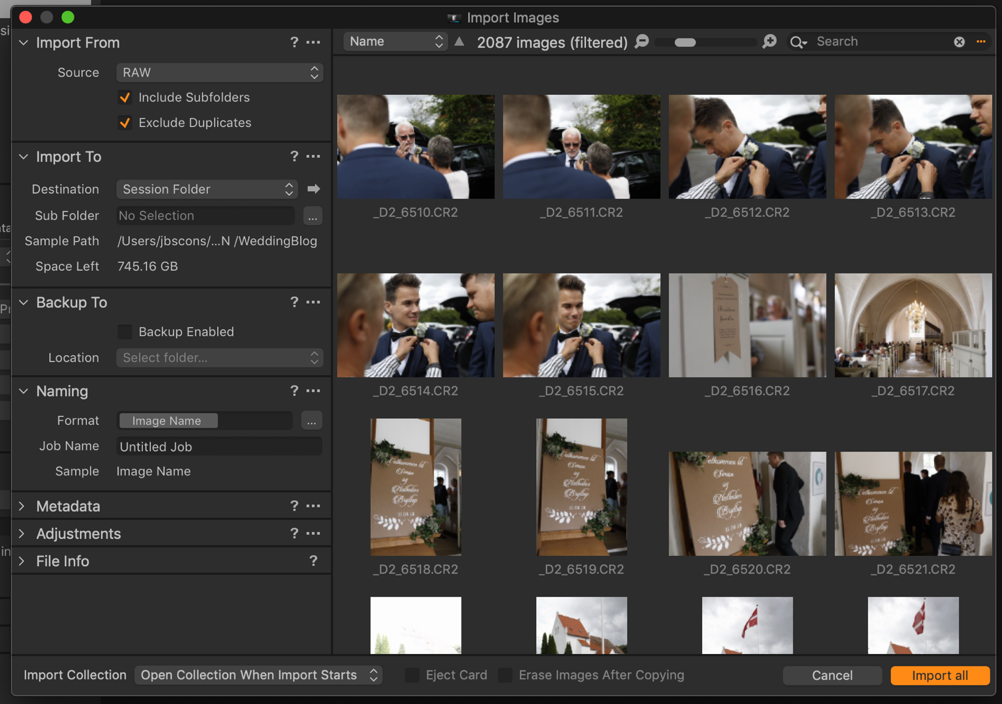
This is the Dialogue box when you choose “Import images”. Note that you also have the “Import To” section – that’s where the images will be saved. This can be on the computer’s hard drive, RAID drive or anywhere you want.
In the , you can fill out metadata information if you want to. I usually don’t, because it’s already set in my camera.
You can also choose to make initial adjustments during import. I prefer to do it afterwards, but some photographers like to auto adjust the white balance, for example.
Culling
Now the images are imported, it’s time to find all the gold shots.
I have quite a simple way of doing this. All the images that I want to edit are given a rating 1 – simply press 1 when you see an image that you want to take a closer look at.
In this way I save a lot of time, and I wait until I have edited the images before I make the final cut. Some images gain a lot after the right adjustments, so I only have one round of culling, and after edit I might cut some more images.
When the images are rated, I create a Smart Album, for example “Portraits”. I then drag all the images from the portrait session to the Smart Album. This will help me when I’m grading the different photos, because the look has to be consistent throughout the different “stages” or “chapters” of the day.
There is a Focus Mask option which shows you which elements are in focus in the selected image. I don’t use that option because I choose an image based on its mood and not whether it’s razor-sharp.
However, I do know a lot of photographers who use the Focus Mask, and therefore I feel its worth mentioning.
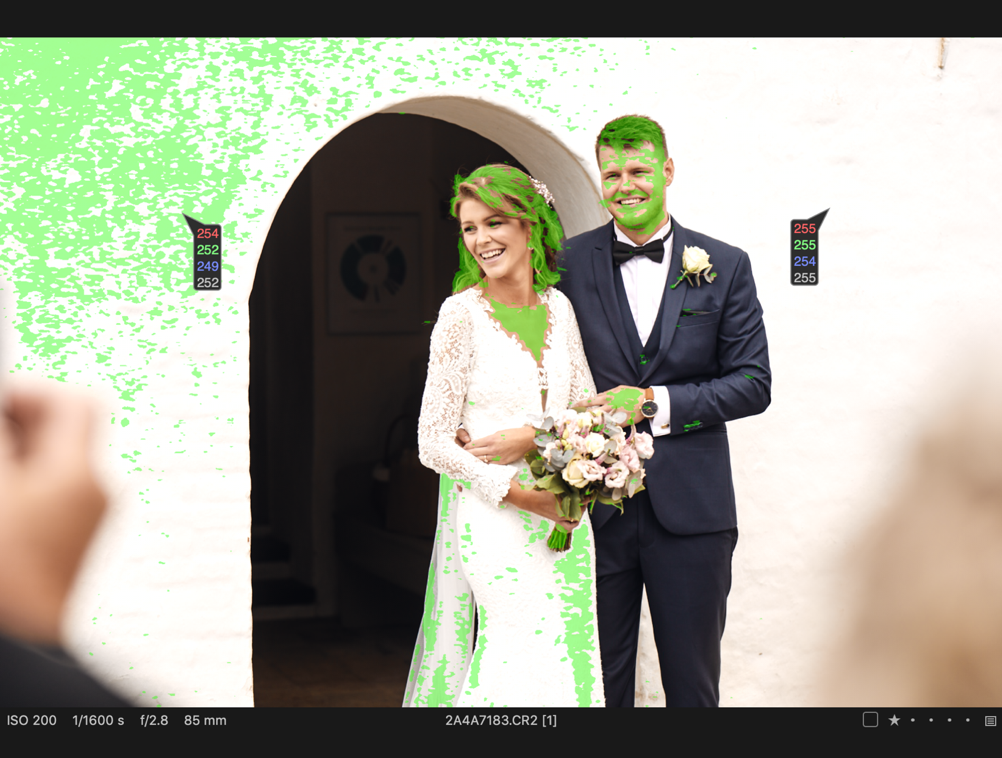
The green area shows which elements of the image are in focus.
Initial editing
After the rating process, I will go through all the rated images. My main focus is on: the right crop, straightening up the image, adjusting the white balance, exposure, brightness, contrast, vignette and clarity. At this point ,I don’t focus on the color grading the images.
There are a couple of particularly useful tools I would like to highlight. The first is the Brightness slider – and how I use it in combination with the exposure slider.
Let’s take a look at an example:
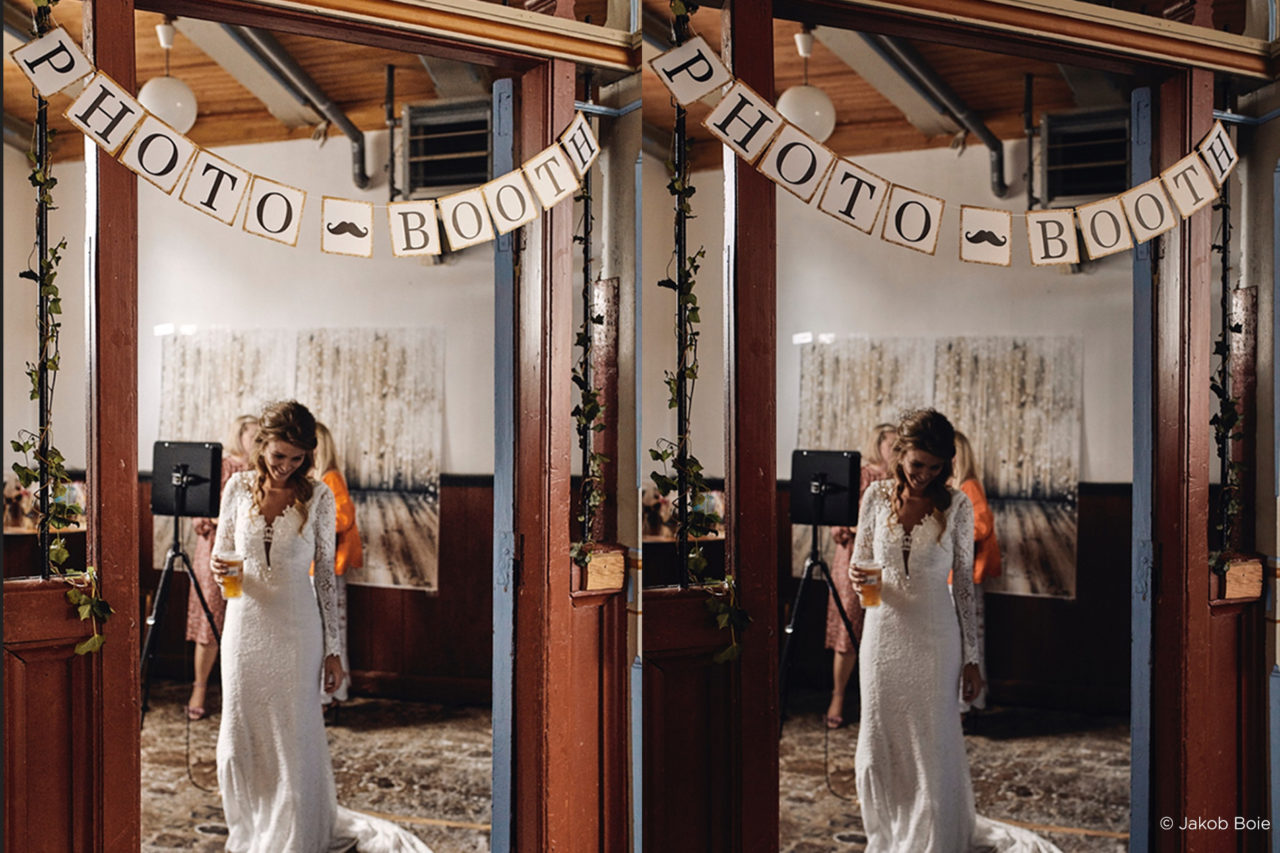
In the image to the left Exposure has been added. In the image to the right Brightness has been added, and Exposure has been decreased slightly.
Notice the difference in highlights and shadows. I think that when you lower the exposure and increase the brightness, the mood of the scene is preserved.
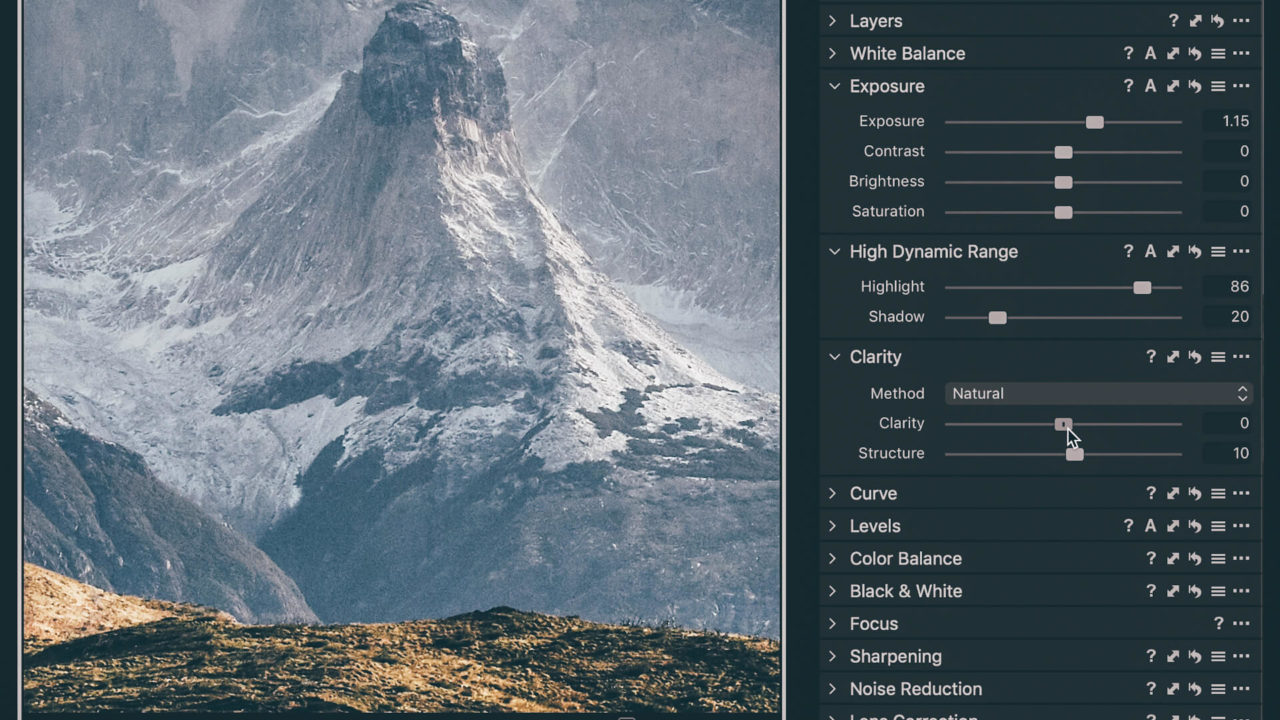
Things tend to move fast at weddings. Sometimes the settings in the camera don’t provide you with the perfect output and this will take some adjustments. For me, one of the biggest struggles has been recovering highlights and lightening shadows. Capture One has a very strong tool. The Highlight and Shadow recovery features are very subtle and are perfect to add that bit of sky or details in dark areas.
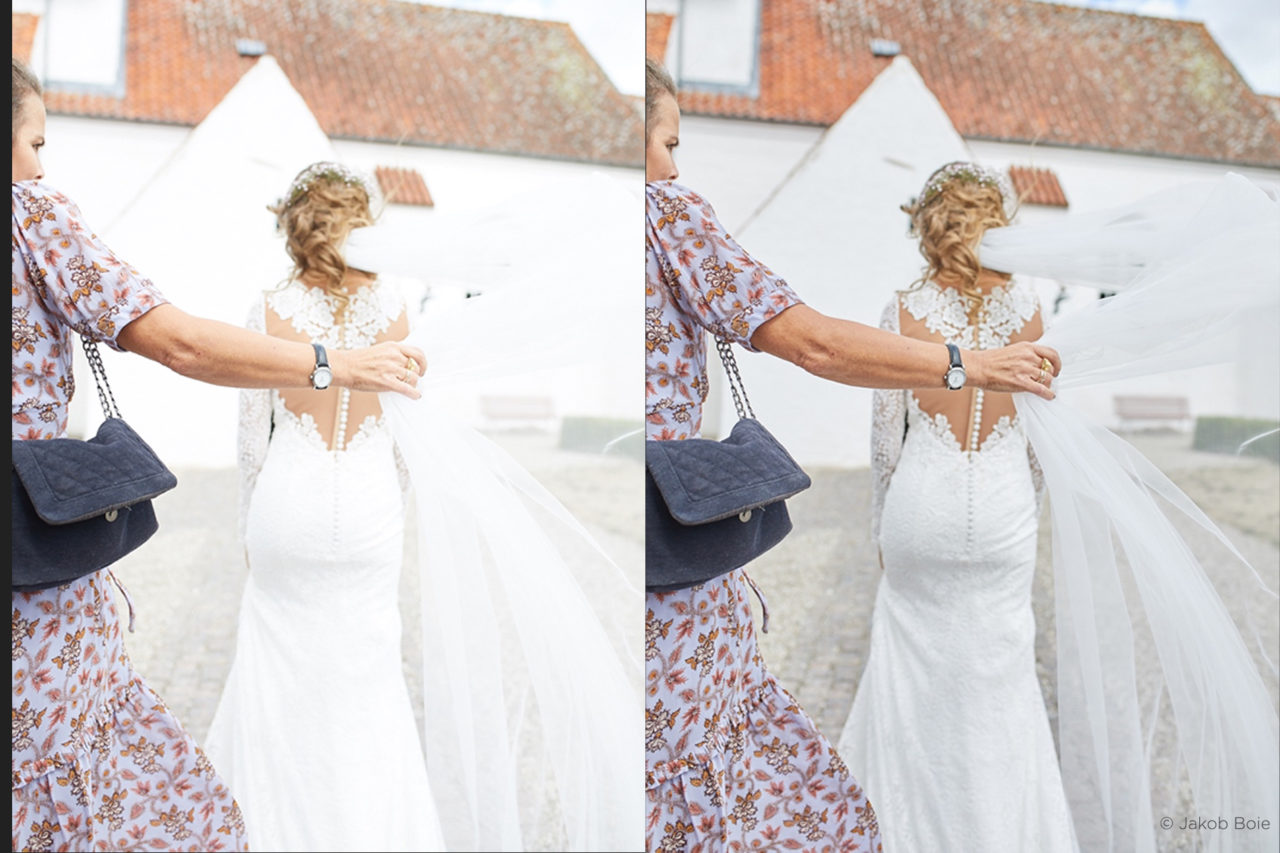
The image on the left is straight out of camera. The one to the right is after using the Highlight Recovery Slider , details in the dress show up, while the white church and the skies are more visible.
Styles
First of all, I love Styles! (Or what is known as ‘presets’ in other photo editing software) It’s an easy, fast and sufficient tool to quickly get the color grading your images deserve.
No matter how good your camera is, how well composed your image is – there will (almost) always something to gain by color grading to get the right mood for your images.
There are a number of ways to achieve this:
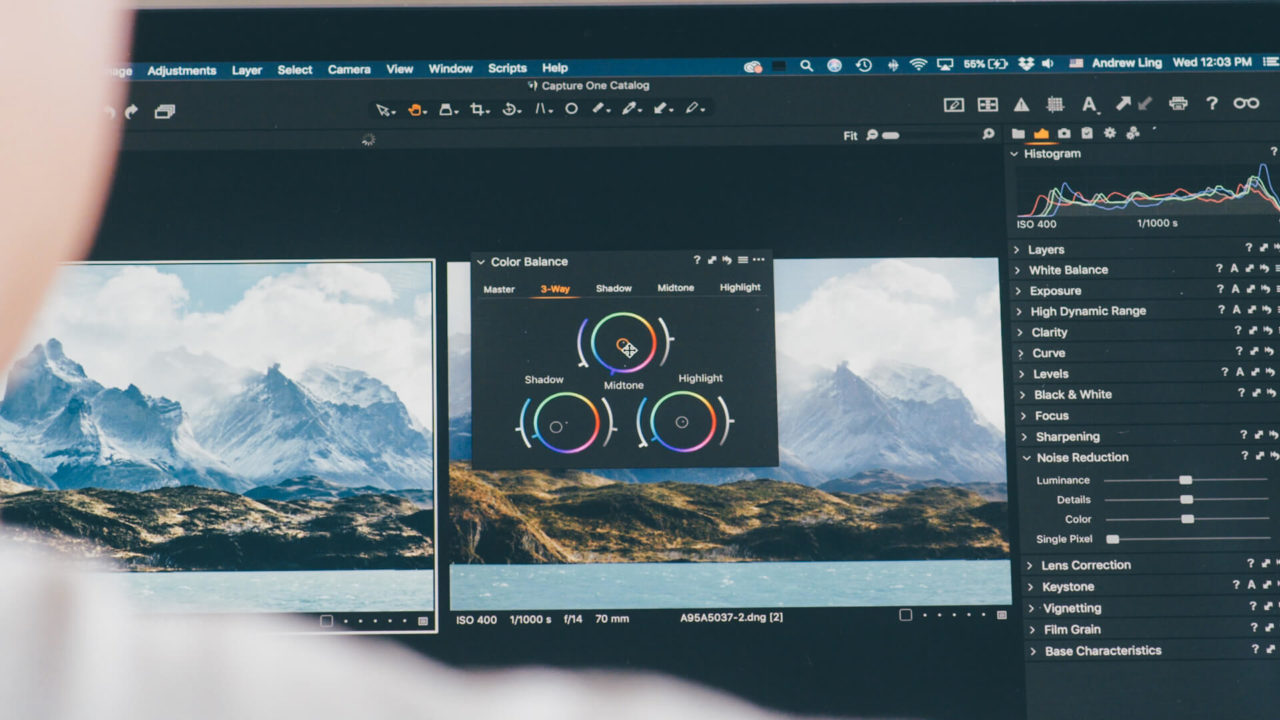
– Manual colorgrading. Capture One has a very powerful and amazing color editor where you can grade every aspect of the image as you want.
– Styles as a “one click fits all” solution. You choose a Style and apply it as is.
– Styles as a quick reference to the final look. Apply the Style you want, and then customize it to your liking. Any adjustment applied by the Style is visible and can easily be altered. You can even save the new look, as a new Style so you also have that for future images.
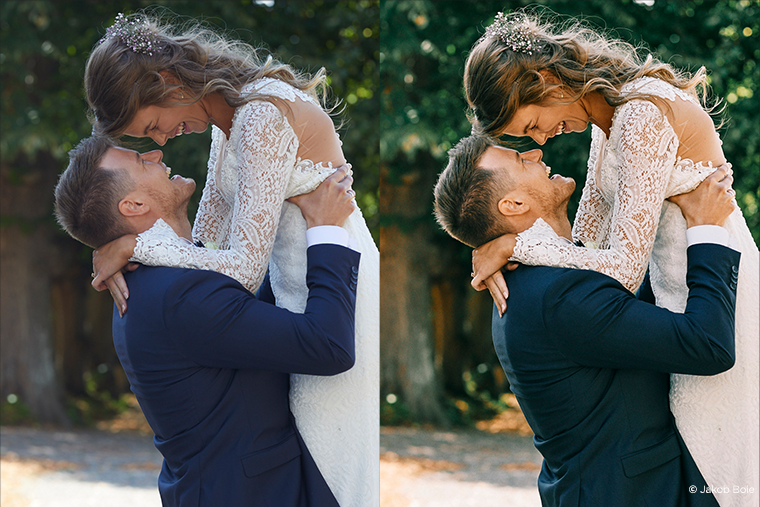
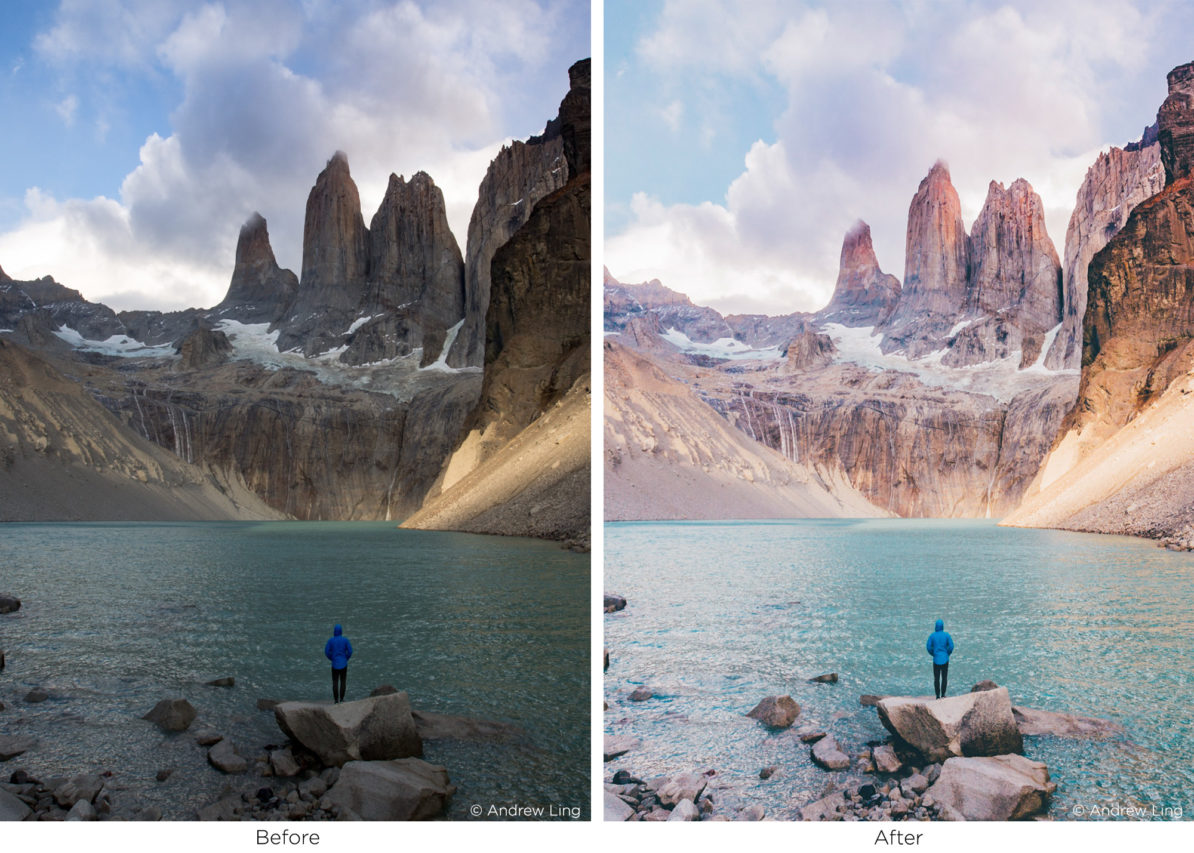
The image on the left is straight out of camera. I have applied a Mastin Labs Style to the image on the right in order to give the image that warm summer vibe and analogue film feel.
Quick batch editing
When you have a lot of images that need editing, it would take too long to edit and color grade every single image individually. So I prefer to Copy Adjustments and Paste Adjustments from images in similar lighting. That waym I get a consistent look and a fast way to edit.
You can either use the icons shown below or on a mac: Shift + CMD + C for copy and Shift + CMD + V to apply. On a windows computer use: Shift + CTRL + C for copy and Shift + CTRL + V to apply.

The arrow going up is for Copy Adjustments and the arrow going down is for Apply Adjustment.
After it’s all done, I go through the photos one last time to make sure that every image is to my liking and has the look I want.
B/W
I always deliver the images in both color and black/white. It’s easy and not particularly time consuming to make a beautiful black/white conversion and still keep the color images as well.
You can make a clone of your image or a new variant. If you right click on the image and choose New Variant, it will take your original image without any adjustments and make a new variant so you know you can begin cropping, changing exposure or making a black/white conversion – either manually or, again, by using a Style.
If you choose Clone Variant. Then you will see an exact copy – you can now go to your Styles. Remove the Style, but it will keep all other adjustments. Then apply an amazing black/white Style to compliment the look of your image. Using this method will keep the two versions, color and black/white, as close to each other as possible.
Exporting images
My good colleague, Alexander Flemming, wrote a great blog post last year about his Wedding Workflow. When I read it I realized that my way of exporting images could be done more efficiently and I adopted his Exporting technique. The Following excerpt is from his blog post, which can be read in full here.
When I export images for digital delivery to a wedding couple, I want to make it easy for them to share the images with friends and family.
I also want them to be able to make large prints of the files. This requires two different sizes of each picture with different amounts of sharpening and different ICC profiles. For convenience, I also want to split up the exported images into subfolders, just like I divided my RAW files in the beginning.
Proces Recipes are pure genius, and here is the reason behind it:
I can select my images in each Session Album, click “Process” (shortcut: ctrl/cmd + d), and Capture One now does all of this for me automatically.
How did I achieve this? By setting up my Process Recipes to my exact needs using Tokens.
The Process Recipes are found in the Process Recipe Tab. I have two I use for weddings; “Wedding Print” and “Wedding Resized”. Create a new recipe by clicking the plus-icon and name it what you want. Let’s go through the setup for both (I will ignore Metadata and Watermark for now):
“Wedding Print”
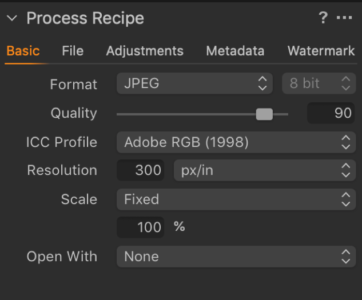
Basic
I use 90 in Quality for wedding exports, which will slightly decrease the file size without affecting visual quality.
ICC Profile is Adobe RGB and images are exported to 100% of their original file size. Resolution is 300 dpi for print.

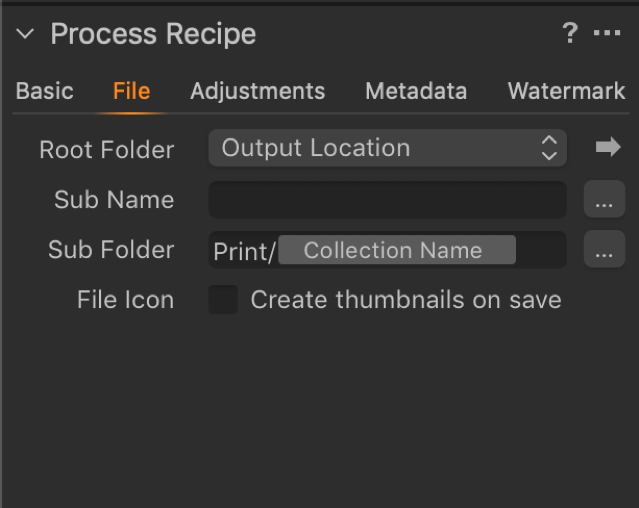
File
Root Folder is set to Output Location, which will match the tool below (Output Location). This should, by default, have ‘Output’ chosen as folder. This is the Output folder in your session.
You can always click the arrow to check.
Sub Folder is set to ‘Print/[Collection Name]’ where ‘Print/’ is manually written and [Collection Name] is a Token from the Token list, similar to when we imported images.
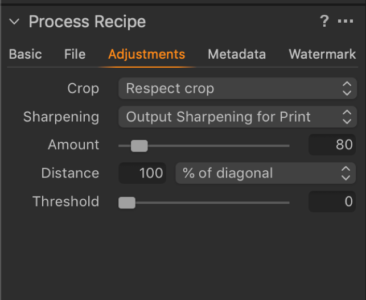
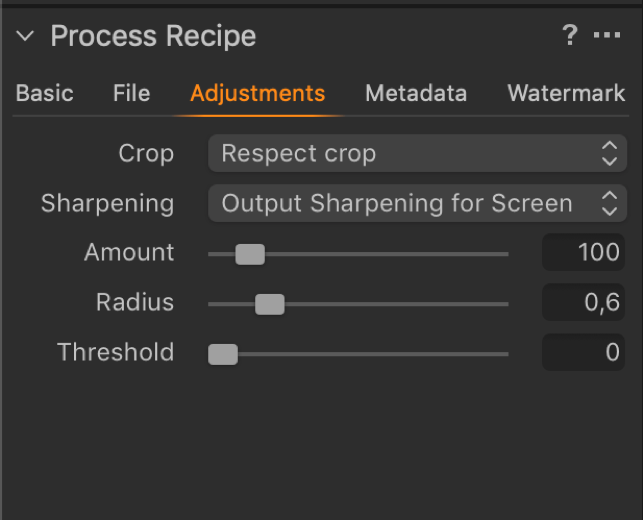
Adjustments
Here I add ‘Output Sharpening for Print’. Using the Recipe Proofing (glasses icon top right), you can see the effect of your sharpening amount of your selected recipe in the viewer. This way you can tweak it to your liking before doing any exports.
To sum up the first recipe; ‘Wedding Print’ will create a full-size JPG file in Adobe RGB, add a little sharpening to it, put it into a folder matching the name of the Session Album it’s processed from, and that folder is put inside a parent folder called Print.
Similarly, I want to create a resized version for sharing on social media or other fast applications.
“Wedding Resized”
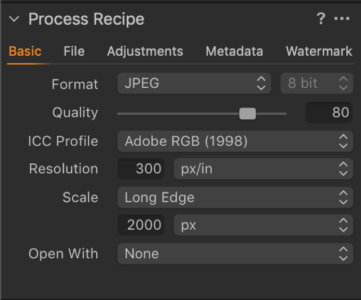
Basic
I turn down Quality to 80 for this recipe to minimize file size without affecting quality. ICC Profile is now sRGB for web-based applications and Scale is set to 2000 pixels Long Edge.
With today’s retina displays and high-resolution smart phones, anything less might look pixelated.
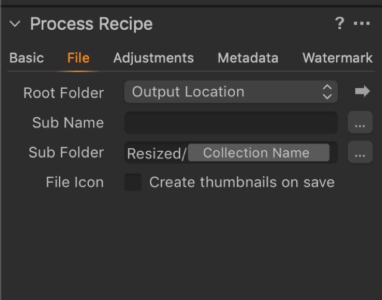
File
The only difference from my Print recipe here, is that I change “Print” to “Resized” in the Sub Folder format.
This creates a new parent folder for all resized images.

Adjustments
Here I use Output Sharpening for Screen instead, giving me a simple setup for adding sharpening for my resized images.’
The amount of sharpening is subjective, and you should use recipe proofing to make sure you nail it. The image should look sharp and crispy without being overly sharpened. Too much sharpening kills images!
Make sure you have only the two selected Wedding Process Recipes enabled now.
When exporting using “Collection Name” as a Token, make sure you are in the correct Session Album when clicking ‘Process’.
Images can be in multiple Albums, and Capture One only knows the name of the collection you’re currently in. Therefore, go to ‘Preparations’ from the Library Tab, Filter by five stars, select all images and process using ctrl/cmd + d. Repeat for the four other Session Albums.
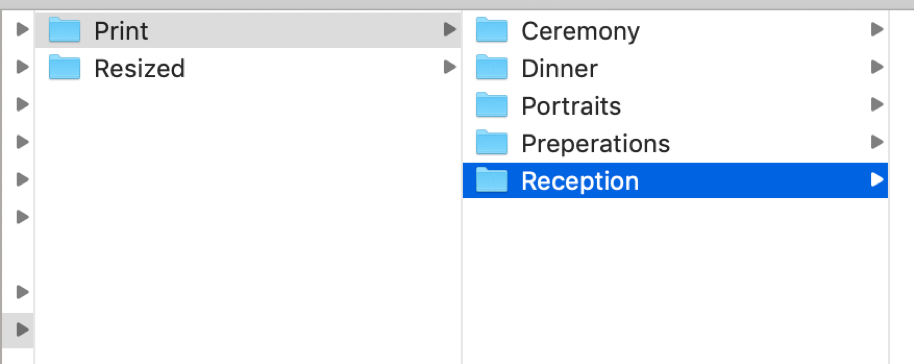
The result is all your exported images are put into a total of ten subfolders, distributed in two parent folders, both within the Session Output folder. Print files are full-size JPGs with ‘print sharpen’ and Resized are 2000 pixels long edge with “screen sharpen”. Like I said, pure genius.

This is what the folder structure looks like.
Workspace
I don’t want to fiddle around in too many menus and fewer clicks saves time. In Capture One everything is build in modules, and you can drag and drop them anywhere you want. So I have made my own workspace where I have all my essential edits collected in one menu.

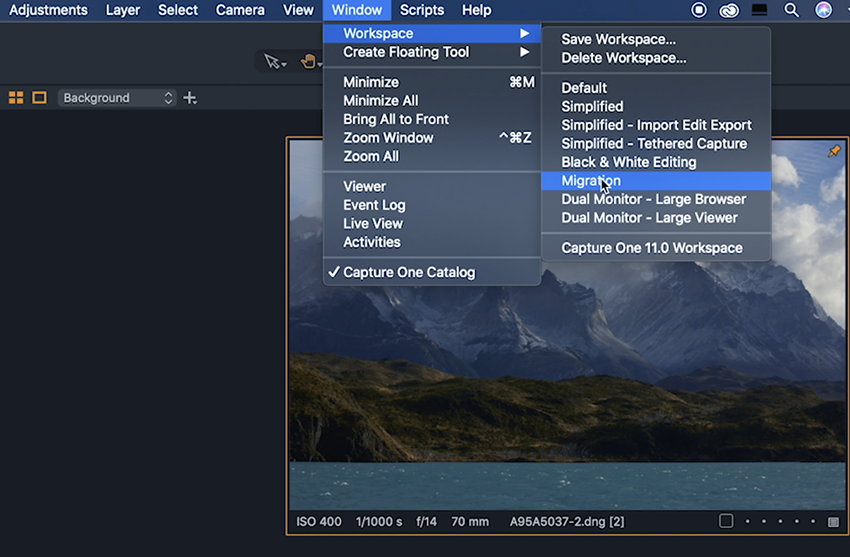
This is my Wedding Workspace – notice that you can see my saved workspace in the Workspace tab.
I have saved this as a “Wedding Workspace”, because the tools I need for editing weddings are different than when I’m shooting tethered or editing portraits.
Final thoughts
This was an introduction to my preferred workflow when editing weddings. This workflow might change as I continue to find new ways to reach my final goal. The great thing about Capture One is that there are several ways to achieve your desired end result.
I’m always for the lookout for new paths to a faster, sleeker and more sufficient workflow.
If you are curious here is a link to my favourite Styles from Mastin Labs.
Try Capture One Pro for 30 days – if you don’t have it yet, download here.
We love to share our passion and knowledge with you. All of our Blogs, Webinars and Tutorials can be found here in our Learning Hub.
What’s your best tip for editing weddings?