Latest Posts

Why observation is a photographer’s greatest material

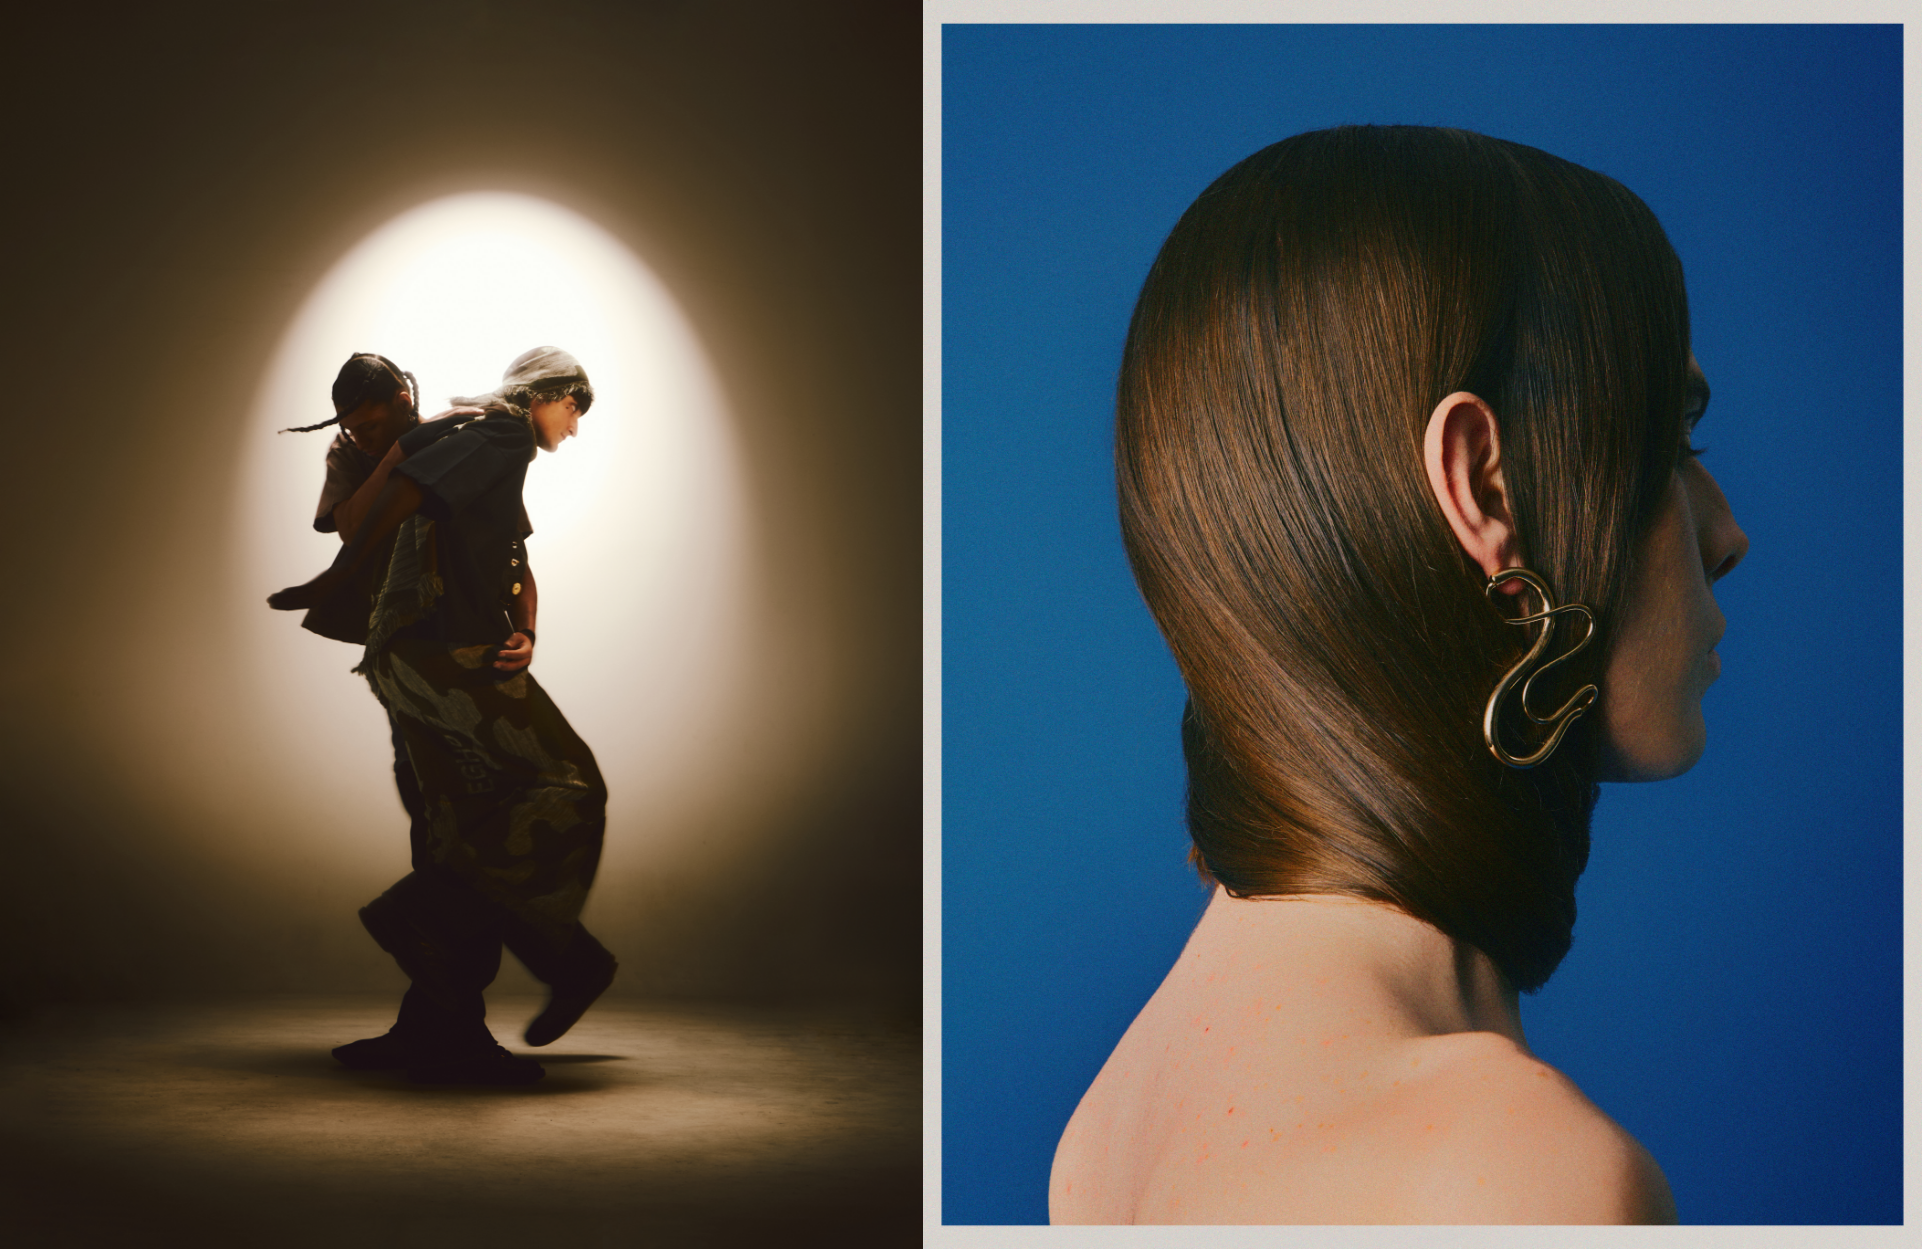
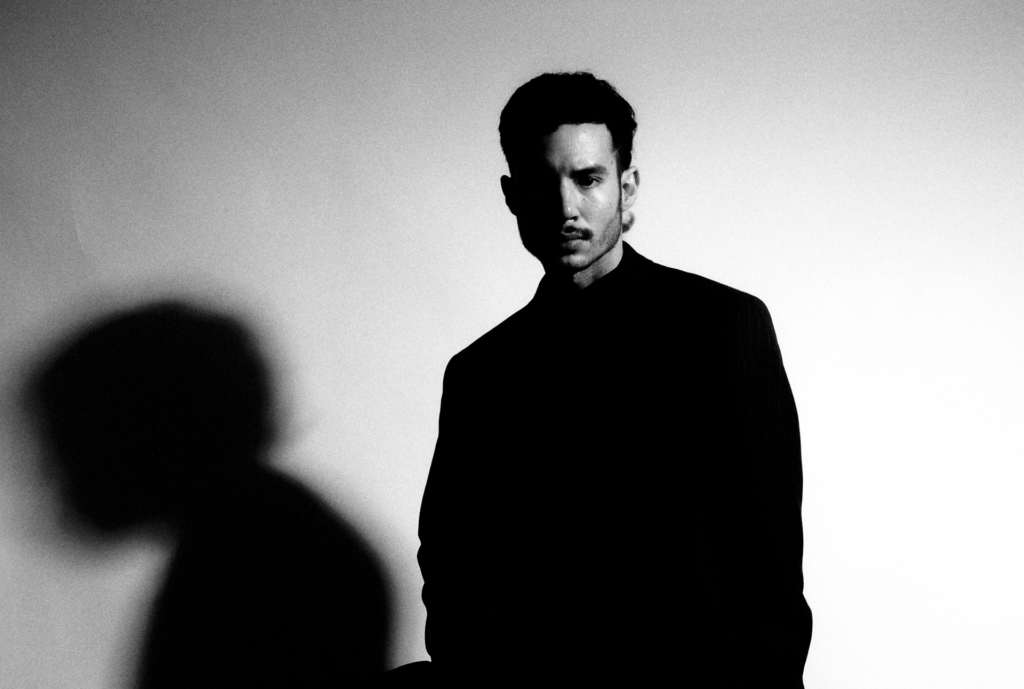
Tom Barreto is a Brazilian photographer and director whose work balances technical precision with emotional sensitivity. Born in Taubaté and now based in São Paulo, he has built a career spanning fashion, beauty, advertising, and personal projects, creating images defined by choreographed light, atmosphere, and a deep sense of humanity. 

His portfolio includes campaigns for Dior Beauty, Fendi, Arezzo, and Bvlgari, alongside collaborations with artists such as IZA, Fernanda Torres, and Marina Ruy Barbosa. His work has appeared in global publications including Glamour, Harper’s Bazaar, Marie Claire, and Numéro Netherlands.  

Tom’s practice goes beyond creating imagery. At its core is a philosophy rooted in observation: of people, of everyday life, and of the quiet tensions that exist beneath the surface. It’s this mindset that shapes how he approaches storytelling, navigates uncertainty, and maintains a consistent visual language across analog and digital workflows. 

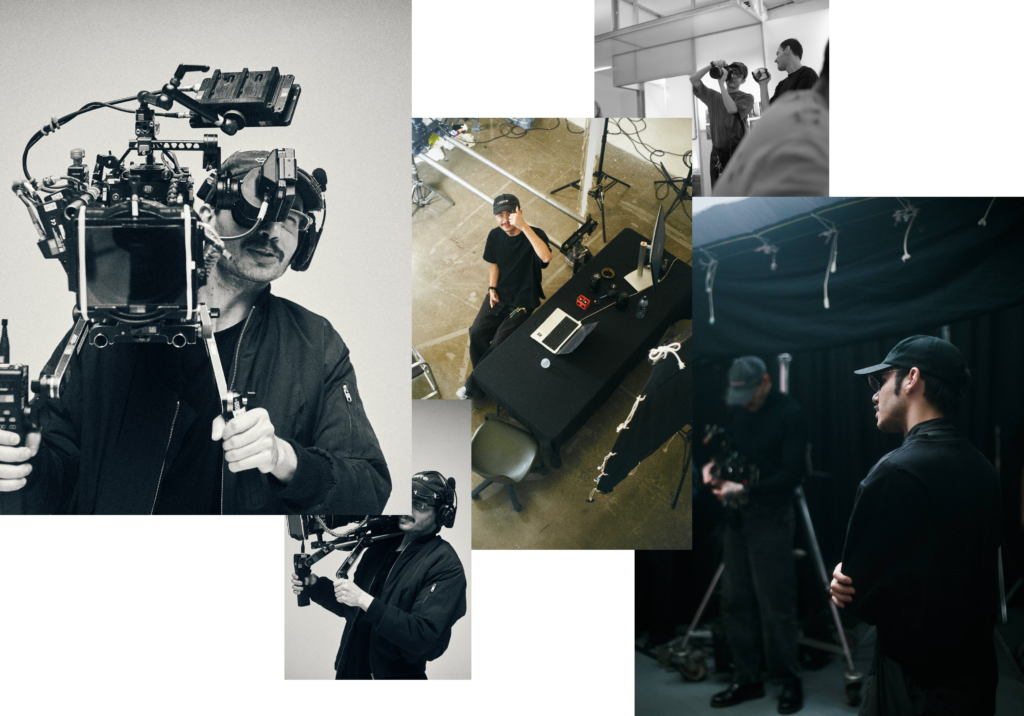
In our chat below, Tom reflects on why observation is a photographer’s most valuable material, how he trains his eye away from the camera, and what keeps him grounded when the industry feels unstable. He also shares insights into his creative process, the role of controlled chaos in his work, and how tools like Capture One support collaboration and decision-making on set. 
What did you mean by “the photographer’s greatest material is observation”?

I believe a photographer is, above all, a professional observer. Our work is to observe the world, people, and everything around us. To be present and to notice details in both the beautiful stories and the difficult ones. That’s why I say this: as long as we stay attentive and observant, we’re being nourished by the greatest material possible, which is life itself. 

How do you train your eye when you’re not holding a camera? 

For me, the best way is simply to exist in daily life: talking to people, listening to their stories, going to museums, connecting what I see there with what I see on the streets, and above all, paying attention. Being present is already a constant exercise.

But my eyes are also shaped by the people around me. My friends are with me in every moment, sharing references, stories, doubts, and discoveries. They constantly expand my perception through conversations, exchanges, and shared experiences. It wouldn’t be possible to train my eye without this network of support, both my family and chosen family. Photographers and artists like Gabi Lisboa, Diego Rodrigues, Mateus Aguiar, Tauna Sofia, Wendy Andrade, Mar Vin, Clara Lobo, KAO, Carlos Queirozi, Arthur Bellini, and Julio Nery, among many others, are part of this daily dialogue that keeps my vision alive.

What keeps you going when photography feels uncertain or challenging?

My family’s support, and something inside me that has moved me since childhood. I come from an artistic family that, for socioeconomic reasons, couldn’t fully live from their art. That “artistic blood” guides me. I’ve had privileges my parents and grandparents didn’t, and I stay true to this path because, in a way, I’m accomplishing something past generations couldn’t.

But there’s also my chosen family. My friends in São Paulo became my home away from home. Without them, very little of what I’ve built would. It has been possible. They inspire me daily, challenge me, hold me when things feel uncertain, and remind me why I create in the first place. This combination of blood and chosen family is what keeps me moving forward.

Being from Brazil, does that show in your work as an artist?

I believe it does. It appears in my habit of mixing mediums and formats, and in finding beauty where it traditionally isn’t seen. That, to me, connects directly with Brazil — a place where cultural diversity is one of our greatest strengths.
What makes an image feel like visual storytelling rather than just a nice photo?

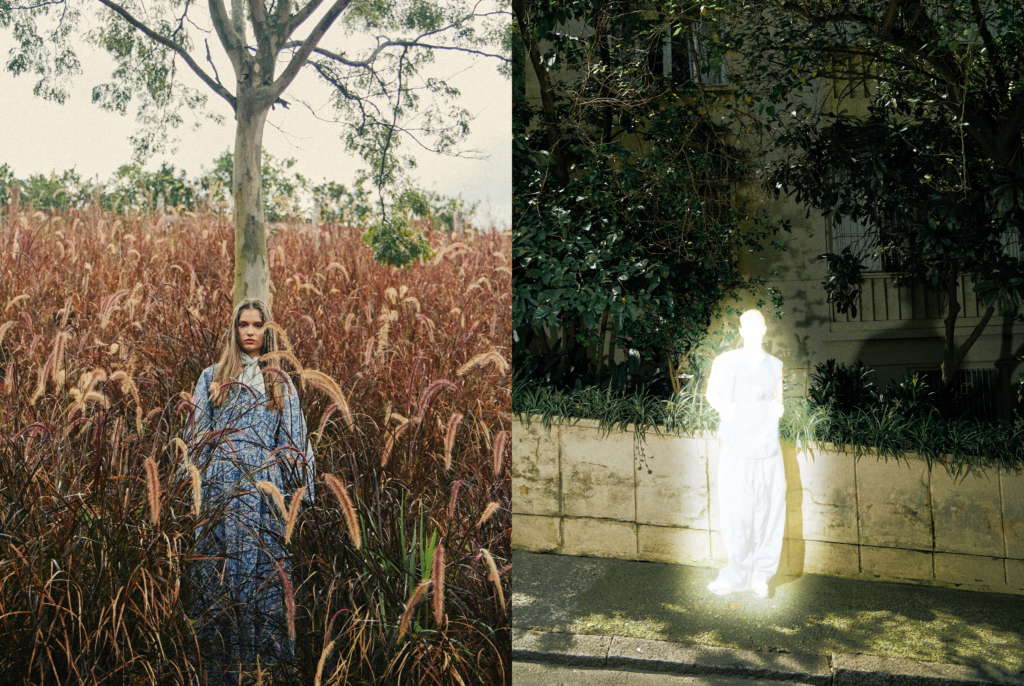
This sense of “delicate and deep” that I seek. The surface might feel aesthetic, but it’s in the layers of interpretation that the image becomes more than just a photo — it becomes a record of life, something that resonates beyond the first glance.

Working with both analog and digital, how do you maintain consistency in your style?

My style comes from playing with discomfort and controlled chaos. I think of my art as a sandbox with specific toys: inside it, there’s room to experiment and to lose control with intention. The consistency is the boundary of the sandbox — the freedom happens within it.
How do you know when a photo is finished?

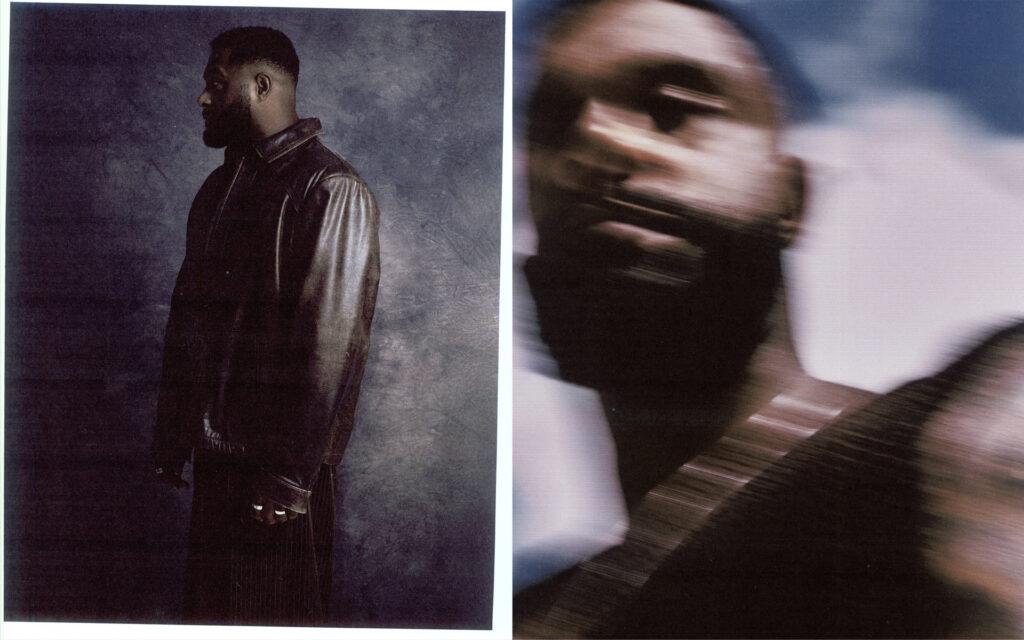
Honestly, I don’t. There’s always another possible path, even when it feels complete. To me, a photo is never fully finished; we simply decide where to stop so the work can exist in the world.

How does Capture One help you and your team?

With exceptional speed, simultaneous viewing on multiple monitors, and efficient organization of looks directly on set. It also makes marking selections easy. Overall, it’s essential for our workflow — especially for my digital tech, who works beside the client, organizing everything and making post-production smoother.
Which Capture One tools do you use the most and why?

I love working with multiple layers. My color process is literally about mixing layers, adjusting opacity, and watching how they interact. It creates an organic tension in the color-building process. Lately, I’ve also used the AI tools a lot — masks and retouching — which are extremely practical for quick previews and for showing clients where the image can go.

What’s one lesson you wish you had known when you started?

You show up, do the work, and stay true to your eyes and heart. Along the way, you learn to stay attentive to people. To recognize those who genuinely help you grow, who have been there with you, and to grow alongside them. And to remain open to new people whose presence and character feel right. Stay true.

Check out more of Tom’s work on his website and Instagram.


New to Capture One? Try for free for 7 days. 


Sign up for the webinar

Seriously. AI is not the main character.

AI needs no introduction. It’s wildly powerful. It ramped quickly and flooded every corner of our lives, and yes, a few big tech companies behaved like hooligans along the way, which naturally created fear, dread, and the sense that something precious was slipping away.

But here’s the hard truth: AI has already been adopted. 

Every single photographer we’ve spoken to in the past six months, and that’s hundreds of them, is using it.

Not as a philosophical debate. Not as an existential threat. Just as a tool to run their business. To build mood boards. To finish images. To keep up.

AI is reshaping photography at a pace we haven’t seen since the transition from film to digital.

And this is uncomfortable. Profoundly uncomfortable.

But if there’s anything we’ve learned from Patrick Fore, we need to “sit with the discomfort.” 

So now the real question is: What future are we building toward? 

Back to the Metal 

When everything gets louder, the best photographers do something counterintuitive:
They go quieter.
They slow down.
They find community.
They create with more intention and honesty.

Because the world doesn’t need less photography. It needs more. 

More authorship, more honesty, more voice, more vision, more truth, more reasons to pick up a camera and make something meaningful.  

And here’s the thing: every great journey is easier with good company. People you trust, and people whose actions match their words.

We believe the same is true about the companies that build your tools. After all, companies are made up of people. Individuals with skills, intentions, and integrity. That’s why the “who” behind a tool matters just as much as the tool itself. 

Where Capture One Stands 

Yes, we’re a tech company.

And yes, we’ve built some of the most powerful AI tools in the industry.

Photographers are using them at a large scale: in 2025, more than 60,000 photographers created over 200 million images using Capture One’s AI-driven workflows. 

But this doesn’t define who we are. That’s not how we measure success. Because we’re also a photography company.

At Capture One we hold each other accountable for celebrating and protecting the work photographers do. We support those fighting to make the work they know is important (thank you, Seth Stern, you’re an inspiration). We own more cameras than we have employees. We run monthly internal photography competitions, we print the winners and we hang them on our walls.

None of this is normal for a software company.

Good. 

We don’t aim to be normal. We aim to be right for photography. 

So, when others zig, we zag. Soon, we’re launching Negative Film Conversion. Analog, yes. 

And you might ask, why film?  

To us, the answer is simple: photographers deserve tools that respect the full spectrum of their craft. Past, present, and future. 

We’re not following the hype cycle or chasing trends. We’re building for the long arc of photography. 

The Future We’re Building Toward 

A future where photography is once again the main character. Where the photographer is the author, not the algorithm.

A future where AI isn’t the headline. Where tools fade into the background.

A future where photographers have room to think, space to create, and full authorship over their work. Where clarity and control return to the people who actually do the work.

Capture One’s role in that future is clear as day:  

Build tools for photography and the people who practice it.

Everything else is noise. 

Sign up for the webinar

Combining Masks in Capture One

Learn how combining masks unlocks more flexible editing in Capture One with almost infinite possibilities.

It’s finally here. The possibility of combining masks while keeping the flexibility of editing them individually. It was one of the highest-rated feature requests, and with the recent additions of many types of AI masks, it made sense to implement now, more than ever.

You can combine masks by adding, subtracting, or intersecting them. Intersect will make a mask in the overlapping area between the masks.

If you’re thinking to yourself, “cool, but I’m not sure I need it for my editing,” you’re in the right place. I will try to show some different examples that might spark not only interest in this feature but also inspire the creative possibilities it has unlocked.

So, what does it unlock exactly?

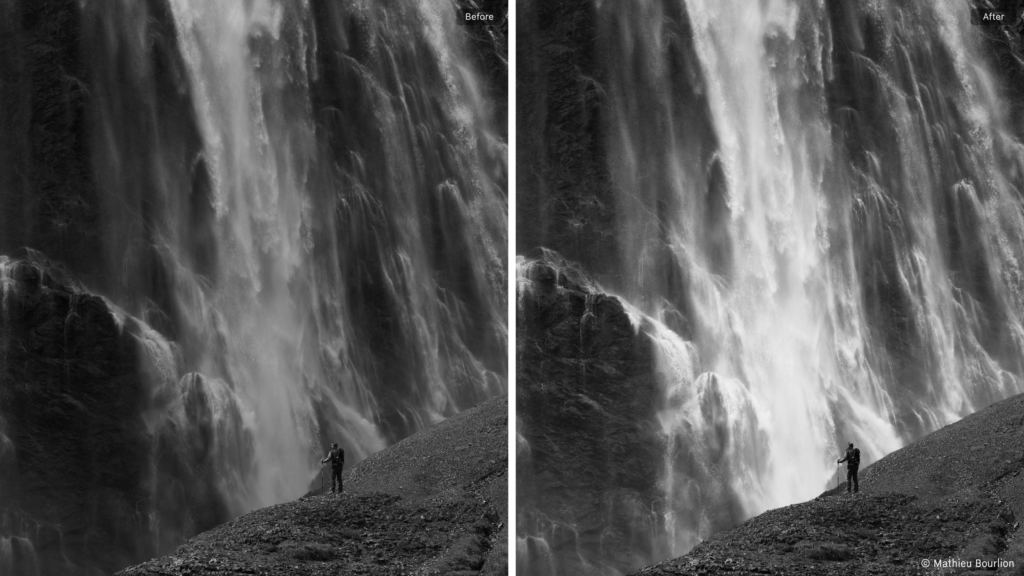
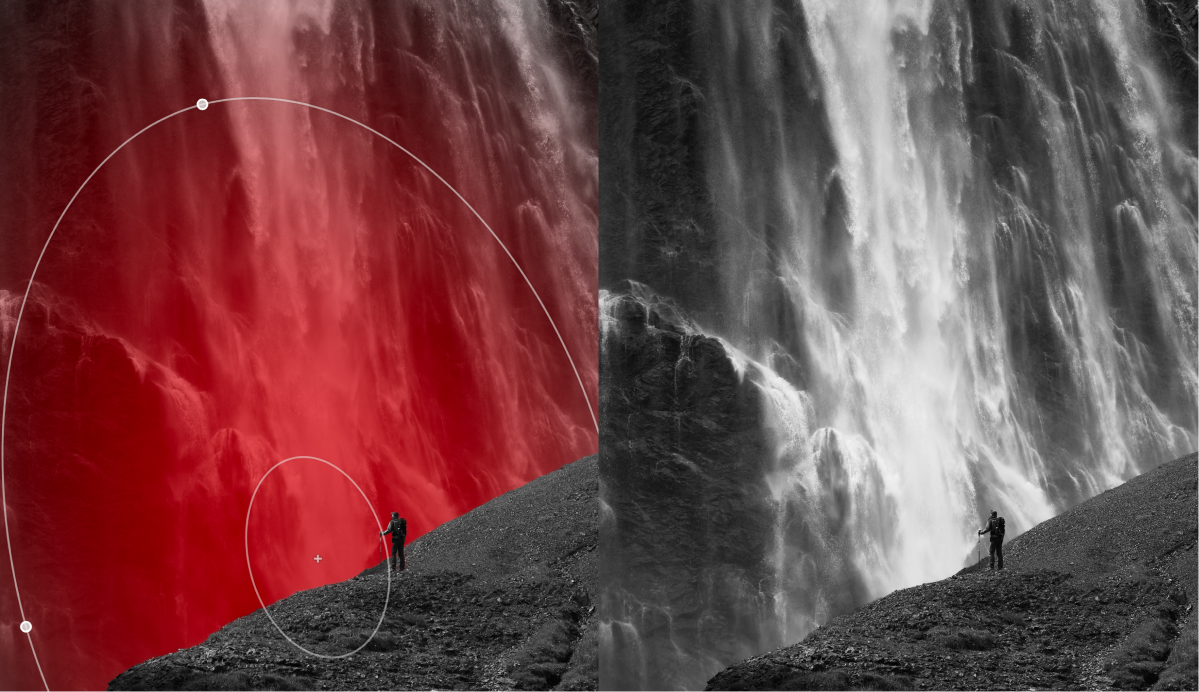
Imagine you have this image of a person in front of a waterfall, and you would like to lighten the waterfall to separate it from the foreground. You could brush it, create a Gradient, use AI Select, or many other options. However, they wouldn’t be as flexible as combining two masks.

What would you do instead?

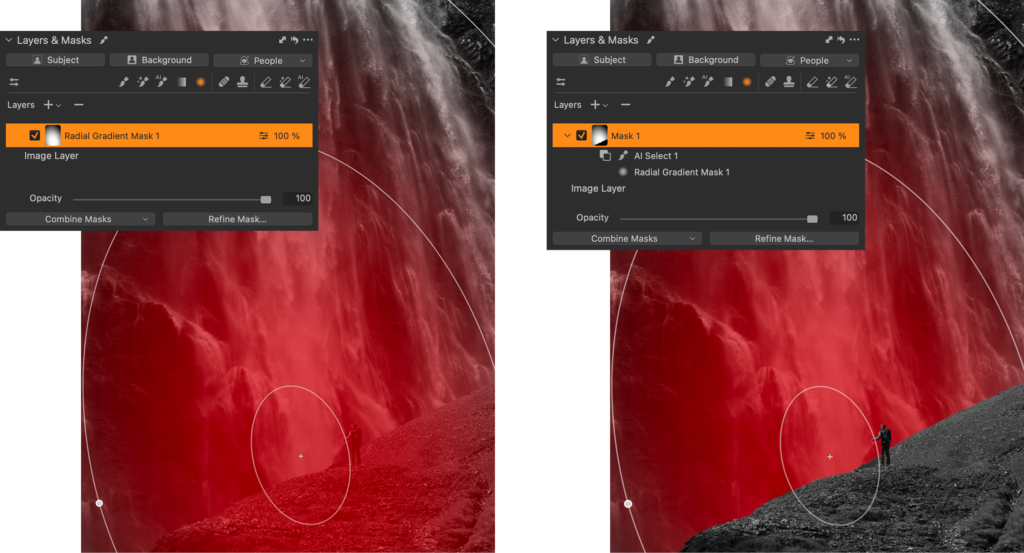
First, create a Radial Gradient in approximately the position and size you want. You can always adjust it afterwards.

Once you have your first mask, click the new ‘Combine Masks’ button. Here you have three options for the type of combination. Add, Subtract, and Intersect. For this example, I used Subtract, as I want to subtract the foreground. For the type of mask, I used AI Select to manually select the foreground and person.

Pro tip: Masks created with AI Select will be more detailed if you zoom in before you click on the image.

The result will look like this in the Layers tool. You still have the two individual masks; the Radial Gradient and the foreground masked with AI Select. They are now nested under the new combined mask, Mask 1. You can edit each of the individual masks by selecting them and using masking tools.

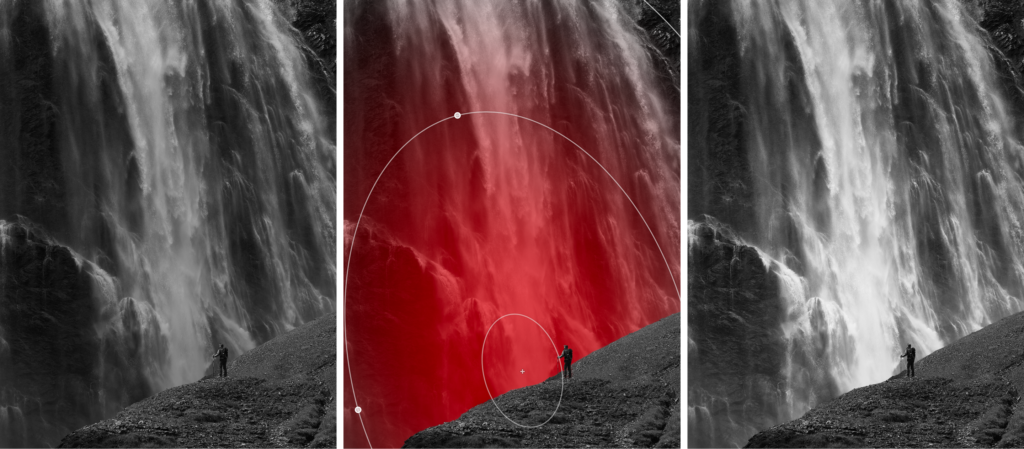
Now you can freely move or resize the Radial Gradient behind the foreground, getting exactly the look you’re going for. By applying some brightness, levels, and clarity, the waterfall truly stands out.

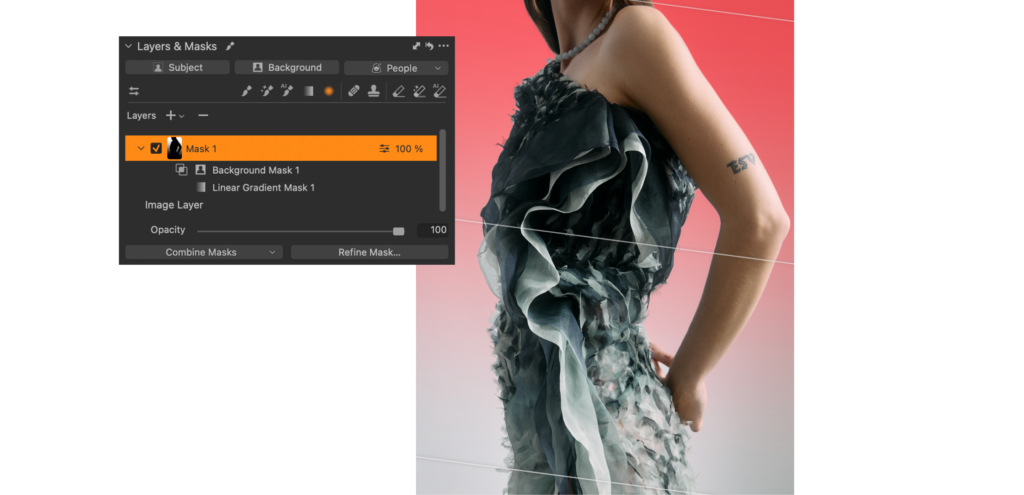
Gradient on the background

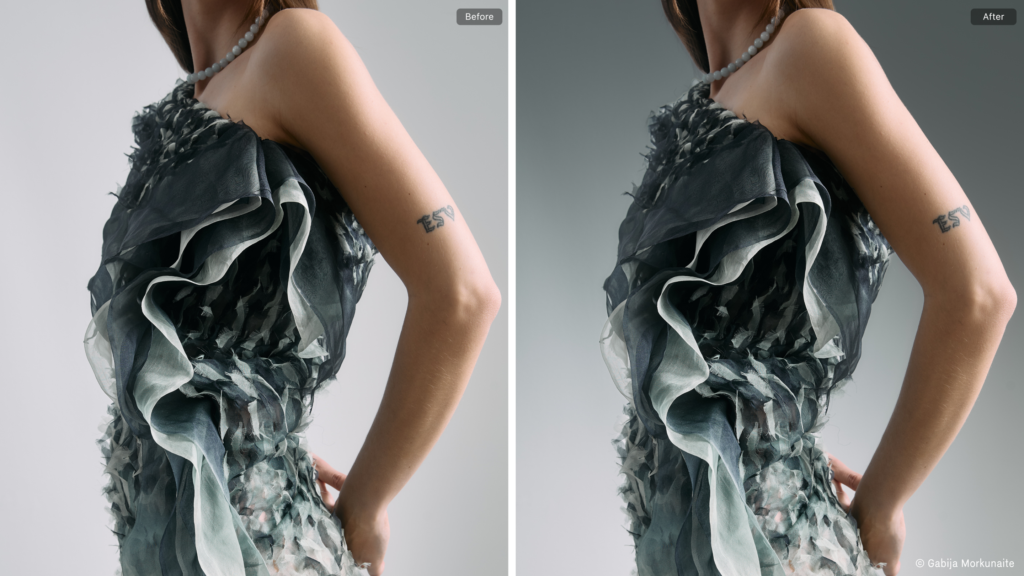
Adding a gradient to the background on this image makes the model stand out more.

This one is slightly simpler. First, you add a Linear Gradient. Then you have two options to achieve the same; you can either Intersect with the Background or Subtract the Subject. Both will give the same result, allowing you to freely move the Gradient around behind the subject to achieve the look you want.

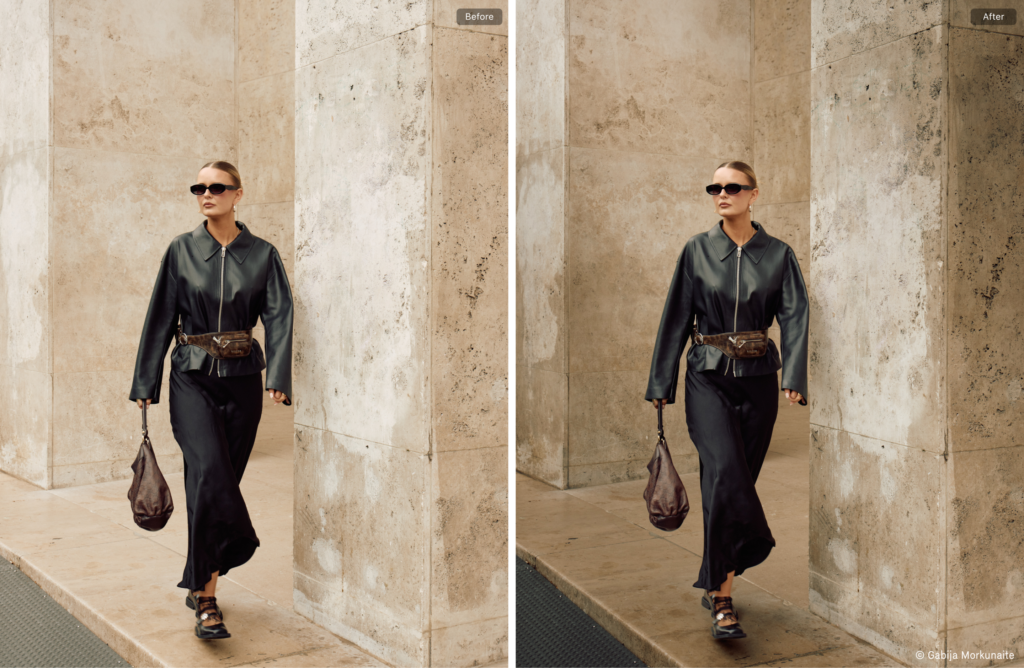
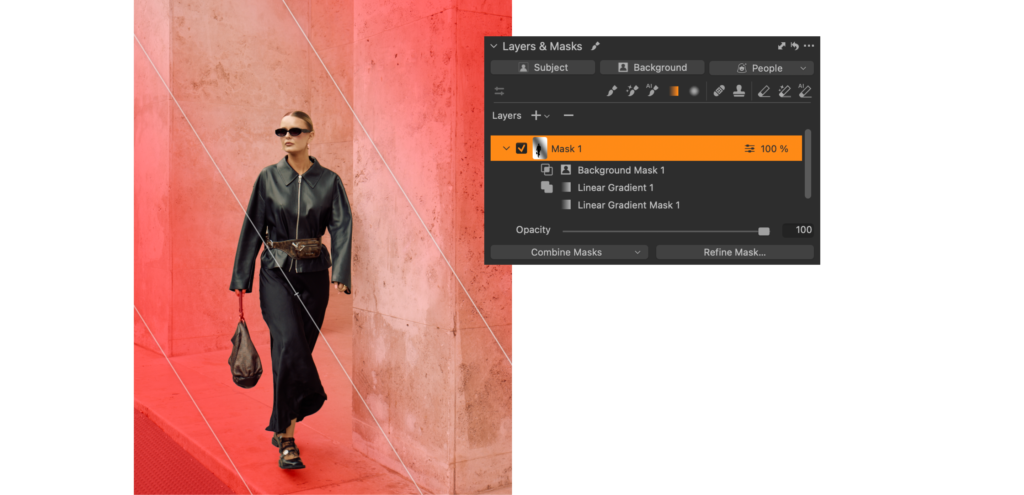
Directional light

On this image, you can create an interesting contrast on the background, drawing attention to the center of the image.

This one is a bit more complicated as it consists of three masks. First, you add a Linear Gradient from one corner. Then you use Add in the Combine Masks menu to add a second Linear Gradient from the other corner. As the final step, you Intersect with the Background to make sure the mask does not overlap with the subject.

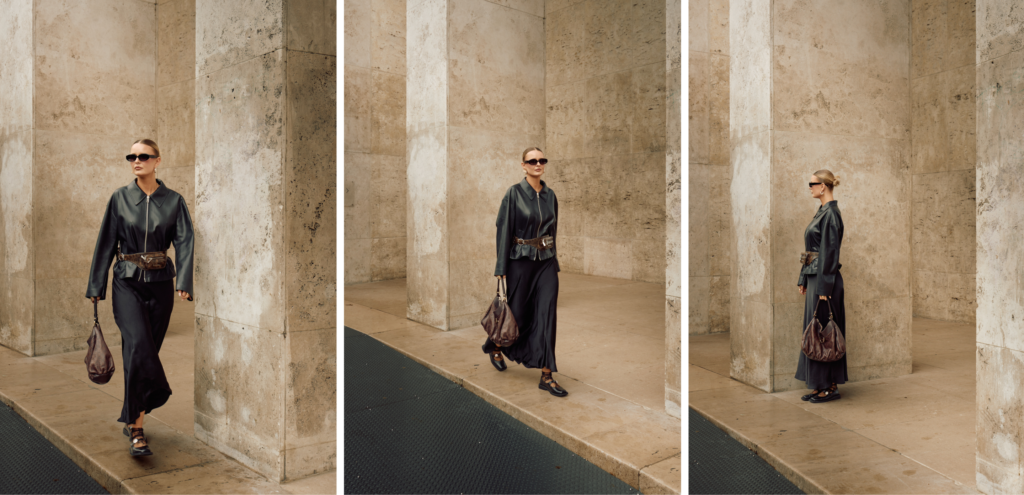
What’s brilliant about masks in Capture One is that you can copy them across other images, and their dynamic properties remain. Copying the Layers to other images gives you the same dramatic lighting change in a few seconds and lets you control the combined masks flexibly on each image.

Including the reflection

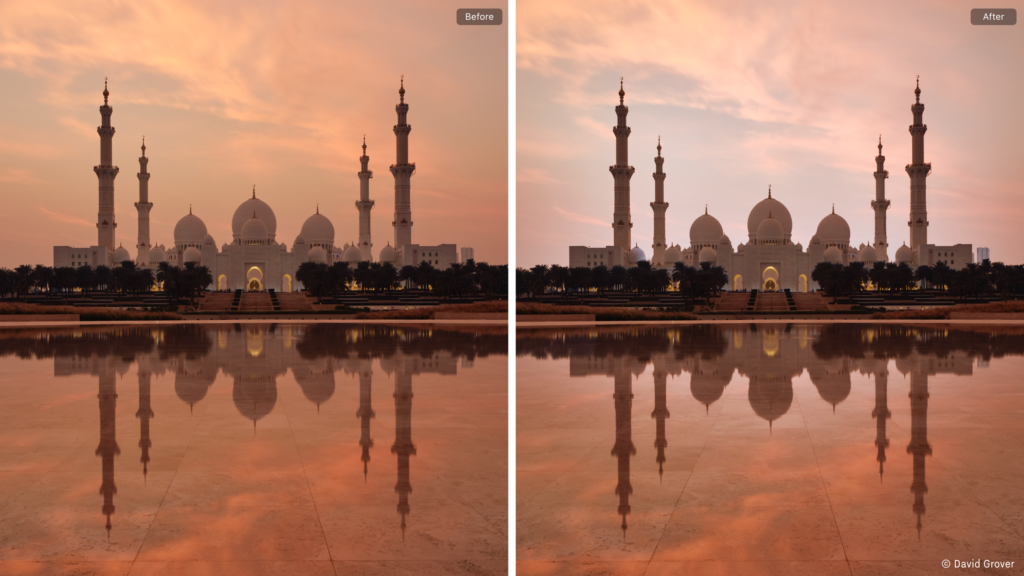
Adding contrast to this image by playing with the light is much easier with a combined mask. To make sure the edit looks natural, the reflection needs to be included.

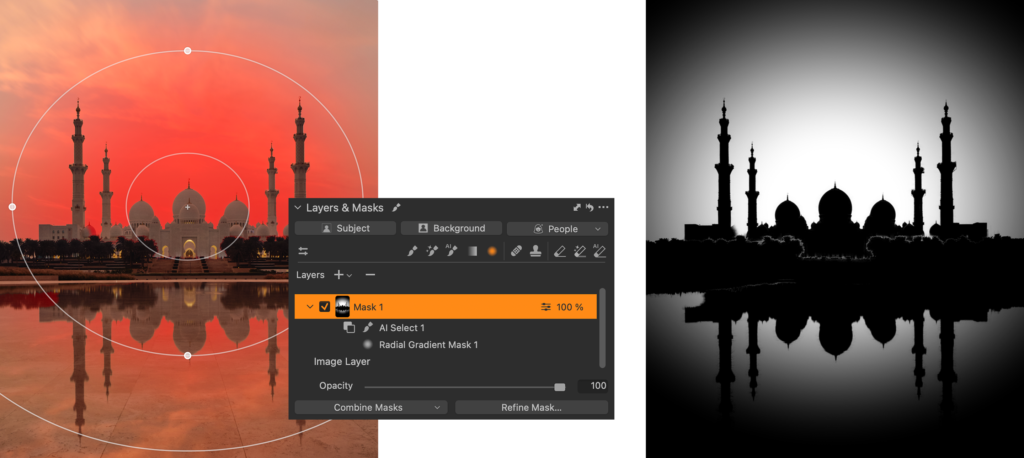
You might have guessed the steps to take by now. To achieve this, you first create a Radial Gradient. Since the beautiful mosque and reflection are a little complex, the regular Subject Mask doesn’t quite catch it all, so you need to Subtract using AI Select and manually select the mosque and trees, also in the reflection.

When everything is selected with AI Select, you should end up with a flexible Radial Gradient you can move around behind the mosque, also including the reflection. Here, it’s also shown as a greyscale mask (Option/Alt + M) to easily visualize the mask.

Adjusting light, contrast, white balance, and clarity creates a nice separation between the mosque and the background.

Restricting a manual brush

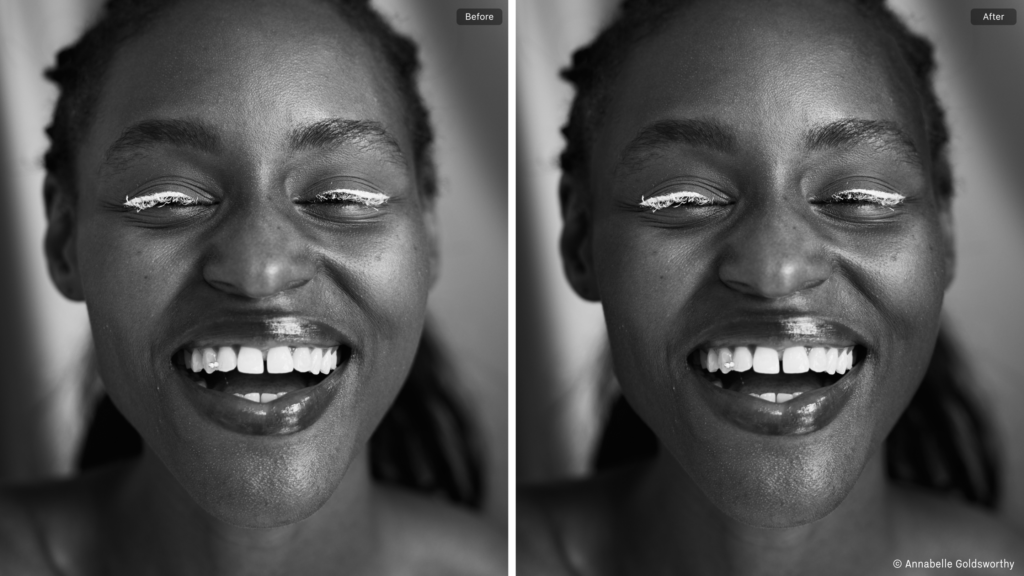
Did you know that Capture One has built-in Dodge and Burn brushes? They are part of the Style Brushes. For this image, it’s easy to gently darken the edge of the face of the model to enhance the depth without affecting the background.

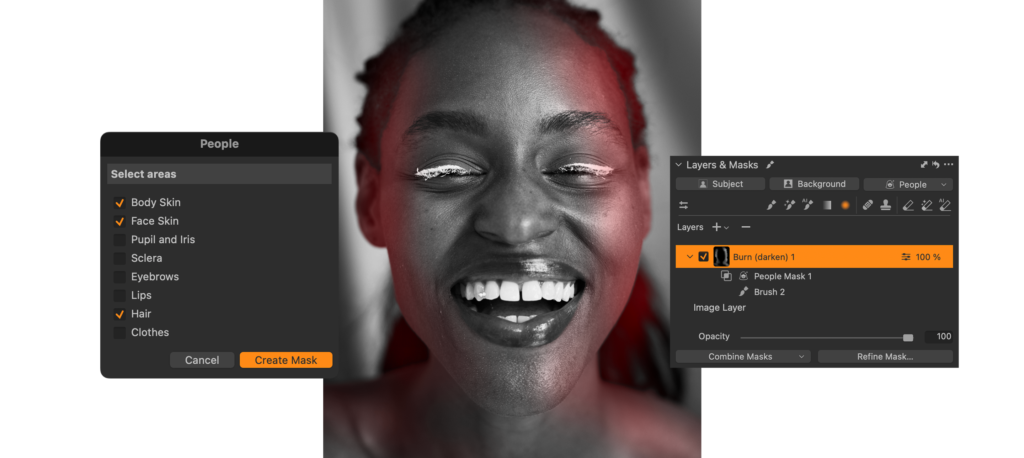
First, you select the ‘Burn (darken)’ Style Brush and make a brush stroke on the edge of the face of the model. This automatically creates a new Layer. Now you intersect this mask with the ‘People’ mask option. Here you select ‘Face Skin’, ‘Body Skin’ and ‘Hair’. Now your mask is restricted to only the skin and hair of the model, and you can brush around the edge without affecting background.

What about Luma Range?

You might have noticed that the Combine Masks button has replaced the Luma Range button. This is because a Luma Range applied to a Layer is already a combined mask. You need to get used to a slightly different workflow. To get the result you’re used to from older versions, you need to use ‘Intersect’ when combining with a Luma Range.

Now you just have Add and Subtract as well in case your mask needs something different.

Remember that you can always add custom shortcuts for each available operation. Just open the Shortcut Manager (Edit > Keyboard Shortcuts > Edit Keyboard Shortcuts…) and search for, for example, ‘luma’, for example.

What about the 16 Layer limit?

Capture One currently limits you to 16 Layers per image. You don’t need to worry about Combined Masks taking up too many slots, because no matter how many masks you combine, the final mask only counts as one Layer.

Almost infinite possibilities

After these options were implemented in Capture One, I’ve discovered masking options that I wouldn’t have thought of before. It makes me think about editing and improving my images in a new way, and it’s difficult to imagine advanced editing in Capture One without it.

I hope these examples give you some inspiration for what you can achieve and how to start playing with combining masks.


New to Capture One? Try for free for 7 days. 


Sign up for the webinar

How Sarah Silver stays creative by being organized

Fashion and beauty photographer Sarah Silver might be best known for her bold, playful, and colorful visuals, but behind every image lies a bulletproof workflow and process that make it all possible. For Sarah, creativity doesn’t come from chaos. It’s built on structure.  
 
In this quick Q&A, she shares how preparation fuels her imagination, the systems that keep her shoots running smoothly, and the tools she relies on from concept to final export. 

What’s essential when prepping for a shoot? 

There’s so much information coming at me from all sides while prepping a shoot, so filing everything properly for easy retrieval is a MUST. I have pre-made digital folders, shoot sessions, job checklists/tasks, and naming conventions that keep me on track and consistent for EVERY project I undertake. I find that if all the pieces are in the right place, it opens my mind to maximum creativity.

Do you have any post-production advice for us? 

Post means so much more to me than just retouching. It also includes proper file storage. When backing up files after a shoot, I use on-site RAIDS to upload my Capture One shoot sessions, and multiple off-site backups for redundancy (you never know when there will be a flood in the studio). So I highly recommend multiple backups in multiple locations! 

Also, a quick tip for retouching: When we go through retouching rounds in Photoshop, I always refer back to my original base image (R0) to see how far the image has come and where I’m going; otherwise, it’s really easy to overdo it. I will often “brush back” details that were removed from the original so I can keep retouching and make it feel more natural rather than overly airbrushed.  

How do you balance creativity and efficiency on set? 

Quick Answer: A time-tested workflow that I have developed over the years through tough lessons! 

Long answer: Over the years, I have developed a workflow that helps me avoid making the same mistake twice. 

The second a shoot comes in, my workflow begins with meticulous organization. When you’re organized, you can move quickly and address the most common questions/complications that may arise during a shoot. This allows space for creativity to take over, because you’re not busy trying to problem-solve for a million questions on set that you could have asked before the shoot.  

My organization also trickles down to my team, so everyone understands where they need to be and what needs to be done to make a shoot go smoothly. Ultimately, this streamlines our entire process, allowing us to focus on our creativity. 

Of course, there will always be challenges to be solved on set, so it’s also important to be able to wear many hats and be able to pivot quickly into problem-solving mode. 

Can you share a favorite shoot and what made it stand out? 

Gosh, this is a really tough question. I am lucky to work with such amazingly talented teams that are always pushing to create stunning visuals. I can honestly say that every shoot is my favorite because it’s a blank slate where I can be inspired and inspire others to create something extraordinary that we can all be proud of. 

What’s your strategy for managing time on set?  

I built a spreadsheet schedule that shows everybody’s role and where they are on the shoot day in 5-minute increments. I know it’s a bit detailed, but it’s my north star during a shoot and helps make sure everybody’s time is 100% accounted for. 

How do you collaborate with your team? 

I learned early on in my career that I thrive in a collaborative space. I work with amazing artists who bring so much to my creative process. The best feeling in the world is when the entire team yells out “omg” when a killer shot pops up in Capture One. It’s as if we are all synced into the creative flow, and it just feels so magical.

Where does software fit into your workflow? 

Capture One is ever-present throughout my entire shoot process – from prep to post. We customize sessions in advance of the shoot and refer back to them throughout post-production to export and re-export as needed. For me, my favorite features are:

  1. Multiple Compare Variants 
  2. Export as EIP from the processing menu
  3. All my custom keyboard shortcuts – these help me move at the speed of light! I am especially obsessed with filtering when editing.

What’s your top advice for building a solid workflow and a distinct voice? 

When it comes to workflow, it’s super important to learn from your mistakes. I am always refining my workflow to ensure that I never make the same mistake twice.  

As for finding a distinct voice, I strongly believe you should draw on what you love. If you can combine the things that you are most passionate about, you will create with heart, and, in the end, that heart is what is most unique, because no one else has the same worldview as you. 


New to Capture One? Try for free for 7 days. 


Sign up for the webinar