Capture One Pro 7 comes with an Overlay Tool that allows you to display another image on top of the image that you are editing or are capturing. This feature is designed as a guide to help you compose your image according to specific composition requirements.
The tool can be a big help if:
- You get a fixed layout for your image from an art director
- You want to recreate an image with the exact position of specific objects
- You want to compose your final image in Photoshop using several exposures with different lighting
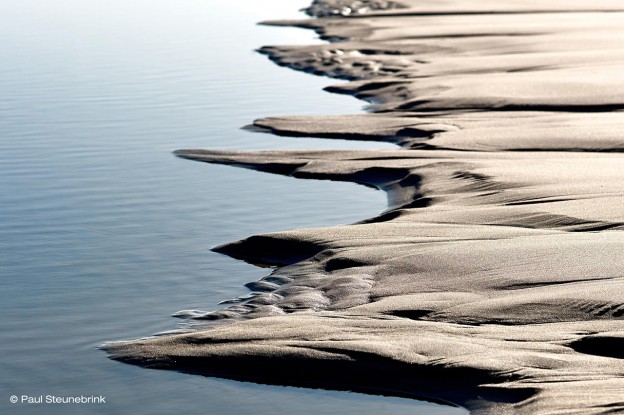
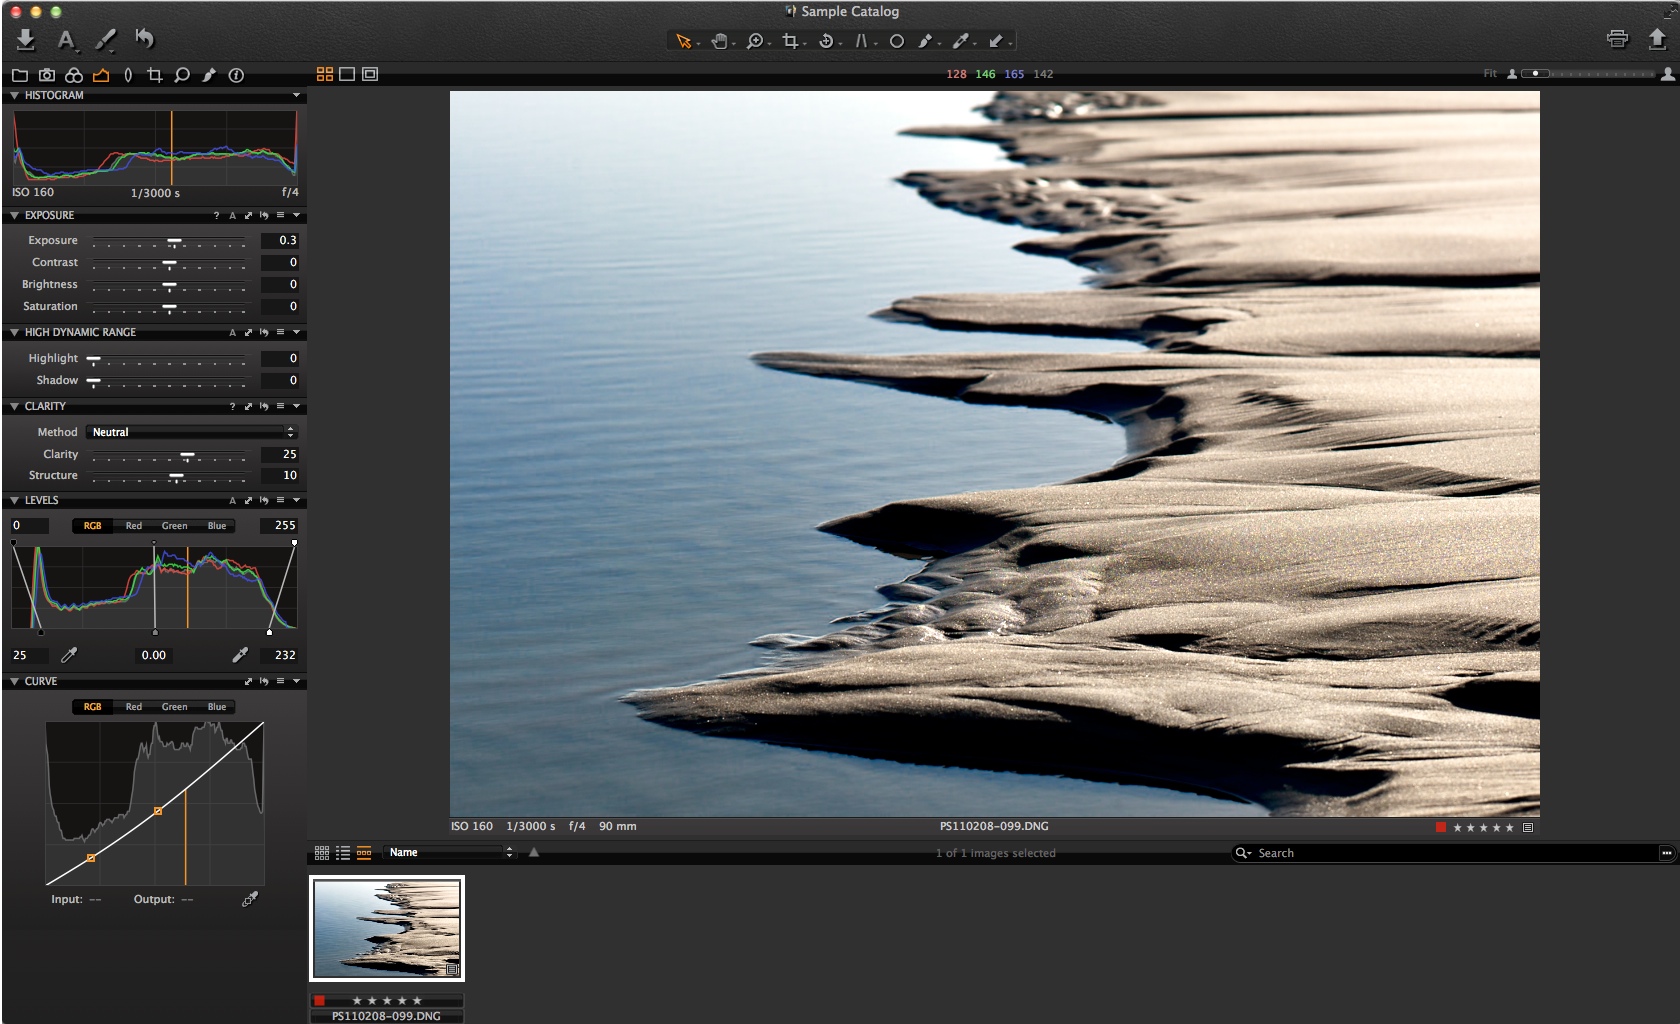
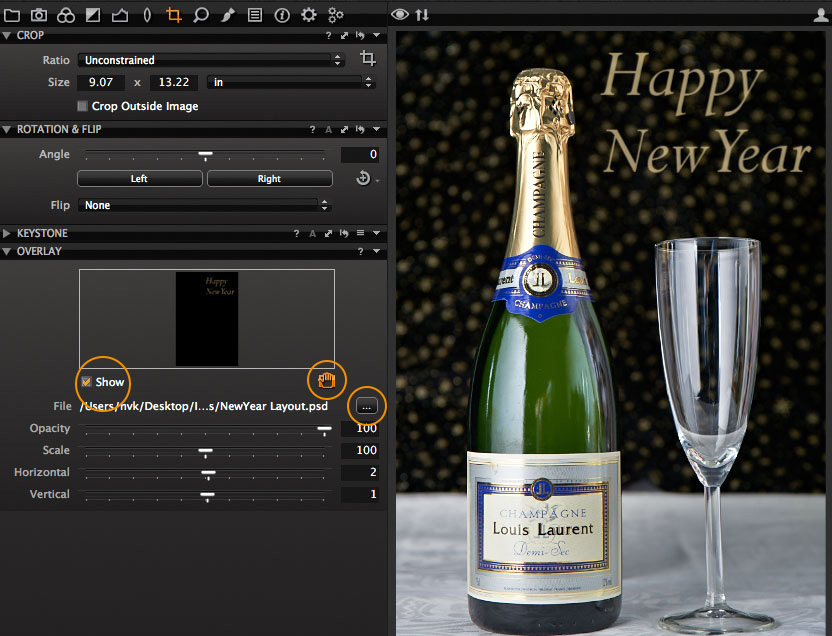
The image above is a screen capture from Capture One Pro 7 from when I was creating an image for a New Year greeting card. Using an overlay file showing the text for the card made it much easier to compose the image to fit with the text.

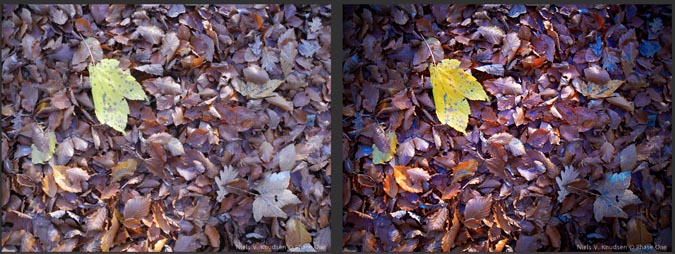
The final image composition is shown to the left. On the right you see the text background as a PSD file.
You find the Overlay Tool in Capture One Pro 7’s Composition Tool Tab. As it is the operating system that handles the overlay files there is difference between Mac and PC. You have the following options for overlays formats:
|
Mac |
PC |
Comments | |
| PSD |
+ |
– |
Support transparency |
|
+ |
– |
Support transparency | |
| PNG |
+ |
+ |
Support transparency |
| TIF |
+ |
+ |
|
| JPG |
+ |
+ |
|
| RAW |
+ |
(+) |
Pc has only support for selected Raw files |
Especially the formats that supports transparency can be very useful. An overlay file with text made on a transparent background will simply show the text on top of the image that you are working with.
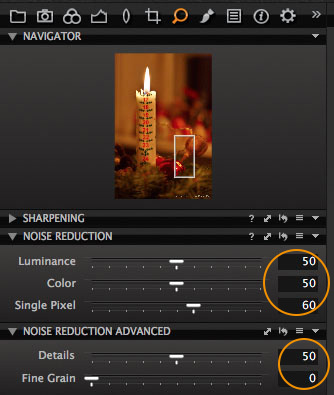
The Overlay Tool in the Composition Tool Tab
To load an overlay file, you can either click the “browser button” to open a file browser for selecting the overlay file or simply drag a supported overlay file into the white square in the Overlay Tool. After you have selected the overlay file select “Show” and use the sliders or the hand to position the overlay correctly on top of the image.
It is also easy to reestablish a previous image composition, as you can use an existing raw file as an overlay file.
If you are making multiple exposures of a scene for later assembly in Photoshop, remember that you can always use a previous exposure as an overlay file. With the Opacity slider you can then easily blend the new exposure and the previous exposure used as an overlay to validate your work.
I wish you all a Happy New Year and look forward to welcoming you back in 2013!
All the best,
Niels