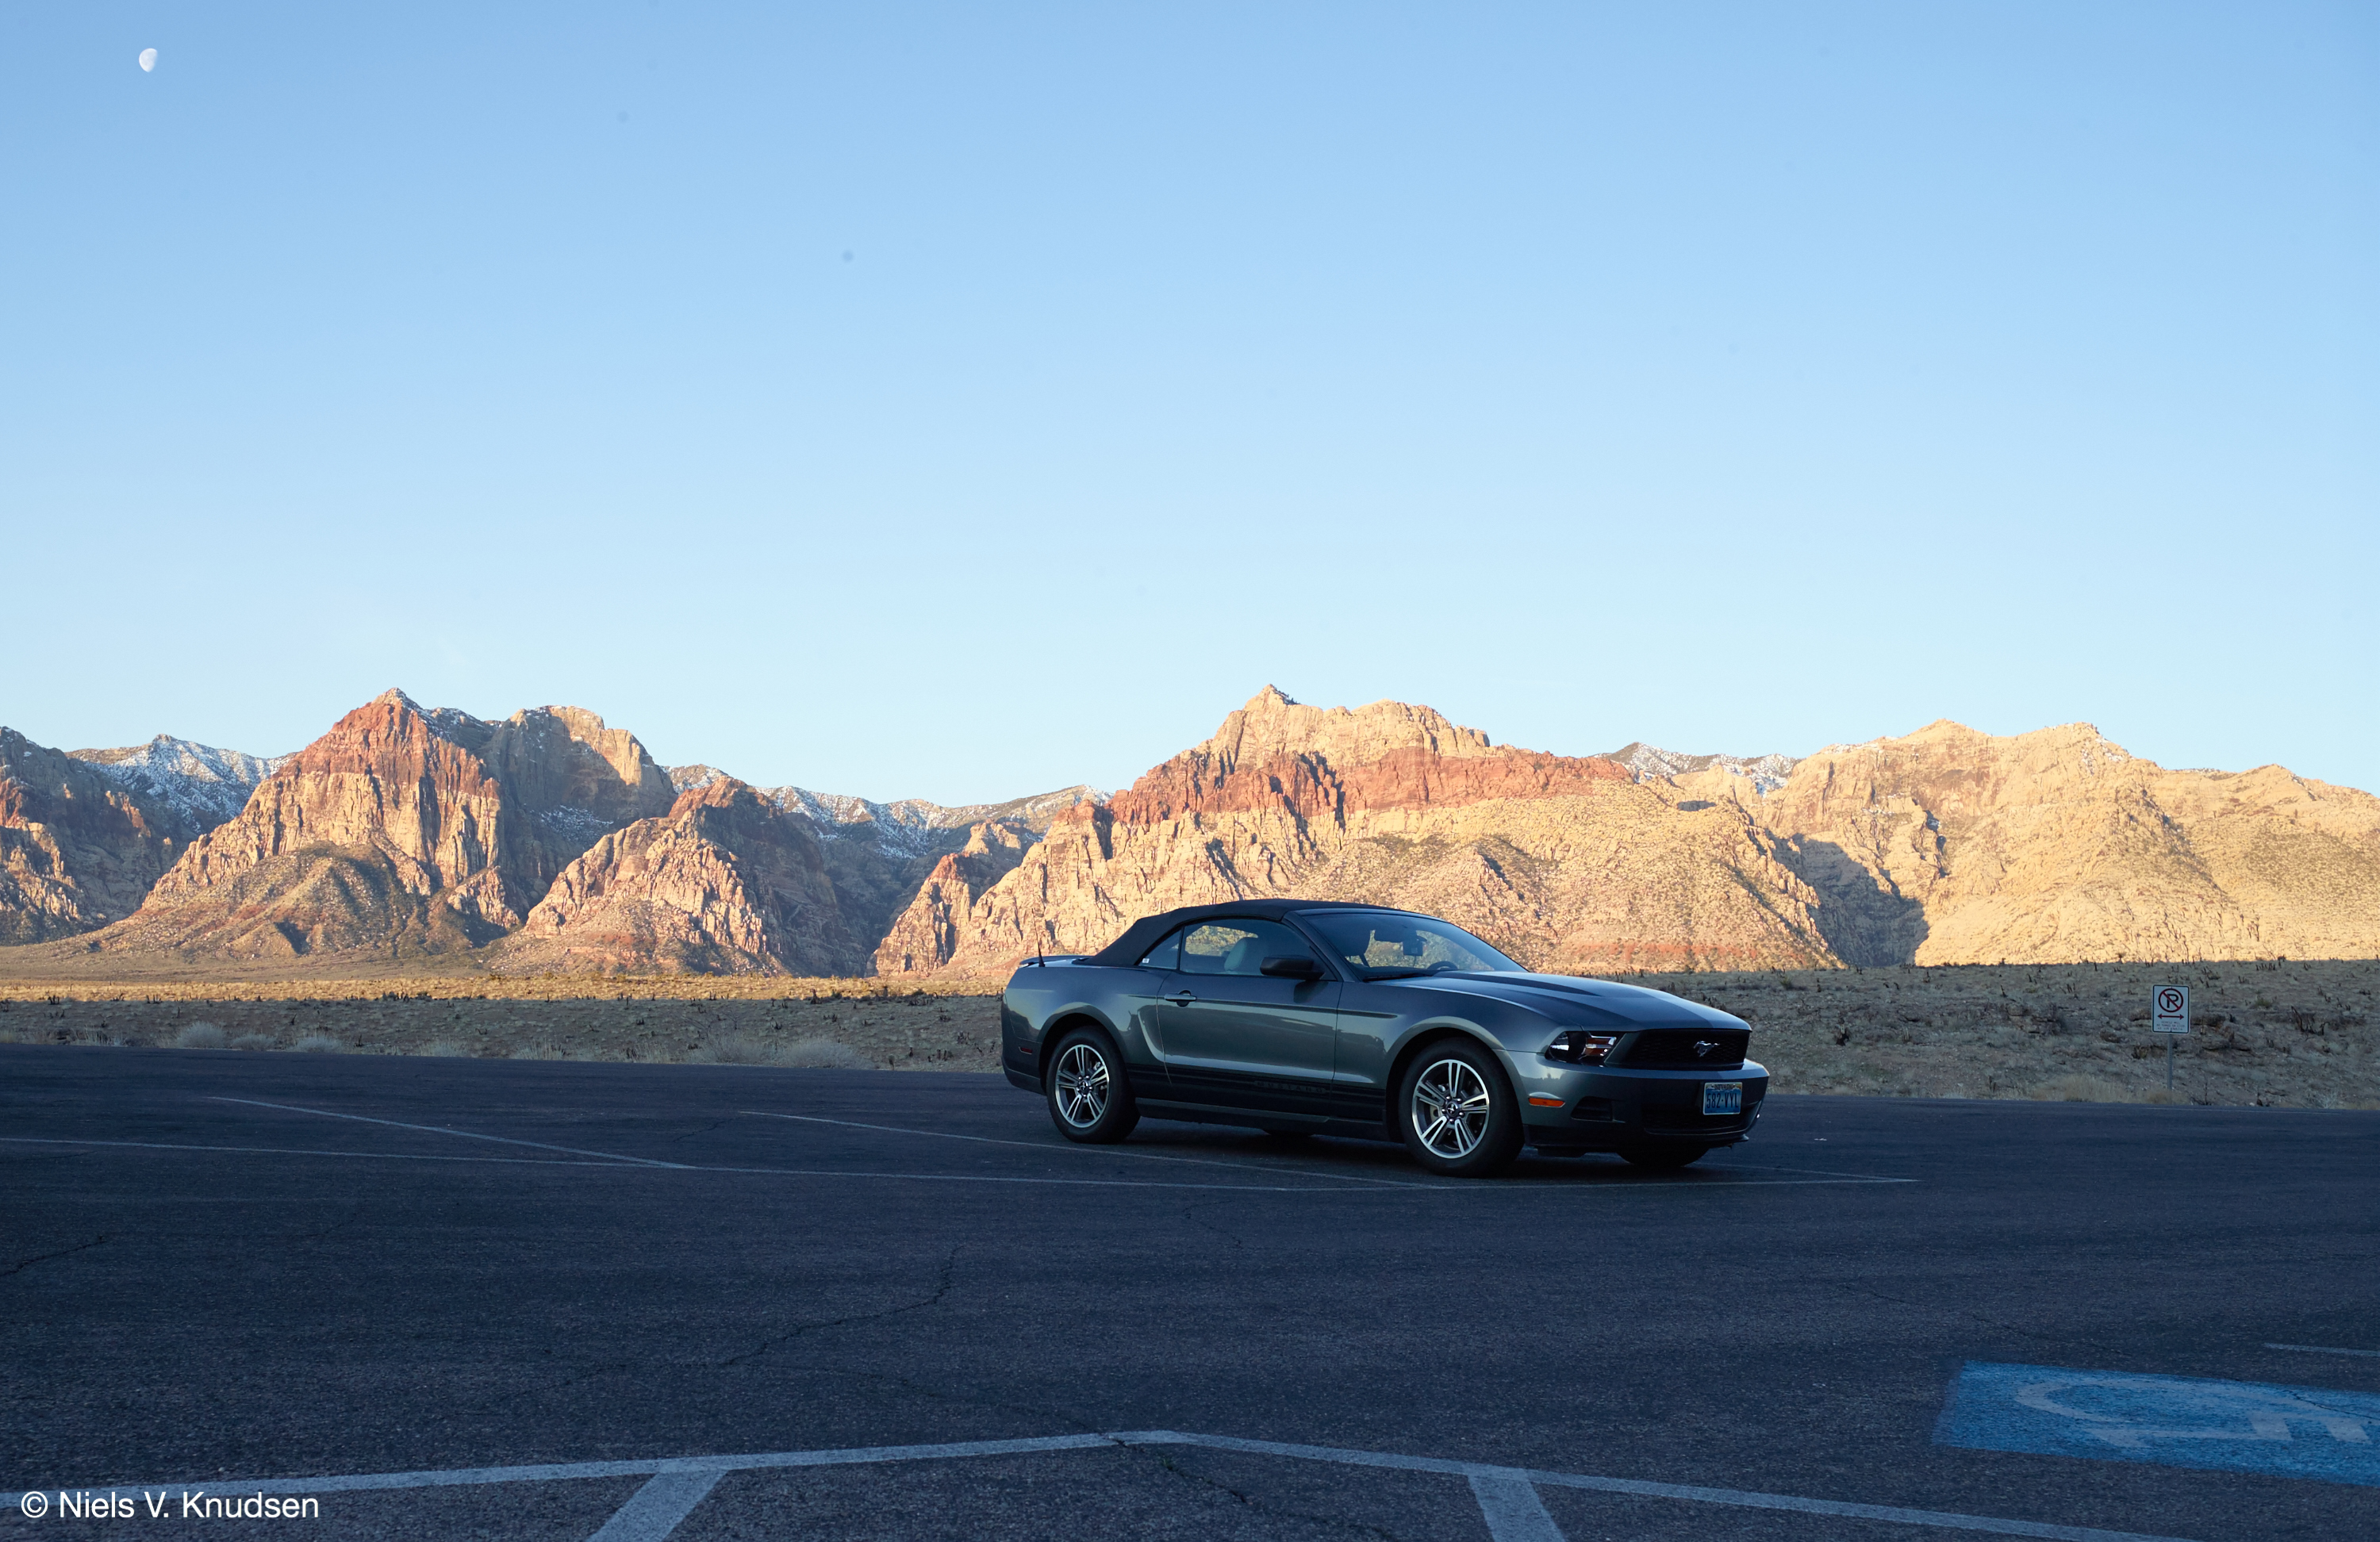
Our Image Quality Professor, Niels V. Knudsen, took the shot below of his rental car some years ago while on vacation in the sunny American desert.
I will use this image (with intended room for improvements) to really illustrate just how easy and powerful the creative tools are in Capture One.

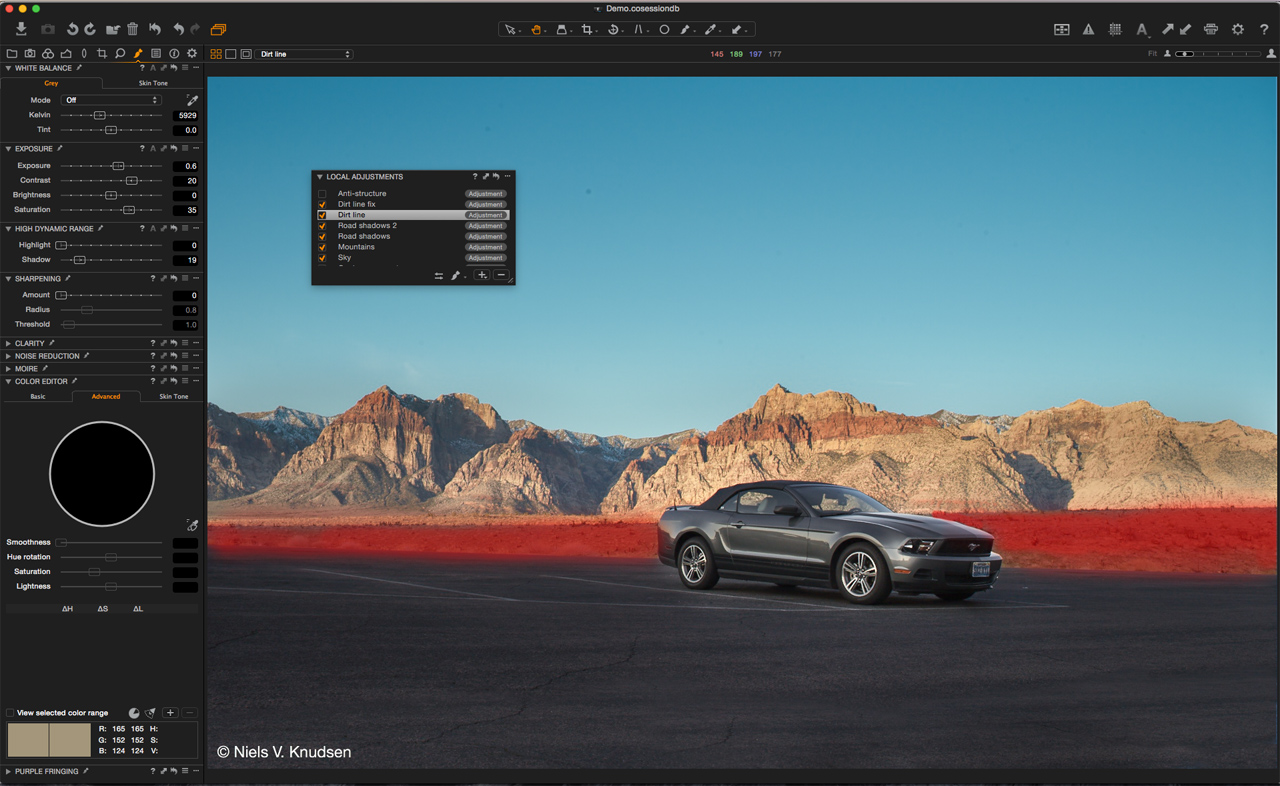
Powerful Adjustment Layers
With the update to Capture One 8.1, the maximum amount of Local Adjustment layers increased from 10 to 16. This is an example of how far you can actually go in Capture One, using Local Adjustments in an intelligent way.
In total I used 14 Local Adjustment layers for this image. I won’t go into details for every adjustment and provide specific examples, as not all of them are equally important. However, I’ve mentioned each adjustment in the text so you can follow along.
Healing the road
The first thing on the list of improvements was the road. I used three healing layers in total. One heal layer helped to remove some of the undesirable elements but all three helped to retain the detail and tones of the foreground.
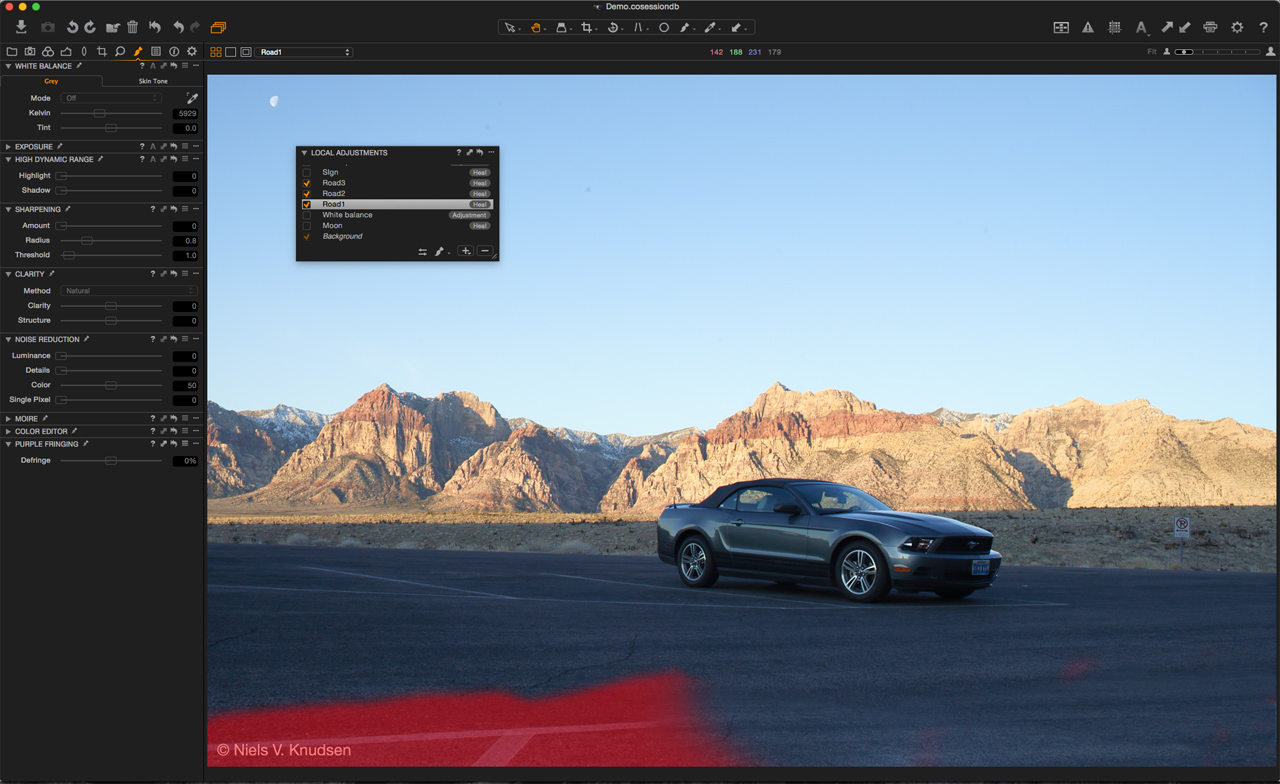
Fixing the color temperature
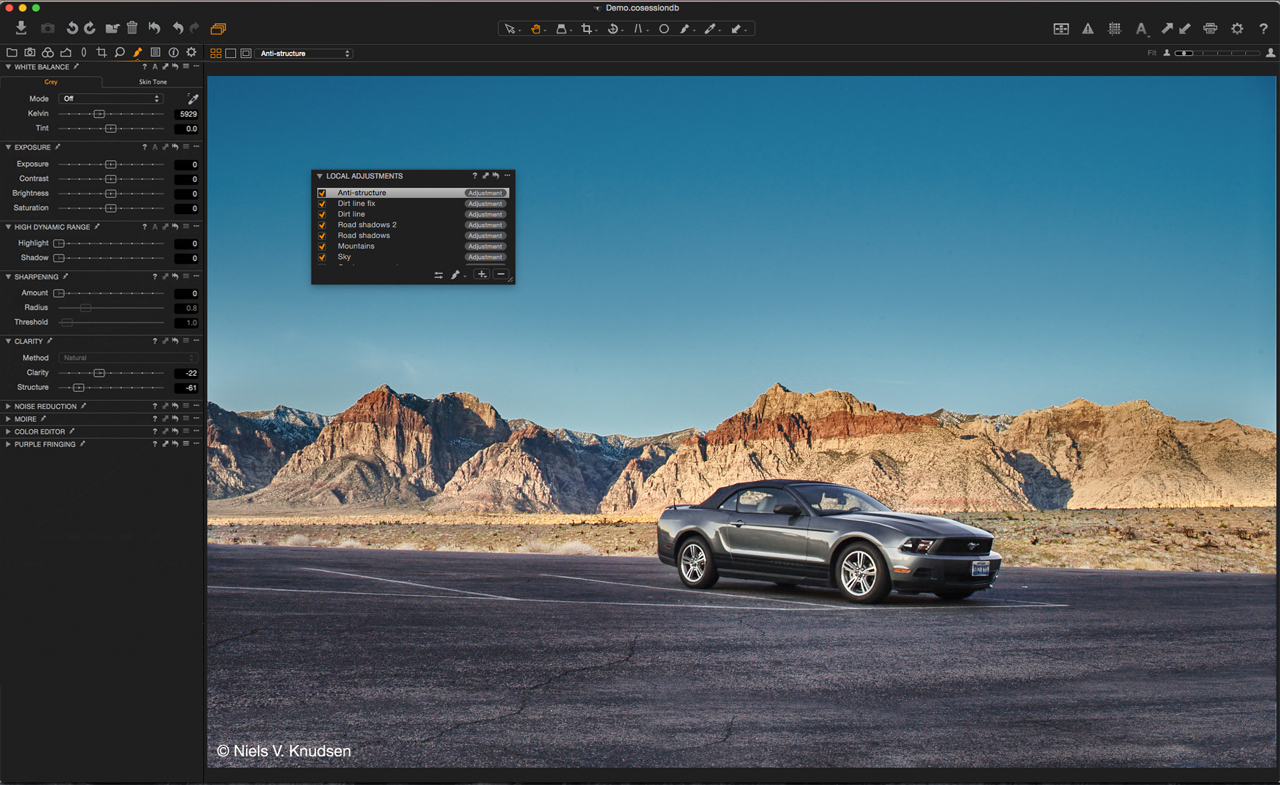
Next I wanted to fix the White Balance between foreground and background, shadow and highlight. The area in shade was masked in and the white balance kelvin was increased by ~2500K. I then created another layer to clean up the image, removing the moon in the corner and any signs of dust with two healing layers. The image is well on its way to professional polish! See below.

I then went ahead and created a gradient layer for the sky, changing the exposure and color to a more pleasing tone. Still within Local Adjustments, I went to the Advanced Color Editor, picked the color of the sky and changed the hue, saturation and brightness just slightly. See screenshot below.
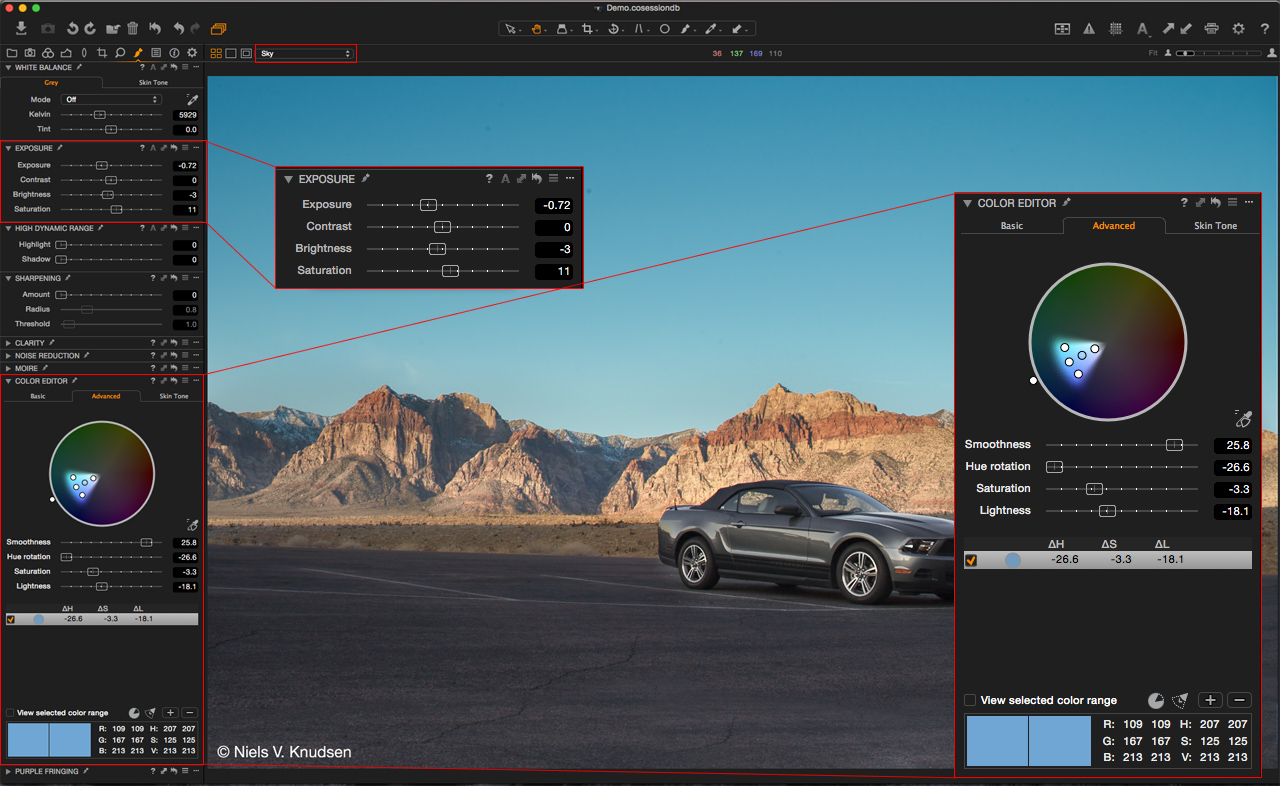
I also decreased the Exposure and increased Saturation for the masked area. In the next steps I added a little Brightness and Contrast to the car, along with adding some “dullness” to the mountains in form of less contrast, less saturation and more highlight recovery. This helps in increasing the focus on the car.
This next step was to increase the light, contrast and saturation to the horizon line that lies in shade, creating a bit more separation between the asphalt and the sunlit mountains. I also added two soft masks to darken the asphalt around the car, which helps the focus on the car even further by adding a custom Vignette effect.
In this step I added Contrast overall, a bit of High Dynamic Range adjustment, Clarity (both overall and Structure adjustment) and a bit more color change to the sky using the Advanced Color Editor. This helped to create the micro contrast that’s very important for images in this style.
The dust specs in the sky were removed. I went in and added a tiny bit of Negative Clarity, as well as Negative Structure to the car with a Local Adjustment layer. This was to distinguish the car’s detail from the asphalt and the mountains surrounding it. Again, this adds necessary focus to our subject.
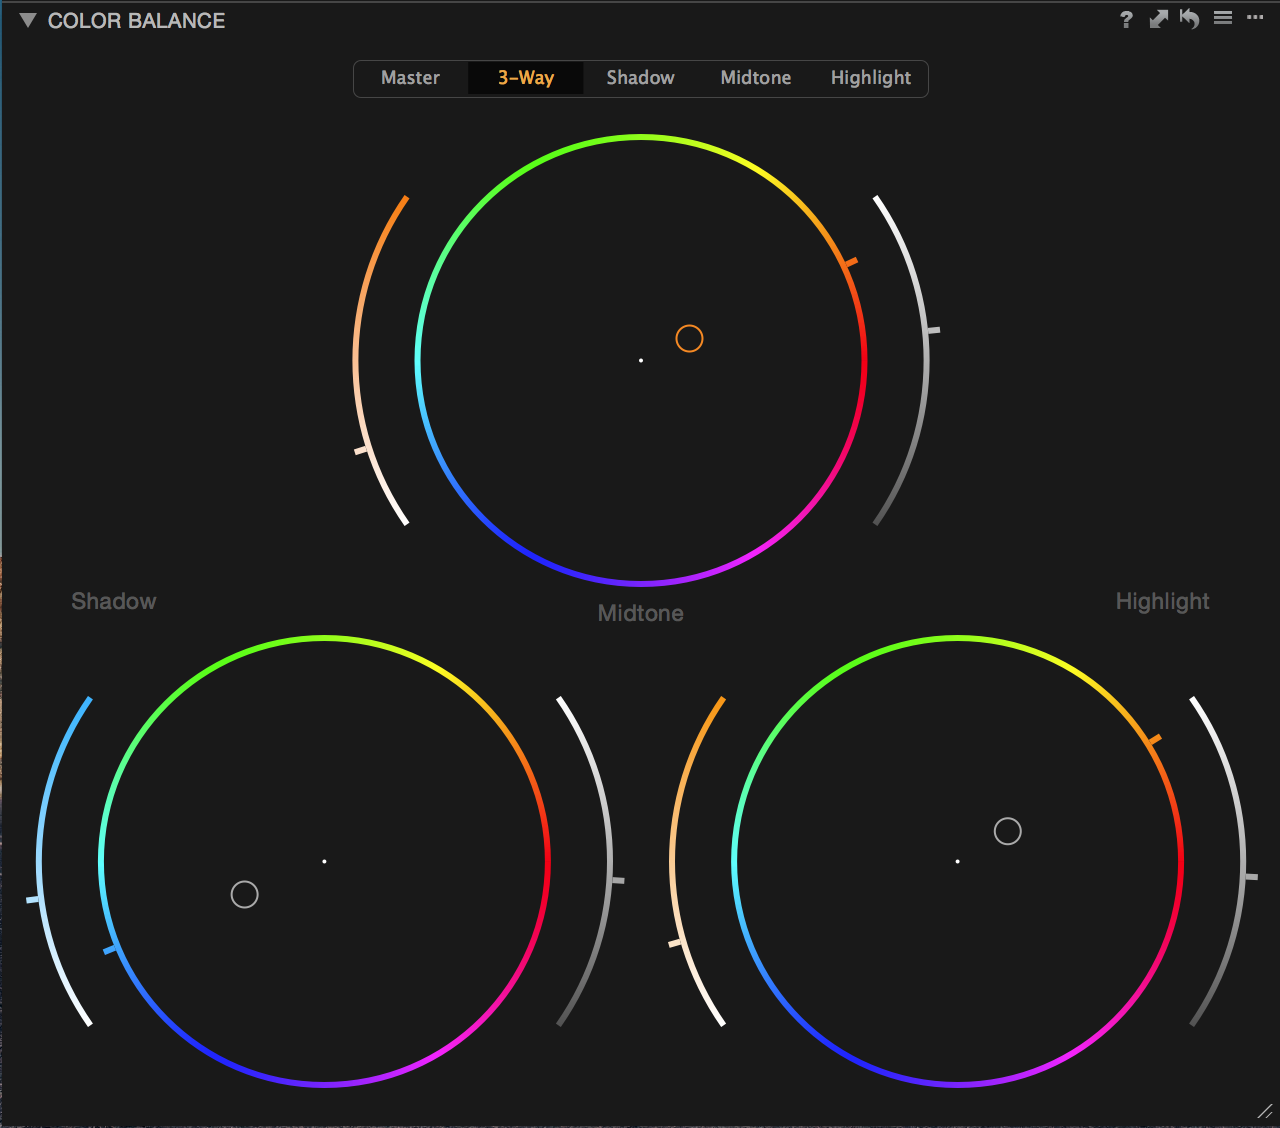
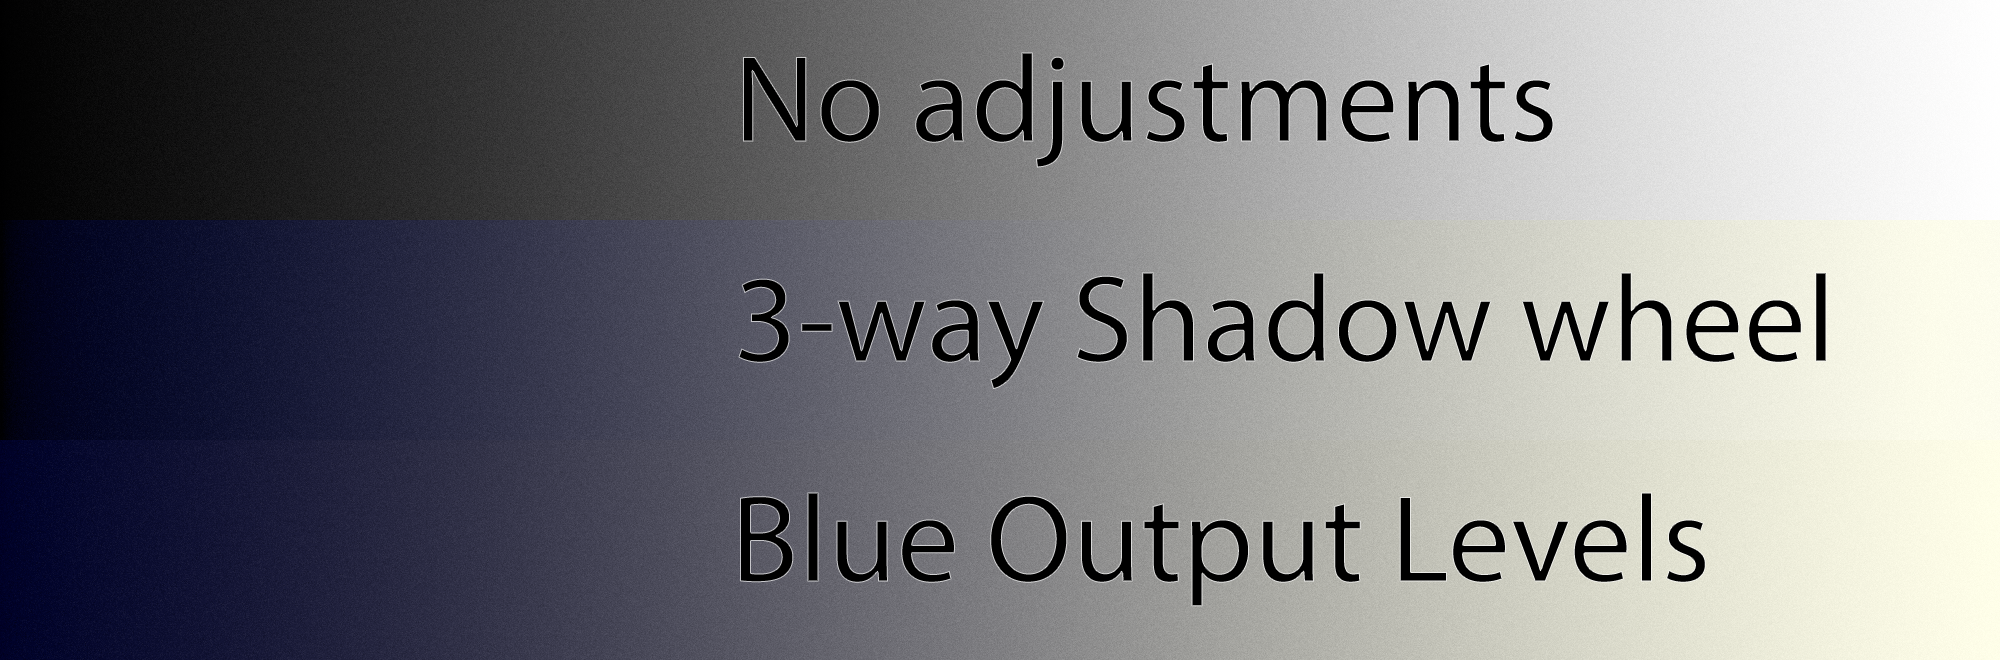
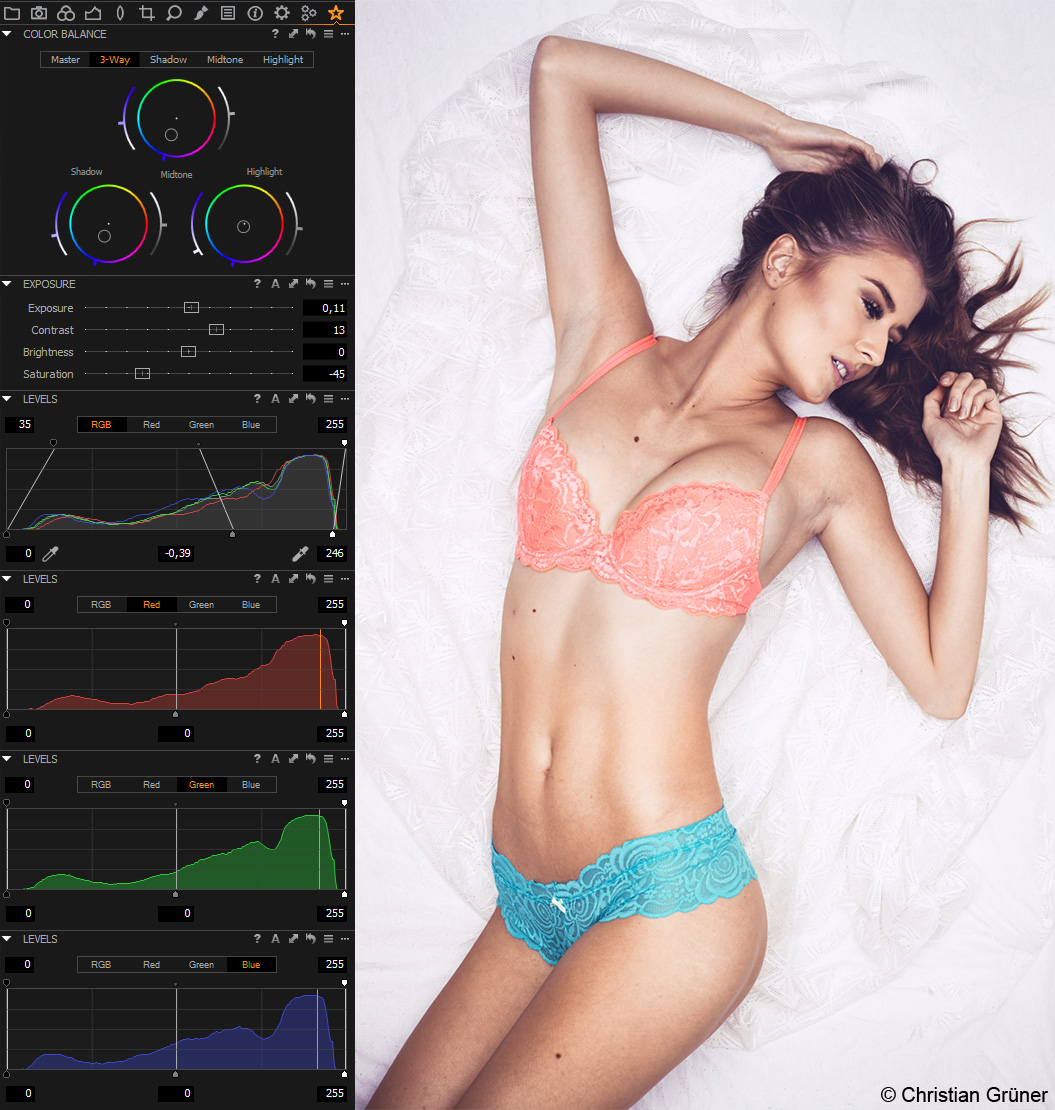
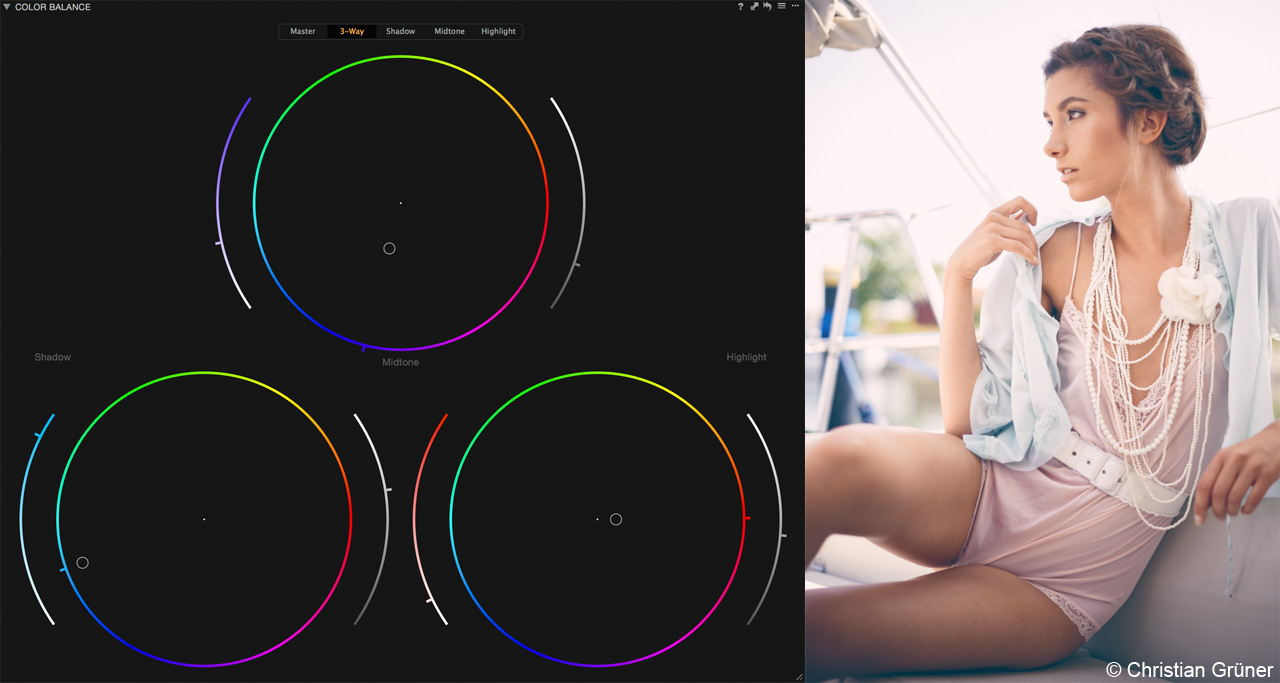
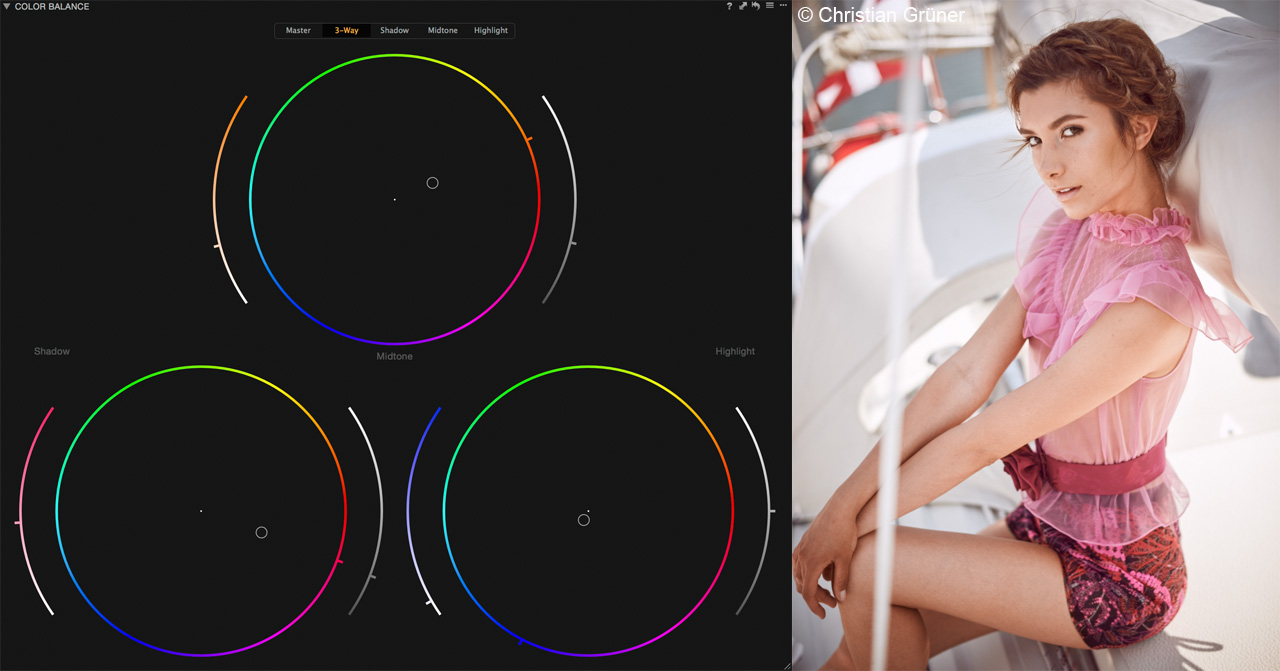
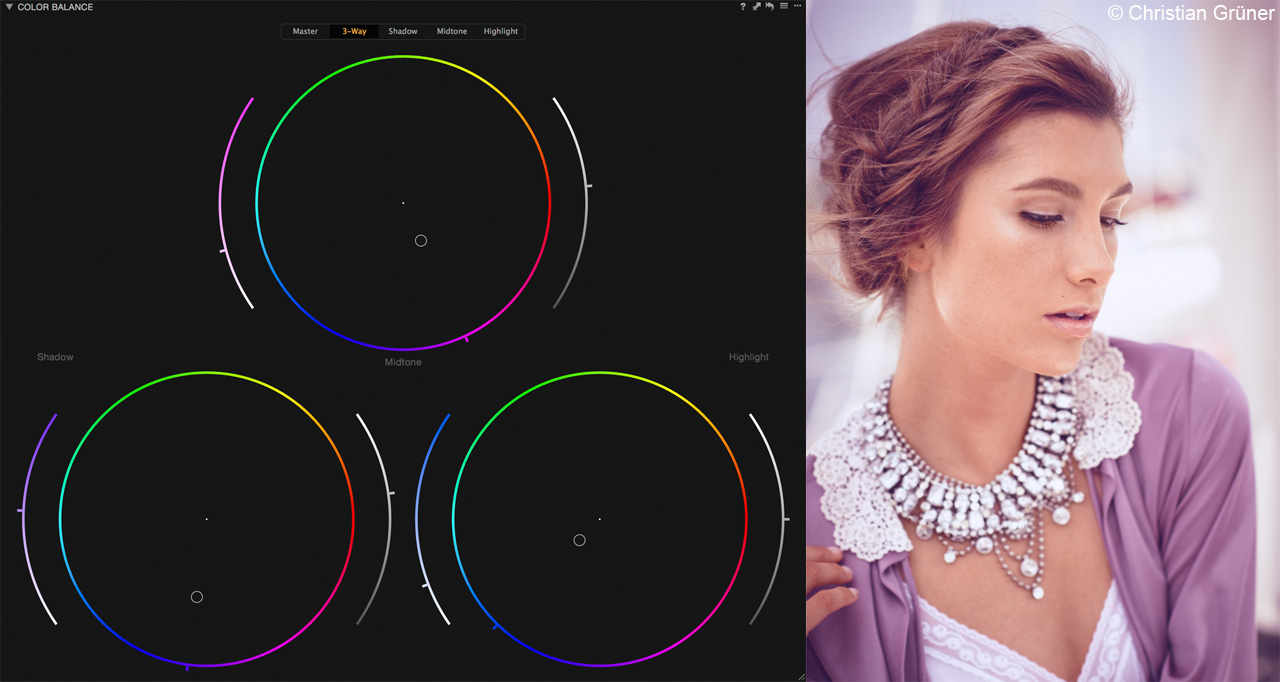
Finally, with the new Color Balance Tool outside of the Local Adjustment Tool, it was very easy to give the image the overall toning I wanted. I added some turquoise to the Shadows and some orange in the Midtones as well as the Highlights. The complimentary tones do wonders to emphasis the composition of the image and it adds to the look I was trying to achieve.
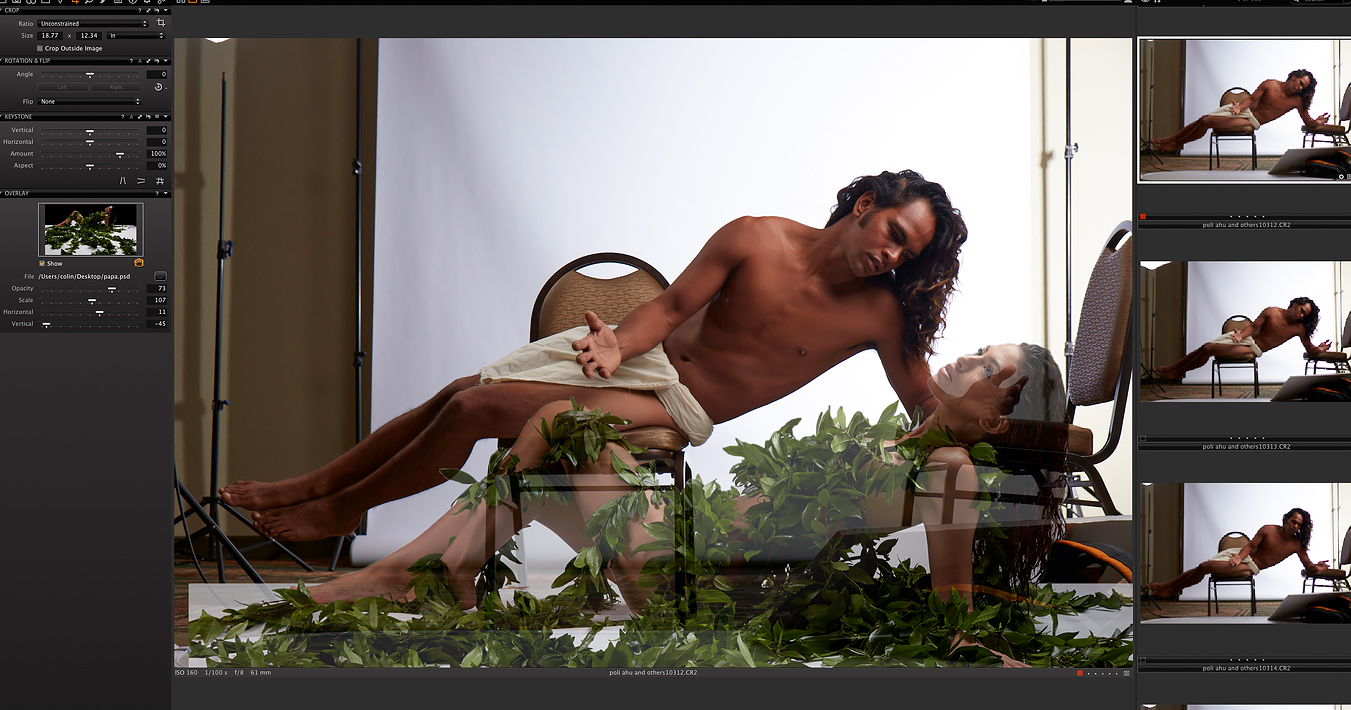
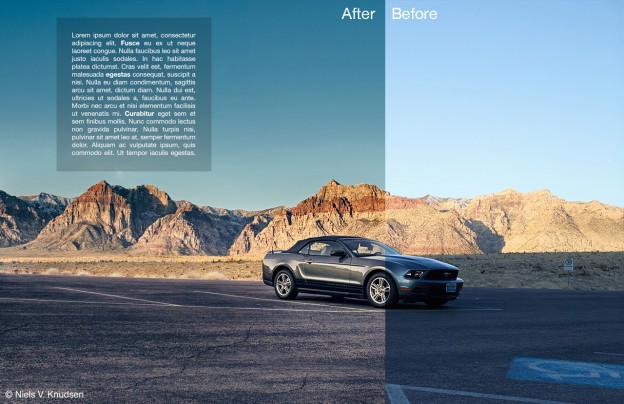
As the crowning detail I added some text filled with gibberish and a homemade logo to a separate document and imposed it over the image with the Overlay tool to get an idea of how a final mock-up might look. I think it’s safe to say the image came a long way. I present to you the brand new Awesome SuperCar, brought to you by Capture One Pro 8!

The before-image for comparison:
Best regards,
Alexander Flemming