Capture One 8.3 was released last week in conjunction with our new XF camera system.
Our new camera inspired us to expand the communication between Capture One and the tethered camera. Therefore the new Camera Settings tool enables you to configure many of the settings of not only the new Phase One XF but other models from Canon, Nikon and Sony.
So, as opposed to digging through the menus of your camera, simply search for the term in the Camera Settings tool and adjust from there!
It makes life much easier (and faster!) to adjust the settings directly from Capture One.
We have also redesigned the Camera tool to mirror the XF display and be able to change settings directly from here. Don’t forget – this is not just for Phase One cameras, this also works for Canon, Nikon and Sony too.
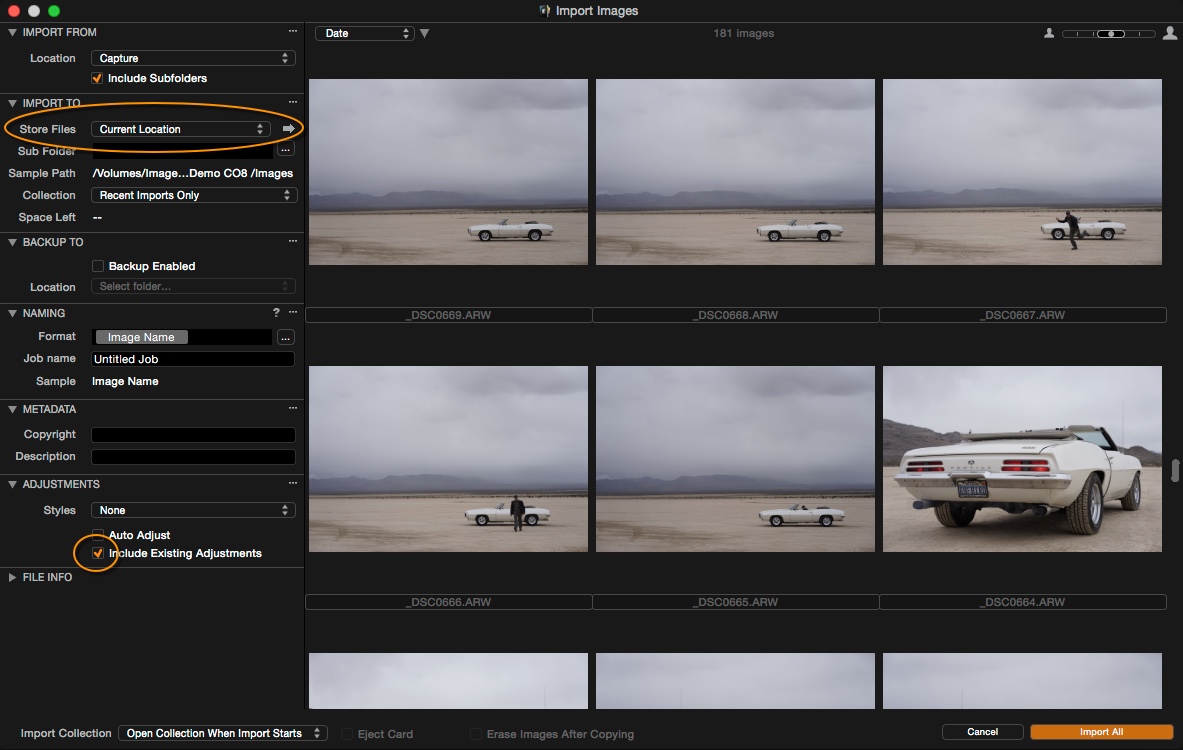
When you start up Capture One 8.3 you will find the new Camera tool and the new Camera Settings tool in the Capture tool tab.
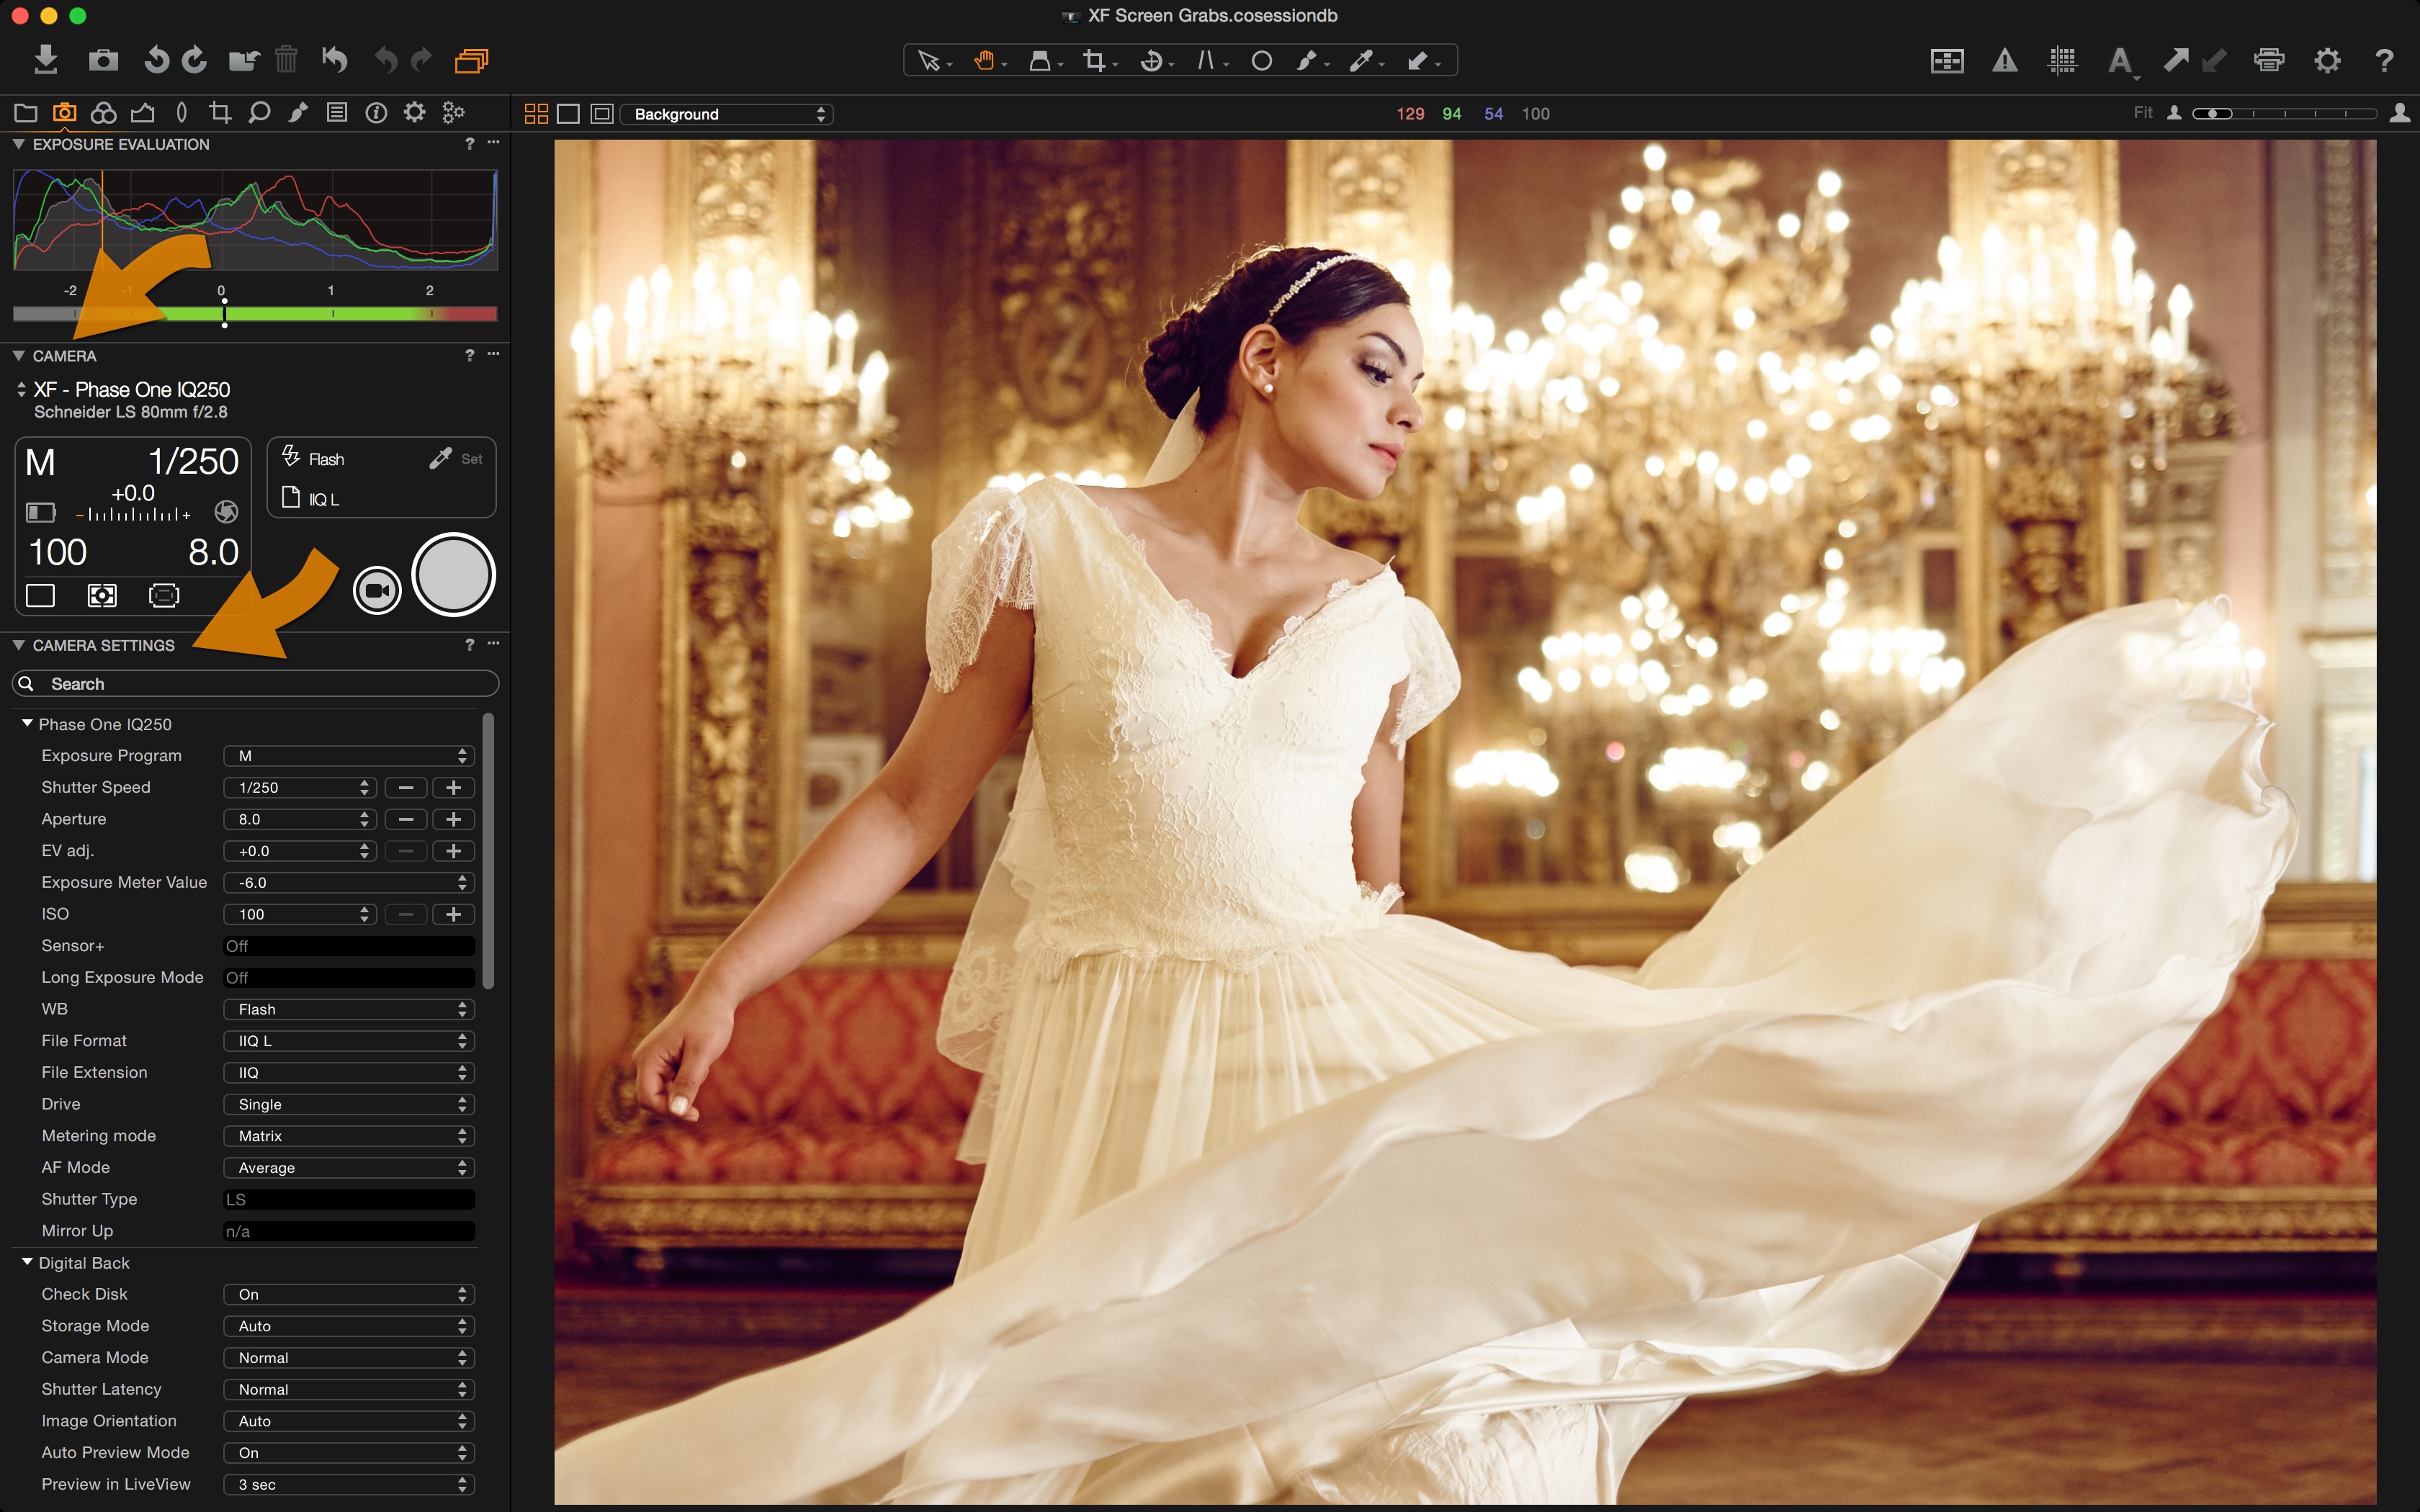
The new Camera tool, not only gives you a display of the current settings, but also allows you to change them, without the need to necessarily enter the Camera Settings tool. Simply click on a parameter and use the pop menu to adjust with the Plus / Minus buttons.
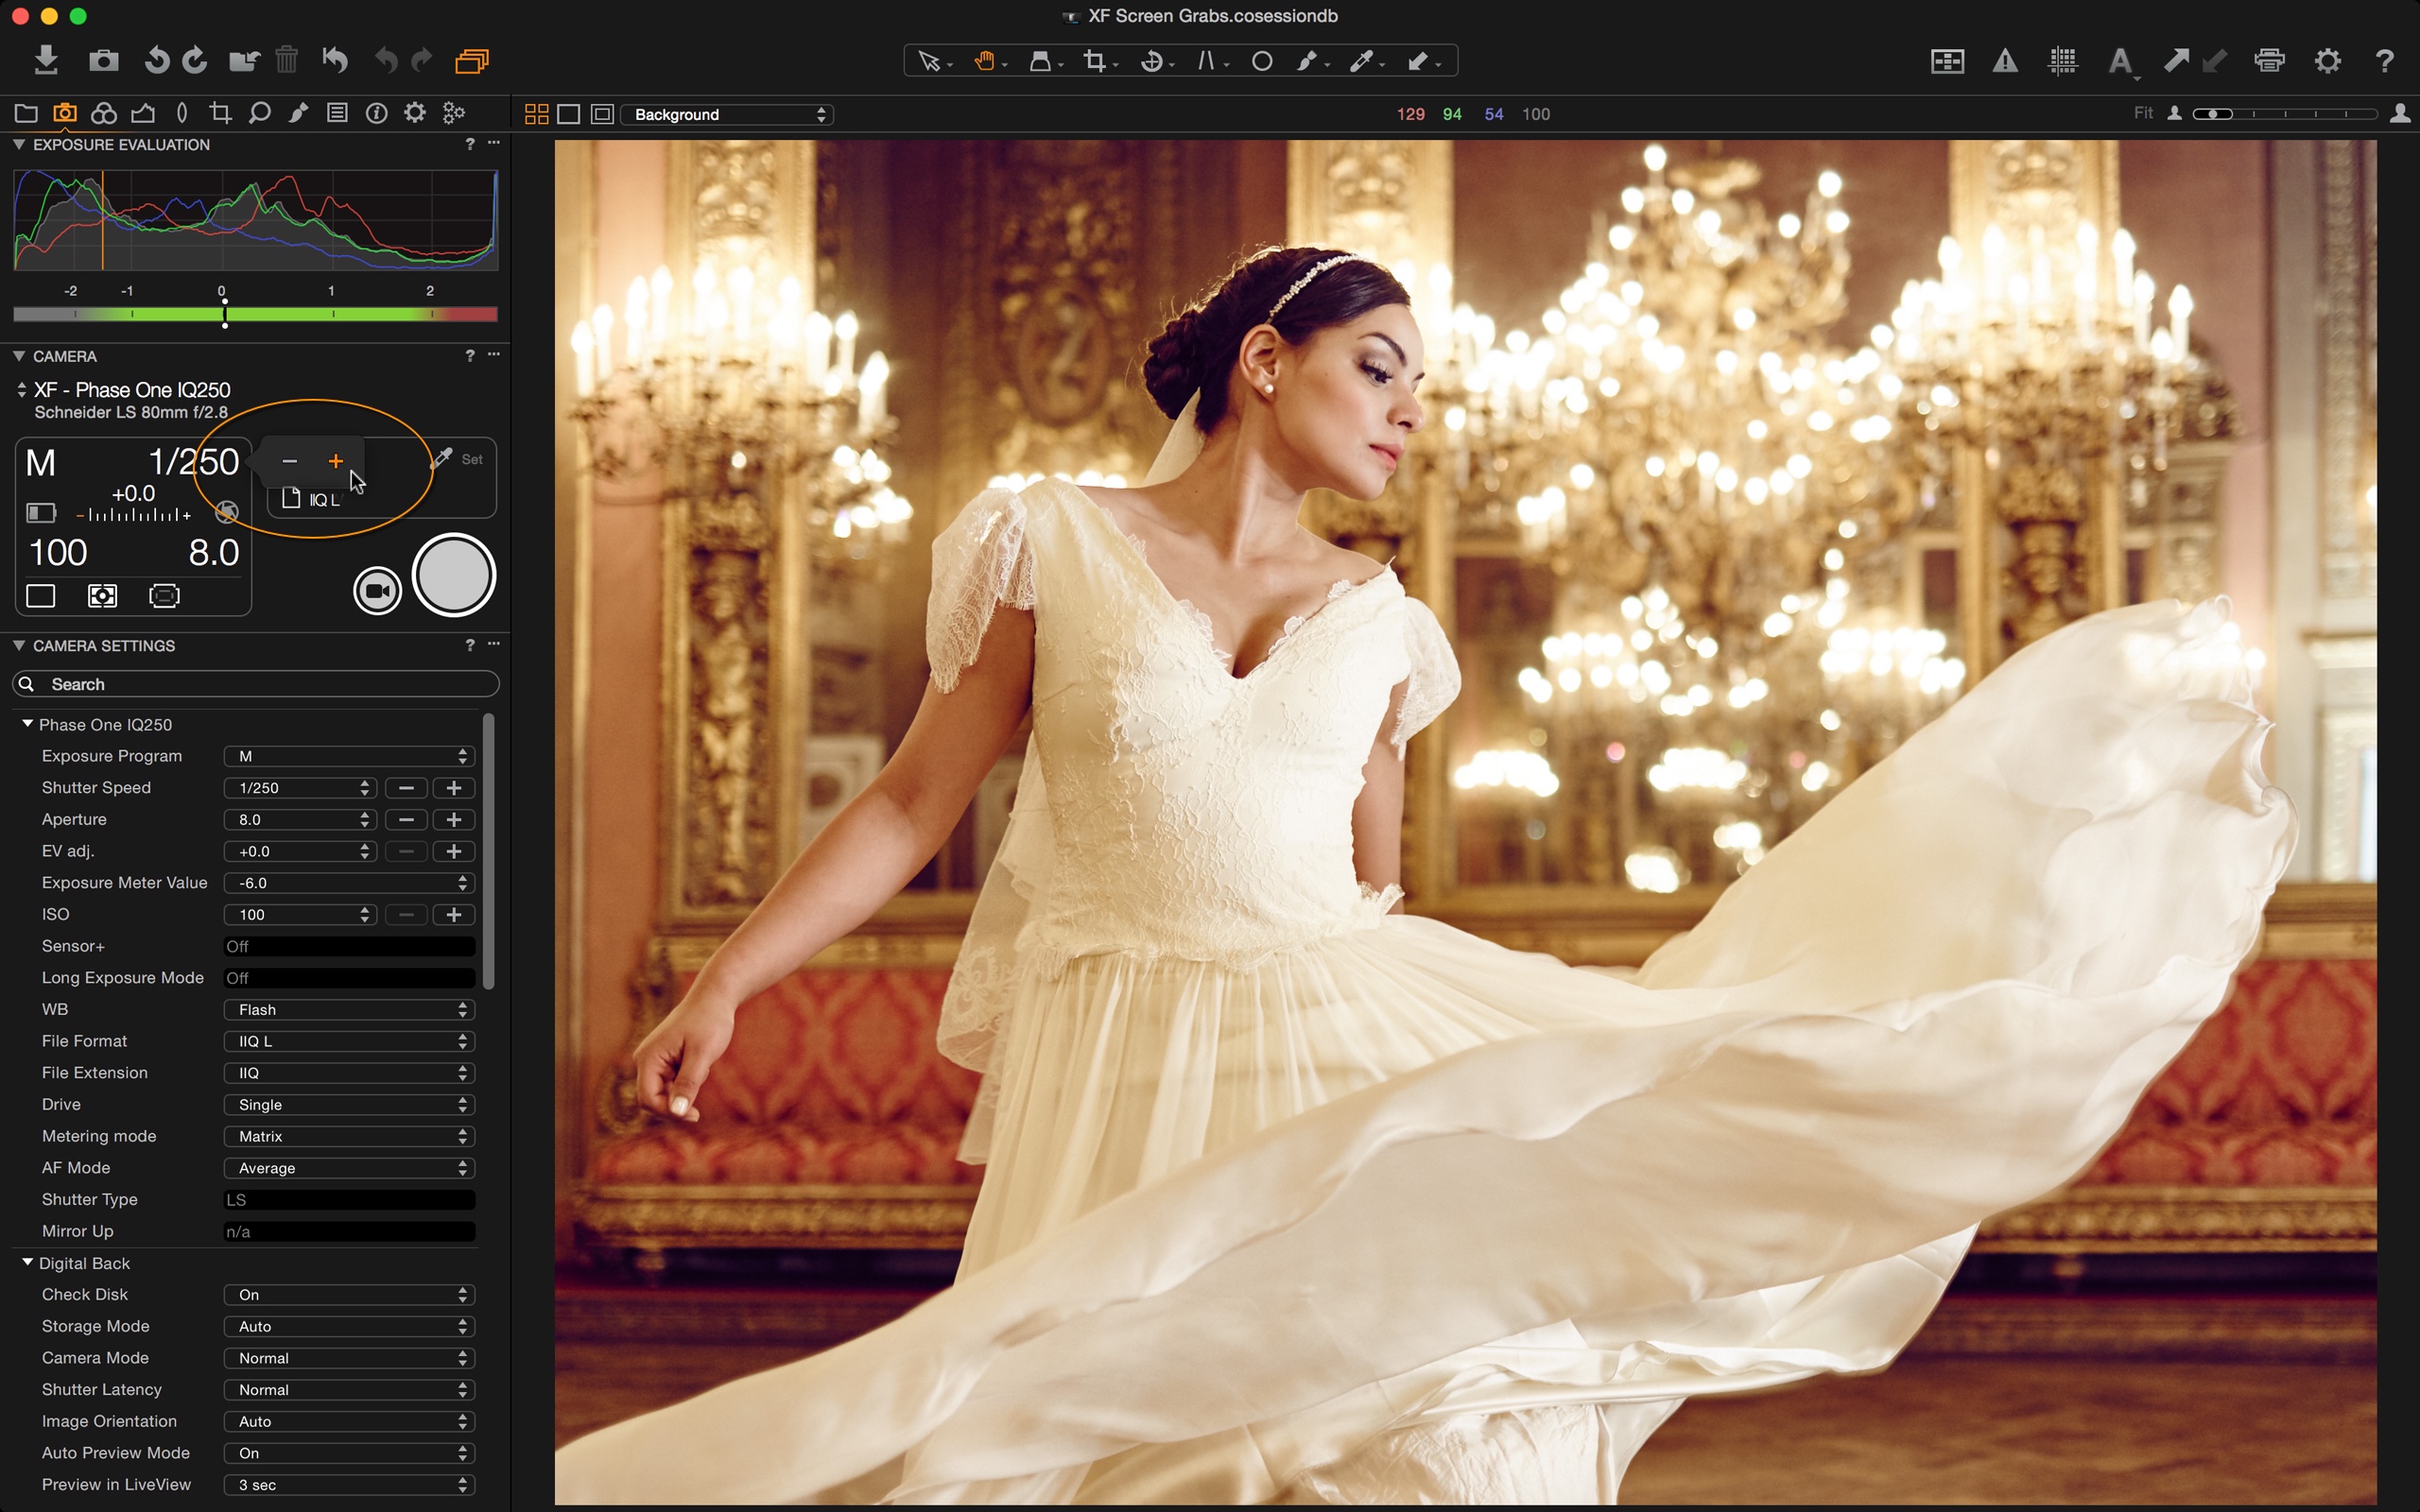
Clicking another option, for example, could bring up a list…
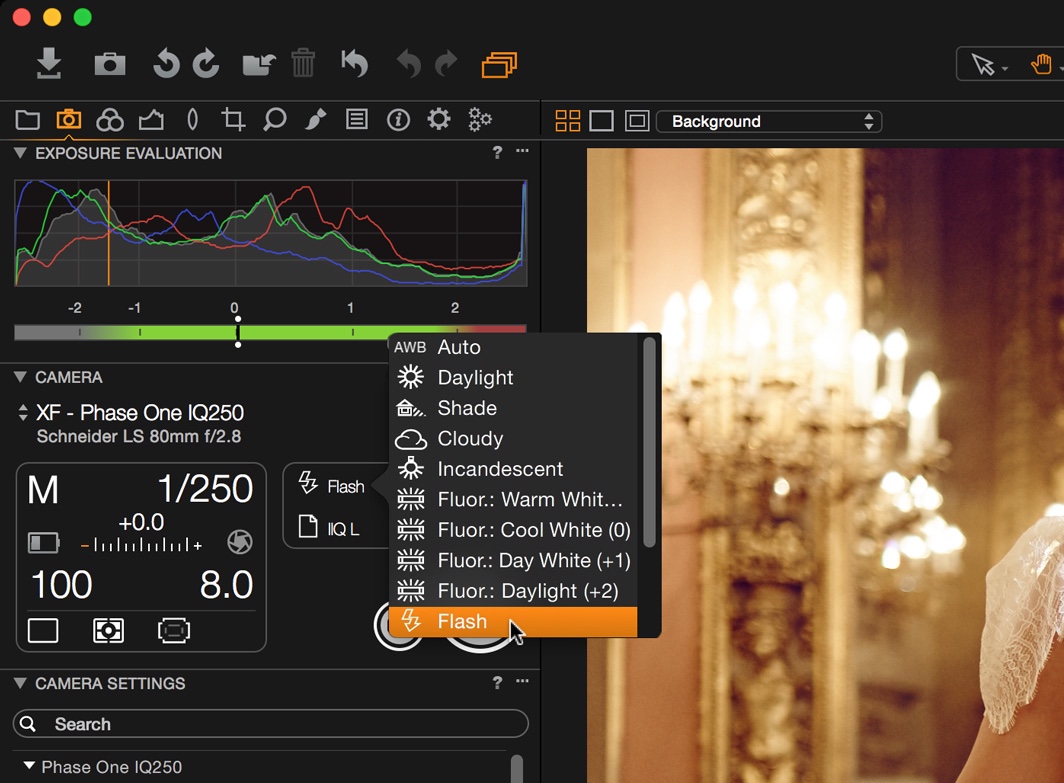
So, for your given camera, just have a click around and see what you can change! The available options are based on your camera model and what is made available for access. So it will vary model to model.
Note that there is also a camera battery status icon. Very useful for keeping an eye on during tethered capture!
The next new tool, Camera Settings, goes further than the simple Camera tool, by accessing as many options in your camera as possible. Again, we access what is made available by the specific camera model so you may see some variations.
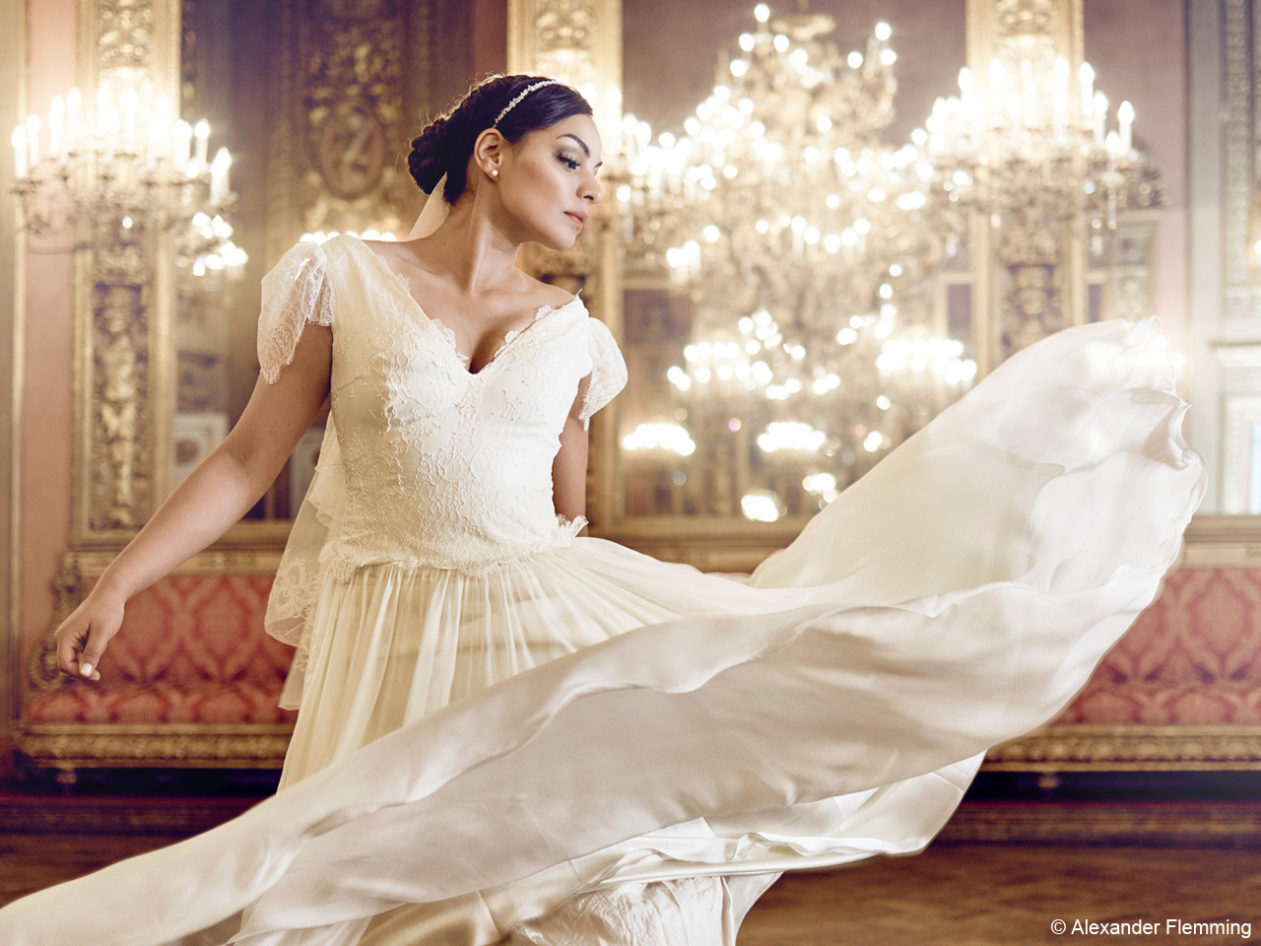
Here is a view from the new Phase One XF camera…
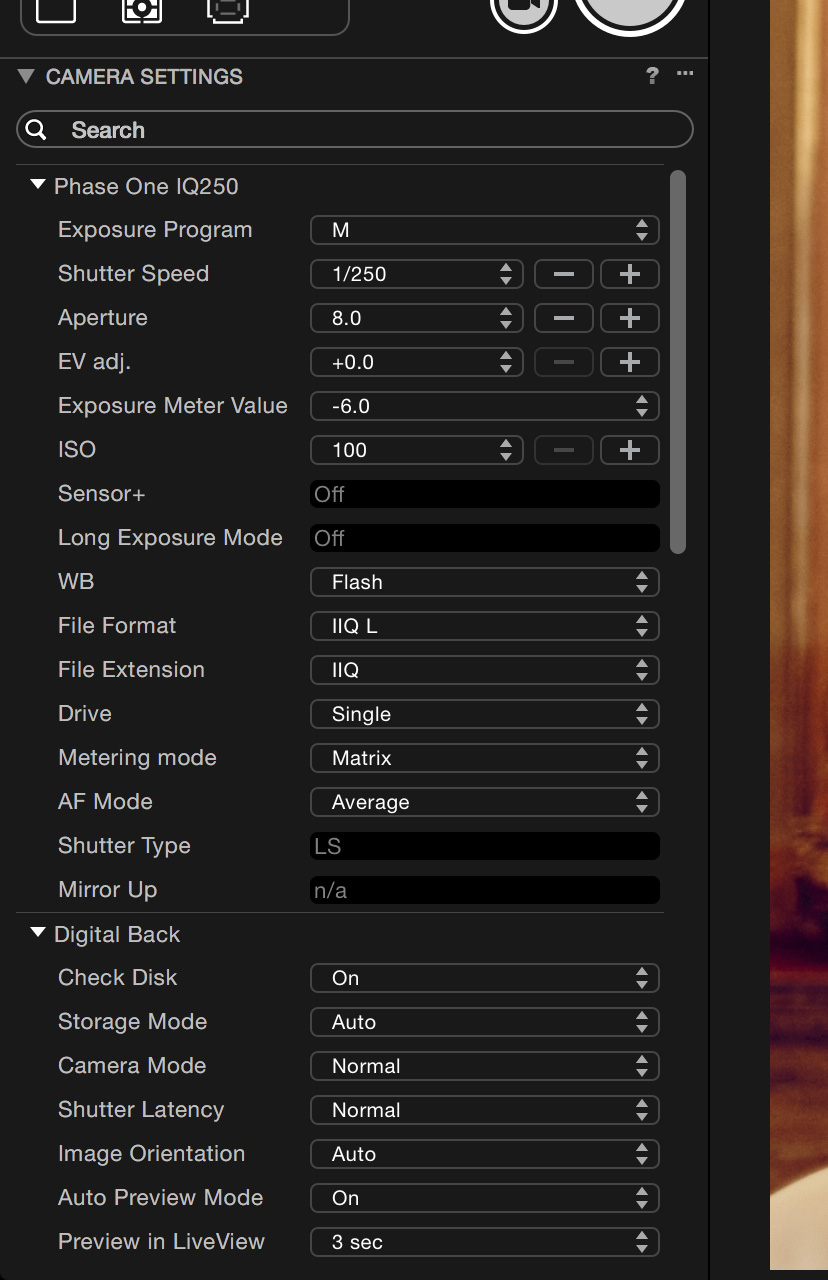
And that’s just a small part! Therefore, to make this easier there is also a search bar at the top of the tool, so you can get straight away to the desired setting.
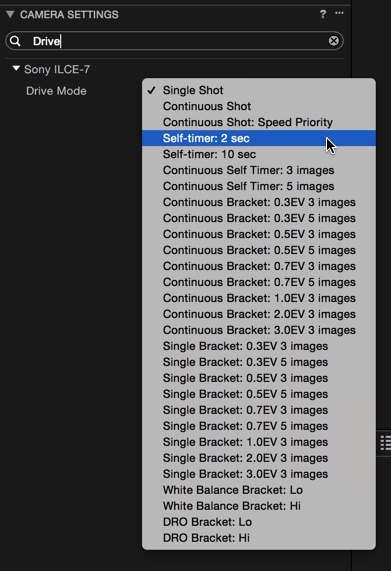
Type any search term in there and go straight to the adjustment. So, for example, if I connect a Sony A7 camera and type ‘Drive’ in the search menu and get straight to the following.
Therefore you could also consider Capture One as a camera configurator, even if you don’t shoot tethered.
Grids and Guides
To bring Capture One in alignment with options available on IQ digital backs, we added a couple more compositional grids. The preferred grid can be selected in the Capture One preferences under ‘type’…
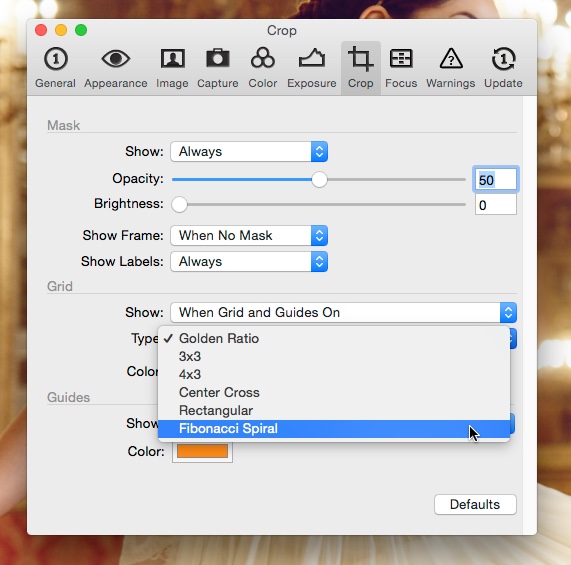
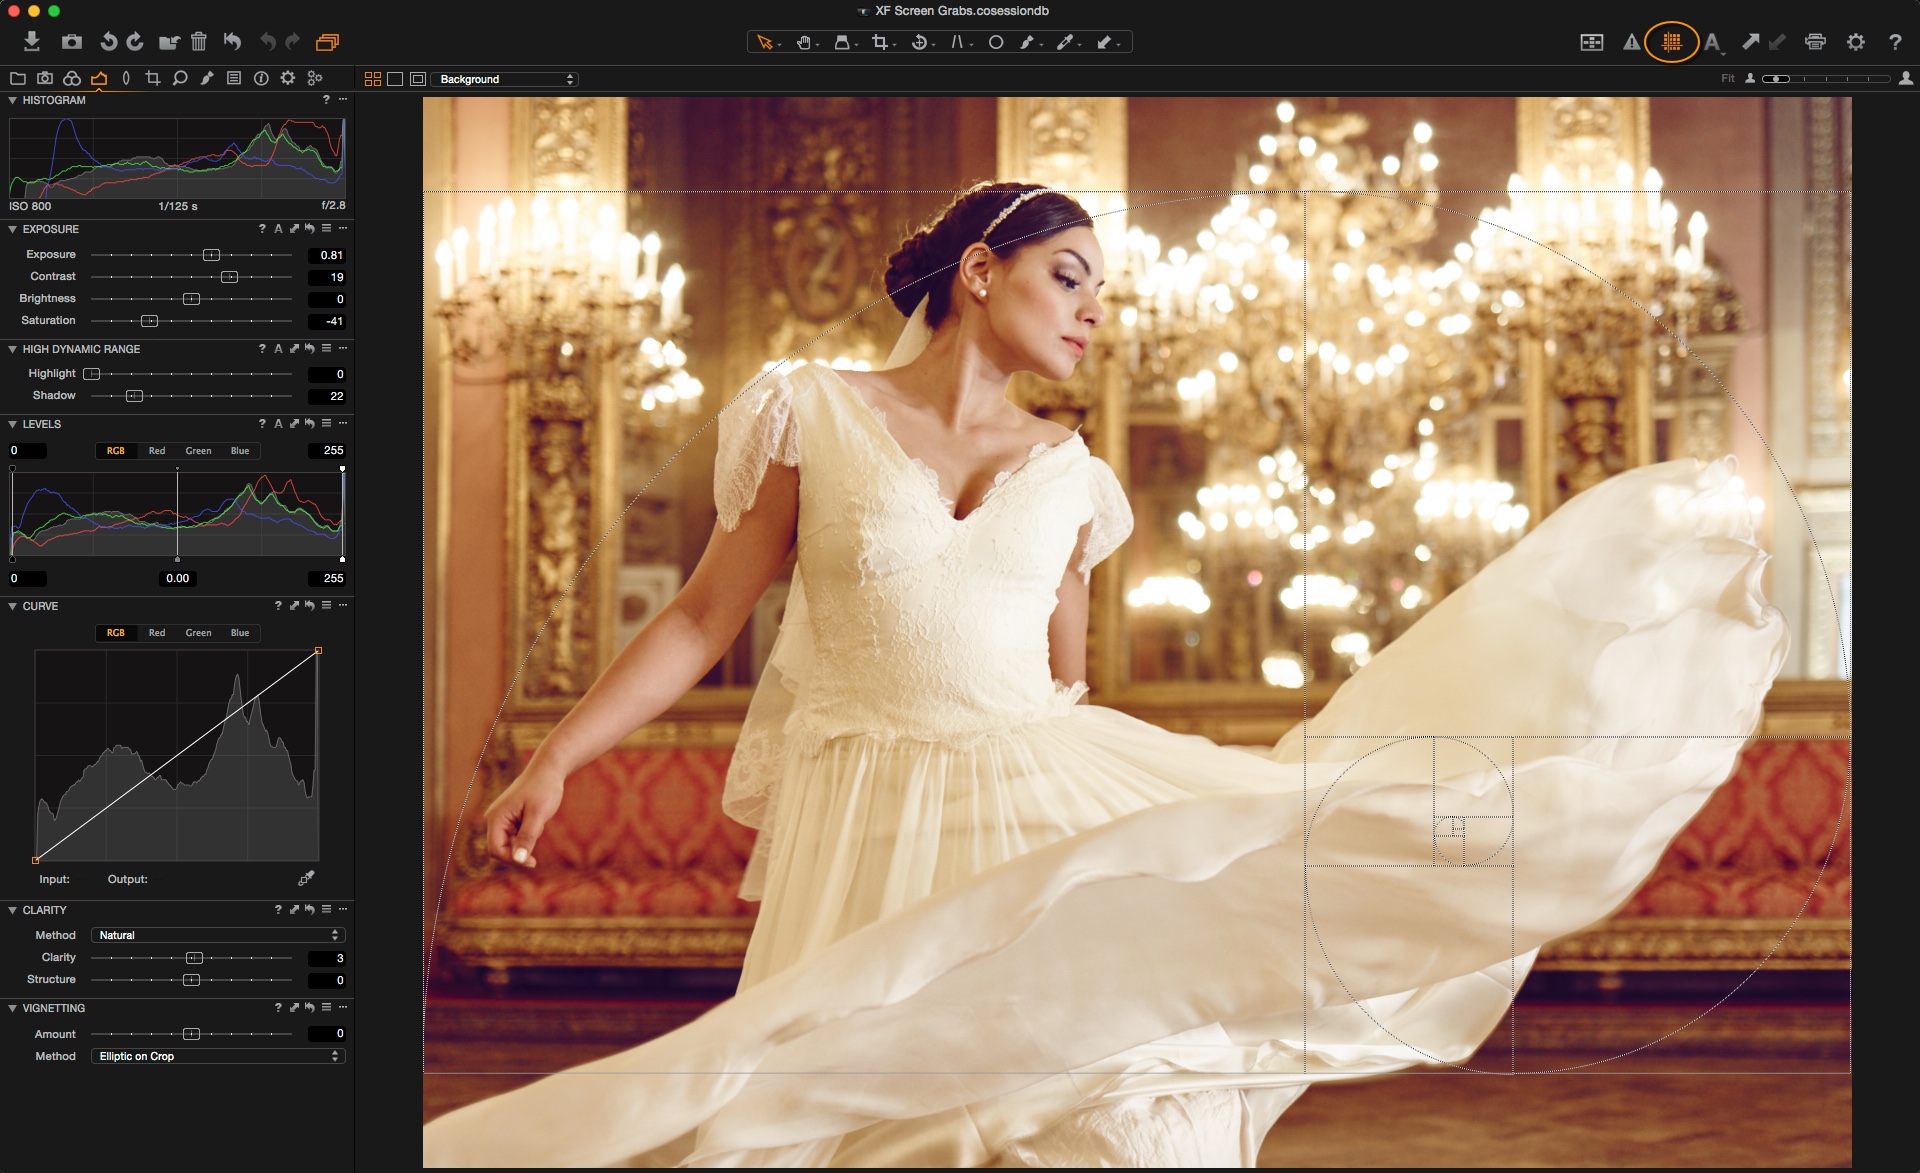
To view the grid in the Capture One viewer, click the show guides icon on, in the top toolbar. (Indicated by the orange circle)…
Also in Capture One 8.3, we have approved tethered functionality on the Mac platform with an overhaul of the engine to increase performance and stability!
Download today and enjoy the new features.
Best regards,
David