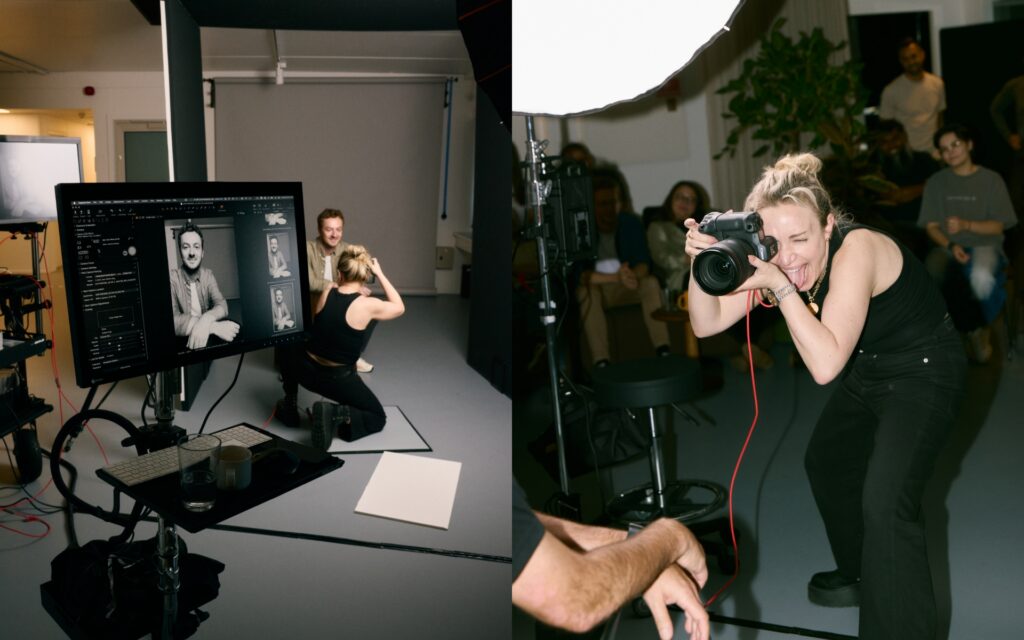
Fashion and beauty photographer Sarah Silvermight be best known for her bold, playful, and colorful visuals, but behind every image lies a bulletproof workflow and process that make it all possible.For Sarah, creativity doesn’t come from chaos.It’s built on structure. In this quick Q&A, she shares how preparation fuels her imagination, the systems that keep her shoots running smoothly, and the tools she relies on from concept to final export.
What’s essential when prepping for a shoot?
There’s so much information coming at me from all sides while prepping a shoot, so filing everything properly for easy retrieval is a MUST. I have pre-made digital folders, shoot sessions, job checklists/tasks, and naming conventions that keep me on track and consistent for EVERY project I undertake. I find that if all the pieces are in the right place, it opens my mind to maximum creativity.
Do you have any post-production advice for us?
Post means so much more to me than just retouching. It also includes proper file storage. When backing up files after a shoot, I use on-site RAIDS to upload my Capture One shoot sessions, and multiple off-site backups for redundancy (you never know when there will be a flood in the studio). So I highly recommend multiple backups in multiple locations!
Also, a quick tip for retouching: When we go through retouching rounds in Photoshop, I always refer back to my original base image (R0) to see how far the image has come and where I’m going; otherwise, it’s really easy to overdo it. I will often “brush back” details that were removed from the original so I can keep retouching and make it feel more natural rather than overly airbrushed.
How do you balance creativity and efficiency on set?
Quick Answer: A time-tested workflow that I have developed over the years through tough lessons!
Long answer: Over the years, I have developed a workflow that helps me avoid making the same mistake twice.
The second a shoot comes in, my workflow begins with meticulous organization. When you’re organized, you can move quickly and address the most common questions/complications that may arise during a shoot. This allows space for creativity to take over, because you’re not busy trying to problem-solve for a million questions on set that you could have asked before the shoot.
My organization also trickles down to my team, so everyone understands where they need to be and what needs to be done to make a shoot go smoothly. Ultimately, this streamlines our entire process, allowing us to focus on our creativity.
Of course, there will always be challenges to be solved on set, so it’s also important to be able to wear many hats and be able to pivot quickly into problem-solving mode.
Can you share a favorite shoot and what made it stand out?
Gosh, this is a really tough question. I am lucky to work with such amazingly talented teams that are always pushing to create stunning visuals. I can honestly say that every shoot is my favorite because it’s a blank slate where I can be inspired and inspire others to create something extraordinary that we can all be proud of.
What’s your strategy for managing time on set?
I built a spreadsheet schedule that shows everybody’s role and where they are on the shoot day in 5-minute increments. I know it’s a bit detailed, but it’s my north star during a shoot and helps make sure everybody’s time is 100% accounted for.
How do you collaborate with your team?
I learned early on in my career that I thrive in a collaborative space. I work with amazing artists who bring so much to my creative process. The best feeling in the world is when the entire team yells out “omg” when a killer shot pops up in Capture One. It’s as if we are all synced into the creative flow, and it just feels so magical.
Where does software fit into your workflow?
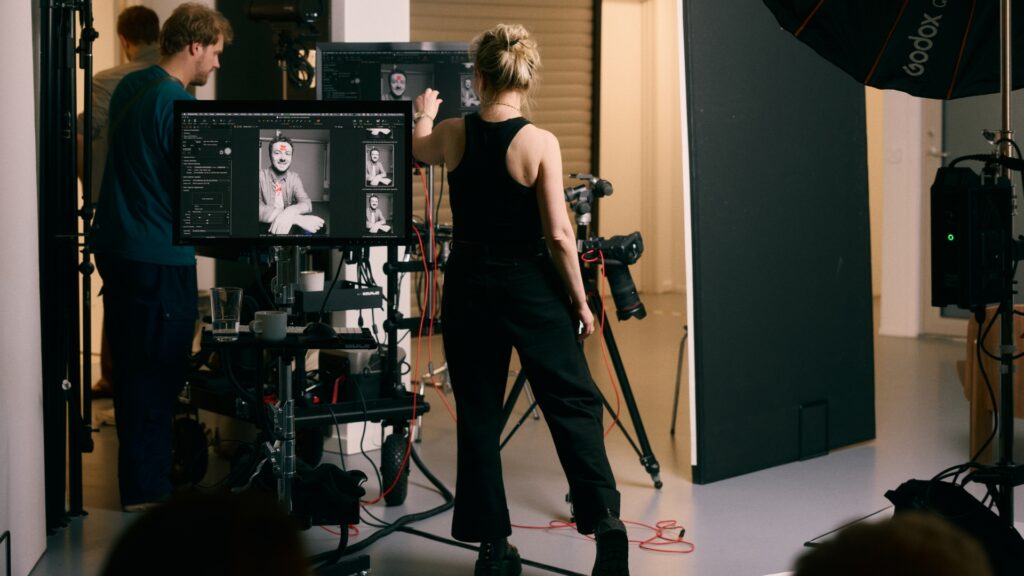
Capture One is ever-present throughout my entire shoot process – from prep to post. We customize sessions in advance of the shoot and refer back to them throughout post-production to export and re-export as needed. For me, my favorite features are:
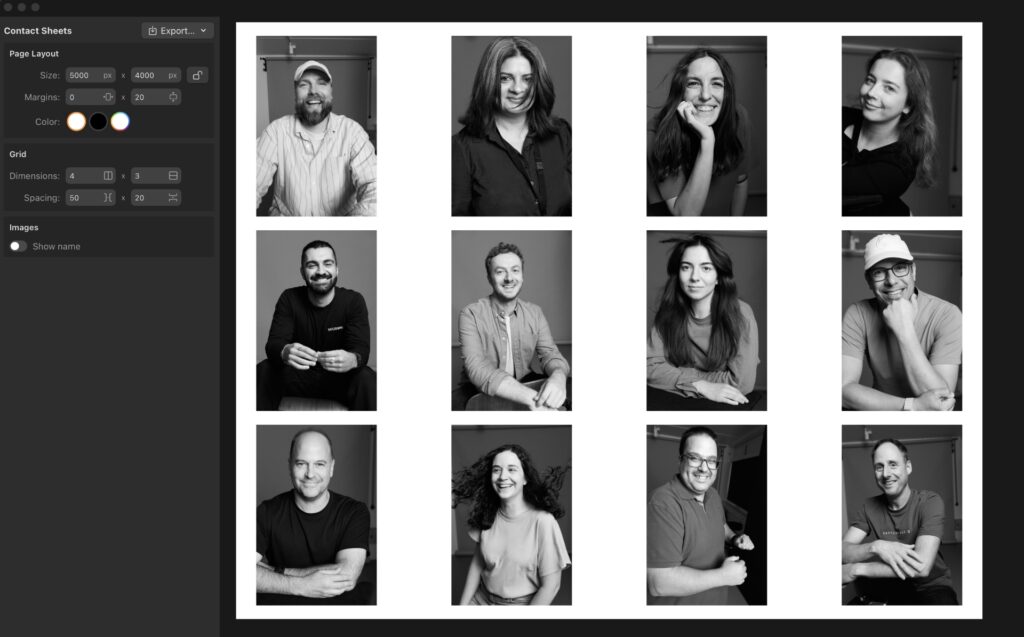
Multiple Compare Variants
Export as EIP from the processing menu
All my custom keyboard shortcuts – these help me move at the speed of light! I am especially obsessed with filtering when editing.
What’s your top advice for building a solid workflow and a distinct voice?
When it comes to workflow, it’s super important to learn from your mistakes. I am always refining my workflow to ensure that I never make the same mistake twice.
As for finding a distinct voice, I strongly believe you should draw on what you love. If you can combine the things that you are most passionate about, you will create with heart, and, in the end, that heart is what is most unique, because no one else has the same worldview as you.
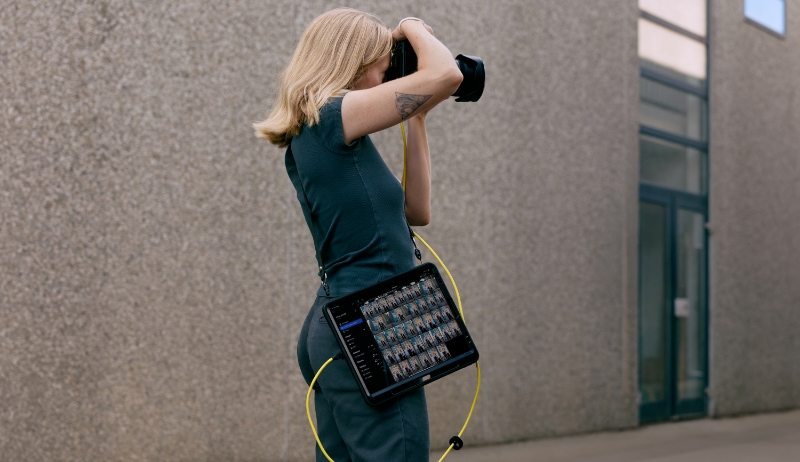
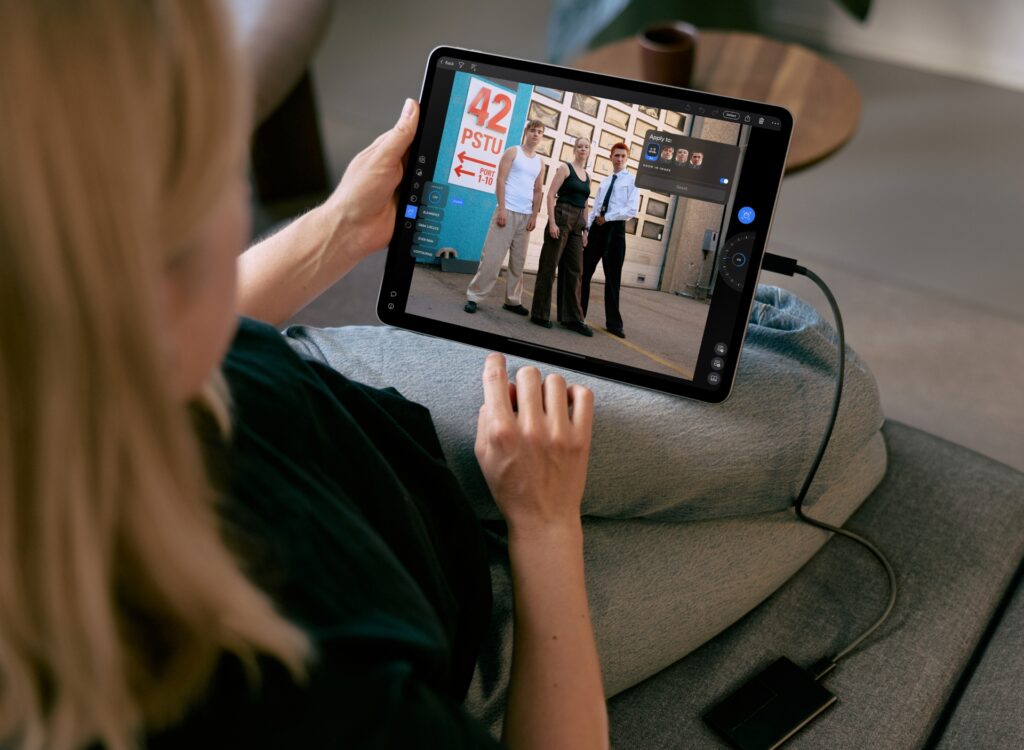
Mobile photography workflows are quickly becoming the norm, and our mobile app is evolving to match.
With recent updates, it functions as both an independent solution and a seamless bridge between your camera, iPhone, iPad, and desktop setup.
In this guide, we’ll walk through the whole journey. From setting up storage and importing, to tethered shooting, reviewing, editing, retouching, and exporting.
Capture One mobile now gives you everything you need to work your way:
– Standalone power to shoot, edit, retouch, and export on the go.
– Smooth integration into your desktop workflow when you need more.
– Flexible storage with external drive support.
– Assisted tools like People Masking and Retouch Faces.
– Styles and Cloud Sync so your looks and edits follow you everywhere.
– Built-in Capture One Live for easy, browser-based collaboration and real-time feedback.
These features enable you to access the full benefits of our software from anywhere. It’s now easier than ever to fit mobile work into your professional workflow.
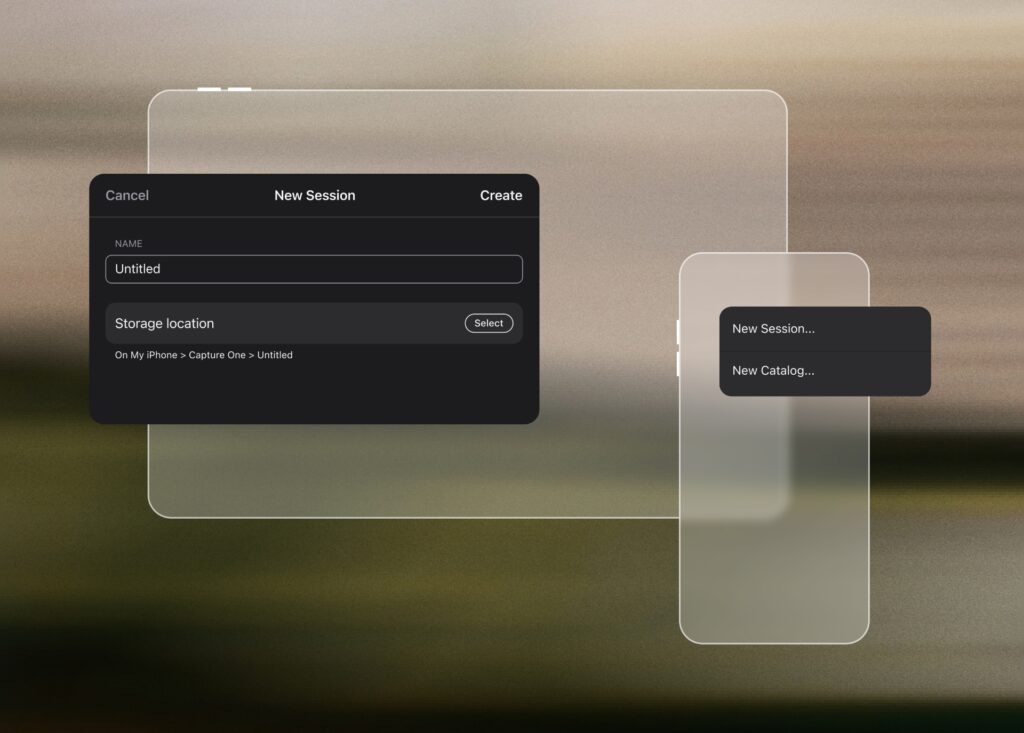
When you open Capture One mobile, it starts with a default Catalog, but you can also create Sessions.
These two document types suit different workflows, and the main distinction lies in how they handle the database.
– Sessions are flexible folder-based projects. Because they don’t depend heavily on a database file, they’re portable and easy to manage. In a Session, all your images live in a simple, customizable folder structure, with preview and adjustment files stored alongside them. Sessions are ideal for quick shoots, work on external drives, or projects you plan to share with a desktop workflow.
– Catalogs store your edits, previews, and images together through a central database. This makes it easy to search and filter across your entire library, but you can’t use a Catalog without launching Capture One. Organization in Catalogs is virtual: the folder structure is automated and managed by the database, not by you. To protect your work, Catalogs require regular backups of the database file. They’re best for long-term libraries where you want everything unified in one place.
Working with External Storage
With Capture One mobile 3.0 came advanced external drive support. You can now create Sessions and Catalogs directly on an external drive and work with files stored there. This also allows you to shoot straight to external storage when tethering or move documents between internal and external storage, making your workflow much more flexible.
For example, you can set up a Session on an external drive in mobile and shoot an entire run-and-gun session without being tied to a desktop. Wired tethering gives you speed and reliability, while Capture One features like AI retouching, Styles, and other automated adjustments apply to every incoming shot with Next Capture Adjustments. At the same time, reviewers can follow along through Capture One Live, rating, tagging, and commenting on images as they appear. Once the shoot is done, simply plug the drive into your computer and continue working with the exact same files, with all your edits carrying over seamlessly. In practice, this means you get the full benefits of Capture One on the go, and it’s easier than ever to slot mobile into your desktop workflow.
Importing Images
Capture One mobile gives you several options for bringing in your images:
– Photos app: Access your entire Photos library. – Files app: Pull from internal device memory, cloud locations, or external devices such as USB drives and SD cards connected to your iPad or iPhone. – Connected Camera: Import directly from your camera using a cable or WiFi.
Starting with Capture One mobile 2.5, you can choose whether to copy files into your Catalog or keep them in their original location.
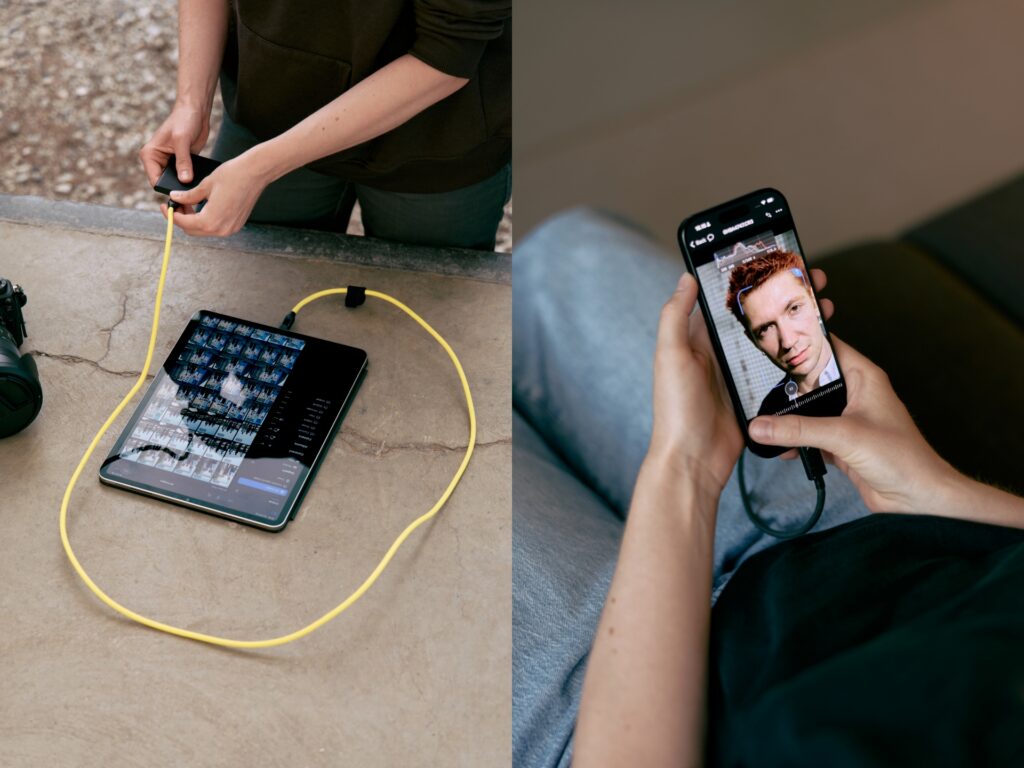
Shooting Tethered
Capture One mobile is built for shooting tethered.
Connect your camera to your device via cable or WiFi to shoot directly into Capture One mobile. Enable Next Capture Adjustments to apply edits as you go, rate shots on the fly, and manage capture folders when working in Sessions.
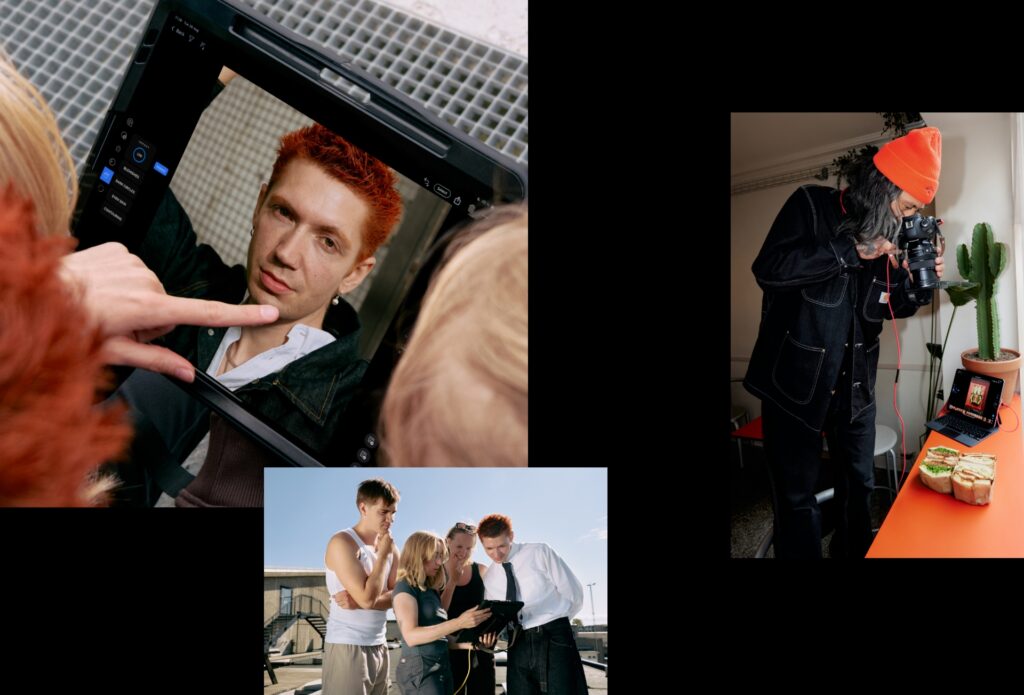
Reviewing images and Capture One Live
You can review your photos in-app with ratings and tags, and instantly share them through Capture One Live, which is built right into the mobile app.
Capture One Live lets you generate a link that peers or clients can open in any web browser, no downloads or accounts required. They can view, rate, tag, and comment on individual photos in real time. You can control access by inviting people via email for full collaboration, or by creating a public link with limited access. All at the same time. This flexibility makes it easy to adapt to different projects. By using their own devices, your team and clients can follow the shoot on location without bulky equipment, while providing real-time feedback as you capture each image.
Editing Images
With Capture One mobile you get color editing, exposure control, sharpening, and all the essentials of the full Capture One desktop engine, right in the palm of your hand. Whether you’re polishing a few selects or editing an entire session, you can handle professional work on the go.
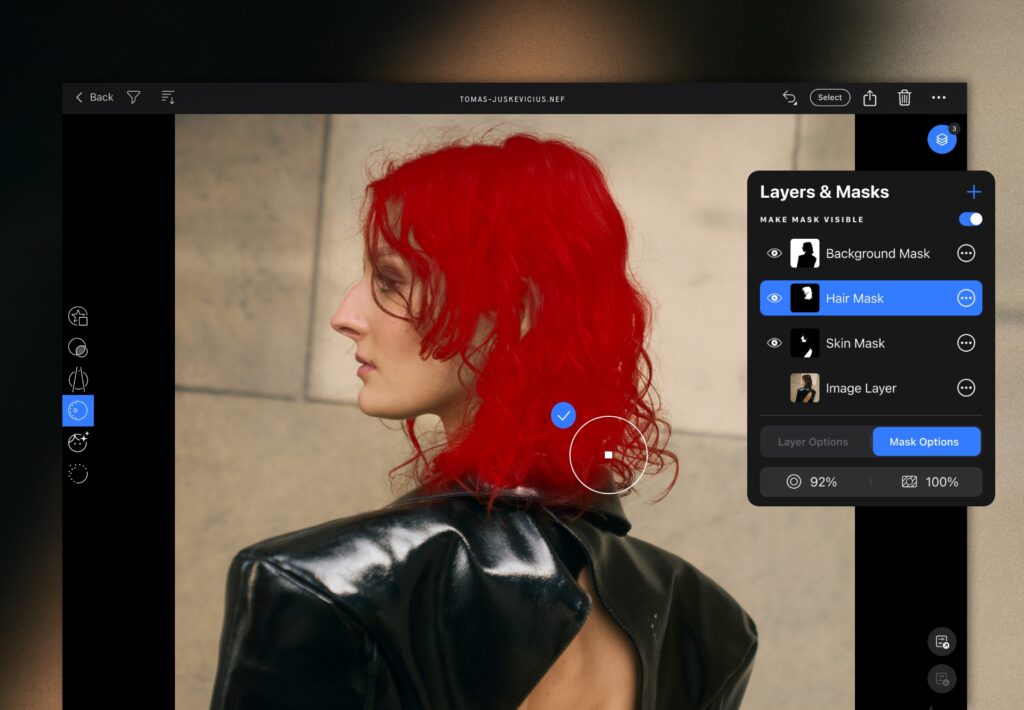
AI Masking
Capture One mobile 2.7 introduced AI Masking for quickly isolating distinct subjects like people or objects, with tools such as Select Subject, Tap to Select, and Draw to Select. In version 2.8, People Masking was added, letting you target areas like body skin, face skin, eyebrows, lips, hair, pupil and iris, and sclera. The Separate Masks option places each People Masking feature on its own layer.
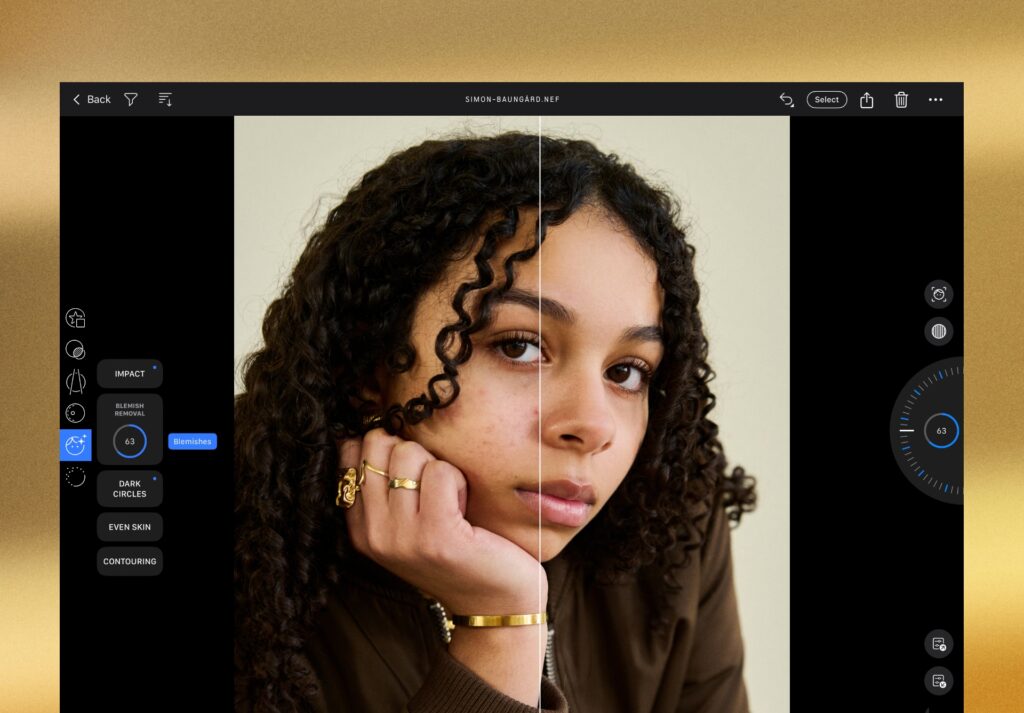
AI Retouching
Retouch Faces, first introduced on desktop in version 16.6.0, became available in Capture One mobile starting with version 3.0. It brings AI-driven, natural-looking retouching directly to your mobile device. Features like Blemish Removal, Dark Circle reduction, Even Skin, and Contouring make quick, natural adjustments that align with your desktop workflow.
The Retouch Faces Tool automatically detects faces in an image. You can then choose to retouch all detected faces at once, or focus on a single face for more precise edits. You can also create a Style or combine it with Next Capture Adjustments for automated batch retouching as you shoot.
Batch Editing and Next Capture Adjustments
Apply adjustments across multiple files or automatically as you shoot tethered.
Styles and Cloud Settings
If certain tools or sliders you rely on aren’t yet exposed on mobile, you can still create a Style on desktop and share it with Cloud Settings. That Style becomes available on all your devices. Apply it on mobile and Capture One will honor all the edits, even if those are not available yet on mobile, thanks to the full Capture One engine running under the hood.
Moving between mobile and desktop
Your workflow doesn’t need to stay tied to one device. With updates introduced in Capture One mobile 3.0, you can branch out at any stage, making it easy to start anywhere and finish anywhere.
– Start on mobile: Shoot and edit directly on your device, then transfer your Session to desktop through an external drive or the cloud to continue with advanced adjustments.
– Start on desktop: Tether and edit on desktop, then move the Session onto external storage and plug it into your mobile device for editing and exporting on the go.
Exporting images
Once your edits are complete, exporting is straightforward and flexible.
– Export images in multiple formats, including JPEG, TIFF, Originals (RAW), and EIP (RAW + adjustments sidecar files). You can control scale, quality, bit depth, and compression, and even add text watermarks to protect your work.
– Save exports directly to your device, cloud services, or an external drive.
– Archive Sessions and Catalogs through Files for reliable longtermlong-term storage.
Your images remain portable and ready, whether you need to deliver them, back them up, or continue working on another device.
Try Capture One mobile
Capture One mobile is part of All in One, a bundle that delivers the complete workflow solution within Capture One. You get pro tools on desktop, mobile apps, Cloud Settings that sync across devices, realtime collaboration with Capture One Live, and priority support.
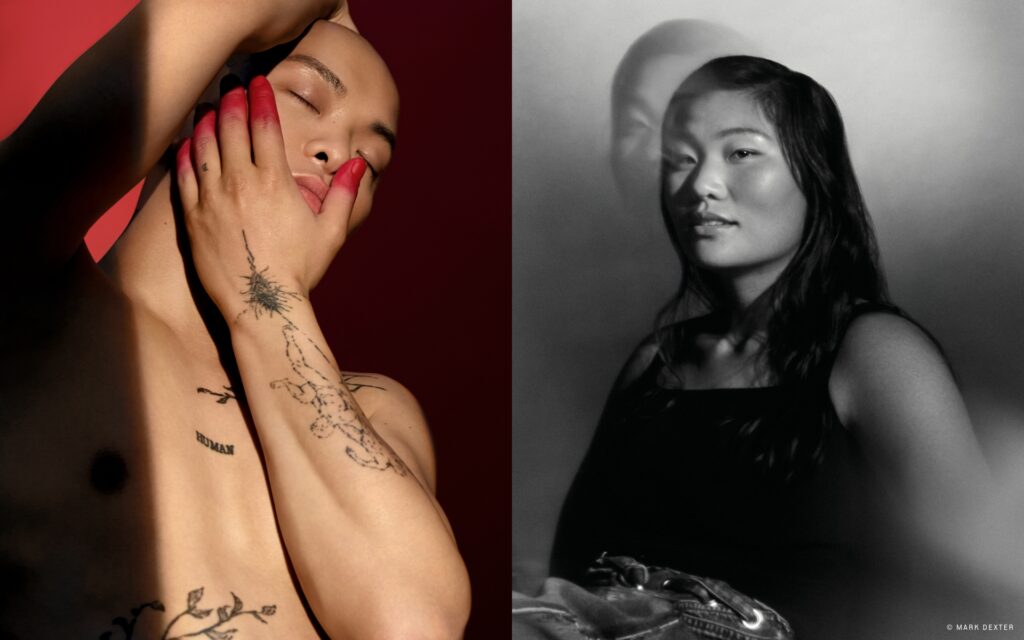
We followed art director Olivia Cho Lund as she captured her latest project, Finding You to Find Myself, a striking blend of surreal portraiture and deeply personal storytelling. We got the chance to see her own layered identity, and the collaborative energy of her team helped shape the project.
Born and raised in Brazil, living in France, and now based in Denmark, Olivia has always carried a complex sense of self. But it was her Korean heritage, the “deepest hidden layer,” as she calls it, that inspired this journey.
Along the way, she connected with Danish individuals who were subjected to adoption from Korea, people who, like her, navigate the intertwined paths of belonging and self-definition.
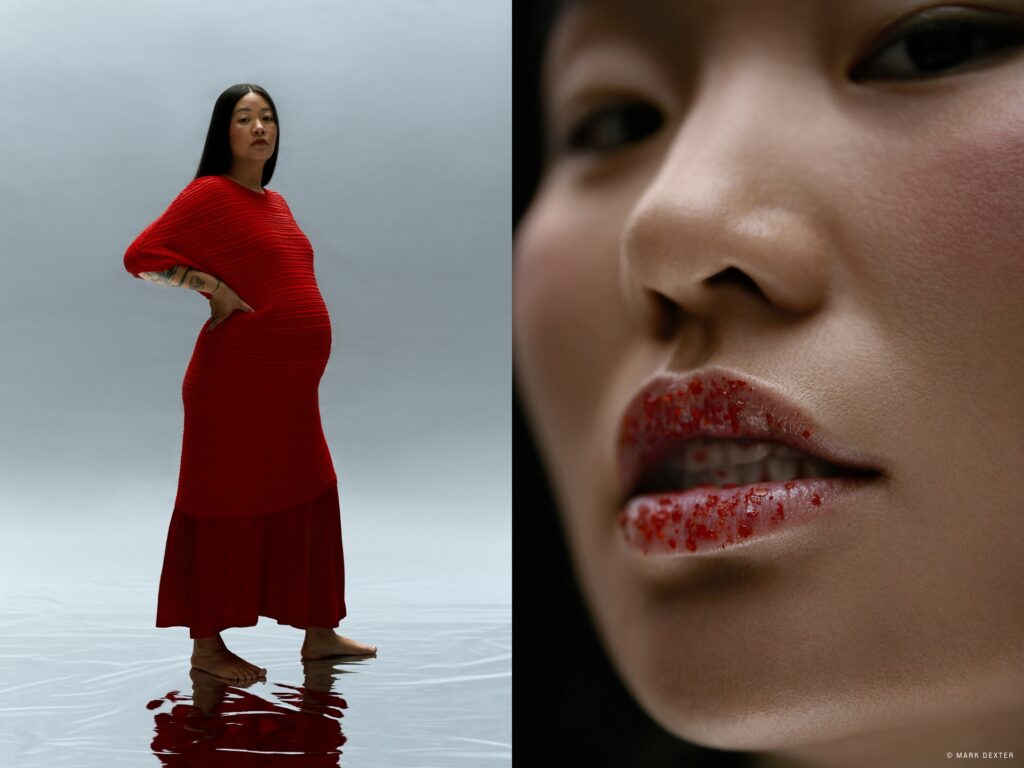
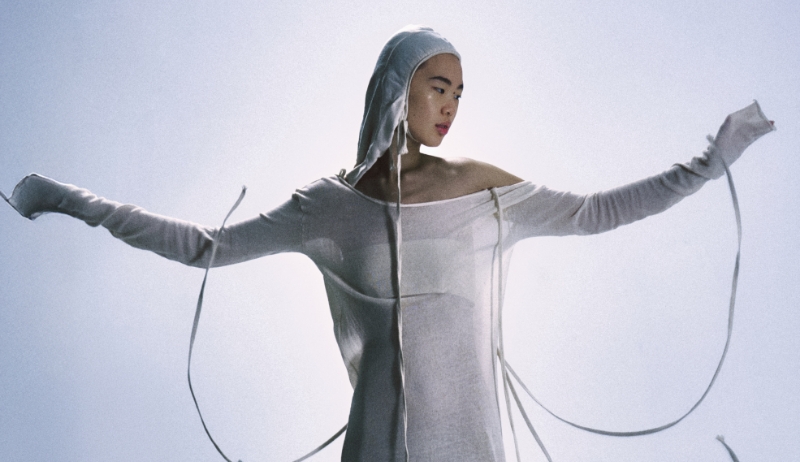
“This project is an exploration of cultural identity, a red thread that weaves together immigrants, multicultural individuals, and those subjected to adoption, revealing one of the many facets that shape who we are: our Koreanness.”
From makeup dusted with gochugaru, to gestures frozen mid-movement, to surreal camera effects revealing inner worlds, every detail was intentional. And every detail needed to be right.
That’s where Capture One played its part: enabling Olivia and her team to collaborate seamlessly, review shots in real time, and fine-tune images on the spot, having the visual language match the depth of the story.
“Identity is not just a birthplace, it is history, connection, and the cultures we carry within us.”
The result is a body of work that’s both visually captivating and emotionally resonant, a celebration of Korean heritage, and a reflection on identity in all its forms.
Project credits Photographer: Mark Dexter MUA: Cianne Denize Hair stylist: Laerke Lykke Stylist: Stephane Park Producer: Abigail de Jourdan Creative director: Olivia Cho Lund Art director: Olivia Cho Lund Models: Benjamin Kyoo Dysager, Christian Jin Frederiksen, Emilie Yung, Eva Molise, Jeanette Park, Rikke Jung Larsen, Sophie Gevind
Francis Tama, visual creator and founder of post-production studio Casa Dusk, has a strong editorial eye and is the creative mind behind many fashion, beauty, and still-life photoshoots.
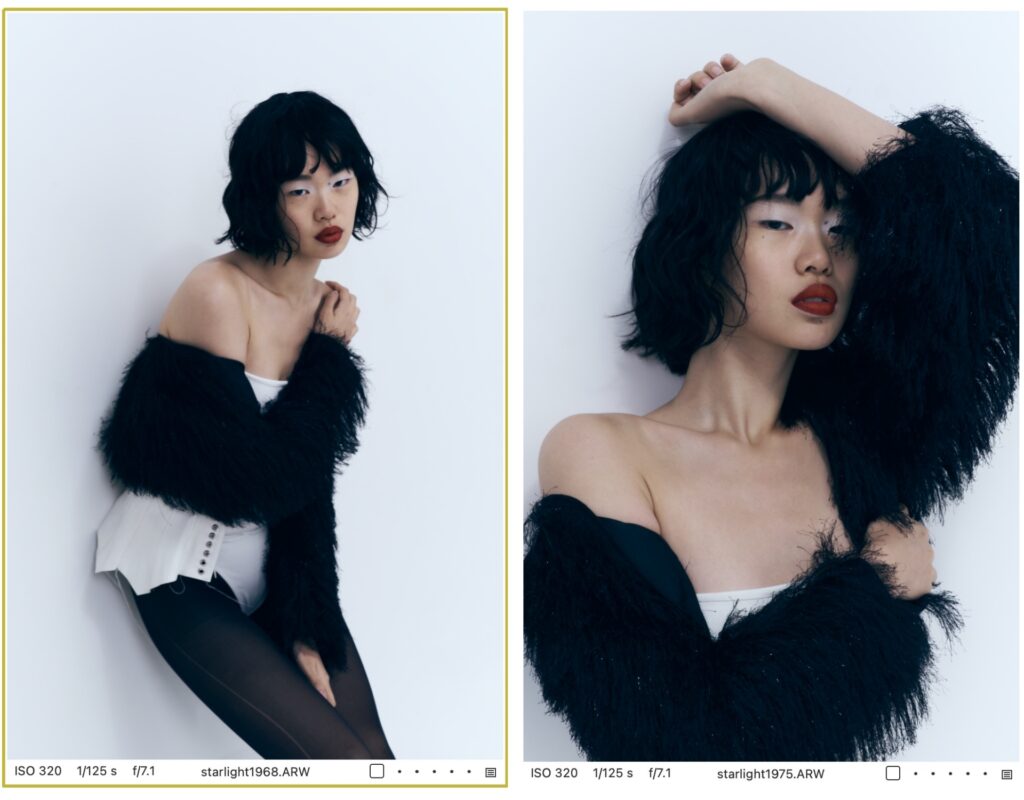
In spring, Francis took on the creative direction of Starlight, a fashion editorial for PAP Magazine. Featuring delicate contrasts between light and shadow, rich textures, and emotive color palettes, the editorial was built with intention: clean, calm, and focused.
What makes Starlight unique, is that it was created entirely remotely. Francis decided to collaborate with people he’d met while living abroad, after he’d connected deeply with them both personally and creatively. Starlight, conceptualized by Tama and Casa Dusk studio, was the result of a harmonious collaboration, a shared visual language and trust.
We asked Francis to tell us about the project’s concept, how Capture One made the remote creative direction possible, and the team’s collaborative process. Here’s what he shared.
Can you tell us a bit about the concept and story behind this shoot?
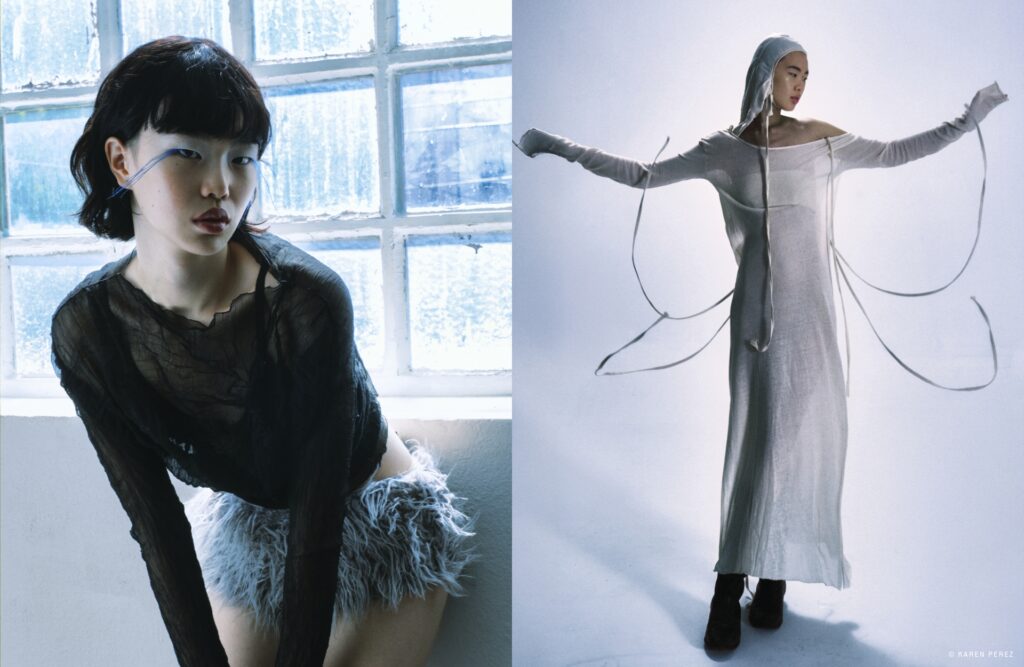
Starlight was born from the desire to explore softness, distance, and connection — even when everything is done remotely. The editorial reflects a quiet intimacy, a subtle presence between light, shadow, and a touch of melancholy.
Some time ago, I lived in Argentina and met people with whom I connected deeply, both personally and creatively. I wanted to find a way to keep creating with them, regardless of distance. That’s when I reached out to my dear friend Karen Pérez, a photographer with whom I share a unique connection and a subtly intertwined aesthetic, and Ignacio Mora, an exceptional makeup artist whose sensitivity and vision I trust completely.
Because this was my first time fully directing a project remotely, it was essential for me to collaborate with a team I felt creatively aligned with. Starlight became not only a creative exploration, but also a way to reconnect and co-create across space — guided by intuition, trust, and a shared visual language. I wanted the images to feel cinematic yet delicate, like small moments suspended in time.
What was your approach to planning the shoot?
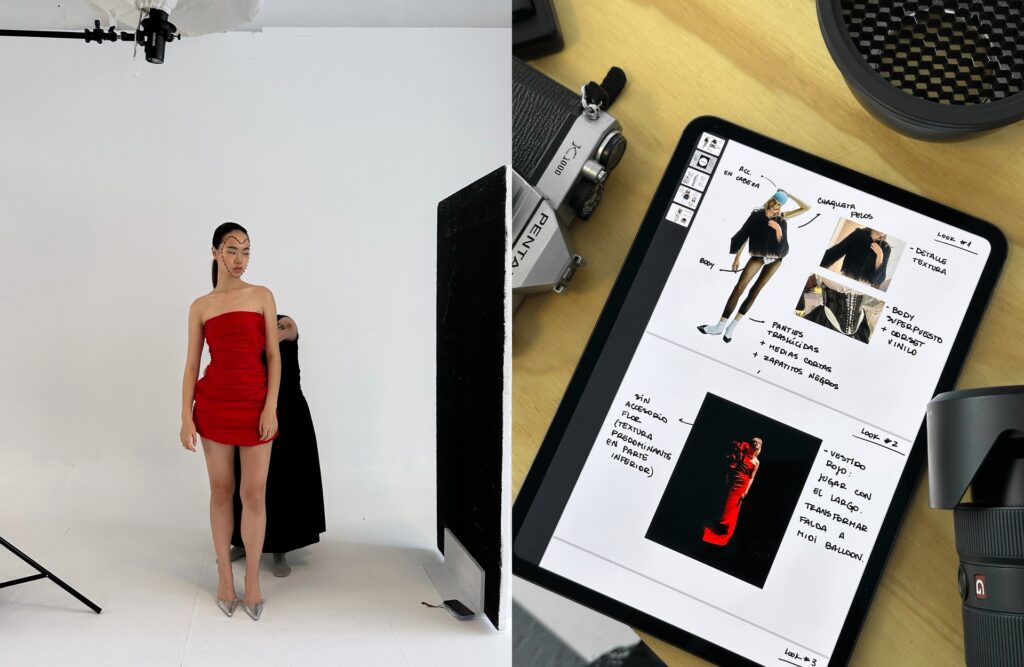
Since I wasn’t going to be physically present, the planning had to be precise and intentional from the very beginning. I created a detailed mood board with references for color, framing, light direction, and emotional atmosphere. One of the things I value most is when each person brings their own feedback to the mood board — it makes the project feel more alive and collaborative.
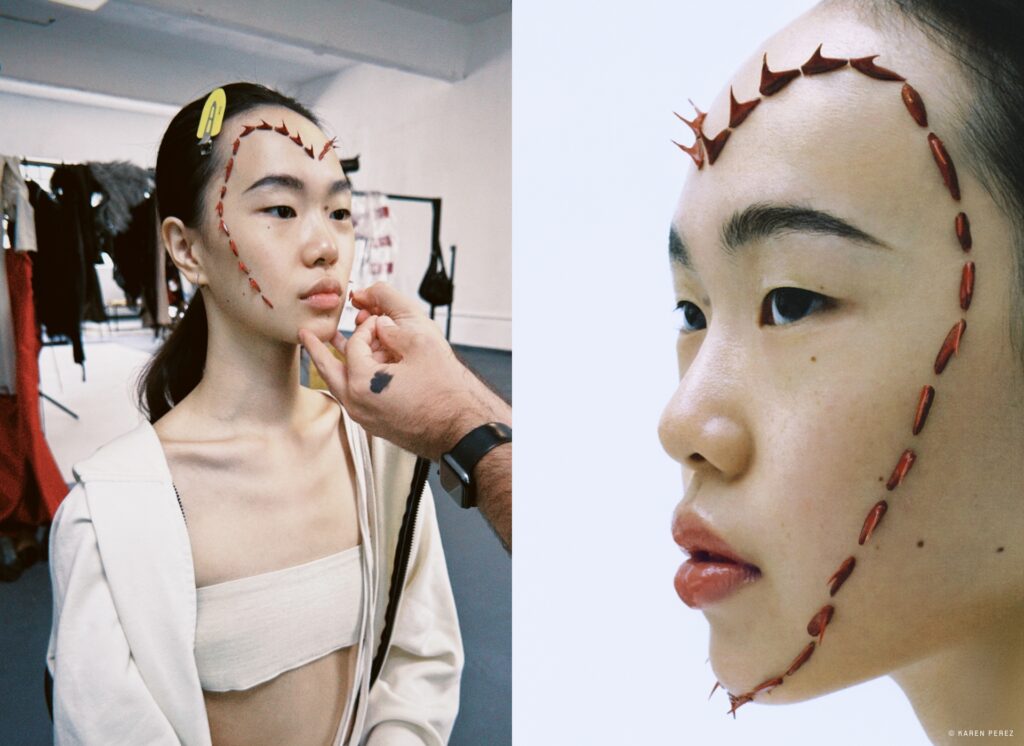
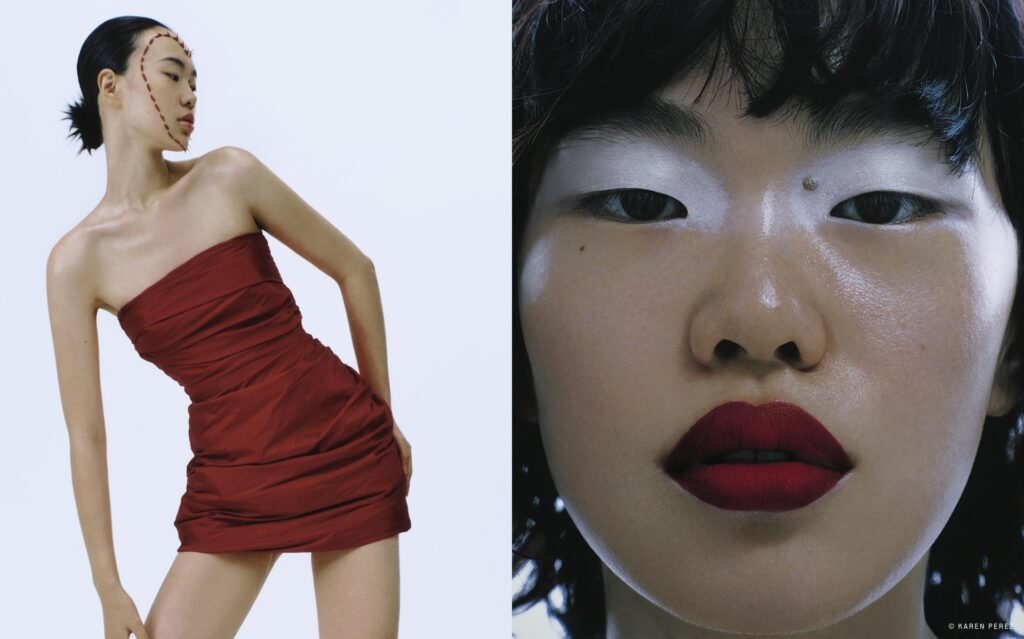
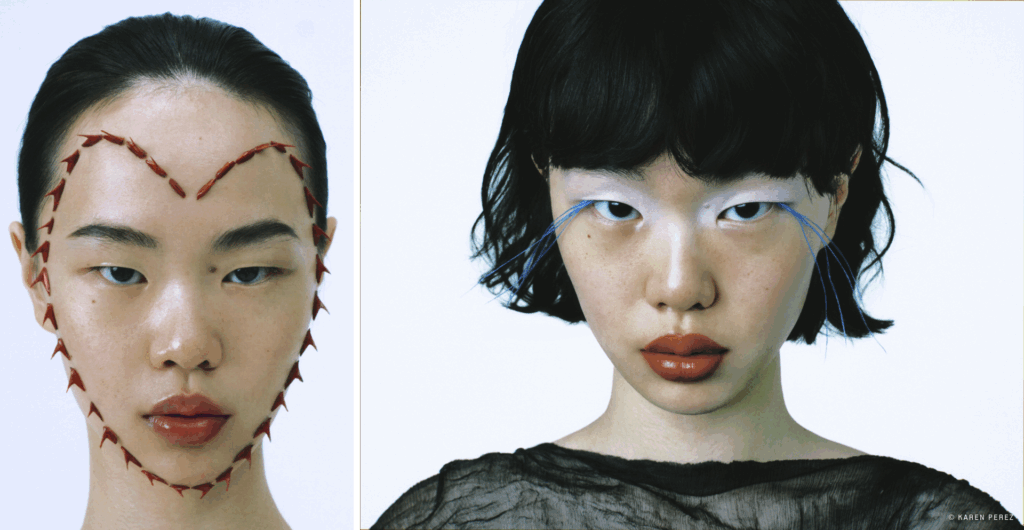
I worked closely with Karen, who was in charge of photography, and shared with her not only visual guides but also emotional cues — how I wanted the story to feel, the rhythm of the moments, and how light should move around the subject. Ignacio Mora, our makeup artist, interpreted the vision beautifully, starting from our model Estrella’s features and building a look that blended nature and skin: glossy reds, feather lashes in primary blue, and a natural hair texture that enhanced her unique presence.
Carla Alzarise, who handled styling, is a brilliant multidisciplinary creative. She translated each look exactly as I imagined it, adding layers of texture and narrative to the shoot.
The location was also key — we needed a clean, all-white studio where we could play with both natural light and flash. That flexibility allowed us to shape the softness and contrast we were looking for, and gave the entire shoot a quiet, versatile energy.
How did Capture One fit into your workflow during the shoot?
Capture One was the main tool — and honestly, the most essential part — of making this remote shoot possible. I connected virtually during the session and was able to see the images in real time via tethering. This allowed me to make key decisions on the spot — adjusting exposure, color balance, and curves — without physically being on set.
Karen shot tethered directly into Capture One, which to me is the most accurate and efficient way to work in studio. It gave us a clear, controlled environment where we could refine the image in real-time and maintain consistency with the original mood board.
After the shoot, we continued the workflow with Casa Dusk, my post-production studio, where we ran different visual exercises based on what we captured. Throughout the process, Capture One helped us hold on to the emotional starting point — the essence of what Starlight was meant to be.
Are there any specific tools or features in Capture One that you relied on heavily?
Absolutely. Beyond the essentials like Color Balance and Curves, I worked a lot with Base Characteristics to set the right starting point for color and contrast. It gave me a clean and flexible foundation to build the look we had envisioned.
The Layers and Masks system — especially the new AI Masking tools — was incredibly helpful for making precise, delicate adjustments. We used them to subtly isolate skin, clothing, and background elements without interrupting the natural flow of the image.
Tools like Clarity and Film Grain added a final layer of tactility — giving the images a slightly filmy, organic feel. It helped reinforce that sense of softness and atmosphere we were after: something a little imperfect, very human, and above all, ethereal.
Before the shoot, we had a meeting with the Casa Dusk retouching team to review the production plan and give feedback on key elements like lighting, makeup products, and details we needed to keep in mind on set. That gave us a strong visual guideline for maintaining consistency across the process.
After the shoot, we regrouped and agreed that the retouching should be minimal and respectful. The focus was on cleaning small distractions — floor details, threads, minor blemishes — while keeping the skin untouched and honoring the model’s features and the makeup exactly as they were captured.
Did your post-processing end up evolving the original concept?
In a way, yes — but not by changing it, rather by deepening it. The original concept was always meant to feel intimate, minimal, and emotionally quiet. Post-processing became the space where we could refine that vision without over-polishing it.
Through subtle adjustments in color tones, clarity, and texture, we enhanced what was already there — not to transform it, but to preserve its honesty. Working with Casa Dusk, we were very intentional about maintaining that softness and atmosphere, always staying close to the visual and emotional core of the mood board.
So, while the essence remained the same, post allowed us to lean even further into the ethereal quality we wanted — that fine line between reality and something slightly dreamlike.
What was the biggest challenge during this shoot, and how did you tackle it?
The biggest challenge was directing everything remotely — not being on set meant I had to rely fully on preparation, clarity, and trust. There’s something very vulnerable about guiding a team from afar, especially when the project is so personal.
To make it work, we invested a lot of time beforehand: aligning on mood boards, light direction, product choices, and overall emotional tone. We also held a meeting with the post-production team before the shoot to flag important details that would affect both capture and retouch — that helped build a shared visual language across every stage of the process.
During the shoot, I stayed connected virtually and gave live feedback through Capture One. It became my eyes on set. But more importantly, I worked with a team I truly trusted — Estrella, Karen, Ignacio, Carla, Piero — people who understood the essence of the project and could carry it forward with sensitivity and intuition.
Distance became part of the story. Instead of limiting us, it helped shape Starlight into what it is: something soft, quiet, and built on connection.
What does it require to document a shoot as you’ve done here?
It requires clear direction, sensitivity, and an editorial mindset.
For me, documenting a shoot isn’t about capturing everything — it’s about curating what matters. As a creative director, I approach documentation with the same eye I use for the final images: I think in sequences, in frames that communicate feeling, and in details that reveal process without breaking the magic.
Even though I wasn’t on set, I made sure the documentation reflected the mood and aesthetic of Starlight. I gave the team specific visual guidelines — what kind of moments to capture, how to treat the light, what textures or movements to focus on. That way, everything aligned with the atmosphere we were building.
It takes intention, a deep understanding of your concept, and the ability to guide others toward the same visual rhythm — even in the smallest behind-the-scenes capture.
Do you have a favorite image or moment from the shoot?
I actually have two favorite images from the shoot — both speak to different sides of what Starlight represents for me.
The first is the portrait where Estrella’s face is framed by red spikes. I love the tension in that image — the strength in her gaze, the contrast of the sharp red forms against her softness. There’s something powerful and feminine about it, and the composition creates an atmosphere that feels cinematic and interpretive, almost like stepping into a dream.
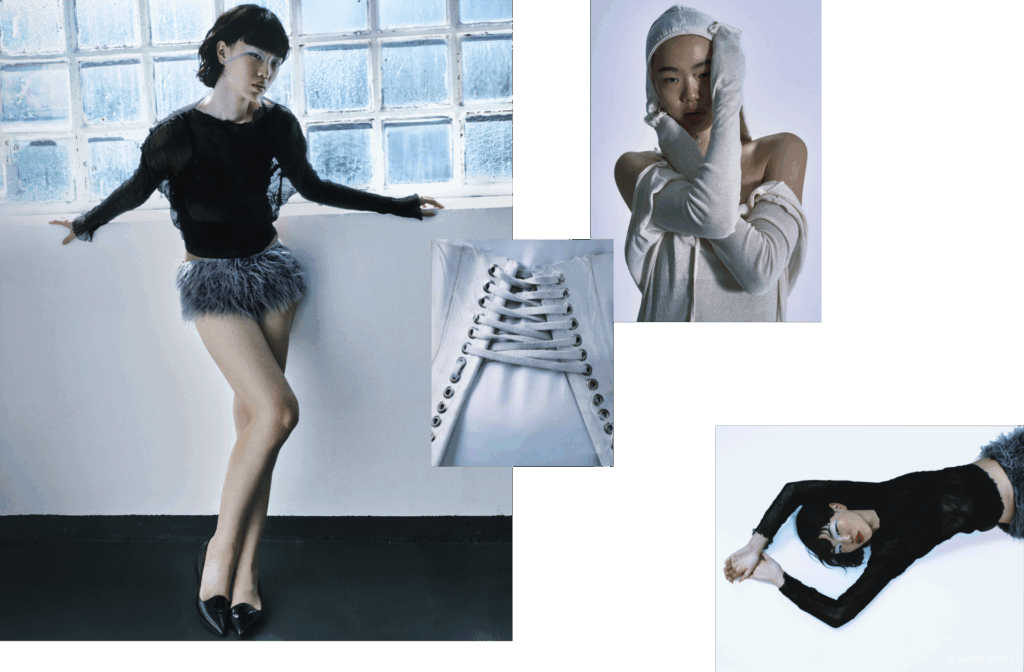
The second is the look with the blue feather lashes and red lips. What fascinates me in this image is the play between minimalism and richness. The textures — her skin, the soft feathers, the tulle top — and the bold yet harmonious color palette all come together in a very intentional way. It’s visually quiet, but emotionally charged.
Both images feel timeless to me — like stills from a film I’d want to watch over and over.
What are you hoping people will take away from the images?
I hope people feel something quiet — something they can’t fully explain but that stays with them. Starlight was created to hold space for softness, presence, and introspection. It’s not loud or fast; it invites you to slow down and pay attention to the small things: light on skin, color against texture, a gesture in between thoughts.
I also hope it challenges the idea that intimacy has to be personal or direct. Sometimes it’s in the atmosphere — in the way an image breathes, in how it makes you feel seen without being obvious.
If the images leave someone feeling curious, calm, or emotionally connected — even for a moment — then I think the project did what it was meant to do.
Finally, any advice you’d give other photographers?
Be honest with your vision — and learn to communicate it with care.
Creative direction is as much about clarity and leadership as it is about ideas. Knowing how to guide a team, how to make people feel seen and involved, is what gives a project emotional depth. The more you trust your collaborators and stay open to their input, the more powerful — and surprising — the result becomes.
Also, don’t be afraid of simplicity. There’s strength in subtlety — in letting the image breathe, in choosing what not to overdo, and in focusing on what truly matters.
And maybe most importantly: don’t wait for the perfect conditions to create. Lead with what you have, use your resources wisely, and keep building your visual language with intention. If the energy and direction are clear, everything else tends to fall into place.
See more of Francis’ work on Instagram and get to know the rest of the team behind Starlight: