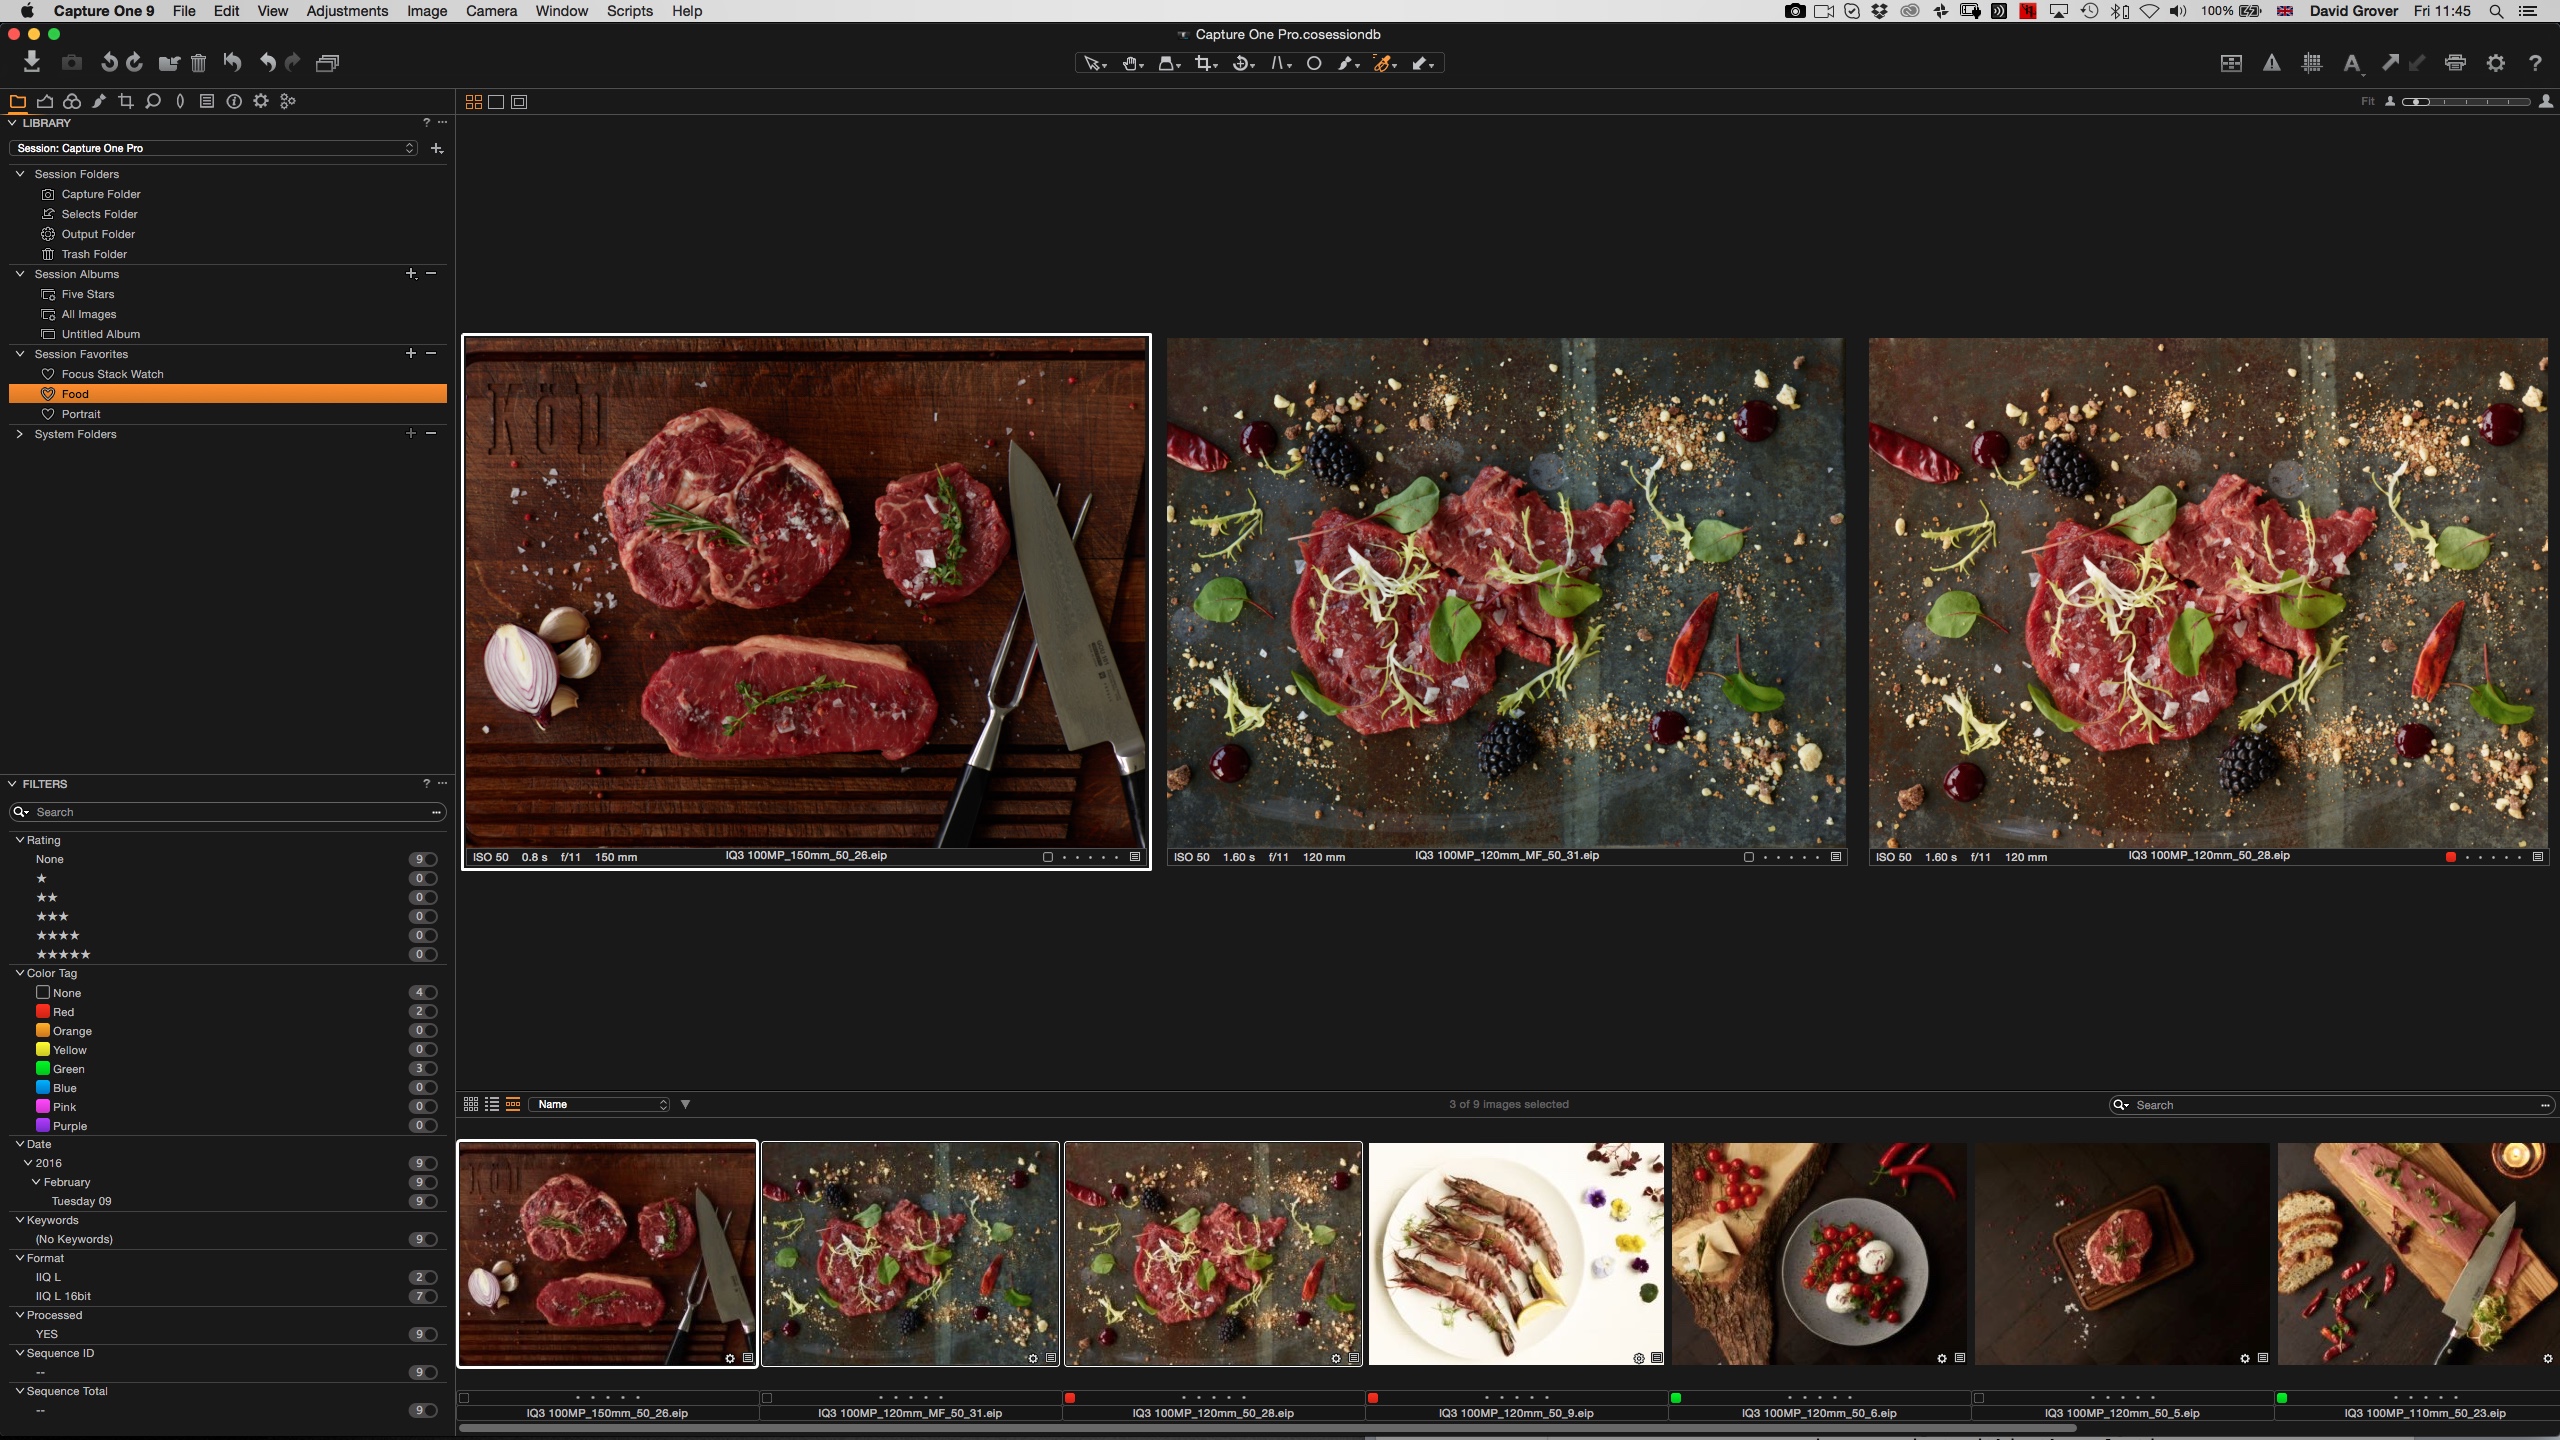
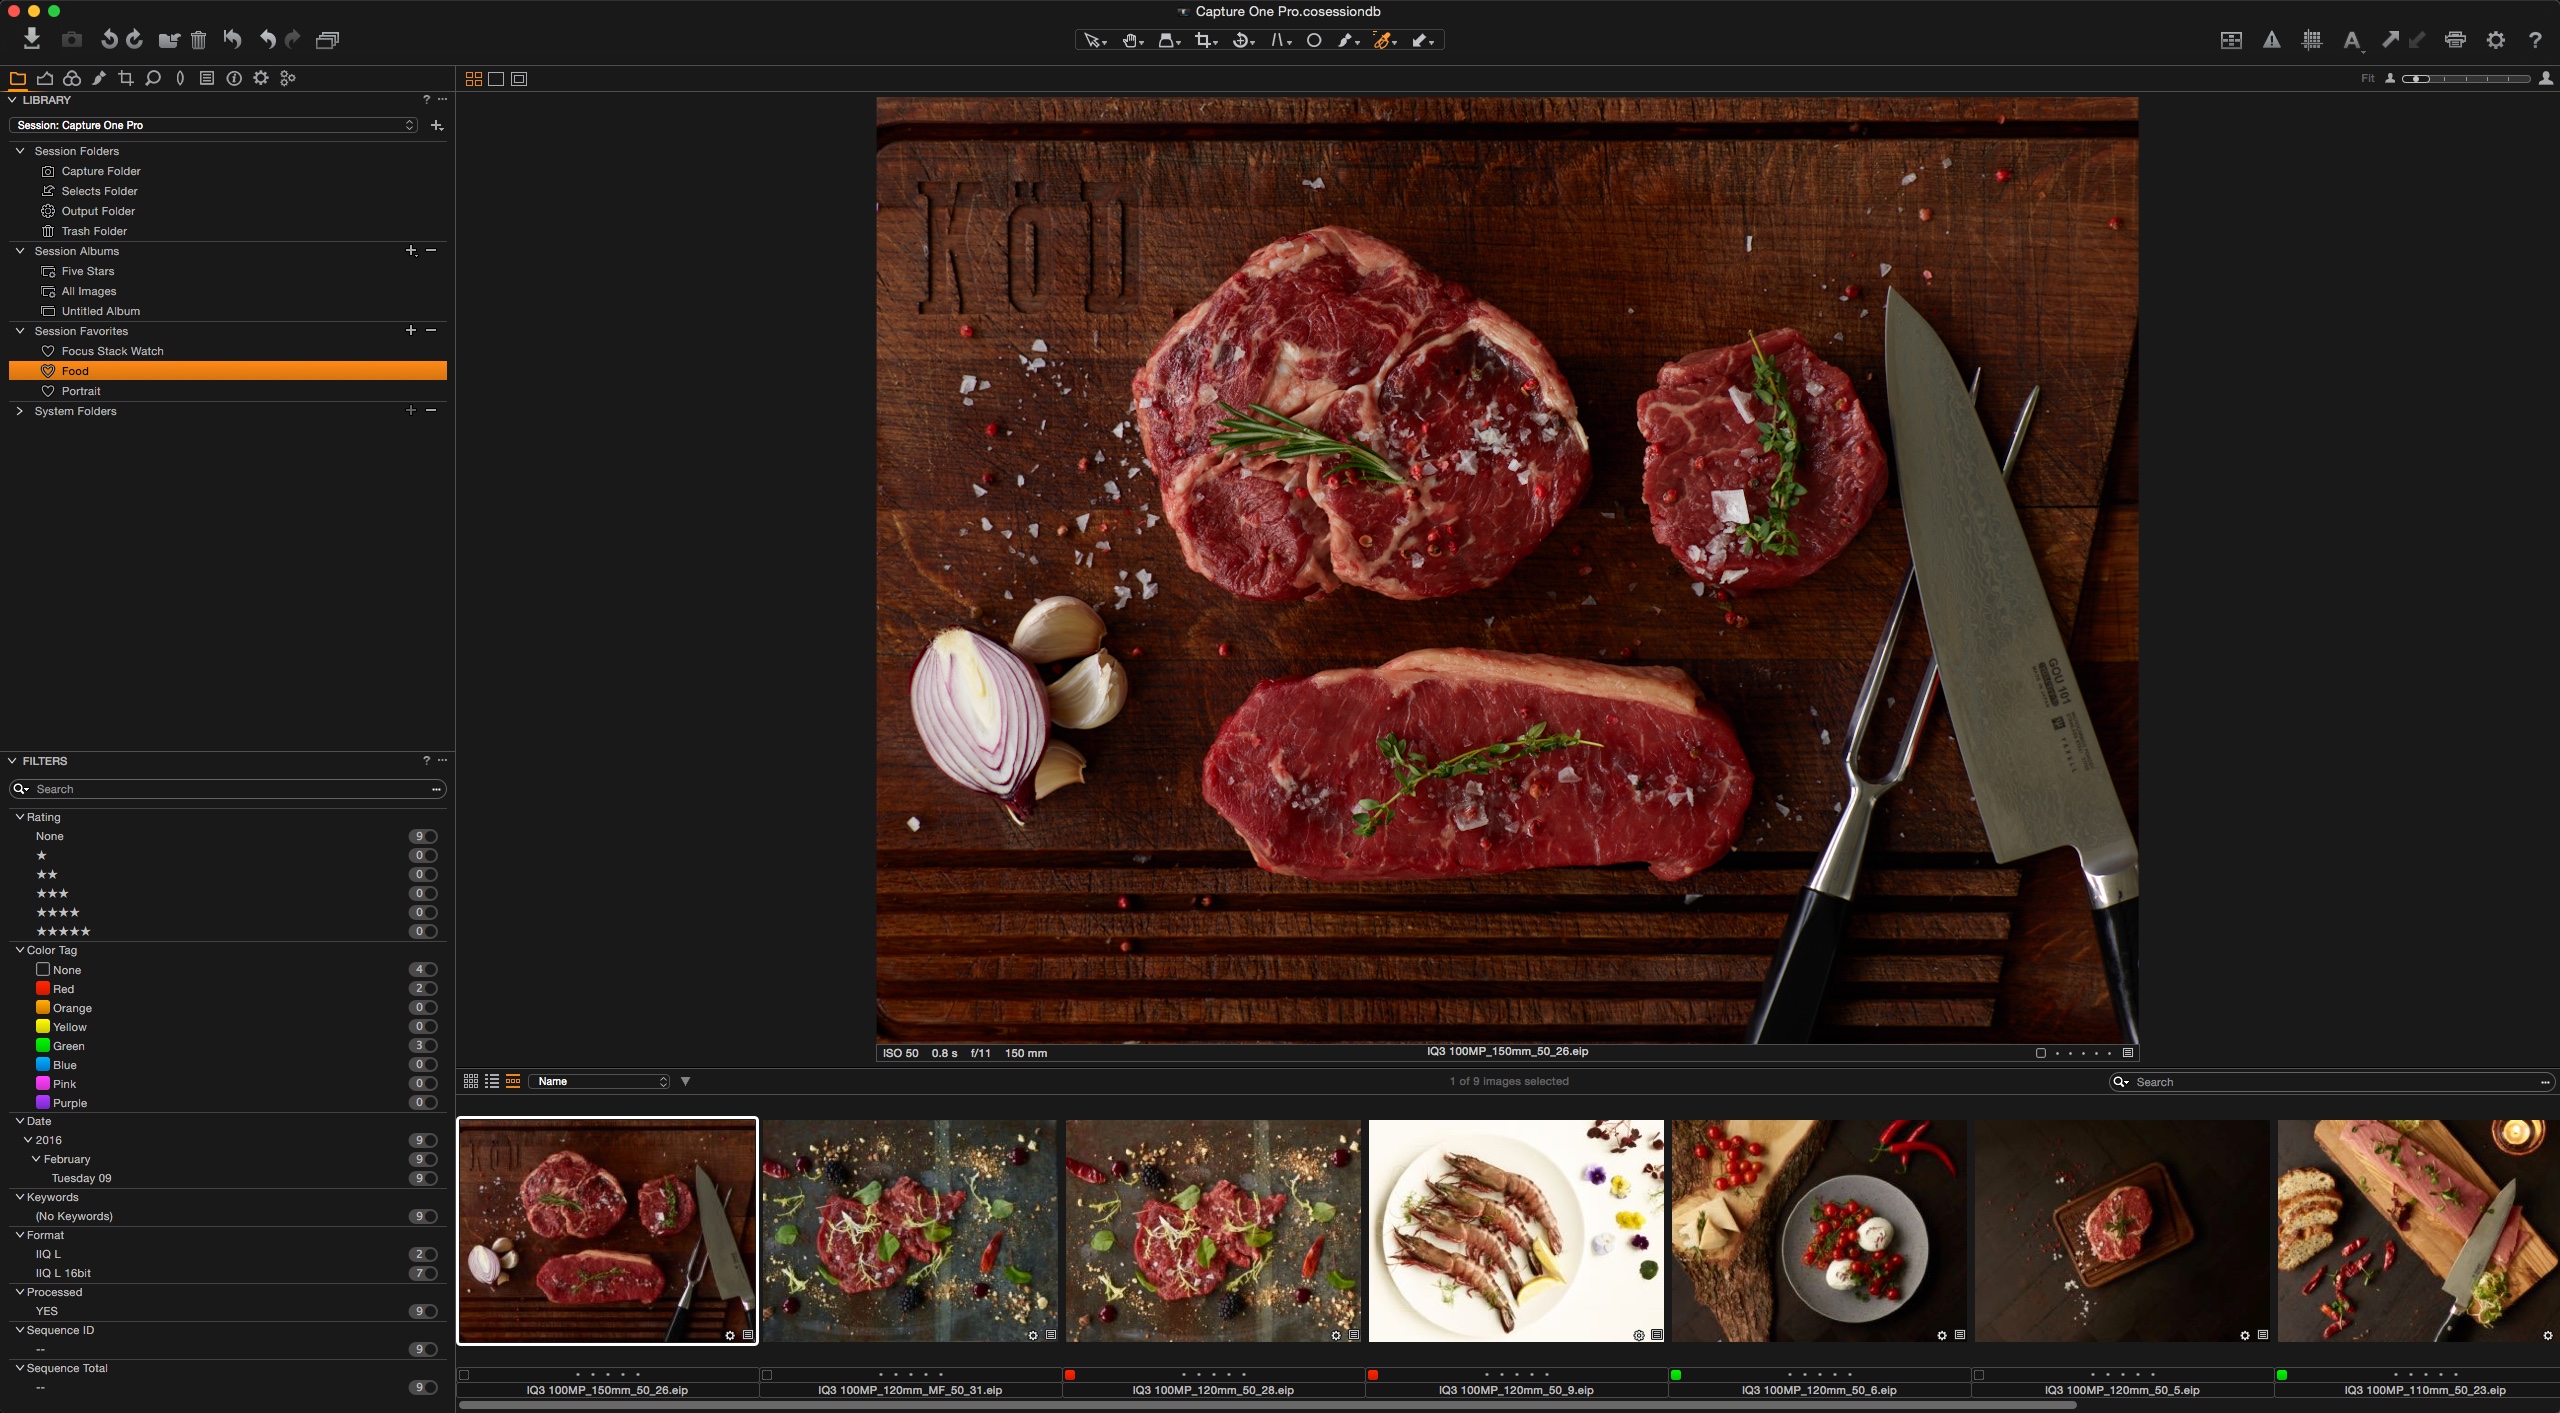
I have had the pleasure to try out Phase One’s Capture One 9.2, which enhances the usability surrounding image management.
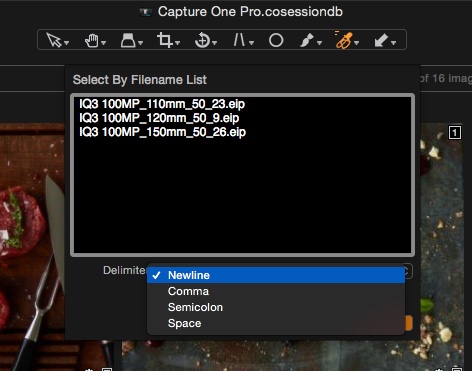
This recent update has untangled and solved the industry’s long issue of selecting and utilizing selects from my clients, based on simple lists. I’ve no longer had to spend vital hours finding and selecting my images individually based around my clients selects, as the handy new feature allows me to simply copy and paste a list from emails and documents, applying said information to Capture One Pro 9.2 for quick and easy selection.
Capture One 9.2 allows me to organise efficiently
As always, Capture One Pro 9 has benefited my work flow, even more so with the new features available to me throughout the new update, it is essential that my work flow remains at ease and organised. With the vast amount of shots taken from each of my outdoor shoots, I rack up a large number of files for myself and my studio staff to work through.
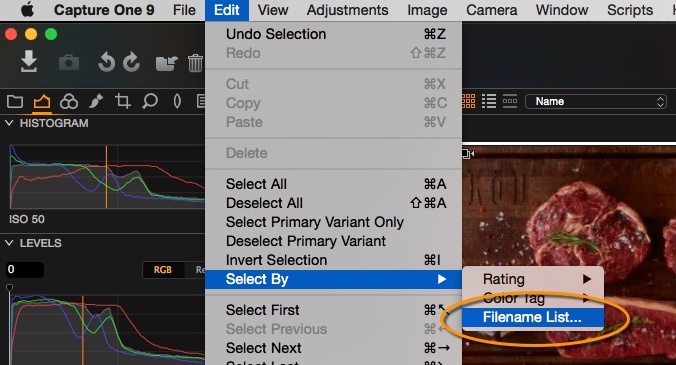
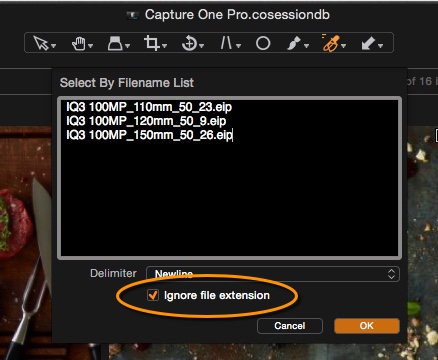
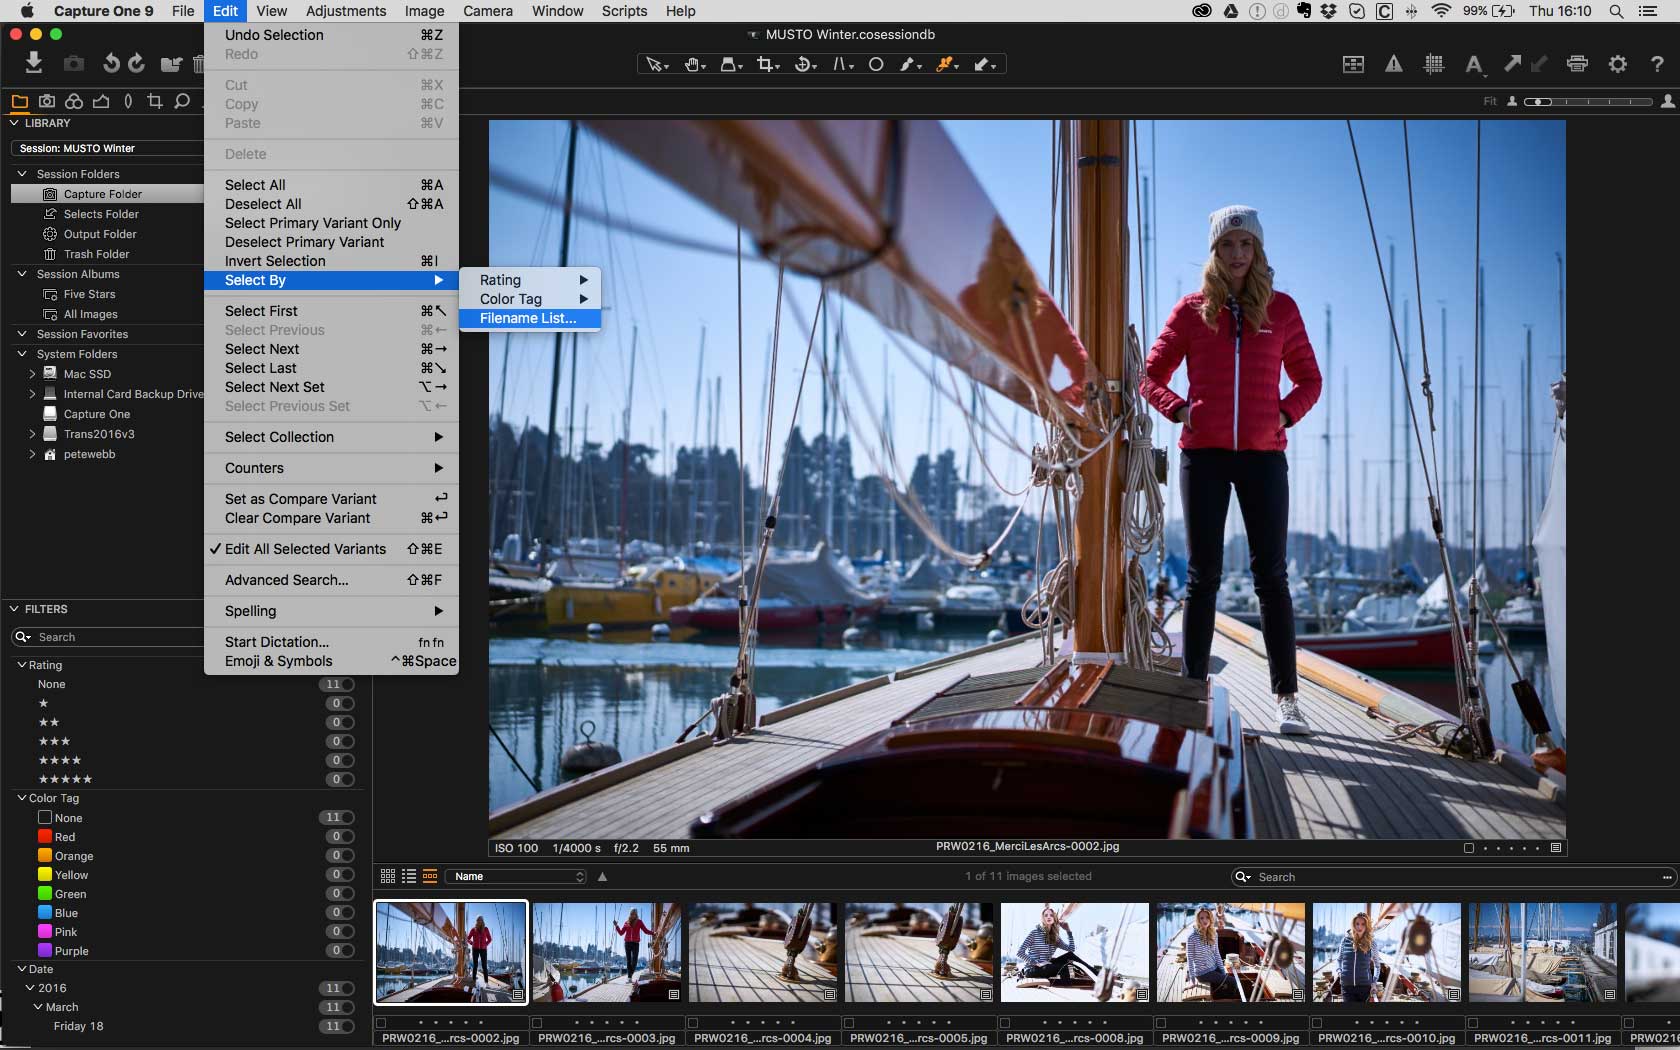
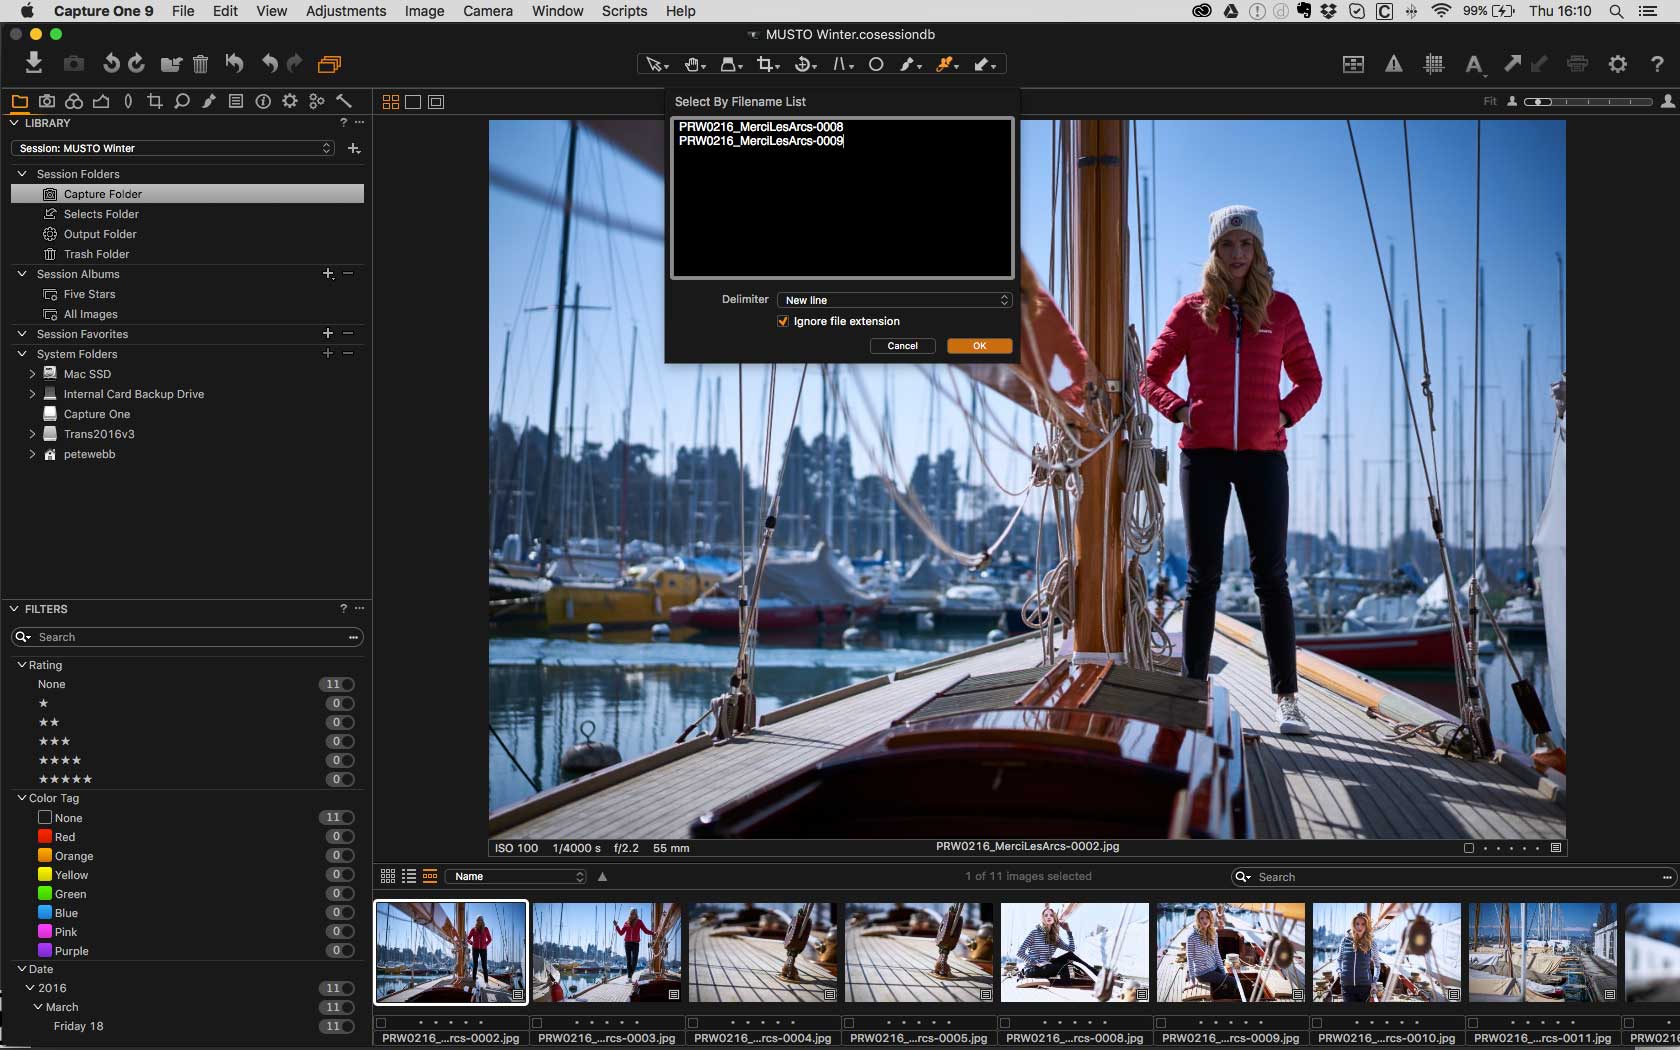
In the past, when receiving ‘Selects’ from my clients, I have had to sift through each file individually, typing in file names to rate each file. I have tried numerous methods to aid this such as writing my own scripts, however, Phase One has realised that this is a problem that their software can solve and have introduced the efficient new ‘Select from filename list’ function. Providing a fast and easy way of copying and pasting lists of files directly into Capture One 9.2, which is able to automatically select all corresponding files.
How Capture One 9.2 benefits my work
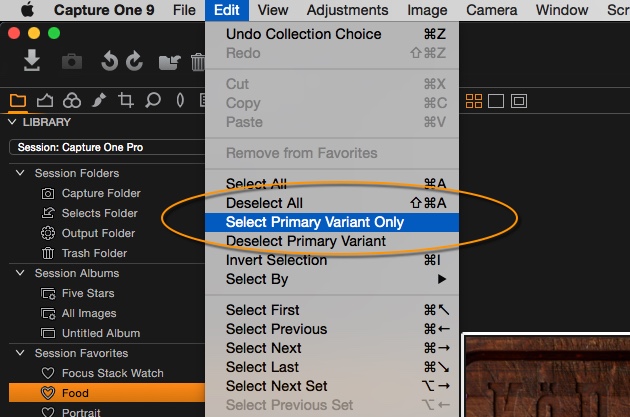
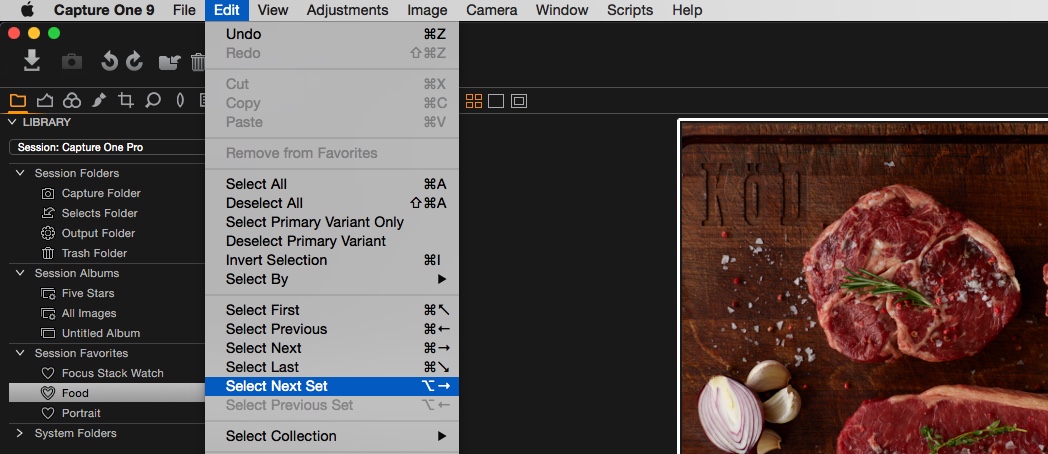
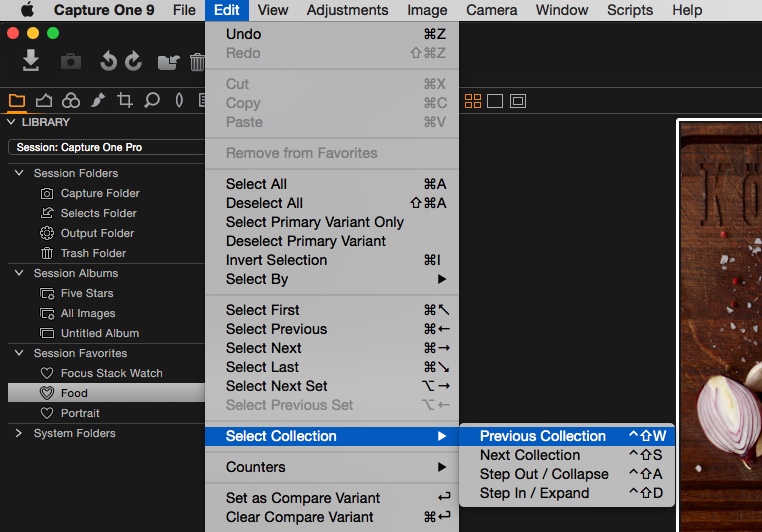
The first and most essential feature I’ve been using is that of selecting primary variants and sets of images within the browser. This is excellent, allowing me to easily compare images against each other for key characteristics such as exposure or colour grading, however, the tool is easily utilized both pre and post processing. This feature found through the ‘edit’ menu allows me select primary images that can be coupled alongside corresponding compositions, furthermore by creating sets of images I’m able to use easy key shortcuts to navigate through each set conveniently.
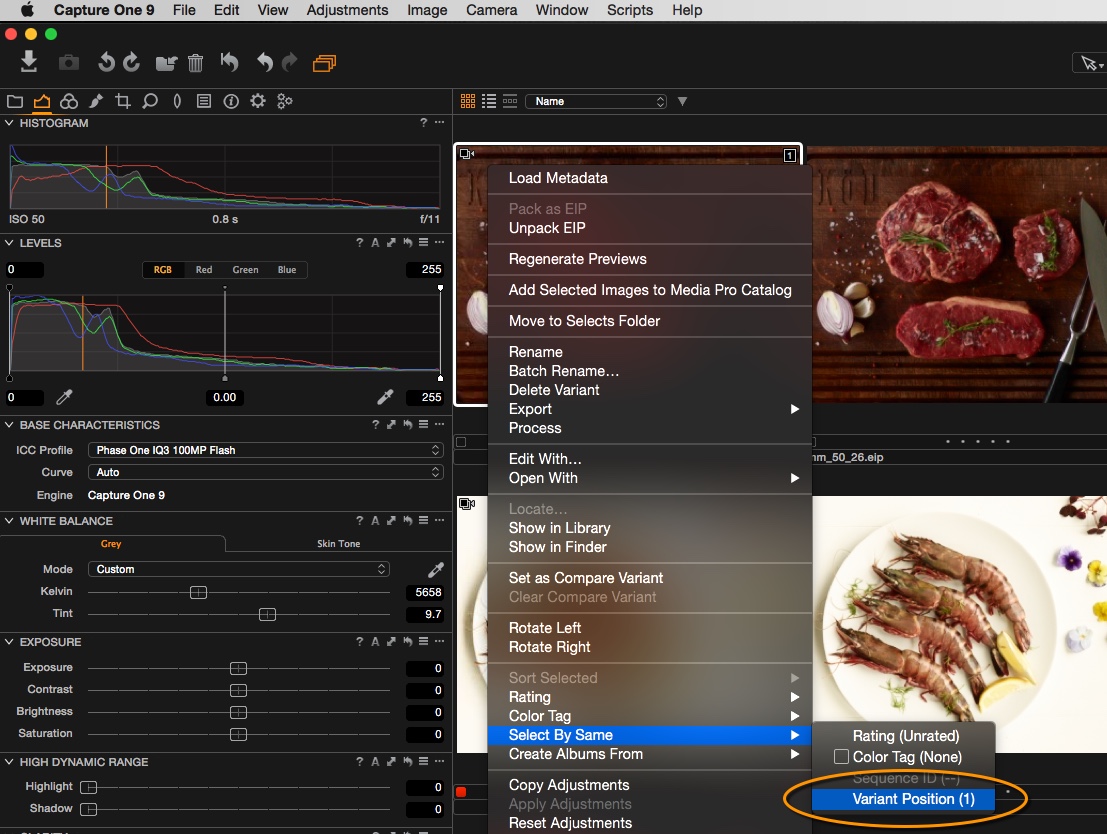
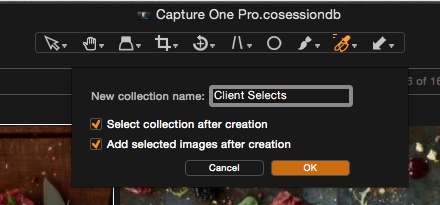
My use of these easy to use sets doesn’t end there, to organise my workload further I use handy shortcuts to rate my images based on quality and importance, ensuring only the best for the client. Doing this within sets is efficient and free flowing. Once a client has provided their chosen selects I use the brilliant new album creation tool to generate an album from the client selects list, this automates the whole process of dragging and dropping selected files for me, boost my work flow creativity. The way in which Capture One Pro 9.2 has eliminated the tedious tasks of commercial photography is gratifying.

Improved user interface
I’m very pleased to find that there is improved customisability towards key bindings and user functionality within Capture One 9.2, being someone who prefers to utilise software to my own needs, this is an essential new feature. When working with large numbers of files and automation functions, it is key to ensure that I can maximise time by binding my mouse and keyboard shortcuts to suit me. We all have our own work styles and flows, meaning that this update is a huge advantage towards feeling even more comfortable towards the use of trusted commercial software. Not only this, but one can also design key binding presets, allowing different key binding profiles for a variation of tasks, I can easily change these using the drop down menu.

Raw image quality
Through my promise to deliver the highest standard to my clients, I have taken vast proven trust in Capture One to provide accurate quality and colour to my raw files from my various shoots. Leading into a favourite new feature, which is that of ‘Raw Vs TIFF’ files retaining accurate quality, allowing the same seamless colour grades across the file types. This gives me reassurance towards the software I’m using in the commercial industry.
All in all, Phase One has really brought a user defined update to their excellent Capture One software, allowing photographers in the commercial medium to optimise and extend the quality of their work. I would suggest the use of Capture One 9.2 to any photographer with high confidence.
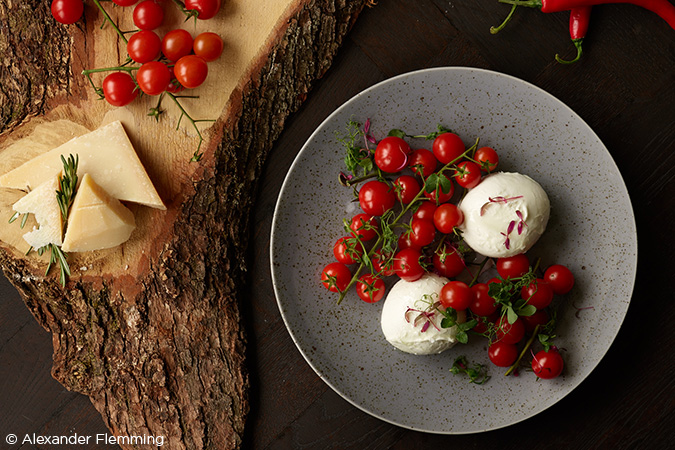
Images by MUSTO
Check out more of Pete’s work