Latest Posts

Make or break your Beauty Shot

Color is arguably the most important part of an image when retouching. While Cleanup and Dodge & Burn are both important skills, the overall color can make or break an image even before any detail work is done. Photoshop has its place for color manipulation but, whenever possible, I prefer to work with Capture One Pro 9 to apply a grade to a set of images. My main reasoning for this is because there is so much more maneurverability while working with a RAW file rather than an exported TIFF or PSD.

Step 1: Determine mood and color harmonies

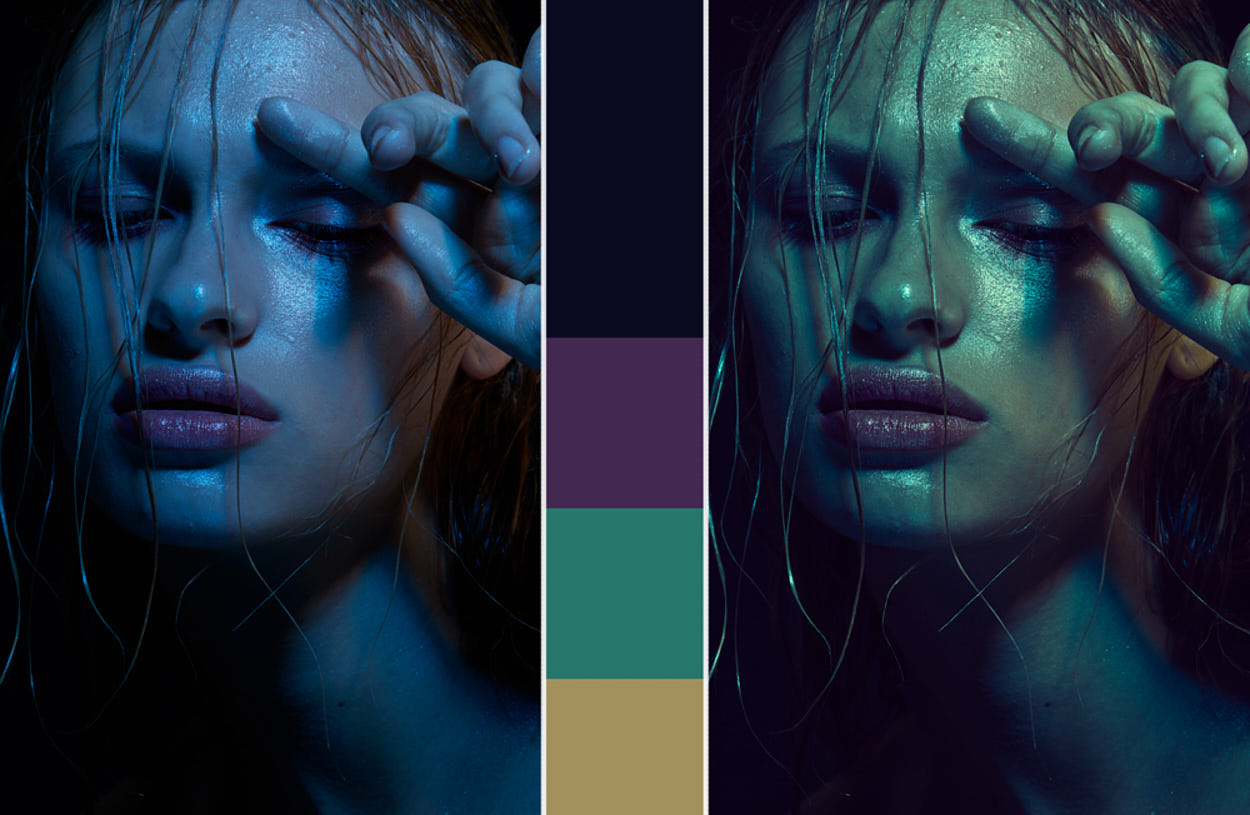
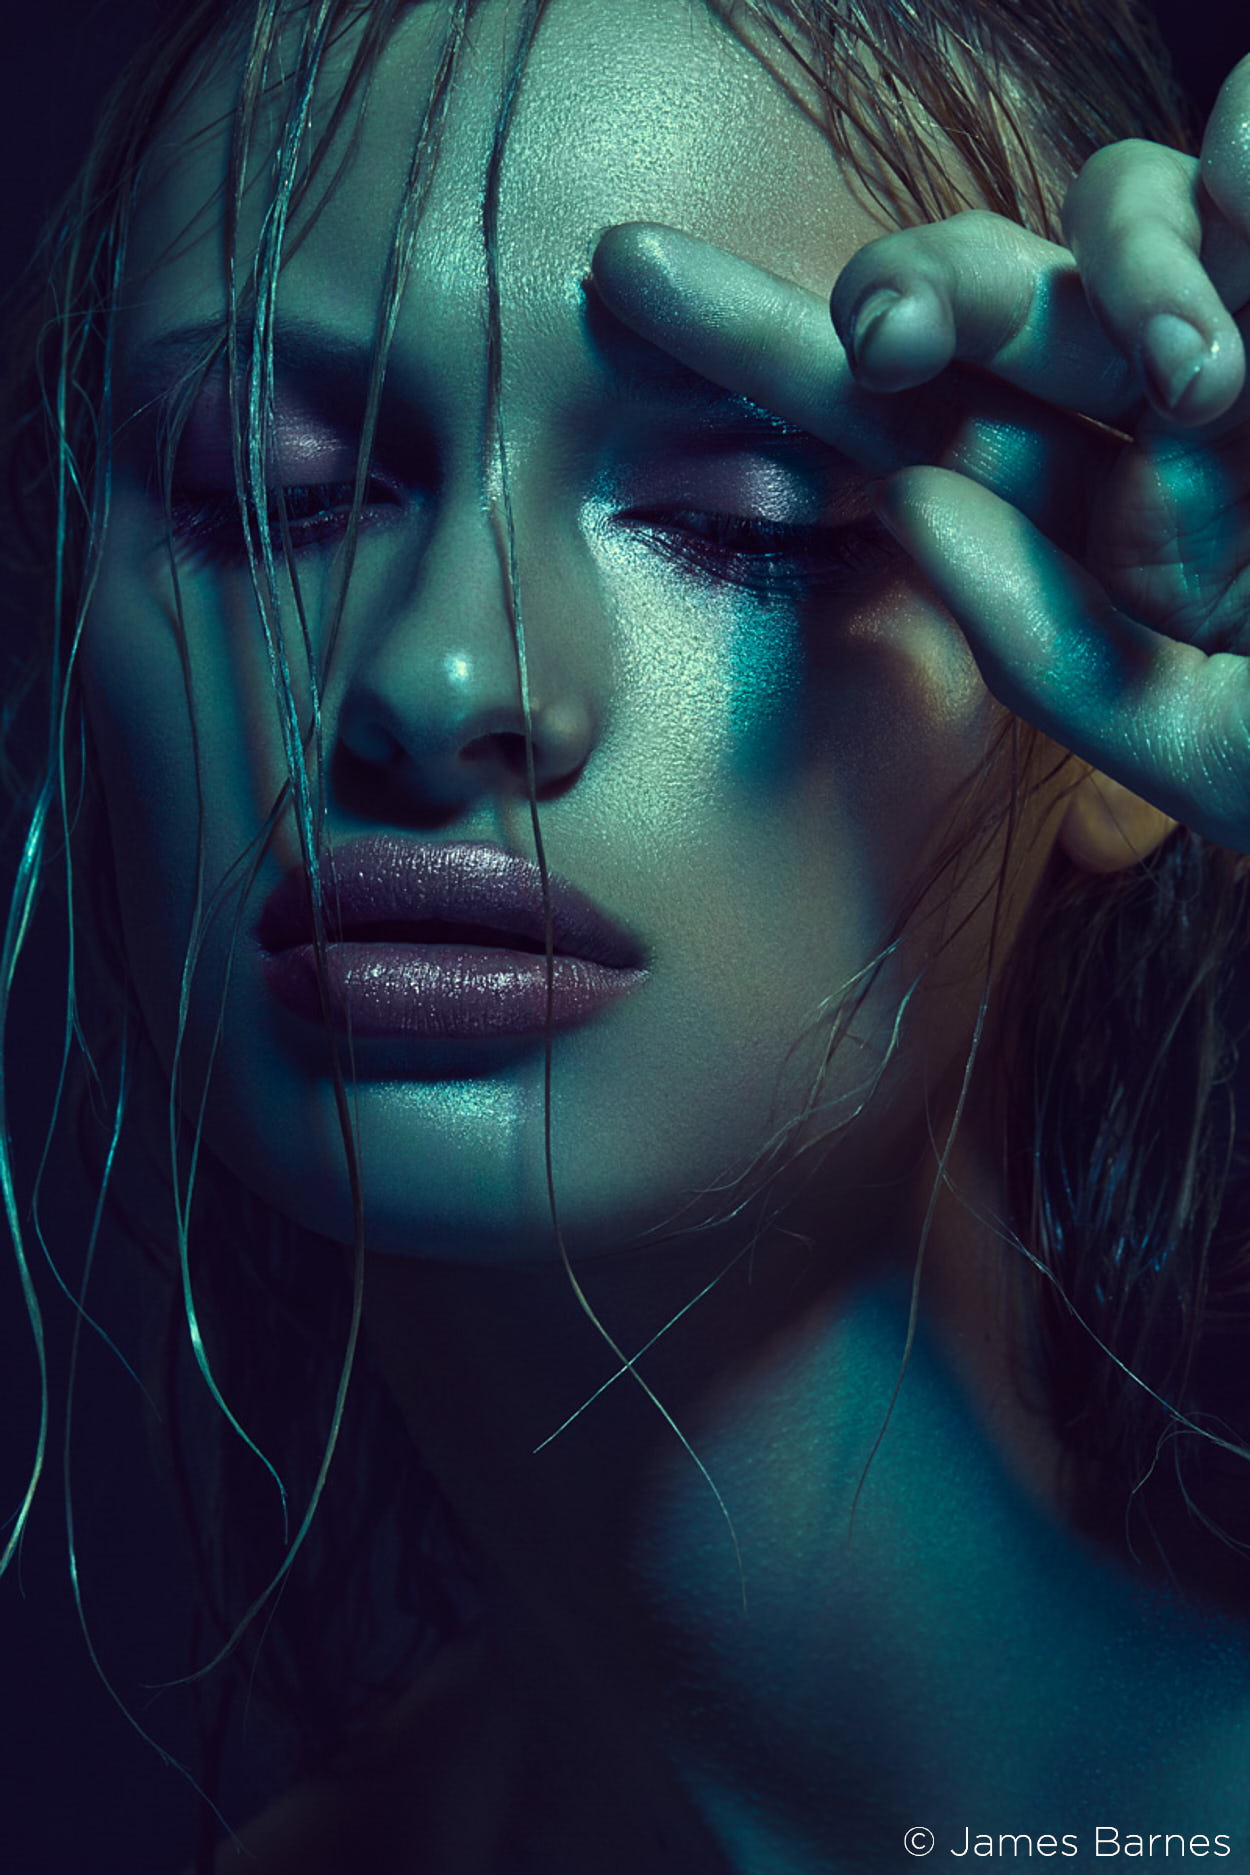
The first step into applying a color grade to a photo is to figure out the proper color harmonies that enhance the photo while bringing out the desired mood. For this photo, the photographer, James Barnes, told me that he had his color inspiration from old, run down swimming pools and wanted to name it “Chlorinated”. He did a very good job getting the color done in the camera but I came up with a color scheme that enhanced the base color to take his shot to the next level.

Figure-1_Body

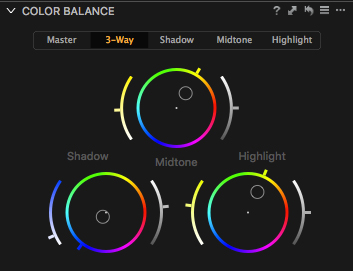
Step 2: Make adjustments in The Color Balance Tool

To get the final colored photo, the first tool I jump to in Capture One Pro 9 is the Color Balance tool. This is because I can separately adjust the hue, saturation and luminosity of the highlights, midtones, and shadows. Since this tool is so versatile, it’s easy to manipulate the color of a photo to be more color correct or to have a color grade applied. For this specific photo, I added blue and increased the luminosity in the shadows, then added yellow into both the midtones and highlights. The reason I added yellow was to make the blue into the green tone that I wanted from the color palette.

Figure-2

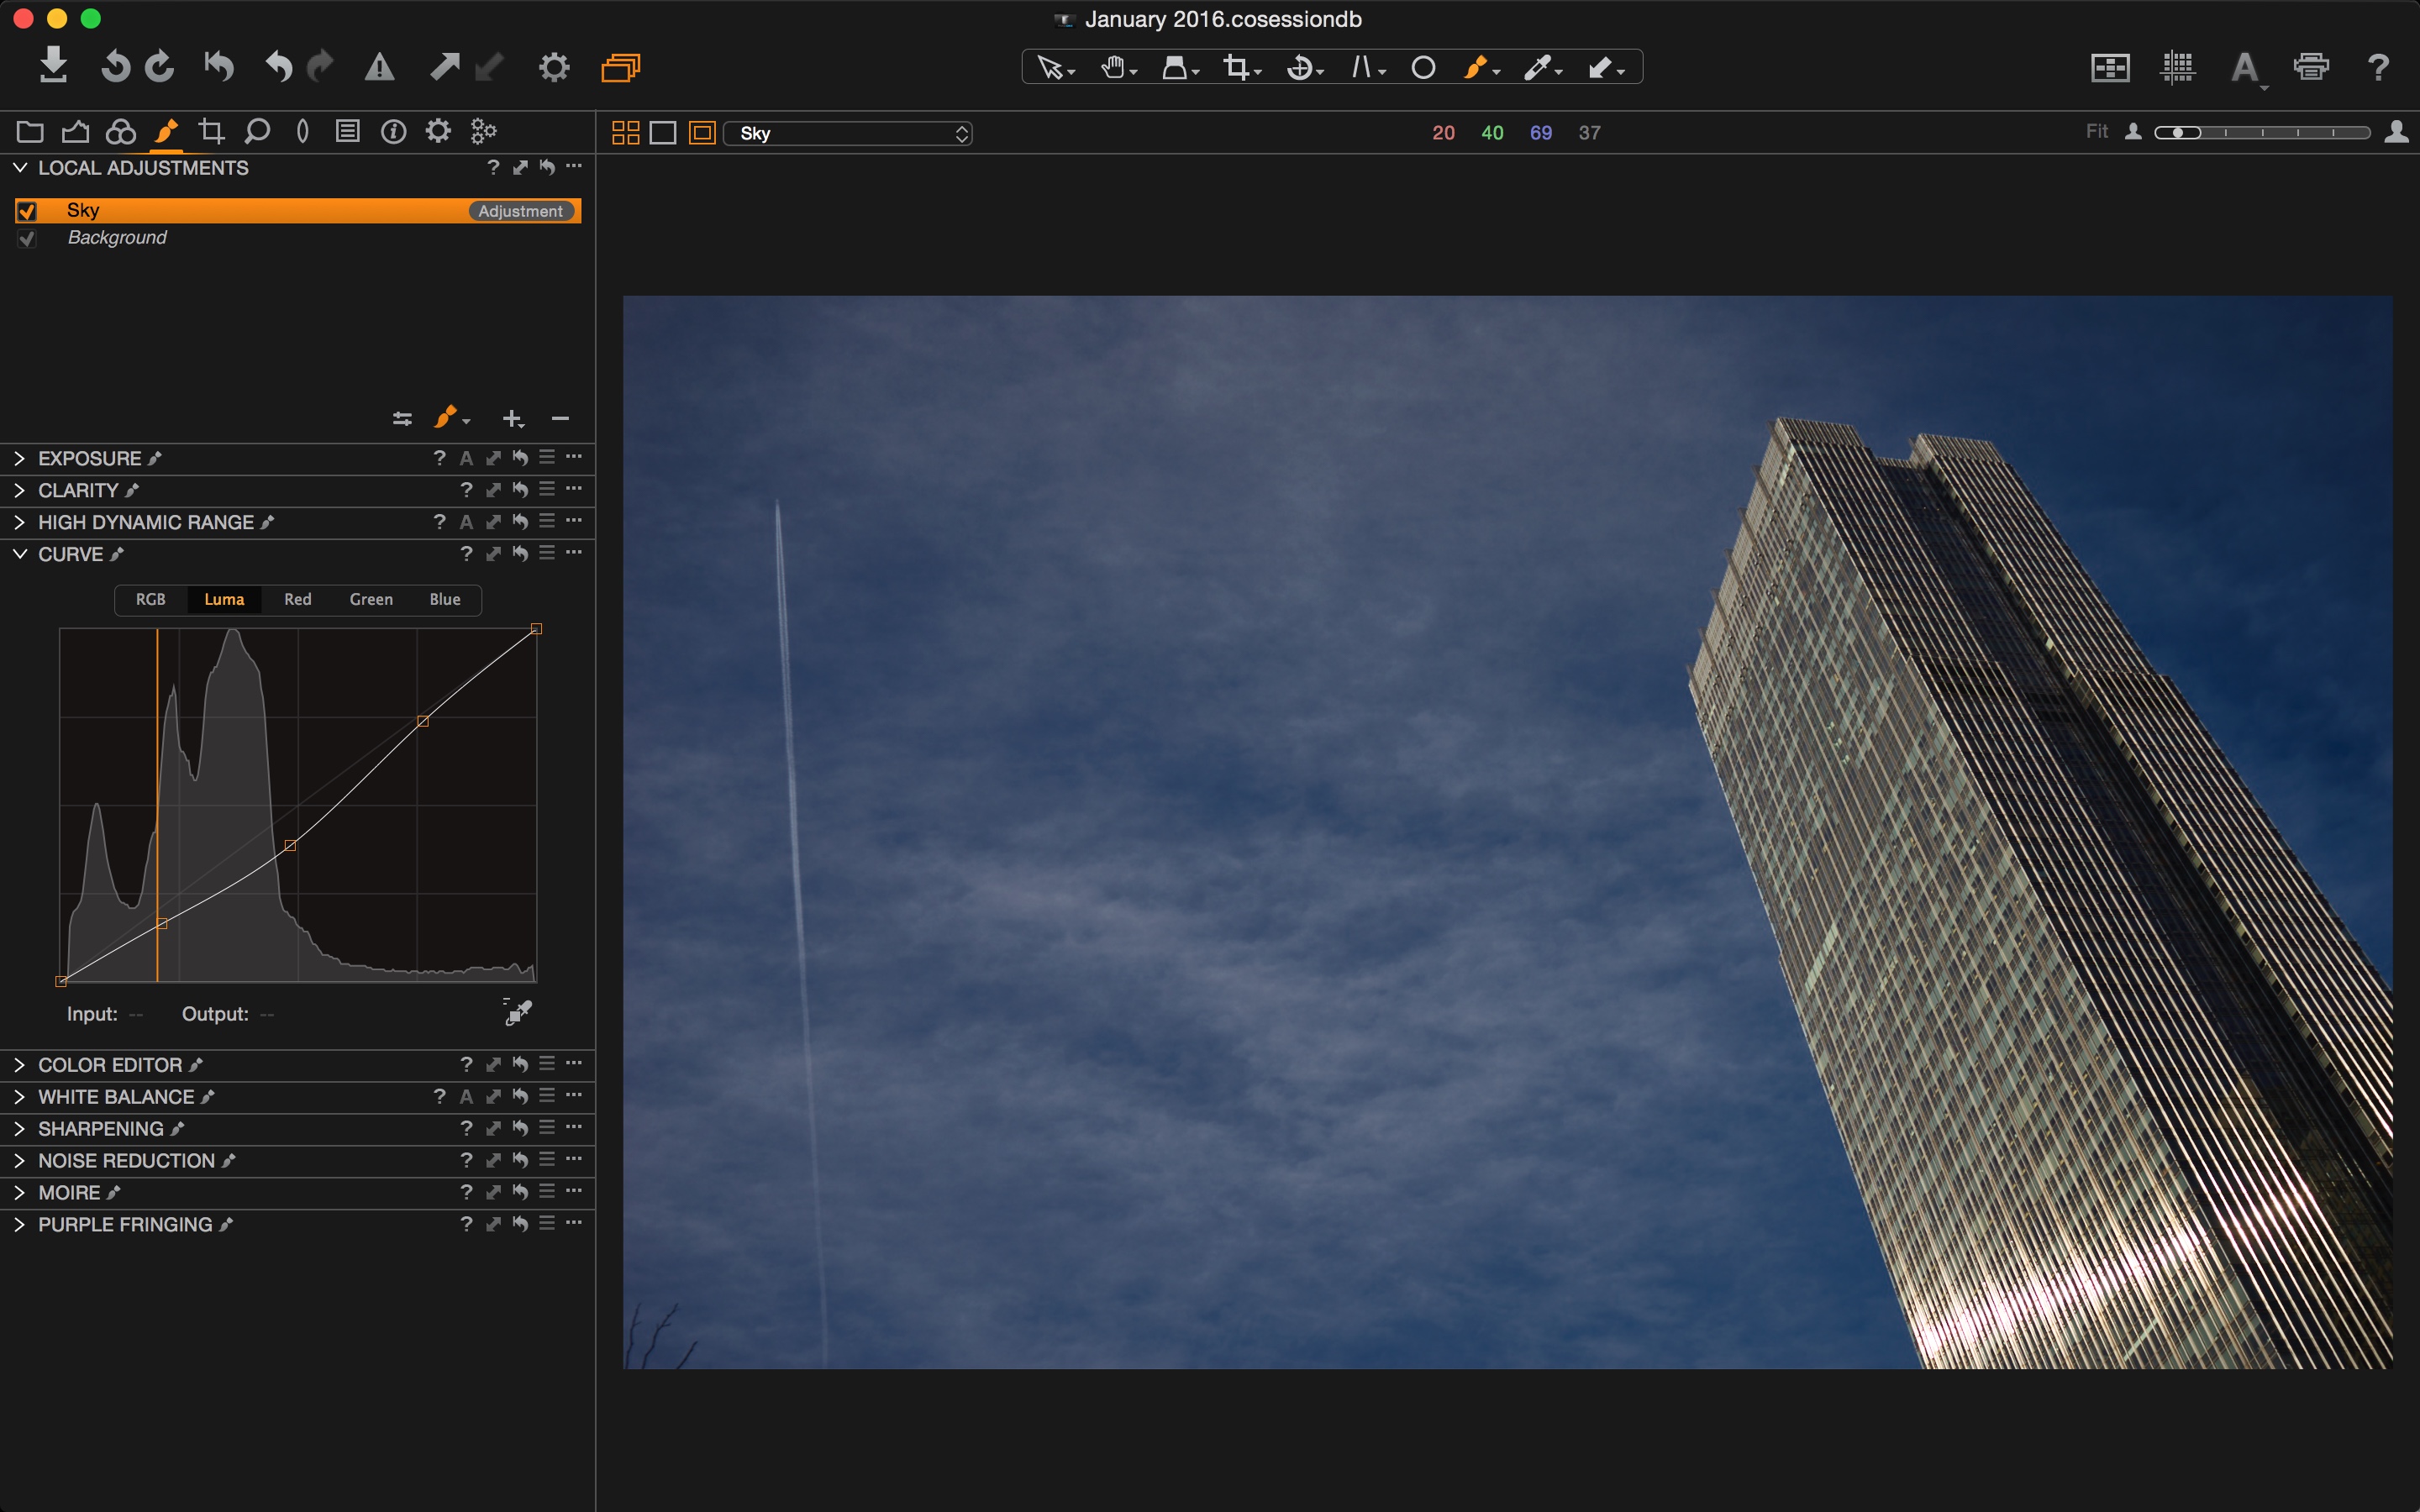
Step 3: Fix layers in the Local Adjustments Tool

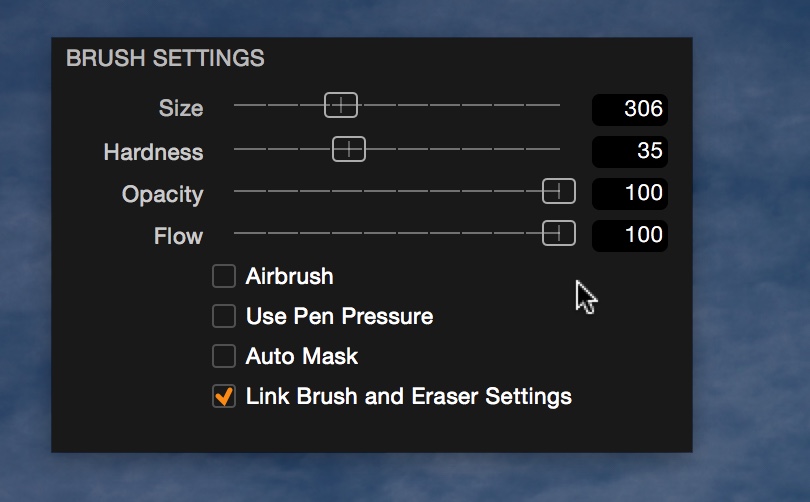
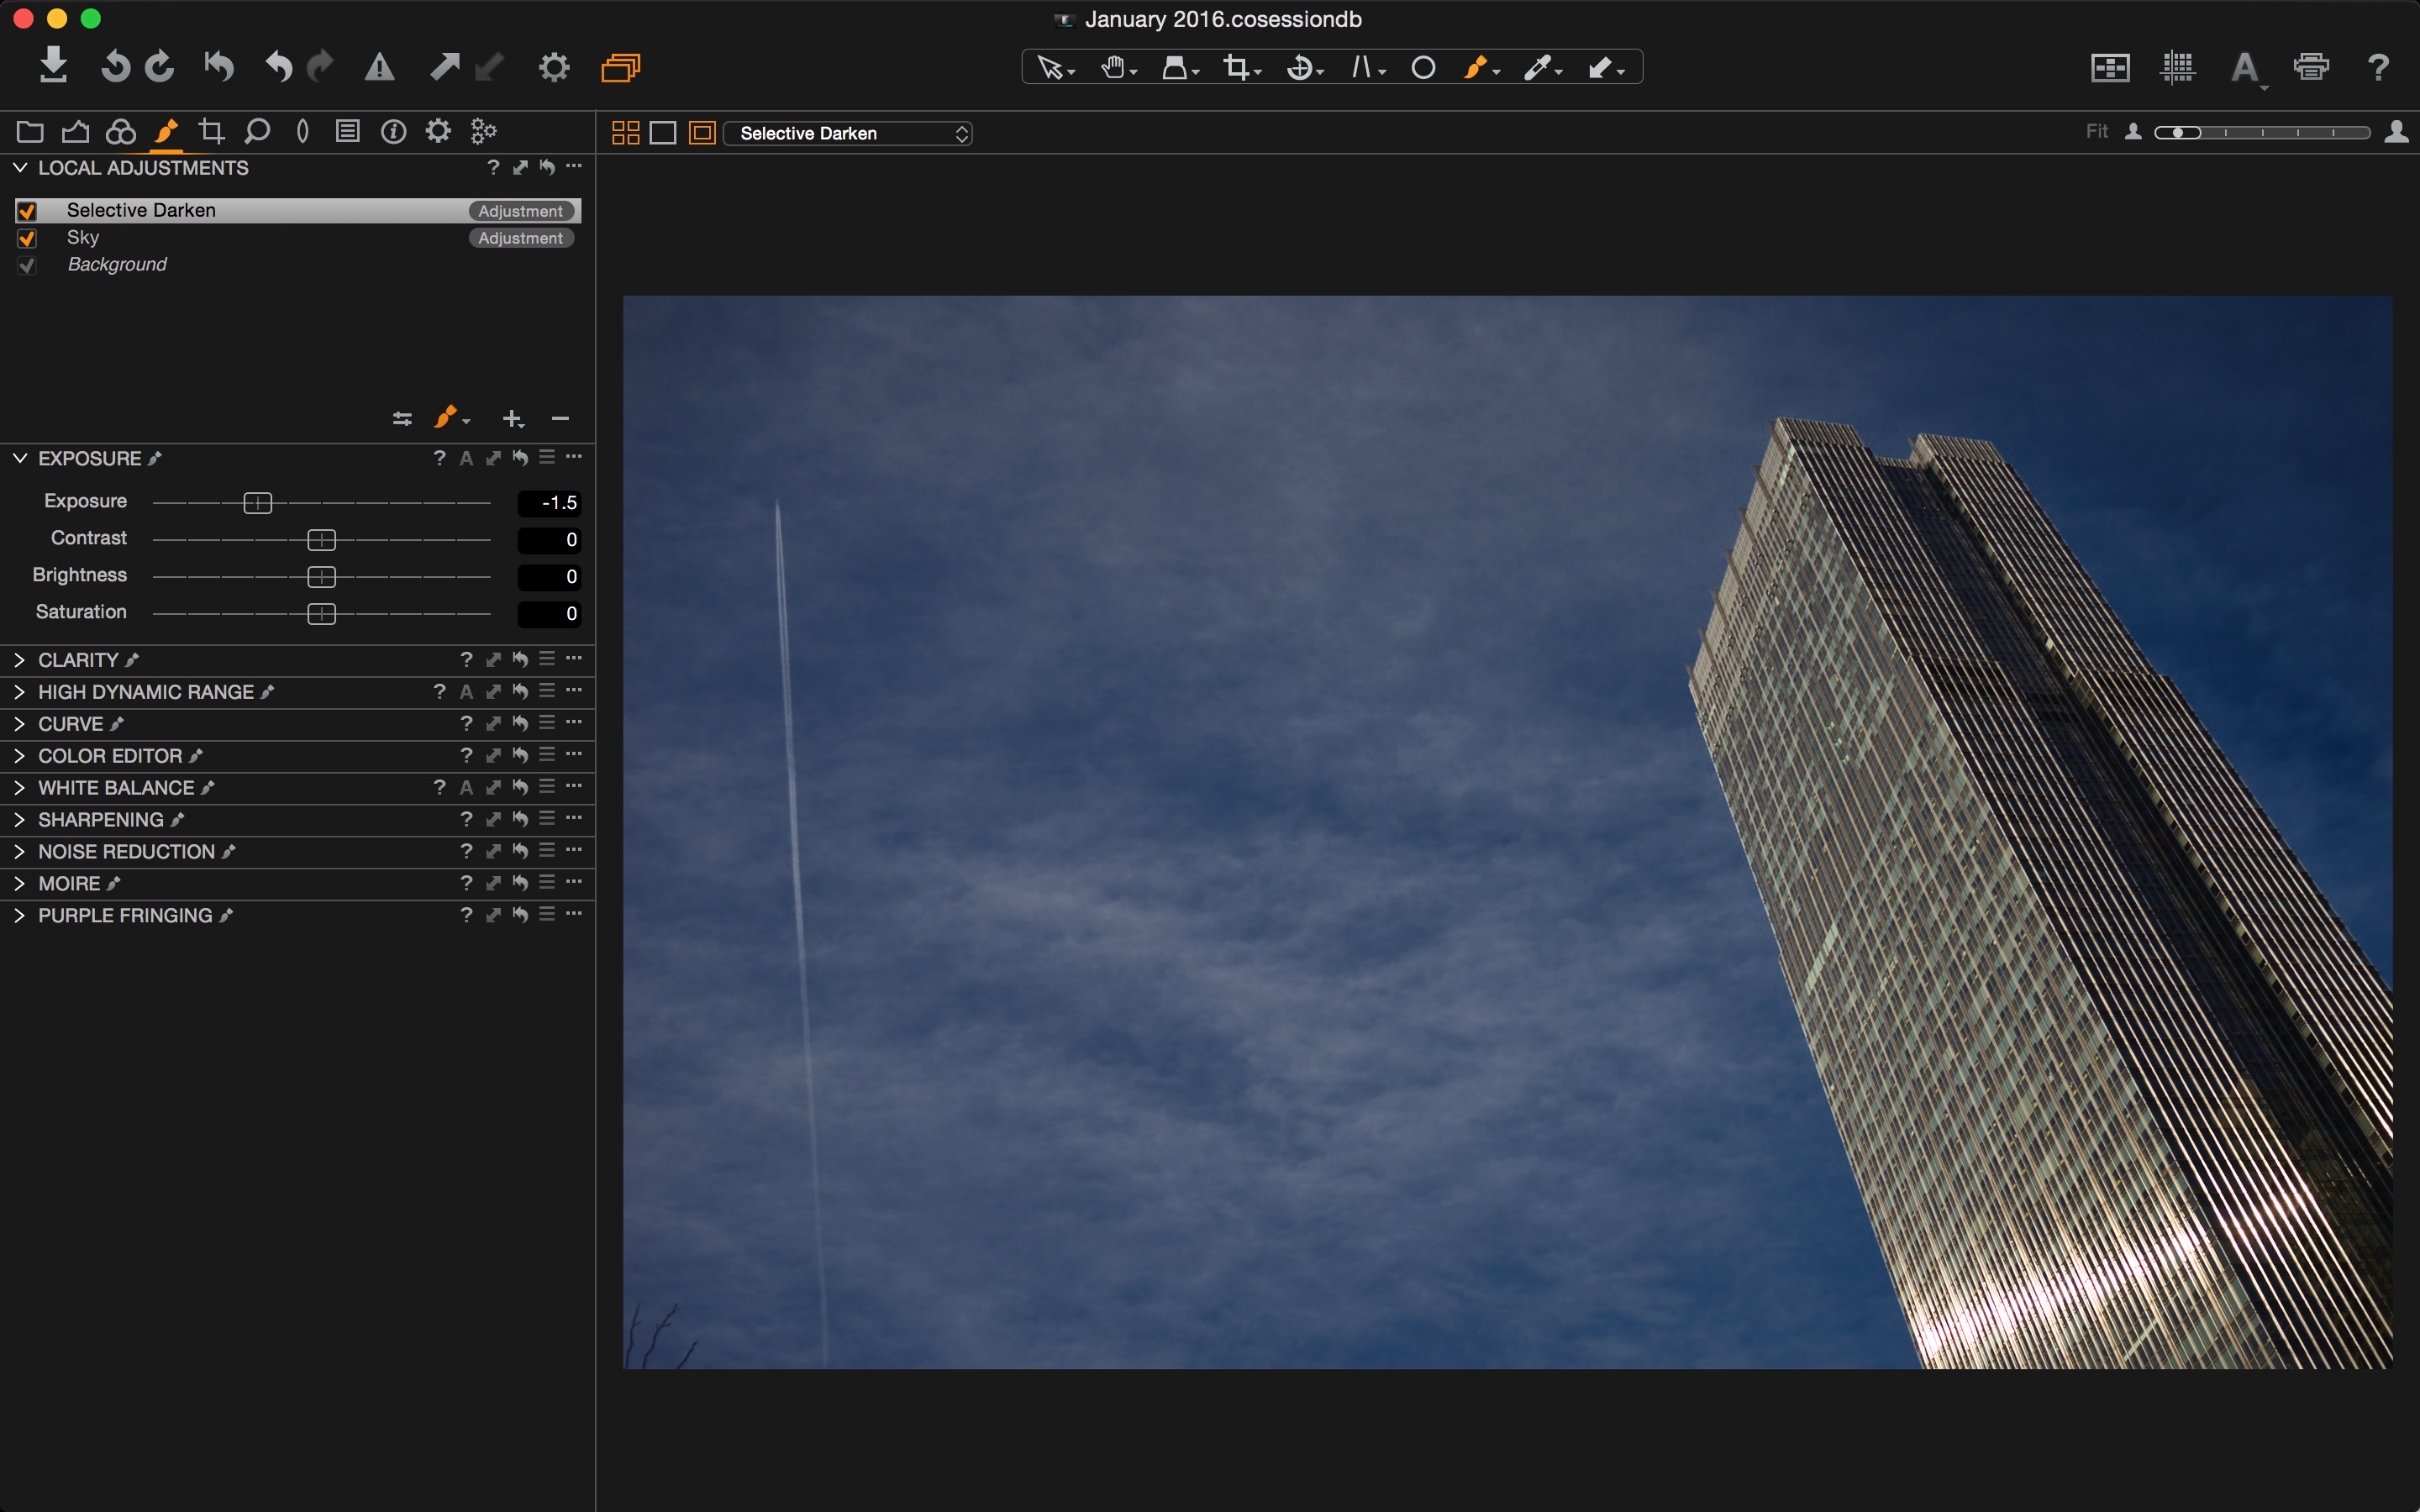
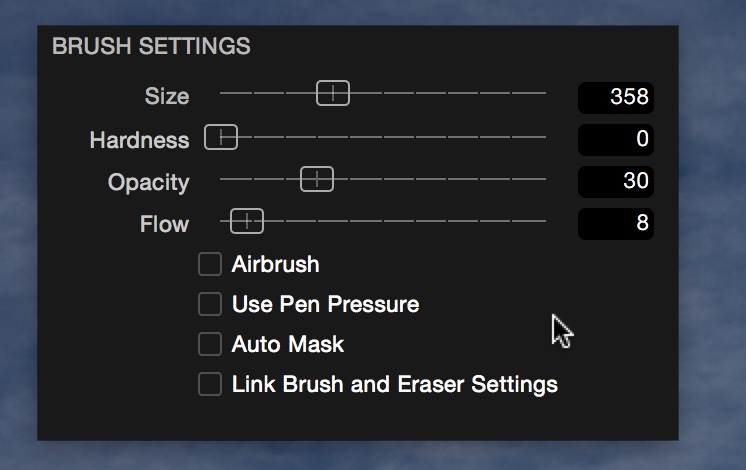
With the majority of the color work done, there needs to be some selective adjustments to pull the color palette together. The Local Adjustments panel in Capture One Pro 9 is an amazing feature for taking care of these changes – and it is so easy to use. To fix the little areas of color that weren’t complying with the chosen colors, I would make a new layer, mask in the problem area, and make the adjustment. In this photo, I used Local Adjustments in three areas:

Figure-3

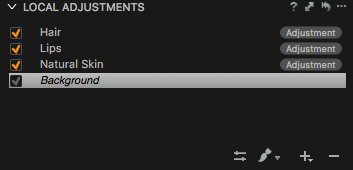
I darkened and removed some red from the natural skin color in the area around her ear, added some purple to her lips, and removed red as well as added blue to her hair around the dark edges of the shot. All of this was made extremely simple with the help of the Local Adjustments panel.

The final touch

To complete the picture, the only additional color work I did in Photoshop was the purple tones on the eyelids, otherwise all of the color toning was done completely in Capture One Pro 9. To get the final image from the color toned image, I used healing techniques as well as Dodge & Burn to remove distractions.

And that’s it! The colors of the picture have been improved significantly by the use of Capture One Pro 9. Have a look at the final result and make your own judgement:

 Figure-4_Body 1

If you are interested in more of Jordan Hartley’s work, visit his website on jordanhartley.ca or his Instagram account on Instagram.com/jordanhartleyretouch


Dear readers, it’s time to subscribe

From now on, the Image Quality Professor’s newsletter will no longer find its way to your inbox every week, so if you want to stay updated with Capture One Pro 9 tips, please subscribe to the blog:

Subscribe to blog via e-mail

Sign up for the webinar

The importance of Flow control

In Capture One Pro 9 we added a couple of new features for drawing Local Adjustment masks.

These were Flow amount and Airbrush mode.

In this particular blog post we will take a closer look at the Flow setting in the Brush Settings dialog.  It’s really important if you want to ‘dodge and burn’ (Selectively lighten and darken parts of the image) and will lead to better results in a shorter space of time.

That’s got to be good!

Lower flow, more brush movements

In Capture One Pro 8 (where there was no flow control) you can liken that to a setting of 100 in Capture One Pro 9. But what does that actually mean?

First of all, it helps to think of Flow as a movement based setting. So with a flow set to 100, one single pass of the brush onto the image will deliver a mask to the maximum set Opacity (in the example above that would be 100).

With the Flow set to 50, it would take two passes to reach an Opacity of 100.

So in conclusion, the lower the Flow, the more brush movements it takes to reach the maximum set Opacity.  This is why you should also consider Opacity settings when thinking about experimenting with Flow.

So, what’s the benefit?

With no Flow control, it becomes much more difficult to make gradual controlled changes of a mask. In Capture One Pro 8, if you want to build up or reduce a mask, you have to lift the pen or mouse in-between every brush stroke with a very low Opacity set. It does work, but the control and speed of the result is somewhat diminished.

Therefore, using Flow is particularly handy for dodging and burning as mentioned earlier.

Selective Lightening and Darkening (Dodge and Burn)

Here is a simple shot, currently with one Layer named ‘Sky’, which is adding a small Luma curve to the blue areas of the image.

I want to experiment with bringing down the exposure on parts of the building and sky a little, and the easiest way to do this is with a Local Adjustment.

Before doing anything, I make a new Layer called ‘Selective Darken’.

fig3

New Layers are created in the Local Adjustments tool by clicking the + icon

As you can see in the above image, I have also reduced the exposure by 1.5 stops.  The image, of course, does not change as there is no Masking on that layer as yet – remember, changes on each layer only show on the masked areas.

Next, I need to adjust my Brush Settings to allow a gradual and controlled build up my mask.

fig4

I choose a really low Flow (8 in this example) and also a low Opacity (30 in this example). You might be wondering why I don’t simply start with a less drastic Exposure correction, and this indeed could be a valid approach. But, it also gives me another level of adjustment to play with, as once I have applied the mask, I can increase or reduce its overall effect by playing with the Exposure slider.

With these settings, I can use my pen and tablet to ‘paint’ over the image.  The more I brush in one particular area, the more the image darkens. I don’t have to lift my pen off at any point, I just brush away. Concentration in one area means the mask will build up gradually to my final desired look.  Briefly brushing over a different area will be just a subtle effect.

Its important to add that I don’t have the mask showing when I’m drawing as I want to see the result on the image in real time.

Link Brush and Eraser Settings

If I feel like I have gone too far, I just press E on the keyboard to choose the eraser. Make sure the check box Link Brush and Eraser Settings is checked in the Brush Settings tool so that the Eraser and Brush share the same settings.

fig5

After masking, I settled on an Exposure value of -1.26 to reduce the effect a little.

You can see the before and after below:

Before imageAfter image

Oh, and to finish the image I also used a repair layer to get rid of the tree branches in the lower left hand corner.

Don’t forget, if you want to selectively lighten, the process is exactly the same, just use a positive Exposure correction.

The Airbrush checkbox adds an additional component: Time. The mask will build up simply by clicking and holding with the mouse (or pen).  Higher flow rates will lead to the mask building up faster.  I haven’t yet found a way to use the airbrush function in my own work.  If you have, I would be interested to hear in the comments!

I hope you find this useful on your images.  Dodging and Burning can be a fun way to add another dimension to your images and also save a step in Photoshop. Working on the RAW file gives a better result… as always.

All the best,

David Grover


Sign up for the webinar

Cityscapes with the Phase One A-series

Peter Marshall, cityscape photographer and technical supporter at Phase One, recently visited China to hold the first POCP courses (Phase One Certified Professional) in Hong Kong, Shanghai and Beijing. As a cityscape photographer, he jumped at the opportunity to photograph some of the most iconic skylines in the world with the Phase One A-series and IQ280 digital back. Read on to hear his firsthand account of shooting cityscapes in high traffic areas and difficult weather conditions.

PeterMarshall_SH1

“When I go out to shoot, I like to keep it simple and lightweight. For this trip, I used the Phase One A-series and an IQ280 digital back. I love the process of using this camera; physically dialing in my settings. It has a fantastic analogue feel, supported by some of the world’s best sensor technology. Everything about the design and production of this camera is done to perfection – from the quality of the lenses to the feel of the grip. And although the IQ280 would not have been my first choice for the hot conditions and long exposures, as it lacks the long exposure mode that other Phase One digital backs feature, I was still amazed with the results it produced.

PeterMarshall_SH2

The first night in Hong Kong, I quickly learned that conditions here were very very different to other locations I have photographed around the world. The outside temperature was around 38 degrees Celsius, and humidity hovered around 70%. But the difficult part was the drastic change in conditions from the air-conditioned hotels, taxis and trains to the hot and humid outside air. Taking my cold camera out in the heat instantly covered everything in moisture, rendering the camera unusable. After that experience, I started carrying a towel and more lens cleaning equipment. This helped me dry off the moisture on the outside caused by heat change, and also ensured that my lenses were as clean as possible before exposing – problem solved!

I also underestimated how busy the fantastic locations my translator and local photographers found for me would be. Many times, I had to fight my way to the waterfront for the best spot for the image. Often, I had to balance my tripod on bins, rails or hang it over the water. This is when having a small, high quality system that I could rely on was a lifesaver. And with the manual controls, I could physically feel when my settings were in the right place instead of relying on a screen – which was sometimes out of view.

PeterMarshall_SH3

Although I shot many different locations during my trip, my favorite shot was the Shanghai skyline across the water.  I have seen hundreds, if not thousands, of photos taken of this, and knew I wanted something a little different. I put on the super wide 23mm lens to isolate the other side of the river almost as if it were an island. After the first shot, it started to rain – a lot! As the other photographers ran for cover, I stayed out to get a few more shots. Although the system is not weatherproof, I knew I could rely on the quality build of the Alpa body and lens as well as the IQ Digital Back in these conditions nonetheless. Staying out while others took cover proved to be a great decision, as I found exactly what I was after. The lights mixed with the rain on the lens gave some great natural flare in my final image, and having the IQ280 allowed me to shoot at super low ISO. As my black frame started, I grabbed my camera and ran for cover with the others. The black frame helps reduce noise by capturing a second exposure to help map out noise when it is processed in Capture One. With some other systems, I would have to shoot this manually by covering the lens for the second exposure and apply it in postproduction myself. By shooting with the A-series and processing in Capture One, all of this is done automatically for me.

PeterMarshall_SH_Pudong

Looking at the photo while sheltering from the rain, I knew it was the one.

Peter Marshall

Learn more about the POCP Program that Peter teaches


Sign up for the webinar

Second to None Color with Pratik Naik

According to high-end retoucher, Praktik Naik, photographers spend a lot of money investing in gear such as cameras, lenses and lightning. However, they seem to forget the RAW processing stage, which is the most crucial element in photography, if you ask Pratik.

JonasJensen_Beauty11April20161966

Personally, Pratik prefers to use Capture One Pro 9 for his RAW processing. His explanation is that it contains reliable tools that offer richer colors, compared to all other RAW converters on the market. Watch his video about Capture One Pro 9 to learn why he thinks this is so essential to your photography:

Would you like to try Capture One Pro 9?

Download free 30-day trial

Stay on top of your game

If you are interested in getting to know more about Pratik’s work with Capture One Pro 9, watch the BTS-video from his shoot with professional photographer, Jonas Jensen:

“Fashion photographers on set, they’re using it on a day-to-day basis because it’s industry standard, I mean.. If you’re using something else, you’re probably not on the top of your game”. – Pratik Naik

New to Capture One Pro?

If you’ve never tried Capture One Pro, you can download a free trial here:

Download free 30-day trial

Check out Pratik Naik’s new tutorials for those who want to learn Capture One Pro:

http://rggedu.com/products/the-best-tutorial-for-capture-1-101-for-photographers-with-pratik-naik


Sign up for the webinar