I almost started the title of this episode with Ch-ch-ch-ch-Changes, like the one I released when I quit my old day job to pursue photography full-time six years ago. Although not quite as dramatic, I’m really excited to tell you that I’ve switched from Lightroom to Capture One Pro as my main image processing, asset management and workflow application.
I started using Lightroom back in 2006, during the initial beta phase, and I’d been a loyal Lightroom user since. So, this may come as a shock to people that know me. I can already hear you Capture One users chuckling to yourselves, not so surprised that I’ve finally decided to make this change.
Why the Change?
Firstly, let me explain the reason for this sudden change in direction. It’s pretty simple, but this is a powerful motive, so I want to take the time to relay this. Then, I’ll talk about the tests I did to see if I really could move to Capture One completely.
Capture One has been on my radar since 2009, when I tried the demo version of version 5 or 6. At that time, a lot of key features were missing, although the RAW processing engine was already very impressive.
After the release of Capture One 7, I took another look, and found that most of the functionality I wanted was now there. However, I couldn’t really invest the time necessary to fully check it out. As a result I still didn’t really see the benefits to switching.
A Revelation!
In July 2016, with the latest version being 9.2, I had some time and decided to take a deeper look. I simply grabbed a handful of my favorite images from Lightroom and imported them into Capture One.
There’s a checkbox in the import dialog to Include Existing Adjustments, and I’m not sure if that was on or off during this first import, but my images were totally reset. None of the Lightroom adjustments were imported. That was a good thing though, as it enabled me to see something that was a total revelation for me. I saw details that I didn’t even know existed from my view of the images in Lightroom.
First Comparison
The Red-Crowned Crane study was my first image to explore. This, some of you might recognize from the cover of my Making the Print eBook. Before I show you the new version, I want you to know that there’s perhaps too much detail visible. I’ll probably dial that down a little again to the more dreamy look from my original.
My point is, in Capture One I’m able to see details, which I can keep or dial down. In Lightroom, I didn’t even know that the detail was there, so the choice didn’t even exist!
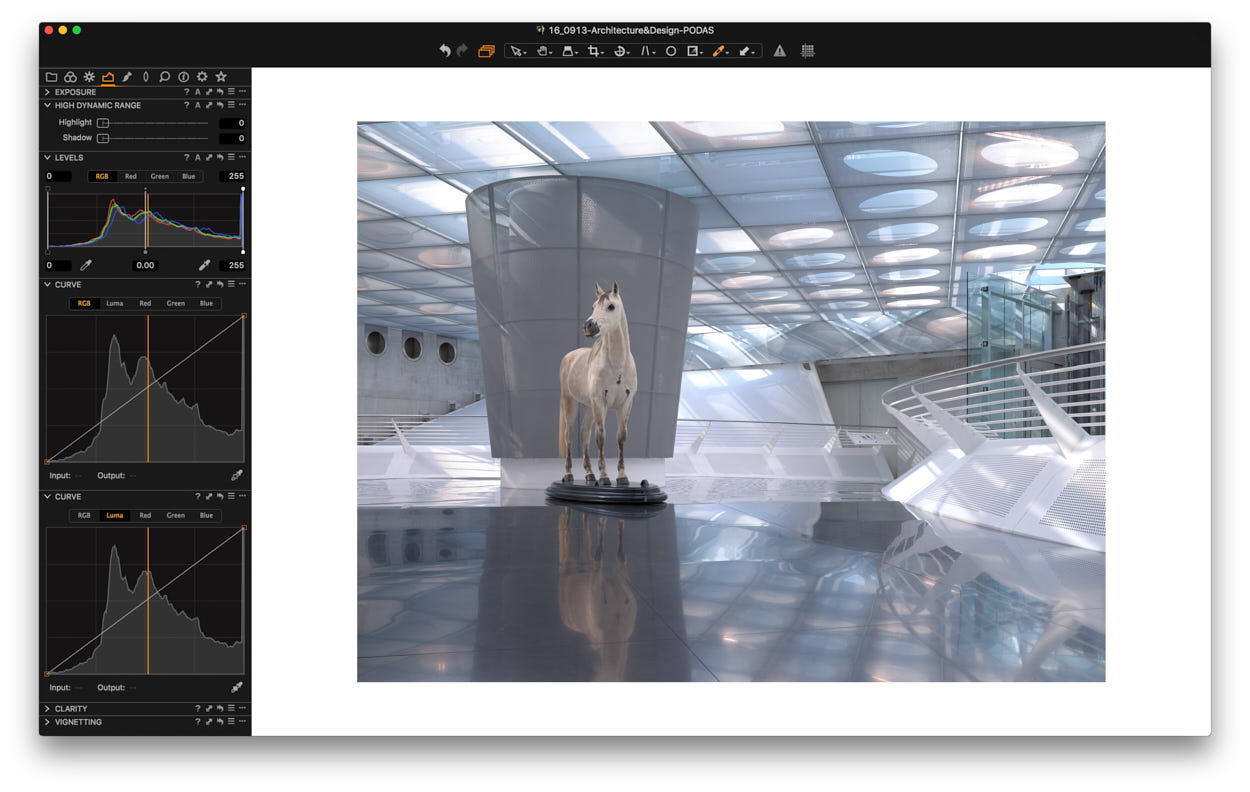
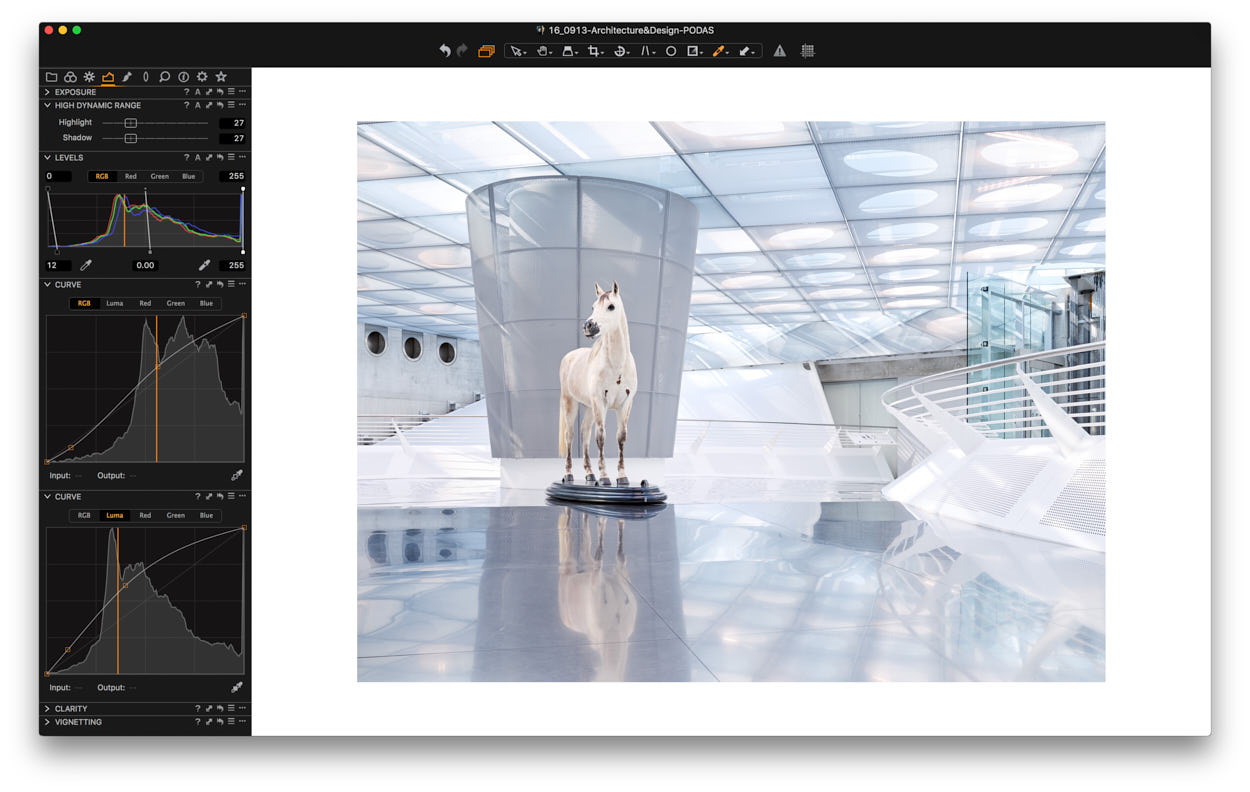
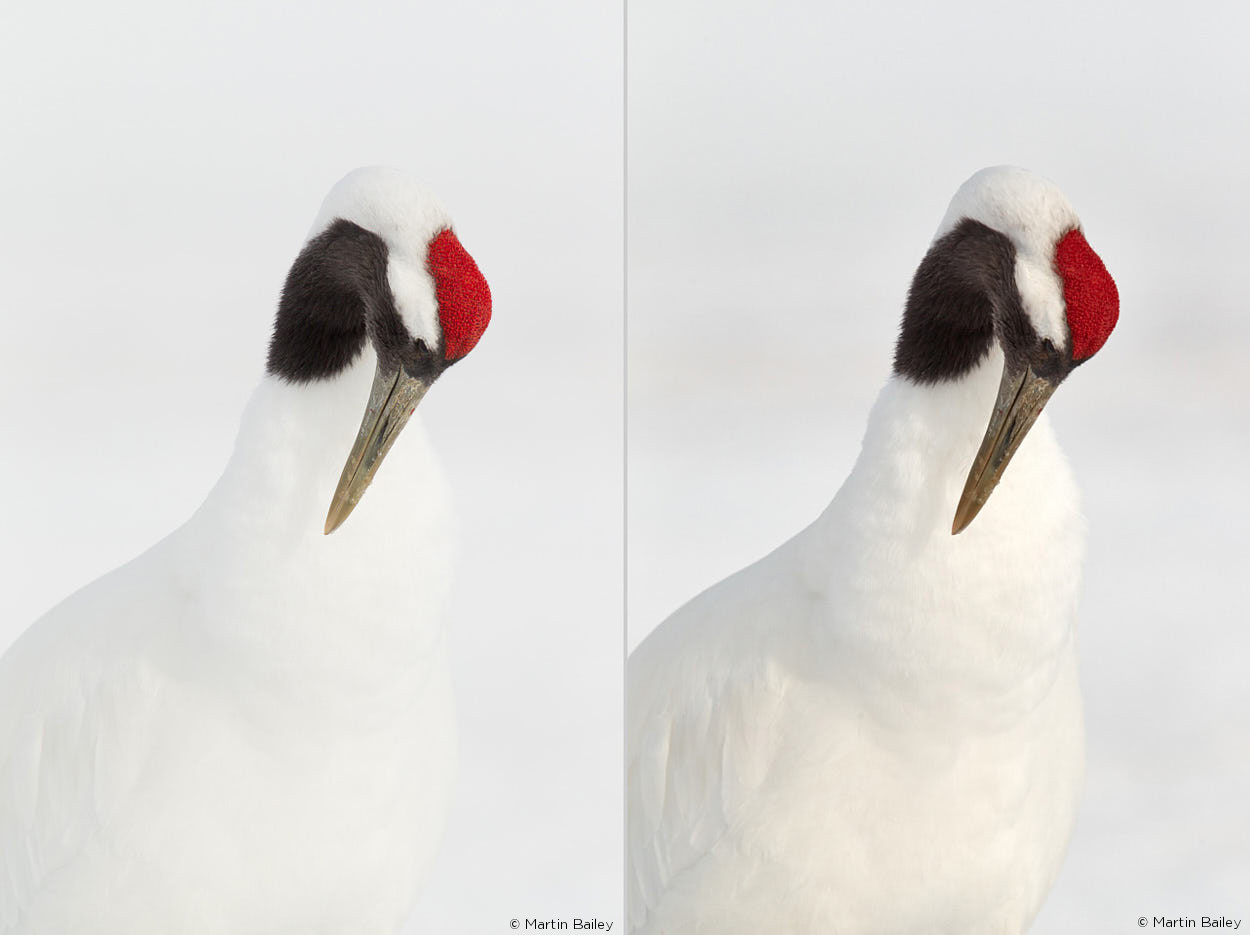
To illustrate, you can see my original Lightroom version (left) and the first Capture One version (right). Regardless of which one you prefer, I’m sure you’ll notice that the Capture One version has a huge amount of detail, compared to my Lightroom version.

Tanchou Study #7 – Lightroom (left) and Capture One (right)
There are a few things that we need to bear in mind at this point. The first one being that, as I imported my RAW file without Lightroom modifications, I had to play with the Levels in Capture One to boost the image. However, it was pretty easy to bring it closer to how I wanted the image, while maintaining the detail.
When I asked my wife about the Capture One version, she said the crane looks like a chicken. I tend to agree. Nevertheless, my second point is that, as I’ll import work from future shoots directly into Capture One, I’ll now be able to see the detail. This will enable me to make up my own mind about how much of the detail I want to maintain. I get to decide how much I want to lose if I go with a soft look like my original.
You won’t have to rework your archives
Also note that I was going to include the version of the crane photo that I was presented with in Capture One after importing my Final Selects folder. As opposed to simply importing the file, this was done by using a Lightroom Catalog and Include Existing Adjustments. However, it actually looks so similar to the original version that there isn’t much point in doing so. You can migrate your work to Capture One and maintain the Lightroom look of your images, to a certain degree.
A lot of things aren’t imported along with your images. For example, any dust removable or cloning that you did to your originals in Lightroom will be lost. Moreover, you lose all Lightroom Local Adjustments. So, if you want to maintain a copy of the file in Capture One, you have a couple of choices. The first one is to save the Lightroom version as a TIFF, and bake your changes into the image.
The second option is to make the changes again in Capture One. Here, you need to be aware that the spot removal tool in Capture One works differently than in Lightroom. For detailed cloning it is generally better to jump into Photoshop anyway. If this is necessary, just save your image as a TIFF before importing it into Capture One. Note too that it has to be a TIFF because Capture One doesn’t support Photoshop PSD files. More on this later…
Tests continued
With my mind already significantly blown by the detail in my crane shot, I decided to take a look at Capture One’s black and white capabilities. As some of you know, black and white plays a big part in my photography. I’ve been a big fan of Silver Efex Pro, originally from Nik Software, until they were bought by Google. Therein lies part of another problem I was hoping to fix with a potential move to Capture One.
Although it’s been stated by Google that they don’t intend to kill off Silver Efex or any of the Nik suite of plugins, we haven’t seen a version upgrade since version 2, which was released like an eternity ago. I’ve continued to use Silver Efex Pro, because I believe it’s still the best black and white conversion plugin. Lightroom’s Black and White conversion lacks the control that I need.
This doesn’t mean that I’m totally happy with Silver Efex Pro though. There are times when it leaves a nasty white line or halo around dark objects. Sometimes, I have to spend hours painstakingly removing that in Photoshop before printing a photograph for a customer.
It can also leave grain in the sky, and although it can look organic, it requires some cleaning up. Consequently, the next test was my ability to create a well-balanced and toned black and white image without a plugin.
Excellent Black and White Conversion in Capture One
Believe me, I’ve tried lots of different methods to convert to black and white, so that I could overcome my reliance on a plugin that’s no longer being improved. None of my tests have really beat Silver Efex Pro – until now.
The first conversion was of my Boat Graveyard shot from my Hokkaido Landscape Photography Tour last year. Again, there are a few points that we need to keep in mind, as this is not a straight comparison. First, here is my original black and white version from Silver Efex Pro:
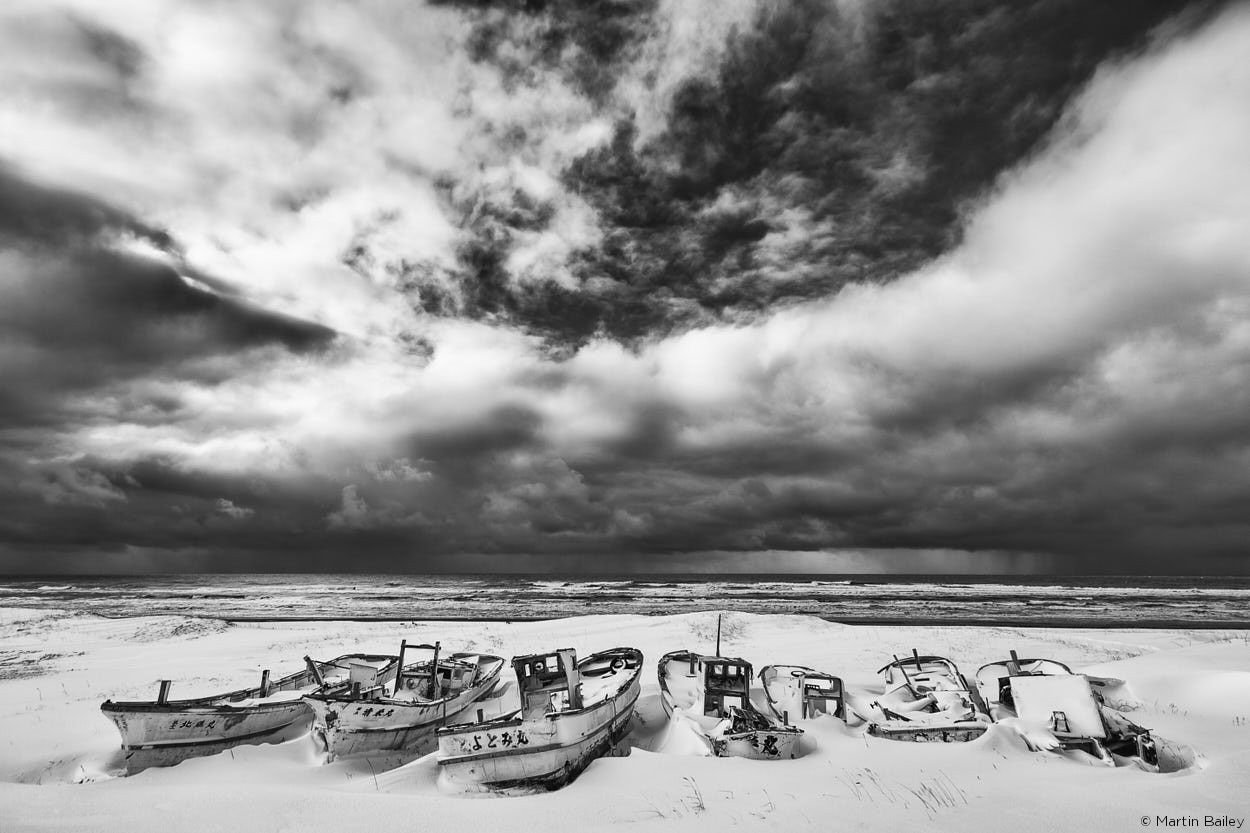
Boat Graveyard #2 – Silver Efex Pro
Below is a new version, which is created from the original color RAW file in Capture One. I didn’t necessarily try to recreate the Silver Efex Pro version, although I could get close if I wanted. Rather, I was looking for something with beautiful tonality and texture, and not as heavy-handed as my Silver Efex conversion.
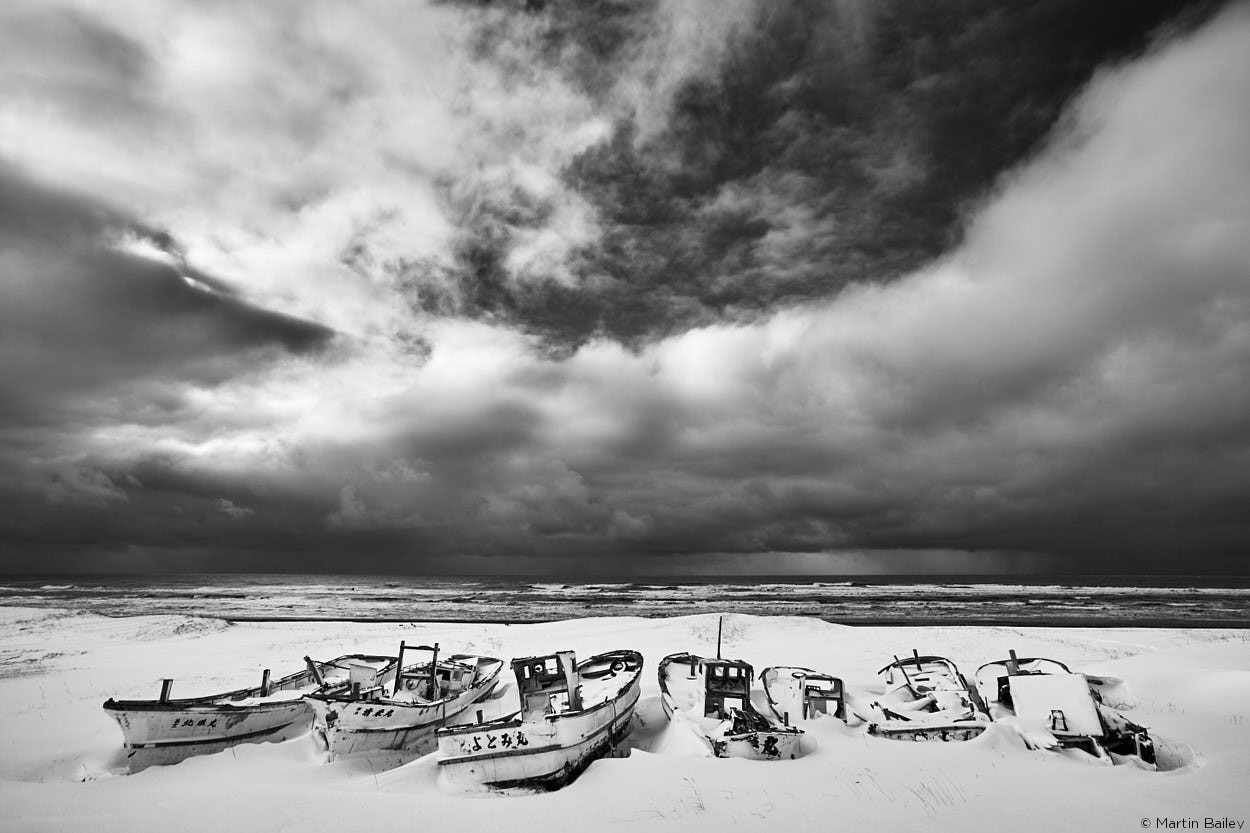
Boat Graveyard #2 – Capture One Pro 9
I’m sure you agree that this conversion shows that Silver Efex isn’t necessary for this kind of photograph. But there’s another kind of black and white photograph that I do. I make the background almost totally black, and I honestly didn’t expect Capture One to be able to do this.
Black Backgrounds
First, below is the original photo. As I shot it I knew that I was going to make it black and white.
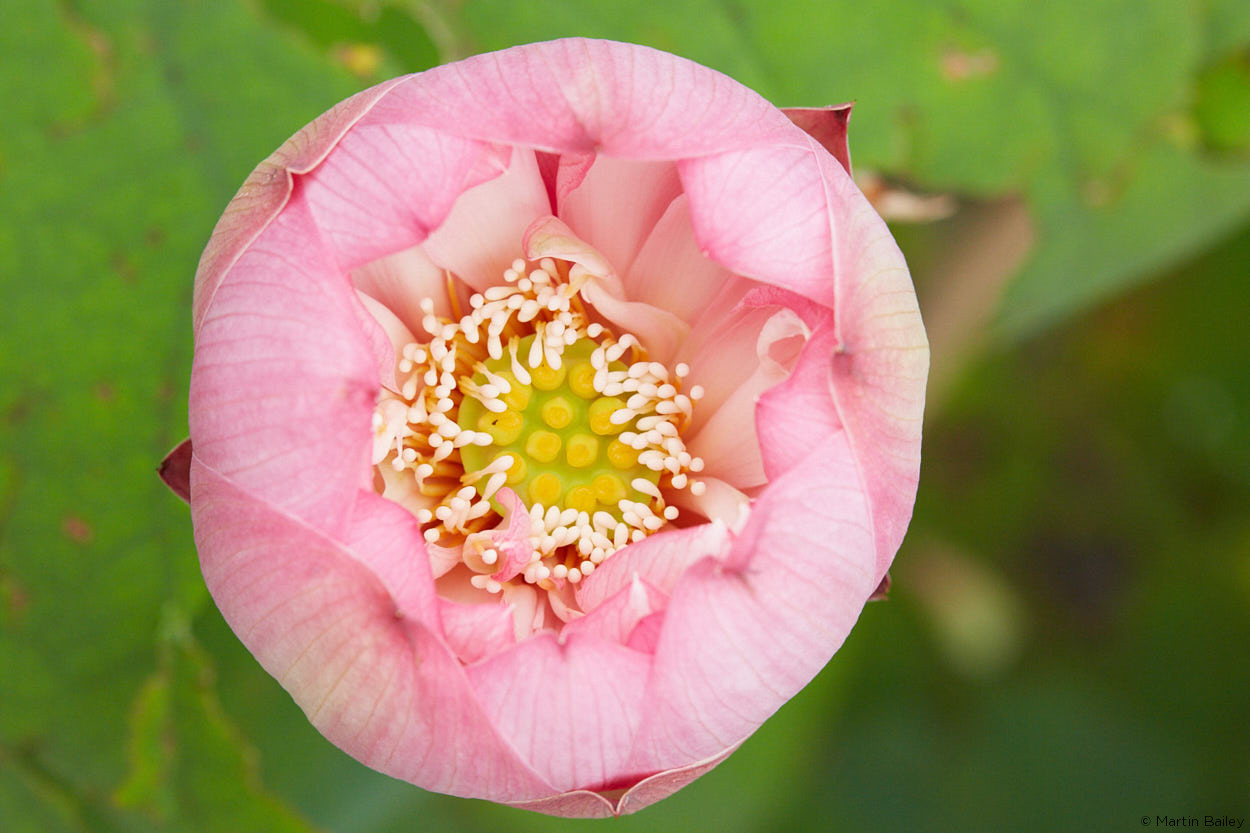
Lotus Flower Interior – Original Color Version
Now below here is the black and white version that I did completely in Capture One. Until now, in Silver Efex Pro, I’ve had to use Control Points to knock the background out like this. In Capture One, I got it close to a black background just with the available sliders, levels and other controls. The last few spots of light grey I took out with a some local adjustments on a new layer. Yes, Capture One supports layers!
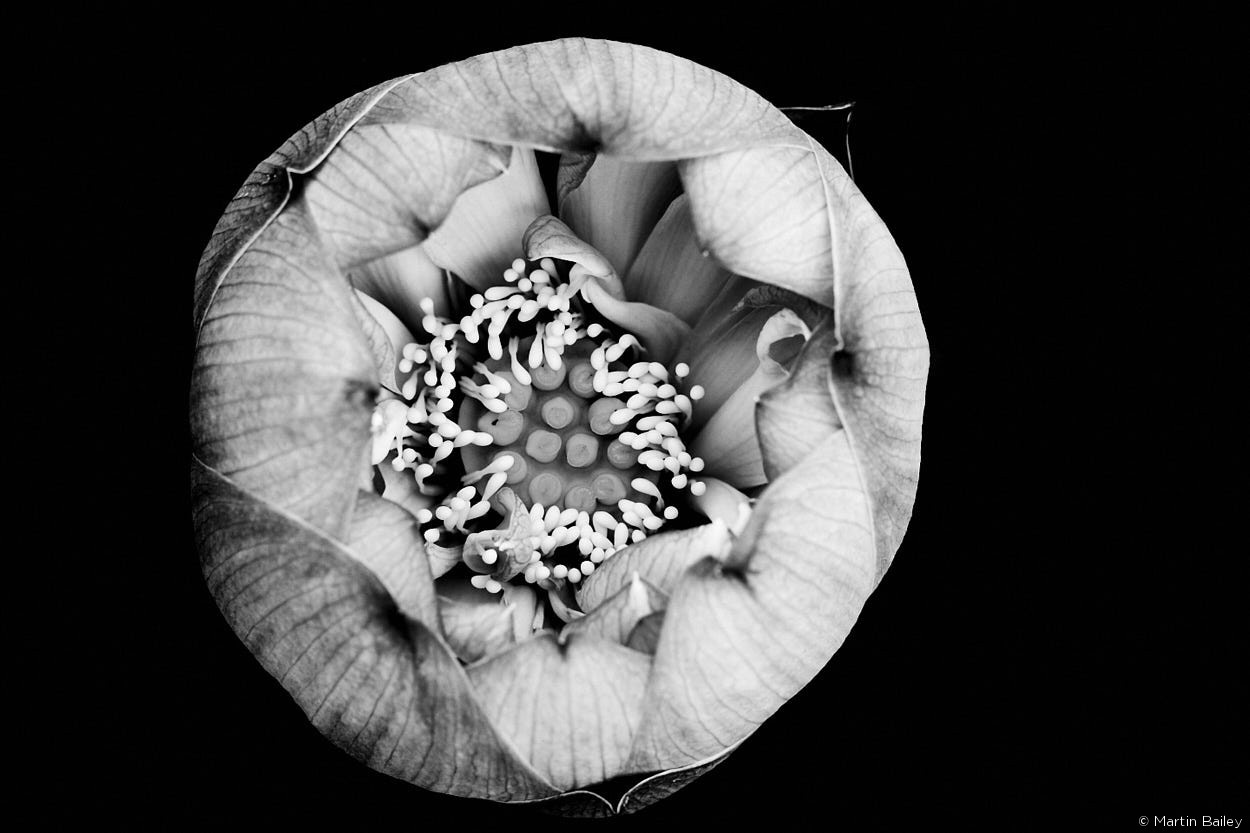
Lotus Flower Interior – Capture One Pro 9
Once again, I was blown away by the fact that I could do this level of black and white conversion. The image exported here is in my catalog as a Canon RAW file with a cr2 extension, instead of a 130 megabyte TIFF. When necessary, I don’t mind saving TIFF, but the more you have in your archives, the longer the backups takes. In my opinion, the more images you can keep in the original RAW format, the better.
Subtle Tones and Detail
I really have been impressed with the subtle tones and detail that I’m getting from Capture One. Here’s another black and white example to show that it’s possible to get great details and tones in Capture One. You might remember this photograph from Mount Asahi from this year’s Hokkaido Landscape tour. Again, this is a Silver Efex Pro conversion:

Mount Asahi Trees – Silver Efex Pro
Below is a version that I did in Capture One. I wasn’t trying to emulate the Silver Efex Pro version, but to express that I feel it’s actually better with more depth and tonal quality. Once again, let’s keep in mind that I was simply not able to do this level of conversion in Lightroom.

Mount Asahi Trees – Capture One Pro 9
I’m really just breaking the surface with my processing in Capture One, but I’ve been totally impressed with it. To the point that I’ve now committed myself to switch completely over to Capture One. At this point in my evaluation, I set the task of checking out all of the other features.
Spot Removal & Cloning
Another test that I performed was my ability to do some complicated cloning in Capture One. Originally, a lot of cables run behind the trees in the left side of this Mount Asahi Trees photo. Even in Lightroom this was too much of a pain to clone out, so I did it in Photoshop.
At first glance, spot removal in Capture One seems less capable than Lightroom. I didn’t think that removing the cables would be possible. The Spot Removal tool in Dust mode works well when removing dust from skies or other plain backgrounds. It just makes the dust spot disappear. Lightroom, however, often selects a part of the scene that has nothing in common with the background of the dust spot. This can be very frustrating.
With the Capture One Remove Spot tool in Spot mode, I initially tried to remove some people from the beach in the Boat Graveyard shot. It didn’t work, but then I found that you can use the Adjustments Brush in Clone and Heal modes.
This is quite a powerful tool, and is enough to save me from going into Photoshop and saving a TIFF in all of the cases I’ve tried so far. It’s easier to remove in Photoshop, but I did it in Capture One to prove to myself that it’s possible.
Import Folder Structure and Filename Change
Another test was my ability to import images into my usual folder structure automatically, and also rename my files. I don’t want to have to set this up every time I import, so I need to be able to create presets with the necessary settings.
I import my images into Year/Month/Day folder structure. Capture One has sessions and other ways to organize images, but I want my regular shoots organized how I’ve always done it. I like having everything from each year in a single top level folder, and then 12 month folders. Inside each month folder I have a day folder for all the days on which I’ve made photographs.
If you use location or shoot names to organize your images, it quickly becomes unmanageable, especially when it comes to backing up. Therefore, it was important for me to figure out how to automatically import into my preferred folder structure, which is possible by creating a preset:

Import to Year/Month/Day Folder Hierarchy
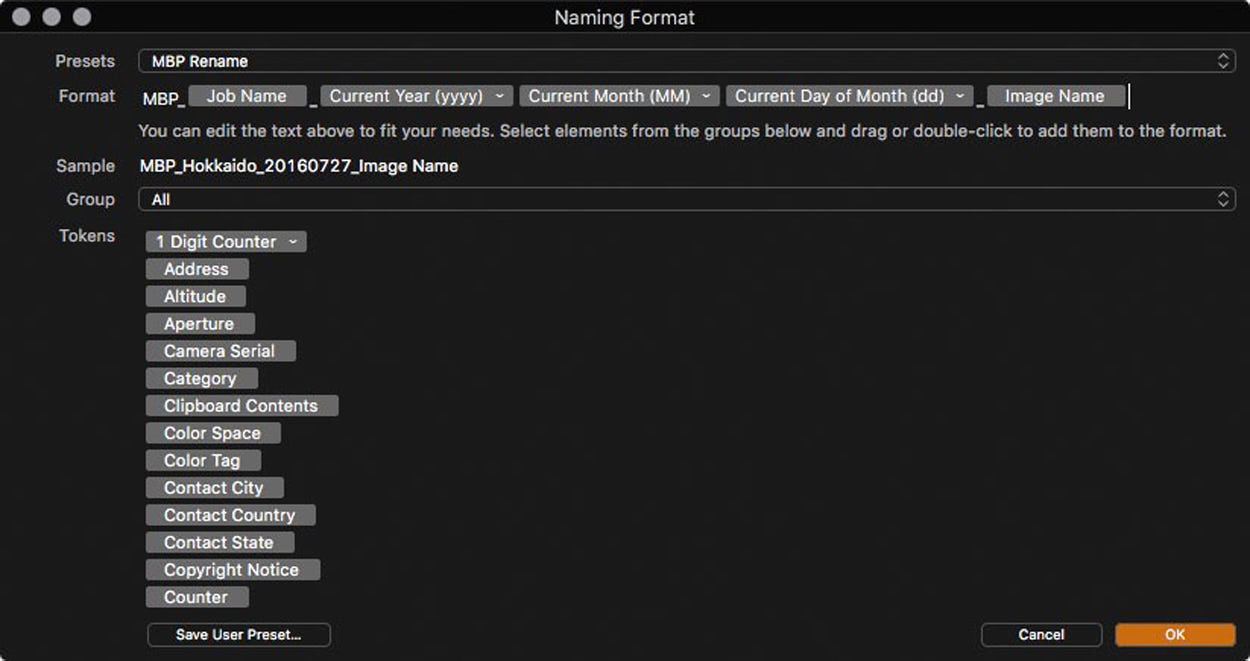
To change the filename during import, I created another preset. This one automatically uses a shoot or location name, the date of the image, and the original filename. These were a couple more things I could check off my list. As you see in this screenshot, you can build the new filename from text you enter and insert the various metadata tags:

Change Filename During Import
I add my location or shoot information, such as “Hokkaido” in this example, included a tag called Job name. With this, if I enter a keyword for the shoot into the Job Name field in the import dialog box, it gets inserted into the new filename. Once you save this as a preset, it’s available for selection during import, and is actually automatically selected for future imports unless you change it.
The Importance of Presets
For me, being able to set up this kind of preset is vital to creating a smooth workflow that is automated to highest possible degree. Even if I had to manually create a new day folder inside a month and year folder, and navigate to that in the import dialog, it would have made me think twice about switching to Capture One. I simply feel that the workflow itself should disappear into the background and allow us to get on with our work.
Export Presets
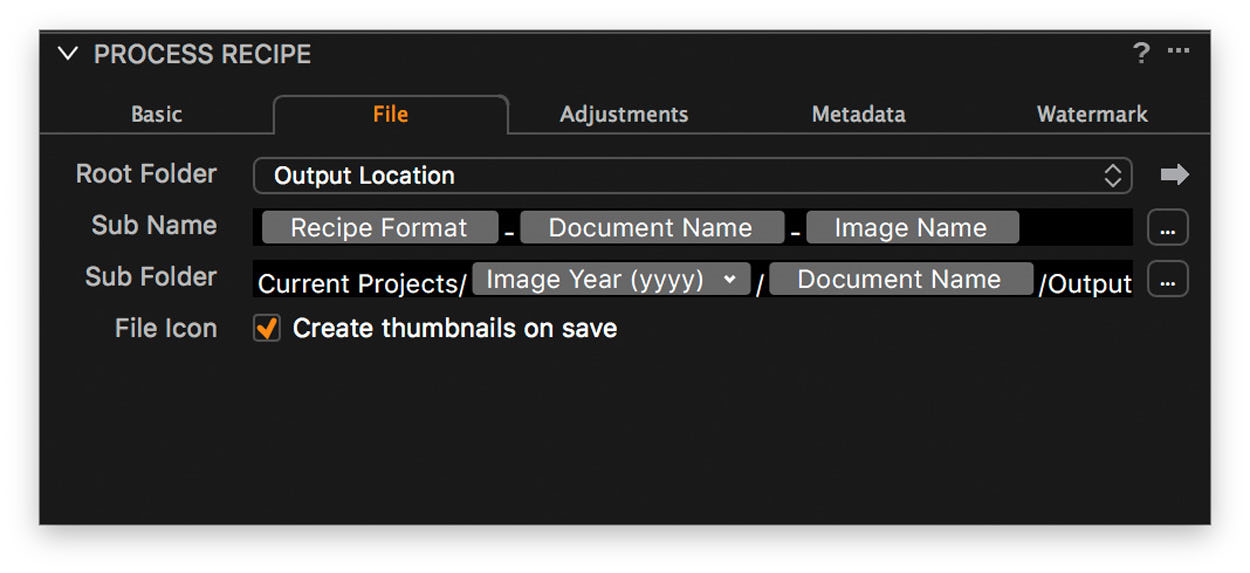
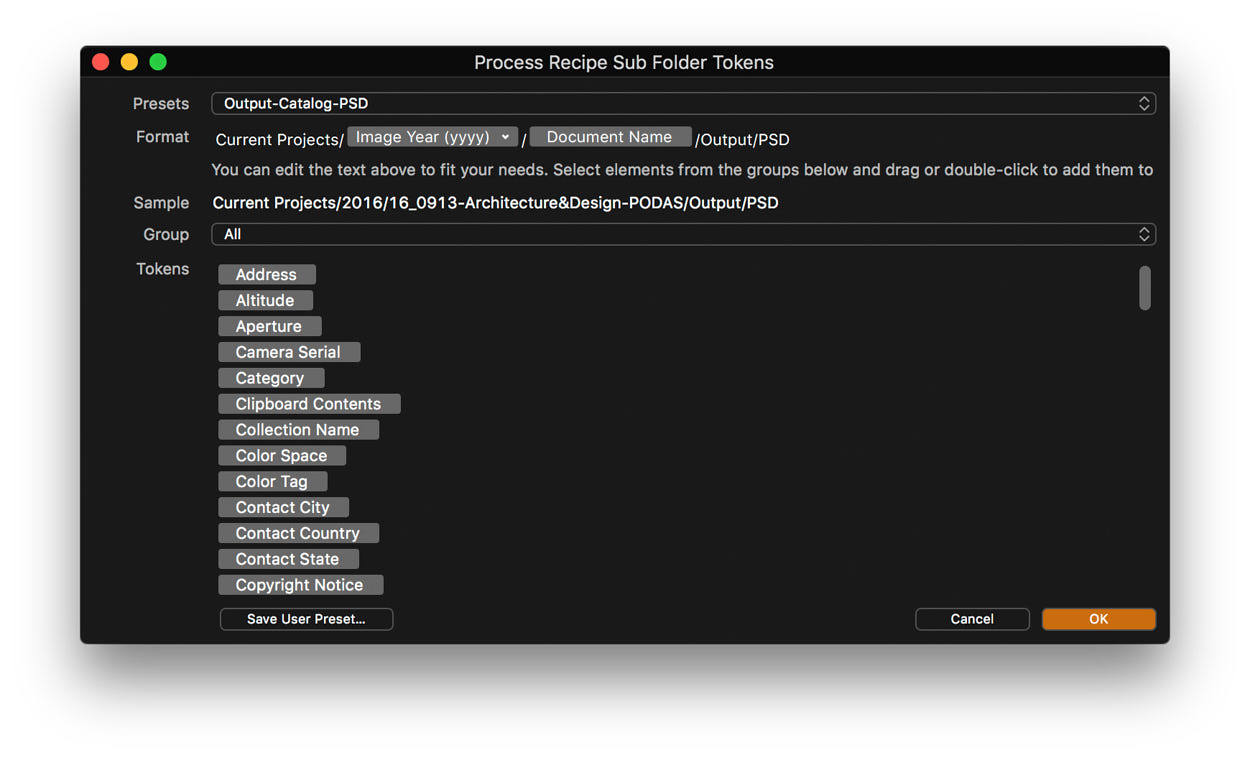
The next thing I tested was my ability to create good export presets. Capture one has a very powerful export feature and uses presets called Process Recipes. Again, I follow up with detailed descriptions of these features, but by creating a Process Recipe, you can very easily select these and export your images in various formats and sizes. It’s even possible to select multiple Recipes, so you can export different versions of your photos at the same time, which is great!
Please read my blog post Exporting and Printing in Capture One Pro to read more about this.
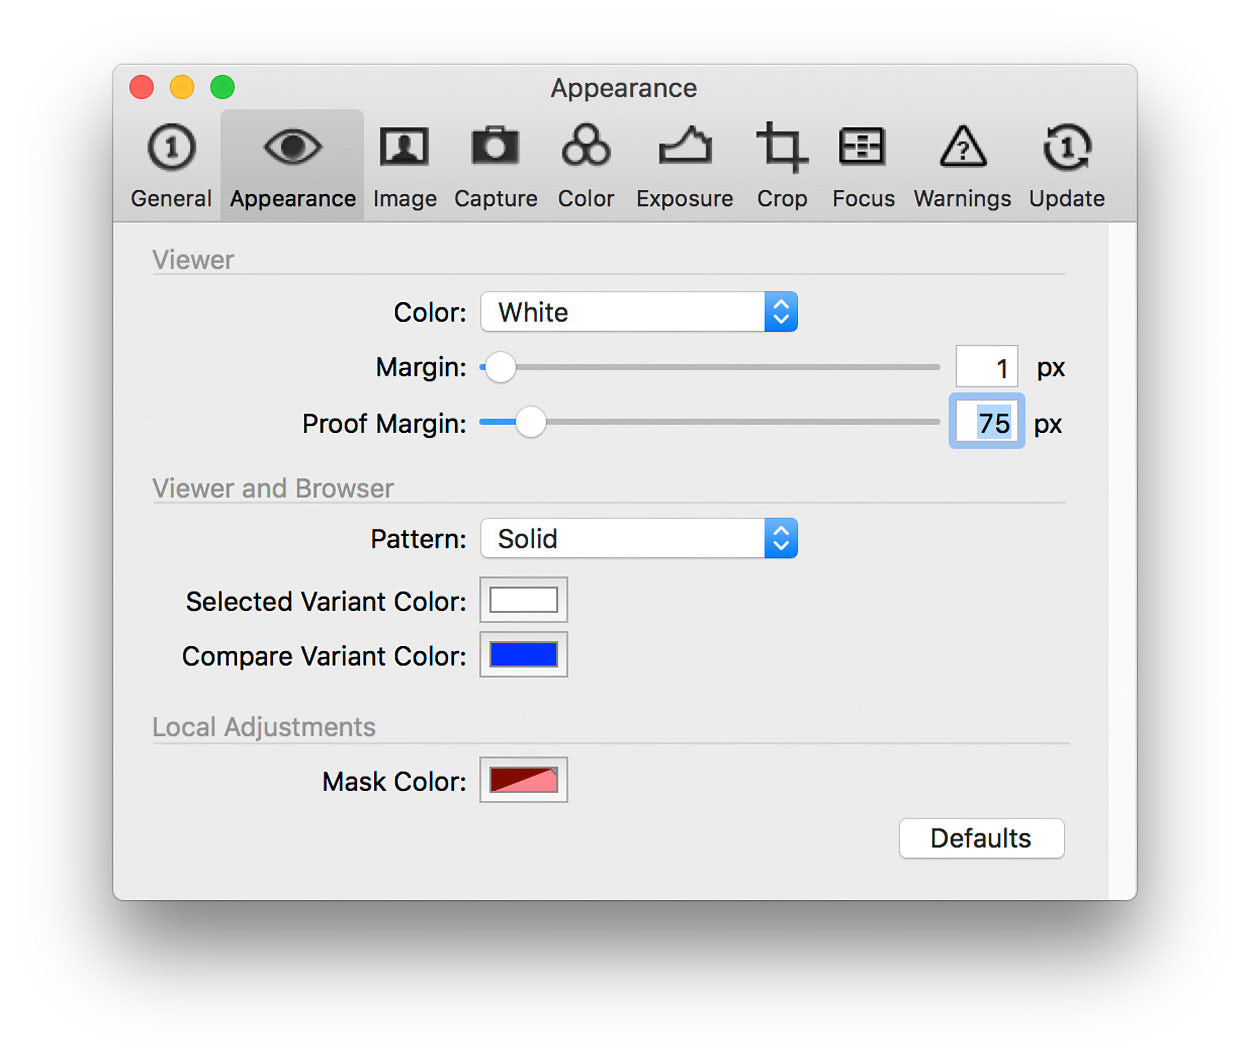
Printing
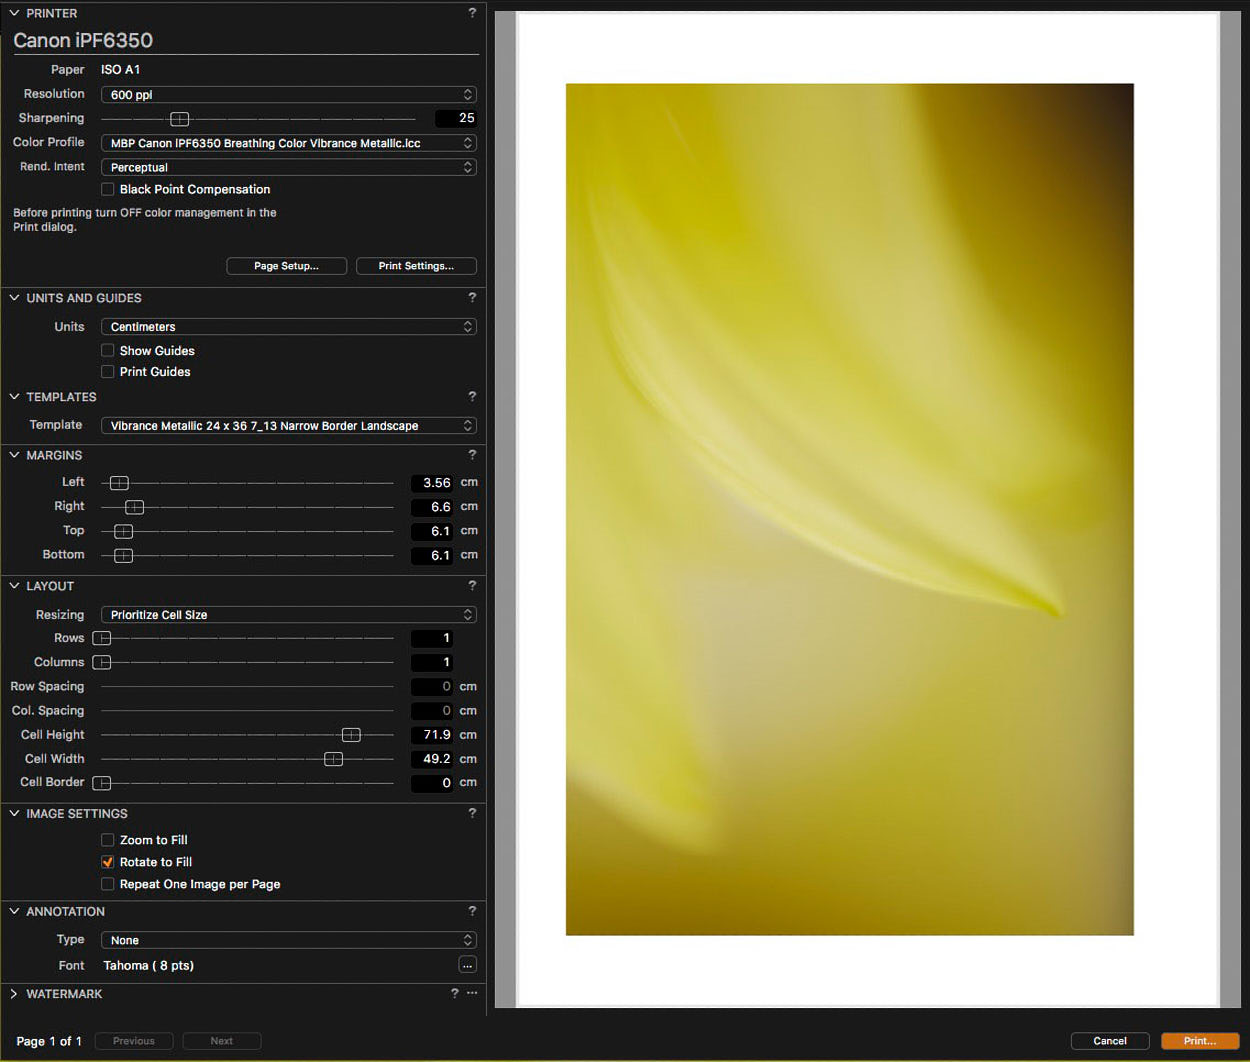
For my final check, I made sure that it is possible to print from Capture One, with specific border sizes, and I wanted to save all of my settings in presets, again, as I don’t want to be re-entering these details every time I want to change media, print size or orientation.

Capture One 9.2 Printing Dialog
At this point, although I have found a way to save my border settings in a preset, or Template as it’s called in the print dialog (above), I have not yet found a way to save all of the print settings in this dialog in a single preset. This means that when I change media, I have to ensure that I change the Color Profile specified for that media in this dialog. I always check that anyway, before I print, so if I don’t find a way to do this later, it’s not going to be a show-stopper for me.
Note: I hadn’t actually printed from Capture One Pro 9.2 at the time of writing, because my large format printer had given up the ghost, but I have been printing from Capture One since, and have generally been very happy with the results.
Checks Complete
This was really the last check I wanted to clear before I made my mind up that I was going to actually jump ship. There are some things that don’t feel as smooth as Lightroom, but that’s probably more a case of me not being fully accustomed to working in Capture One yet. Having said that, it didn’t take long to figure out where things were, and it’s getting more and more intuitive each day.
What will I miss?
There are a few things that I’m going to miss about Lightroom, one of them being Lightroom Mobile. I made good use of Lightroom mobile. Both for sharing work from tours with my wife as I travel, and also for sharing work with potential clients for them to let me know which images they want to license or buy as a print for example. I also keep my portfolios in Lightroom Mobile, so that they are always on my iPhone and iPad, to share with people that I meet.
Because I don’t currently intend to cancel my Adobe Creative Cloud subscription, I’ll still have Lightroom available. Adding my final selects just for Lightroom Mobile is something that I’ll consider, but that’s less than ideal.
Another thing that I’ll miss to a degree is the control Lightroom has over Slideshows. From what I’ve seen so far, Capture One has just one Slideshow mode, with no titles or intro screen, and no way to change the size of the image on the screen.
There’s a way to change the transition type and number of seconds before moving to the next slide. Also, the transitions, other than fade, are tasteless. I thought this didn’t match the level of refinement I found in the rest of the application in any way. Hopefully, this is still a work in progress.
These couple of things are about it, though. I’m sure I’ll miss Lightroom in other ways as I continue to make Capture One my main processing and workflow app, but I’ve been using it for the last few weeks, and I really enjoy it. I’m prepared to work around any other shortcomings I might find.
Preparing to Migrate
With my tests complete, and feeling happy to jump ship, I set about the task of actually migrating my images into Capture One. Here, I learned a few things in the process that I’d like to share with you before we wrap this episode up.
Convert PSD Files to TIFF
As mentioned earlier, Capture One doesn’t support Photoshop PSD files, at least not as of version 9.2. So, you need to convert any PSD files that you might have in your Lightroom catalog to TIFF format. To do this, I created a Lightroom preset as you can see in this screenshot:

Lightroom Save as TIFF Export Preset
The important thing to note here is that you can select Same folder as original photo for the Export To location. This means you can run this on all of your PSD files at once, without have to worry about where they are and specifying the save location. They’re just go right where your PSD files are, and you can then delete your PSD file.
Also, ensure that you turn on the Add to This Catalog checkbox, so that you don’t have to manually add your TIFF files back. Then select TIFF under File Settings as the Image Format, I don’t use any Compression. For the Color Space, select ProPhoto RGB if you want to keep your images in as high quality as possible. However, if you don’t use ProPhoto RGB already, you might as well select whatever Color Space you do use. Keep the Bit Depth at 16 bits/component as well.
The Resolution isn’t really import, but I always use 300 pixels per inch because that’s what I use as a base for all of my printing. I also use All Metadata, and of course you don’t need to watermark these images, so ensure that isn’t checked.
Keeping Layers in PSD Files
The only problem with this method of exporting your PSD files as TIFF is that the images will be flattened. So, if you have any layers in your PSD files, you’ll need to open each of them in Photoshop and then save them as a TIFF file manually. This ensures that you turn on the Layers checkbox to preserve the layers in the file. If you have a large number of PSD files with layers, you can also create an Action in Photoshop to save them as a TIFF with layers.
Clean up your Collections
The next thing I did was to clear out any Lightroom Collections that I didn’t need. Partly because when you import a Lightroom Catalog into Capture One, it’ll create a User Collection and add the images that were in your Lightroom Collections into these new User Collections.
If you have a lot of PSD files in your Lightroom Collections, you also need to replace these images with your new TIFF files manually. So, the less Collections you maintain, the less time you’ll spend on this task. In Lightroom, I selected my Collections and turned on the Metadata filter. Under File Type I selected Photoshop Document (PSD).
This shows all of the PSD files in the collections. Then I was able to right click each PSD file and jump to that image in the Library. I added the new TIFF file that was next to the PSD to the Collection that the original PSD was in. I also right clicked each PSD file and rolled over the Go To Collection option, to see if the PSD file was in any other Collections. If it was, I dragged the new TIFF file to these other Collections too, and then deleted the PSD file.
Once you know that you have all of your PSD files converted to TIFF and check that there are no more PSD files in your Lightroom Collections, you can filter out all of your PSD files again, and delete them. Be careful that you really do have a new TIFF for each of them first, but as long as you do, it’s safe to delete your PSDs.
Export Lightroom Catalogs for Each Import
After this, I exported my main Lightroom Library structures as new Catalogs. In Lightroom I was able to keep my Final Selects and all of my original RAW files in one catalog, something Capture One doesn’t like. The Catalog gets huge if you import too many images, so I started by splitting my images into three catalogs.
One catalog called Finals, with all of my final selects from all time; a 2016 folder with all of my raw files from this year; and an archive folder called Photo Originals, in which I have year folders from 2000 to 2015. To make the importing of these to Capture One easier and maintain my Collections, I right clicked each of them and selected Export This Folder as a Catalog.
I unchecked the three checkboxes so that I didn’t Export negative files, Build/include Smart Previews or Include available previews in my new Catalog. With these three top level folders exported, I was ready to import into Capture One.
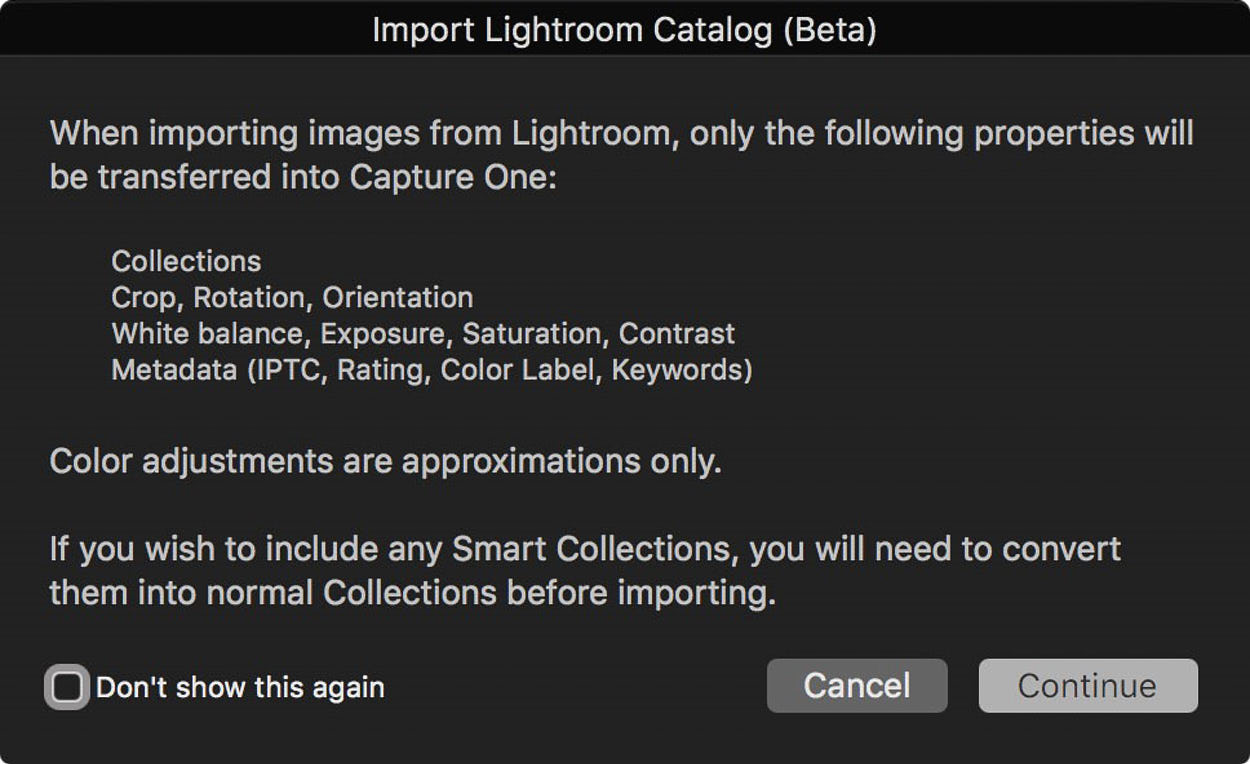
Importing Lightroom Catalogs into Capture One
To import a Lightroom Catalog, from the Capture One File menu, select Import Catalog and then Lightroom Catalog. The following dialog (below) will tell you what information will be imported. At this point in time, this included Collections, Crop, Rotation and Orientation information as well as White Balance, Exposure, Saturation and Contrast settings, and Metadata, including IPTC, Rating, Color Label and Keywords.

Capture One Import Lightroom Catalog Dialog
There’s a note about Color adjustments being approximations, and I noticed some images that were totally off. Those were probably the ones which I’d applied a custom white balance to in Lightroom. The White Balance was like 860K, to they were a shocking bright blue. I went back through these and corrected the White Balance. It wasn’t a big job.
Catalog Considerations
After I imported my three main catalogs to Capture One, I checked the size of my new Catalogs, and my @Finals Catalog was 8.8GB, which is manageable. My 2016 current year originals is 21GB, and will probably be around 30GB by the end of the year. Even though that’s big too, I don’t want to split it up.
My Photo Originals Catalog, with every image I’ve shot since 2000 to the end of 2015, was a massive 174GB, but I was able to import this into Capture One. However, when I reopened Capture One it froze and I had to delete my corrupted catalog. I ended up splitting my old original raw catalogs into individual years.
Working on Multiple Computers
My blog readers might also remember that I’ve historically kept my Lightroom Catalog on an external Thunderbolt hard drive. That way, I could move easily from computer to computer, simply by moving the hard drive. At the moment, I’m not quite there.
With the actual folder in my Dropbox, I’ve set up Capture One with a symbolic link to its settings folder. That way, all of the presets and settings automatically synchronize between my computers. If you don’t know how to create a symbolic link, there’s too much risk in me telling you, so we won’t go into this.
I’m also currently synching my Catalogs between machines using ChronoSync, but that’s something that we don’t really have time to get into today.
No Turning Back
There are a few annoying quirks in Capture One, as I’ve mentioned before. However, nothing at this point has made me feel disappointed that I’ve decided to switch. In fact, the last few weeks have been a lot of fun, as I’ve dissected my digital workflow and rebuilt it in a totally new application.
I’ve done a number of shoots and imported my work directly into Capture One, and I love pretty much everything about it. The image quality and control is making me totally happy with my decision to jump ship. This is more than enough of a reason to overlook its few shortcomings.
I think the last time I used the term “jump ship” in the Podcast was around seven years ago when I decided to switch from Windows to Mac computers. This actually feels almost as big a move, and it’s both disruptive and time consuming, but it feels right. I already feel at home in Capture One, so this is it. I’m no longer a Lightroom User.
Update – Oct 2016: I have now processed all of my images from Greenland and Iceland tours in August and September in Capture One. I’m even more in love with it now than I was when I wrote this article.
The Bottom Line
If you want an application that works exactly the same as Lightroom, then you’d better stay with Lightroom. This is why I stayed with Lightroom for such a long time. However, if you want the ultimate image quality, and you are willing to make changes to your workflow, I personally think it’s worth the change.
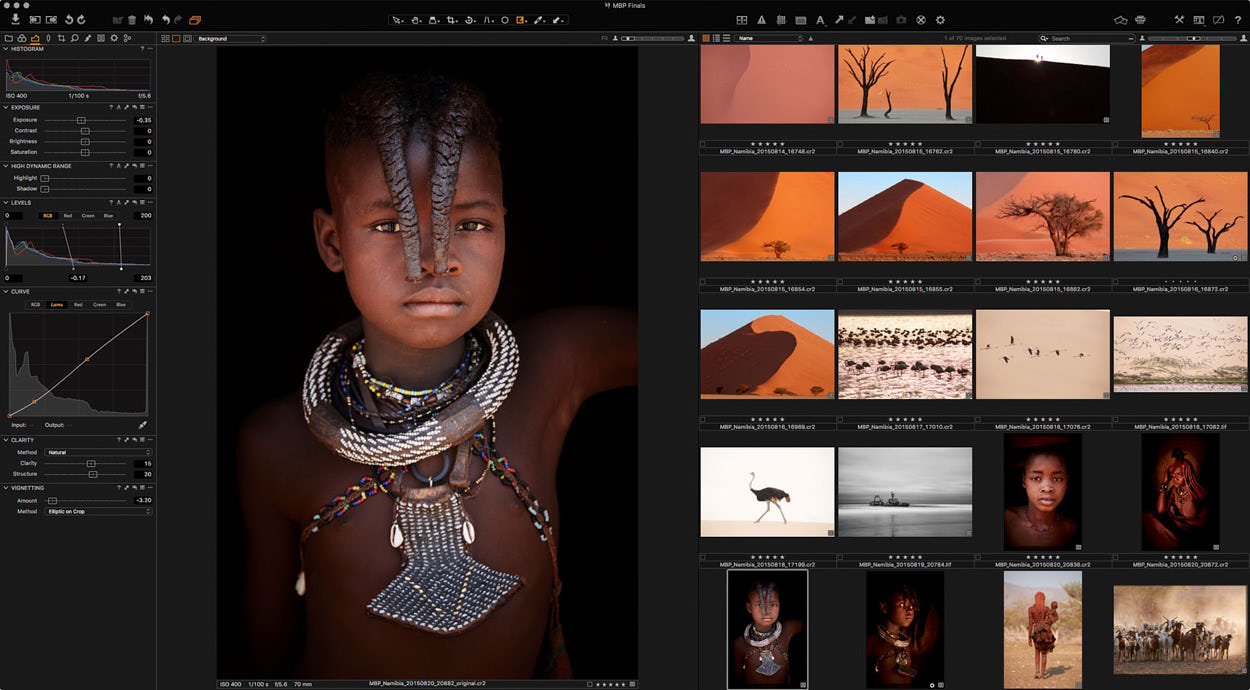
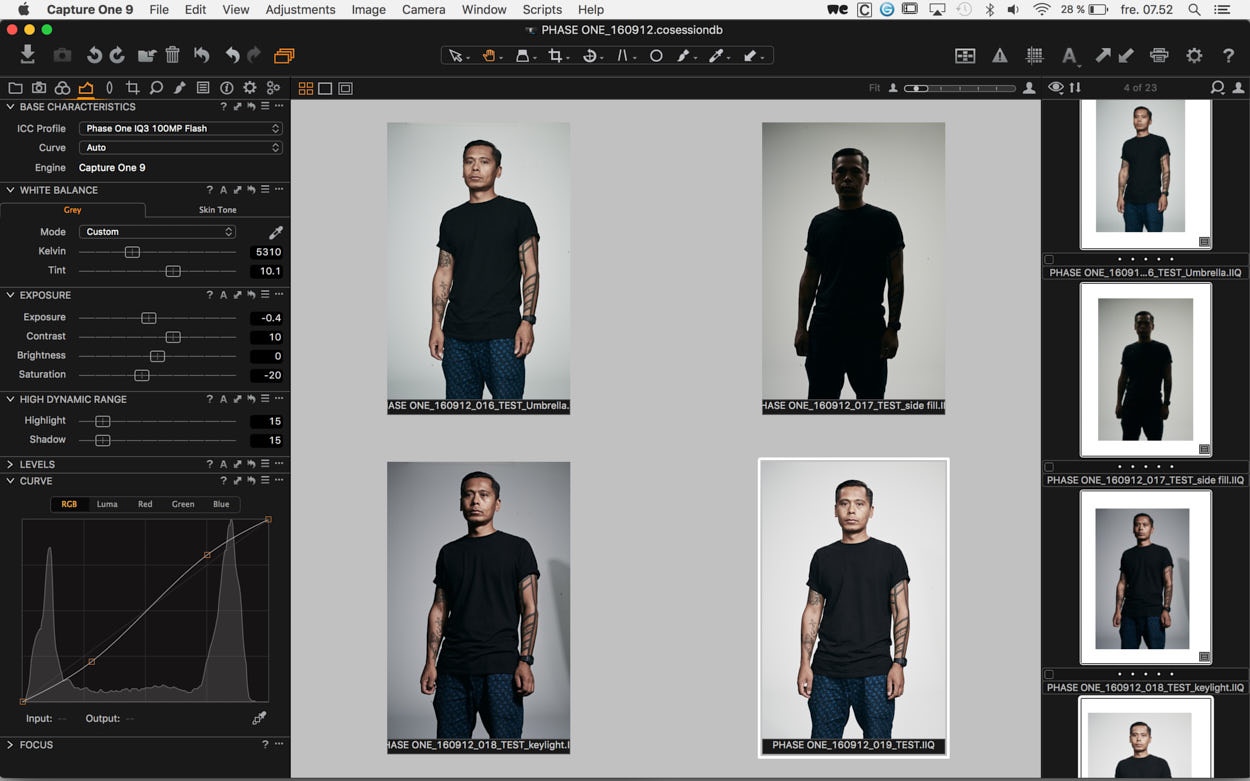
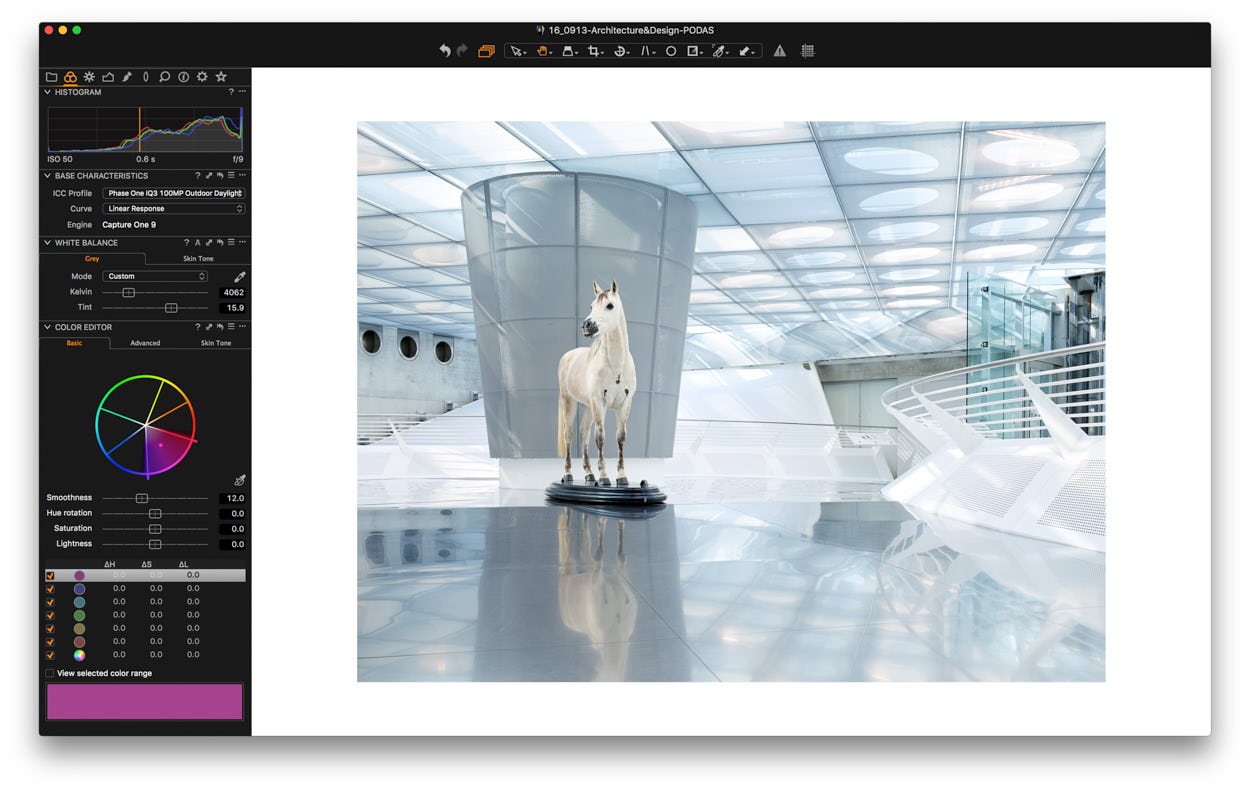
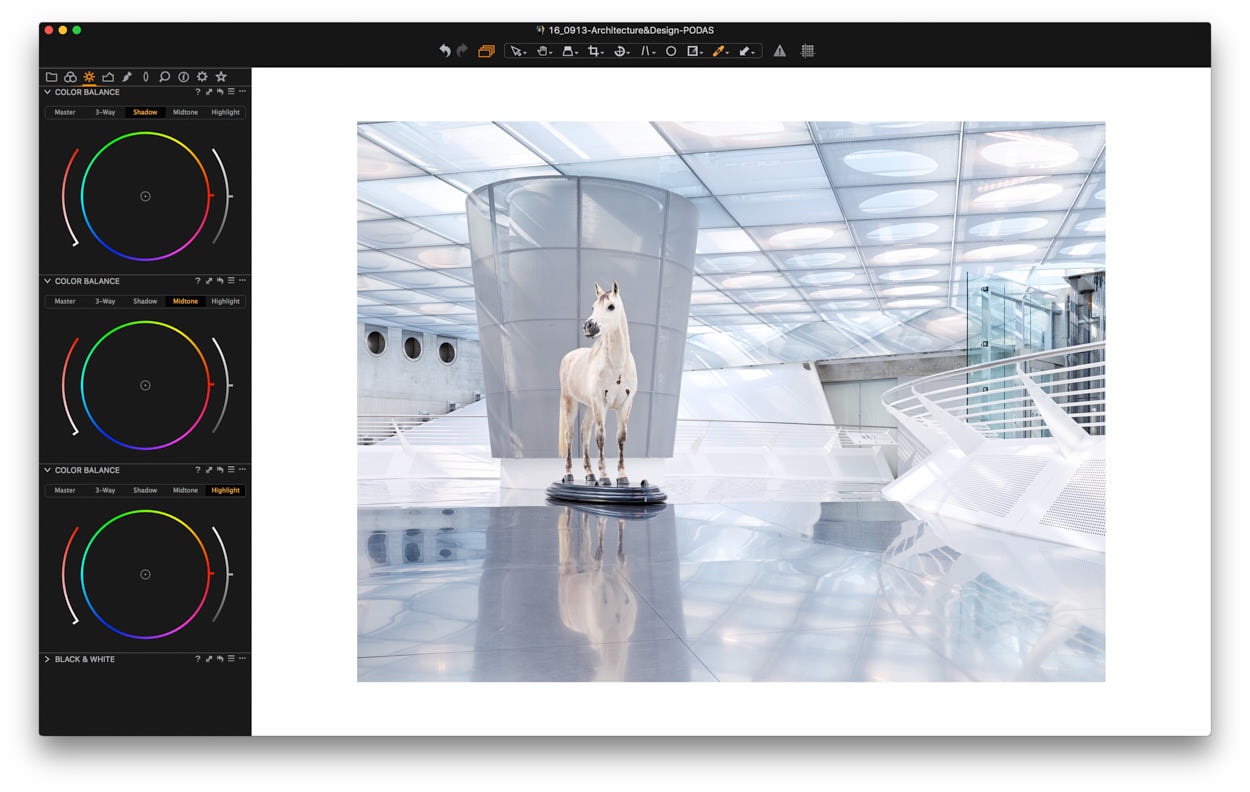
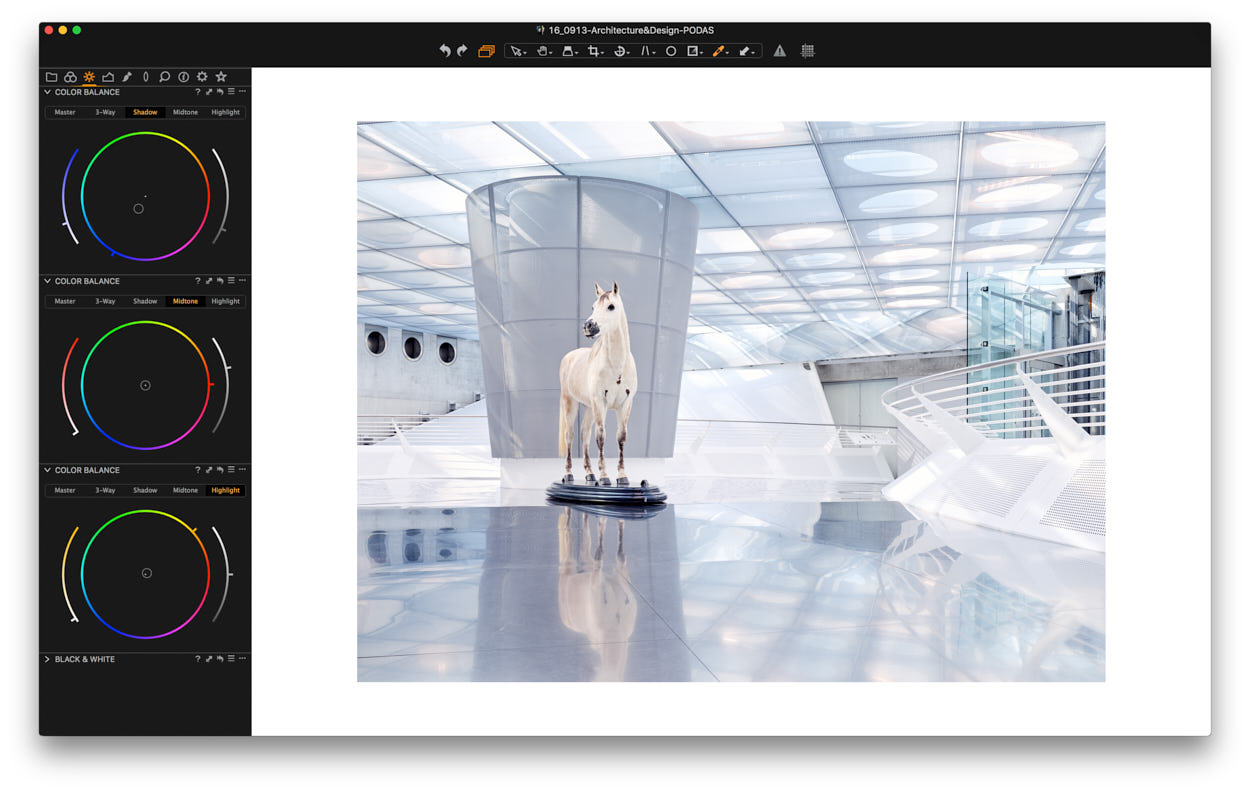
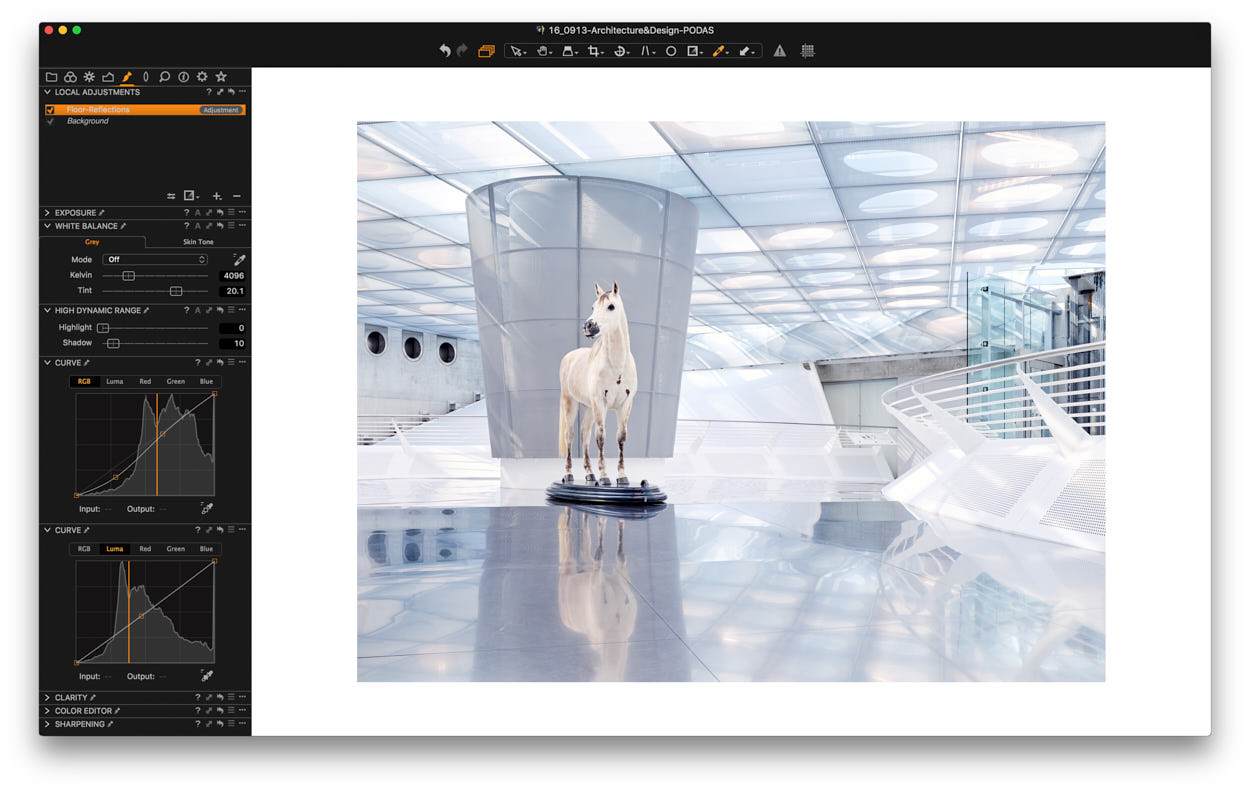
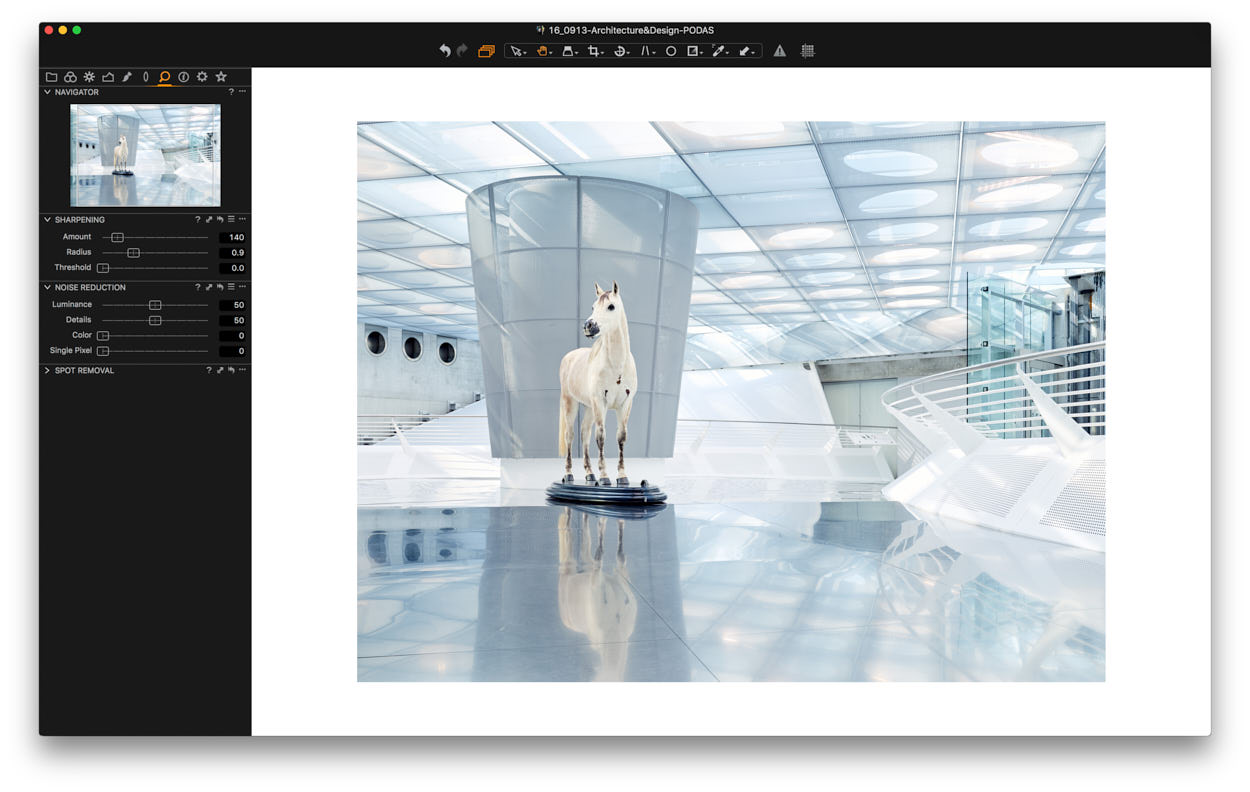
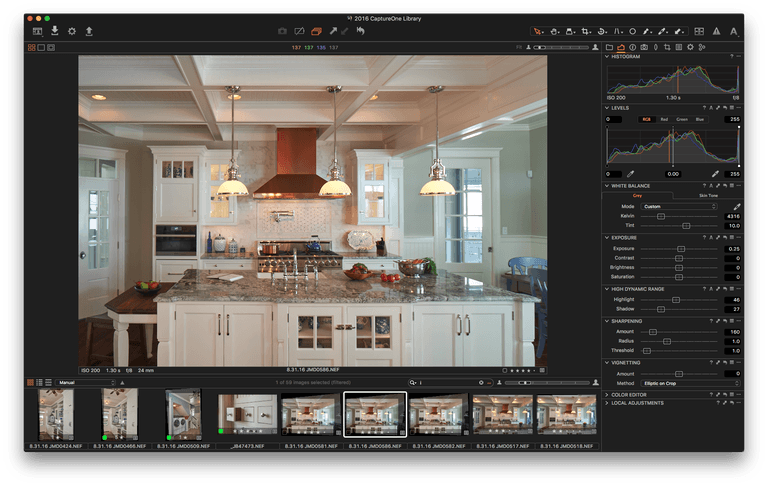
Capture One Pro 9.2 Screenshot
7 Day Trial of Capture One
Note that you can download a fully working trial version of Capture One and try it for 7 days. This is without any costs. My recommendations is to download it and see if you love it as much as I already do.