NOTE: This article discusses an outdated version of Capture One. To learn more about our latest version, click here.
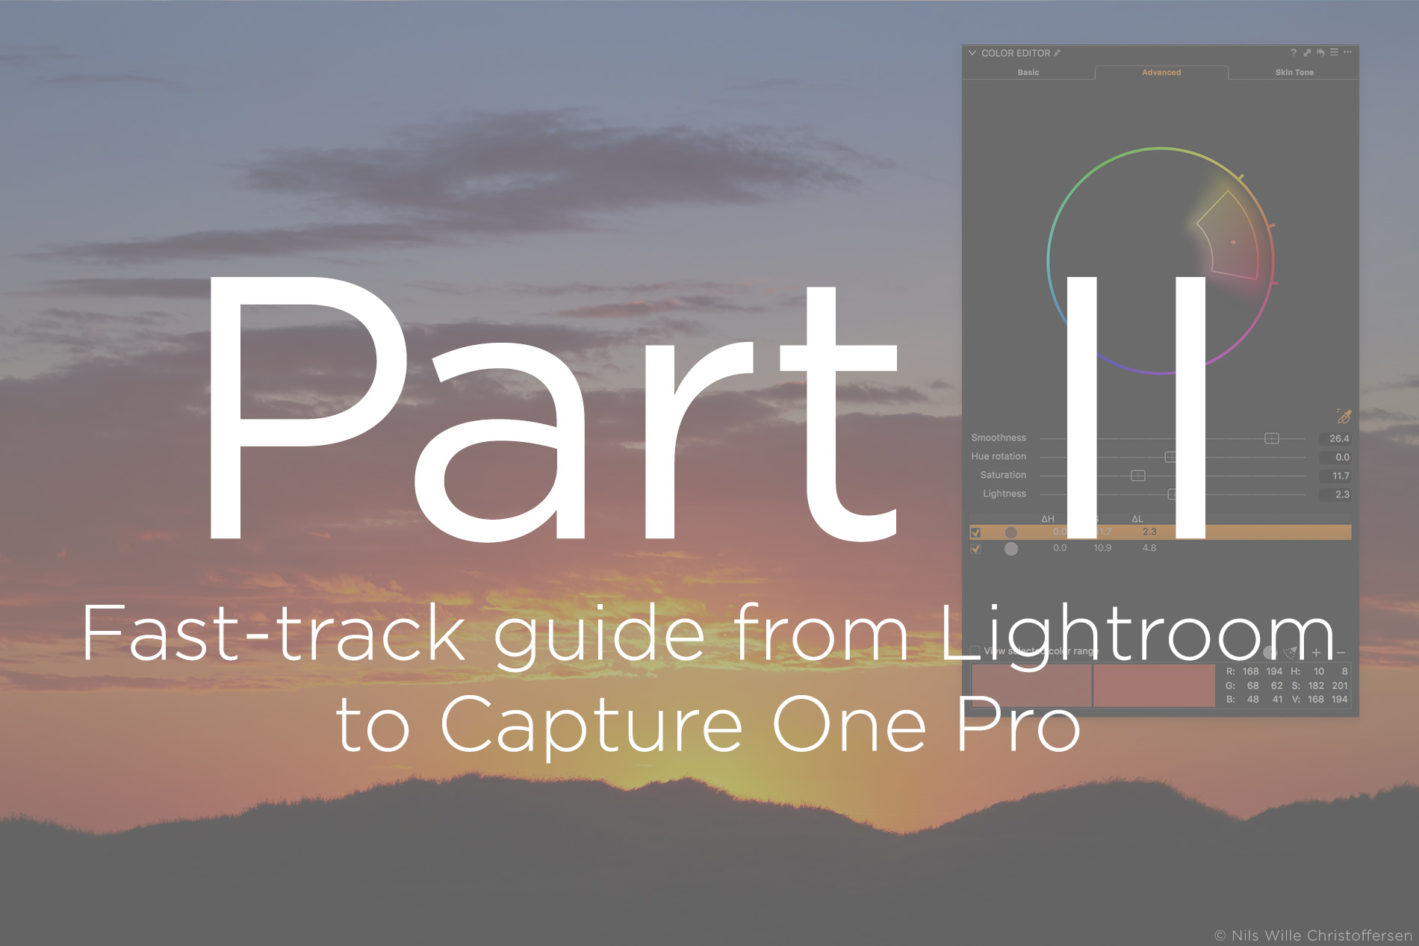
In this Part Two of the Fast-track Guide from Lightroom to Capture One Pro, we will look at the key differences between image editing features in the two programs. You will also get to know about some of the most powerful adjustment tools that Capture One Pro offers over Lightroom.
Just like in Lightroom, all adjustments are done non-destructively on the image files, so there is no harm in experimenting with the many editing tools in Capture One Pro. You can always reset everything by selecting Adjustments > Reset, and if you need to reset just one Tool, click on the little icon with the arrow pointing to the left. With that out of the way, let us first look at the image adjustment tools that are familiar to those from the Basic panel in Lightroom.
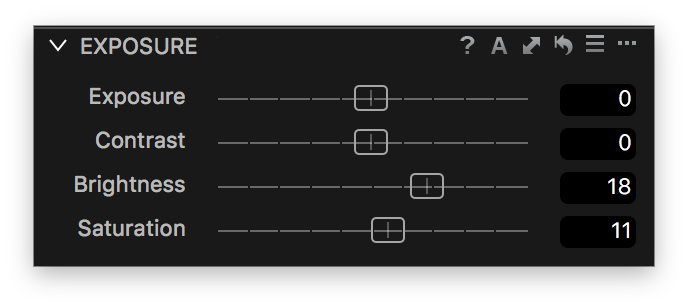
The Brightness slider works great when you want to brighten mostly the midtones.
The sliders in Exposure Tool works like you would expect, but with one notable difference. Saturation is more akin to Vibrance in Lightroom as it primarily saturates the more subdued colors while affecting the saturated tones less. It works so well that you will probably not miss having the separate Vibrance and Saturation sliders from Lightroom.
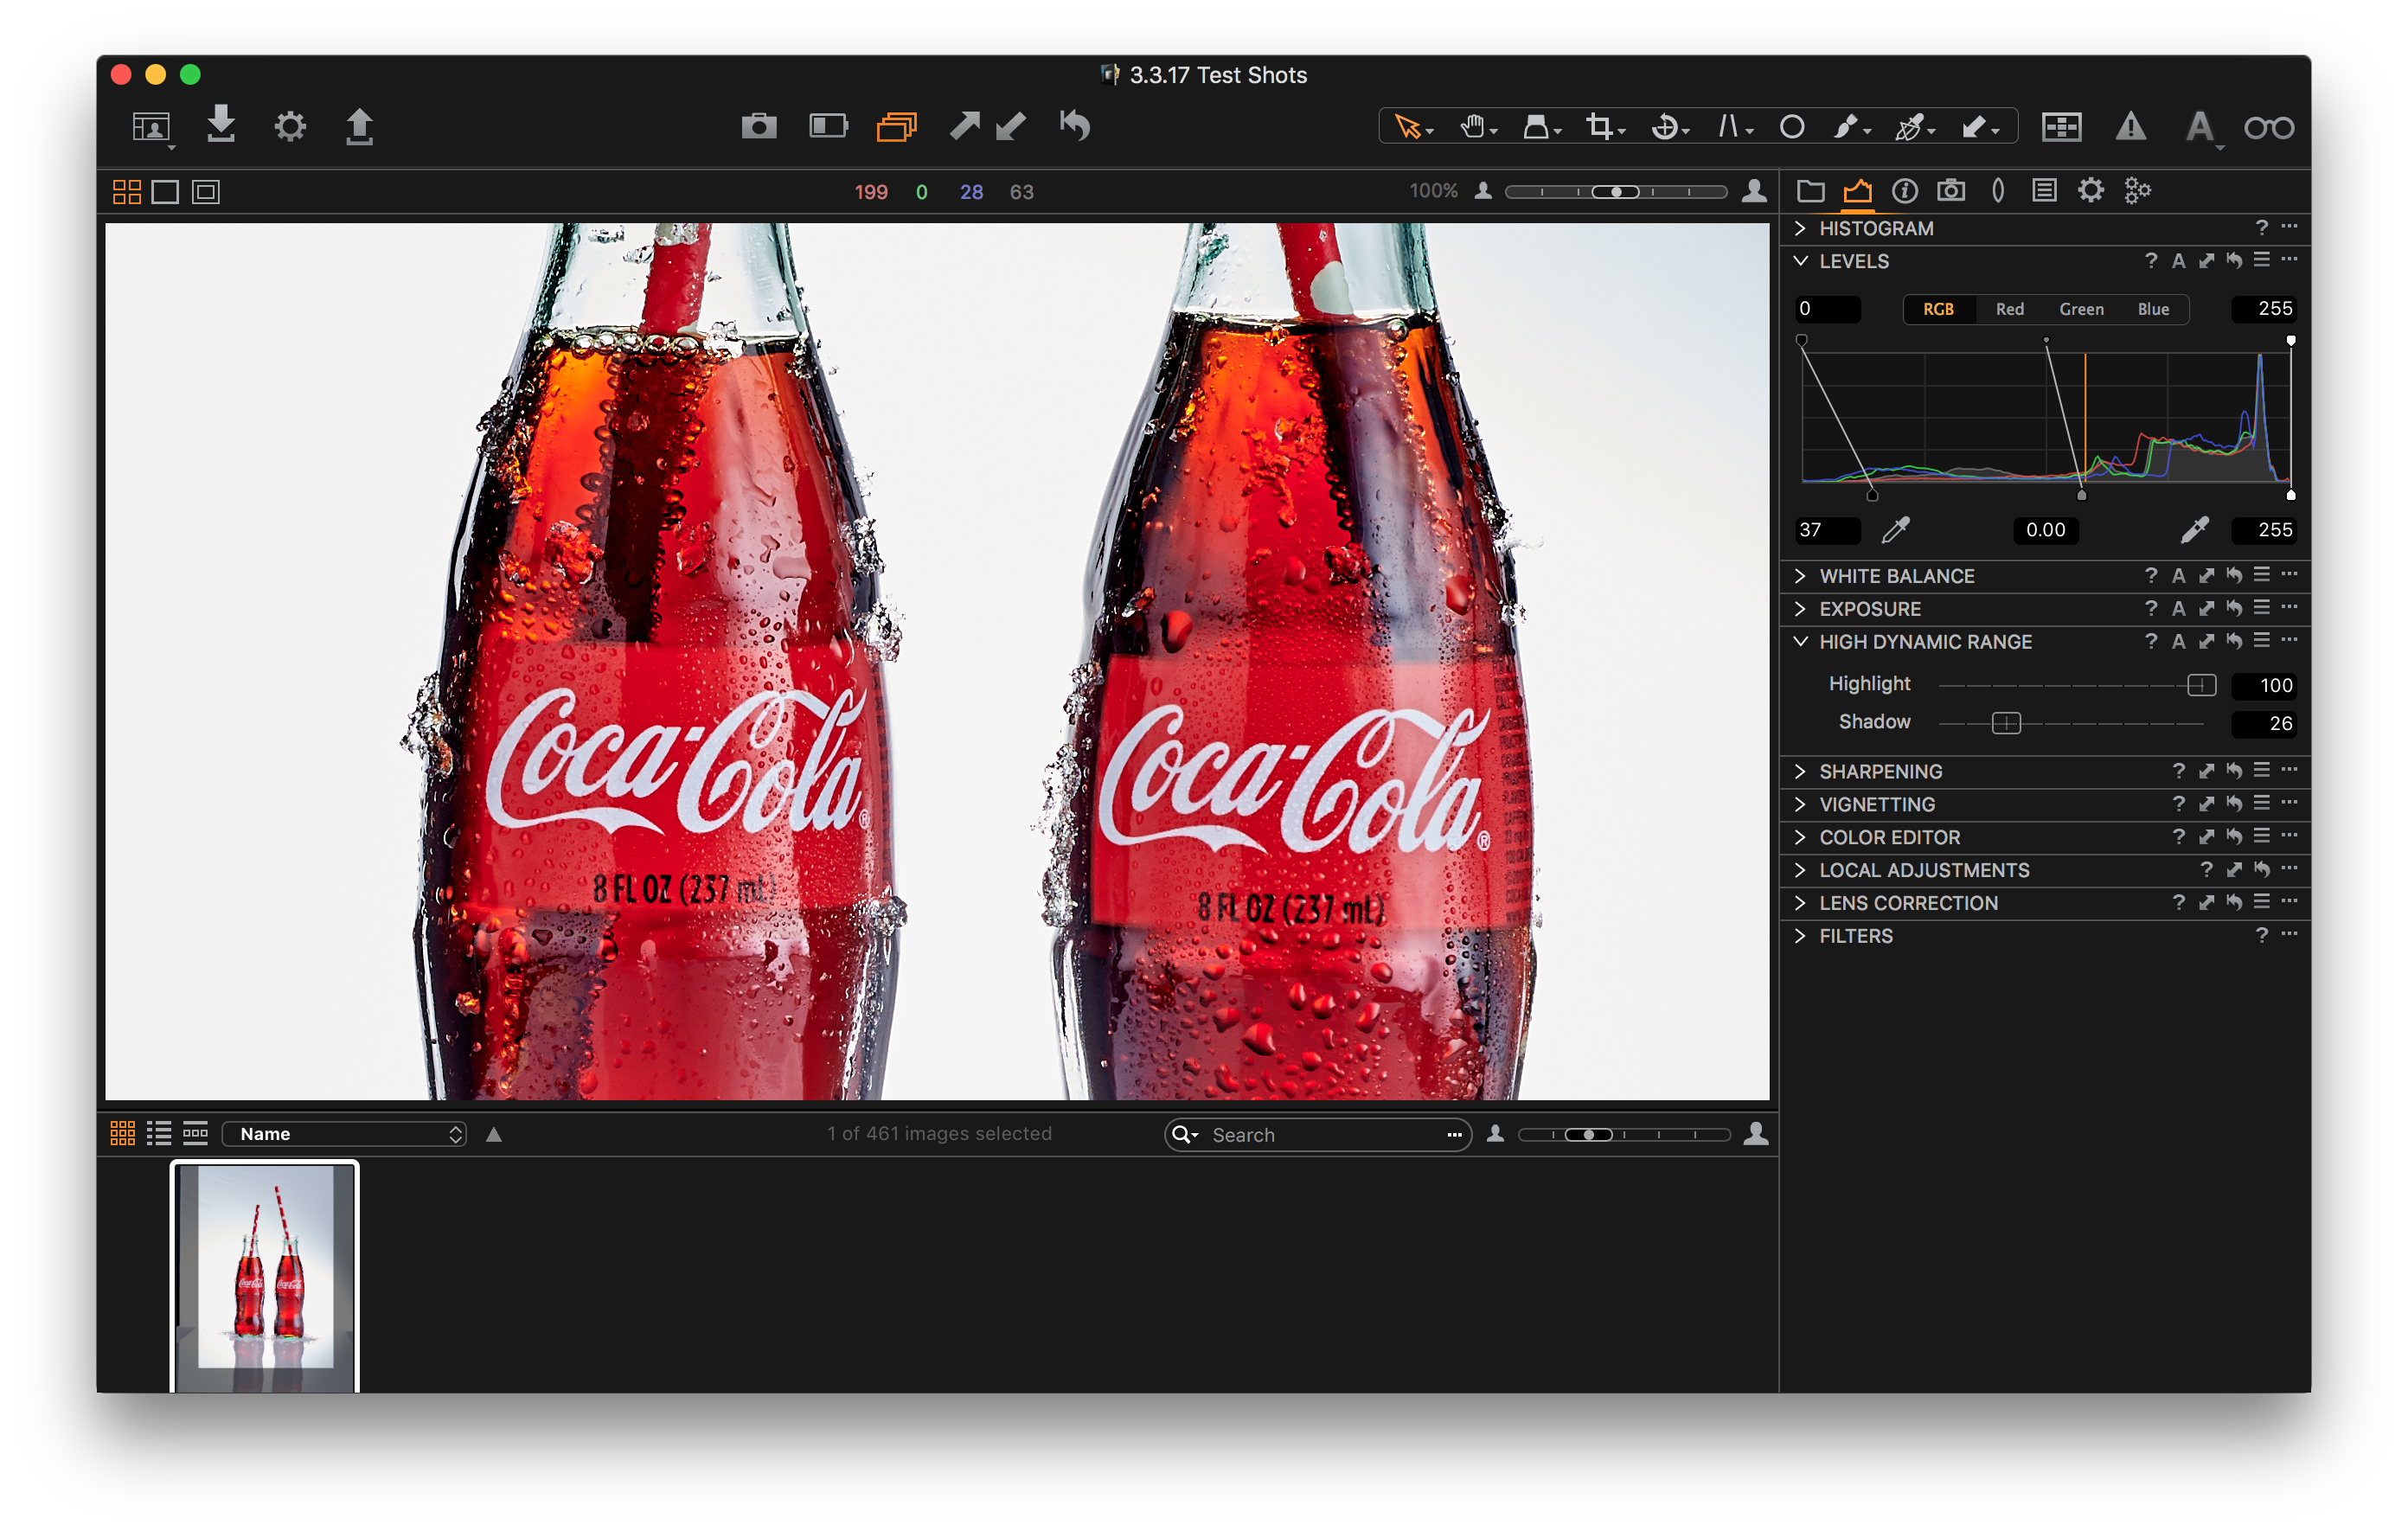
The Black and White sliders in Lightroom is used to set the black and white point in the image, and this is done with the Levels Tools in Capture One Pro.

The Levels Tool is excellent to establish the base contrast by setting the black and white points.
The tool works exactly like you are used to in programs like Photoshop, so it can obviously do more than simply adjust the black and white points. Hitting the A icon in the Levels Tool will automatically set them both, and that is a very handy shortcut to remember.
The Highlight and Shadow sliders in the High Dynamic Range Tool work like their counterparts in Lightroom. Although you can’t expect them to have the exact same effect on the images – Shadows tend to brighten the midtones a bit more in Capture One Pro – they do a great job.
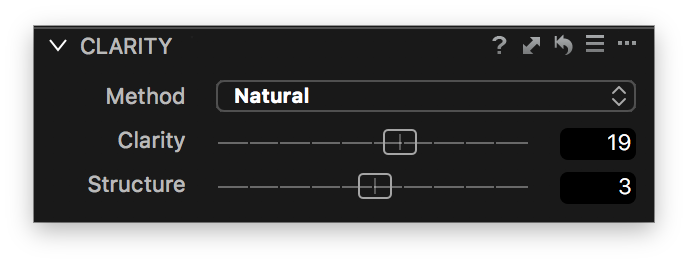
Give your images more punch and bite with Clarity and Structure.
The Clarity feature from Lightroom is split up in two, separate sliders called Clarity and Structure, and this is often a big benefit when editing your images. Now you can apply Clarity to a photo without the crunchy look you might get with the equivalent tool in Lightroom, or conversely, add a bit of bite with Structure without adding Clarity. In most circumstances, you want to leave the Method to Natural.
The Curve Tool in Capture One Pro is comparable to the Tone Curve in Lightroom, if you have switched it to Point Curve. It’s obviously also similar to the equivalent tool from Photoshop, but it has one very cool feature that you absolutely need to know about.
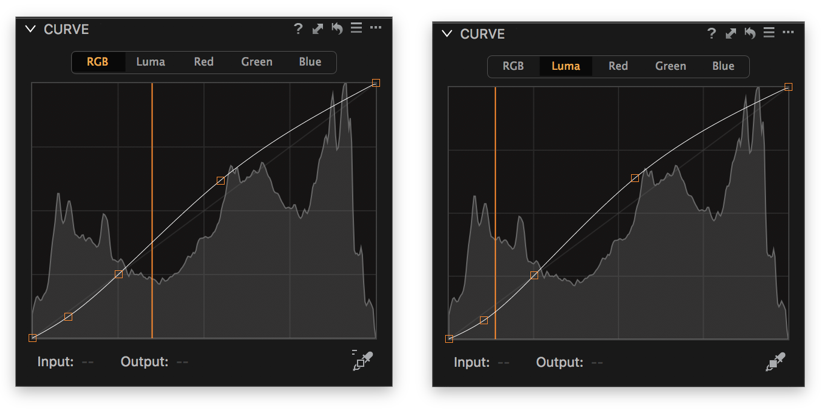
Working with both the RGB and Luma Curve to affect or preserve colors.
You can either use Curve to work in the RGB mode, where colors will be affected by any changes to the curve, or in Luma mode where you are only affecting the luminosity levels. The Luma curve is the perfect choice when you are working on subtle tones like a skin tone, where you don’t want the colors to shift. It is also a powerful choice when working on product shots where delicate or specific colors are not allowed to change.
Lens corrections and sharpening
The Tools used to apply lens corrections, sharpening and noise reduction are straightforward to use when you are coming from Lightroom. There are a couple of notable differences, especially regarding two new features in Capture One Pro 10.
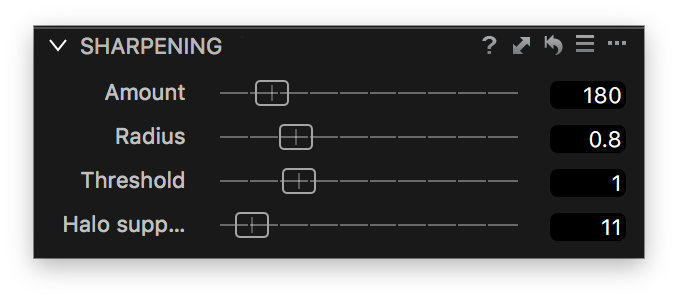
Remove sharpening artifacts with the Halo suppression slider.
The first new feature is that version 10 has added Halo suppression to the Sharpening Tool in order to remove halo artefacts along edges when using a high amount of sharpening. This is similar to lowering the Detail slider in Lightroom below 25. The second new feature is the Diffraction Correction in the Lens Correction Tool.

Improve the detail when shooting at small apertures with Diffraction Correction.
This will mitigate the slightly blurry effect that shooting with small apertures like f/16 will have on the image. This deconvolution technique is comparable to setting the Detail slider in Lightroom to 50 or higher.
Another thing you need to know about the Lens Correction Tool is that while Capture One Pro will automatically recognize the lens used if possible, the tool will not always automatically apply a Distortion correction by setting the slider to 100%. If Capture One evaluates that the lens model has a low distortion, it will keep the slider at 0%. You can obviously change this if need be. The Lens Correction Tool has one additional feature that you should know about. The Sharpness Falloff slider will apply extra sharpening towards the corners, so if your wide angle lens tends to be a bit soft there, you can mitigate that somewhat with this feature.
As a new user to Capture One Pro, there is one important change to be aware of with the Noise Reduction Tool. Both the Luminance and Color sliders are by default set at are by default set at 50, even at very low ISO values. This is different from Lightroom and it does not imply that a hefty dose of noise reduction is applied.
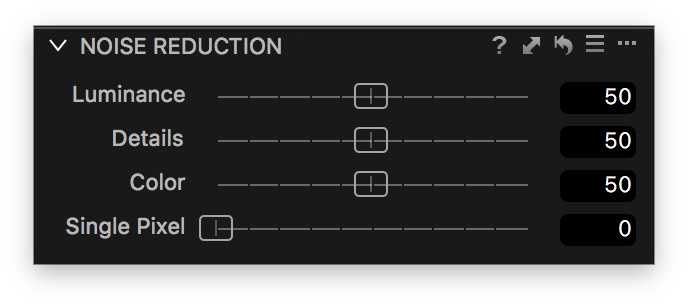
Use Single Pixel to remove hot pixels from long exposures.
Think of them as sliders that control the balance between detail and noise reduction. When at 50, it merely means that this is what Capture One regards as the best balance for your camera and the ISO used on the selected image. The tool also has a very nice feature called Single Pixel. With this slider, you can remove those nasty, hot pixels that often show up on long exposures, especially during the night.
Base Color Profiles
In Lightroom you typically have several different Profiles under the Camera Calibration panel to choose from, and they all render the raw files differently. Capture One has taken another approach. While there are usually just one or two ICC Profiles in the Base Characteristics Tool, the colors have been tweaked to look great on many different subjects captured with the camera. This is one of the reasons why raw files are typically rendered very pleasing with the default settings in Capture One Pro.

Choosing the Linear Response Curve will give you a flat tonal range which can be appropriate for heavy contrast adjustments.
Note that you have the option to choose from different Curves in the Base Characteristics Tool. Those mainly affect the light balance, and for most intents and purposes, you should probably just leave it at Auto.
Superior Color Adjustments
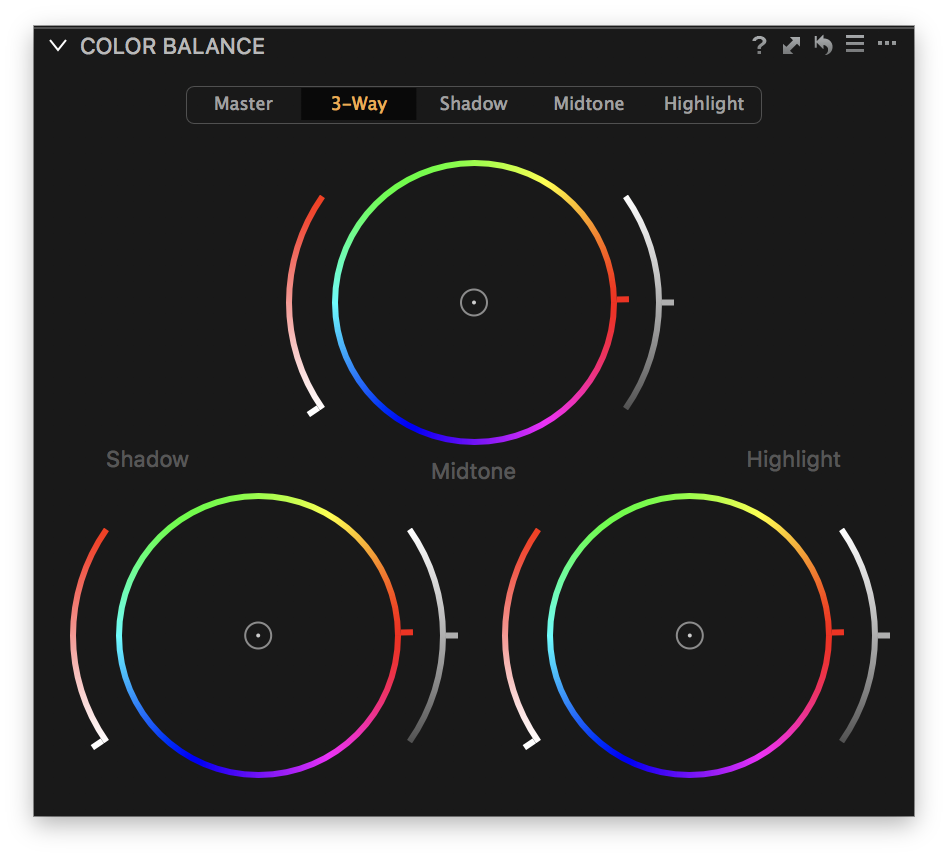
The Color Balance Tool is an excellent feature that has no equivalent in Lightroom. It is similar to the Color Grading concept in video editor apps, if you’re familiar with those. The 3-Way option is especially powerful as it makes it possible to adjust the color tint separately in the shadow, midtone and highlight areas.
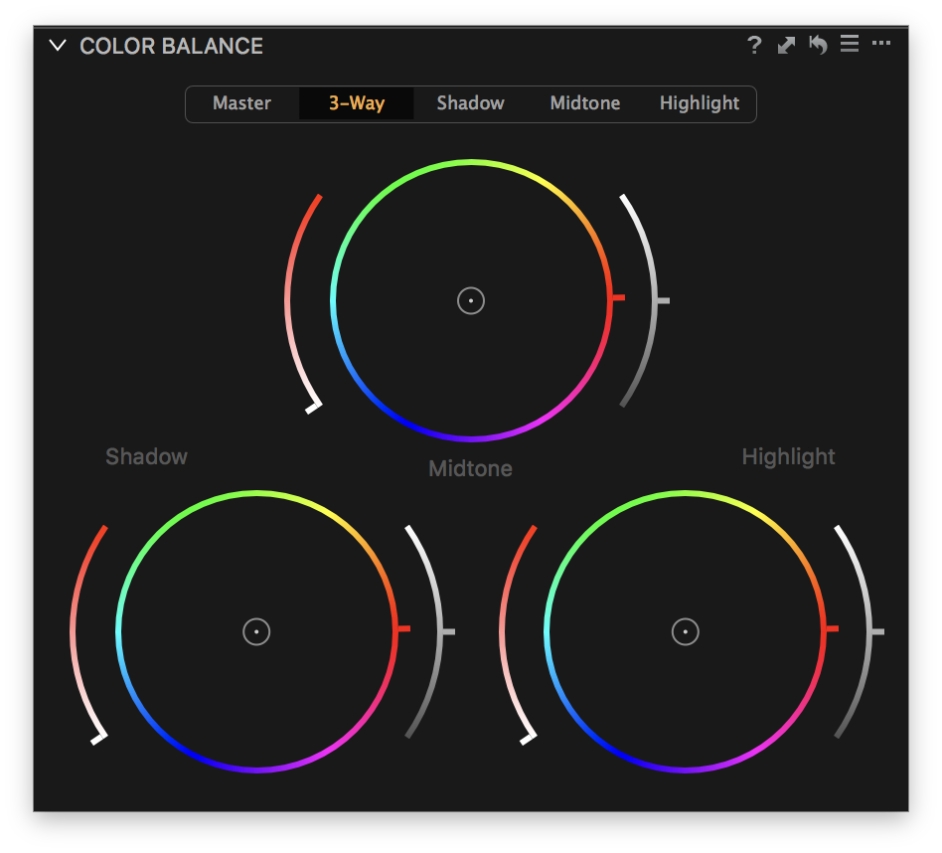
The Color Balance Tool is a fantastic way to add a creative style and look to your images.
Note the color wheels have two additional sliders that let you adjust the saturation and the lightness of each of the three tonal ranges. It’s a brilliant way to add a creative color style, so don’t forget to play with it.
The Color Editor Tool is arguably one of Capture One Pro’s strongest advantages. Where Lightroom limits you to eight colors within the HSL panel to work on, with Capture One Pro, you have full freedom to choose a specific color to affect. Just remember to select the Advanced tab first, then click with the Pick Color picker in the image to choose the color that you want to adjust. You can then fine tune the affected color range on the color wheel and adjust Hue, Saturation and Lightness as you are used to in Lightroom.
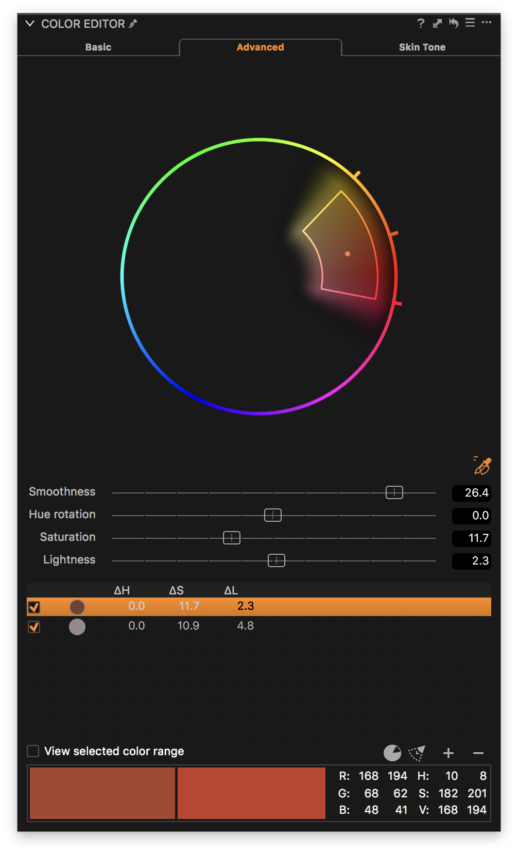
Note that you need the Pro-version to get the advanced Color Edition features. The Express version only contains the Basic tab.
A useful feature is the ability to invert your color selection by clicking on the Invert Slide icon, and then, for example, reduce the saturation or lightness.
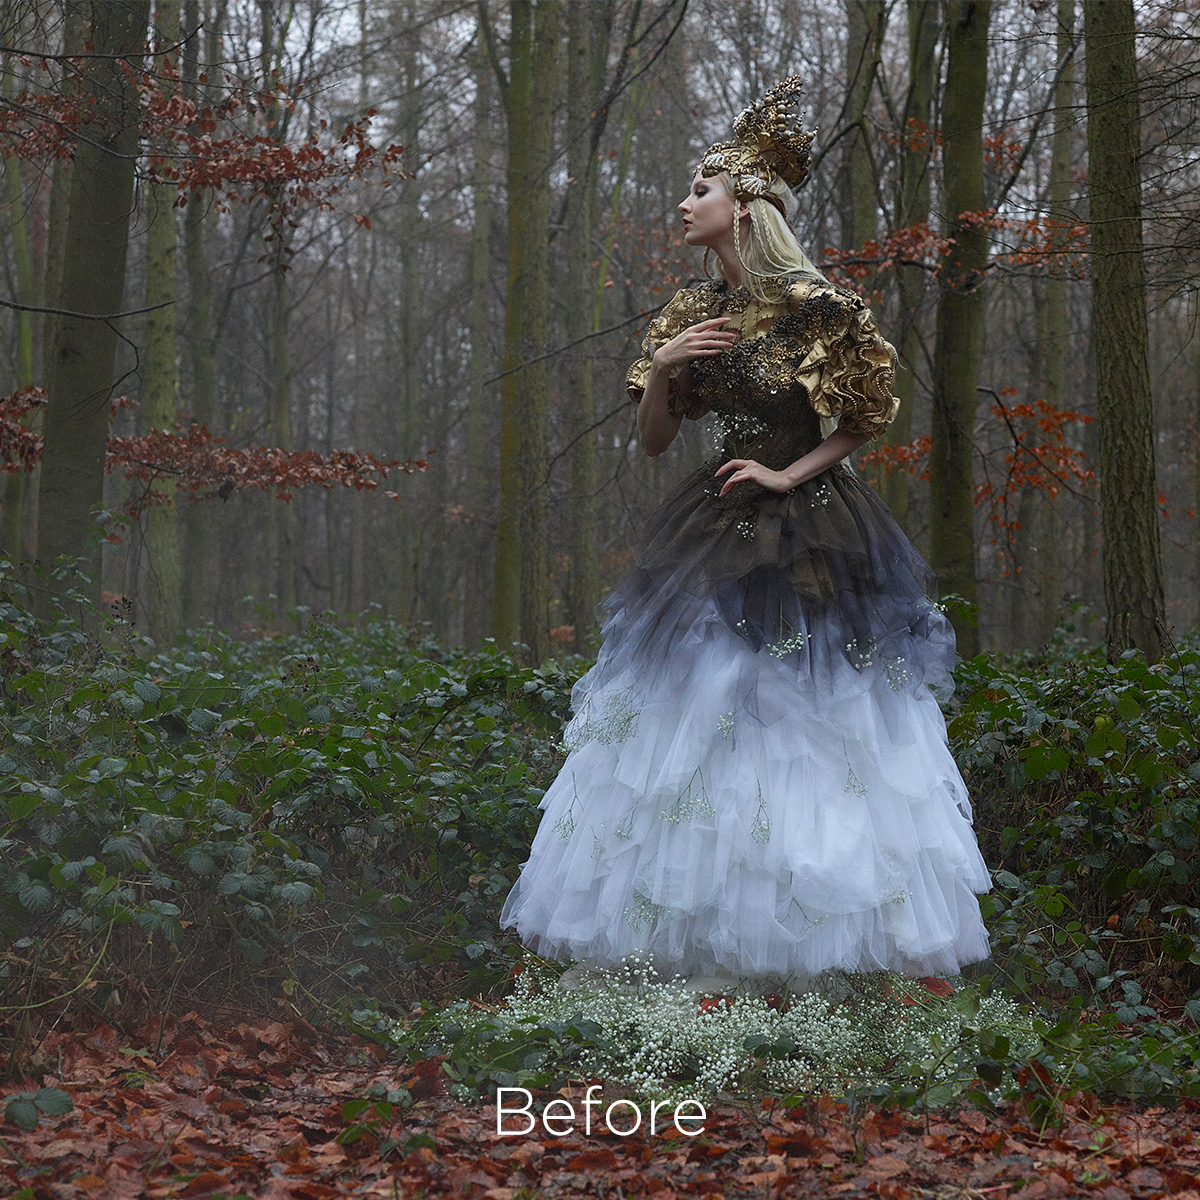
The fun doesn’t stop there. You get some additional, powerful features when you choose the Skin Tone tab in the Color Editor. Once you have selected a certain color range, you can even out any differences in the Hue, Saturation and Lightness within that area. This is done with the sliders under Uniformity.
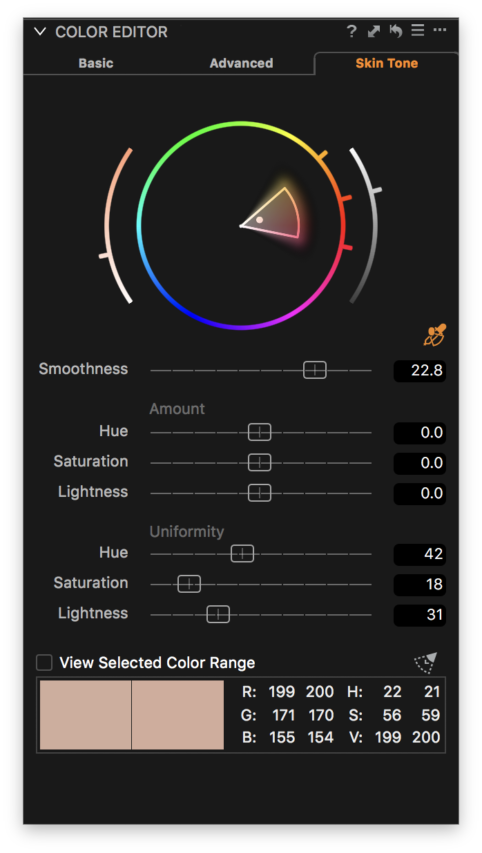
Skin Tone is a superb tool to even out skin tones or other areas where to colors need to be more similar.
Not surprisingly, it is perfect to get cleaner, more even skin tones, but it works equally well if you want to smooth out other colors like a blue sky. There is one power-user trick you should know about. Any color selection that you make with the Color Editor Tool can be converted into a mask and is automatically saved as a new Local Adjustments layer. This is done by clicking on the three-dot icon and selecting Create Masked Layer from Selection.
This is a very powerful feature because it allows you to use a lot of different image adjustments on the masked area with familiar tools like White Balance, Curve, Sharpening, Clarity and even the Color Editor.
Local Adjustments
Working with local adjustments is a bit different than in Lightroom and more similar to working with layers in Photoshop. Once you select the Local Adjustments Tab, you will see the layer stack on top and all the possible Tools preloaded below it.
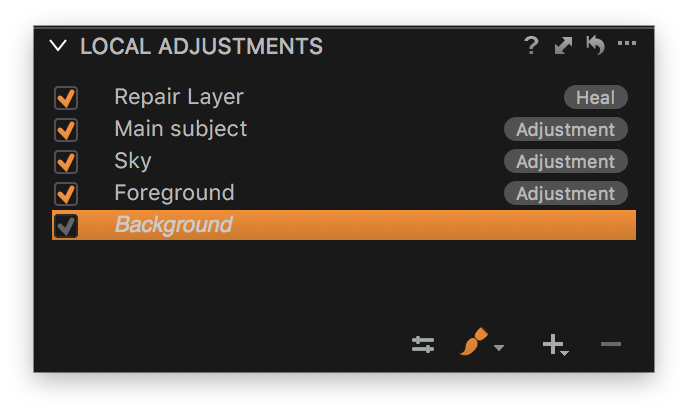
You can toggle the visibility of a Layer on and off by clicking in the visibility box.
A layer in Capture One Pro can contain either adjustments, cloning or healing, so remember to choose the appropriate type. To use a Local Adjustment, you simply draw a mask with either a brush or a gradient. Press M to toggle the visibility of the Mask on and off as an overlay.
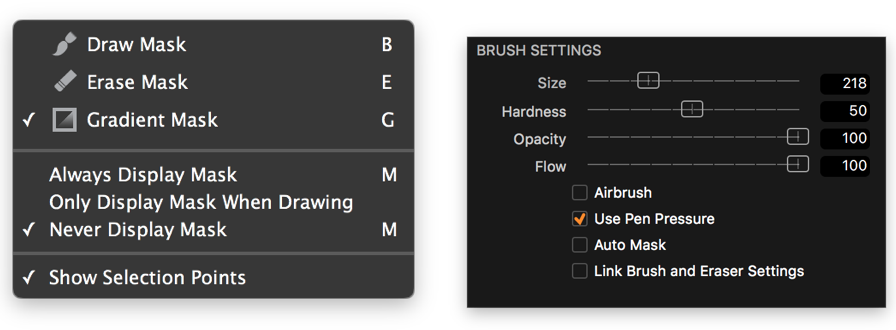
If you need to erase a part of a mask, just choose Erase Mask or hit the keyboard shortcut E.
If you right-click on the image, you can change the size, hardness and opacity of the brush and enable, for example, the Auto-mask feature. Once a mask is drawn, you can use any of the Tools to adjust the selected area. A very neat trick is that you can copy a mask from one layer to another layer and invert it. This is done by right-clicking on a layer.

Right-clicking on a layer gives you handy options like inverting the mask.
One of the most powerful advantages on the Local Adjustments in Capture One Pro is the ability to combine a mask with the color selection features of the Color Editor Tool. When combined, they allow you to select a certain range of colors that you want to adjust, plus you can also further narrow down the affected area by adding a mask. One of the most useful examples is to make a rough mask over the face of a person, and then using the Skin Tone feature, you can even out the skin tones without affecting similar hues in the image.
It is also worth mentioning that switching to Capture One Pro from Lightroom gives you the flexibility of using the Curve Tool on a layer as well as applying sharpening that you can fine-tune to taste.
One final thing that is important to pay attention to when working with Local Adjustments is the little brush icon next to the name of the Tool. When it is visible, you are working on a layer, otherwise you are making the adjustments on the background. You can toggle between those by clicking on the option icon and turn Adjust Selected Layer on and off.
Advanced Export
A powerful part of Capture One Pro that needs a brief introduction is the comprehensive export features under the Output Tab. Here you will find the Process Recipes Tool which is more or less like the Export Presets in Lightroom. These Process Recipes contain everything from image format, ICC Profile and resolution over output locations to renaming during the export.
The primary advantage of those in Capture One Pro is that you can enable several of these Process Recipes simultaneously and have them all exported at once. In other words, you can have full resolution TIFF-images exported to certain folders and web optimize versions in JPEG to others.
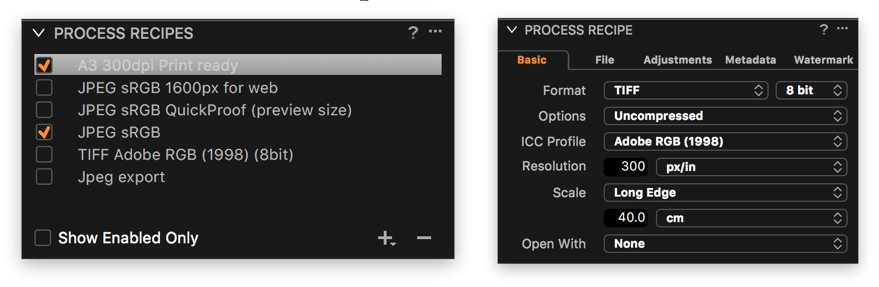
Process Recipes gives you the ability to save file export options for later use. The options are vast, and include output sharpening.
While it goes beyond the scope of this Guide, it should be noted that you have vast possibilities to automatically create both folder and file names during export based on a long list of options from (primarily) metadata. Just click on the small rectangle with three small dots inside, and choose from the many options, called Tokens.
Just like in Lightroom, you can apply output sharpening during export. Select the Adjustments sub-tab in the Process Recipe Tool and choose either Output Sharpening for Print or Output Sharpening for Screen.
A very cool new feature of Capture One Pro 10 is that you can check the final applied sharpening directly in the program by selecting View > Show Recipe Proofing. This is especially useful when you are going to resize an image for the web, because you won’t need to export it to Photoshop first in order to evaluate the final sharpening. With the Recipe Proofing feature, you get what you see, including resized resolution, JPEG compression and the ICC Profile.
There are many more image adjustment tools in Capture One Pro than are covered in this Guide, but hopefully it has provided you with a valuable insight to the most important differences coming from Lightroom. There are a lot of new, powerful image editing features waiting for you to enjoy, so have fun!