NOTE: This article discusses an older version of Capture One Pro. To learn more about our latest version, click here.
Customization is key
With Capture One, you don’t have to work around the interface or adapt to the default keyboard shortcuts. You can customize it all! Make the software yours instead of working around the way engineers designed it.
Better yet, you can create different workspaces for specific parts of your workflow. For example, you can have one workspace for culling wedding images, and then another one dedicated to editing the photos. This way, you’ll only have the tools you personally need on-screen at any given time.

A customized workspace makes the transition from other photo editors much smoother and helps you build your own, personalized workflow. There’s no need to be bogged down by tools you don’t need for wedding editing. Simply create your own Tool tabs and add only the tools you use in the order that suits you.

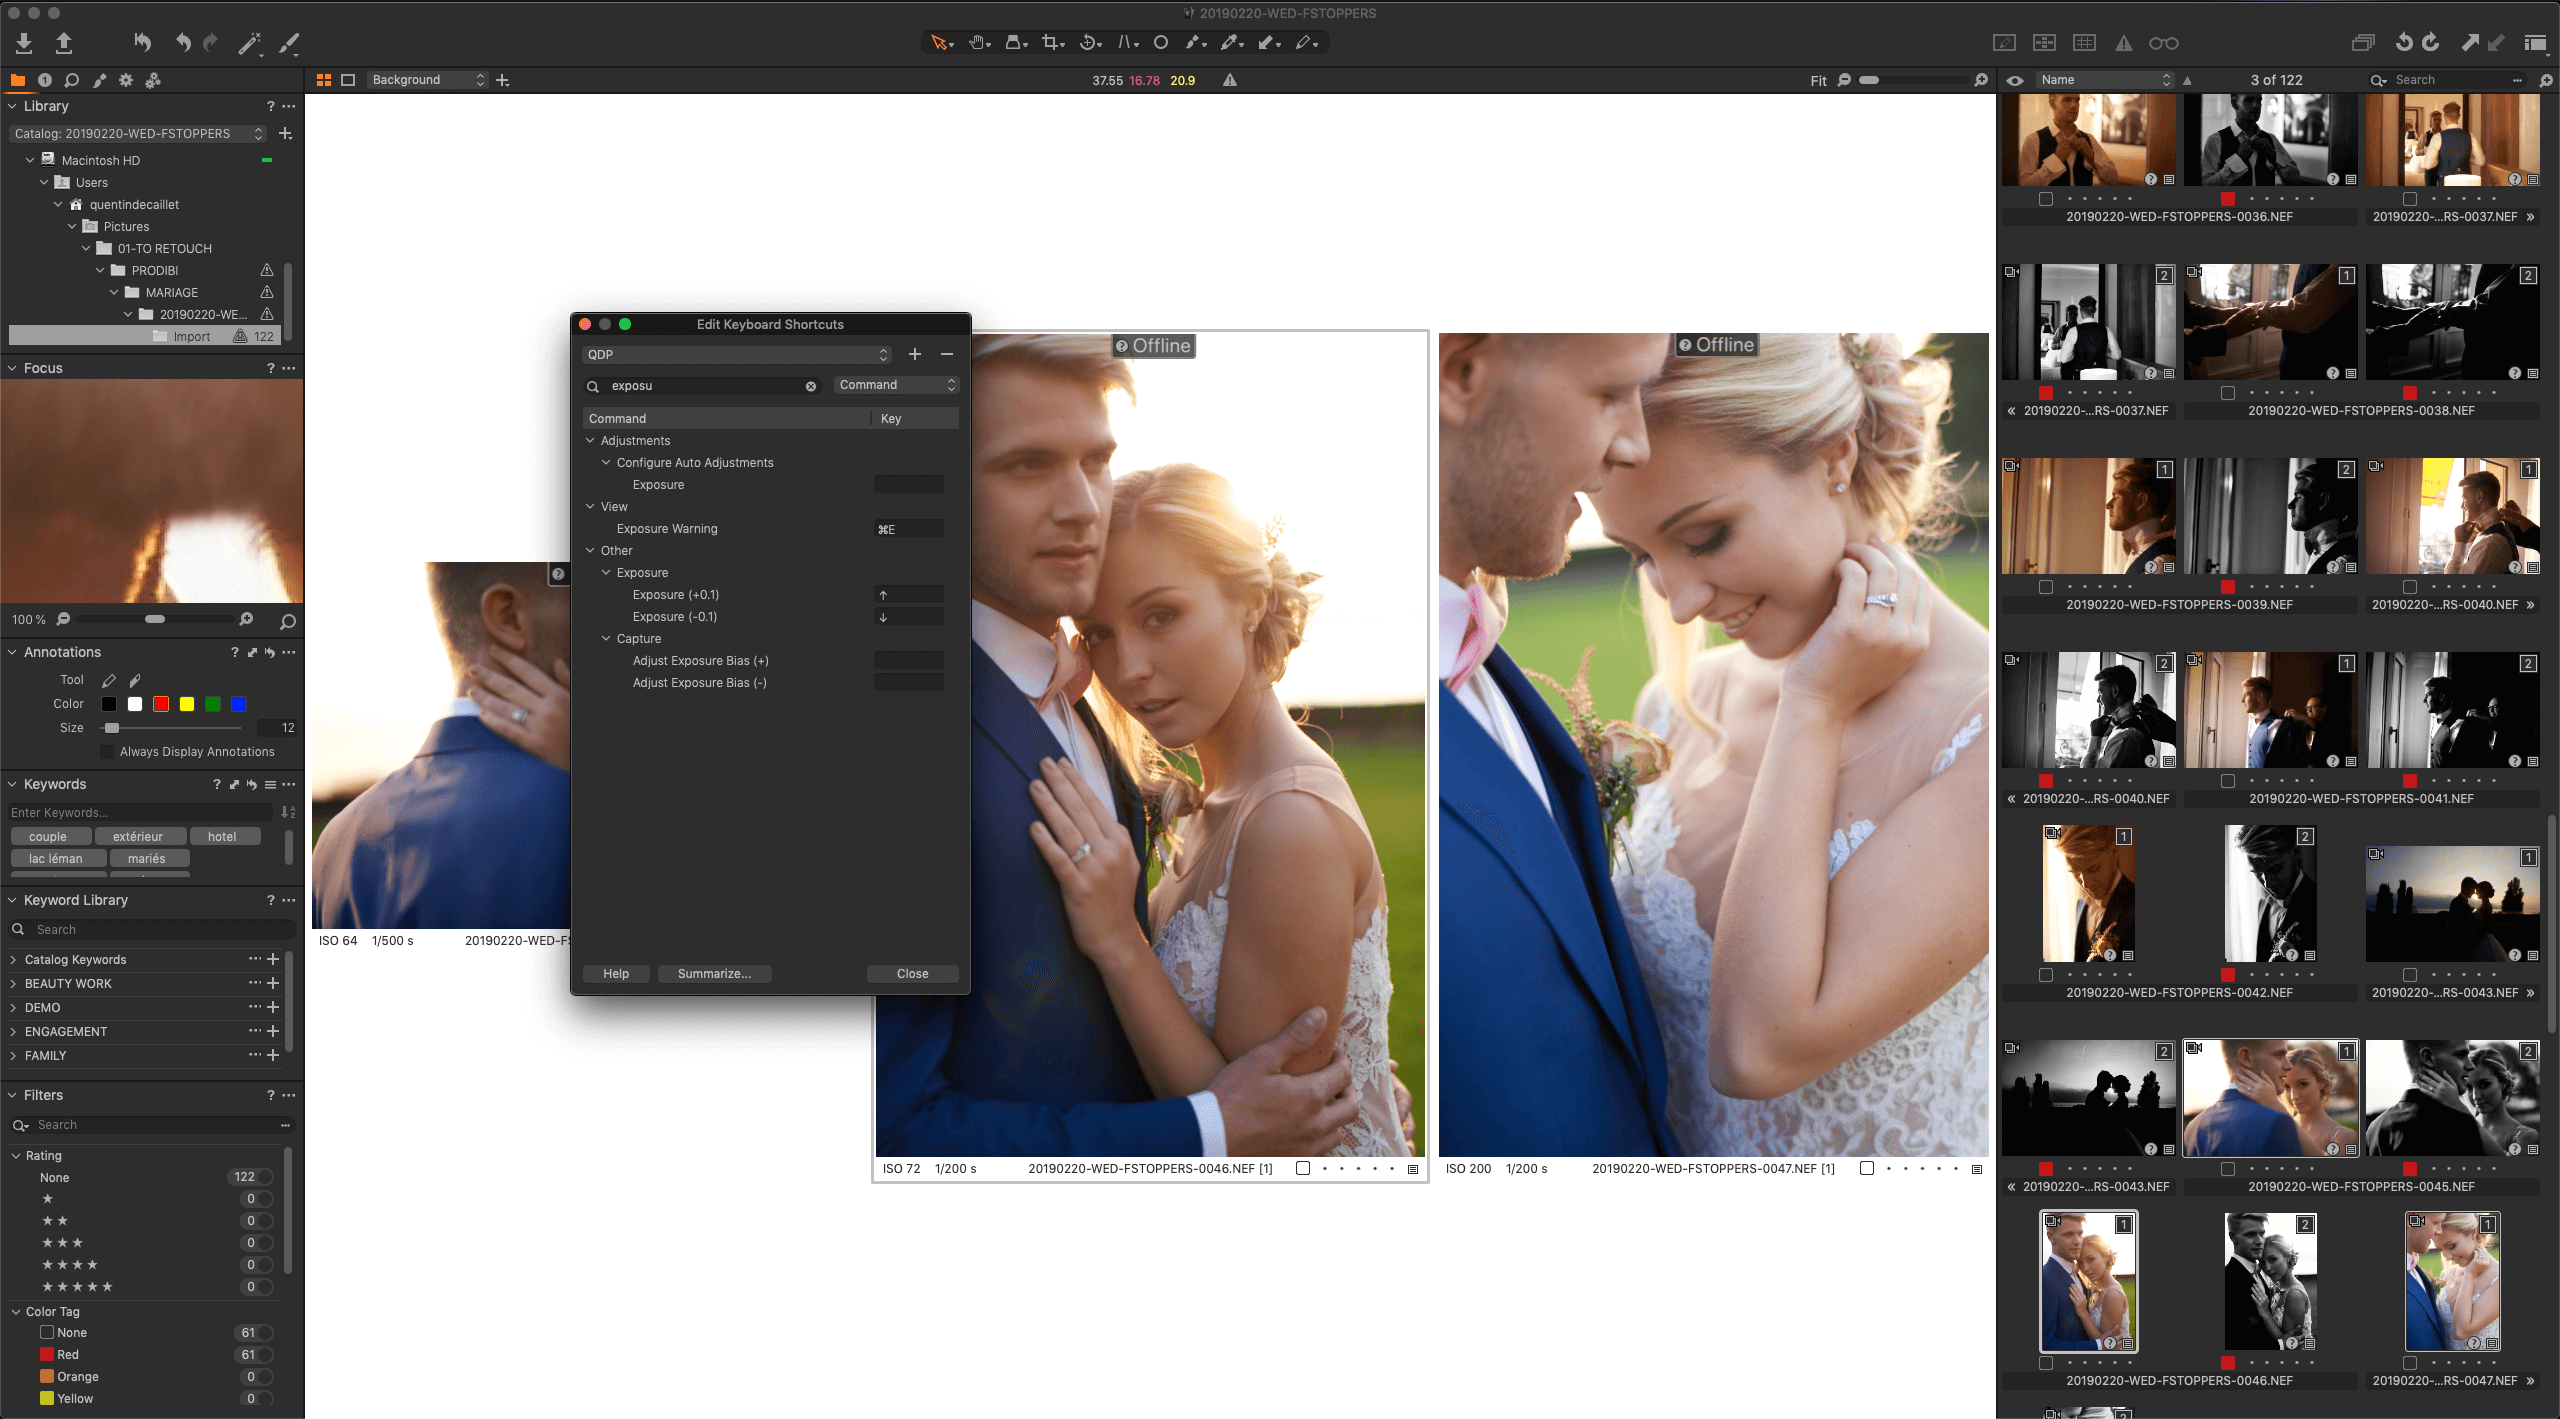
Keyboard shortcuts are also a very powerful tool in Capture One, saving you a ton of time. You can also customize them yourself – search for the features you use most of the time and set unique shortcut commands that will make it easiest for you to access them.

With the most recent versions of Capture One, you can also work with external controllers such as the Tangent Wave 2 or Palette Gear (Monogram). Both solutions are also fully customizable with Capture One, and this will bring your workflow to the next level. I couldn’t edit weddings without my Tangent Wave 2 anymore!
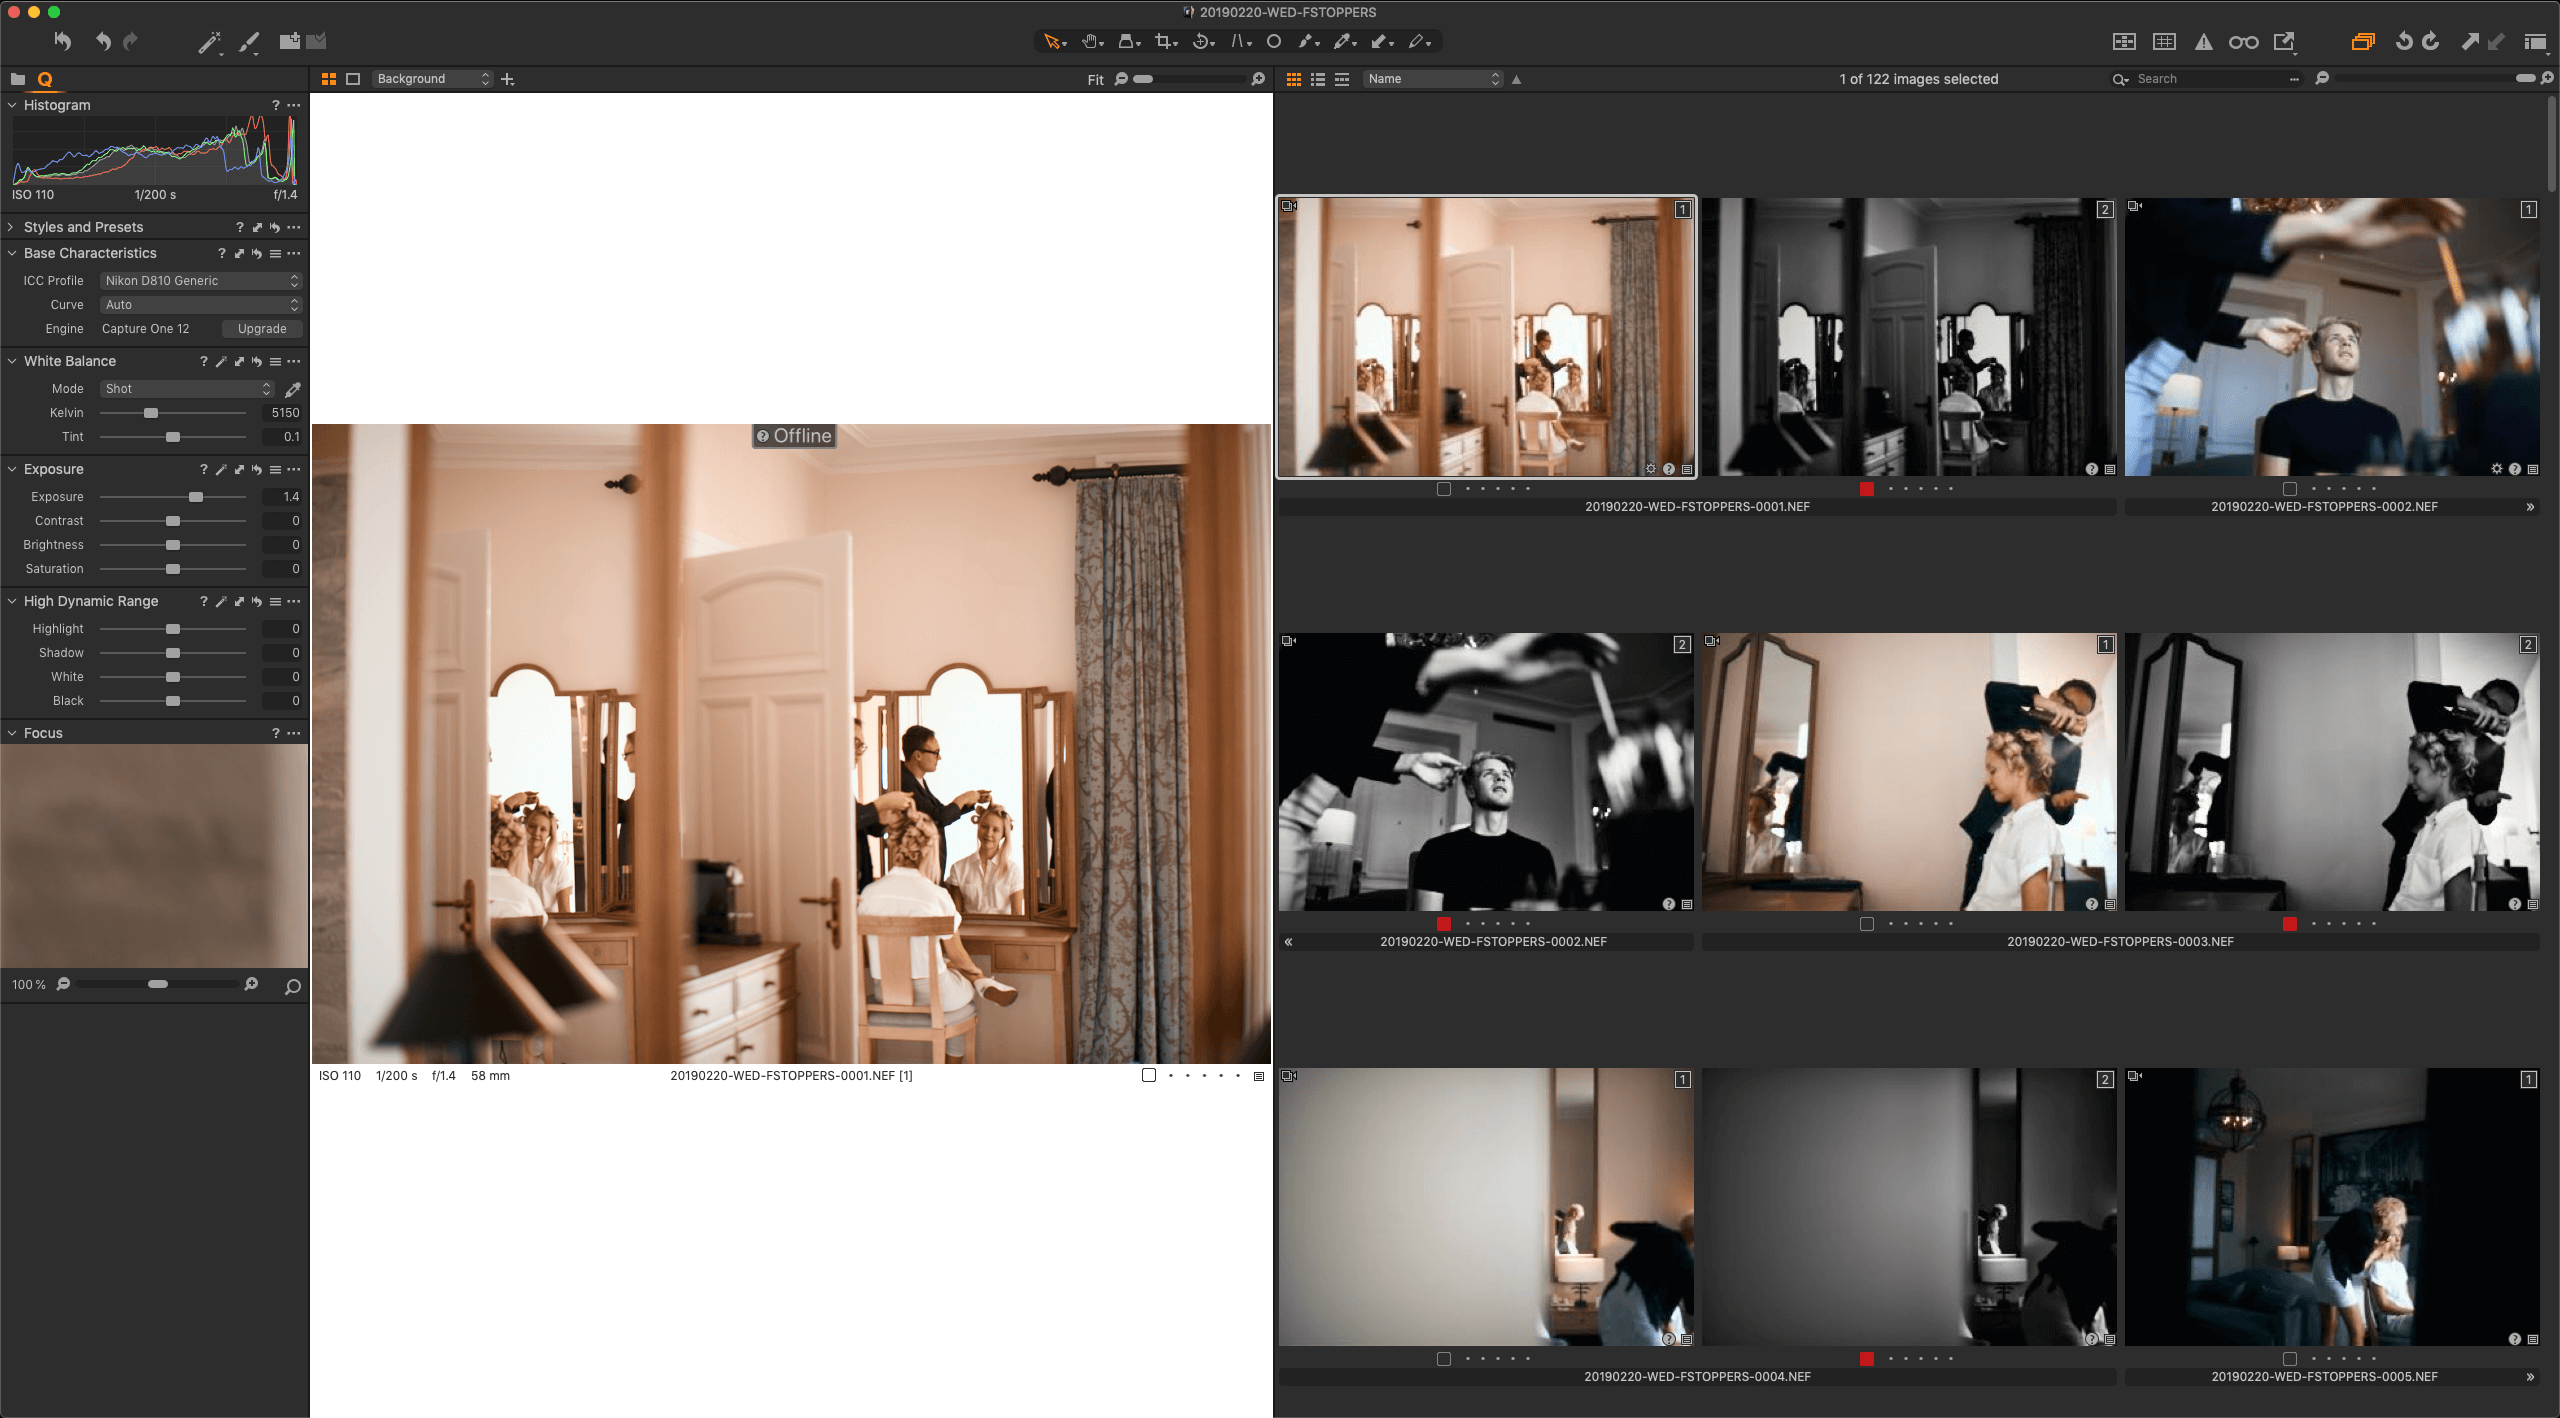
Working on offline files
As someone who travels a lot, I don’t always have the luxury of keeping thousands of RAW files with me at all times on my laptop – but I still feel the pressure to edit images on-the-go to meet client deadlines.
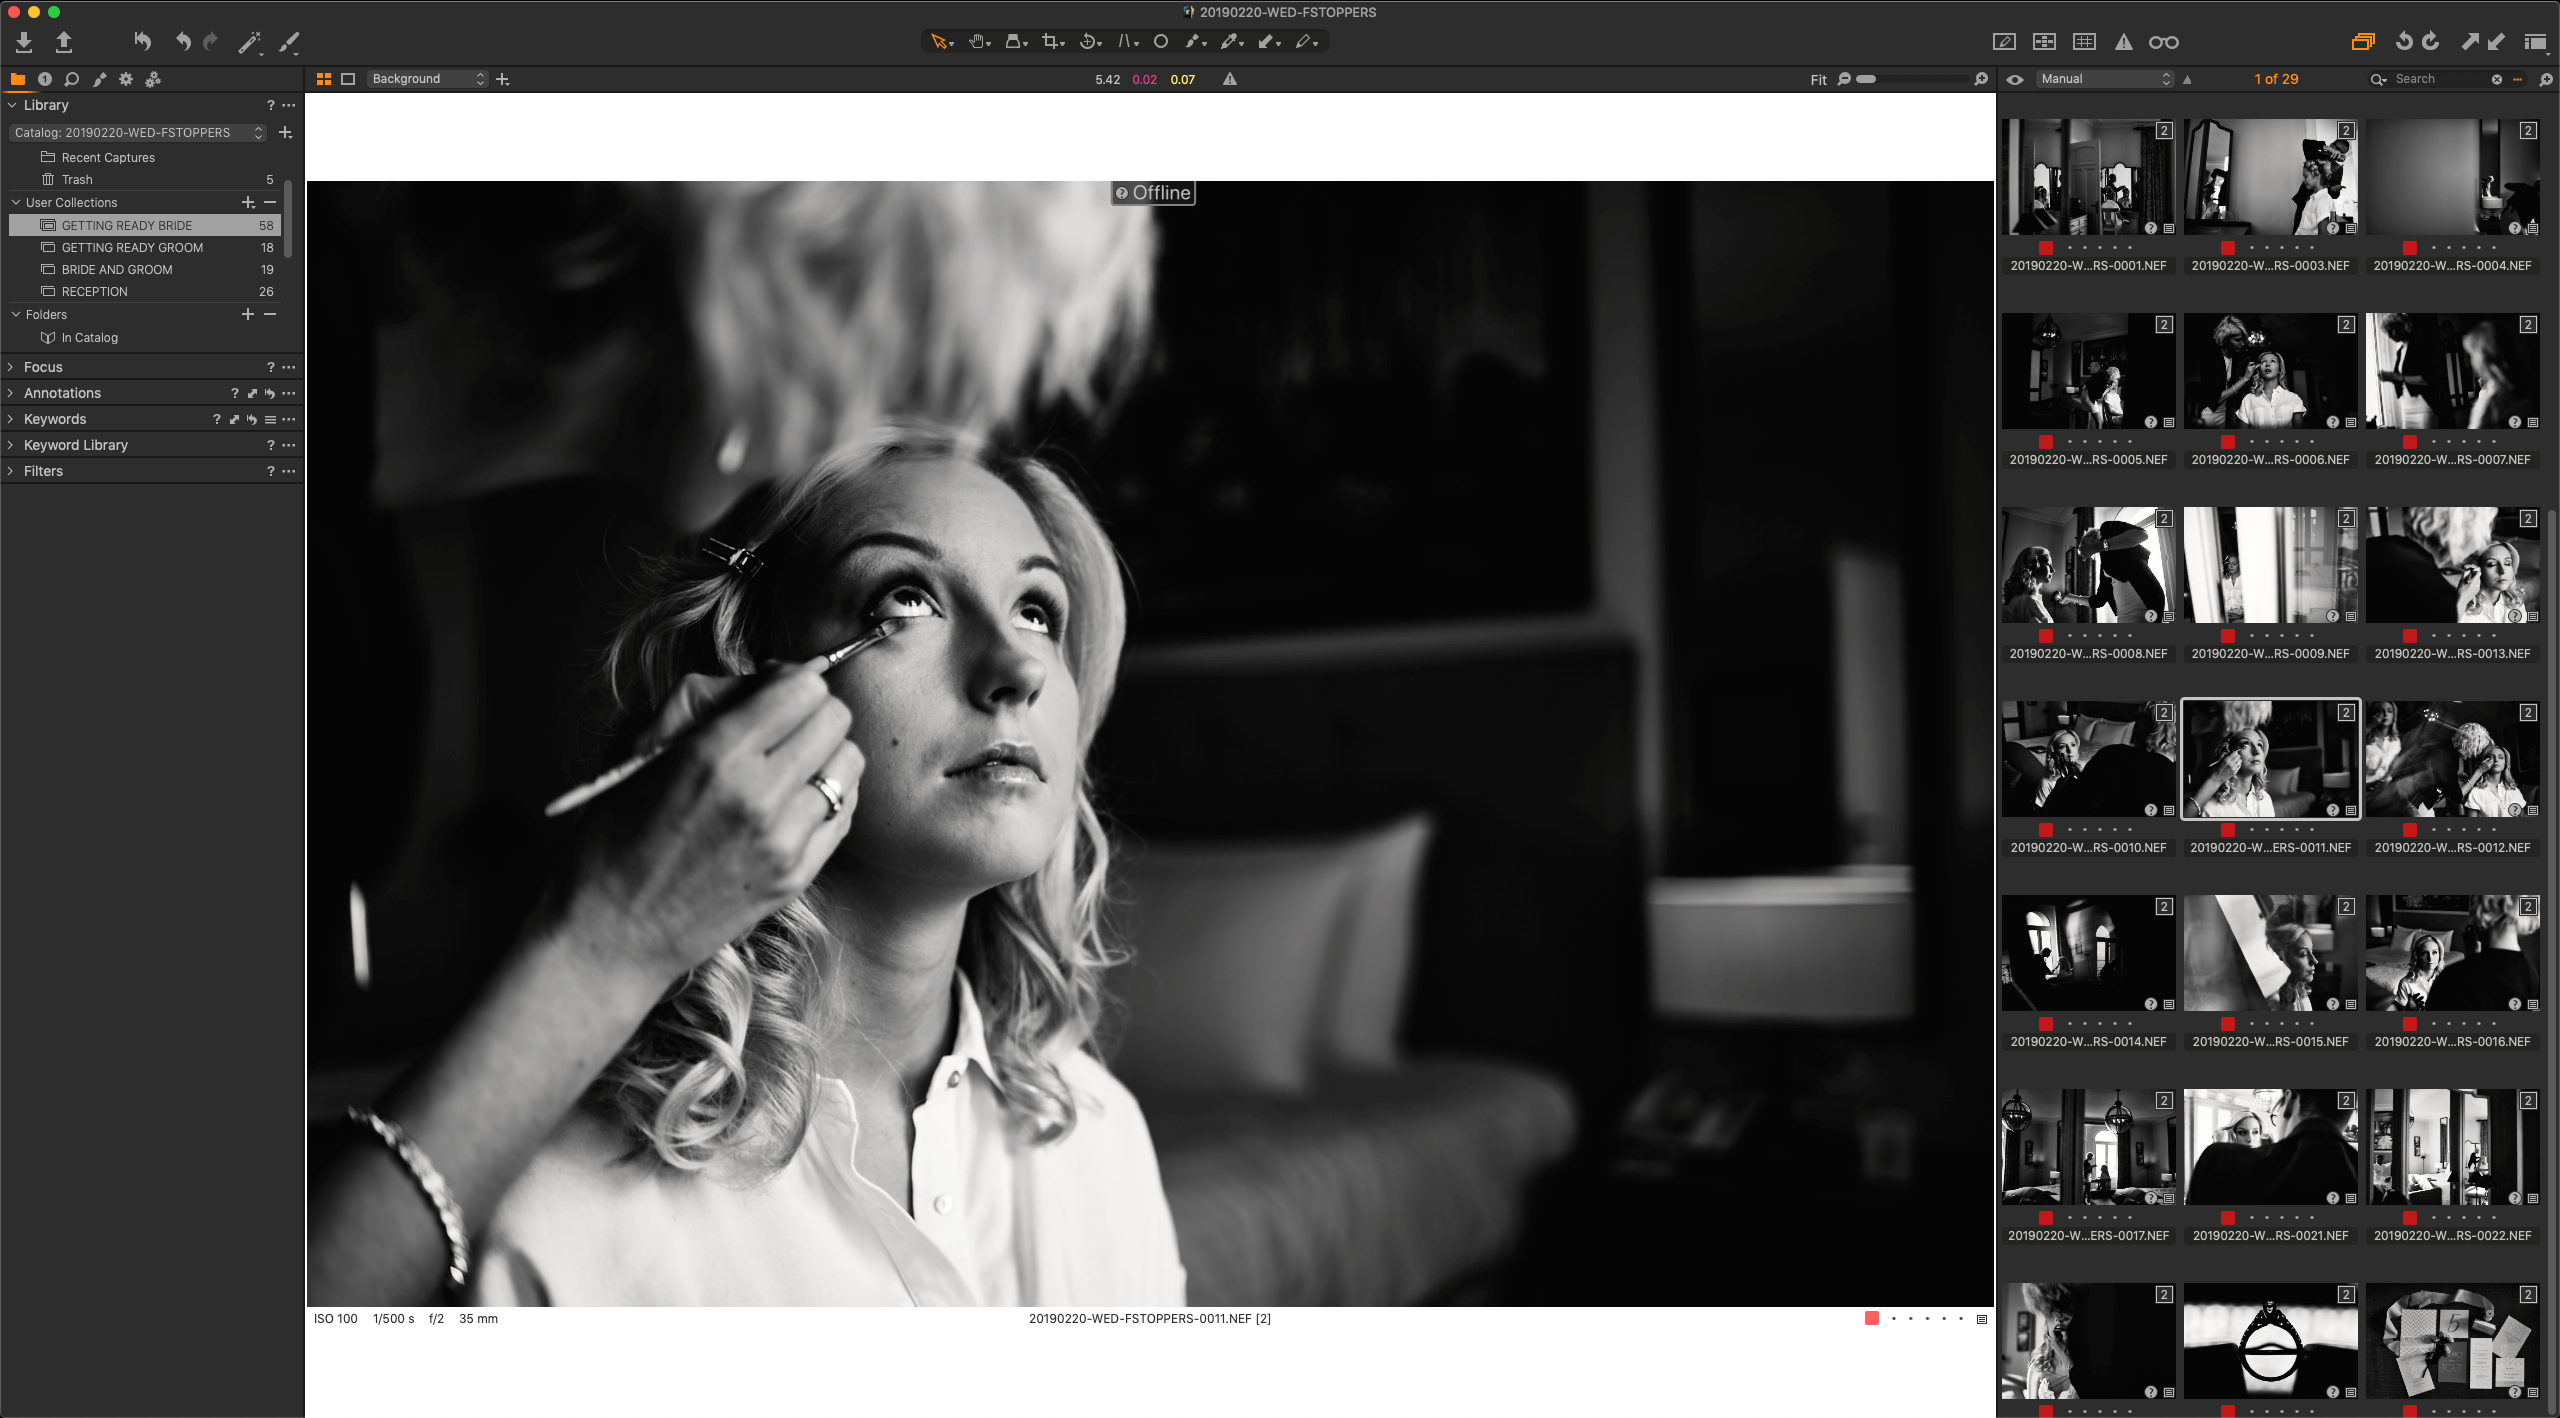
This is where Catalogs come in handy. When I get back from a wedding, I create a new Catalog, import the files from my memory cards into my Catalog but store them onto my NAS rather my laptop. Capture One builds previews I can work from on my laptop, even if I don’t have access to my NAS.
Once I get back home and I’m done editing the previews, I can simply connect to my NAS. Capture One will see the files are back online and I can now process my RAW files using the settings I applied to the previews. It’s seamless, and you don’t have to do anything specific to take advantage of previews – just let Capture One create them when importing files.
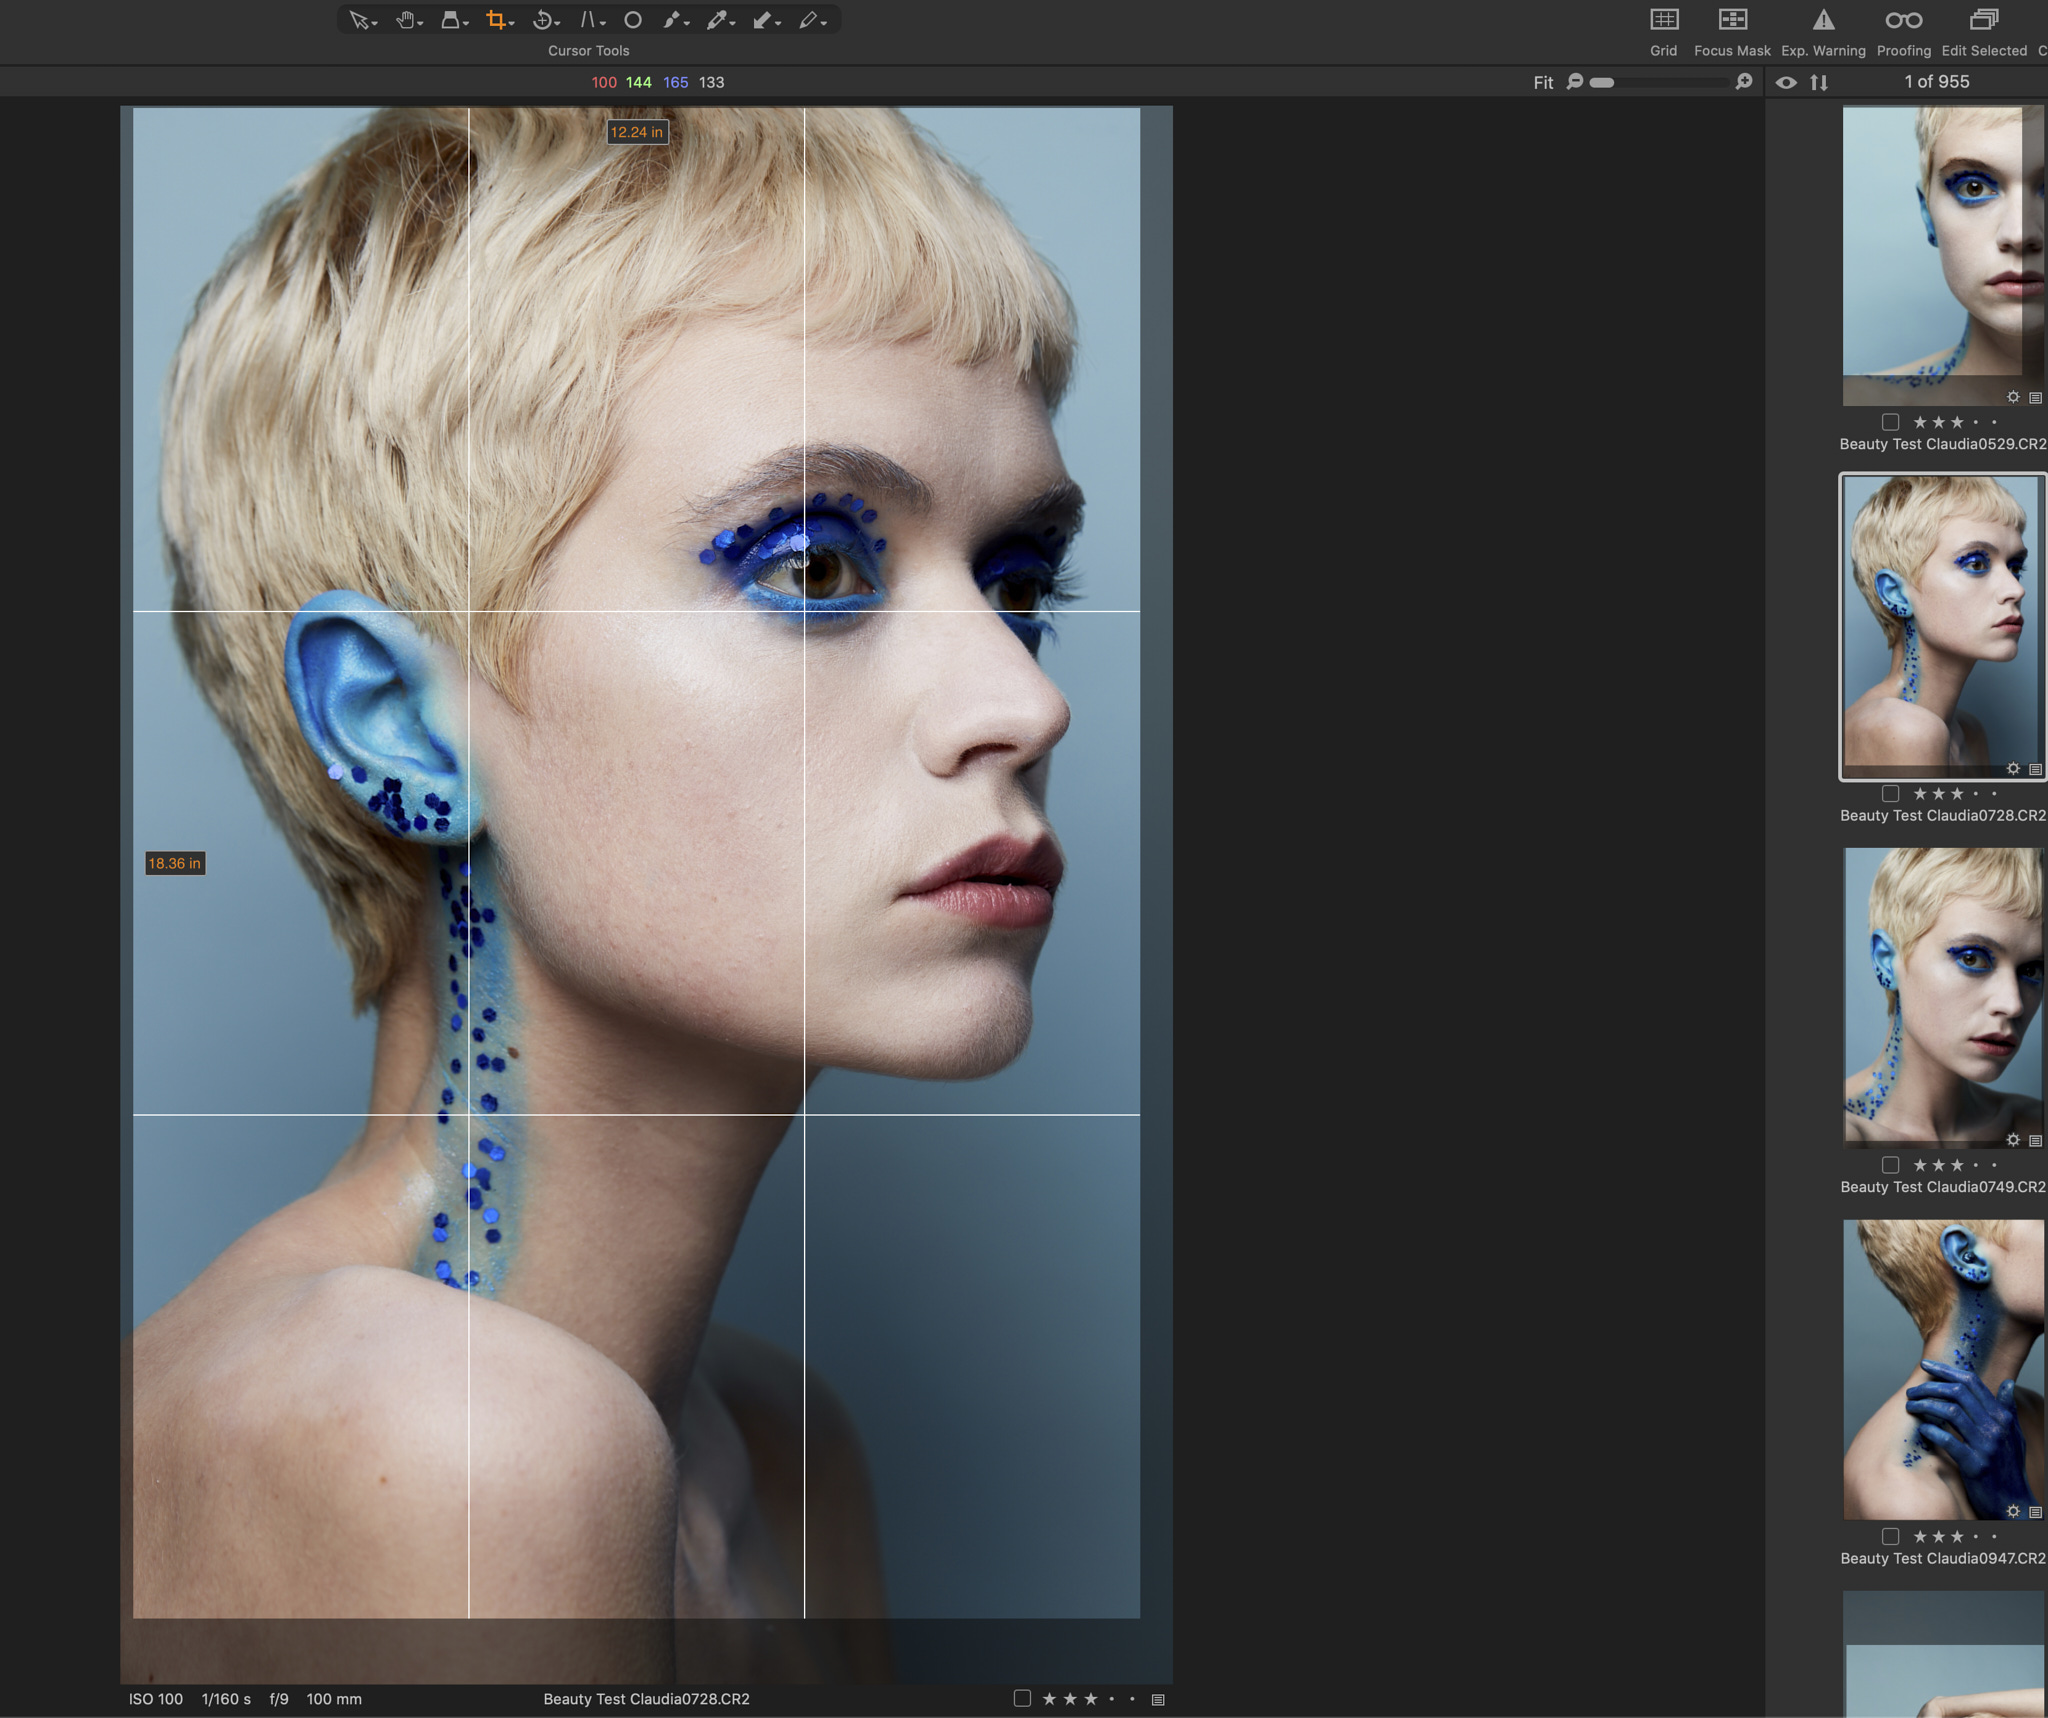
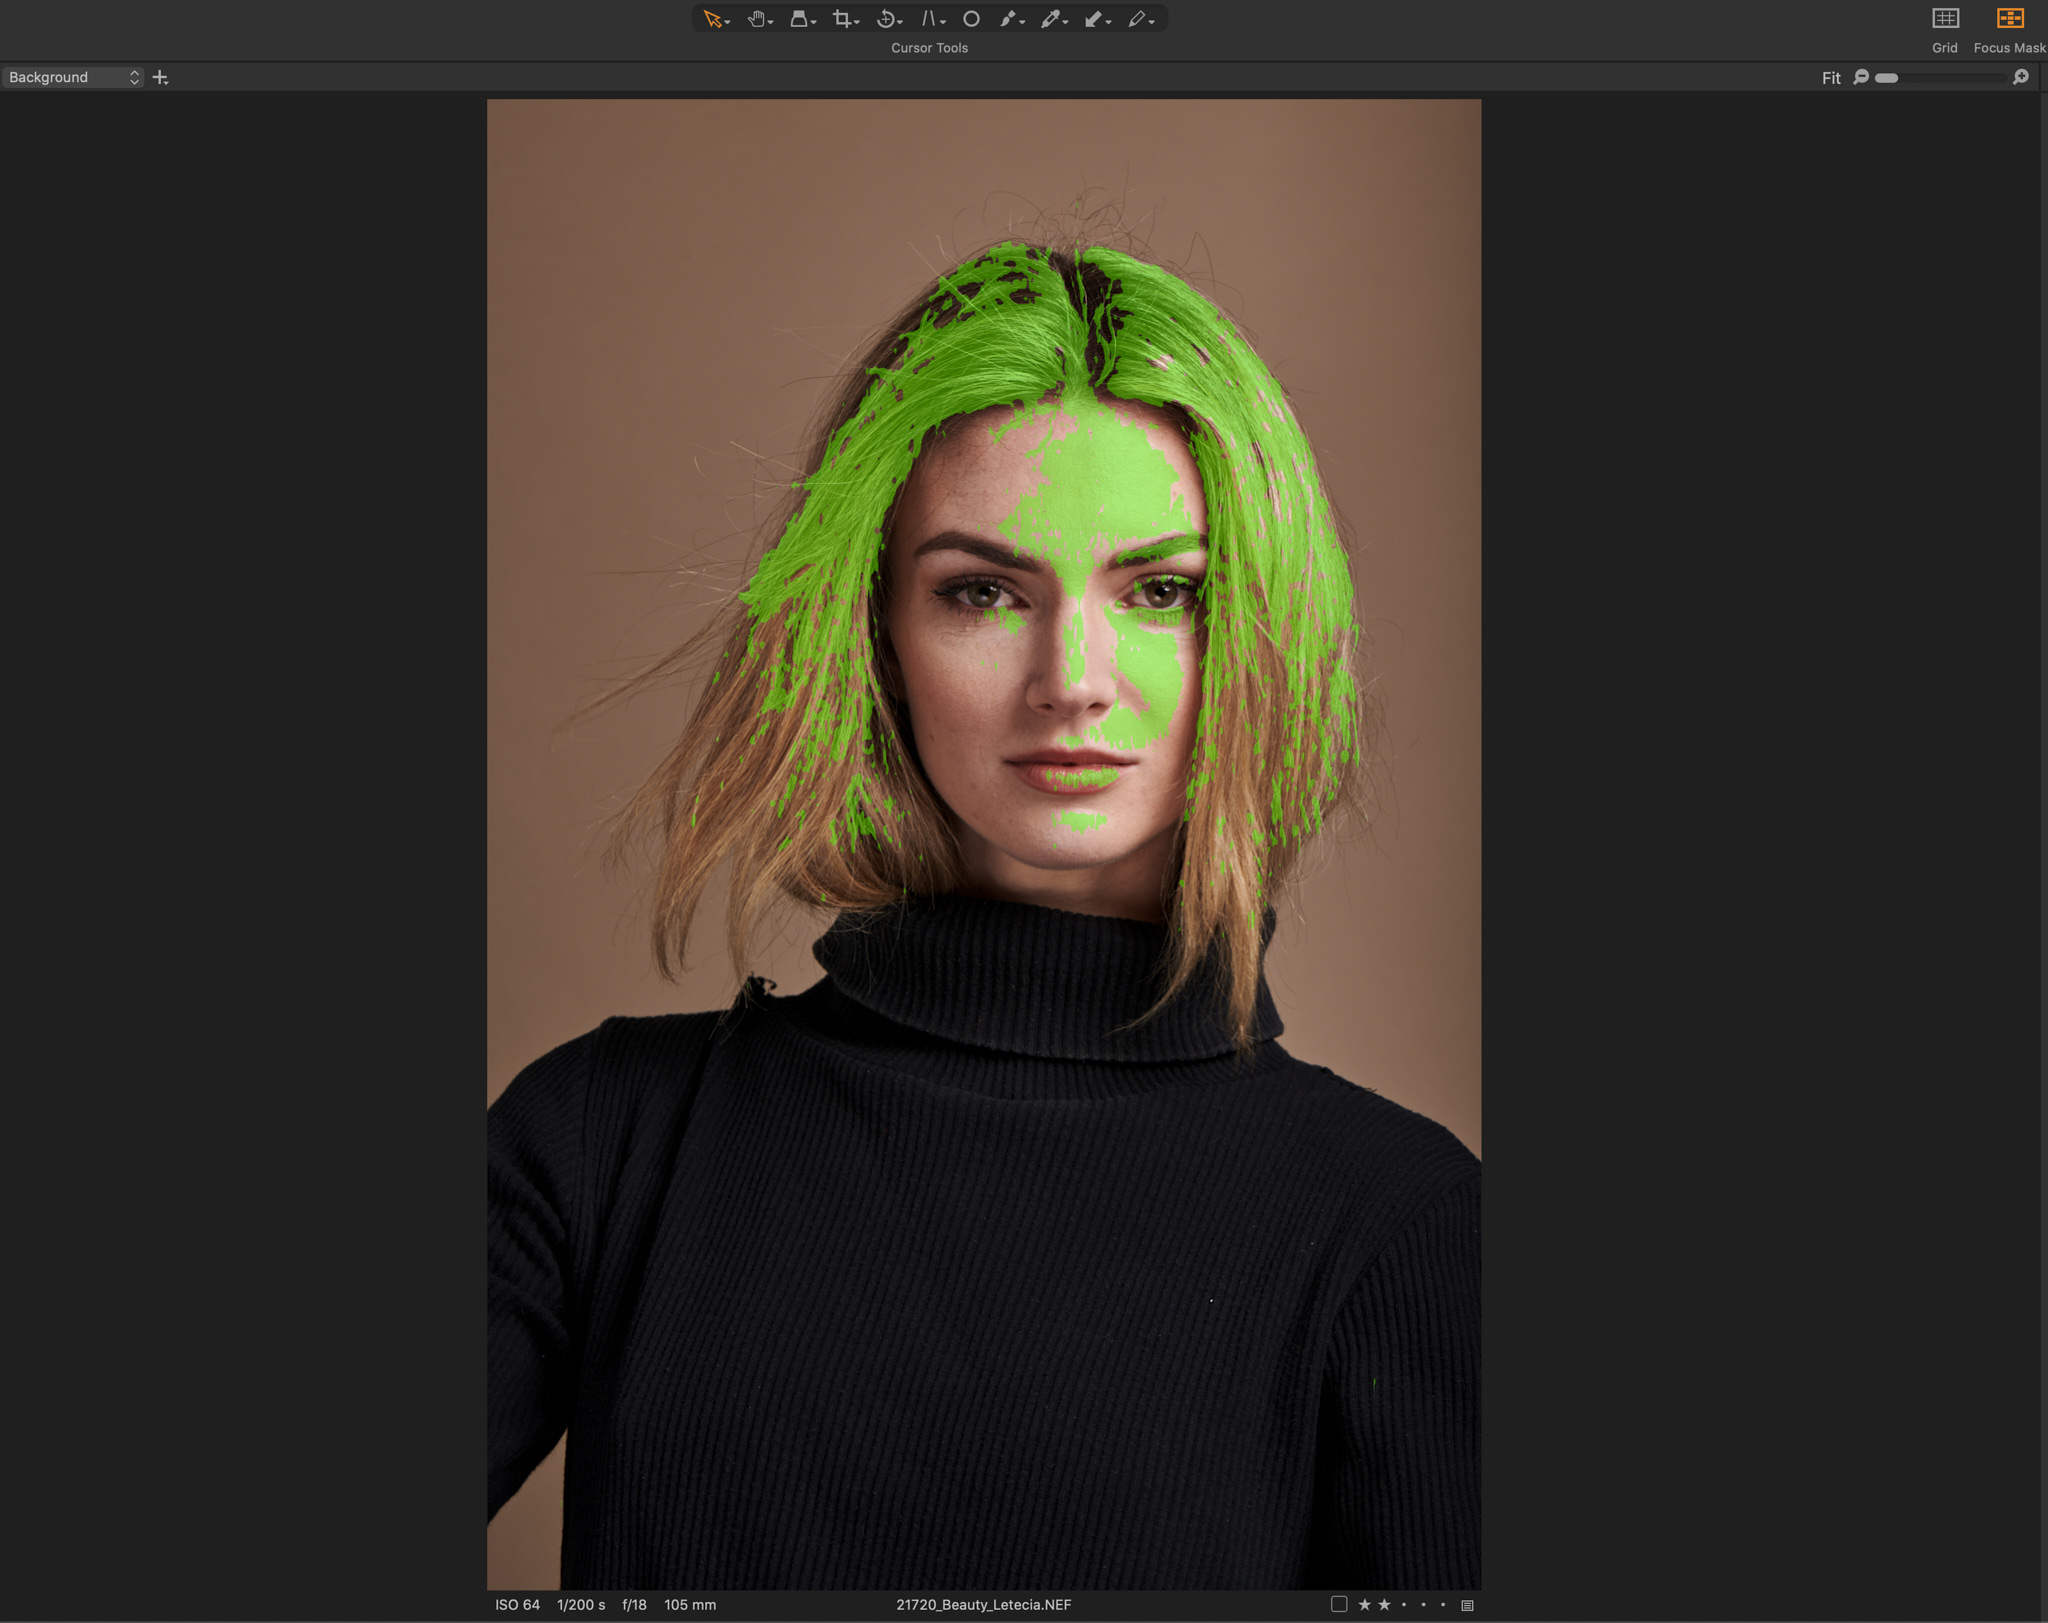
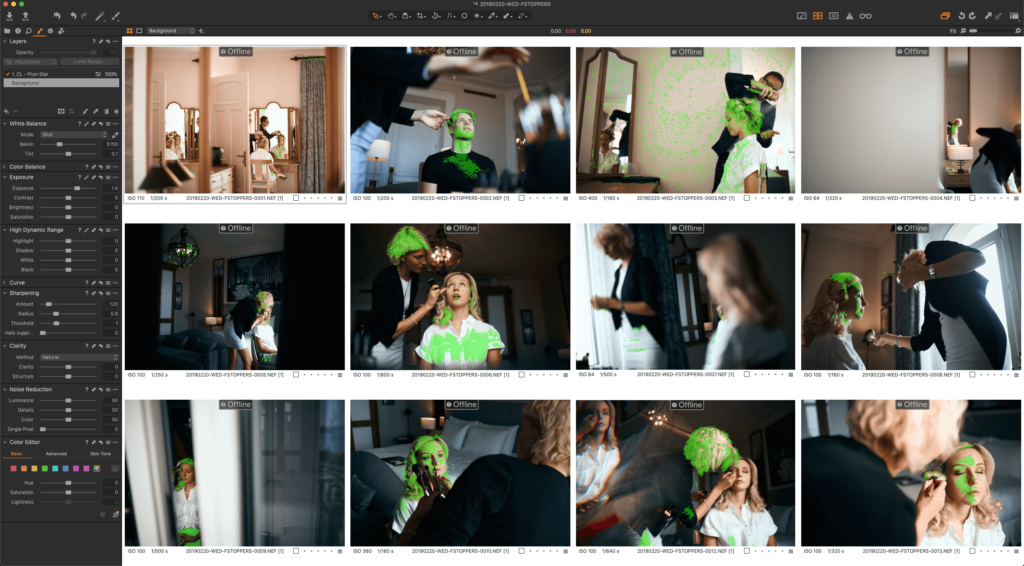
Remove unsharp images quickly
Most photographers I know like to deliver crisp images to their clients and avoid giving away blurry images that may not print well in the wedding album. Thanks to the Focus Mask tool in Capture One, you can quickly separate blurry images from sharp photos and cull them fast.
Enable the tool which will show the sharp area of the image in green. If the default sharpness threshold is a bit high, be sure to adjust it in the preferences.
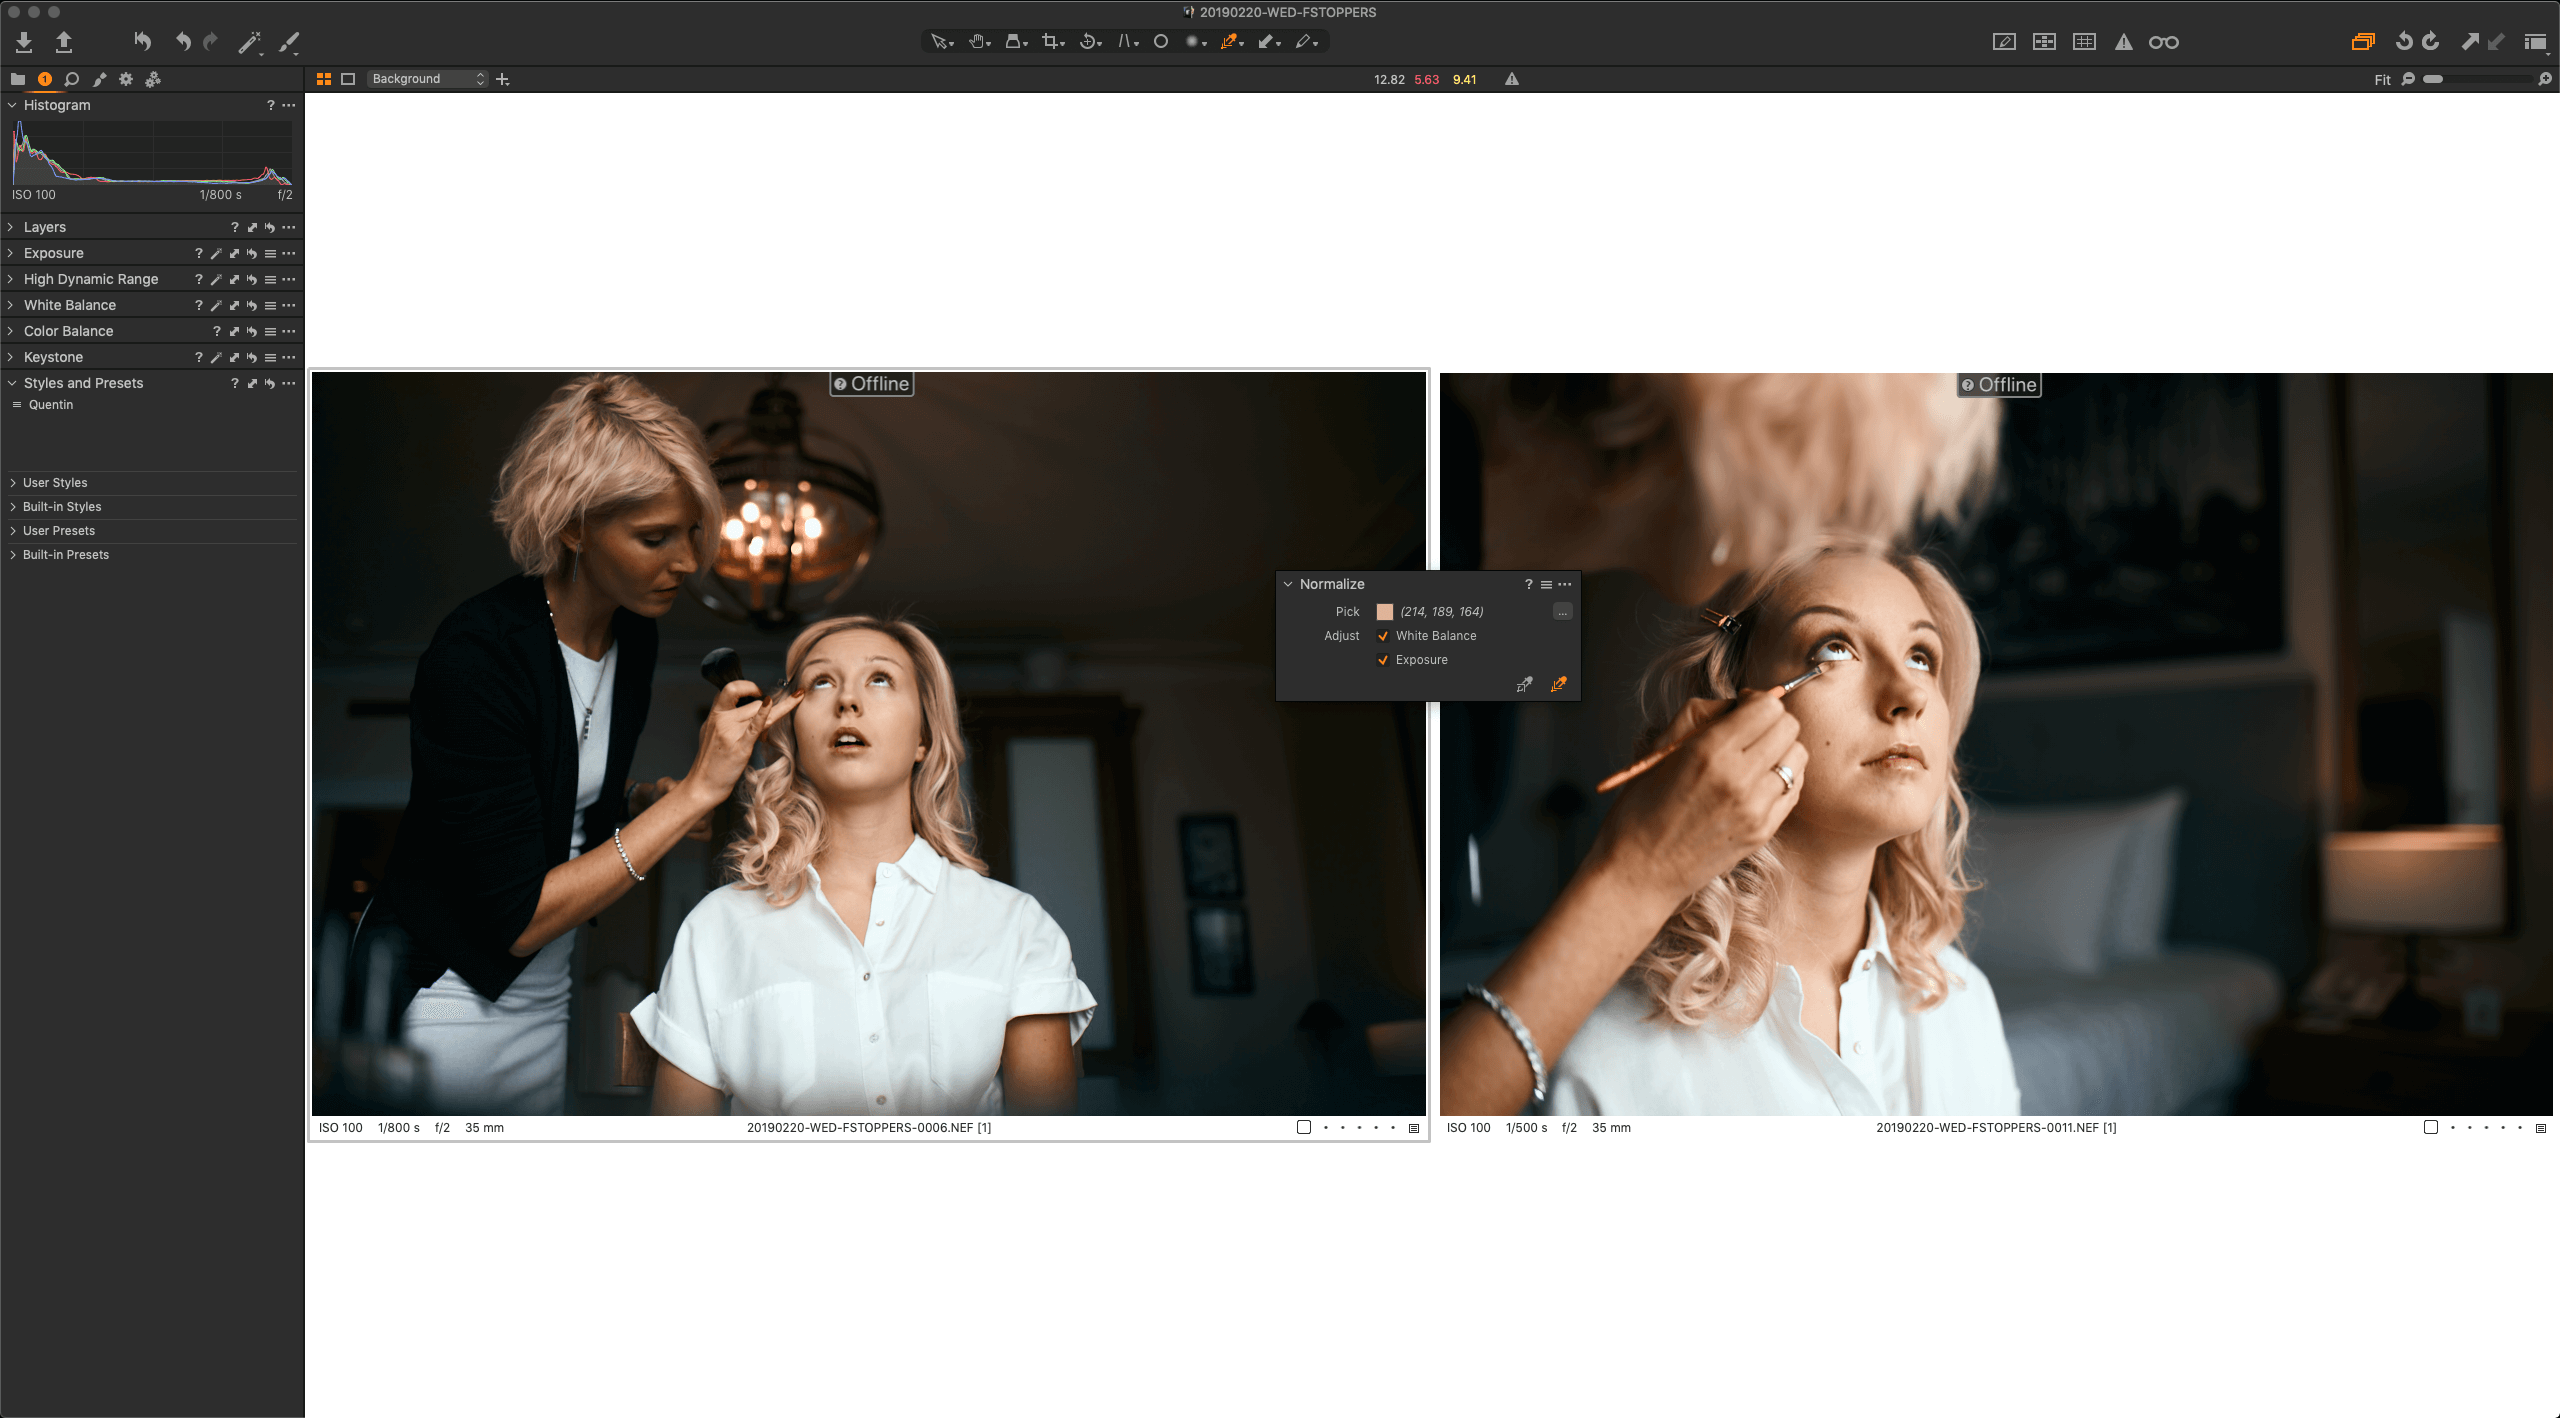
Matching Luminosity and Colors
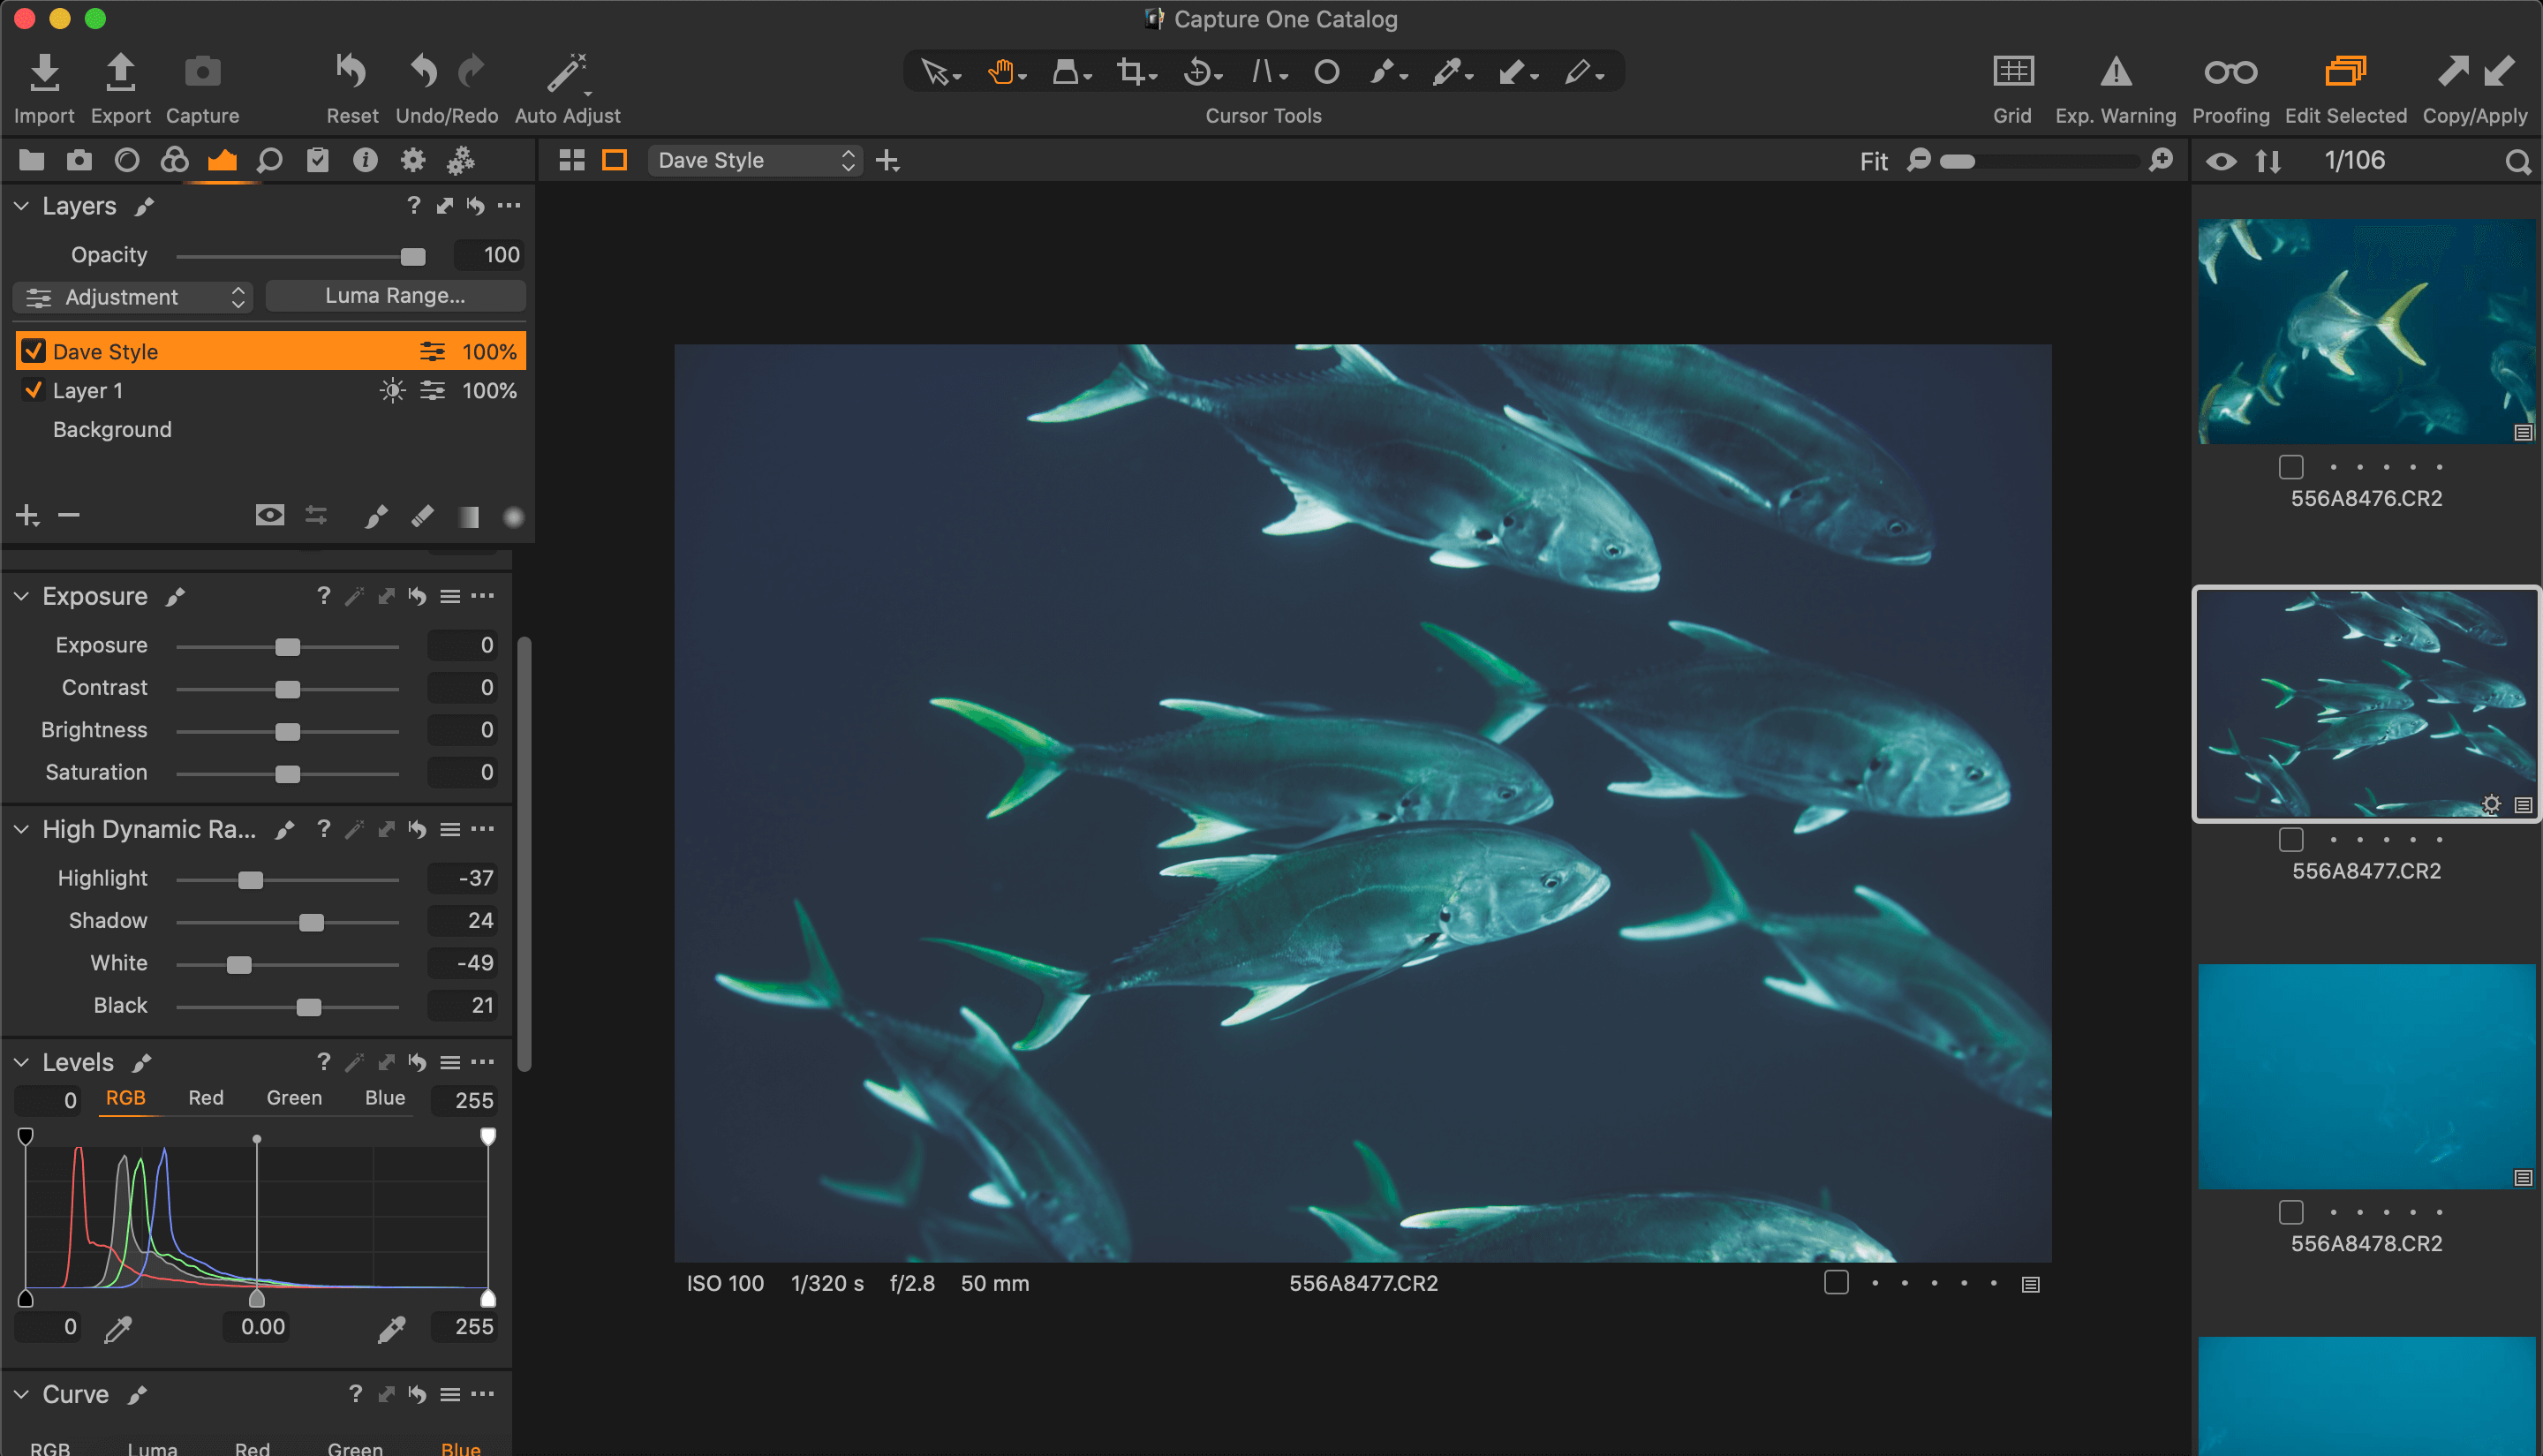
When I edit weddings, the time-consuming task I dread the most is matching the colors and exposure across a set of images. Thankfully, Capture One 20 has an amazingly useful tool called Normalization to do the work for you.
The tool relies on two samples, one to pick the luminosity and color you want to match, and the other to apply and match the selection. Start by using the first sampler on the correct image; click on an area that is available on the second image as well – for example, the bride’s dress or forehead. Then use the second sampler and click on the same area in the photo that needs correcting.

Capture One does all heavy lifting for you in a matter of seconds. It’s easy-to-use and can save a lot of time when editing reception shots, especially at that point in the night when the DJ decides to go nuts with the lighting.
De-noise while retaining details and colors
I used to hate how de-noising features worked in other photo editors. They made my images very soft and dull, even with subtle adjustments. I never found the perfect way to get my reception images shot at high ISO to look the way I wanted – with the same color richness I saw with my own eyes at the wedding. My couples didn’t spend thousands on decorations only to get pictures which don’t accurately capture the look!

Thanks to the incredible noise reduction in Capture One Pro 20, I’m finally happy with the quality I get from images shot at high ISO. Not only does it retain details better, but more importantly, the color is far more accurate and vibrant. For those who don’t shoot much with strobes and rely on high ISO all evening long, this will forever transform the image quality you’ll deliver to your brides and grooms.
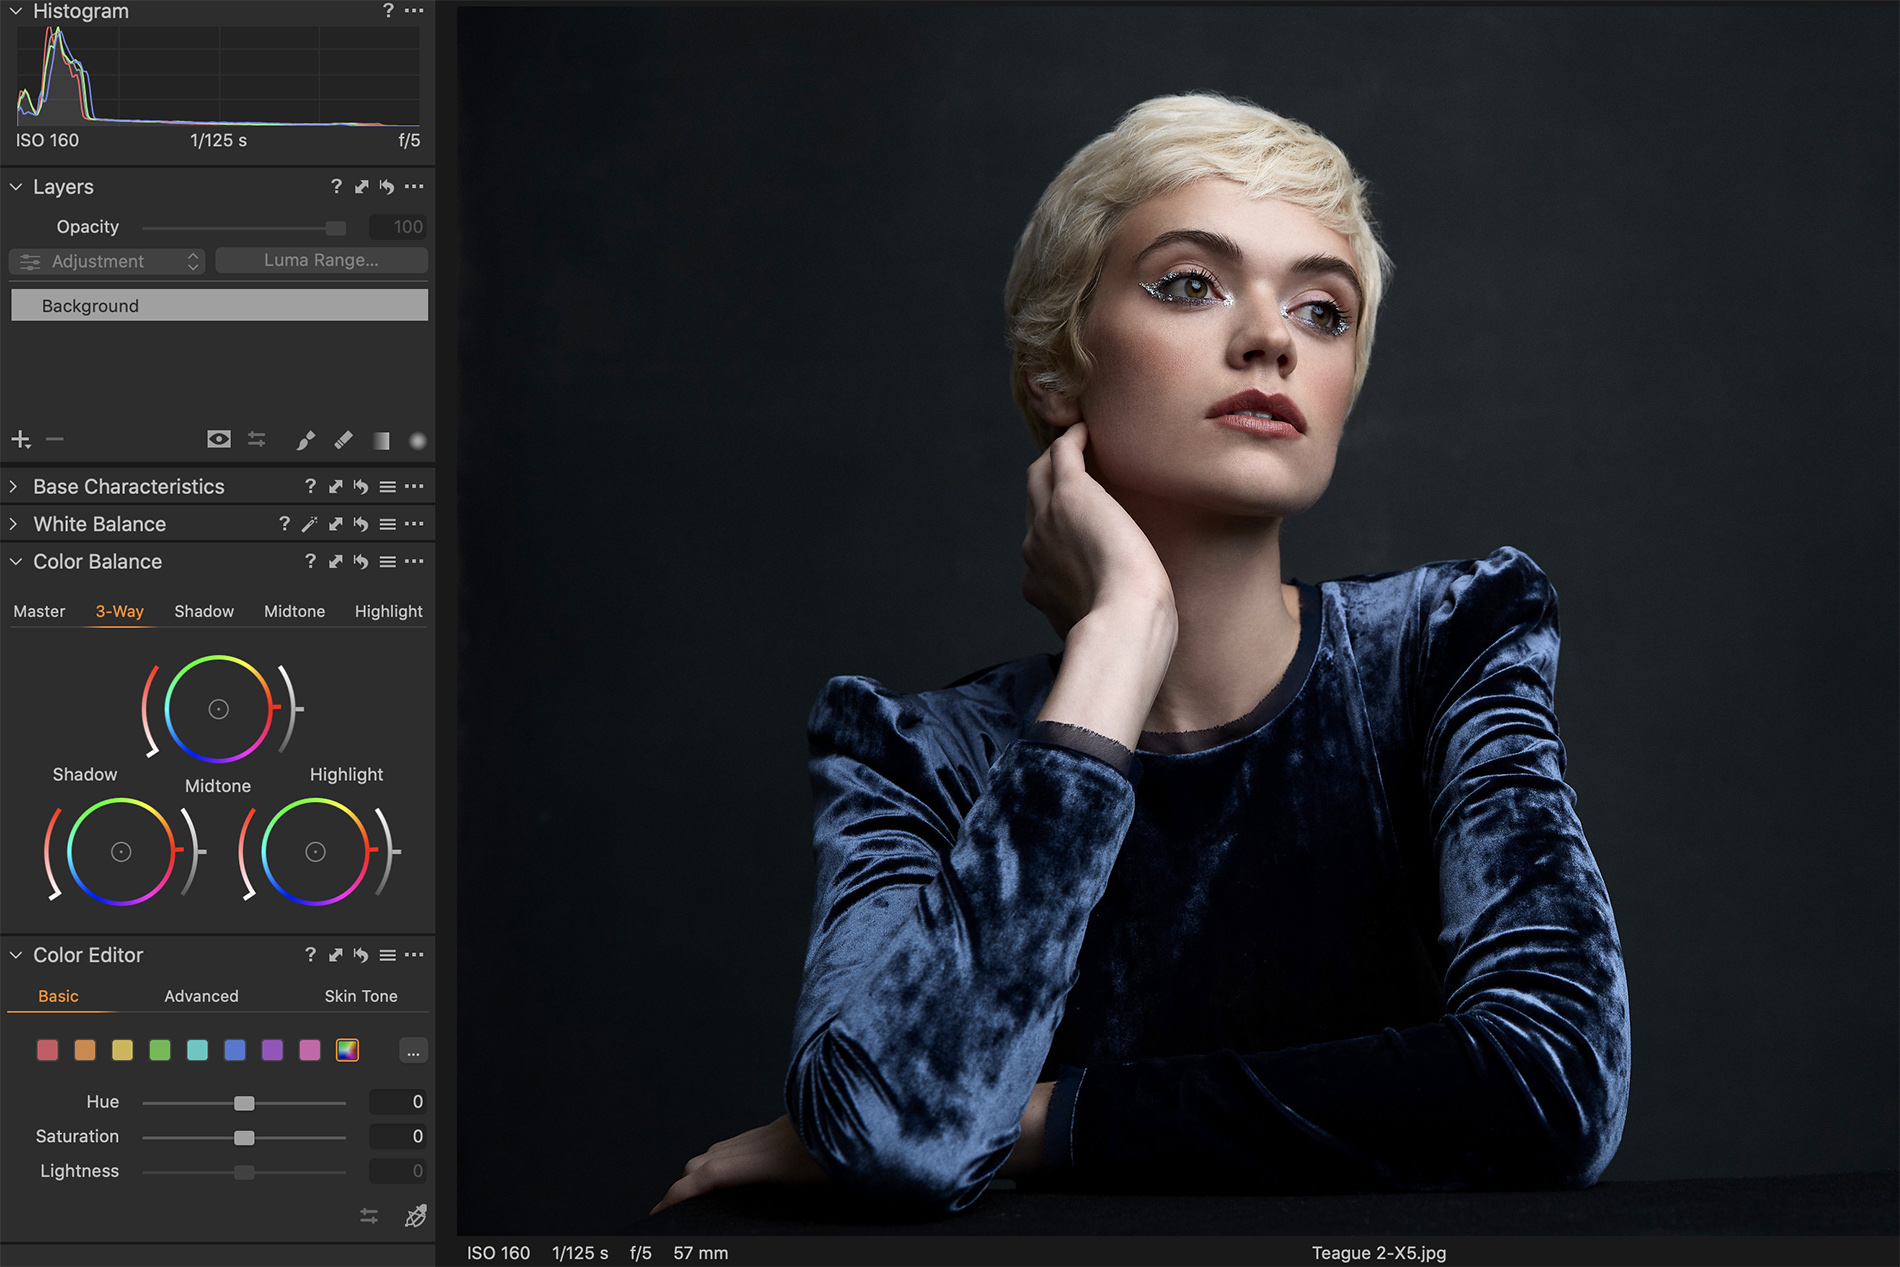
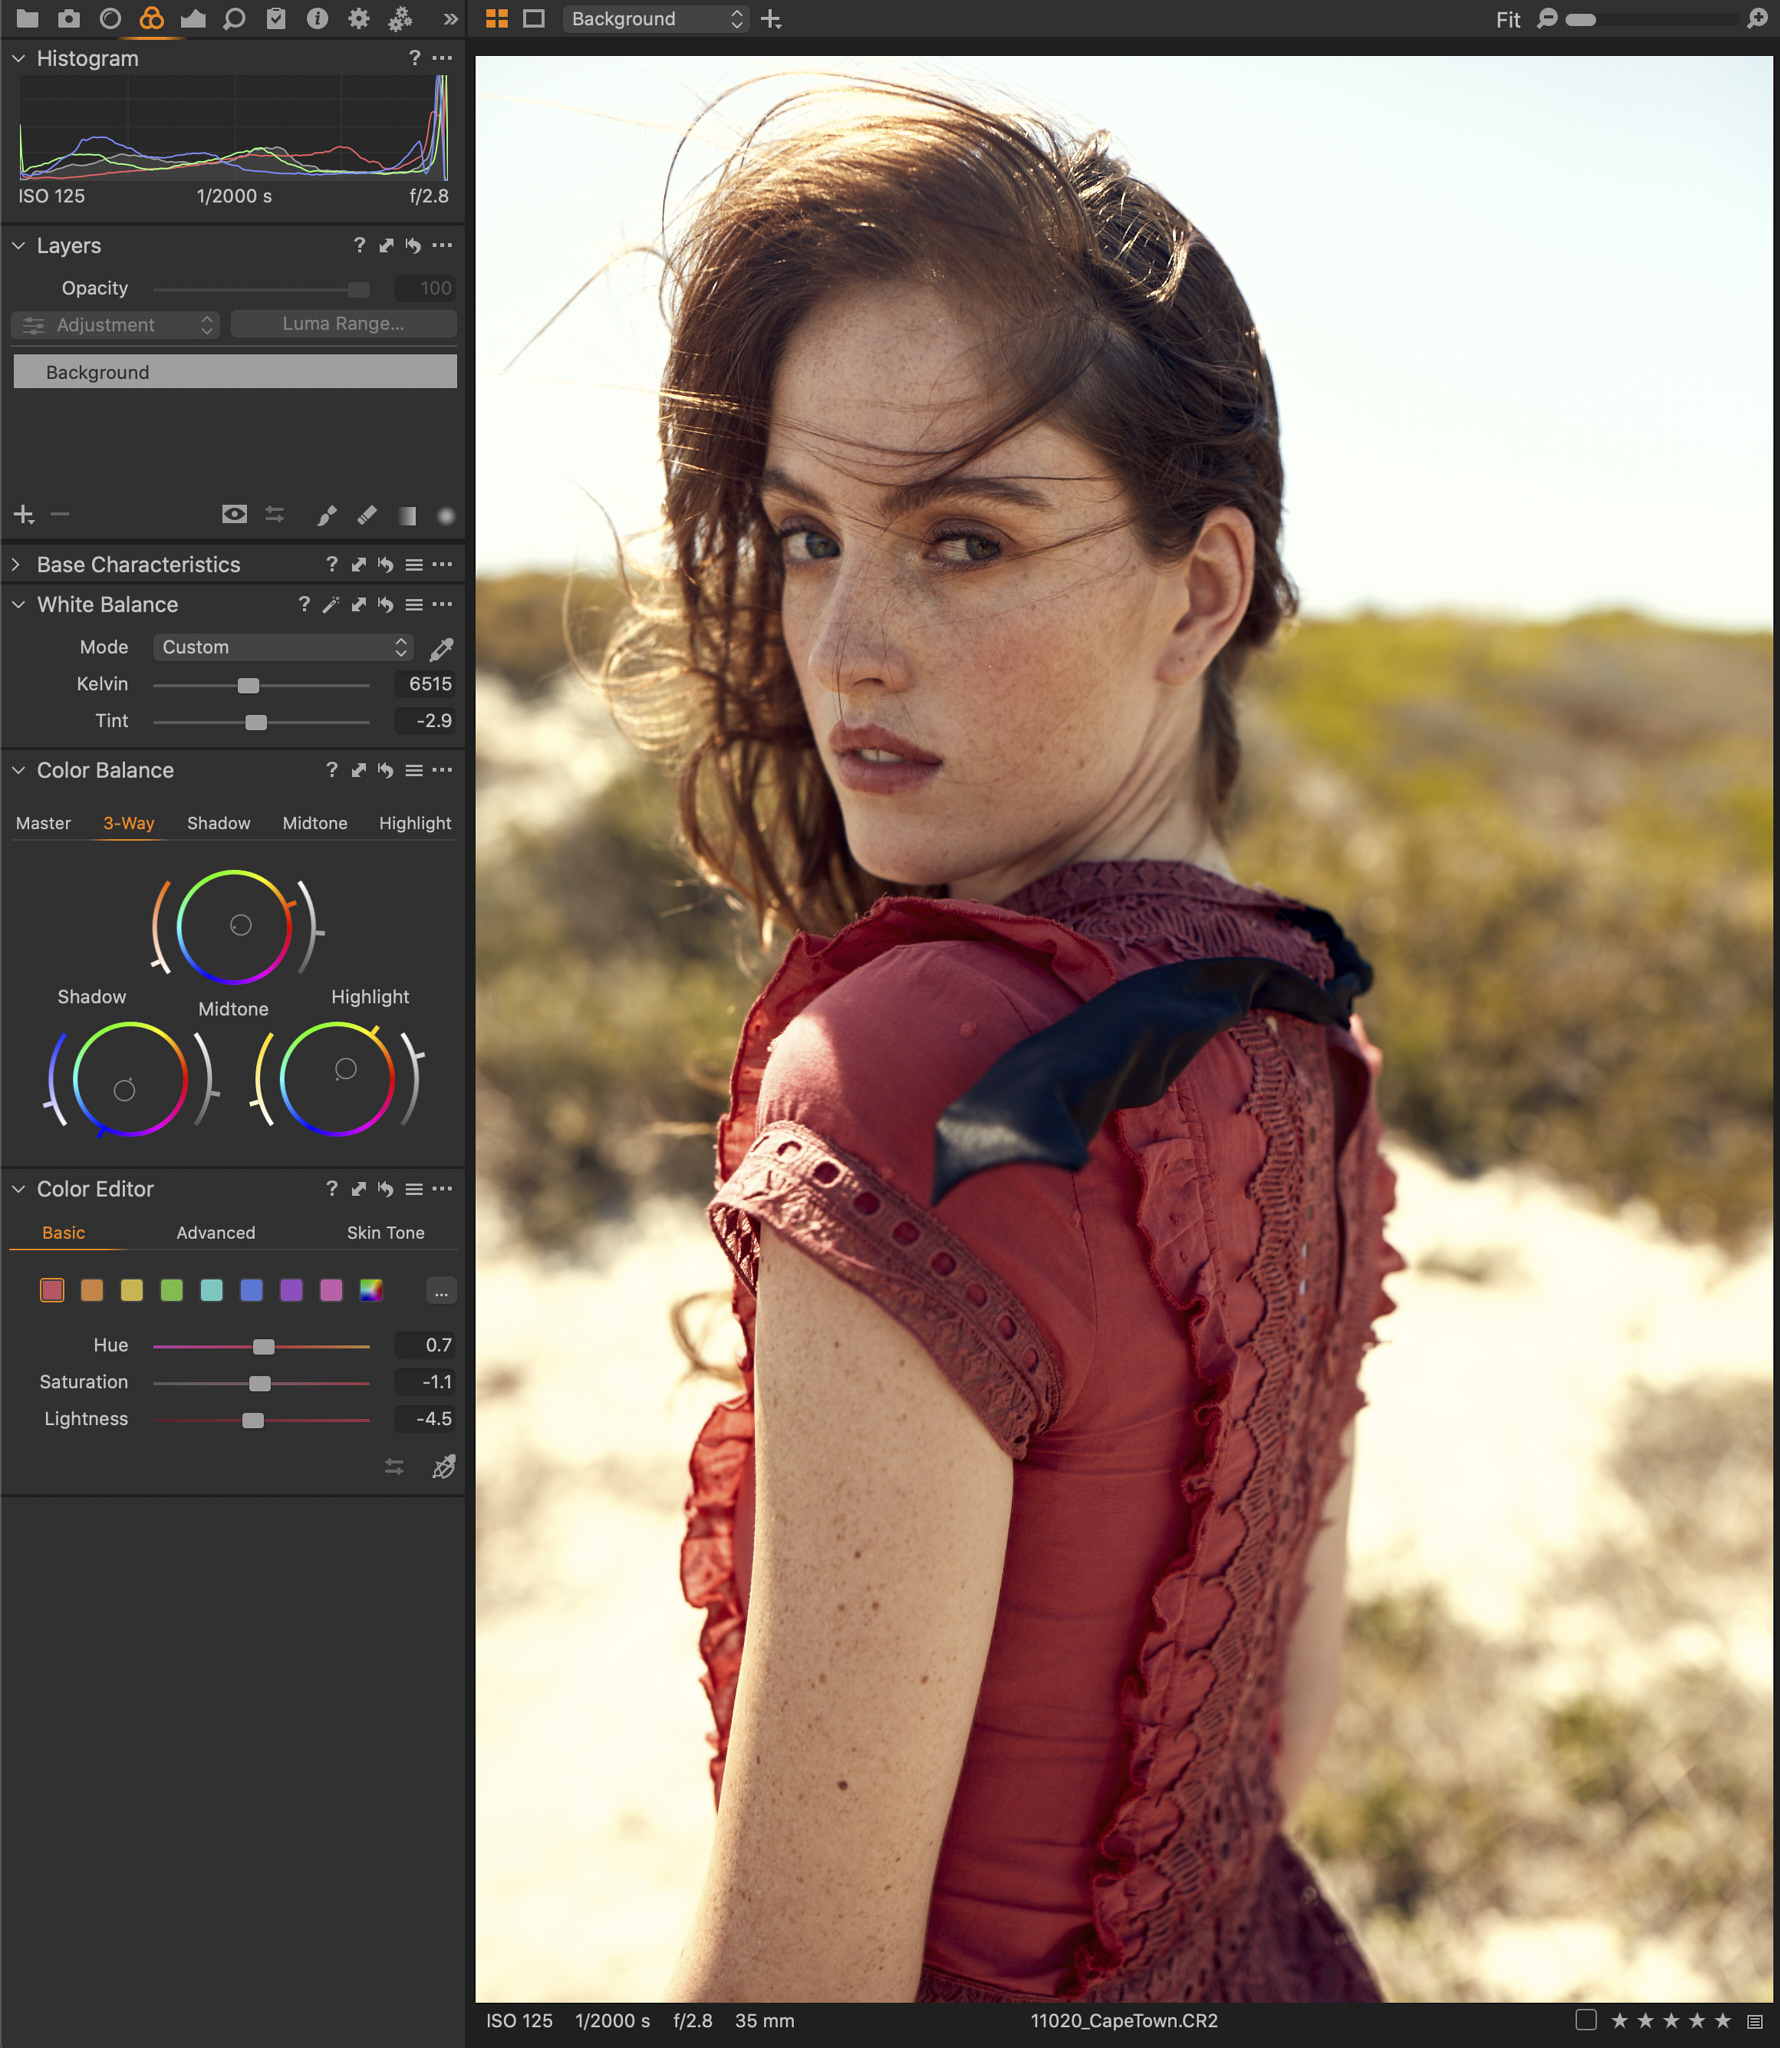
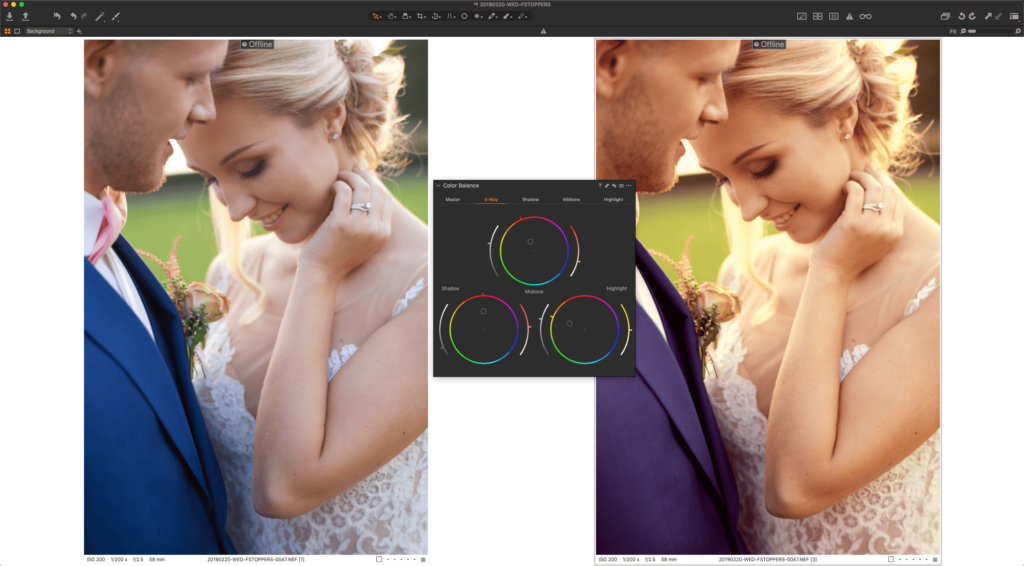
Color Balance for quick grading
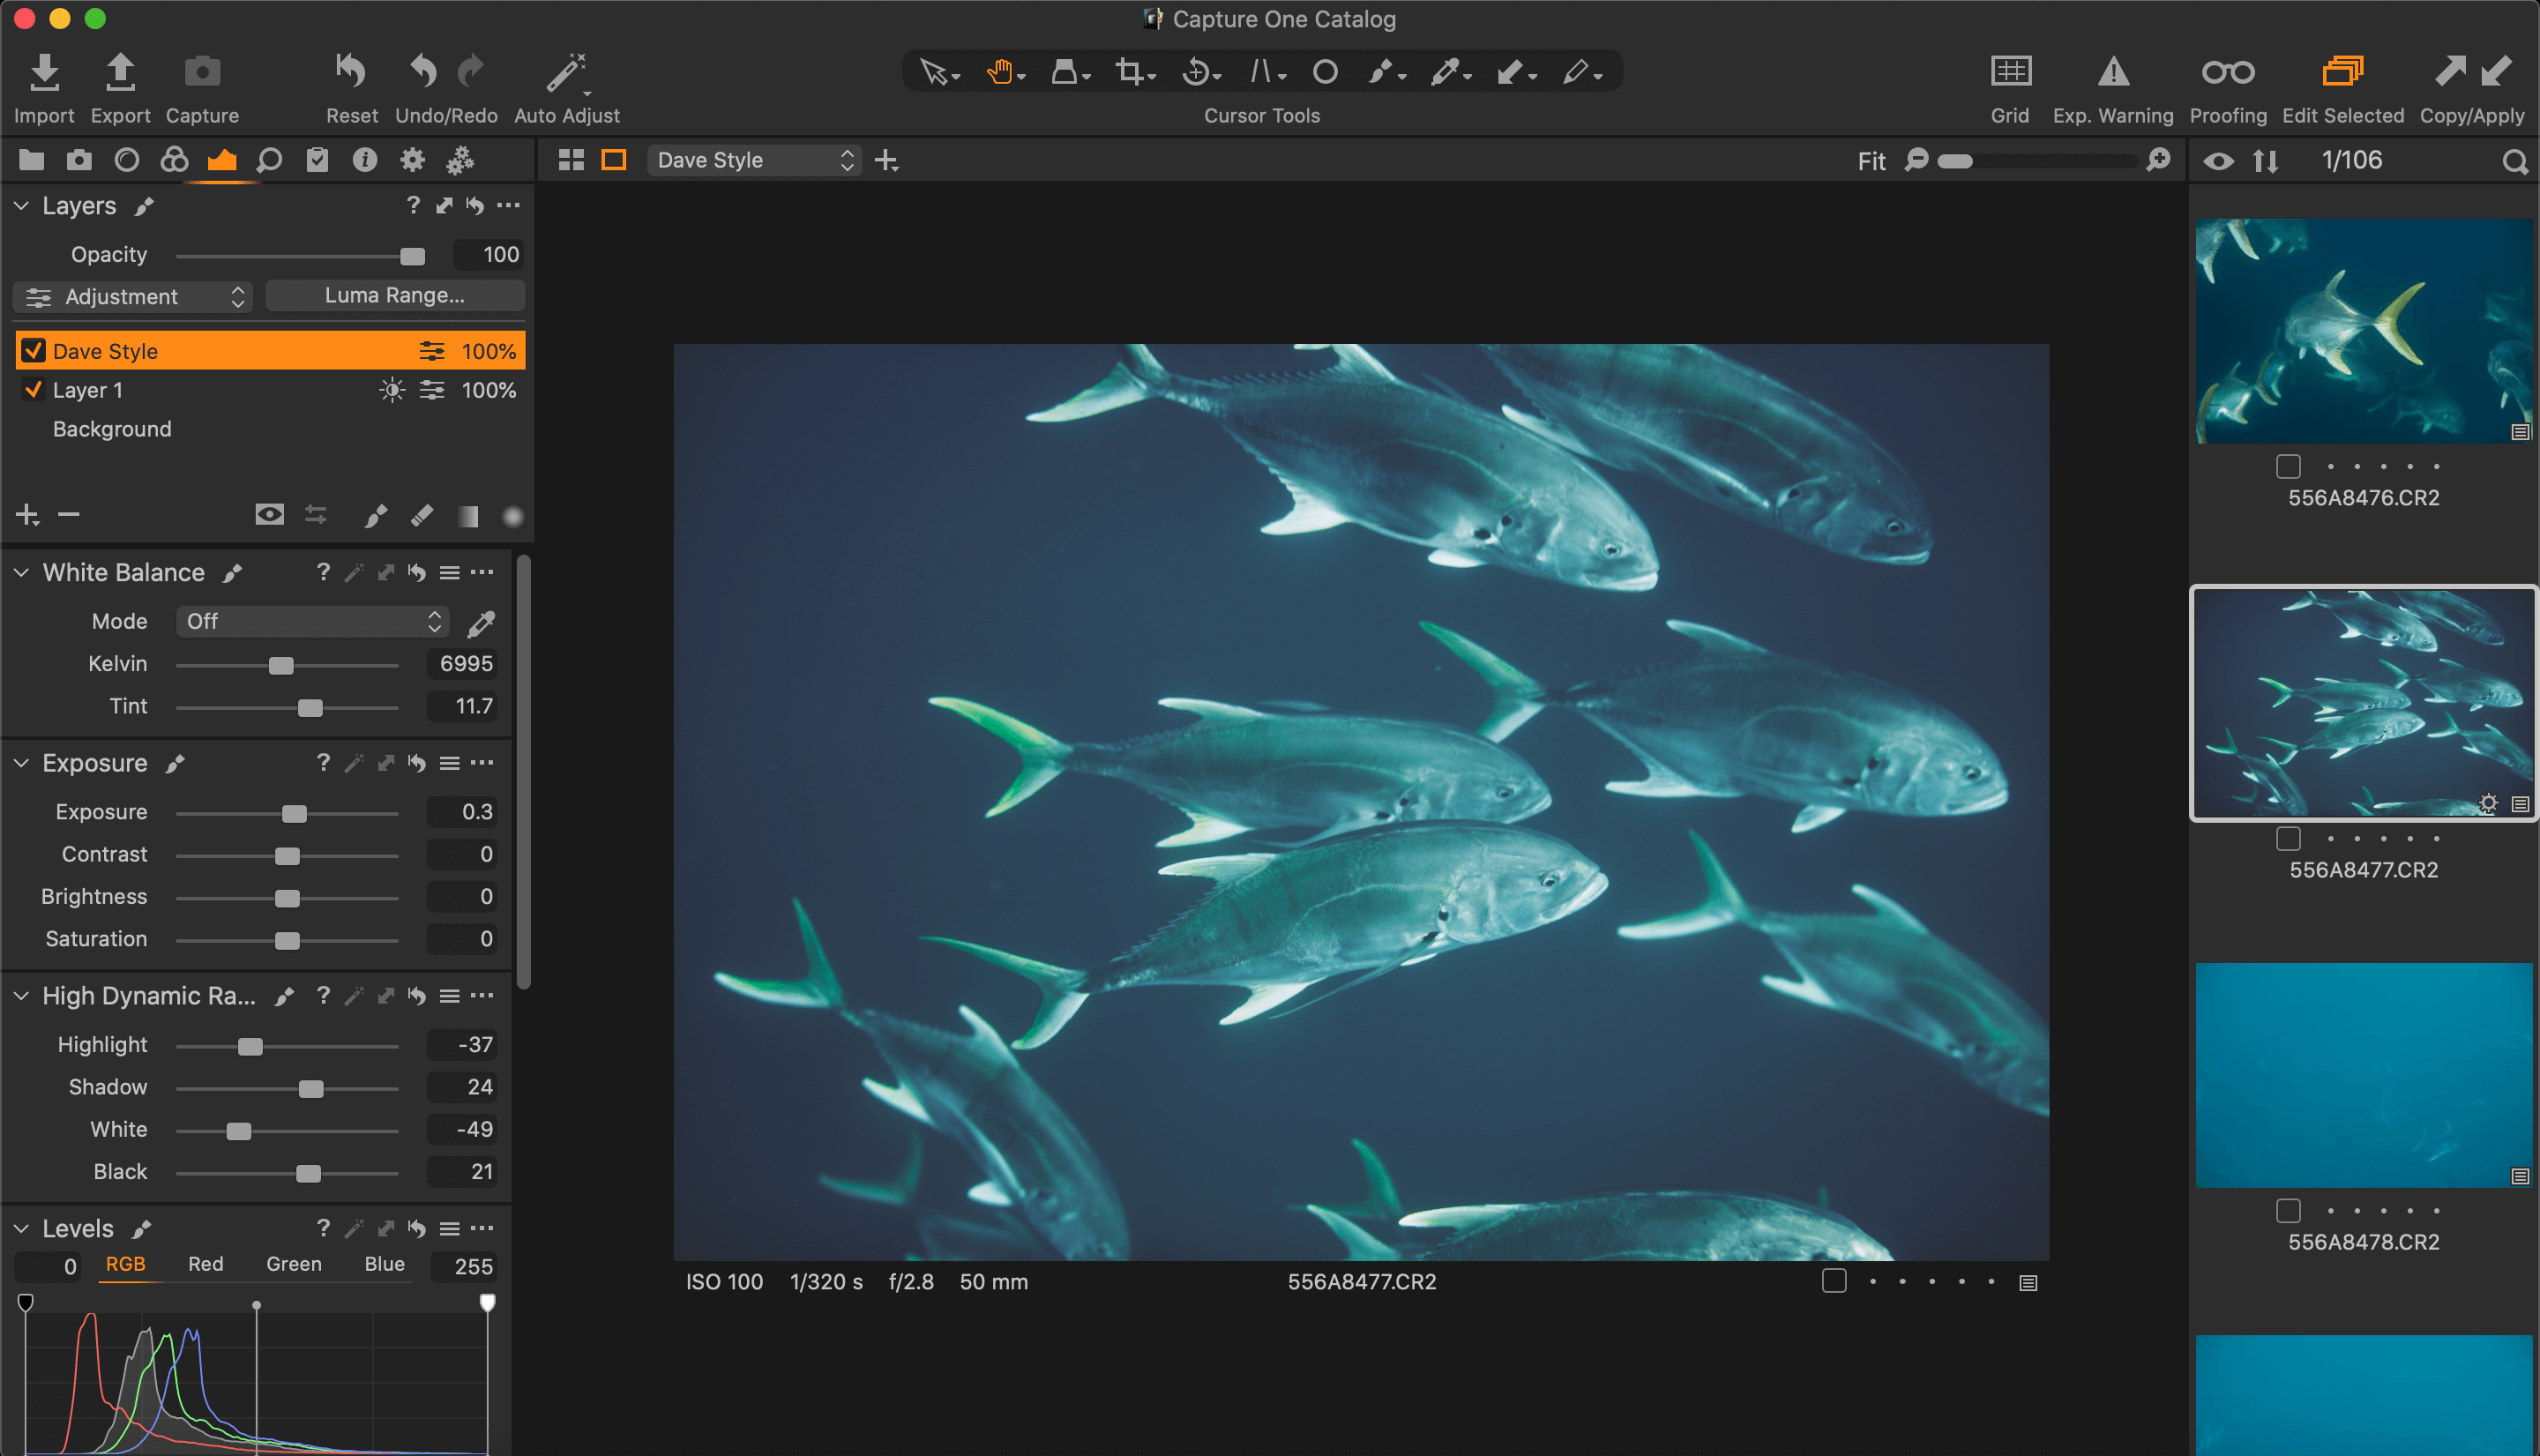
The Color Balance tool is one of the fantastic tools you’ll see colorists use to grade movies and ads in the video industry. It’s very visual, making it quite user-friendly even for non tech-savvy photographers. It can be used for both color grading and color correction.
I love using it for color correction on wedding images, as I can tweak the shadows, midtones, and highlights independently. To correct a color cast, you’ll want to add the opposite color. For example, if the shadows are too warm, you’ll take the opposite color – between cyan and purple – and add some in the shadows. It may sound bizarre at first, but once you start using it, you’ll fall in love with the Color Balance tool.
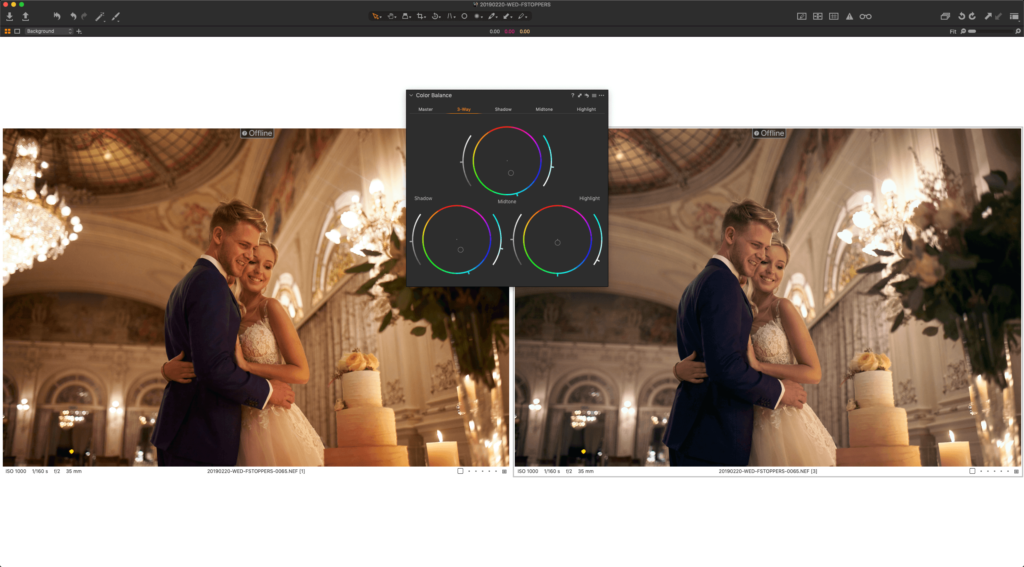
The color grading process using the Color Balance tool is quite easy as well. You can add a different color in each luminosity zone while seeing if the colors you are adding works. No need to check a color wheel somewhere else to make sure you’re basing your grade on a harmony that works.
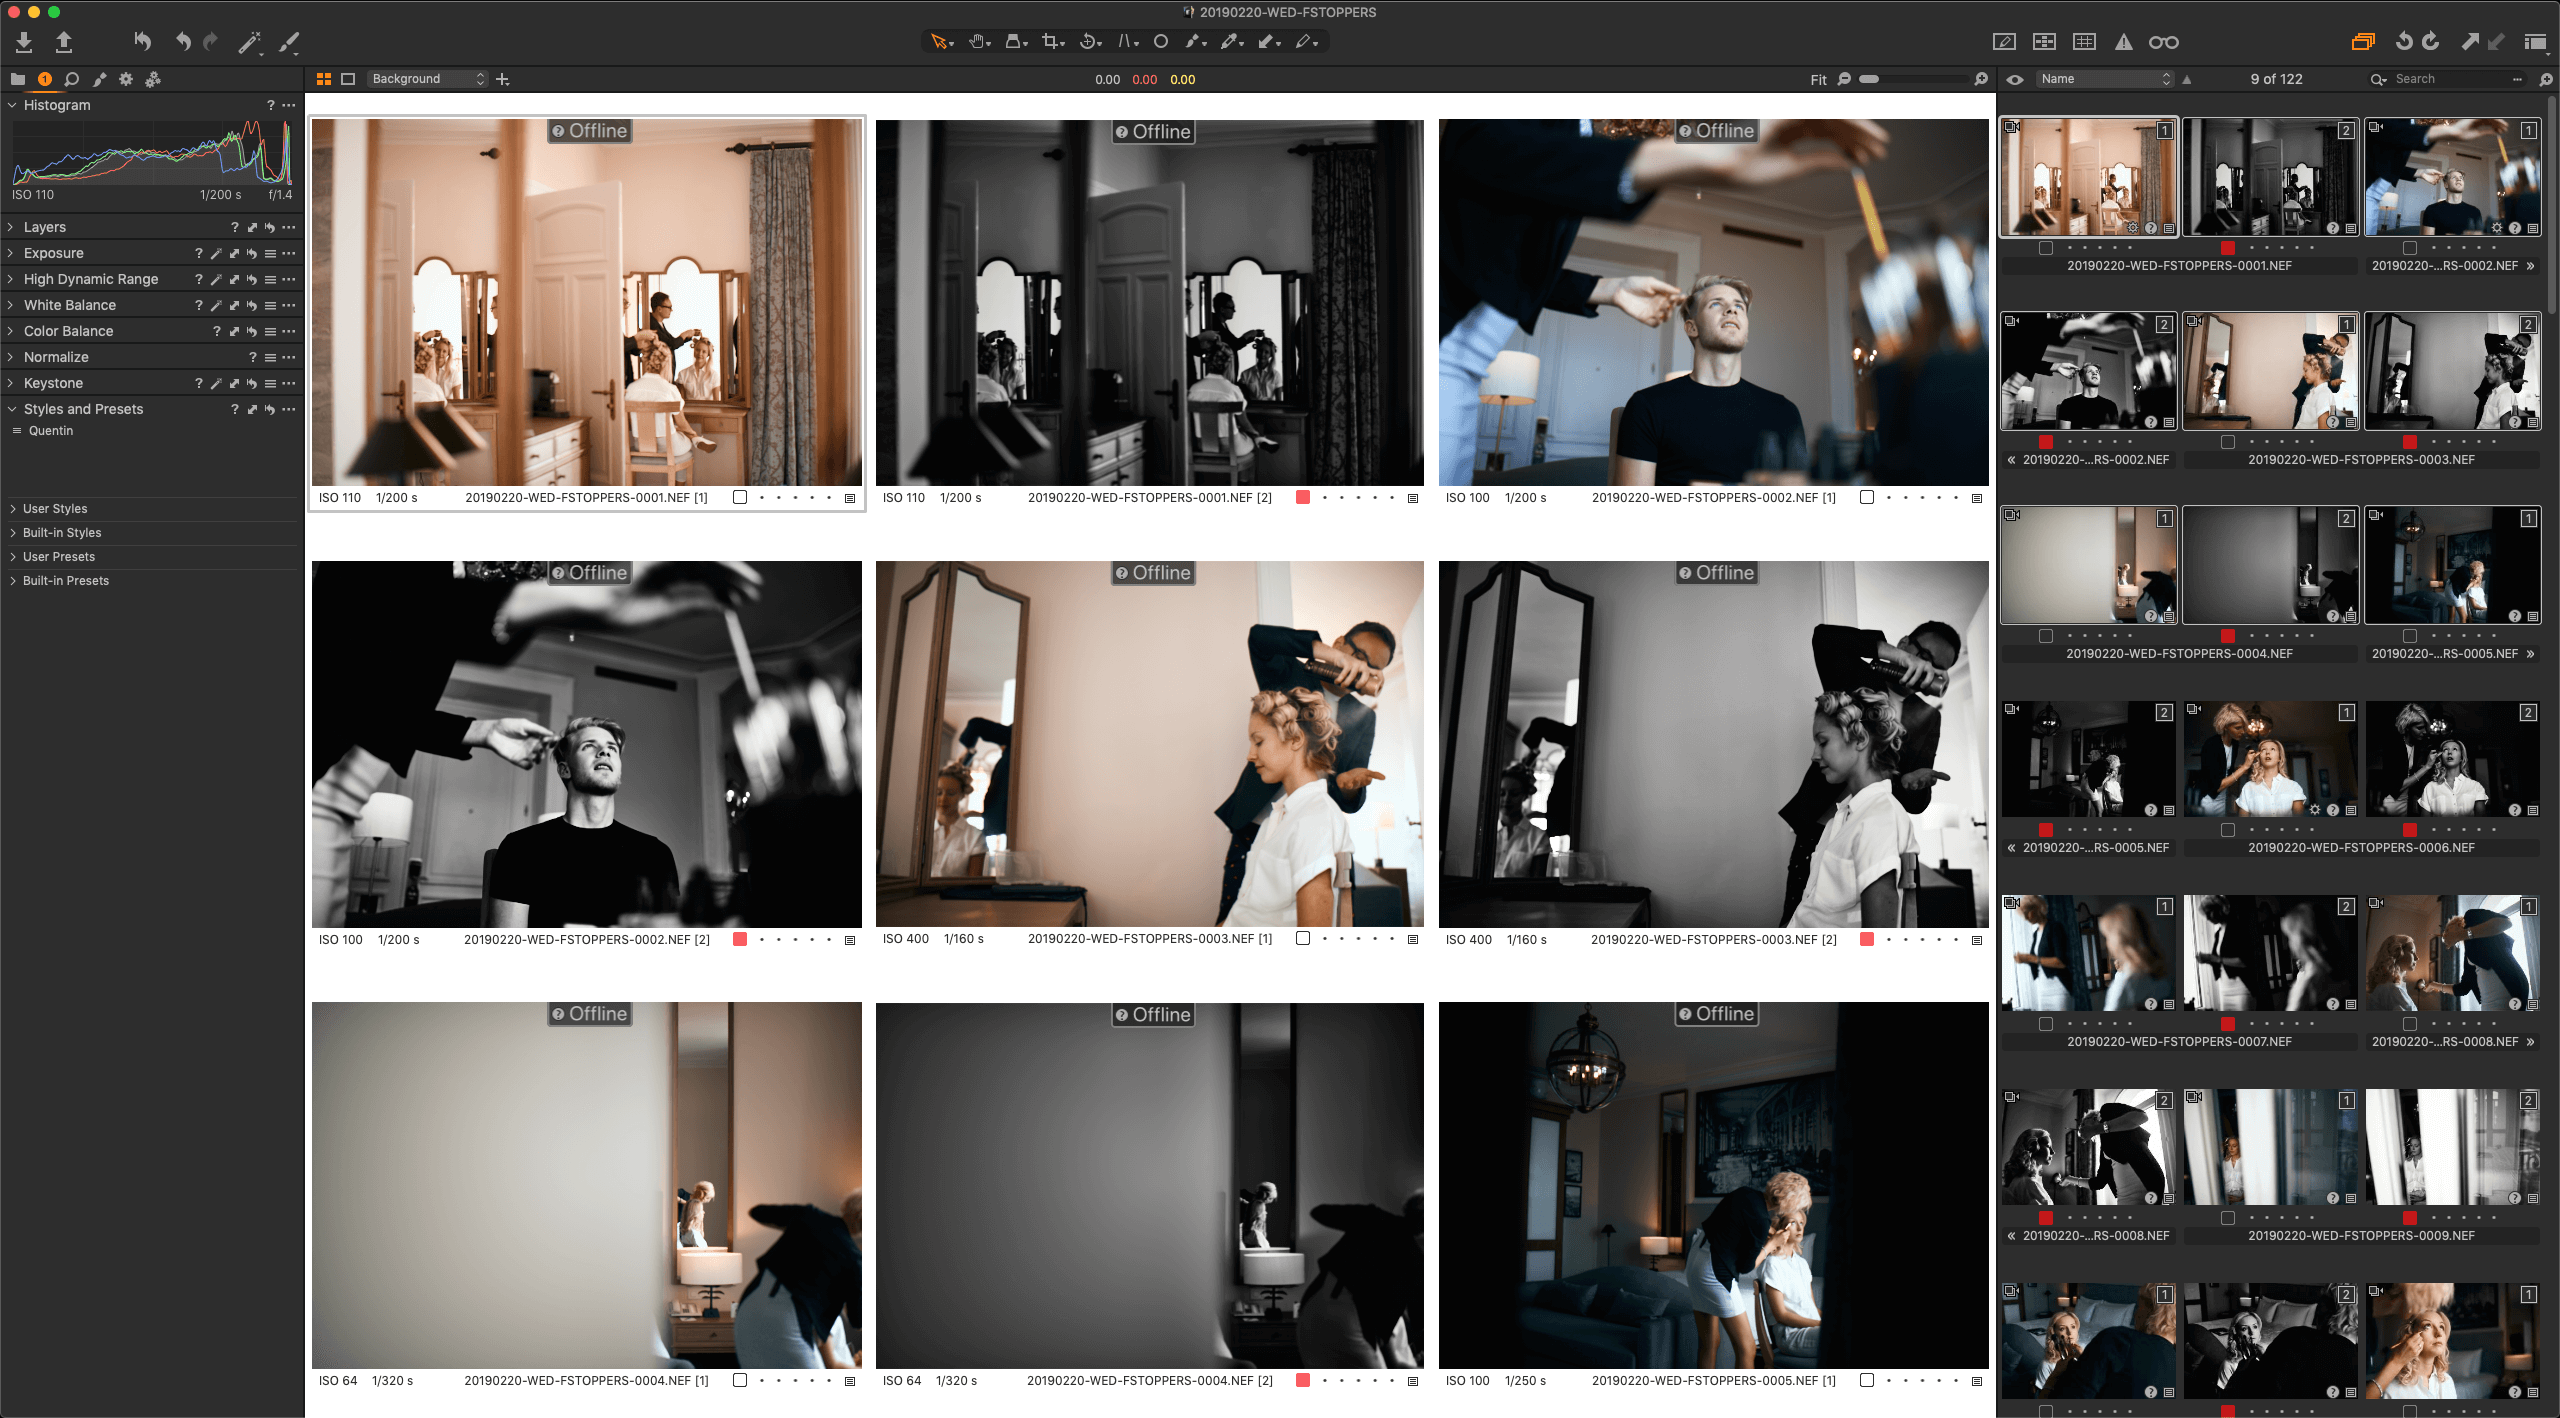
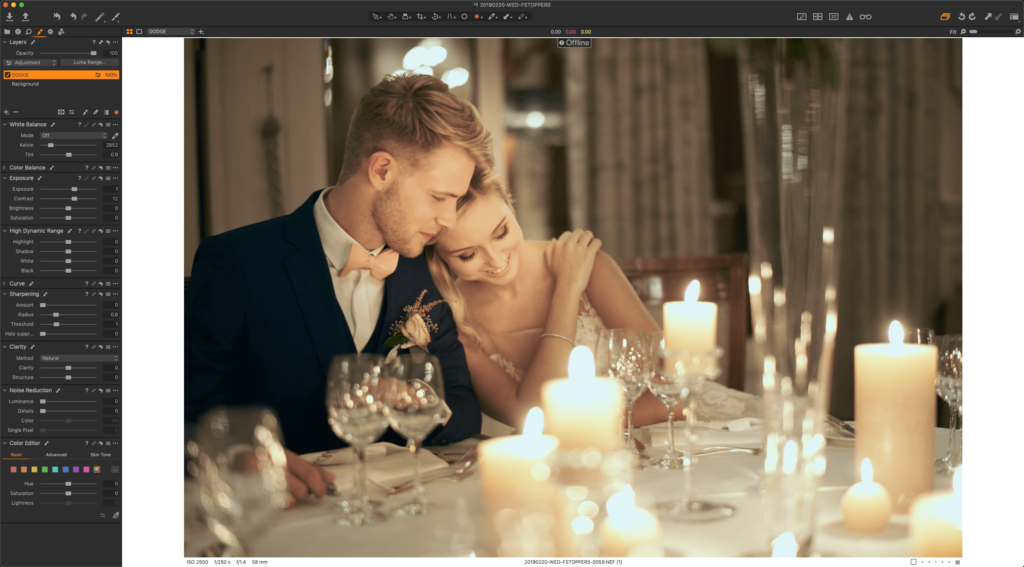
Relying on Layers for more control
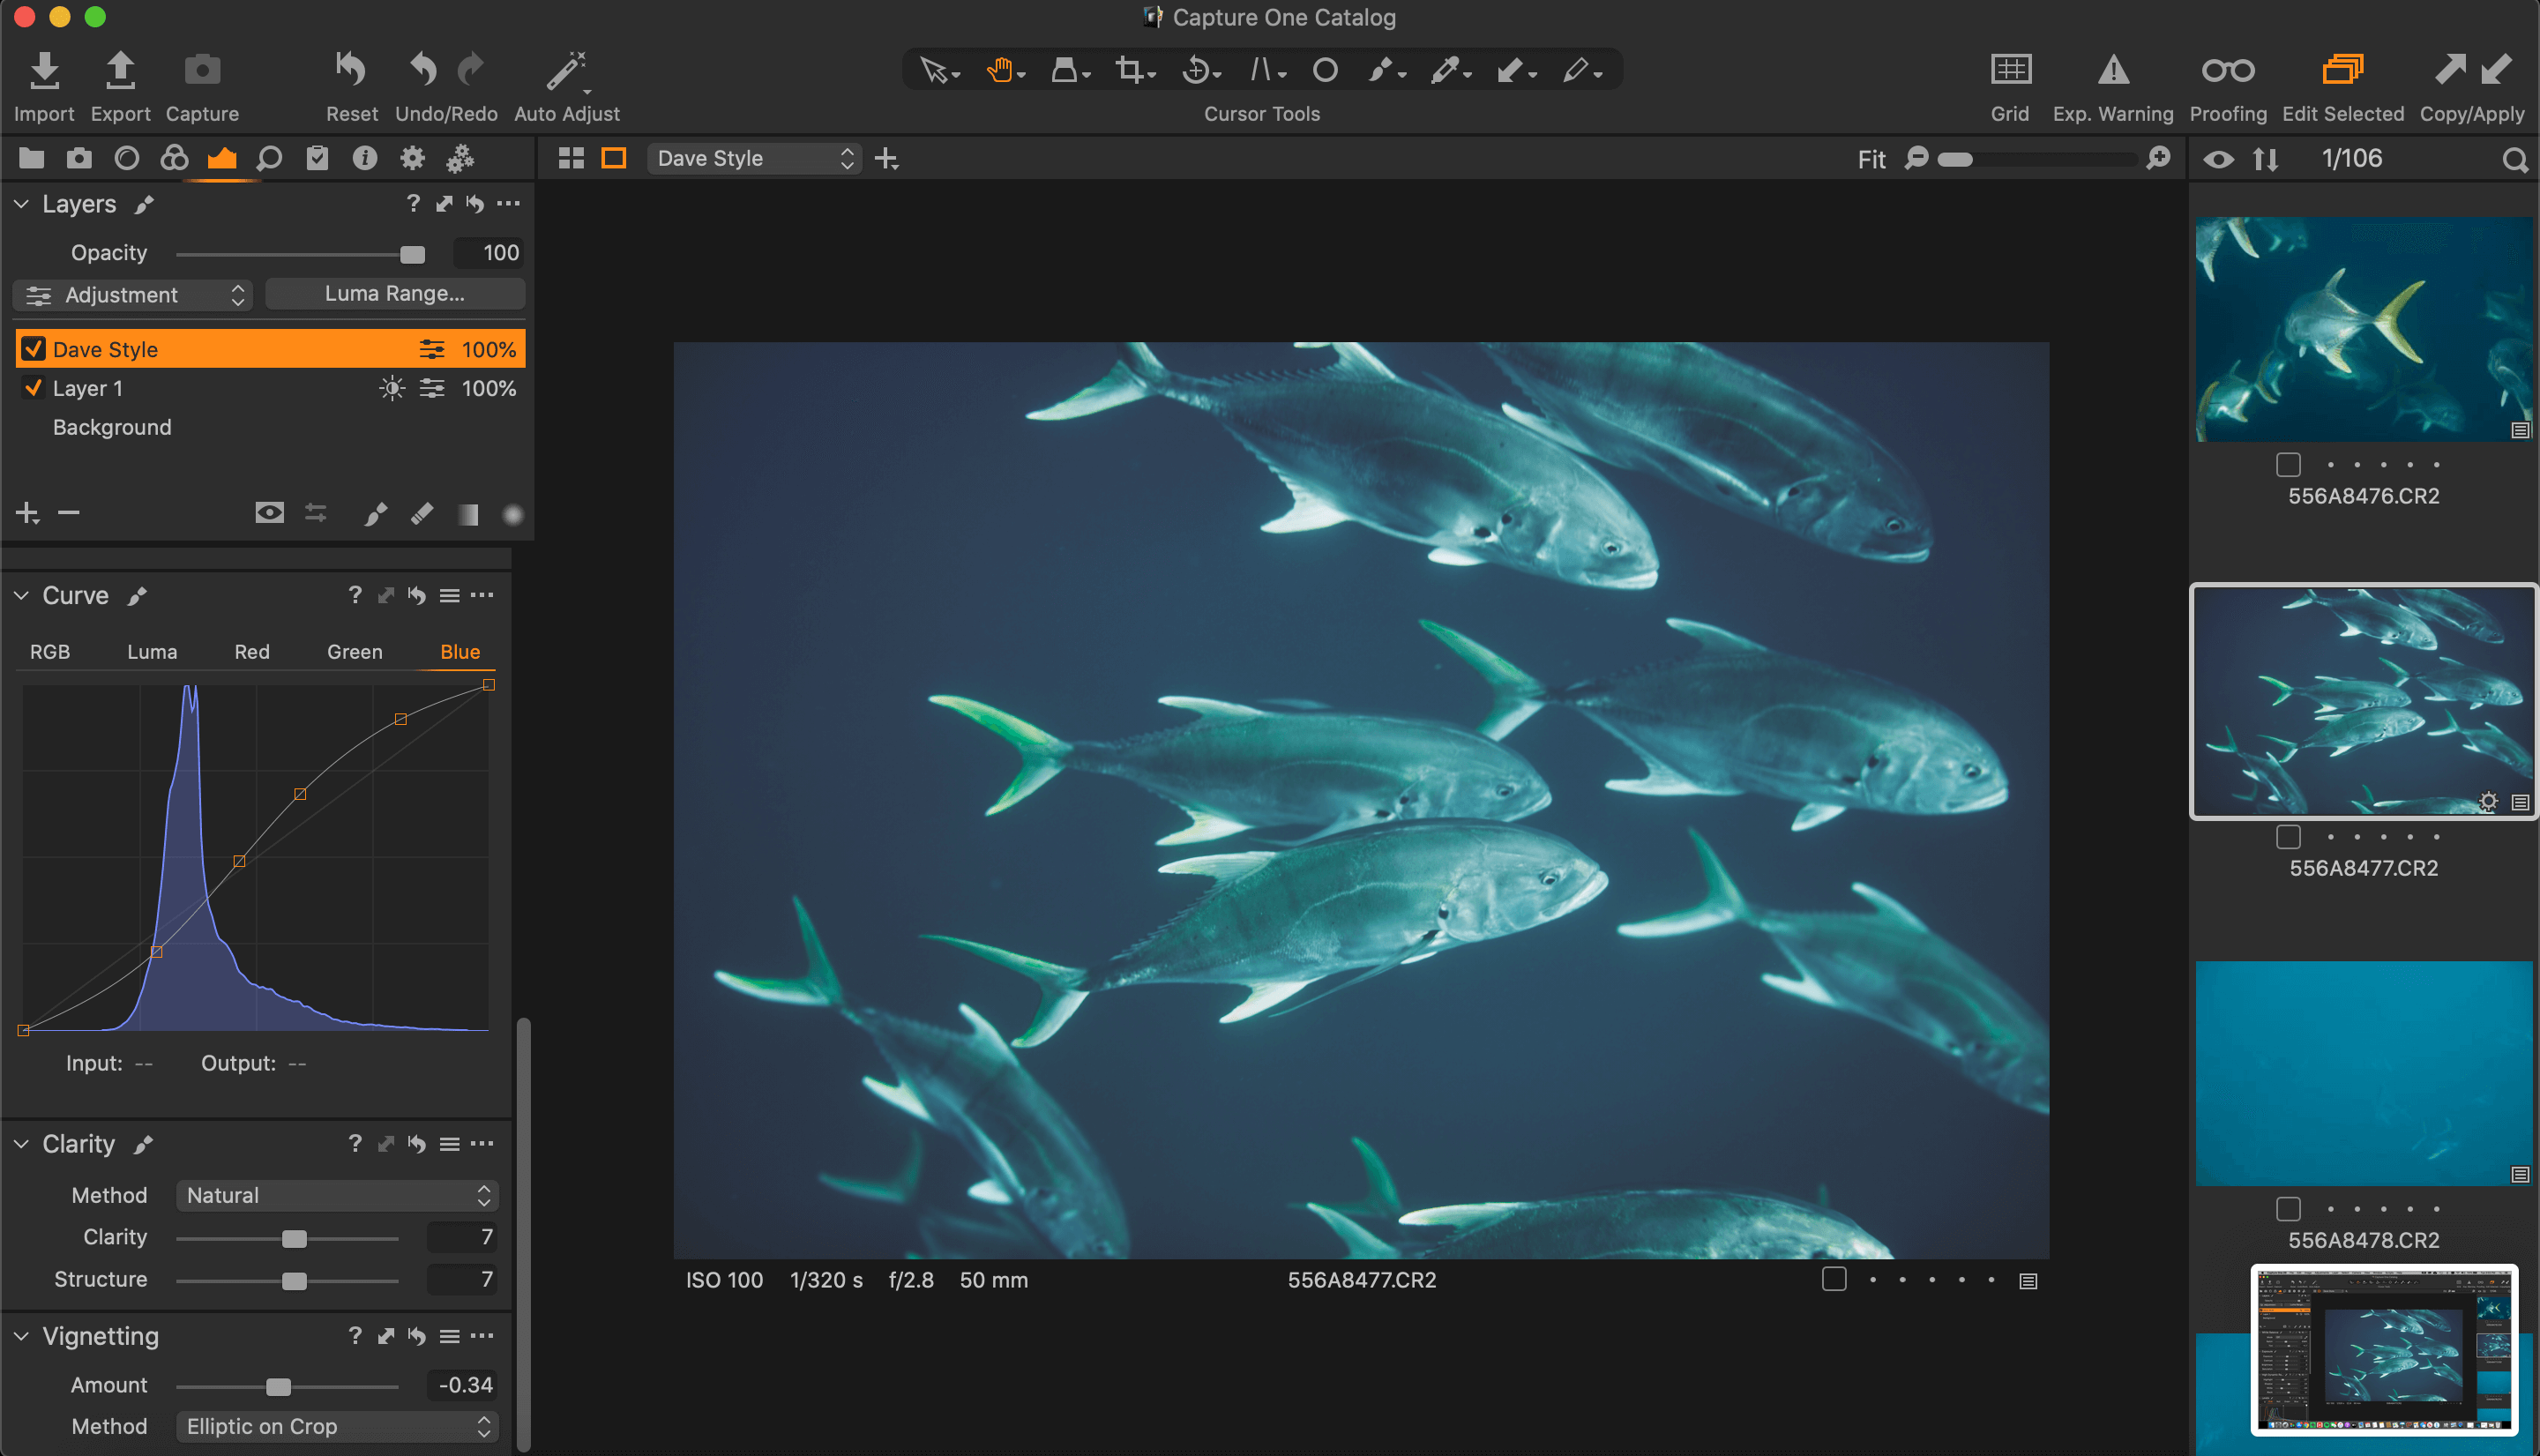
Layers in Capture One are a game-changer for my wedding editing workflow. I can apply Styles (presets) as Layers so I can adjust their opacity and stack a few of them to get the look I want.
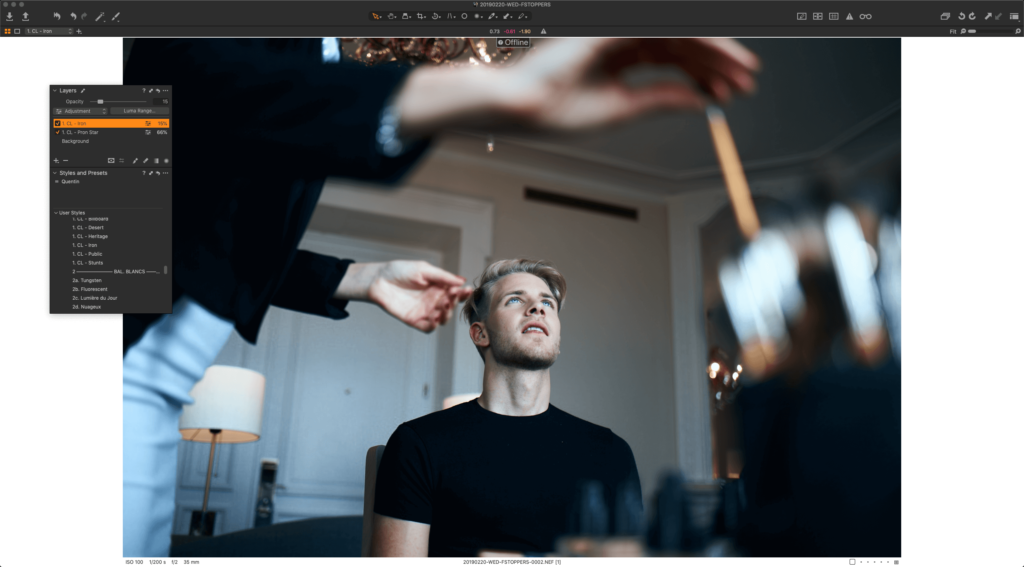
My wedding editing style relies a lot on local adjustment. I dodge and burn areas of my images to direct the eyes of the viewers. Capture One allows me to make this a speedy and easy process. I create a new dodge layer (blank layer with exposure at +1 and contrast at +12) on one image, then copy and paste that layer onto the rest of the pictures. I can now select a bunch of images (usually 9 or 12) to display in the view at the same time, and I brush away to dodge where it’s needed. Once I’m done with the first group of images, I press alt + right arrow to move on to the next group.
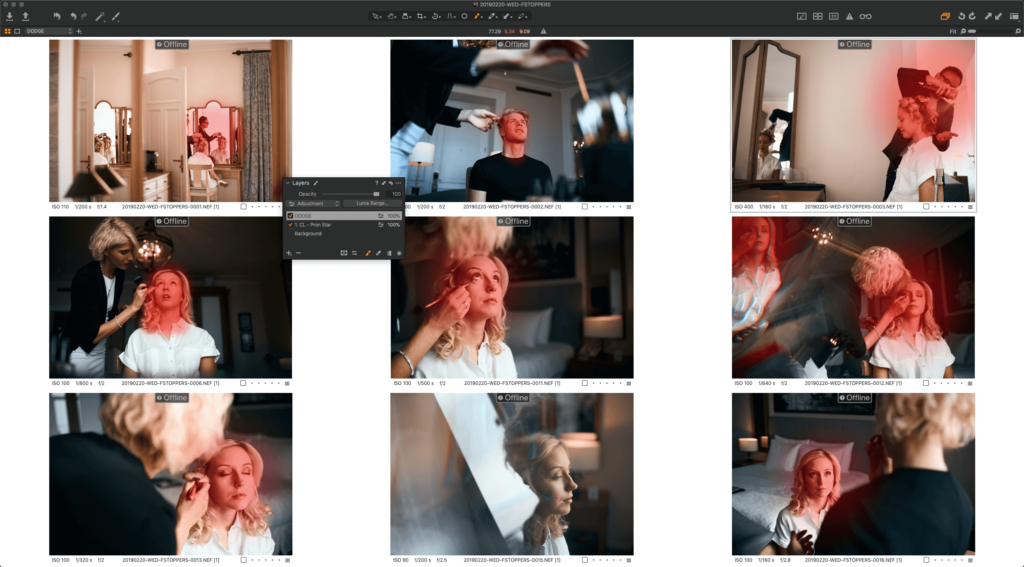
By working this way, I can work on smaller images, making sure my mask falloff isn’t too strong and also allowing me to go through the process very quickly and efficiently. If you do burning at the same time, just make sure to define a shortcut to change layer easily so you can do both at the same time without fumbling around with your mouse to find layers.
Keeping everything neat and organized
That’s why I love Capture One so much – it keeps everything organized for me.
When editing weddings and engagement sessions, I put files from each moment of the day or location in a different folder. Each folder is then imported into a different Collection in my Capture One Catalog, so I can find all the images from the getting ready stage in one place, and then the formals in another.
While Collections have to be created manually, you can rely on Catalog Templates to save time. Simply create an empty Catalog, add Albums to the User Collections for each moment (getting ready bride, getting ready groom, ceremony, etc.). You can also add Smart Albums if you use them. Once you’re done creating the structure for all your future weddings, go to File and then select Save as Template. Next time you create a new Catalog, you’ll have the choice to base your Catalog on the template you just created and thus have all the Albums and Smart Albums ready for you to use.

Even where your files are organized into different folders, you can still do a single export to JPEG for final delivery to your clients. Select all the images that you have edited by going to the All Images Album in the Catalog, then create a new Process Recipe and ensure with the setting you want, and then have a look at the File tab in the Process Recipe.
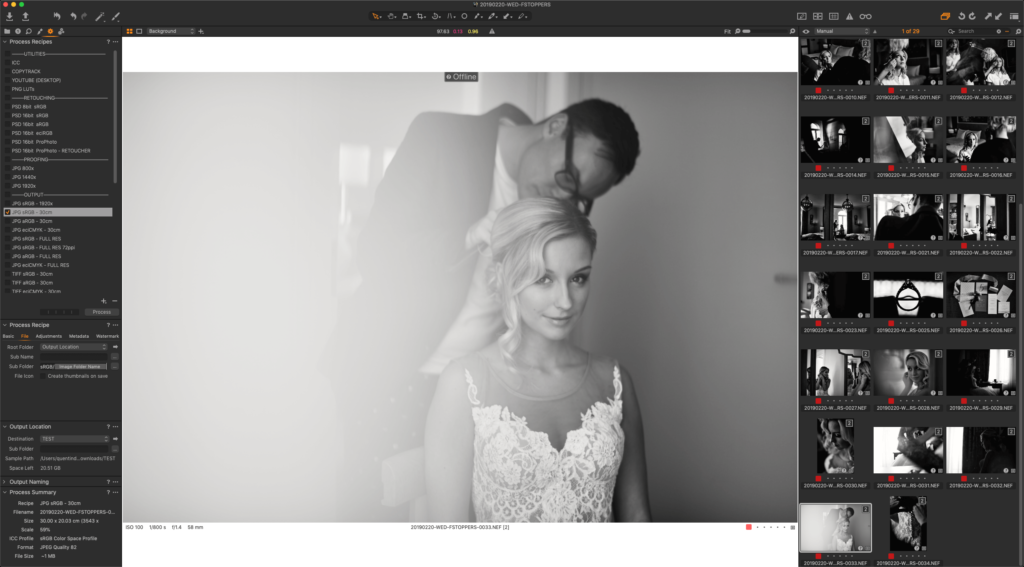
In the Sub Folder text field, you then create a file structure using plain text or Elements. If you want your final JPEGs to be organized in the same way as your RAW, make sure to use the Image Folder Element. Capture One will then place each exported image in a folder that mirrors the folders organizing your RAW files – i.e. Getting Ready or Ceremony.
You can also go further and use Color Tags or Ratings to organize even more your processed files.
Try it for yourself.
For me, Capture One Pro is undoubtedly the superior choice for wedding photography editing.
It has helped me develop my business by allowing me to edit photos faster while improving the quality of my final images.
Try it for yourself – take advantage of the 30-day free trial and experiment with every feature I’ve mentioned above. During the trial period, you’ll have plenty of time to play and see how Capture One Pro can help improve your wedding workflow.