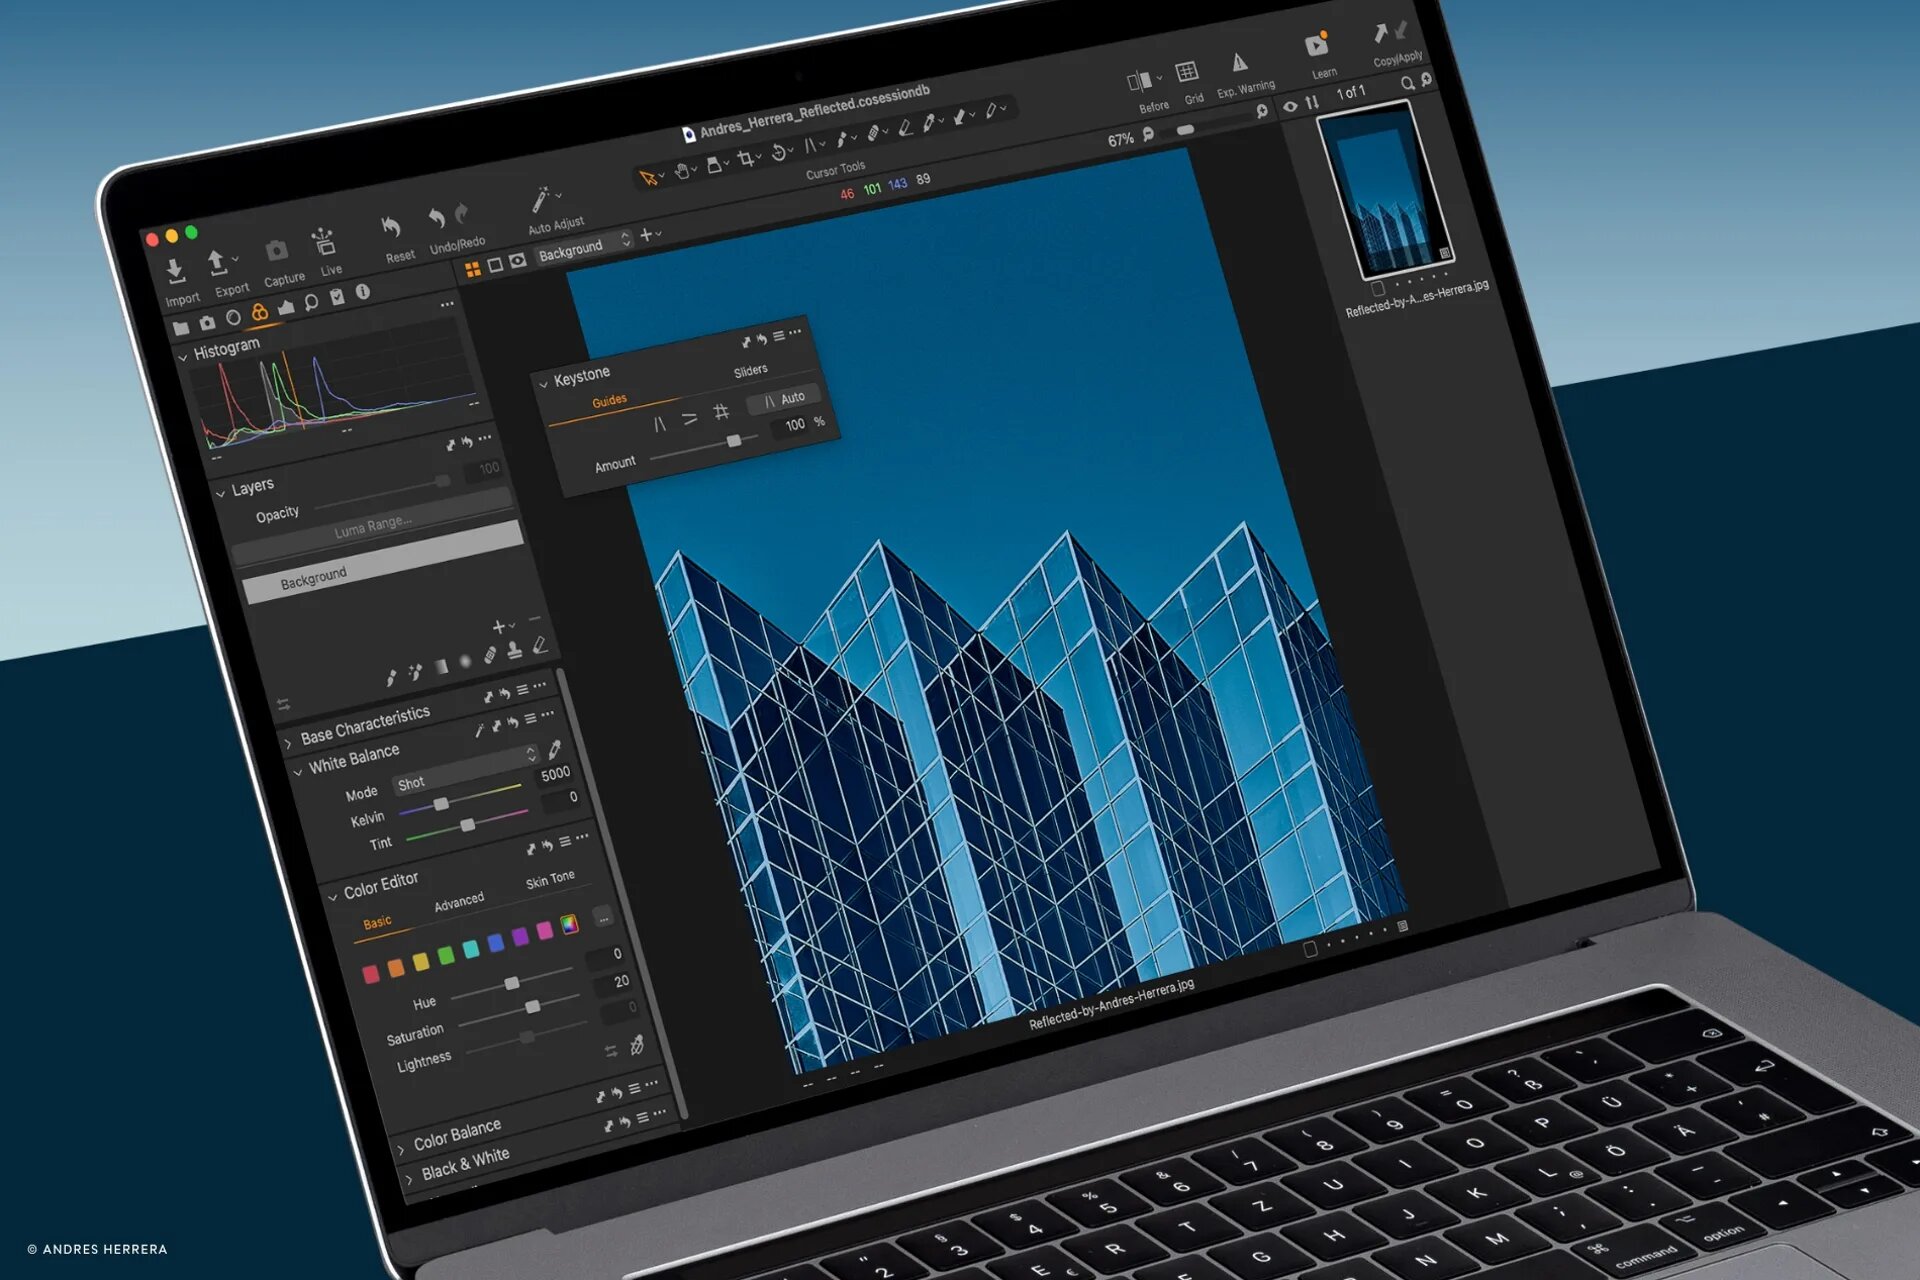
Latest Posts

Zoë Noble on capturing women who choose to be childfree

Starting out as a side project for Berlin-based beauty photographer Zoë Noble to shine a light on women who choose not to have children, “We Are Childfree” has become a community of women across the world that support each other, share advice for how to live childfree, and work to destigmatize the act of choosing not to have children.

“I didn’t have any role models growing up, and the ones that I saw were negative; it was always the mad, career-obsessed, hating-children, woman. And I knew that wasn’t me,” says beauty and still photographer Zoë Noble about the portrayal of childfree women.

Realizing early on that she did not want to have children made her acutely aware of how radical that decision is within most societies. She felt that her choice was met with judgment and at times a lack of respect, having doctors tell her that she would change her mind or rejecting her request to have procedures that would affect her ability to have children.

“When I had fibroids and I wasn’t allowed to have a hysterectomy, because the doctor’s priority was my fertility. Even though I said that I didn’t want children.”

“I knew that if I was feeling like this, there had to be other women who were feeling alone.”

Putting a Face on the Childfree

Wanting to connect with other women in her situation, Zoë set up her home studio and started shooting a portrait series that she named “We Are Childfree”. She interviewed her subjects about their decision and life after opting out of motherhood.

“I knew that if I could shine the light and maybe put a face to the people who were making this choice that it would destigmatize it and just make people not feel so alone. I had a camera and I felt like I could do something about it.”

A global community

Since starting the portrait series, “We Are Childfree” has grown into a global community where  people from around the world share their experiences, advice, and support with others who chose not to have children.

“I asked each woman to choose a location that represents them, that feels most like their personality, and just photographed women all around the city and spoke to women all around the world. And the response was incredible. The New York Times posted about it in April last year, and that really just pushed it out into the world.”

“I’ve been getting emails from China, Kenya, Australia, people who are just really grateful that there is finally some representation.”

Choosing a different lifestyle

As Zoë points out, womanhood and motherhood have historically been seen as one and the same. Nowadays, more women are challenging this view by asking themselves if they actually want to have children and looking at the alternatives.

“It’s about choice. This isn’t about us attacking parents or children. It’s about recognizing that there are different life choices here.”

“We’re told as women that our goal in life is to have children. And when you don’t want that, you are abnormal, and you’re broken. So, putting a face to this movement is showing people that there is no one way to be childfree like there’s no one way to be a woman.”

A lot of the women who reach out to Zoë with their stories have their own reasons for not wanting to have children. For some, it’s the lack of societal support for mothers; for others, it is a political or environmental issue. But for many, it is simply a personal choice about the kind of lifestyle they want for themselves.

“I really wanted to show the diversity. Taking photos of people is a way to actually show that we are here in this society. You can’t pretend that we don’t exist or that we are the monsters that you try and portray us as. We’re just normal people. I feel like that’s the power of the image.”

Explore the “We are Childfree” site to learn more about the project and Zoë’s work.


Sign up for the webinar

Find out how ti witch from Lightroom to Capture One with these 10 killer tips

10 killer tips for switching from Lightroom to Capture One

Getting used to new software is rarely easy – but it doesn’t have to be frustrating. If you are considering switching from Lightroom to Capture One, here are 1o tips for making the transition easy.

1. Interface

There are a few things to take notes of when switching from Lightroom to Capture One:

  • The default layout has tools to the left and browser to the right of the viewer.
  • To choose a layout more similar to Lightroom, simply select ‘Window > Workspace > Migration’. This will provide a workspace that more closely resembles Lightroom’s layout.
  • Most tools in Capture One can be re-organized, moved freely around between Tool Tabs, and even scaled when pulled out of the Tool Tab, by simply clicking the Tool Title and dragging. Parts of the interface can also be hidden. For an easy overview, use the View menu.
  • Tools can be distributed between a scrollable part and a pinned part within the Tool Tabs. The pinned part is always at the top, making it easy to pin the tools you need to have instant access to.
Capture One has a customizable interface. Set up the workspace how you like

Capture One has a customizable interface. Set up the workspace how you like

2. Catalog or Session?

Capture One offers two ways of organizing your images. Catalogs and Sessions. What are they?

Catalog

Just like Lightroom, you can import your images to a Capture One Catalog. You can choose to keep your images in their current location or copy them inside the Catalog. A Catalog is a database that contains information about metadata, keywords, ratings, etc. for each image.

When importing, organizing, or editing your images, Capture One updates the database with this information. This is a very useful way of working with larger image collections.

You can even import your Lightroom Catalog directly into Capture One.

Session

A Session provides a simpler, folder-based workflow with a predefined structure of ready-to-use folders and the ability to browse any other folder on your computer without having to import. Adjustments are placed in a subfolder next to the images. Sessions are suitable for tethered shooting, individual jobs, etc.

You can use one or the other – or both!

3. Presets = Styles

What’s called presets in Lightroom is called Styles in Capture One. They work in a similar way and are easily adjusted after applying. Capture One also features Presets, which only includes one tool, making them accessible from within the tool they use. To summarize:

Style: Pre-defined adjustments including multiple tools.

Preset: Pre-defined adjustments including only one tool.

To learn more about Styles and Presets when switching from Lightroom to Capture One, watch this tutorial (5 minutes).

4. Layers

Layers in Capture One provide similar functionality as Brushes in Lightroom. However, they work more as Layers work in Photoshop, where each layer has a mask. If we stick to Adjustment Layers, you have two initial options:

  1. New Empty Layer – The default option when clicking the plus-icon in the tool. This will create a new layer without a mask on it. To see the effect of any adjustments applied to the Layer, you need to mask the desired area with the brush.
  2. New Filled Layer – By long-pressing the plus-icon, you can choose this option. This will create a new layer with a solid mask on it. Any adjustments will show on the entire image, but you have the option to erase parts of the mask or decrease the opacity of the whole layer.

Layers in Capture One provide similar functionality as Brushes in Lightroom, but work more like layers in Photoshop

5. Speed Edit

You can edit your images in Capture One in many ways. One of them is Speed Edit, which is a functionality that allows you to edit your images without having to pull any sliders.

Speed Edit works by holding down an assigned key on the keyboard and its corresponding slider will temporarily show at the bottom of the viewer. While holding down the key, simply scroll your mouse wheel or trackpad, click-and-drag anywhere in the interface, or press the arrow keys on your keyboard to adjust the slider.

Speed Edit allows you to edit your images without having to pull any sliders

Which keys are assigned to what sliders can be viewed and even customized in the Keyboard Preferences section.

Pro tip: Speed Edit works on batches of images. You can for example warm up 500 images with the same amount, and at the same time, by tweaking the Kelvin using Speed Edit.

6. Copy adjustments

To copy adjustments from one image to others, click the arrow-up icon in the top right corner. Capture One automatically detects changed adjustments and puts them in the Adjustments Clipboard Tool. Control which adjustments you want to be copied from the clipboard, and click the arrow-down icon to apply these adjustments to the selected images. The process of copying adjustments makes your transition easier when switching from Lightroom to Capture One.

Copy / Apply icon is in the top right hand corner of Capture One

7. Color Balance

The Color Balance Tool will make color grading easy and fast. It’s like Split Toning, but with more options.

The Master channel works as an overall visual White Balance tweaker; the whole image will be affected. Shadow, Midtone, and Highlight will tone each part of your image with the hue and saturation of your choosing.

The luminosity slider to the right provides additional control of the contrast of the image while color grading.

The Color Balance Tool will make color grading easy and fast. It’s like Split Toning, but with more options.


8. Edit All Selected Variants

When exporting, deleting, or adjusting multiple images at a time, make sure to enable ‘Edit > Edit All Selected Variants…’. Otherwise, you will only export/delete/adjust the highlighted image in your selection.

You might think “why would anyone need to disable this?!” – but there are surprisingly many instances where it’s useful.

9. Shortcuts

In any software, shortcuts make lives easier. This is no different in Capture One. In addition to an extensive default list of shortcuts, you have the option to add shortcuts for almost anything. Including changing all the default shortcuts.

Go to ‘Edit > Edit Keyboard Shortcuts…’. The first step is to duplicate the default and create your own list. Then you can edit away.

10. Instant tethered capture

Capture One was initially designed 20 years ago as a tethering software, meaning it would transfer an image from a connected camera to the computer, and show it on the screen.
For an industry-leading tethered workflow, simply create a new Session, connect a supported camera and start shooting.

If you don’t already own Capture One, you can download a 30-day trial and discover its power.

Sign up for the webinar

Capture One Pro workflow with professional food photographer Rachel Korinek

We asked Australian-born, Canda-based food photographer Rachel Korinek of Two Loves Studio to share her secrets for a smooth workflow that helps her capture appetizing scenes and create mouth-watering images for her clients. Read her step-by-step guide for a faster workflow from shoot to delivery.

As a professional food photographer, Capture One Pro has allowed me to seamlessly tether a photo shoot, edit and select as I go, followed by efficiently exporting with Export Recipes. An overview of my editing workflow is as follows:

● Tethering and syncing basic edits to each new photo.
● Selecting hero shots using star ratings.
● Editing selected images based on client needs or food stories.
● Taking images to be retouched into Photoshop as a PSD.
● Exporting files into organized folders using Export Recipes.

Let’s discuss the workflow approach I take in a little more depth.

Tethering & Syncing Base Edits and Metadata.

Tethering allows still life and food photographers to make small compositional changes that are important to tell a food story. Capture One Pro also makes it very easy to synchronize edits from one image to another during a tethered shoot.

Not only does that help me visualize how I want the final images to look and if there are any changes to lighting that I need to make, but it makes the entire editing process quicker at the end of a shoot.

In the Camera Tool Tab, I set Next Capture Adjustments to ‘Copy from Last’ to ensure that my basic edits are applied to each incoming photo during the photo shoot.

Selecting & Starring as I Go

Selecting images during the shoot is a great way to speed up our workflow and organize the final hero selects. As I shoot, I will be filtering images to be considered as a ‘final pick’. I find that starring images with 1 or 2 stars helps me organize images I’d like to review at the end of the shoot.

I can easily jump into each filter and see the images we’ve selected and if anything is missing from the client’s shot list or composition options.

Save time in your workflow by starring or filtering hero images or selects to organize them for review after the photo shoot. On large shoots, this helps organize a larger volume of images.

The Editing Process for Starred Heros

All images will already have basic edits applied during tethering. From here, I’ll focus on editing each hero shot based on what they need – the light I am shooting, and the type of food story I am trying to tell. The tools I use the most are:

Luma Curve, Levels, and Clarity. White Balance, Basic Color Editor, and the Advanced Color Editor.

As masks are local adjustments, I leave my masking until this stage rather than during tethering.

Once I’ve edited my final selects, I will move them to the ‘Selects Folder’ for simple jobs. Larger jobs might require more organization and can be organized into Session Favorites.

Capture One Pro makes it easy to customize the interface to edit in a way that suits you as a photographer and what you’re trying to achieve.

Taking Files into Photoshop for Retouching

A large majority of my images will be retouched in Photoshop. At this stage, Capture One  Pro lets me to take my image seamlessly into Photoshop for retouching. Saving the file will then bring the PSD (or TIFF file) back into Capture One Pro so I can have the retouched file stored and organized with the other hero images.

To keep a track of the retouched files, I will assign a different color tag for further organization.

Assigning a different filter, i.e., a Color Tag to retouched files allows me to quickly find retouched files at later dates.

Exporting Files into Custom Folders

Once final edits and retouching have been completed, it’s time to export the files for the client. Clients have various needs when it comes to final files. I have set up Export Recipes for different client needs for the final file format, all being named specifically for the client and organizing them into individual folders. For example, images for Instagram can be exported to the optimal format for Instagram and saved into a separate folder. I also organize files into High Resolution, Web Resolution, and PSD files so the client can easily access each file type.

Setting up your Export Recipes takes just a few moments and has had such a huge impact in quickening my workflow and making ease of organization. I’ve set up Export Recipes to organize files into separate folders instantly.

My workflow has evolved over the ten years I’ve been photographing. While I continually strive to perfect my RAW editing and streamline my workflow, my main goal is to save time and organize my body of work. This has freed me up to spend more time being creative both in and out of Capture One Pro. Integrating a superior RAW editor like Capture One Pro into my workflow has allowed me to evolve my work in ways that would have otherwise taken years.

Sign up for the webinar

A plate of food. Image shared with Capture One Live

How Quentin Décaillet delivers images faster with Capture One Live 

Plate of food by Quentin Decaillet. Images shared using collaboration tool Capture One Live

As we come out of lockdown, many have discovered new ways of working that better suit a post-pandemic world where remote collaboration is the new norm and clients expect to be connected throughout the process. Capture One Live is the latest tool to help photographers like Quentin Décaillet work smarter, faster, and closer with their clients in a new reality.

“I regularly shoot for a hotel. Every three months I go there to shoot a new menu,” says beauty and product photographer and Capture One ambassador Quentin Décaillet.

“The art director that takes care of the shoots for the hotel isn’t always on set. The last time I was there, they instead had someone from the agency present.” He explains that because the agency rep had other tasks and was not able to stay on the set at all times, he shared his shoot with them through Capture One Live.

Side by side images of plates of food Right image shows a man pouring sauce on the plate. Images shared using collaboration tool Capture One Live

“While they were moving around in the hotel, they could keep checking and make sure everything was on schedule and looking good. The art director, who was in Geneva two hours from the set, could also check the images and let me know if he wanted something different, more shots, or come with ideas shot on the spot. That was extremely useful.”

Shoot, share, collaborate

Designed with workflow in mind, Capture One Live lets photographers share photos with colleagues and clients in real-time without the hassle of exporting the images from Capture One and uploading to a file storage platform. It all stays within Capture One Pro.

With a link to the collection, clients and collaborators can rate the photos as they come in anywhere and on any device with a browser, helping the photographer meet their expectations without being in the same room or even the same time zone.

Saving time and money

In the light of the pandemic when remote work was often the only option, many companies and professionals have seen benefits and come to appreciate the time and money saved on travel by being able to collaborate remotely without losing the proximity to the work and influence on the result.

“It’s definitely something that has changed with COVID,” says Quentin.

“So many productions are now seeing that they can save money by not sending people on set and have alternative ways to double-check the images and make sure everything is going smoothly.”

Side by side images of plates of food. Images shared using collaboration tool Capture One Live

According to Quentin, clients nowadays also expect to be connected and be in close contact throughout the whole process.  “They expect this way of working and having it available, clean, and easy for me and for them to use.”

“Even if they are on set, sometimes I have more than one art director working with me for a single shoot. So just being able to have one on set while another can check the images remotely, that’s great. It’s definitely a big plus, and I think clients are happy that we can offer this option as well.”

Capture One Live is the first in a line of coming updates from Capture One that will improve the workflow for professional photographers. The tool, which will be continuously improved, is designed to better serve the needs of the photography community and make remote collaboration as seamless as possible.

Learn more about how to get and use Capture One Live here.

Sign up for the webinar