Art Director: Jennifer Adie – Stylist: Sonia Genders – Hair and Makeup: Cassie Steward – Digital Tech: Paul Haycock
Model – Rebecca Wharton at Industry People – Assistant H&M: Jemma Stokes
Our webinar program was launched last year and so far we have broadcasted sixteen webinars on seven different subjects, reaching 1000’s of you. We aim at making short webinars with a demonstration and a Q&A session to get you started with using the software – or inspired to try it. If you wish to have more in depth training, you can check out our upcoming events or contact your local Phase One Partner through our partner locator, as many of our partners also offer webinars as well and other training options.
We plan to continue with more webinars in 2013 and hope you can join us. Each webinar always ends with a question and answer session and we thought you might like to see the top ten questions and answers. We hope you can benefit from this information – or maybe get inspired for your next job.
Capture One Webinars
Capture One Pro 7 was launched last October, and we started our webinar program to help everybody get acquainted with the new features and learn how to use the software quickly and efficiently.
Each webinar normally lasts an hour, with the last twenty minutes devoted to questions. Below are the top ten questions we received and the answers given.
Top Ten Questions
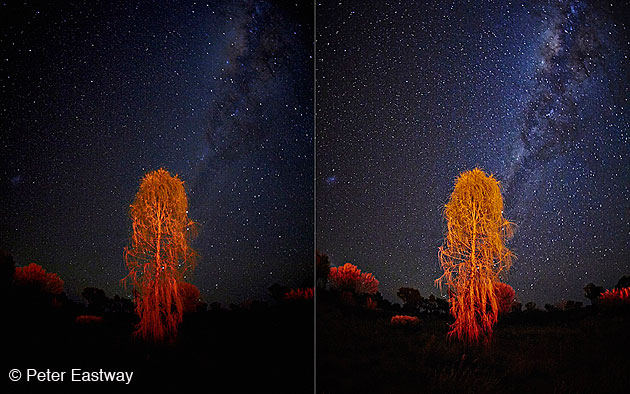
1. Is the actual processing of the raw files in Capture One Pro 7 different to version 6?
Absolutely! We have completely reengineered the algorithms used to convert the RAW image to your final image. We believe the result is a quantum leap in image quality with better detail, lower noise and more accurate colours. This is the case for any camera that we support.
2. Should I use Capture One Pro 7 instead of Media Pro?
There are many compelling reasons why you might want to switch from using Media Pro to Capture One Pro 7, as the latter now includes asset management. If you are using Media Pro purely for image files, then think about importing your Media Pro catalog into Capture One. This can be done from the File menu in Capture One.
The asset management in Capture One 7 does not support cataloging of non-image files like PDF documents or using hierarchical keywords. Therefore, if you need those functionalities, sticking with a Capture One and Media Pro integrated workflow might be the solution for you.
3. How do I get my Sessions into a Catalog? If I make changes to a Session is it reflected in a catalog?
First of all, remember that a Catalog and a Session are two different methods of file management. See my earlier blog post Take control of your image organization with Sessions or Catalogs for more details.
With Capture One 7.1 we added an Import Session feature, which brings a Session into a Catalog, automatically creating a Project and holding all the Session information. But to answer the original question, once the Session has been imported, any changes made on the Session itself won’t be changed in the Catalog. Therefore it is a good idea to use this method for archiving completed Sessions.
4. What is the maximum number of images that can be stored in a Catalog?
There is no theoretical maximum! However, if you go beyond 100,000 images then you might see a performance slow down. You can keep your catalog performing nicely if you work with fast storage even if using external drives. Capture One Pro 7 can also work with multiple Catalogs, so you might like to use more than one Catalog, i.e. one for your work from each year.
5. Can I store images in a Catalog in my own Folder hierarchy?
Yes of course. If you import images electing to store them at their current location and including all subfolders, the Folders area in the library tool will reflect the folder structure.
6. Do you support my camera?
See a complete list of supported cameras here
7. What other ways can you help me learn Capture One?
There are several ways to continue your learning of Capture One.
1 – Visit our help site for a complete searchable instruction manual
2 – Visit our YouTube channel and watch the many Capture One Pro 7 tutorials
3 – Check out our upcoming events and webinars here
4 – Go to your local Phase One Partner for bespoke training
…and not to forget this blog!
8. Why are the noise reduction settings the same for all cameras?
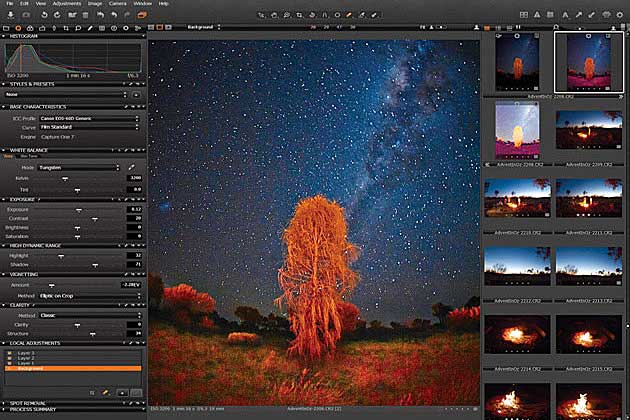
Each camera we support is individually optimised for noise reduction (amongst other things). The settings are always 50 and 50 in the Noise reduction tool but the level of noise reduction is camera dependant. So ‘under the hood’ the level is different. We keep it at those values so you know that this is our best choice for optimisation and you can choose to adjust it accordingly to your liking.
9. What do the new Clarity methods do?
‘Classic’ is the same process as Capture One Pro 6. ‘Neutral’ is a new improved version for Capture One 7. ‘Punch’ works in a similar way to ‘Neutral’ but also increases local colour saturation.
10. Are you planning to add more lenses to your profile list?
Yes. We work very closely with the manufacturers to do so. Look out for new lenses as we release new versions of Capture One.
Future Webinars
Our upcoming webinar program can be viewed here. There are links to sign up for the specific webinars and there are normally two on the same day, for different time zones.
Webinars are also recorded so attendees can view them at a later date for further learning.
You will also get your chance to shape the future webinars by answering a small survey, which we also send out to the attendees.
We hope you have enjoyed the webinars so far and look forward to continuing this exciting program in 2013. Remember, for more in-depth training; don’t forget to visit your Phase One Partner.
All the best,
Niels