Latest Posts

Confessions of a software developer

NOTE: This article discusses an outdated version of Capture One. To learn more about our latest version, click here.

Hi there,

My name is Theis, I’m a software developer and this is my story…….


It started out as just another day at the office. Starting work at 7 in the morning, I was planning to leave somewhat early.

Everything was going according to plan, but then someone dropped the usual 3 p.m. question “Wouldn’t it be cool, if we could give the user a shortcut to………”

And yes, that would be cool, so thus started another long night in the office full of lukewarm coke and cold pizza. In this tip I will share some of the nifty shortcuts that came out of that long and lonely night.

Theis1_1280x8533 p.m. feeling good and quite clever

 1) Quick Loupe

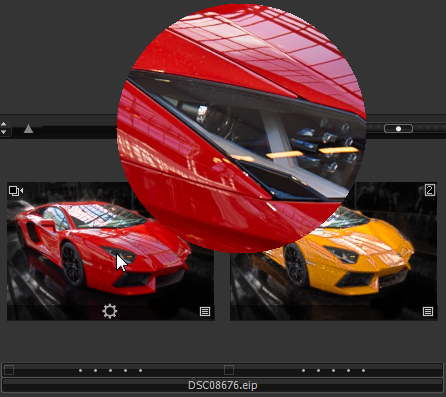
One of these shortcuts is related to the loupe, which is a great tool for quick sharpness checks. To show the Loupe quickly press and hold down Ctrl+Space (Alt+Space on Mac). This makes the loupe show up without changing your current cursor tool.

The Loupe also works on thumbnails. Just hover the cursor over a thumbnail and you can easily do a quick focus check.

Loupe


2) View the same crop on multiple Variants simultaneously

If you select more than one Variant and set the viewer in “multi view” mode, you can easily compare two or more variants.

mutliview
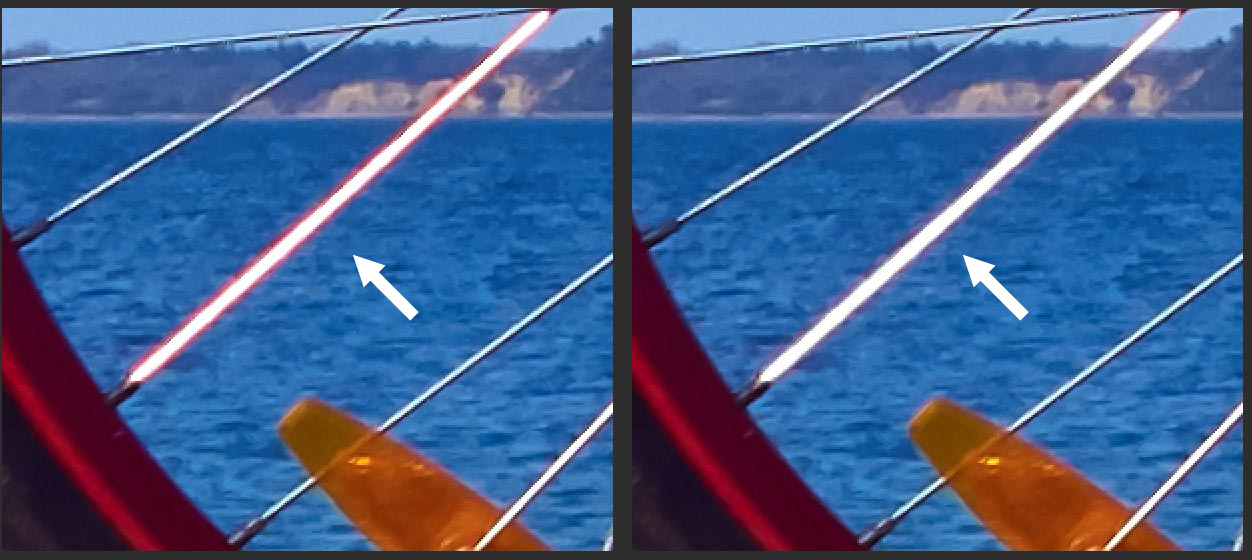
For detail work it is necessary to compare the exact same crop at the exact same zoom level. Fortunately that is easily achieved. Just hold down the Shift key while zooming and panning and Capture One Pro 7 will apply the exact same zoom and pan to all views.

Variants_eyes 
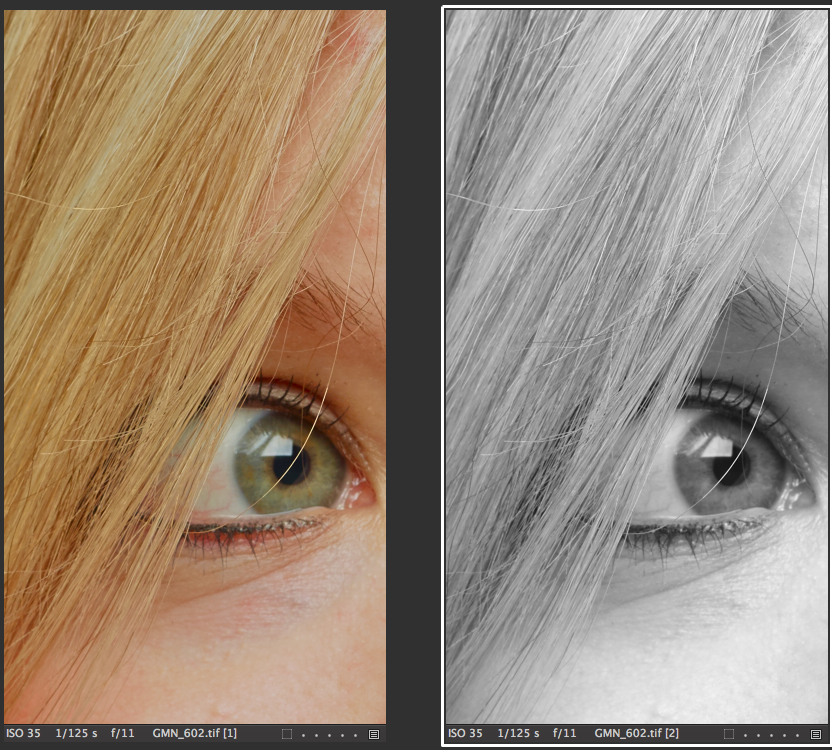
Comparison of two Variants

Theis3_1280x85310 p.m. starting to feel the pressure

3) Handling an existing crop

There are many cases where Capture One Pro 7 will apply a crop automatically to an image. If an image is rotated, keystone or lens corrected it will get an automatic crop in order to achieve a rectangular output image.

But what happens then when you try to set a new crop manually after Capture One Pro 7 has created an automatic crop? Capture One Pro 7 will think that you want to move the crop, it automatically created. To create a new crop, hold down shift while dragging the new crop and it will replace the existing crop.

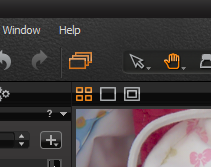
If you want to change the aspect ratio of an existing crop, choose the desired aspect ratio by clicking-and-holding on the Crop Cursor Tool in the toolbar.

QuickAspectSelection

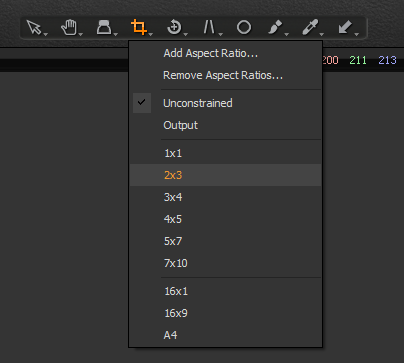
With the desired aspect ratio chosen, double-click the crop in the viewer and the crop will be corrected to the aspect ratio you chose.

To get back to the default crop you can click outside of the crop to reset it.

Theis_hero_1280x8532 a.m. really wanting to call it a night

4) Skip the trash folder

If you press ctrl+delete, Capture One Pro 7 will put your image in the trash folder. This is nice since you can easily get your images back from the trash folder. However if you are sure you will never need the image again you can press alt+delete (ctrl+command+backspace on the mac) and then Capture One Pro 7 will delete your image permanently instead of putting it in the trash. In the case where the trash folder is on different drive than the image file, this will also be a lot faster than moving the file to the trash folder.

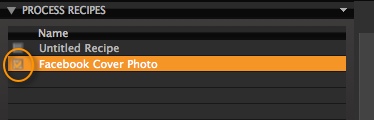
5) Organize your styles and presets in folders

When saving a style you are presented with a standard save file dialog box.

styles in folders how

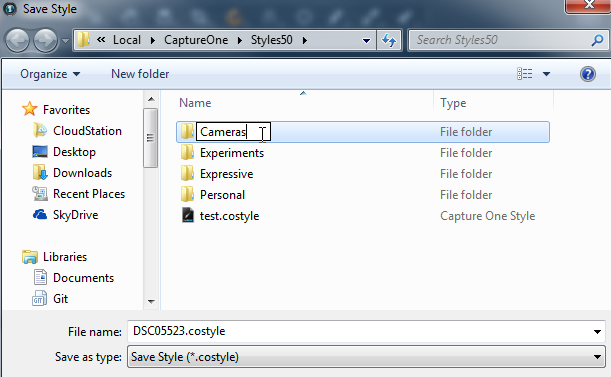
What is not clear from the dialog box is that you can actually put the style in a subfolder and then the subfolder will be shown in the styles selector.

styles in folders resultThis trick also works with Presets and “Print Templates”.

Theis4_1280x8534 a.m. somewhere at Phase One

This is what I came up with that particular night. I’ll report back to you soon with more shortcuts that will hopefully speed up your workflow.


All the best,

Theis Hansen


Sign up for the webinar

How to fix Purple Fringing


Purple fringing occurs because the lens doesn’t behave the same way on all the different wavelengths of the incoming light. This is of course something that the lens designer tries to compensate for, but lenses are almost never perfect.

Purple fringing is often related to how much the lens shows chromatic aberration and it is more likely to see purple fringing when using a lens wide open compared to using it stopped down.

The Lens Tool in Capture One Pro 7 offers a method to remove purple fringing from your images.

Tip728-img1                       Purple fringing                                 Purple fringing fixed in Capture One Pro 7

The image to the left shows purple fringing along the spoke that reflects the sun. To the right you see the image after having applied “Purple fringing” correction in the Lens Tool in Capture One Pro 7.

Purple fringing correction is an optional correction feature in the Lens Tool. To enable purple fringing correction you simply set the checkmark for “Purple fringing”.

Tip728-img2

When using the purple fringing correction, Capture One Pro 7 uses an intelligent algorithm that takes the behavior of light in a lens into account. The algorithm can estimate the original color underneath the fringing and it is not just a simple desaturation of the purple color.

In the image below you can see how the purple fringing correction algorithm in Capture One Pro 7 can bring back the blue of the sea along the spoke. I have also made a simple correction by doing a simple desaturation of the color of the fringing to show you the difference:

Tip728 img4V2                Original                                Simple desaturation                  Capture One Lens Tool

In the image in the middle the purple fringing is removed, but an unnatural gray edge occurs instead. In the image to the right you can see that the fringing has been removed and replaced with the color of the blue sea.

Wide-angle zooms are often prone to fringing. In the examples below I have a strong contrast against the bright sky.

Tip728 img5              Original showing purple fringing                     Fringing removed in Capture One Pro 7

This is a zoom into the top left corner of the image. The purple fringing is seen on the dark side of the edge between the bright sky and the shadow side of the wooden construction.

Another example:

Tip728-img4            Original with strong purple fringing                  Fringing removed in Capture One Pro 7

The “Purple Fringing” algorithm in the Lens Tool does a very good job of removing the purple fringing in most images. But as the algorithm has to deal with colors and contrast in an image, it may not always remove all the fringing as it can be very difficult to distinguish between fringing colors and real colors in the scene.

In such cases you will have to desaturate the purple fringing color using the Advanced Color Editor in a local adjustment layer.


All the best,

Niels

Sign up for the webinar

The secret, yet powerful color editing tool

The green in fluorescent light, the red of the sunset at the beach, or the colored light at your big birthday party last year can spoil the fun when the images are ready.

Back to Levels & Curve

In this third blog post on Levels & Curves I am going to make advanced color adjustments with both the Levels and Curve Tools by using one or more of the Red, Green, or Blue color channels. I call this kind of use for channel mode.

Note that this feature is only available in Capture One Pro and DB 7, and not in Express 7.

When you are serious about using channel mode, I have a power user tip first: create a workspace with four Levels Tools shown, one for each color channel.

WorkspaceLevelsChannels

WorkspaceCurveChannels

Level your power

Let’s start with Levels in channel mode. You will discover that it is an extremely powerful color editing tool. It allows you to add or remove color. All the markers of the tool are at your disposal.

In the screenshot below I made comments on how to add a color. By using the opposite marker you remove color.

Levels-green-instructions

If you want to read more about how Curves and Levels Tools work and the distinction between input and output Levels, click here.

The markers at the left (top & bottom) affect the dark tones in your image, the ones at the right affect the highlights and the marker in the middle affects the mid tones. This way you can easily adjust a color based on its brightness!

Sunset Boulevard

For demonstration I use a sunset image with the obvious reddish/purple cast and low contrast. Thanks to a low camera position I get the maximum reflection of the sky in the water and in the wet sand.

Callantsoog, beach, at night

I like the sky but the foreground is too colored (purple). I also need to improve the tonal scale with black and white point. I need to take the purple color out but in the dark tones only. That is exactly what I am going to do with the Levels Tool’s Red and Blue channels.

blog Channel-3-after Levels-screenshotI raise the dark tone marker at the bottom left to remove the color in both the Red and Blue channel. This removes the purple cast in the shadow.

This is basically the same as setting a black point in the RGB mode of your Levels Tool as I discussed in an earlier blog post. You remove the gray cast to make it black.

Next, I like to weaken the overall red cast with the mid tone marker (move it to the right) of the Red channel. This is the result:

Callantsoog, beach, at night

Now I have the right color at the right places in my image and I have emphasized the romantic mood.

Ease your Levels, enter the Curve

Right, you thought we were done now? Not completely. The Levels red mid tone slider did a nice job, but if you read my previous post on Curves you know that the Curve Tool can do a better job. The warm tones of the sunset can create more of an impact if there are parts that do NOT have that color to increase color contrast.

Also, the general contrast needs a boost too. I use the Curve Tool for both, one curve in the general RGB tab, one curve in the Red tab. Note that I first placed the mid tone marker of the Red channel in the neutral position because the Curve is taking care of that now.

This is the end result I like most:

Callantsoog, beach, at night

And here are my Curve settings:

blog Channel-4-after Curve-screenshot

Tips

Two final tips to wrap up this blog post: tool reset and workspace.

1) Reset all Levels or Curve Tool modes
You know the tool reset: the curved arrow icon at the top. It will reset only the adjustments on the selected tab (channel or RGB mode). To reset ALL adjustments of the tool (all tabs: RGB, R, G, and B) at once use Cmd+click (Mac) or Ctrl+click (Windows) with the reset icon.

2) Workspace
To work with all channels in Levels and Curve, you might want to see them all at the same time. Create multiple Levels or Curve Tools as floating tools or create a tool tab for them. Set each to each channel. Save your workspace for future use.

I hope you enjoyed it and will get more out of your images with the Capture One Pro 7 tools Levels and Curve!


Best regards,

Paul Steunebrink

Sign up for the webinar

Save time when uploading images to social media

Social Media sites often have very specific requirements for image upload, or at least the quality results can be much better if you adhere to their specific recommendations.

For example, Facebook has various dimensions for the Cover Photo, Profile Photo and Shared Image not to mention various other sizing for Highlighted, Milestone images and more!  It is quite a minefield.

You need recipes

Luckily there are some good resources online to discover these sizes and incorporate them into a Capture One Pro 7 recipe so it is possible to export any image to fit perfectly with such requirements.

I have made a few examples based on Facebook, and one for Pinterest, which uses a slightly different way to display images compared to Facebook. Google+ has less restrictions on image sizing, which is why it is not included.

At the end of the blog you can also download these recipes for your own use on Mac or PC.

Creating and Using a Recipe

I will use the example of the Facebook Cover photo, which has the following image dimensions: 851 pixels wide by 315 pixels tall.

First of all, I’d like to define a Process Recipe, which restricts the output file to the pixel dimensions needed. If you haven’t used a Process Recipe before, first navigate to the Output tool tab.  By default there is one Process Recipe called ‘Untitled Recipe’.

2014-04-03_10-16-29

You can either modify that Recipe or create a new one by clicking on the ‘+’ icon in the bottom right of the Process Recipes Tool.

Make sure you name the Recipe so you can recognize it later.  This Recipe will be for the Facebook Cover Photo, so I’ll name it accordingly.

2014-04-03_10-20-13Next, I’ll set the parameters for this Recipe in the ‘Process Recipe’ Tool.

2014-04-03_10-21-42I have changed the format to JPEG, the ICC Profile to sRGB (best for web), and the scale to Dimensions, entering the pixel dimensions as described earlier.  It’s really important that you set scale to ‘Dimensions’ as this will have an influence on how the Crop Tool works when cropping images to this format.

If you wish you can explore the other options in the Recipe by clicking through the additional tabs – File, Adjustments, Metadata and Watermark.

Now that I have my Process Recipe set, I can crop an image to this format.  Before this step, make sure you have the Recipe highlighted in the Process Recipes Tool, as we will need to constrain to these dimensions when we crop.

Select the ‘Output’ option by clicking and holding onto the Cropping Cursor Tool.  This option does just as described, it will constrain your Crop Aspect Ratio to match whatever is set in the currently highlighted recipe.

2014-04-03_10-29-38Now I can crop an image I want to use for a Facebook cover Photo. You can see in the following short clip, that as soon as I begin to crop, the image is constrained to our Recipe pixel dimensions.  This way you are guaranteed of the right dimensions when exporting.

If you don’t see the pixel dimensions on your crop lines (Top and Left), you can turn this option on in the Capture One Preferences.

2014-04-03_10-44-43To export the image, make sure the Recipe is selected by marking the check box.

2014-04-03_10-46-08Before processing the image, make sure the ‘Ouput Location’ Tool is set correctly to the folder you want the resulting image to reside.

2014-04-03_10-49-36If you are working in a Session – By default processed images will be sent to the Session Output folder.

If you are working in a Catalog – You may wish to set the output location by clicking on the ‘Store Files’ drop-down menu and choosing your preferred location.

To process the image, click on the ‘Process’ button in the ‘Process Summary’ Tool, or you can use the Keyboard Shortcut Cmd-D (Mac) / Ctrl-D (Win).  This tool also shows a breakdown “Summary” of your currently highlighted Recipe.

2014-04-03_10-52-13The processed image will fit just nicely for a Facebook cover photo.

2014-04-03_10-54-45

Duplicating and Modifying a Recipe

Now that the bare bones of the Recipe are set, it’s easy to duplicate it to work with other social media sizes.  Click on the small triangle in the ‘Process Recipes’ Tool and choose ‘Duplicate Recipe’.  The benefit of this step is that you will probably only need to change the Scale settings if you want to keep the same JPEG parameters.

2014-04-03_10-57-09I will create one for a Facebook ‘Highlighted’ image, which is designed to span the whole Timeline and are therefore wider.  The recommended upload size is 1200 wide x 717 pixels tall.

2014-04-03_11-09-07It will be the same workflow as before: crop and process the image.

Here is a good opportunity to point out some smart behaviour of the cropping labels and ‘Process Summary’ Tool.   As I have selected the new Recipe I have just made, the crop on the image, which was set when I had the cover photo Recipe selected, indicates that the height is incompatible with the Process Recipe, by displaying it in red.

2014-04-03_11-20-23However, as soon as I go to adjust the crop, it will snap to the correct dimensions, as you can see in this second short clip…

Setting one Dimension Only

Pinterest is a good example where only one image dimension needs to be set for optimal upload.  When a Pin is opened, the image will scale to 736 pixels wide and the necessary length for that particular image.  Therefore it doesn’t make sense to upload anything larger to Pinterest.  The same goes for Tumblr but the maximum width is 1280 pixels.

I’ll duplicate the last Process Recipe again but change the ‘Scale’ to Width and set this to 736 Pixels.

2014-04-03_12-08-24Now when I change the crop, the width will always be output to 736 pixels and the height can be arbitrary.  See an example in this final short clip…

This workflow of constraining crop sizes doesn’t need to only relate to social media, and could easily be adapted for many other disciplines where output sizes are crucial, or perhaps have been dictated to you by the client.  It may save you a step in the workflow chain if you can output correctly from Capture One Pro 7 in the first place.

Remember, the crucial step is choosing ‘Output’ in the Crop Tool, to make sure you are automatically constraining to your Process Recipe output size.

Adding these Recipes to Capture One Pro 7

The three recipes shown here can be downloaded here.


On Mac:

To install them on a Mac, navigate to [USER]>Library>Application Support>Capture One>Recipes and copy the recipes into that folder.  Restart Capture One Pro 7 and then they will be visible.

By default the Library folder is hidden on the Mac. The easiest way to reveal it is to hold down the Alt key and click on the GO menu in the finder.


On PC:

To install on a PC, navigate to C:>Users>[USER]>AppData>Local>Capture One>Recipes70 and copy the Recipes into that folder.  Restart Capture One Pro 7 and then they will be visible.

By default the AppData folder is hidden on the PC.

Go to Control Panel > Appearance and Settings > Folder Options

Select the View Tab from the pop up menu and then Select ‘Show Hidden Files, Folders and Drives’.


Best regards,

David


Sign up for the webinar