NOTE: This article discusses an outdated version of Capture One. To learn more about our latest version, click here.
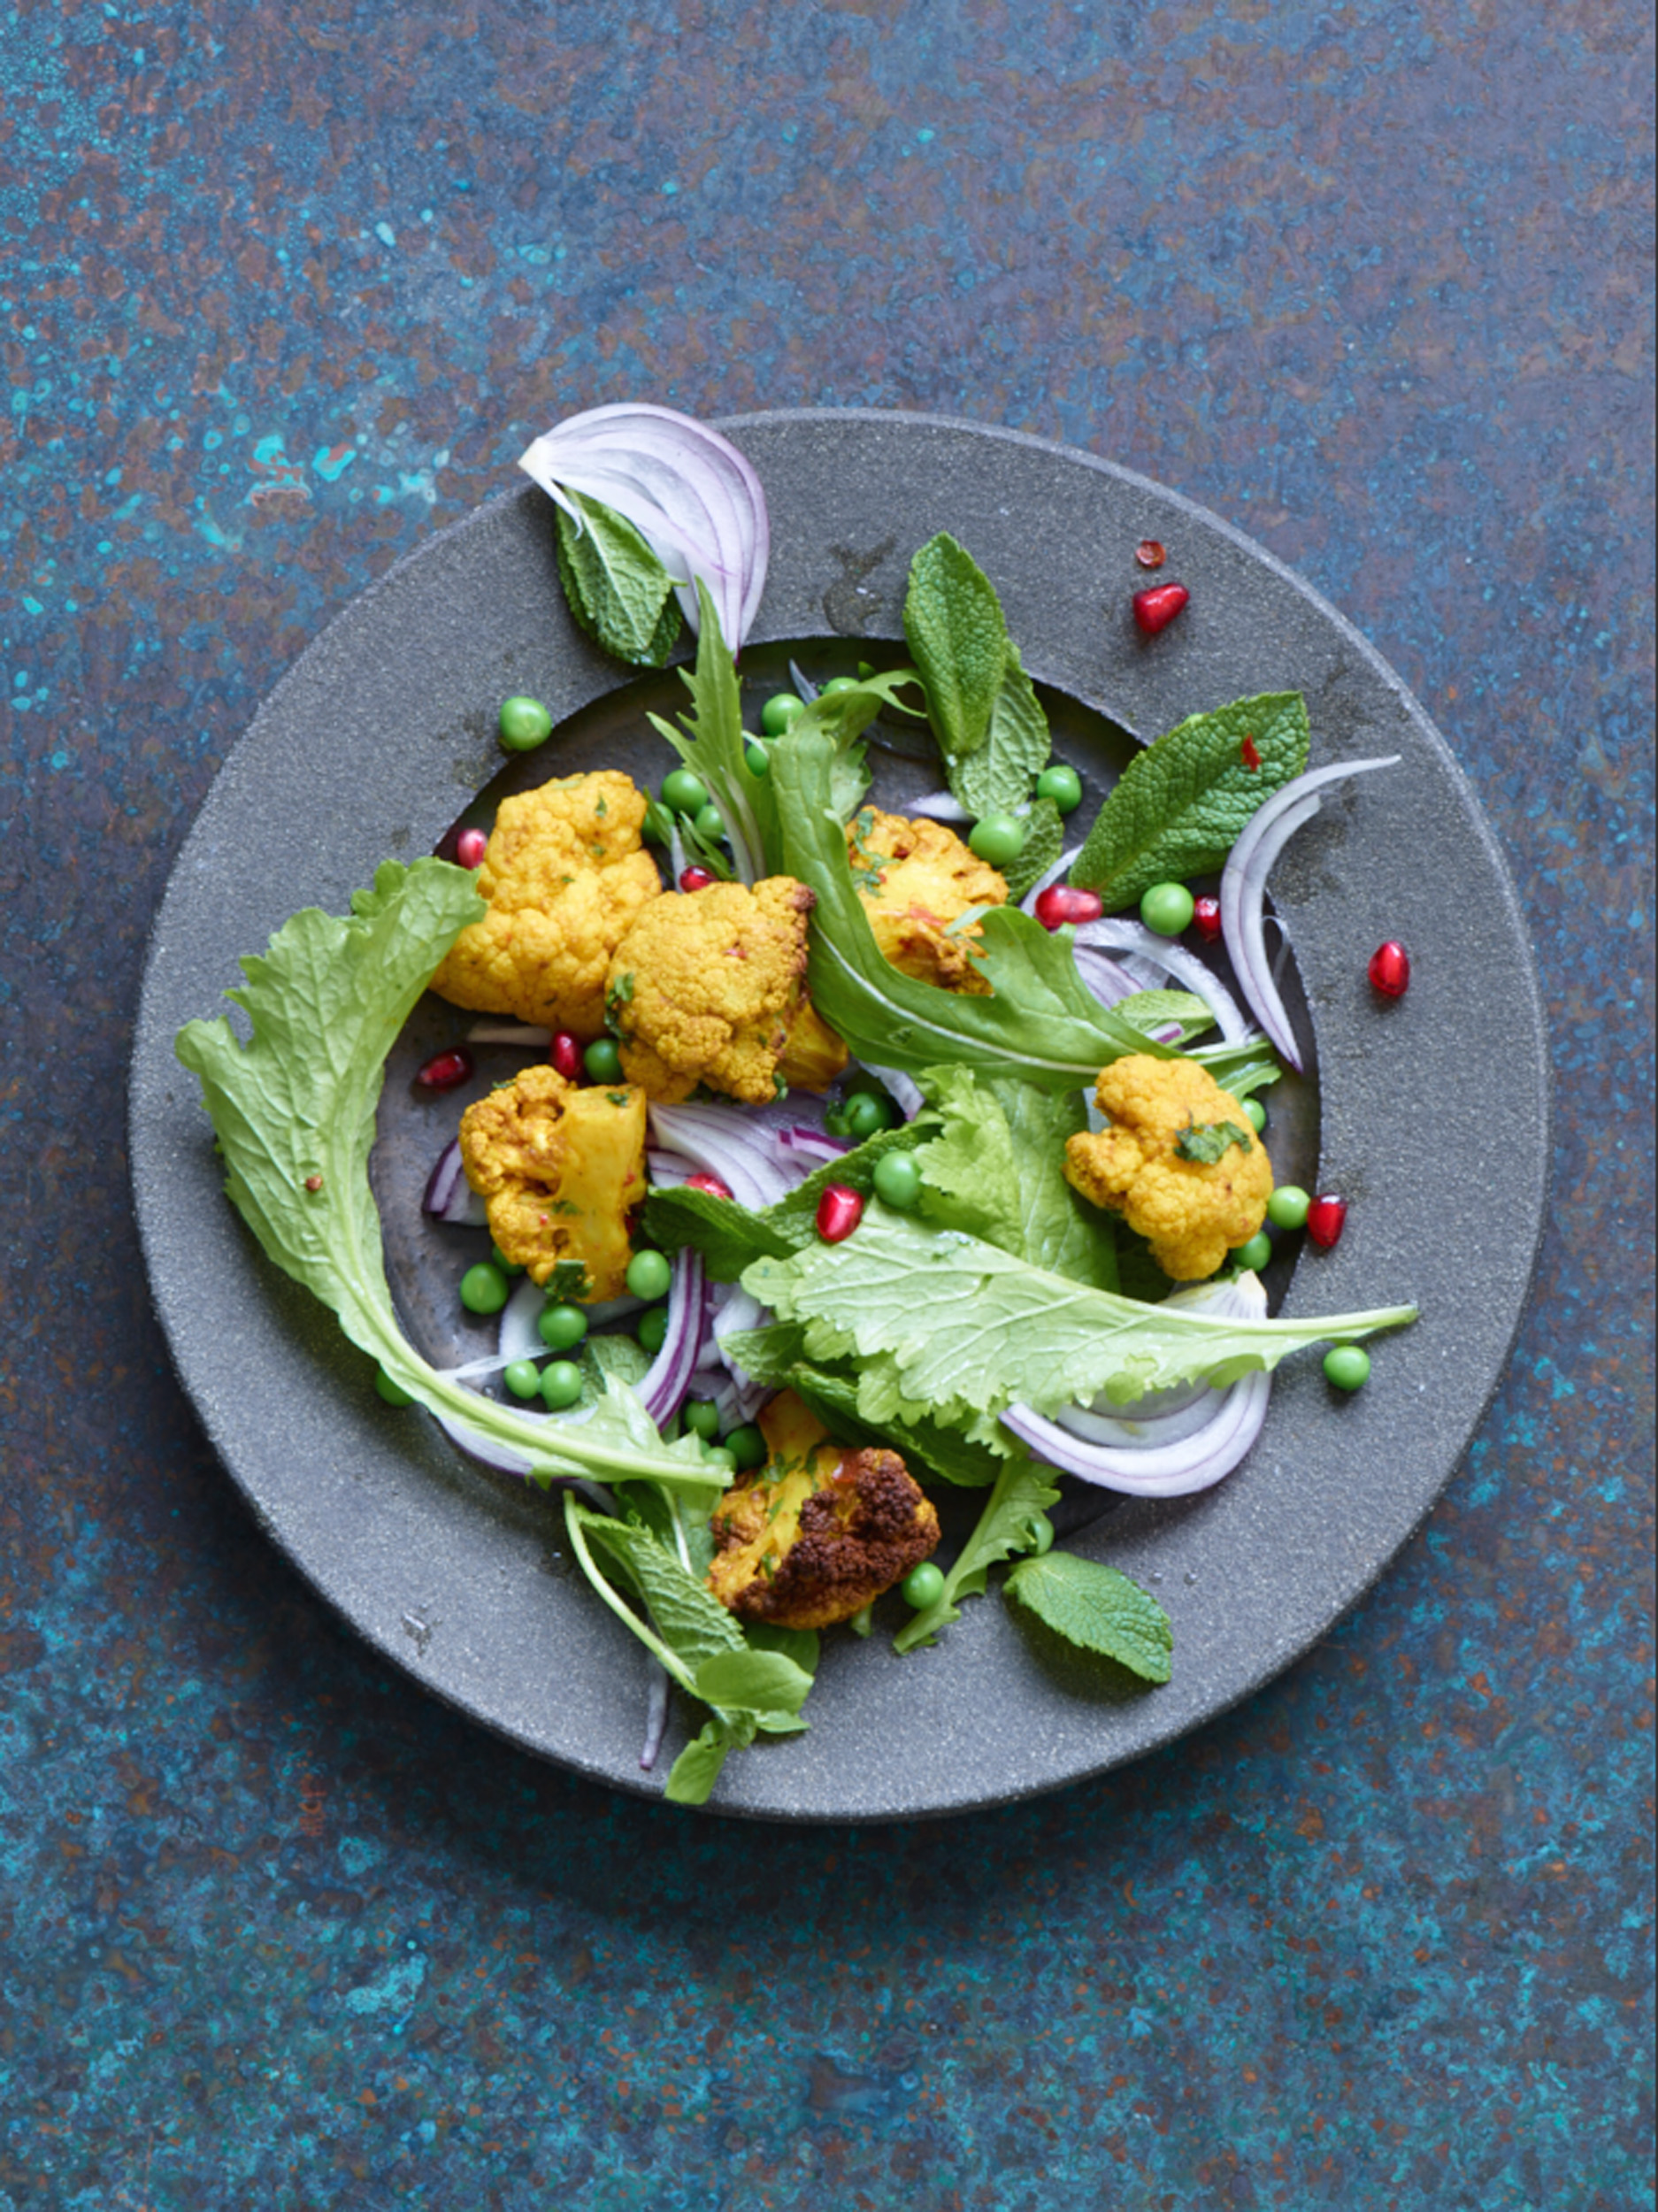
Here is the finished shot of an Indian salad that I shot with my friend and exceptionally talented food stylist, Katie Giovanni.
In this instance I was shooting with Capture One Pro 8 with the IQ 160 back on a Phase One camera. The lighting is daylight with lots of black flags blocking the light out to create more contrast.
The journey from the initial to the final shot
As much as I try to minimize post work and processing, some shots just demand a little more tweaking and that’s when Capture One Pro 8 comes into it’s own. Here I will outline the journey from the very initial shot from the camera to the final shot you see here.
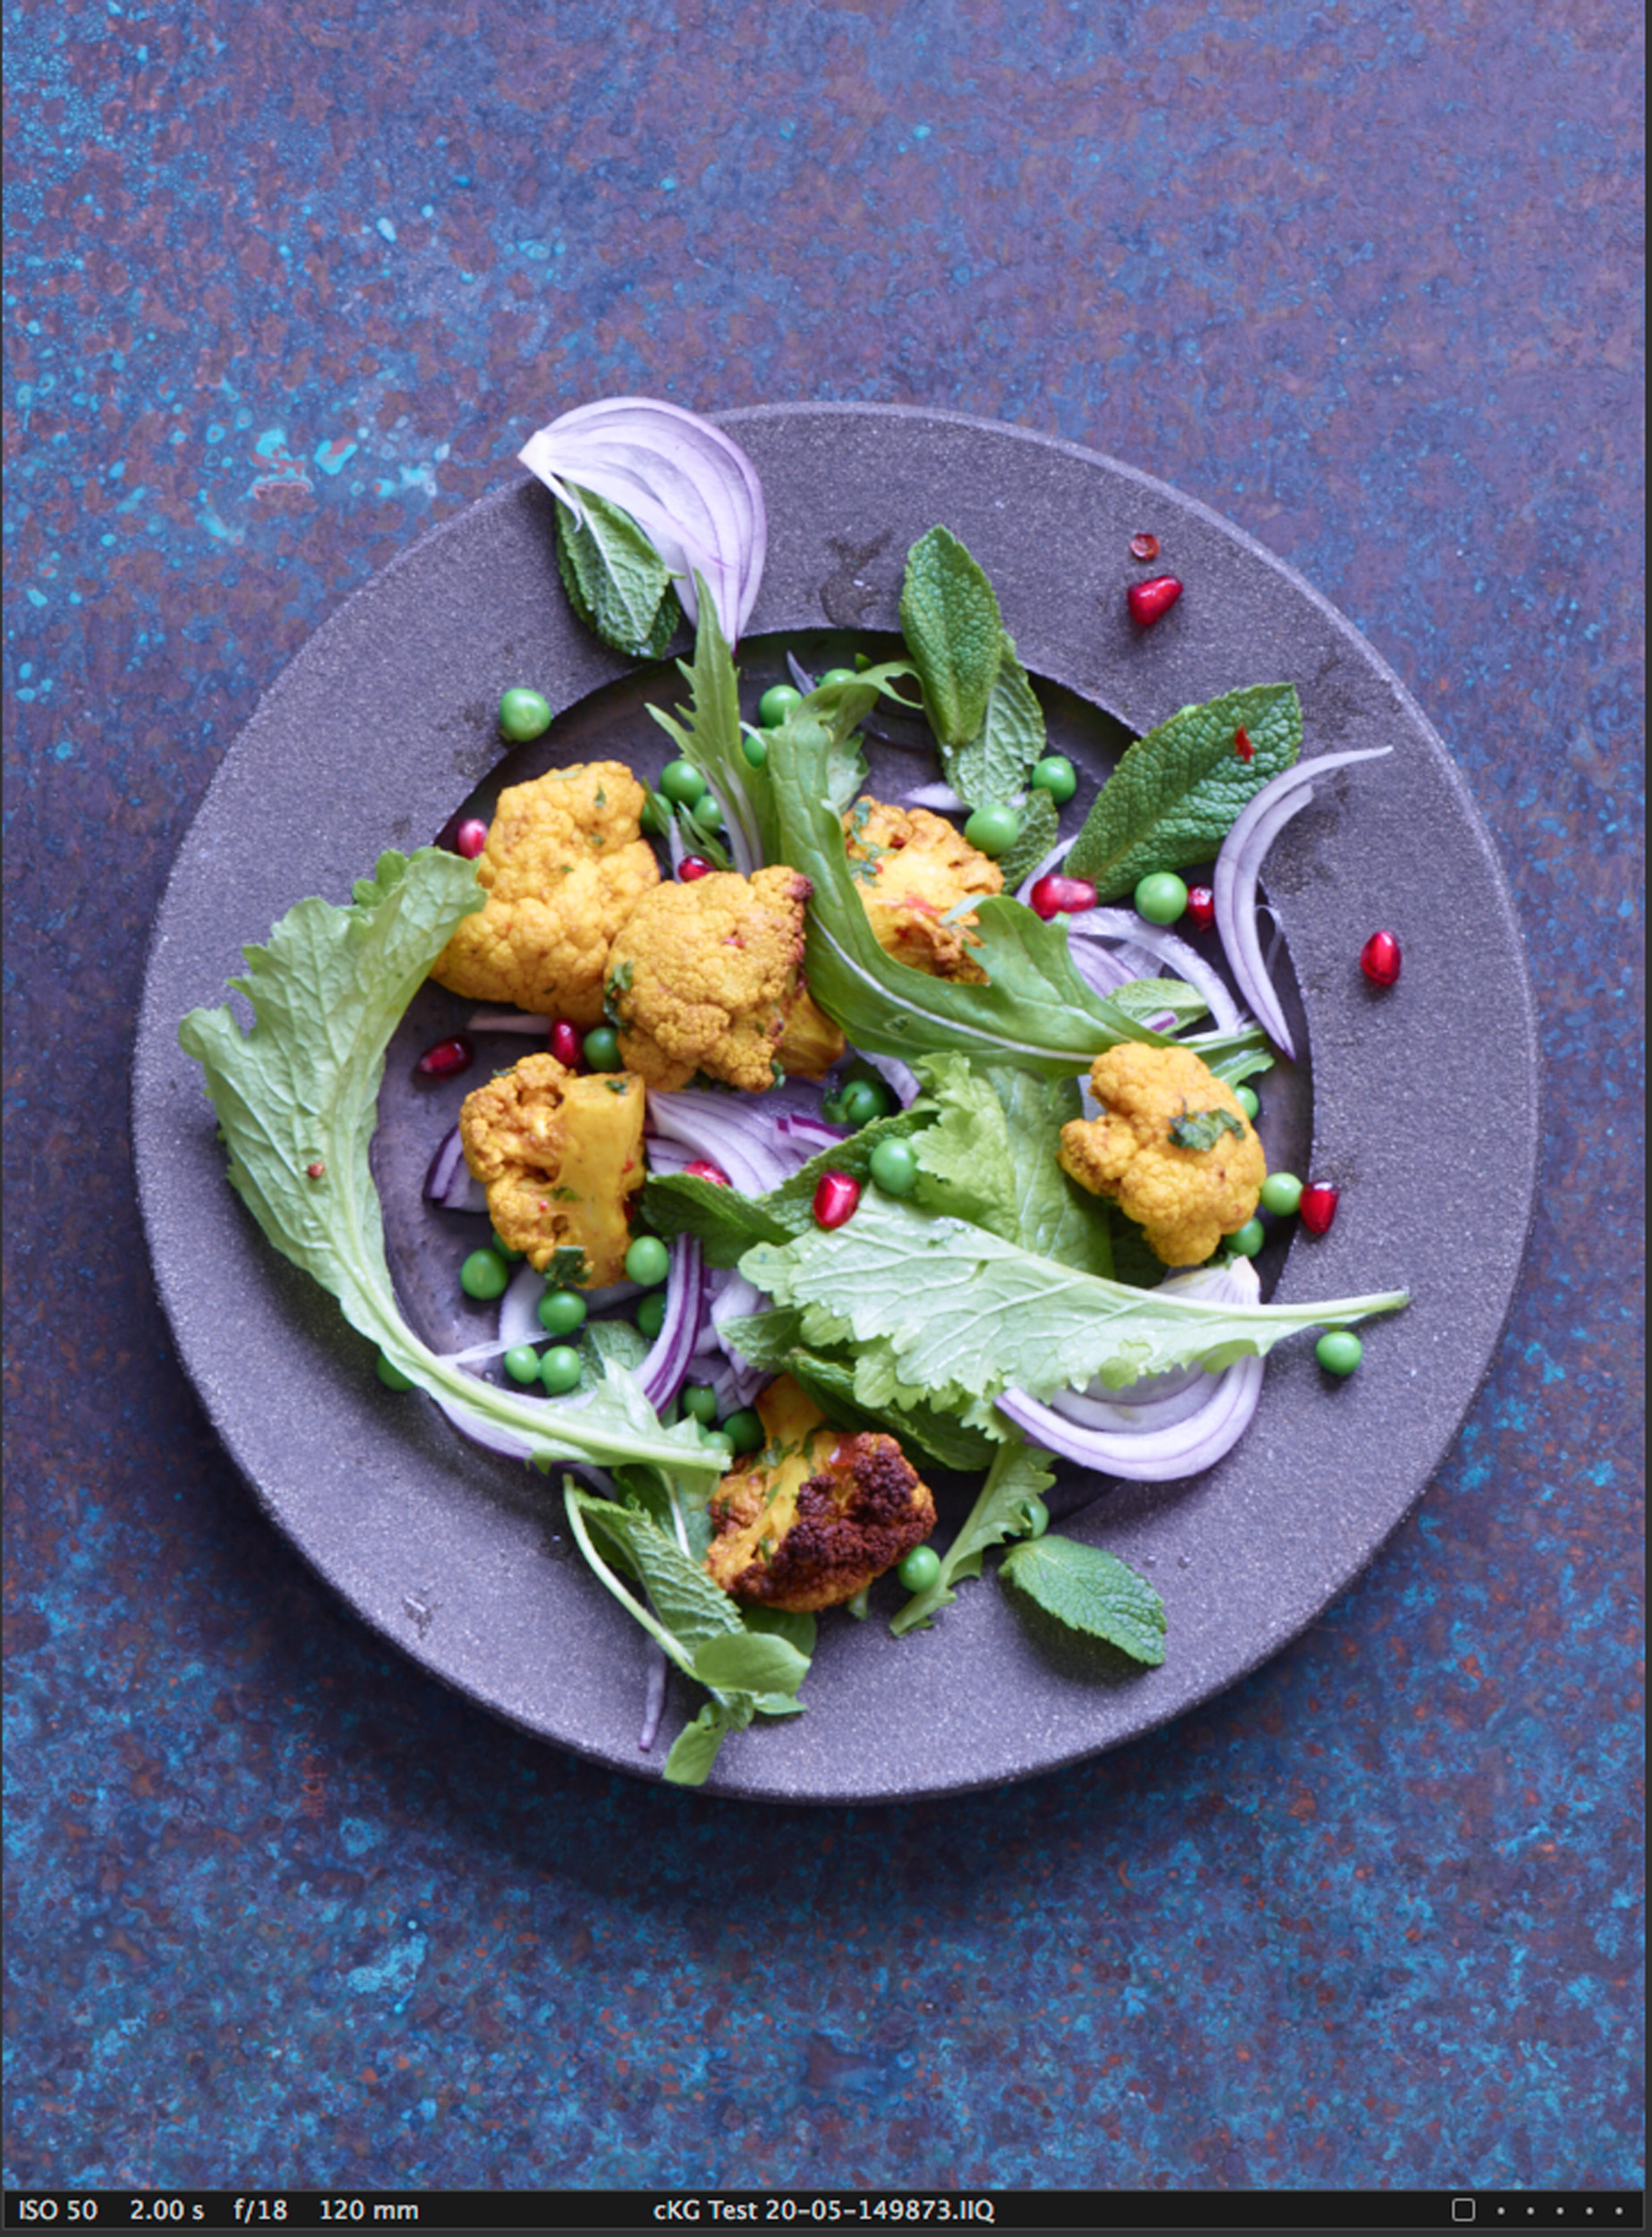
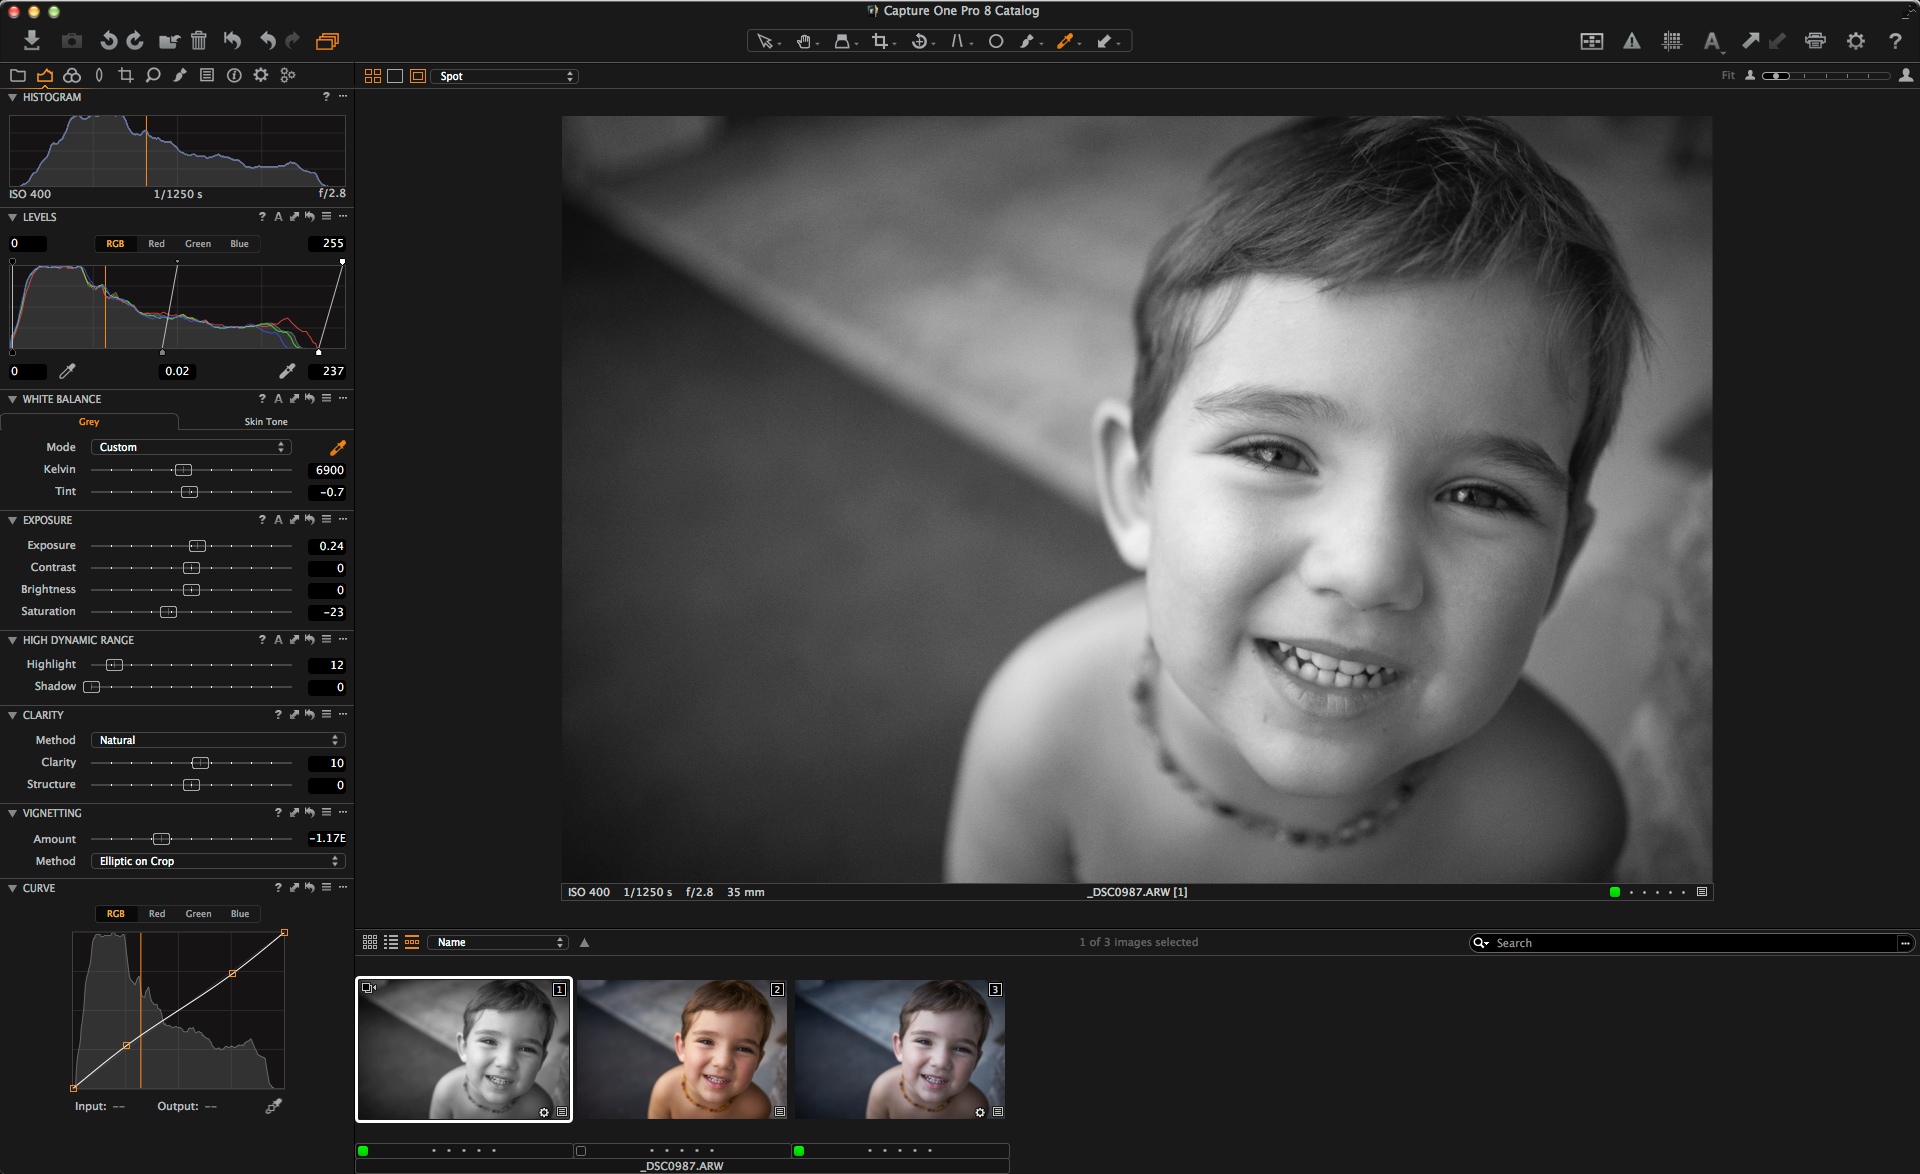
Stage 1: the first shot
This shot above is the first image before I work on the White Balance, exposure control and other processing options. It is a RAW image. Apart from choosing an ISO and exposure values this initial shot is a little bit like dipping the proverbial toe in the water to see what the potential is.
Stage 2: White Balance
I will always adjust the White Balance before the shot is completed so that you get an accurate idea of the composition as it develops. Often I’ll warm or cool the shot down just a little using the White Balance tool.
 Working on the composition

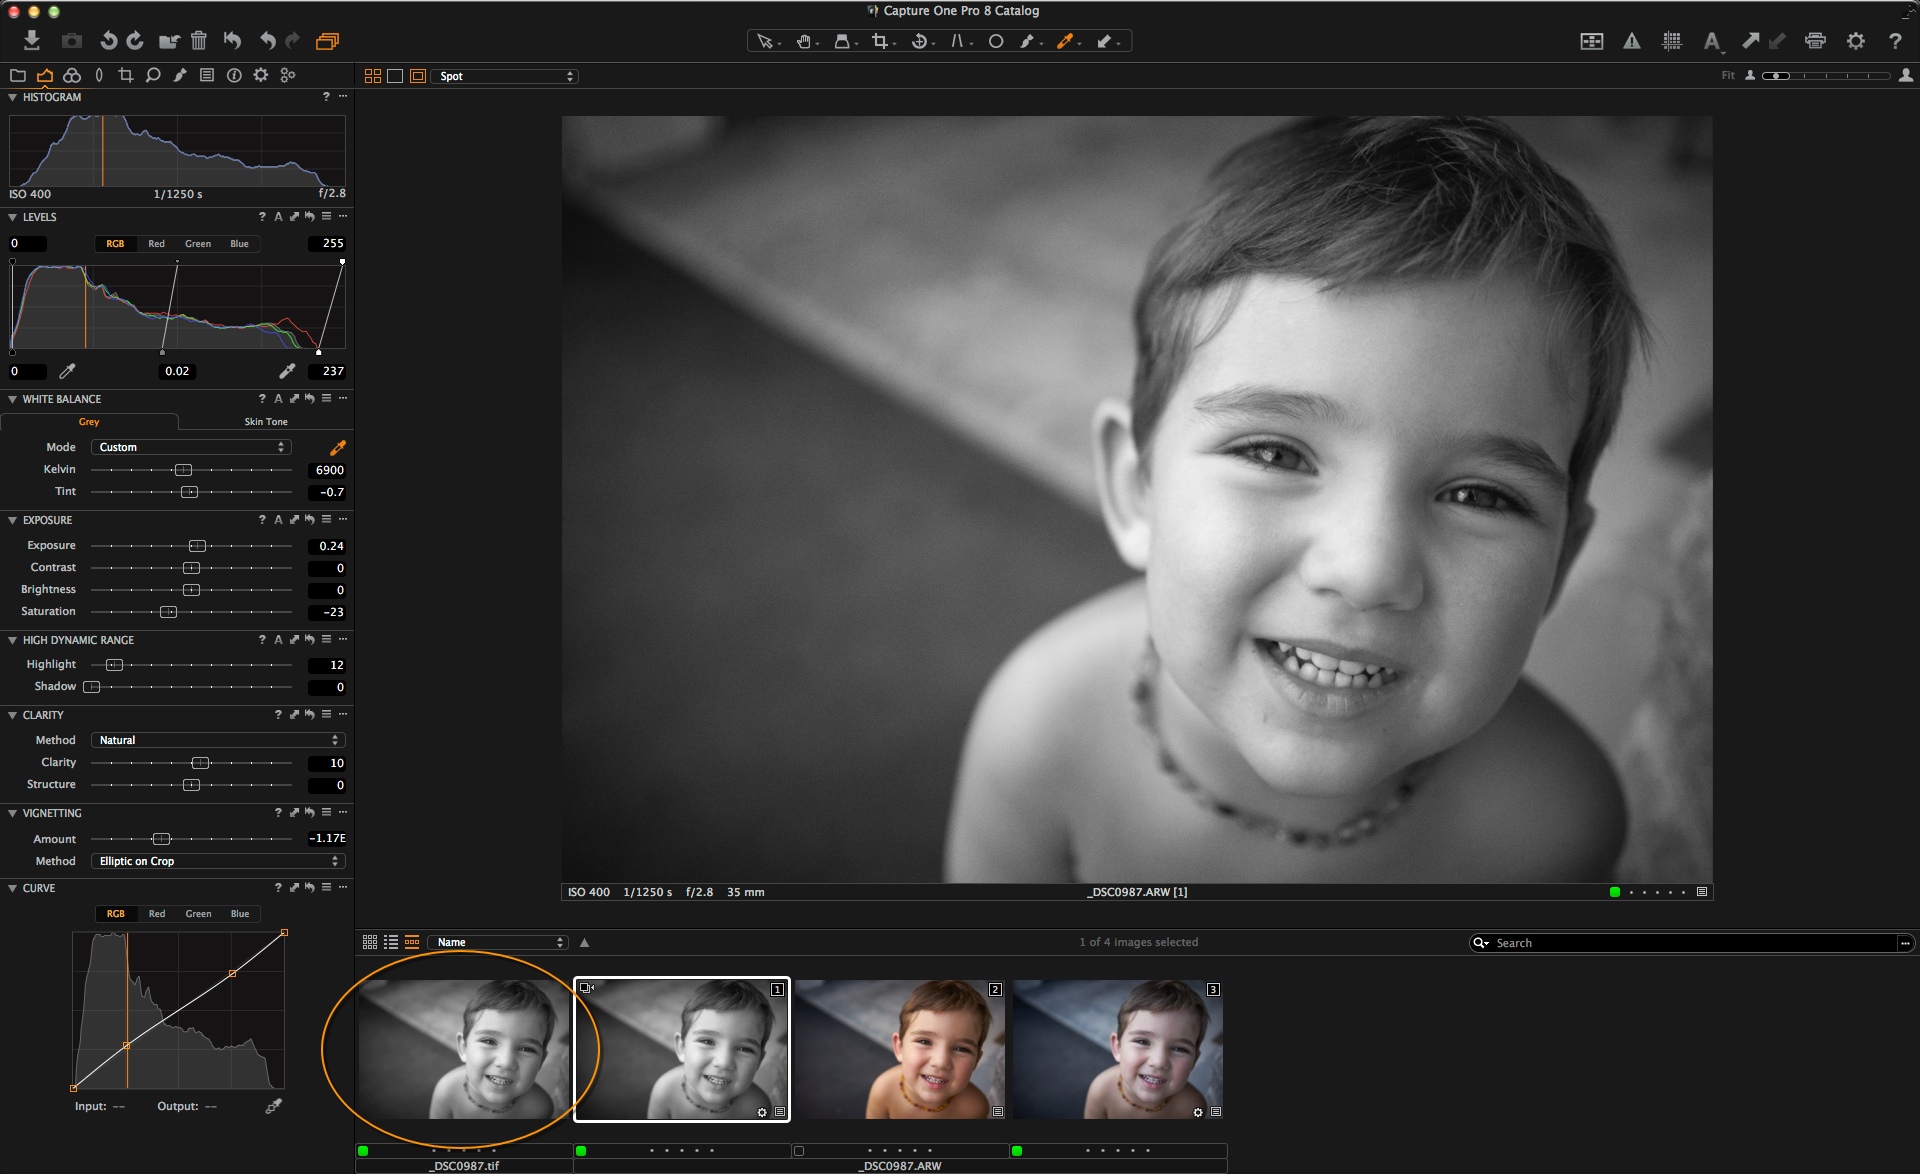
Stage 3: Composition
The shot above is now pretty much complete within the camera but needs a certain amount of work on the raw file. Apart from White Balance the shot has been un-touched in Capture One Pro 8.
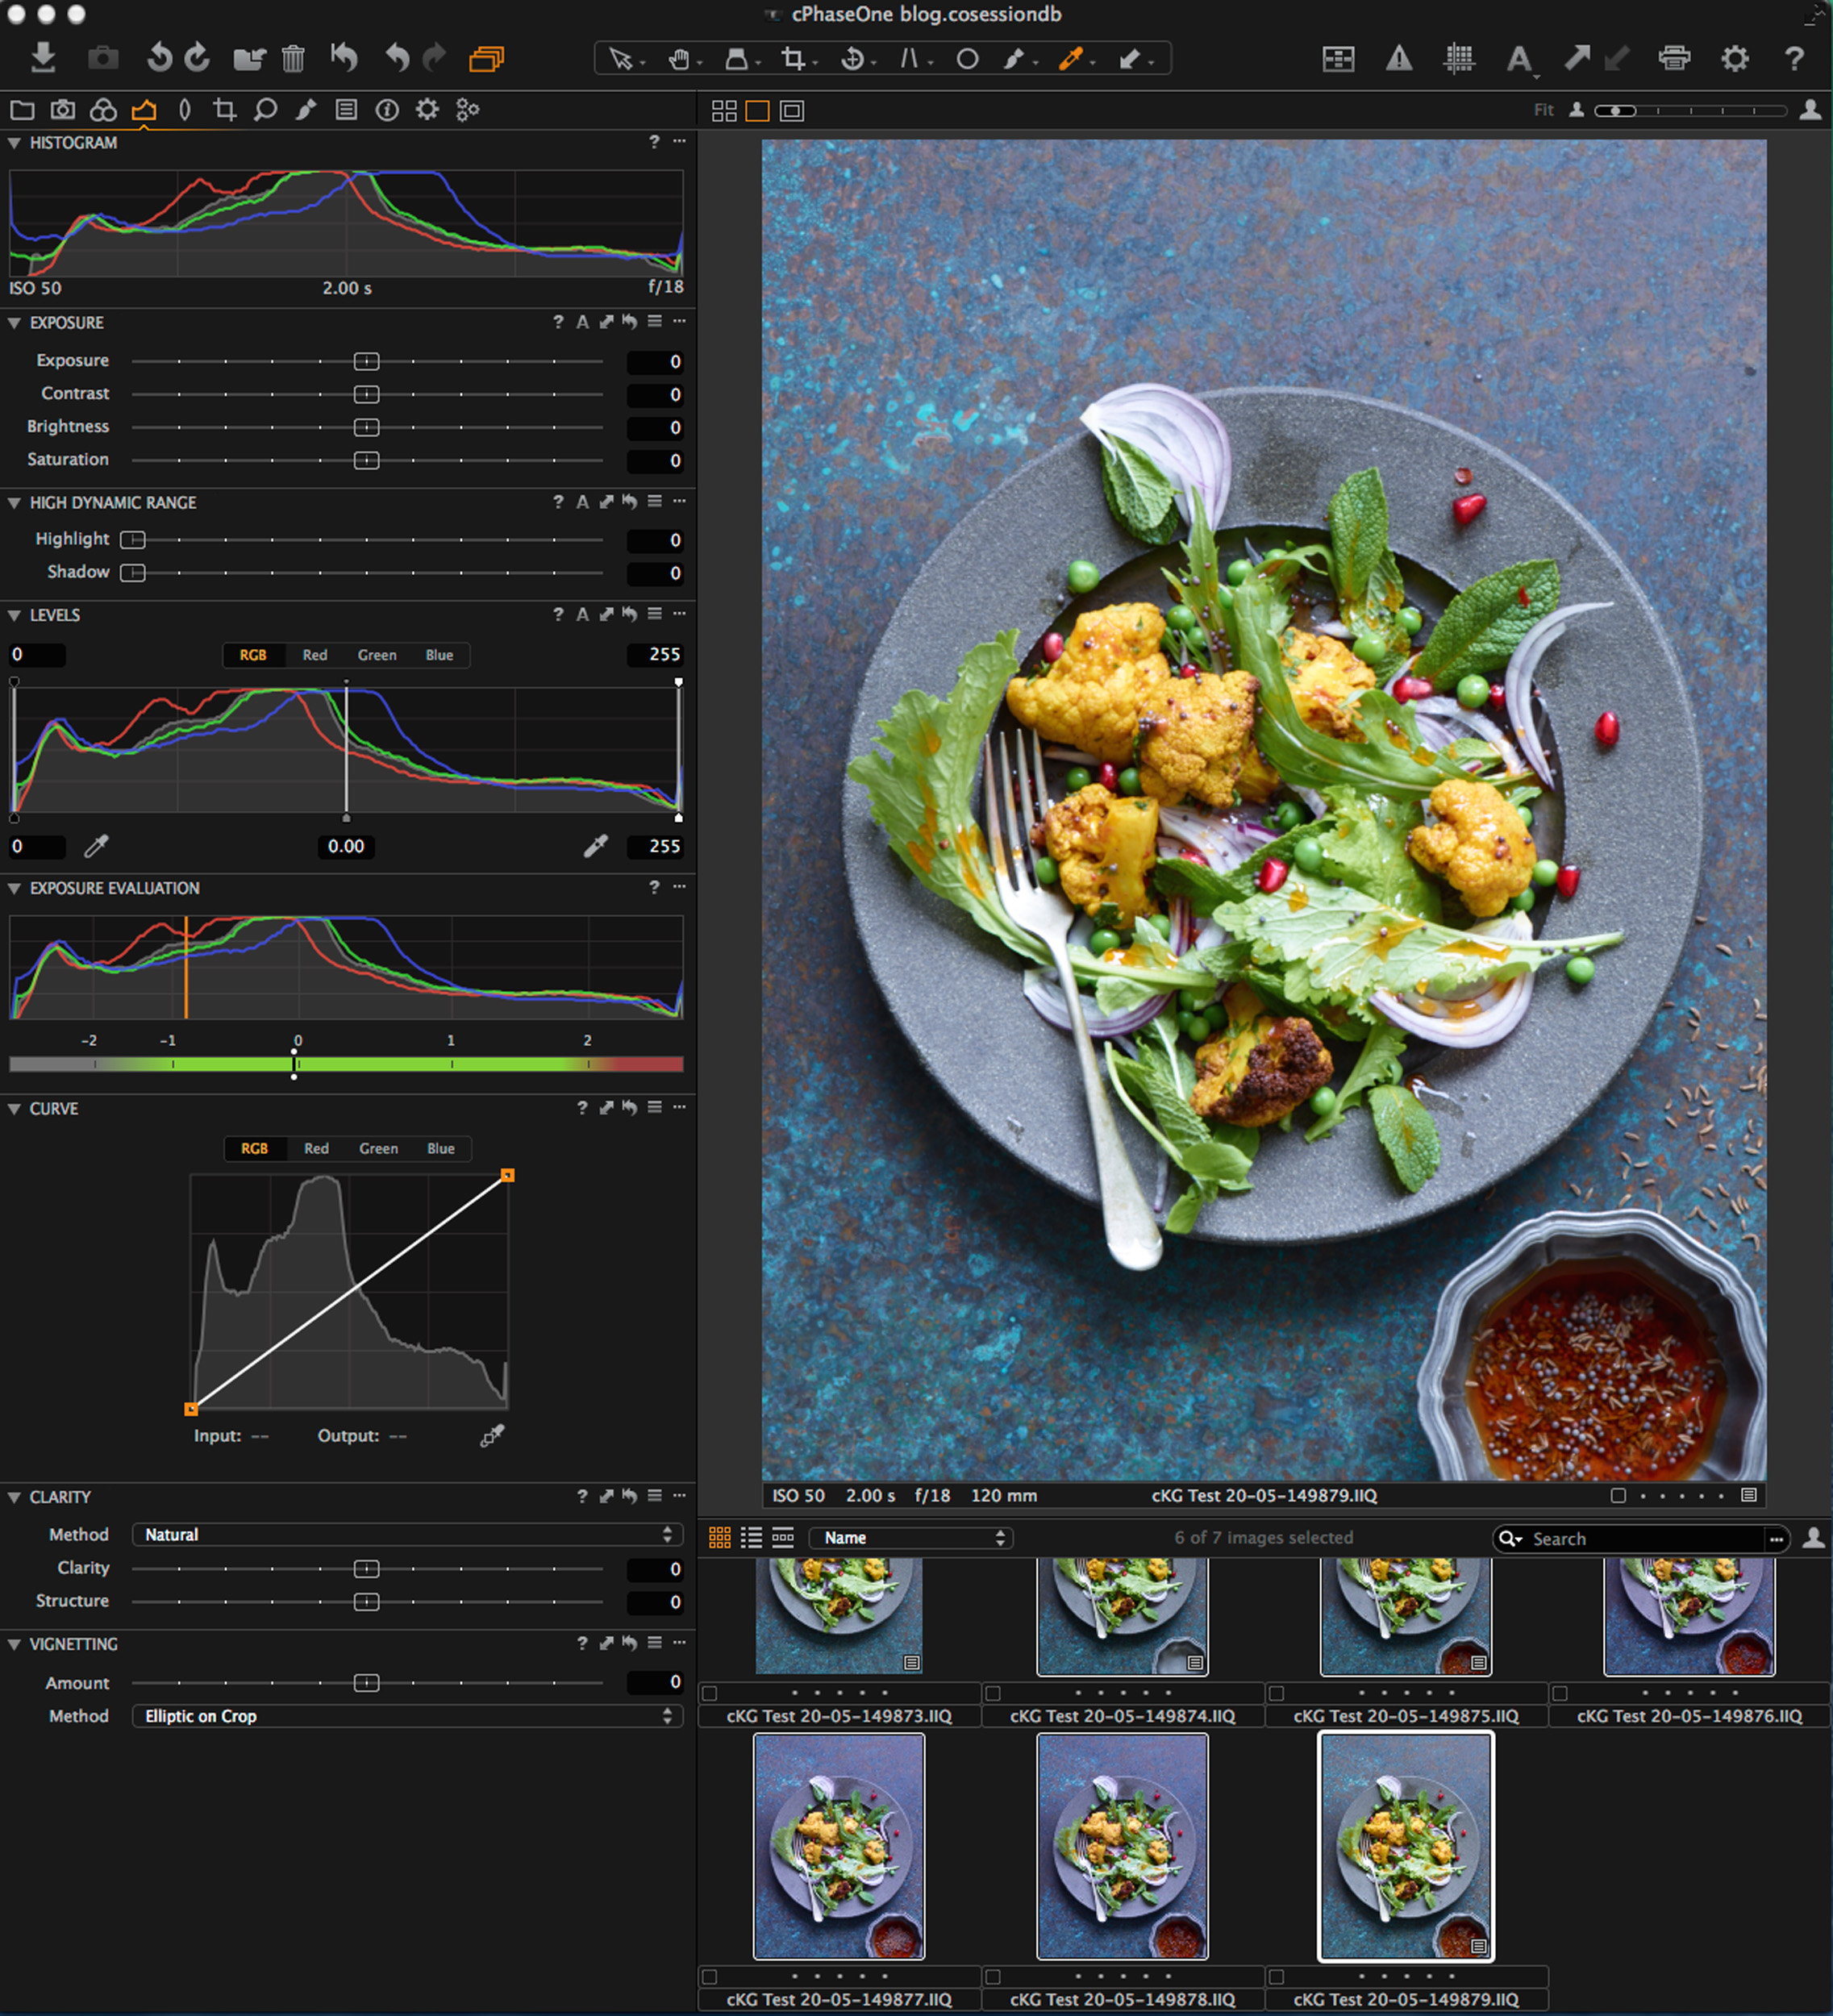
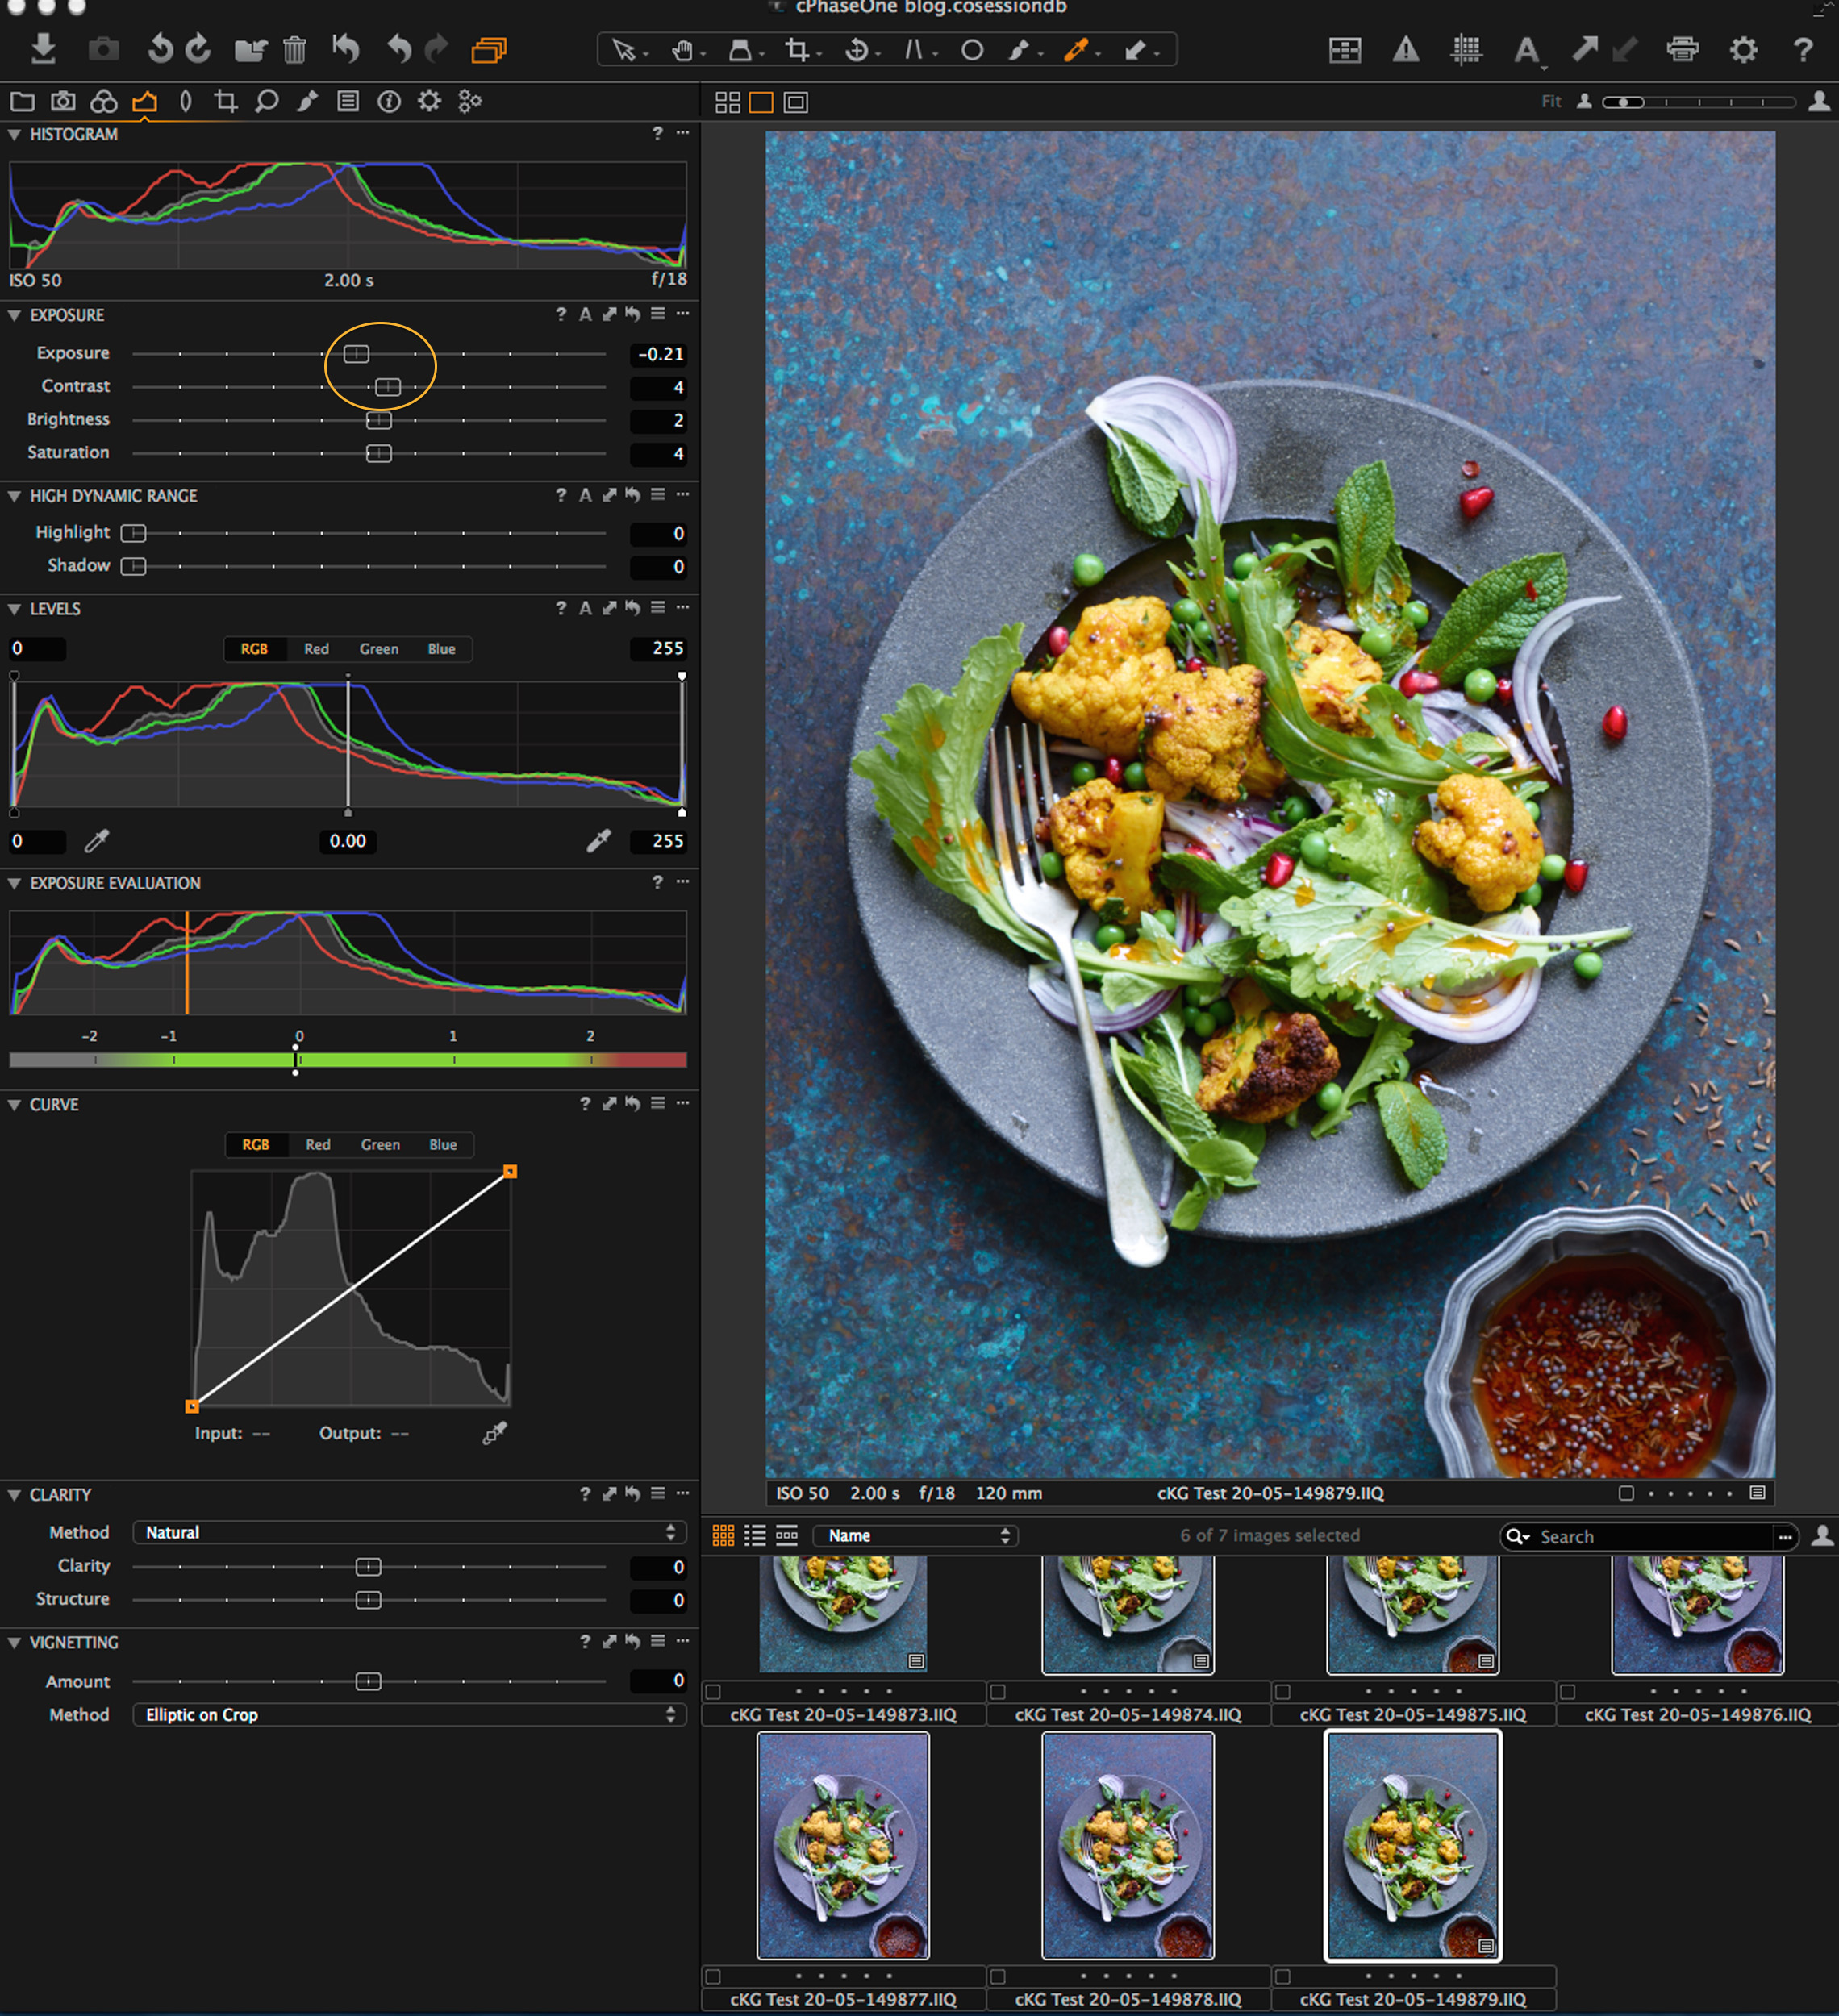
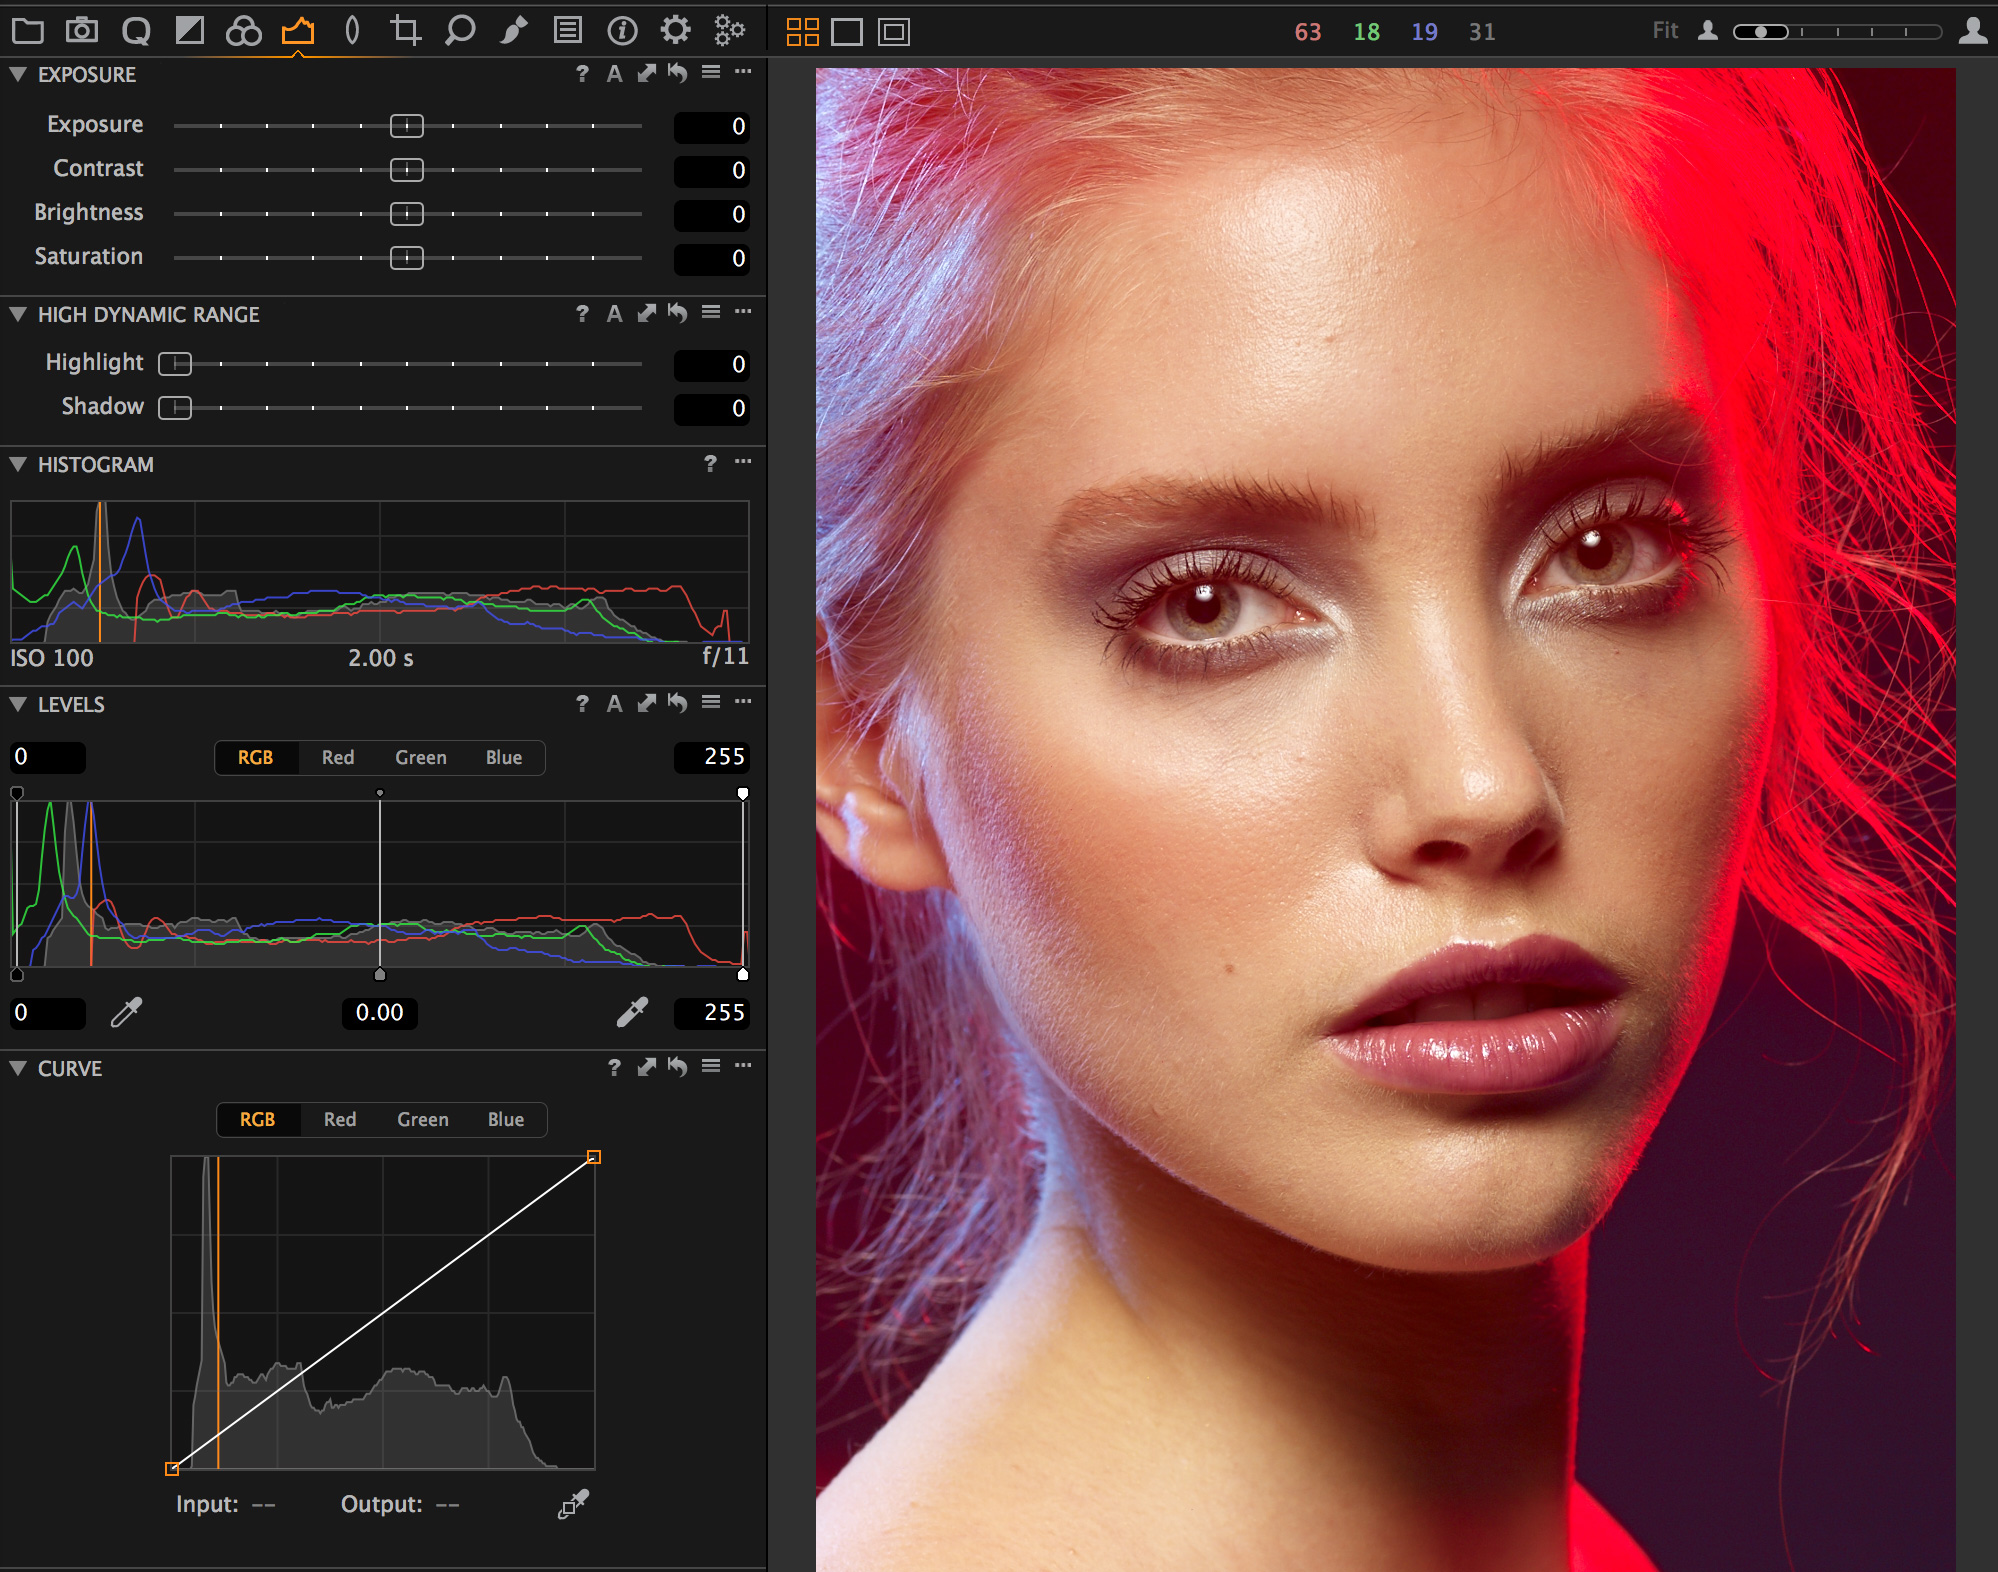
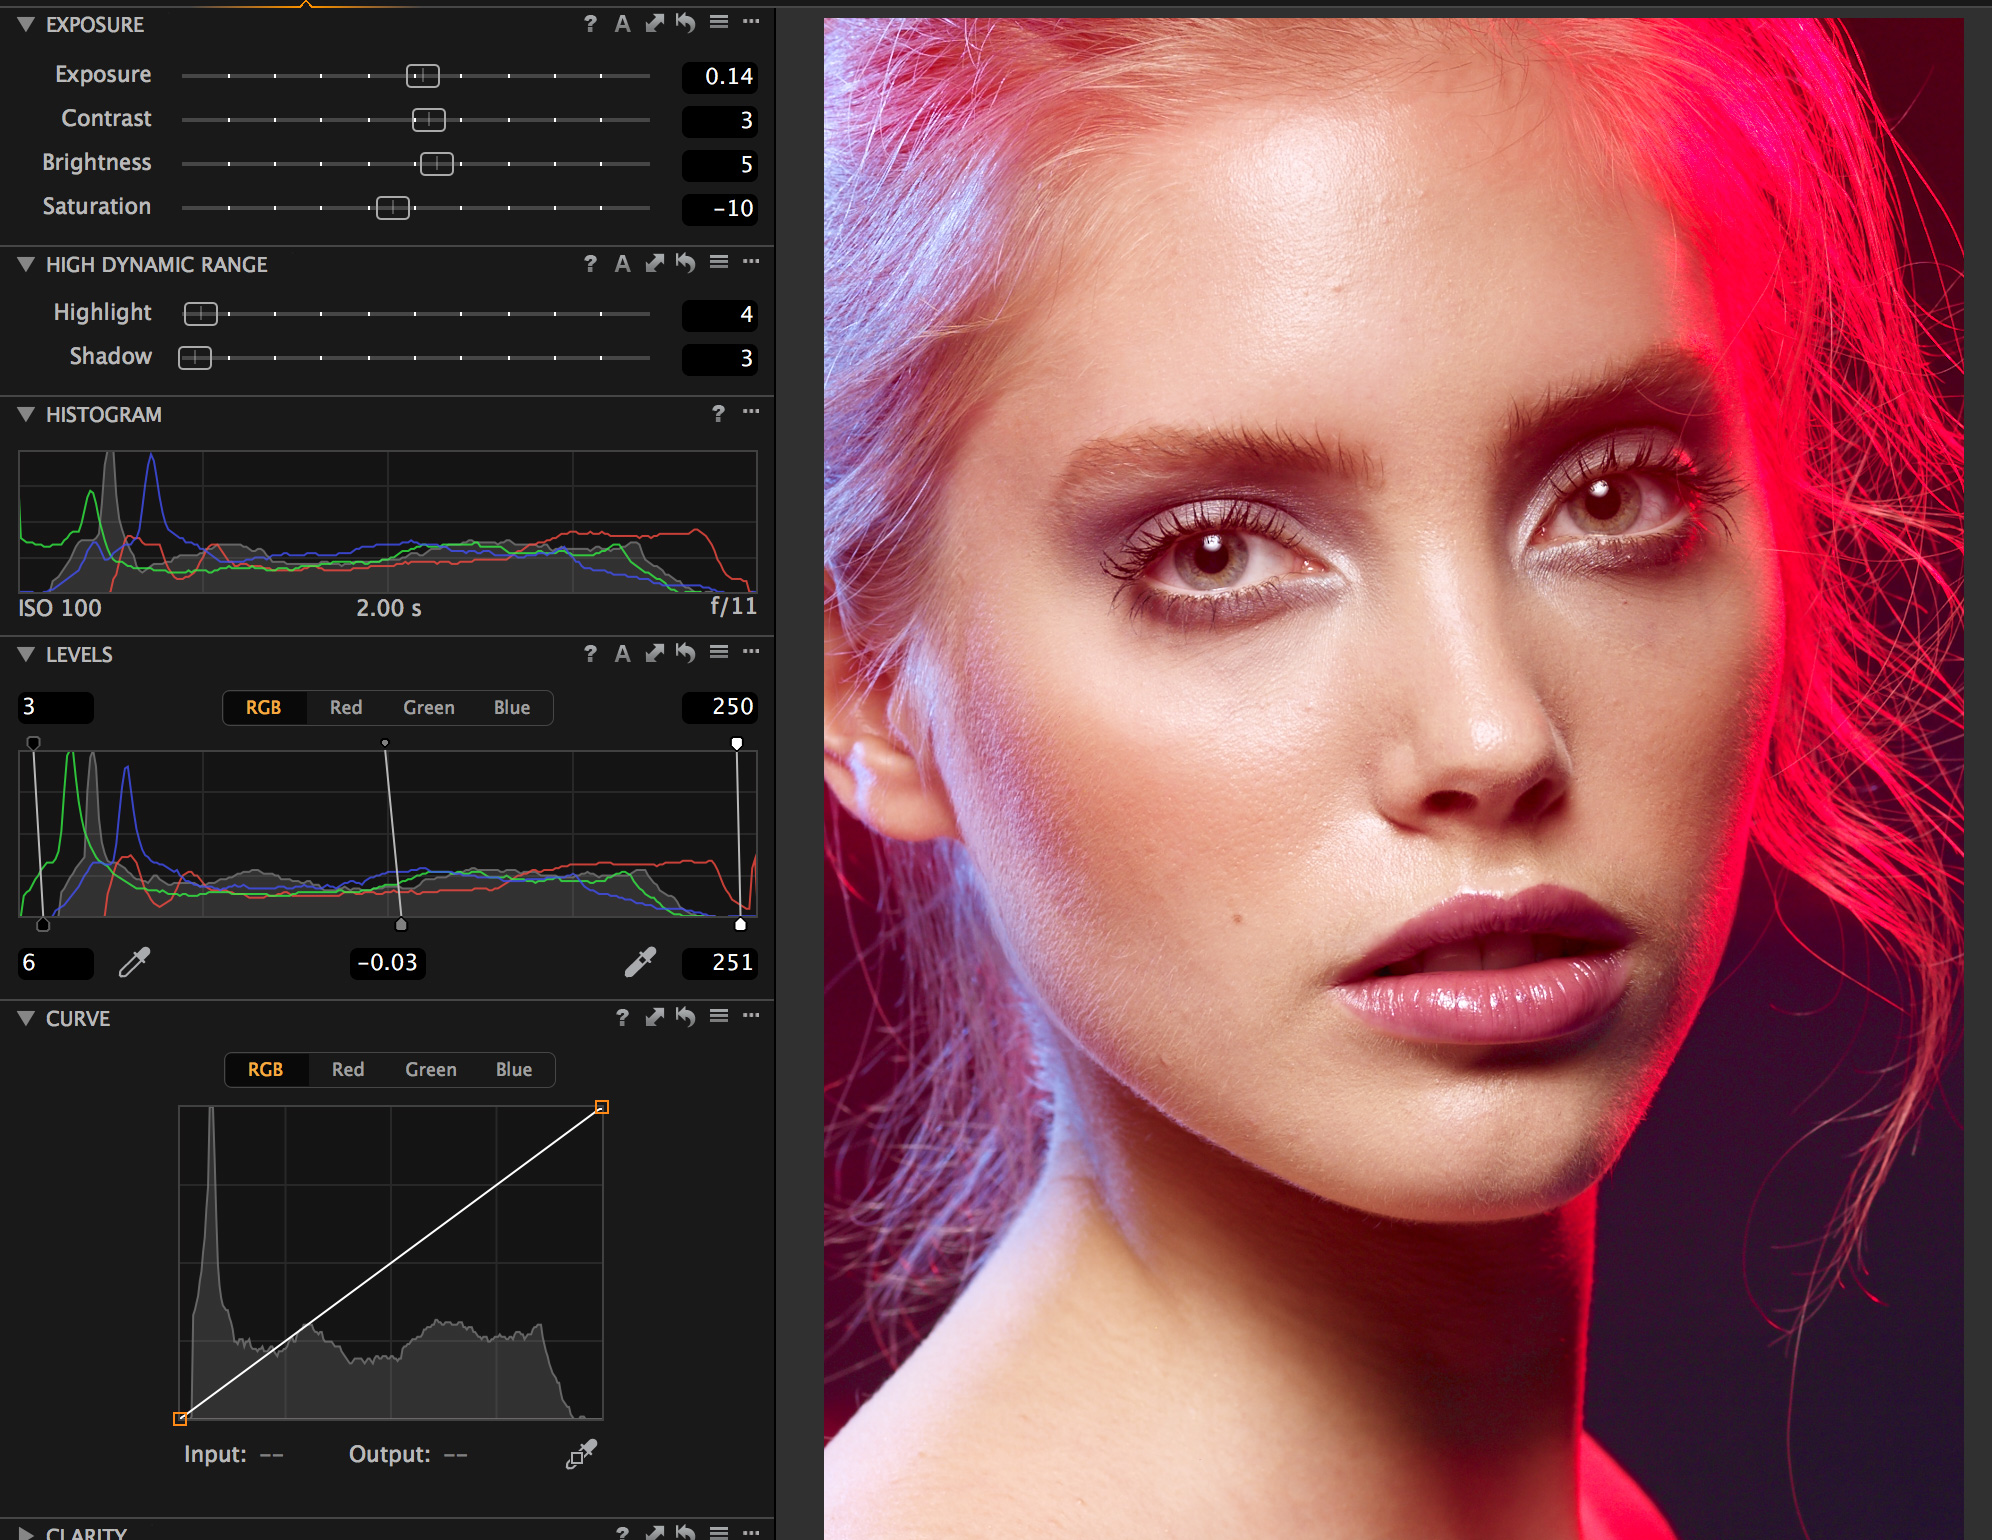
Stage 4: Exposure and Contrast
Changing the exposure and contrast at this stage is for me about trying to determine the mood and feel of the shot. Personally I prefer using this method rather than Levels as for me the exposure directly relates to minor exposure changes as if they were in camera. Obviously a calibrated screen is essential. See screenshots above.
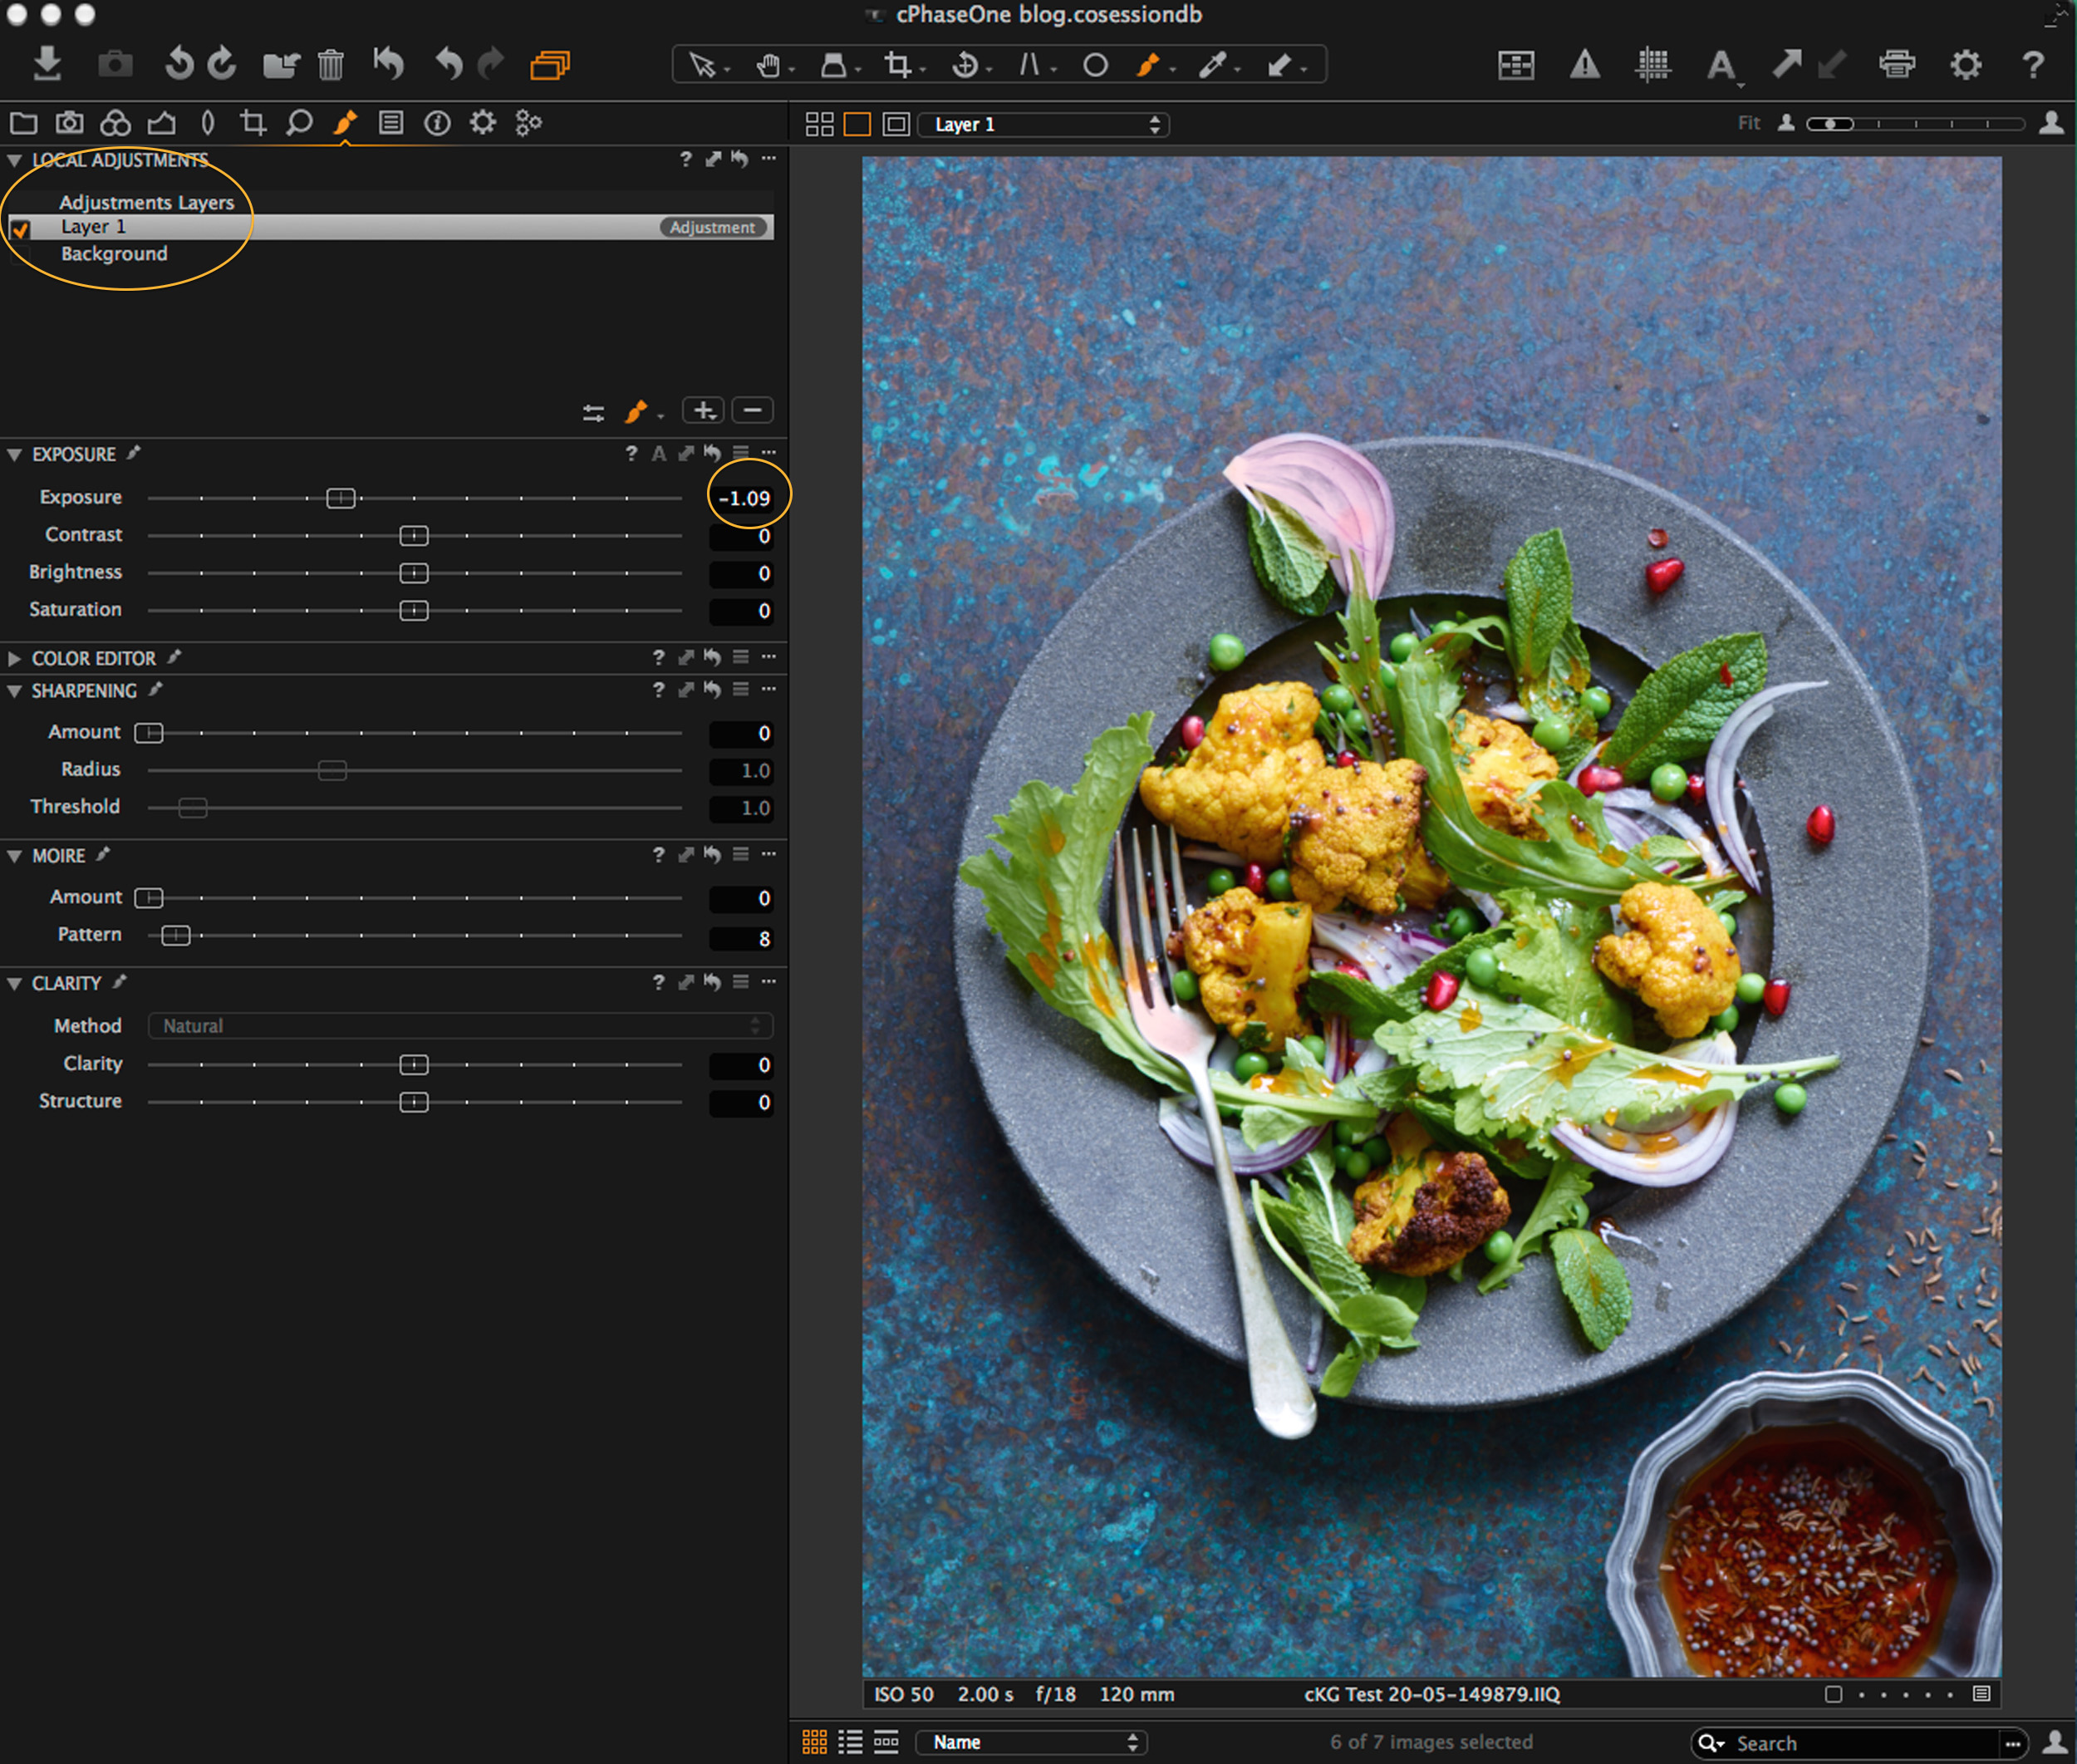
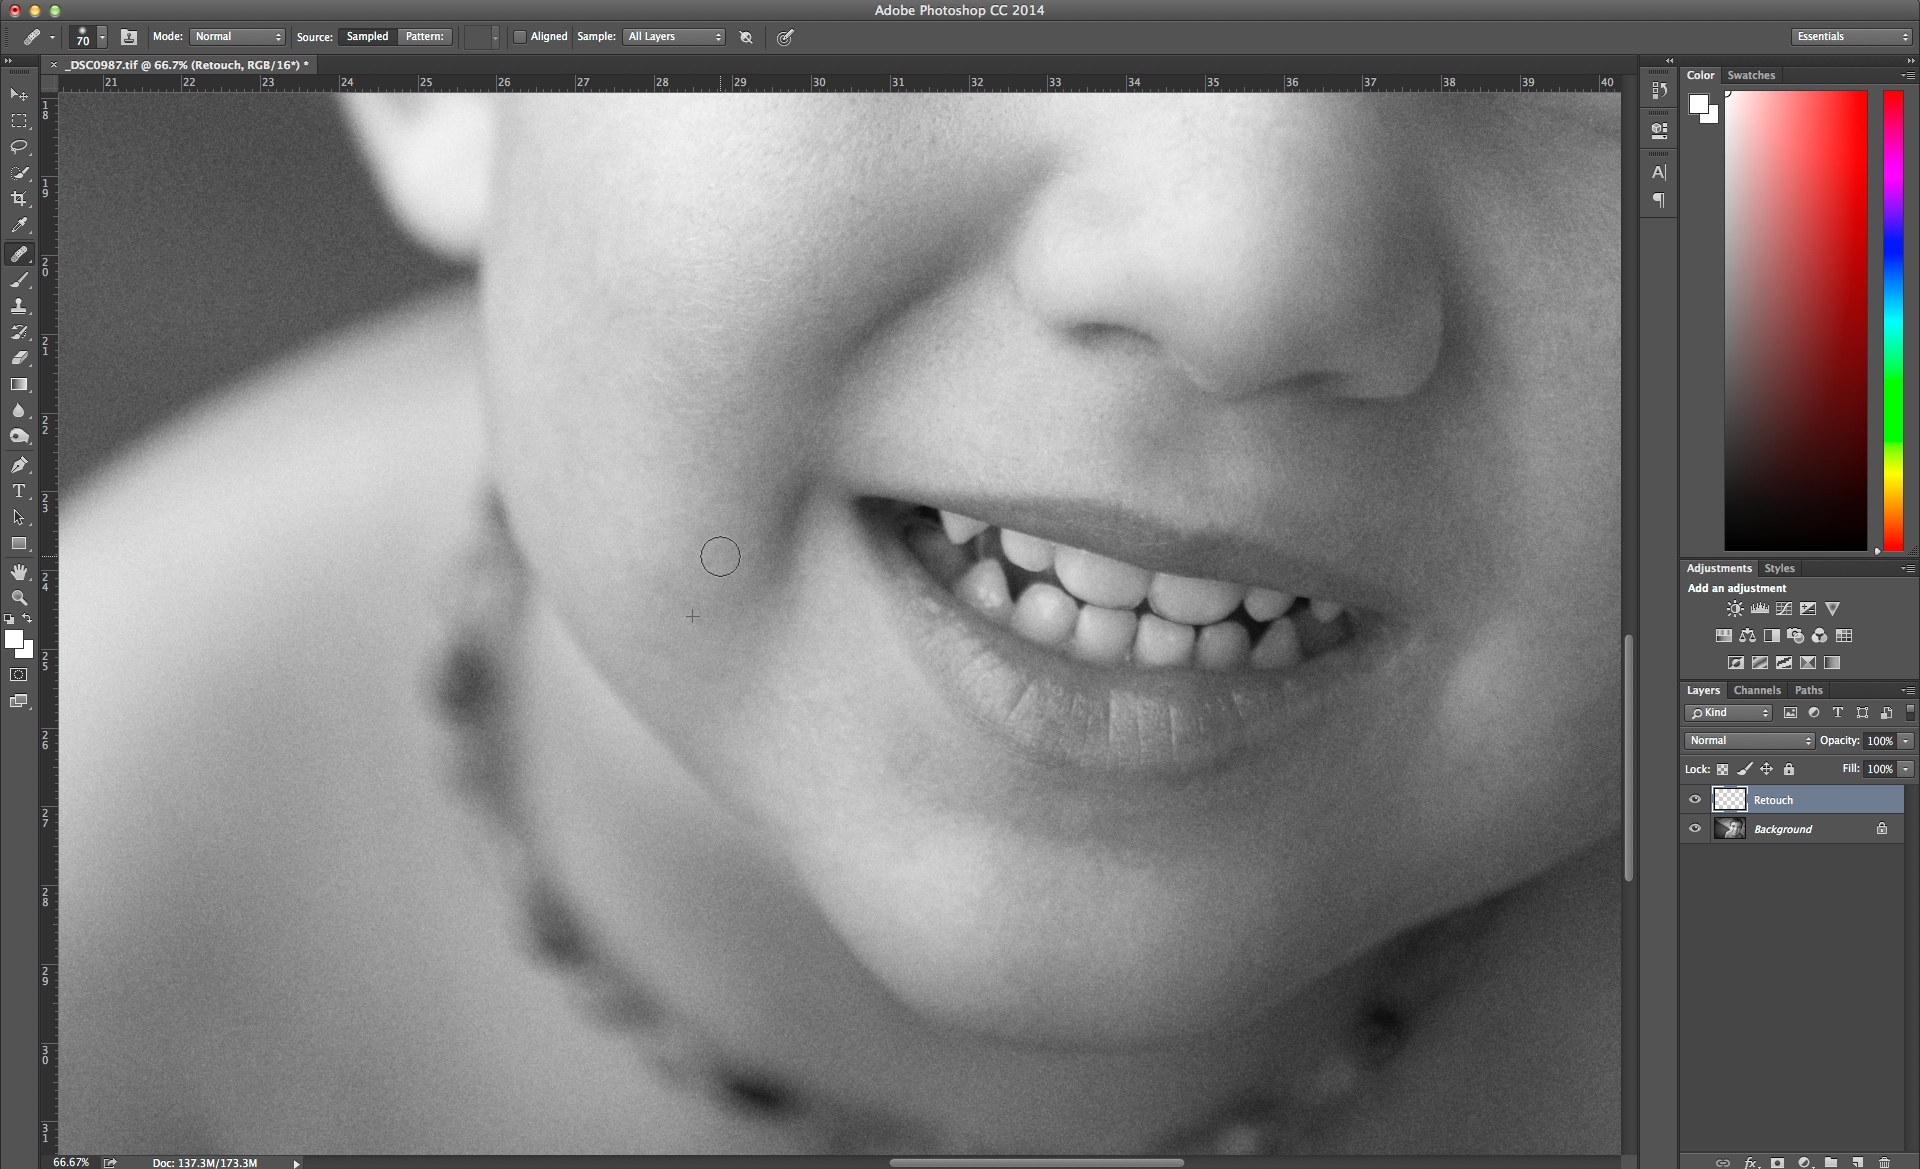
Stage 5: Localized exposure change
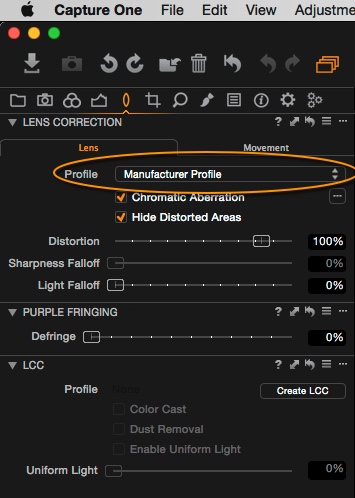
One of the most useful features of Capture One Pro 8 is the layer options where you alter localized areas of the image. The red onion was just slightly burning out the highlights. If we tried to darken this using files that weren’t Raw, it would be almost impossible to retrieve this information. Using the raw information it is relatively easy.
Using the Draw Mask tool, you click on the plus sign to create a new layer. You can rename this layer if using multiple layers. Then using the Draw Mask tool you choose the size of the brush and then paint within the area you require to alter. The area will go red. Then using the sliders you can alter the exposure, contrast, color of this selected area (see screenshot above).
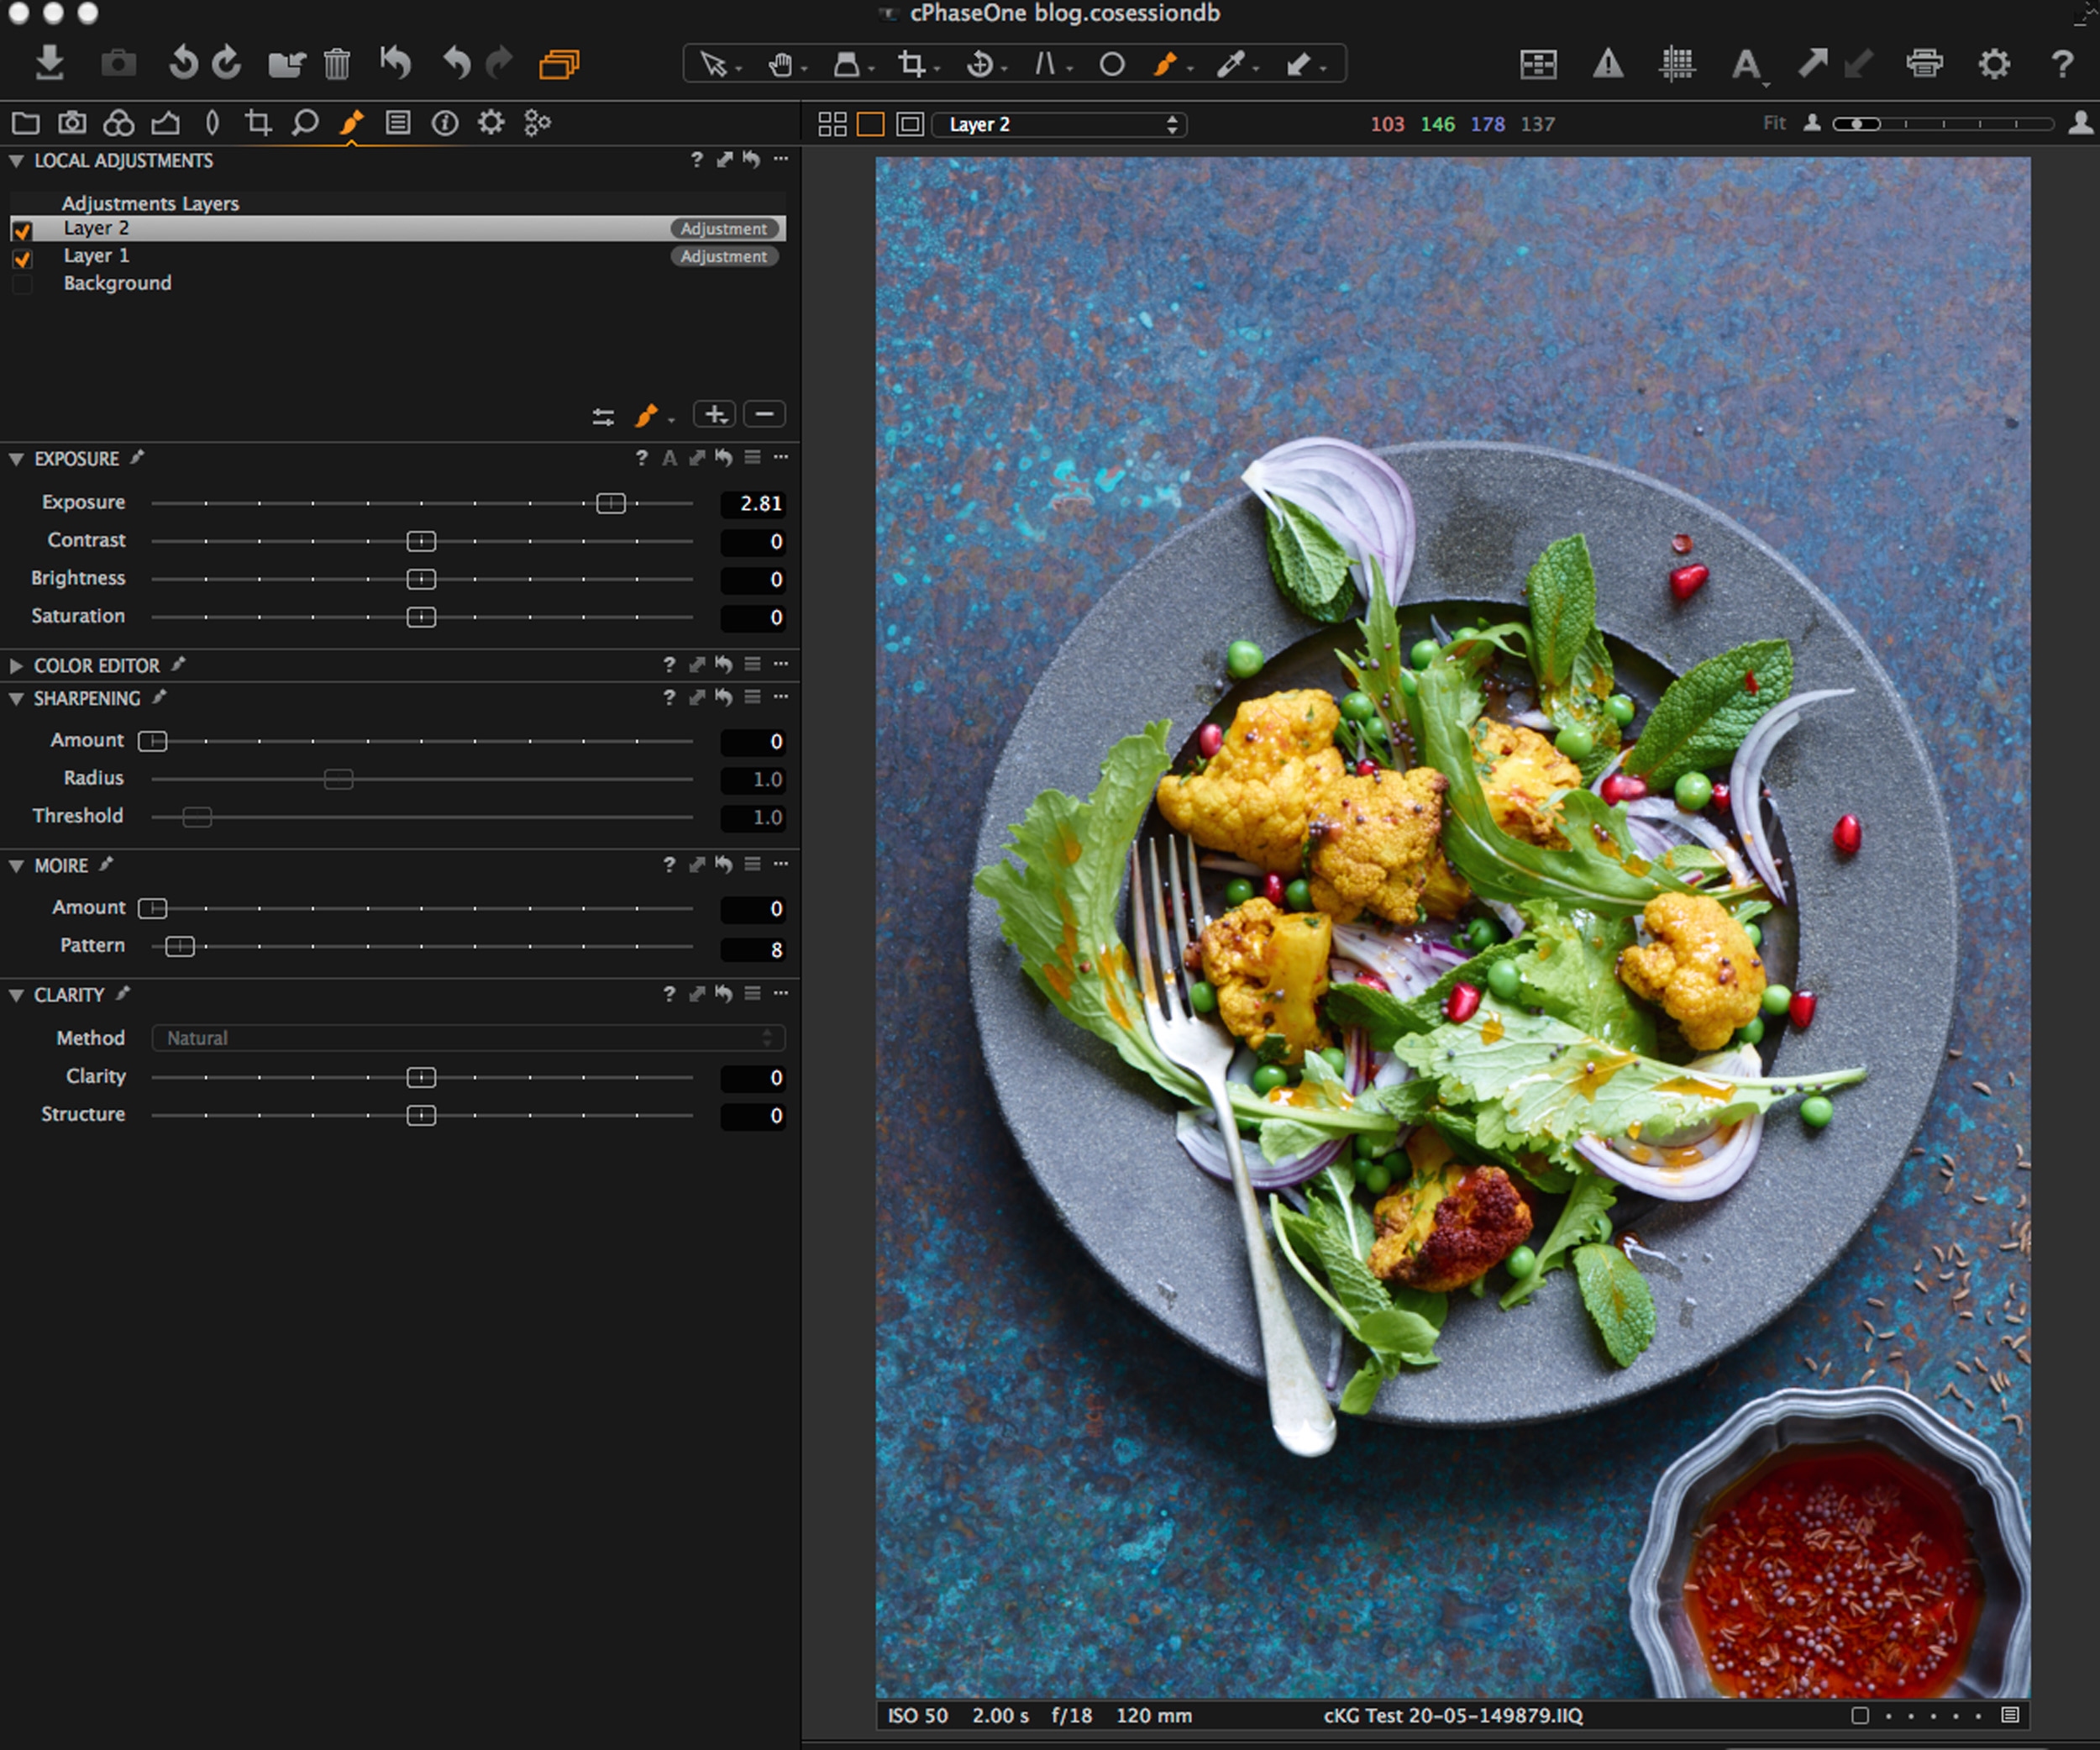
I also used this tool with another layer to make the small metal dish filled with mustard seeds go a little lighter.
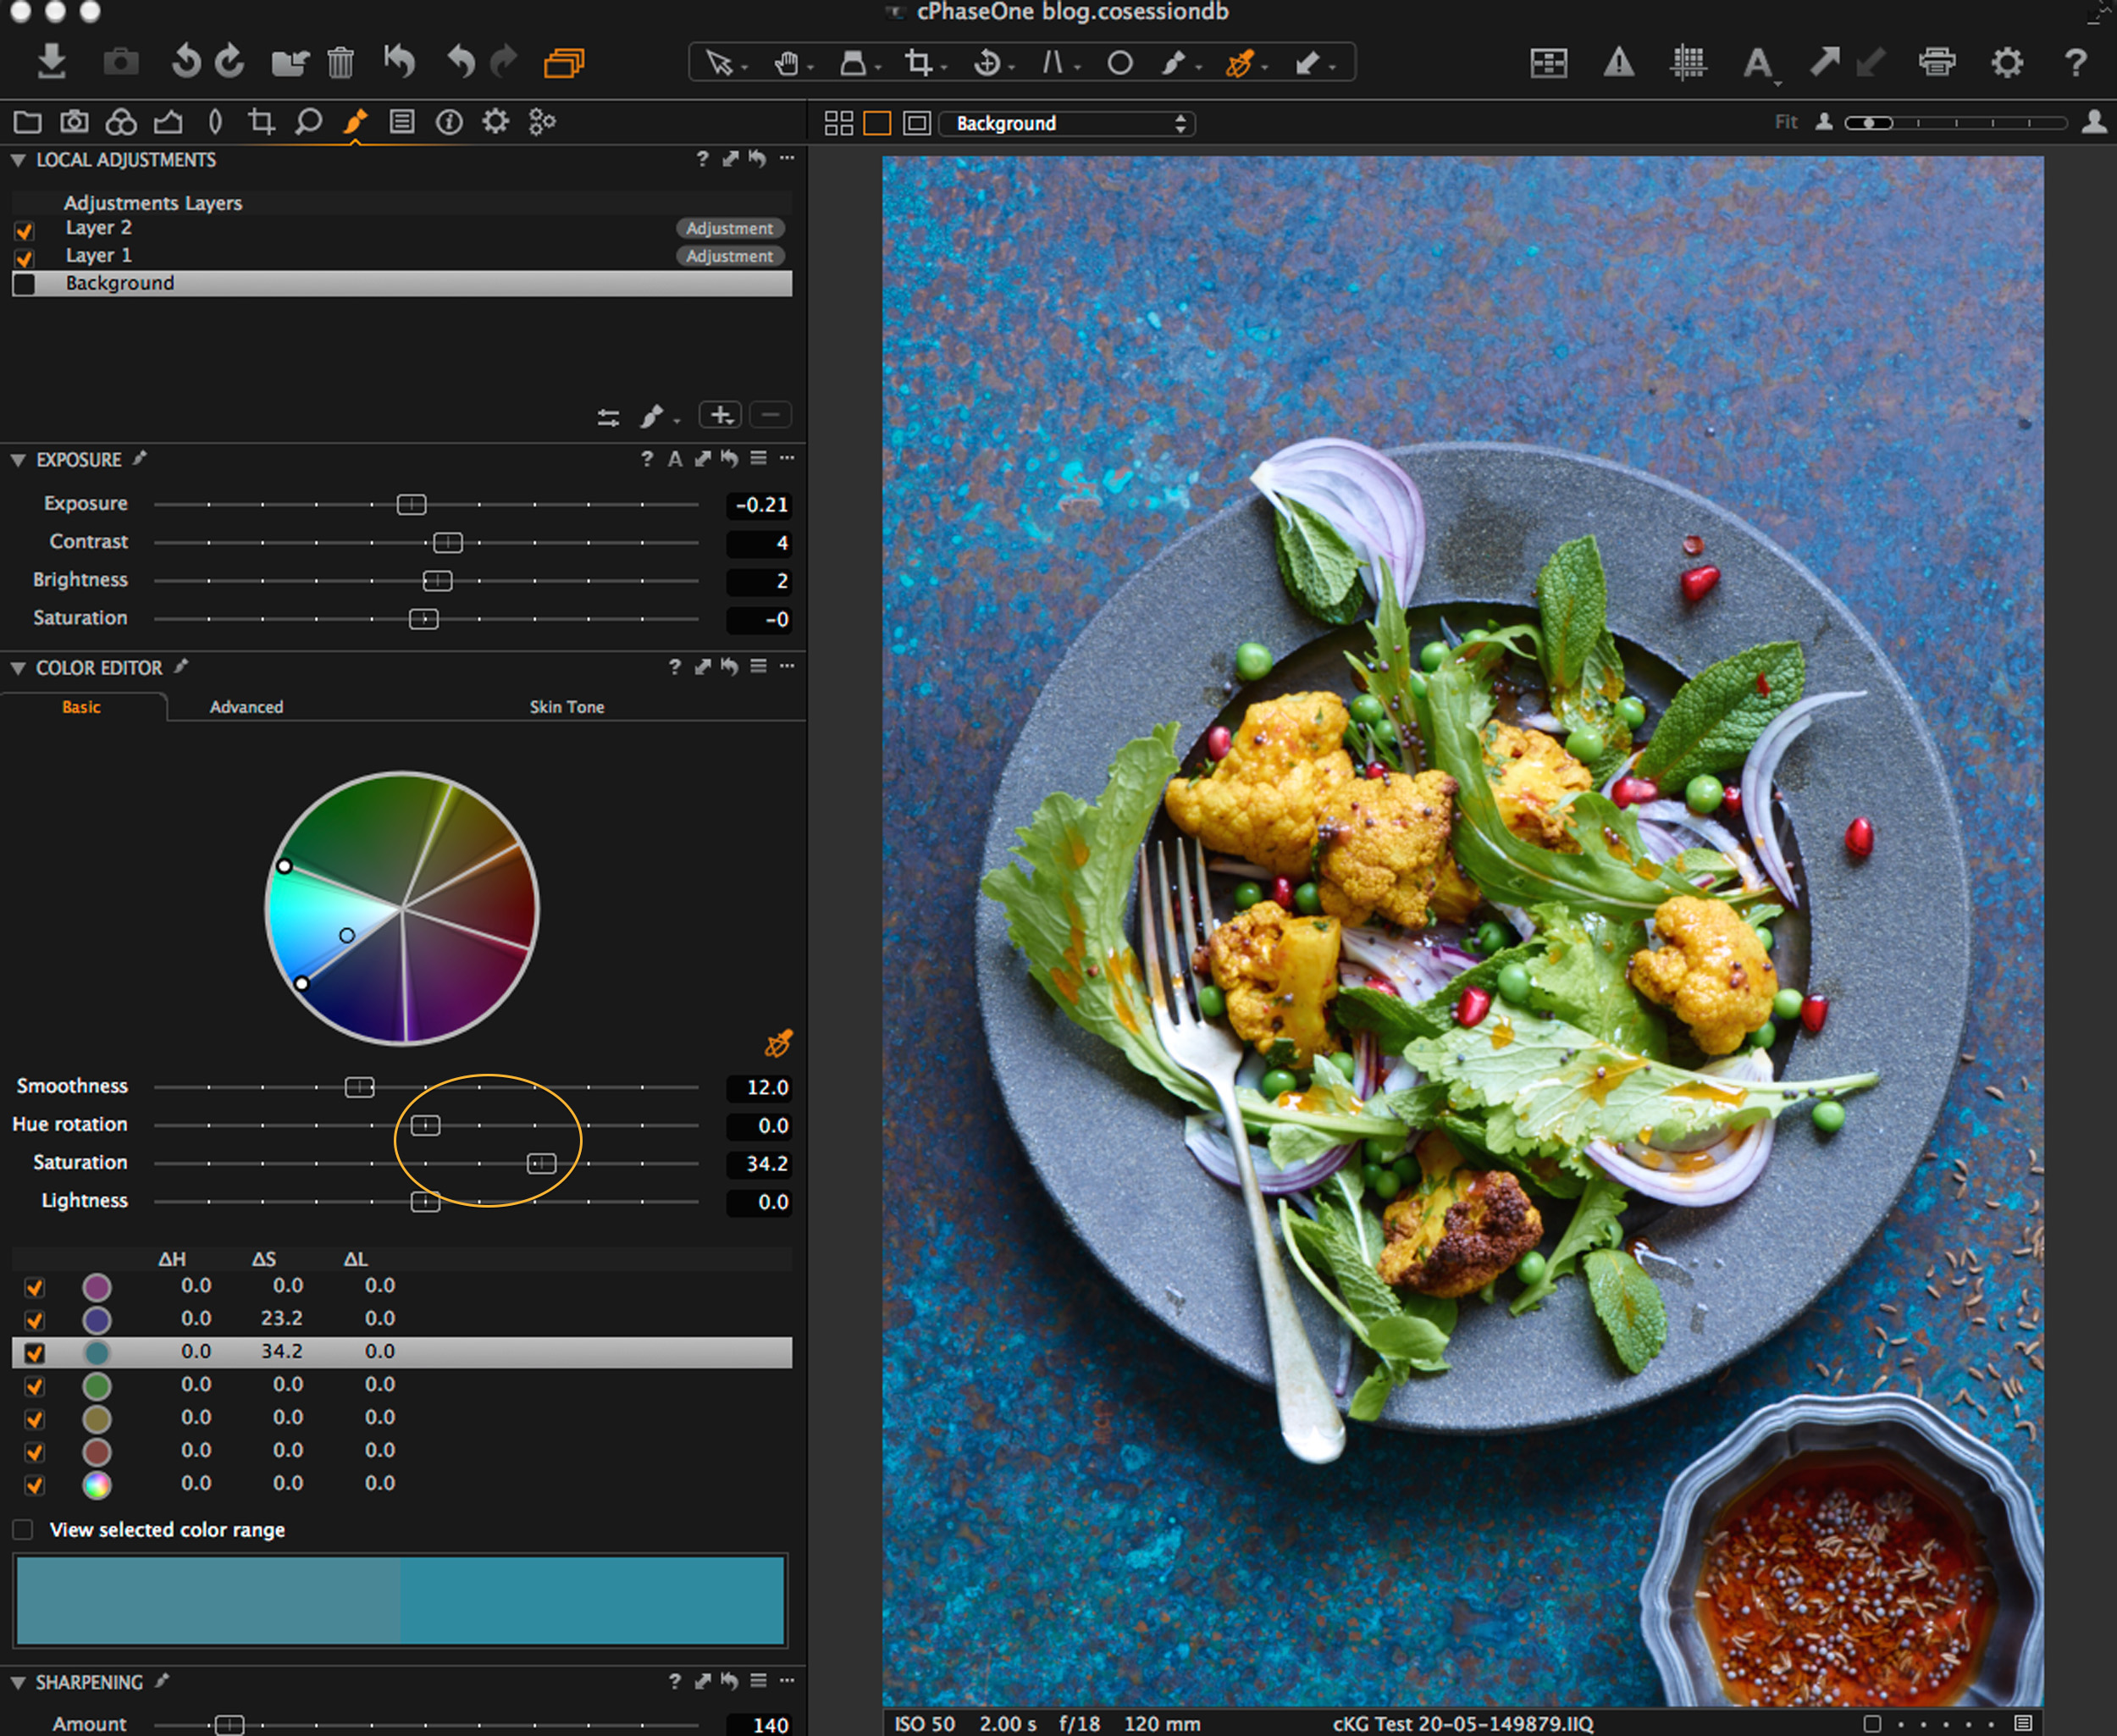
Stage 6: Changing the background color
While using this tool I selected the background layer to make the whole shot a little bluer/turquoise. I did this by selecting the background color using the color picker tool, and then slightly changed the hue and saturation. See screenshot above.

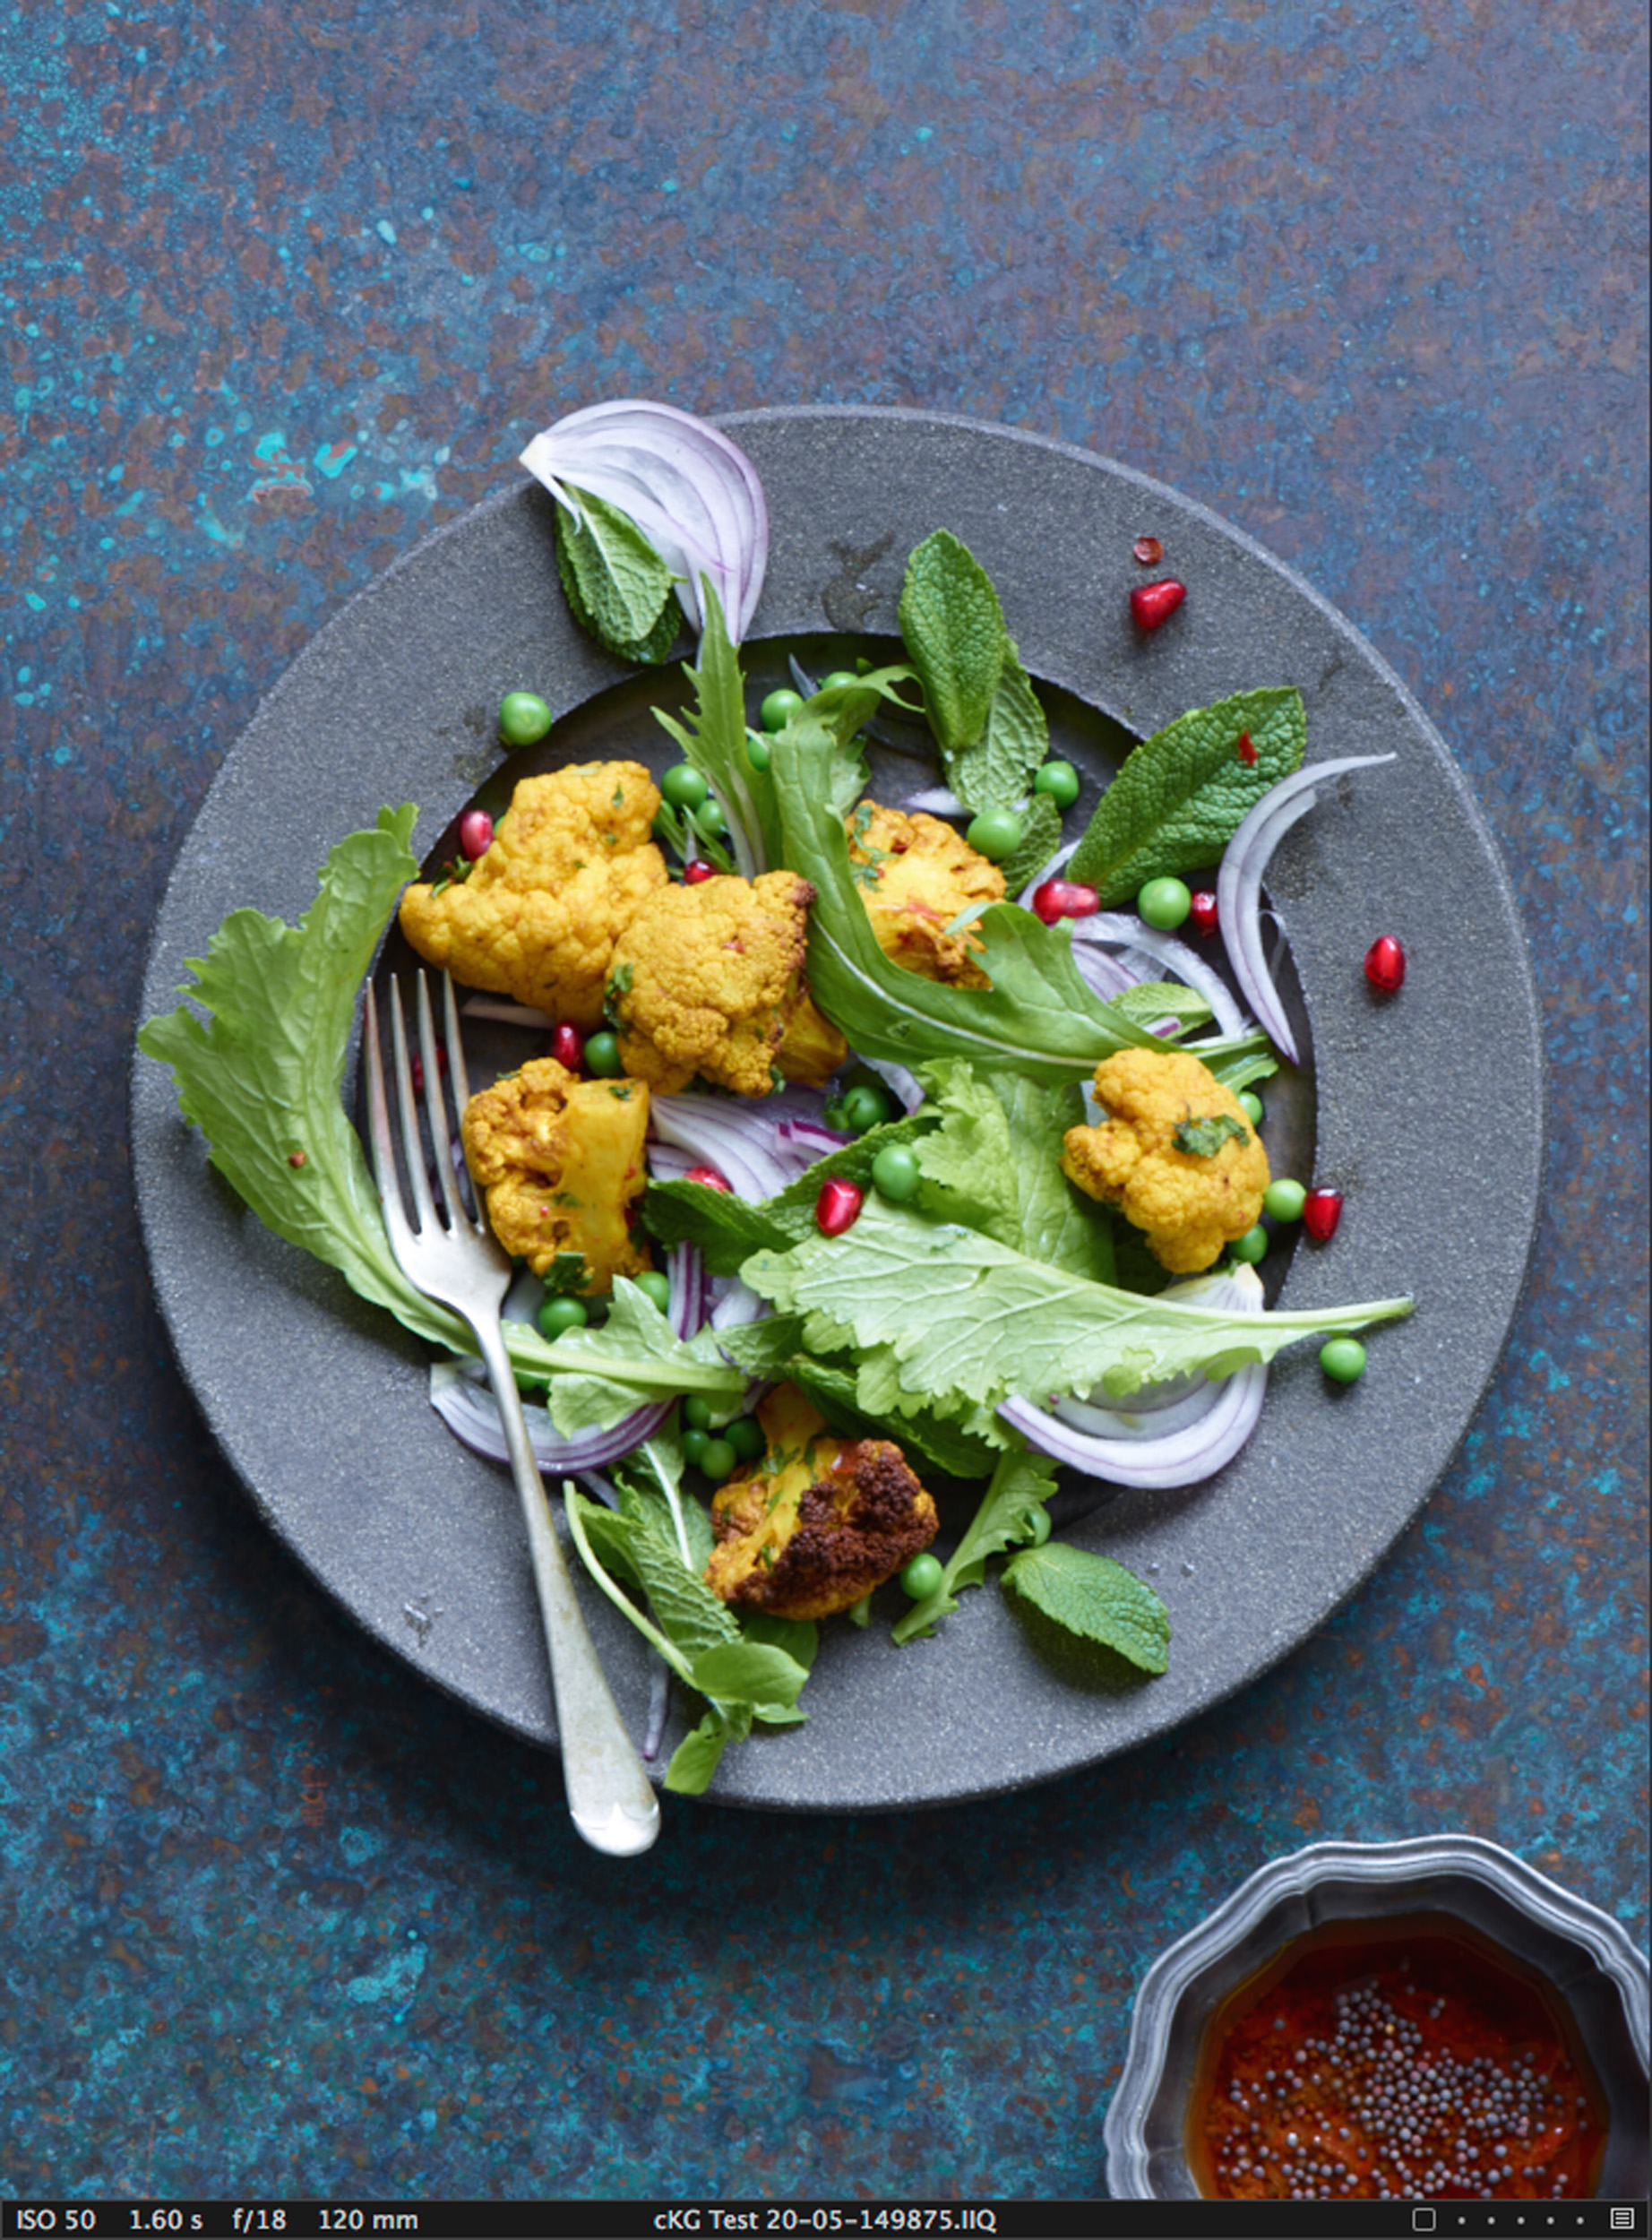
Stage 7: Adding a vignette
Under the exposure slider tab is the Vignette tool. This shot I felt would benefit from your eye really closing in on the main dish so I added a vignette. Vignette’s can add to an image but I personally prefer it to look natural and not overly obvious. Capture One Pro 8 has a range of options to let you select the shape and amount.
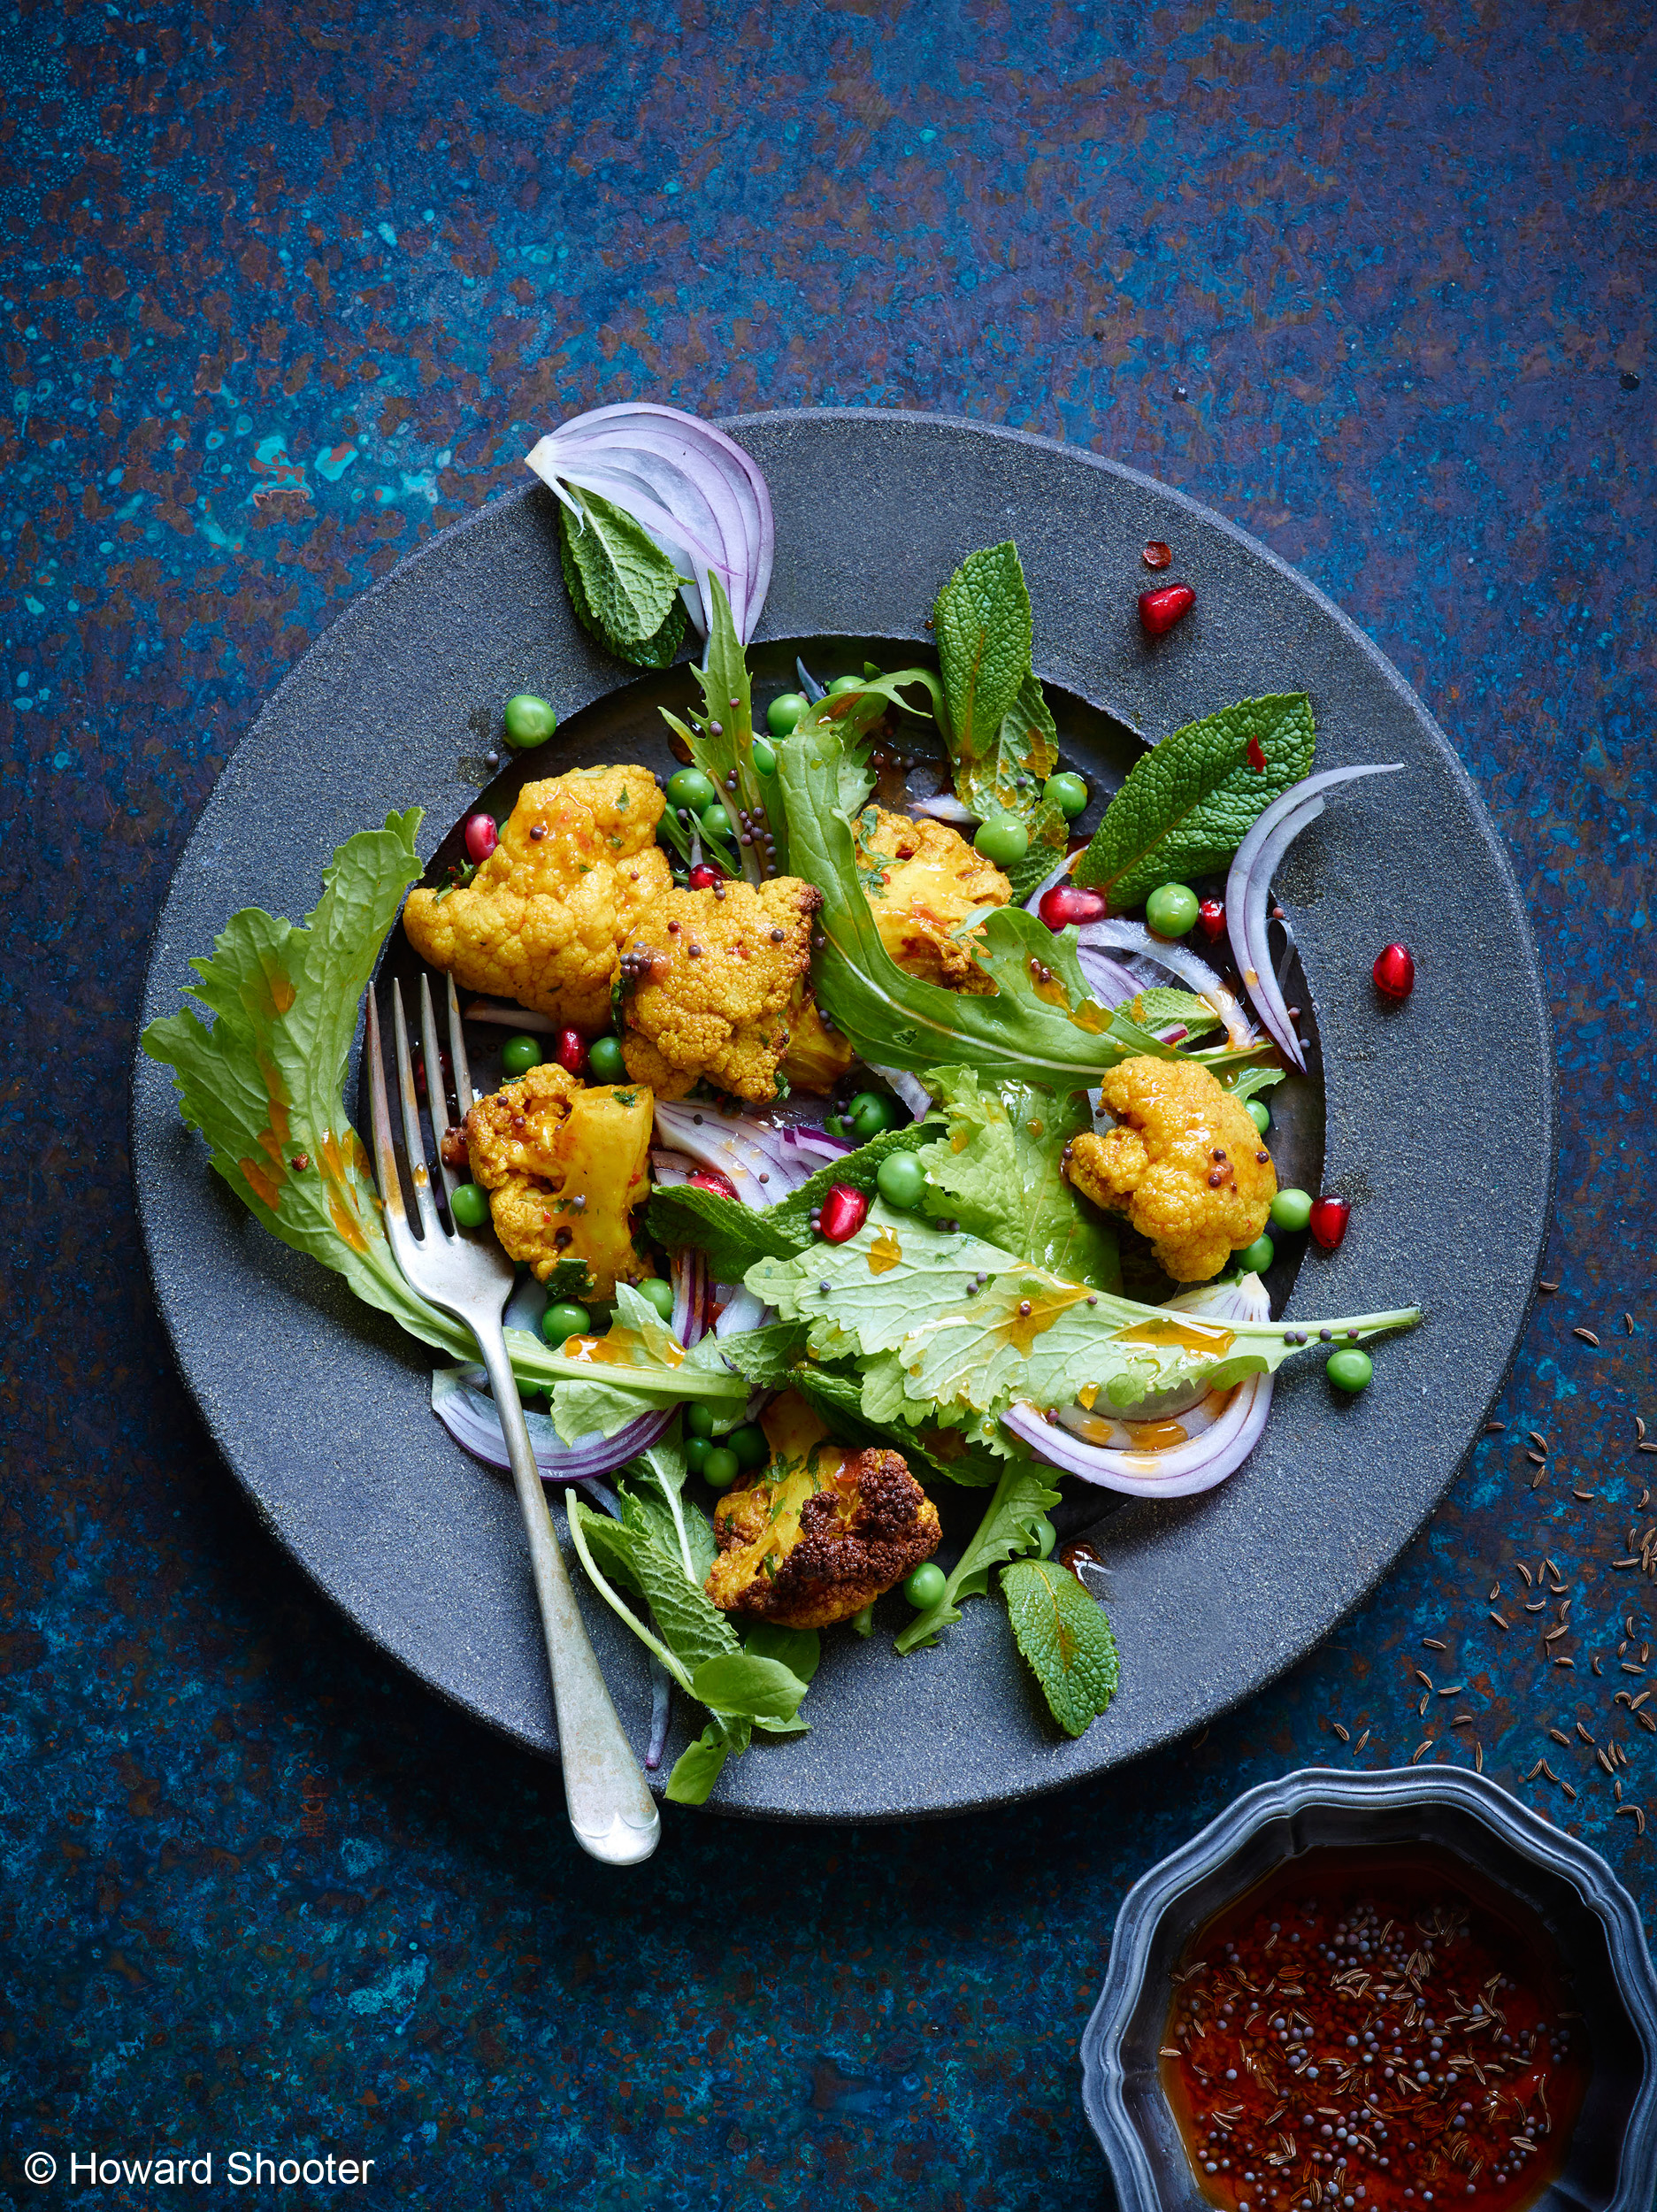
Stage 8: Finished shot
So here’s the finished shot, which has been enhanced by Capture One Pro 8’s many features. The whole process took me just a few minutes.
As a food photographer for such a long time it’s quite incredible how the genre has moved on into the public’s imagination with a lot of people wanting to create their own blog, or wanting to self-publish their Mum’s recipe book. Food is a serious business and whether you are shooting angry soufflés for books or belligerent burgers for fast food chains, it’s always good to know that the digital age is complementing and helping progress rather than compromising quality for convenience.
More on Howard Shooter:
I started 20 years ago assisting a food photographer who photographed across multi disciplines, i.e. editorial, publishing, packaging and design, and I was blessed with his old school attitude to teaching about the craft, using 10×8 sheet film and old Strobe lights. The photographer and I are still great friends today and my approach to digital photography has been shaped by these skill sets that I developed as a young and enthusiastic apprentice.
Being quietly geeky and gadget mad
As an early adopter of digital being quietly geeky and gadget mad, I can’t help always feeling that what Phase One got right was that they allow the photographer to shoot without the digital bit either taking over or getting in the way. If you want it, it’s there but you don’t need a degree in quantum physics to get started shooting in a way that is as easy as pressing the camera shutter.
I shoot tethered which is a posh term for the digital back being physically attached to the computer with either a firewire or a usb cable. Capture One Pro 8 happily receives the raw data from the camera and there is the enormous file in beautiful color in front of your eyes for everyone to see instantly.
Why I use Capture One Pro 8
It is the immediacy of the action and the reliability of the new software, which constantly impresses me. The most crucial part of this process though and what sets Capture One apart from the competition is three fold; firstly the color is so accurate, it always has been the market leader in this area as far as I’m concerned and it just gets better.
Secondly the filmic quality of the files makes shooting seem like a throw back from when we would huddle over enormous light boxes judging the bracketing of sheet film transparency. Finally Capture One Pro 8 let’s you make very exacting changes to raw data, accurately, quickly and naturally.
Hope you enjoyed the blog post.
Best regards,
Howard Shooter
7-1-15