Latest Posts

How to Retouch Faces

Portrait editing, especially retouching, shouldn’t be a time sink or an afterthought. The tools in Retouch Faces deliver clean, natural-looking results without the need to export or rely on third-party apps. It’s fast, built-in, and designed to fit seamlessly into your workflow.

Here’s how it works and why it’s a game-changer for portrait photographers and beyond.


How to access Retouch Faces

You’ll find the tools in the Retouch Tool Tab. It’s part of the default workspace in our May 2025 release (16.6.0) and newer, so you’re ready to go right out of the box.

If you’re using a custom workspace and the Retouch Tool Tab isn’t visible, just click the three vertical dots next to the Tool Tabs > Add Tool Tab > Retouch Tool Tab.

See this Help Center article for details: Customizing user interface.

Retouch individual faces or all

Whether you’re editing a group shot or a single portrait, you can apply changes to all detected faces, or fine-tune each one individually. You can automatically detect up to 32 faces per image, provided each face is at least 200 pixels on its shortest edge. Ideal for studio sessions, events, or anything in between.

To reset edits for a specific face, click the reset button on the frame of the face.

See this Help Center article for details: Resetting adjustments.


Refine skin details with the Blemish slider

Use the Blemish slider to clean up minor distractions, anything from pimples to rough patches. It starts by targeting larger imperfections and, as you increase the value, it gradually picks up smaller ones.

Start between 0 and 40 to avoid over-editing and preserve natural skin texture.

Reduce under-eye shadows with the Dark Circles slider

Tired-looking eyes can dull a portrait’s natural glow, but with a simple slider, you can bring the intensity back. Our Dark Circle Reduction tool softens shadows under the eyes while maintaining natural detail. Great for headshots, corporate portraits, or anyone who needs to look sharp and well-rested.

Smooth skin contrast with the Even Skin sliders

The Even Skin sliders help even out broad contrast inconsistencies while keeping natural texture and lighting intact, ideal for everything from fashion to school portraits. Use the Amount slider to control how much smoothing is applied, and Texture to decide how much fine detail stays in.

Try different combinations for different results: a high Amount with low Texture (like 80 / -70) gives a polished, editorial look; a lower Amount with higher Texture (around 40 / 50) keeps things natural. Pair this with light Blemish adjustments to refine skin without making it look overworked.

Add natural contour to portraits with Contouring slider

Give your portraits dimension without manually dodging and burning. The Contouring slider subtly deepens shadows on the face to define cheekbones and jawlines in a natural, flattering way, especially useful in flat lighting or tight headshots.

But it’s not just a blunt tool. Contouring intelligently analyzes the light on the face, skipping over highlights and applying depth only where it makes visual sense. It enhances the natural structure without fighting the lighting or overprocessing the edges.


Adjust overall retouching with the Impact slider

This is your global control. The Impact slider adjusts the intensity of all your facial edits in one go, perfect when you need to make quick calls during live sessions or client reviews. When working with multiple faces, it acts as a master control for all of them, but you can also fine-tune each face’s Impact individually if needed.

Retouch portraits at scale with Styles and Copy/Apply

If you’re shooting dozens or hundreds of portraits, that’s where Copy and Apply comes in. But this isn’t just a simple copy-paste. Capture One intelligently detects new faces in every image, even if they’re different people, in different positions or lighting, and automatically applies your retouching to the right faces.

When copying edits from portraits with multiple individually adjusted faces, Capture One applies those adjustments based on the face order in the source image. As long as the face order stays consistent, the retouching maps correctly to the right features on each subject.

It’s fast, accurate, and ideal for high-volume workflows where consistency matters.

See this Help Center article for details: Copy and Apply adjustments and layers.

Want to take it further? You can save your global Retouch Face adjustments as a custom Style, so they’ll be applied to all faces in an image automatically. Assign that Style to a custom keyboard shortcut, and you’ve got a rapid-fire retouching setup—perfect for flying through sessions with just a few keystrokes. It’s a powerful way to turn hours of work into minutes.

See this Help Center article for details: An overview of Styles.

Connect your camera and retouch portraits while tethering

One of the most powerful use cases: tethered portrait shoots. With Retouch Faces and Next Capture Adjustments, every portrait you shoot is instantly retouched. The edits carry over from shot to shot, so you’re always showing your client the best version, live on set. That means faster approvals, fewer reshoots, and less time in post. It’s a workflow that makes you efficient.

See this Help Center article for details: Adding adjustments automatically while capturing.

Build a scalable headshot photography workflow with AI Crop, AI Retouching, and tethering

With these new updates, headshot photographers have everything they need to scale—fast, natural edits, automatic framing, and live previews.

Use AI Crop for perfect framing from the start.

Use Session Builder with Tokens to organize files as you shoot.

Combine all that with Retouch Faces while tethered shooting plus Next Capture Adjustments, and your clients see final-quality results the second the shutter clicks. That’s a major advantage for studio work, team portraits, and high-volume bookings.

See these Help Center article for details: AI Crop, The Complete Guide to Sessions in Capture On: Session Builder.

What’s next for portrait retouching in Capture One?

We’re not done yet. In upcoming Capture One releases, we’re working on a new feature that lets you protect beauty spots and other skin details you want to keep during retouching. It’s a small change that could mean a big leap in creative control.

Right now, tools like Blemish Removal may unintentionally smooth out marks users want to preserve, like freckles, scars, or moles. This new protection mask will help you retouch with more intention, keeping important facial features untouched while cleaning up distractions.

Stay tuned. And if you’re curious, try Retouch Faces features for free for 7 days here.

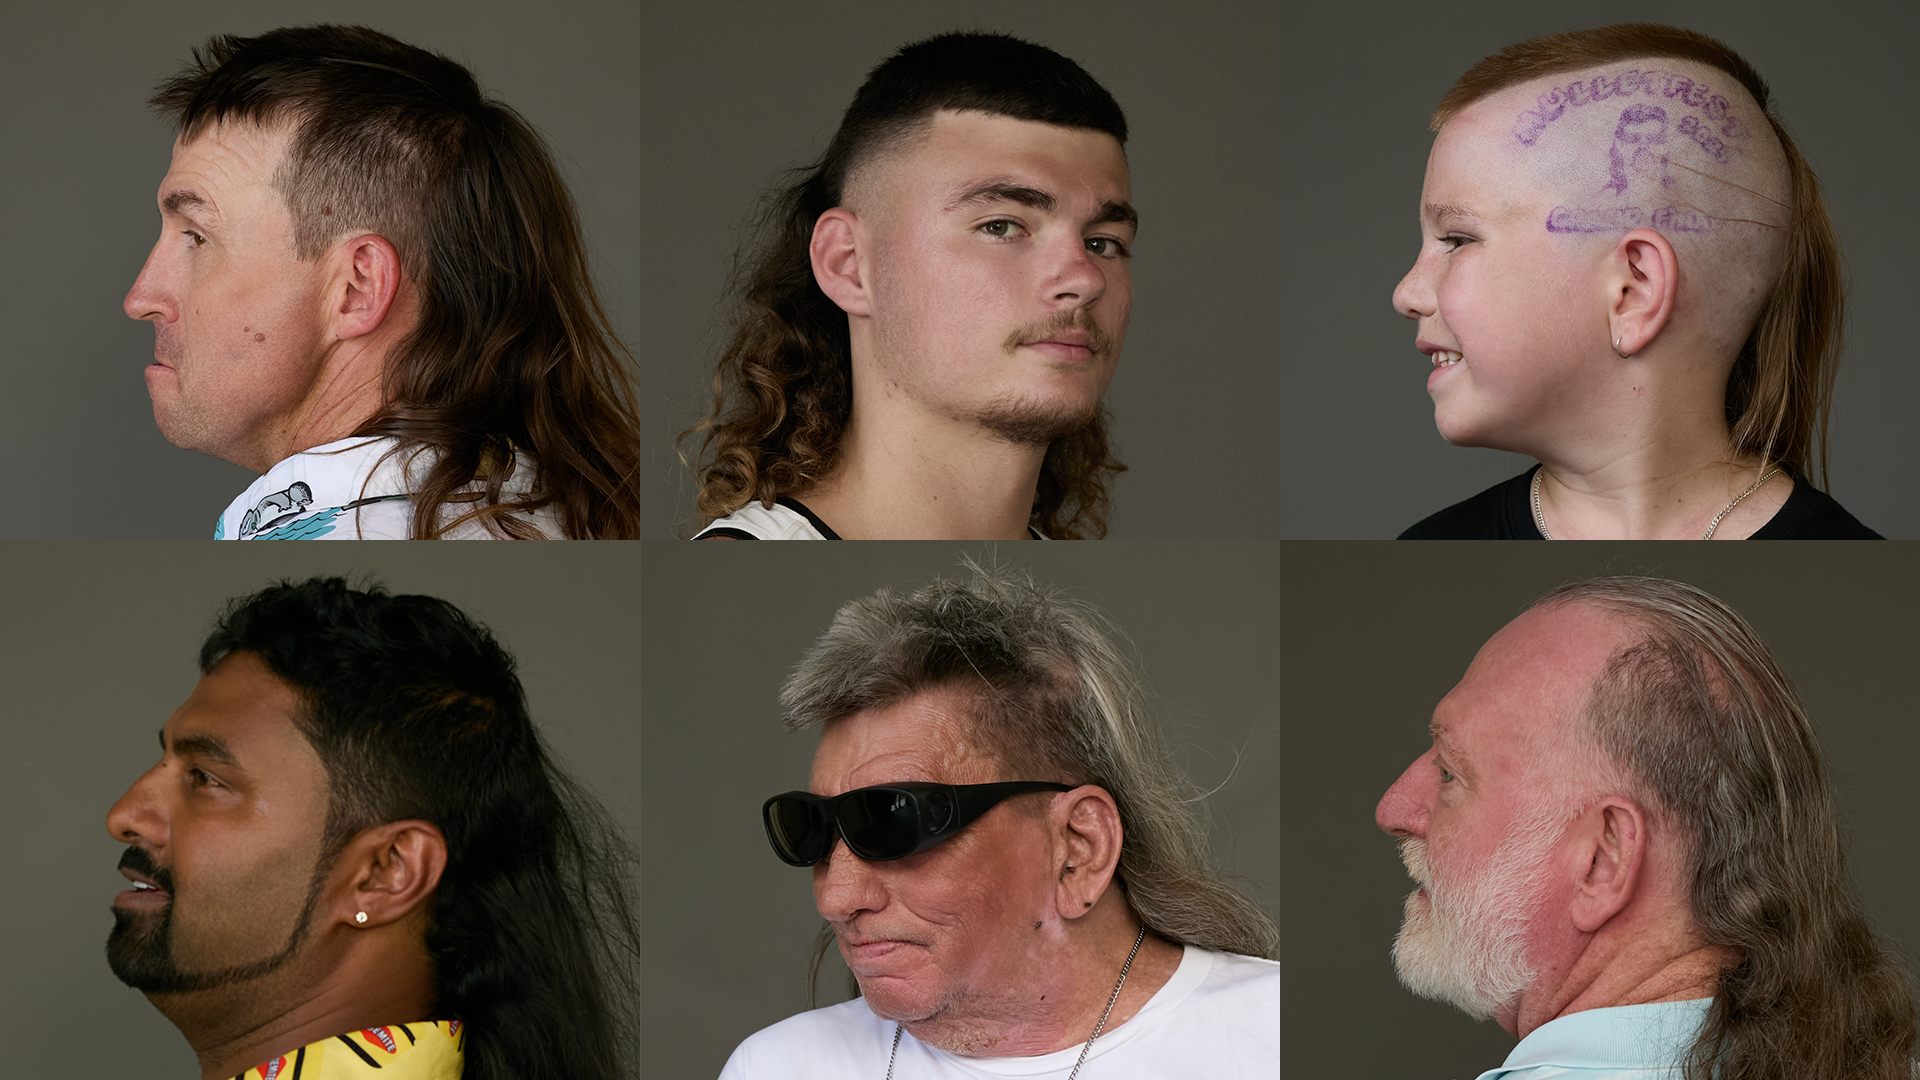
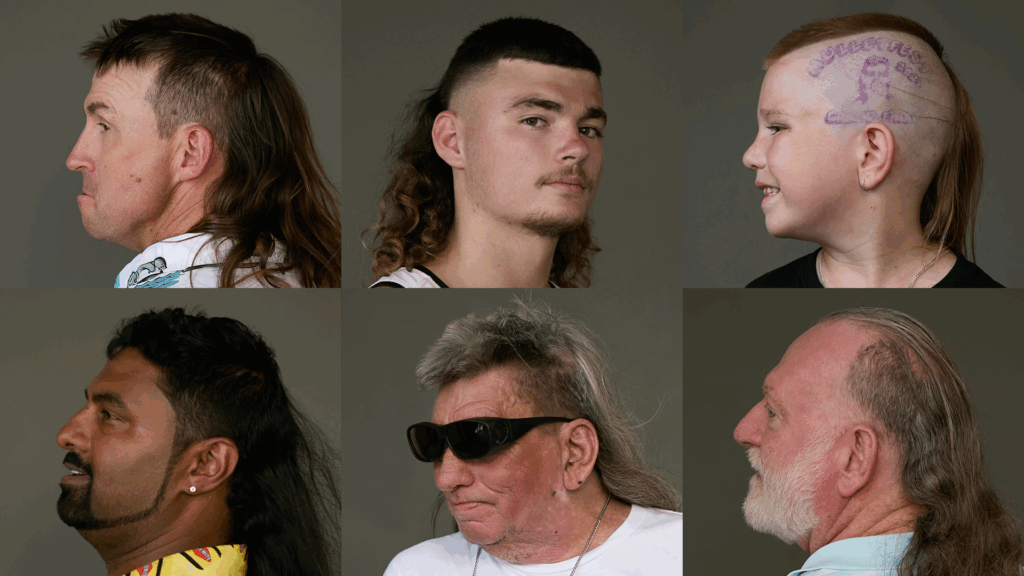
Photos by Mark Dexter, captured on location at Mulletfest with Capture One.

Sign up for the webinar

Why Aleksander Salski ditched “Perfect” photos

Meet Aleksander Salski, a Warsaw-based photographer whose work strikes a delicate balance between classical photography and fairytale-like fantasy.

After spending over a decade as a graphic designer and art director, Aleksander made a shift. What started as a desire to break out of the isolation of design turned into a career behind the camera—one that’s taken him from Tokyo to Indonesia and onto film sets at the Camerimage festival.

With over 20 years in image-making, Aleksander brings an eye trained by design and a mindset shaped by experience. He knows the value of patience, collaboration, and creating a relaxed atmosphere on set. His images reflect his influences—painting, cinema, culture—and his lens: frequent travels, heavier electronic music, and a bit of a rebellious streak.

Check out our Livestream with him. 

We asked Aleksander to share his process, what inspires him, and how he’s found his voice through photography. Here we go:

What’s your first photo memory? 

My earliest photography memory is from when I was about ten. I’d often go on walks with my grandfather, a geologist who treated photography as a hobby. One hot summer day in Warsaw, while other kids were playing nearby, he decided it was time for a portrait. He was using an old Zenit camera, and setting the exposure seemed to take forever. I was fidgeting, desperate to run off and play. At the time, photography seemed complicated and tedious. I never imagined it would become my life’s work.

Why did you choose photography? 

I studied photography at the Academy of Fine Arts in Warsaw but spent ten years working in design. Eventually, I realized I wanted to work with people again and be on the move. Photography gave me that opportunity. I enjoy the energy, the pressure, and the collaboration. I’m still happy with that choice.

Who or what inspires you? 

I’m drawn to social and cultural themes that disrupt my sense of calm. Those subjects make the best starting points for creative and fashion photography. I also take inspiration from painting, cinema, and travel. My recent trip to Indonesia sparked a project that blends documentary and fashion—exactly the kind of work I enjoy. 

How would you describe your unique style? 

I’d describe my style as a search for balance between fantasy and classical photography. I draw heavily from painting, especially its color palette and symbolism. I also use custom-made filters to degrade the image in ways that interest me. It gives my work a distinctive, organic quality. 

What’s a must-have on a photoshoot, and why? 

First, a great team. I have nothing to shoot without a solid stylist, makeup artist, and hairstylist. Second, the mood on set—everything flows if the energy is right. And third, my custom filters. I prefer to create effects on set rather than fix things later in post. It’s more authentic. 

Do you have a photography experience that stands out to you? 

Photographing actors at the Camerimage festival has been a highlight. One moment that stands out was photographing Willem Dafoe. I was nervous—he’s such a legend. To break the ice, I told him my mother had a crush on him when I was a kid. He laughed, and the session instantly felt easy. That connection made for one of my favorite portrait series. 

Is there anything that stands out about your workflow? 

I sketch my shots before a session. It’s not that common in photography, but it helps me have a clear plan. Once I’ve got the essentials, I feel free to experiment. 

What’s been your hardest—but best learning? 

At the beginning of my photographic journey, my biggest mistake was having too much ambition and a desire to “make up for lost time.” This caused me to react very emotionally to stress on set, putting the pursuit of the perfect shot above the team’s overall comfort. In hindsight, I see it was unnecessary—we’re not performing open-heart surgery, and making sure everyone is at ease on set is crucial. Now, that’s my guiding principle.   

What’s next—anything you’d love to shoot in the future? 

I’d love to return to Tokyo. I worked there in 2016, and the culture and visual language still inspire me. I want to spend more time there, go deeper, and create new projects in that environment. 

See more of his work on Instagram. 


New to Capture One? Try it for free for 30 days here


Sign up for the webinar

Portraits that change lives | Jack Eames x Haircuts4Homeless

Jack Eames’ decade-long journey with Haircuts4Homeless, capturing honest stories and opening new opportunities through his lens. 

Photographer Jack Eames has been working with Haircuts4Homeless for nearly ten years. The charity offers free haircuts to people experiencing homelessness, but it’s about much more than a trim. It’s about connection, dignity, and being seen.

For Jack, projects like this matter. They give him purpose, push his creative boundaries, and offer a meaningful way to give back.

“What I do with Haircuts4Homeless is bring things to life.” — Jack Eames

At events, Jack sets up his trusted foldout backdrop, which has been everywhere with him, and photographs guests after their haircuts. His portraits are stripped back and honest. No fuss. No frills. Just real people, often with a quiet confidence that comes through after a small but mighty act of self-care.

The portraits also give something back. They help Haircuts4Homeless tell its story and keep its mission moving forward. For the people Jack photographs, the images can be a powerful reflection—sometimes showing them a version of themselves they haven’t seen in a long time.

“Photography can’t change the world, but it can give us opportunities to create change.” — Jack Eames 

Technically, Jack keeps things simple. He uses Capture One, tethering his camera to his laptop so he can review and adjust the images as he shoots. The software makes the process smooth, letting him focus on what matters most: the person in front of the camera.

This project is a glimpse into how photography can create connections and tell stories that matter. It’s not about changing the world overnight—it’s about small moments that open doors. For the charity, for awareness, and for someone to simply feel seen. 

Get the book and read more about Haircuts4Homeless: https://www.haircuts4homeless.com/

Talent: Jack Eames
Director: Paul Reiffer
DOP: Tom Coe

Haircuts4Homeless: Stewart Roberts, Founder 
Haircuts4Homeless: Belinda Lorenzo-Hernandez, Administrator 
Haircuts4Homeless: Nicky Pope, Trustee 
Haircuts4Homeless: Steven Easton, Team Leader

See more of Jack’s work on his Instagram and website.


New to Capture One? Try it for free.


Sign up for the webinar

Inside Ruo Bing Li’s artful fusion of fashion and precision

New York-based fashion and beauty photographer Ruo Bing Li has carved out a distinct space in the fashion industry with his delicate, painterly aesthetic. Originally from Yunnan, China, Ruo discovered his passion for photography after moving to Canada at age 16 and exploring various art forms. He ultimately earned a master’s degree in digital photography from the School of Visual Arts in New York.  

His portfolio goes beyond photography. He directs moving image projects, always maintaining his signature mix of artistry and beauty. In this interview, we talk to Ruo about his creative process, working with high-profile brands, and some advice for aspiring photographers.

What made you focus on photography as your primary medium?

During my undergraduate years, I first tried a few different art forms to explore other ways of expressing myself. But photography kept pulling me back. I love how it captures a moment and instantly tells a story. It made me see the world in a more detailed way, noticing light, shadows, and emotions. Photography felt like the perfect mix of everything I love about art—so I decided to focus on it.

How do you achieve this unique ‘painterly sensibility’ aesthetic in your photography?

When people describe my work as having a ‘painterly sensibility,’ I think it reflects my approach to photography—which is all about subtlety and restraint. Growing up with a Chinese background, I’ve always appreciated the beauty in simplicity and the power of a soft, gentle touch. I like to create natural and effortless images, avoiding anything that feels overly exaggerated or forced. In my creative process, I often imagine the scene as if I’m painting on a canvas. I consider the lighting, colors, and composition to create a serene and balanced look. In post-processing, I also try to enhance these elements with a light touch to maintain that sense of subtlety and calmness.

How do you stay inspired and adapt to the changing fashion and beauty photography trends?

I remain curious and open to new ideas to stay inspired in the fashion and beauty photography world. I find inspiration everywhere—in art, nature, movies, and everyday moments. This keeps my work fresh and exciting. I watch trends but don’t let them dictate my style. I try blending my vision with my current job to make my work feel relevant and authentic. It’s all about evolving and trying new things while maintaining my unique touch.

How do you maintain your artistry when collaborating with major brands and high-profile clients?

Working with high-profile clients is always exciting and a great opportunity to showcase my style while meeting the brand’s needs. I start by gaining a clear sense of their vision and goals. Once I understand, I find ways to blend them with my style. Collaboration is about finding common ground—respecting the brand’s identity while bringing my unique perspective.

What are some of the most meaningful projects you’ve worked on, and why do they stand out?

One project I particularly enjoyed was ‘TO THE FAR SIDE OF THE EARTH’ for Hot!Hot!Hot! magazine. During COVID, when travel wasn’t possible, I used stock images to create fantasy environments and then composited models into these ‘new worlds.’ I aimed to craft a story that makes people question whether the environments are natural or imagined. It was a fun and insightful experience that helped me develop my collage style, which has since become one of my specialties.

How do you approach directing video projects, with the intersection of still photography and moving images becoming more prominent?

When directing video projects, I approach them like a photo shoot—focusing on strong visuals and storytelling. I plan each shot and ensure the lighting and composition work well. I also consider using movement to enhance the story, ensuring everything looks great, whether in stills or video. It’s all about blending the two mediums to keep a consistent and engaging style.

What key tips or techniques would you recommend to photographers looking to improve their workflow?

To make your workflow smoother, start by keeping your gear organized and ready to go—this reduces stress during shoots. Plan your shots and settings to stay on track. When shooting, use tools like Capture One to speed things up with its great color grading and organization features. Presets and templates can also help you maintain consistency and save time. Finally, back up your work regularly in multiple locations to avoid losing anything. These tips will help keep things running smoothly.

How do we come into your workflow, and what features do you find most beneficial for your photography?

Capture One is a big part of my workflow. I love its color grading and editing tools for achieving the perfect look in my photos. The tethering feature is super handy during shoots, as it allows me to see and adjust images in real time, speeding up the process and ensuring I get what I need. Capture One’s speed and efficiency are also great for quickly handling large volumes of images, making my workflow smoother and more effective.

What’s a must-have for a photoshoot, and why?

A solid plan and communication with everyone involved are essential for a photoshoot. Good planning ensures that you stay organized and make the most of your time. Clear communication with your team helps everyone stay on the same page, keeping the shoot running smoothly and helping you achieve the best results.

What advice would you give aspiring photographers trying to develop their unique style?

Experiment a lot, and don’t rush it. Try different techniques and subjects to find what clicks with you. Make mistakes and learn from them—that’s how you develop your unique style. Look at other photographers’ work for inspiration, but focus on what makes your approach unique. Keep practicing and refining your style over time.

See more of Ruo’s work on his Instagram and website.


New to Capture One? Try it for free for 30 days here


Sign up for the webinar