
NOTE: This article discusses an outdated version of Capture One. To learn more about our latest version, click here.
Introduction
I’ve always loved creating conceptual portraits and I am partial to shooting them in actual locations. Although the process is quite demanding resource-wise and largely dependent on weather, it is a uniquely satisfying experience when everything just works out.
Of course, the creative process doesn’t just stop when you press the shutter. You need an effective software when moving on to the next phase of file management and post-processing. In my case. I have found a reliable partner – Capture One Pro.
I understand that learning a new software can get frustrating and time consuming but critical when trying to enhance your output. I have found it beneficial to migrate to Capture One Pro because it is fast, customizable to my needs, and boosts my overall productivity.
For this edition of my exploration with Capture One Pro, I will share my workflow for creating what I call “ethereal portraits”. In my experimentations with conceptualizing, shooting, and post-processing various types of portraits, my preference for simulating ethereal, other-wordly or “heavenly” images has intensified. You will notice this in my recent creations.
Below, I have shared my process for recreating a previous photo I made in Lightroom into an “ethereal grade” image in Capture One. My gear and the settings for shooting the image I use as reference were as follows:
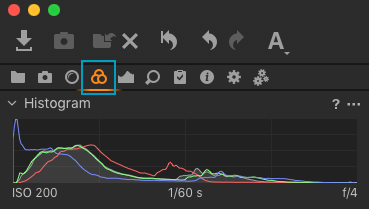
- Fujifilm GFX50s with a GF32-64mmF4 lens at 35mm
- SS 1/60th
- F/4.0
- ISO 200
- One Paul C. Buff Einstein 640 with a 47″ Octa powered by a Vagabond VLX battery.
 RAW Image
Above is the RAW image that we will be working on. Below is the image that I edited using Lightroom.
 Lightroom Graded Image
First off, we need to know the settings that I made in Lightroom.
Adobe Lightroom Settings
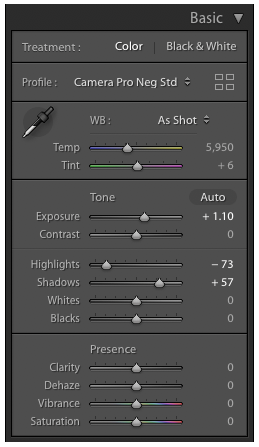 Lightroom Basic Exposure
A bump in the Exposure around a stop +1.10, Hightlights of -73 and opened the Shadows to +57.
 Lightroom HSL
Next, I shifted the Hue on the Yellow to -100 and Green to -100. Took the Saturation back. Red -5, Orange -11, Yellow -51 and Green -45. Luminance remained untouched.
For the Split toning, I shifted Highlights to a Cyanish tone of 183 Hue and a little Saturation of 18. Shadows to an Brownish tone of 48 and Saturation of 25.
That’s about it for the Lightroom adjustments. Now, let’s move on to recreating this to Capture One Pro.
Capture One Pro Settings
Let’s start in the Color Tab. I assume you already exported your image to Capture One.
 Capture One Pro – Color Tab
In the Base Characteristics Tool, I chose Fujifilm PRO Neg. Std in the Curve dropdown to apply my favorite Fujifilm Film Simulation.
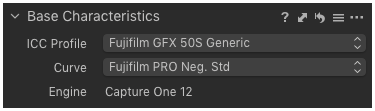 Base Characteristics Tool
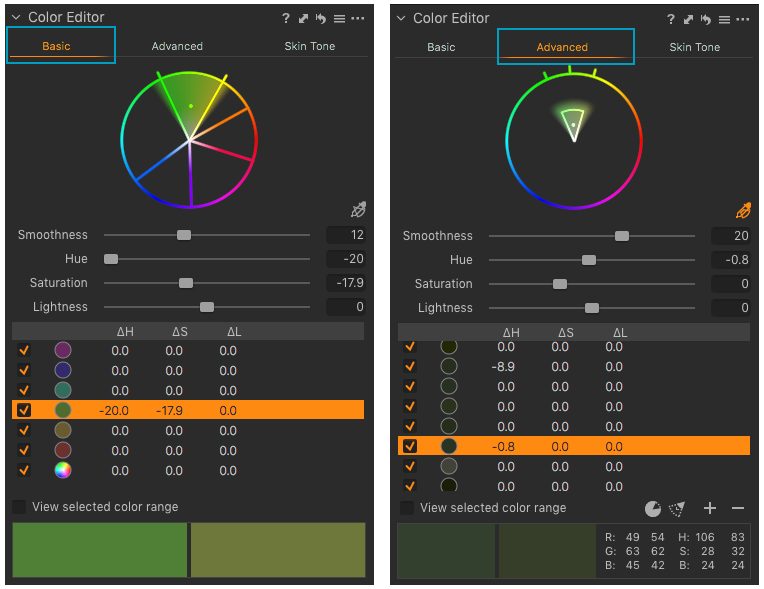
Capture One Pro – Color Editor Tool
I proceeded in the Color Editor Tool and color picked the leaves part of the image using the Color Picker Tool. Adjusted the HSL values to Hue -20, Saturation -17.9. Again, my adjustments here are based on just eyeballing the color. To get it as close as possible to the Lightroom version, I exported a .TIF of the Lightroom graded file and just kind of switching back and forth to see if I am close enough with my adjustments. I noticed that I was not selecting enough yellow and greens so I switched to the Advanced Tab to add more yellow and green to the selection and adjust the HUE to match.
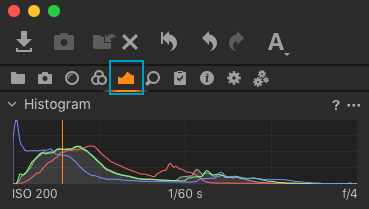
Capture One Pro – Exposure Tab
Next is the Exposure Tab. This is where we adjust tonal and luminance values.
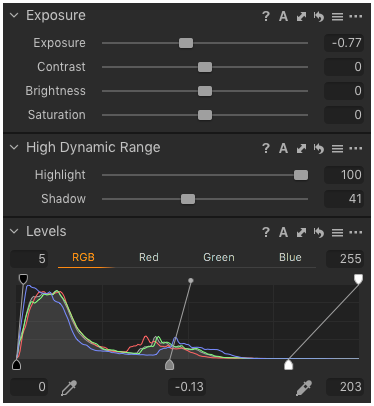
Still eyeballing, I recovered Highlight first in the High Dynamic Range Tool then proceeded to adjust the Levels lifting a bit of Shadow to 5, Mids to -0.13 and Highlights to 203. Then lastly adjusted the Exposure to -0.77. Everything is looking pretty close but I feel the white on the dress is duller than our reference so I used the Luma Range Mask, a new tool in Capture One Pro 12.

Capture One Pro – Layers Tool / Luma Range
I created an adjustment layer (Layer 1) and used Luma Range to select the dress part. When you do this, you may find that some aspects of the images that have same luminance also get selected. I can fine tune the mask by selecting the (E) Erase mask tool and remove the unwanted mask area around the dress, ultimately leaving only the dress selected.
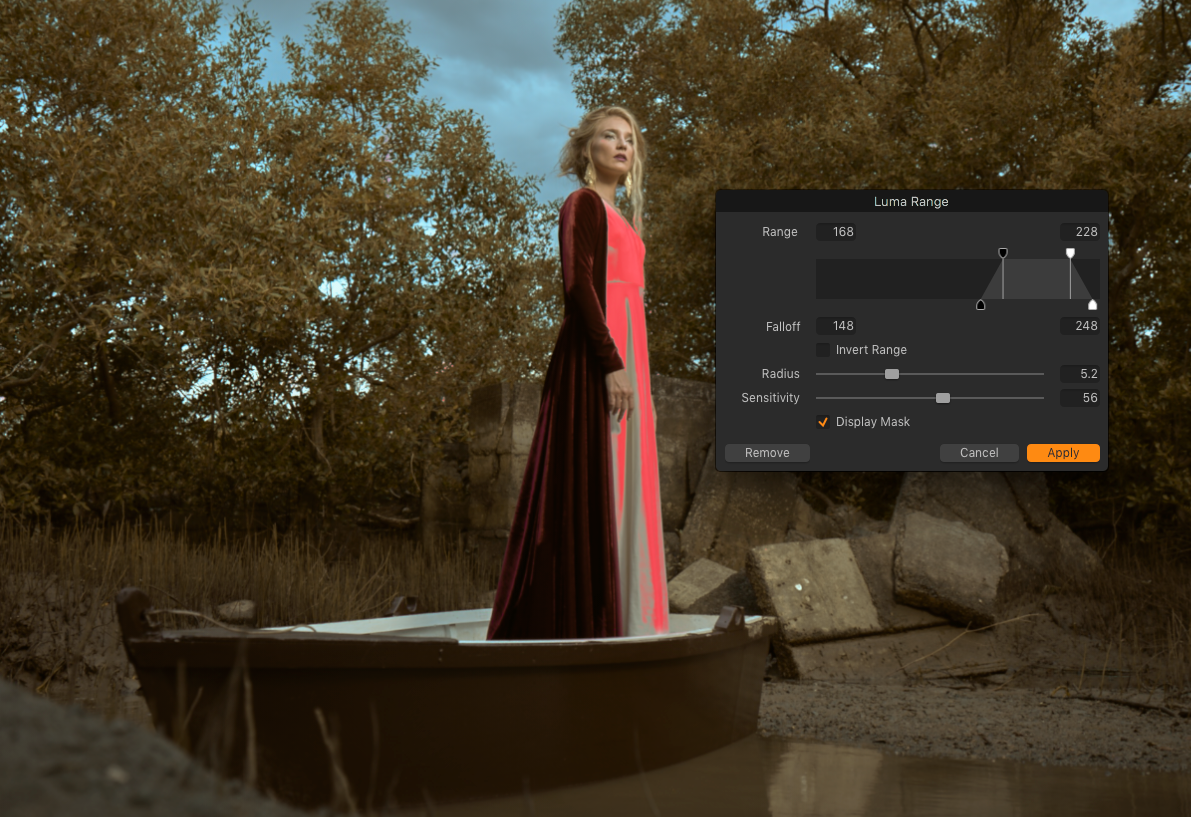
Back on the Layers Tool, I selected Layer 1, the adjustment layer we just created and applied the Luma Mask to and ever slightly bumped Brightness to 12.
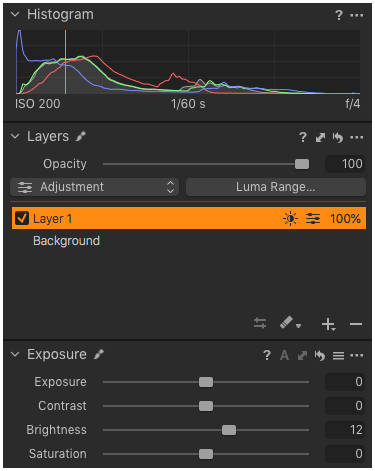
Capture One Pro – Layers Tool
And there you go. Final image color graded through Capture One Pro 12.

Final Image Processed through Capture One Pro 12
I will end this blog by emphasizing my essential reason for choosing to switch to Capture One Pro.
As a Fujifilm X shooter, I value the “film simulation” capability of my mirrorless cameras. With Capture One Pro, I am able to optimize this feature because it is compatible with my own color preference and ambitions for post processing, in this case – creating ethereal images.


Raw image is better than the edited one…!
Love this! – This was one of the places I was struggling with when I first made the transition to Capture One. As a Fujifilm shooter (Primarily) – I love the tones that the camera already produced but found that there were tweaks I had become accustomed to making in LR. When I moved over to Capture One, I fumbled with the dials because I was looking to “recreate” the same looks… I found that in that progress I was able to not just ‘recreate’ but actually understand in a deeper way what I actually love about the looks and build upon that. So in a way, a refresh of the previous style and an evolution in the way I approached the post process and portraiture. Fun stuff, isn’t it!? lol. A huge part of the ‘ahaa!’ moment for me was realizing the different options and functionality I know had – luminosity masking was a breeze and the fact that I didn’t have to jump into PS to do so was excellent! The color control options were another huge bonus…. I could go on… you get the point. Great post! – Cheers! Alex Ponce