If there is one thing most people wish they had more of, it’s time. Time to relax, to spend with friends and family, to work on what you truly care about. Although an essential part of a professional photographer’s work, culling and editing can sometimes take up unnecessary time. We spoke to three photographers about how they have made their workflow more efficient in Capture One Pro and get more time to do what they love.

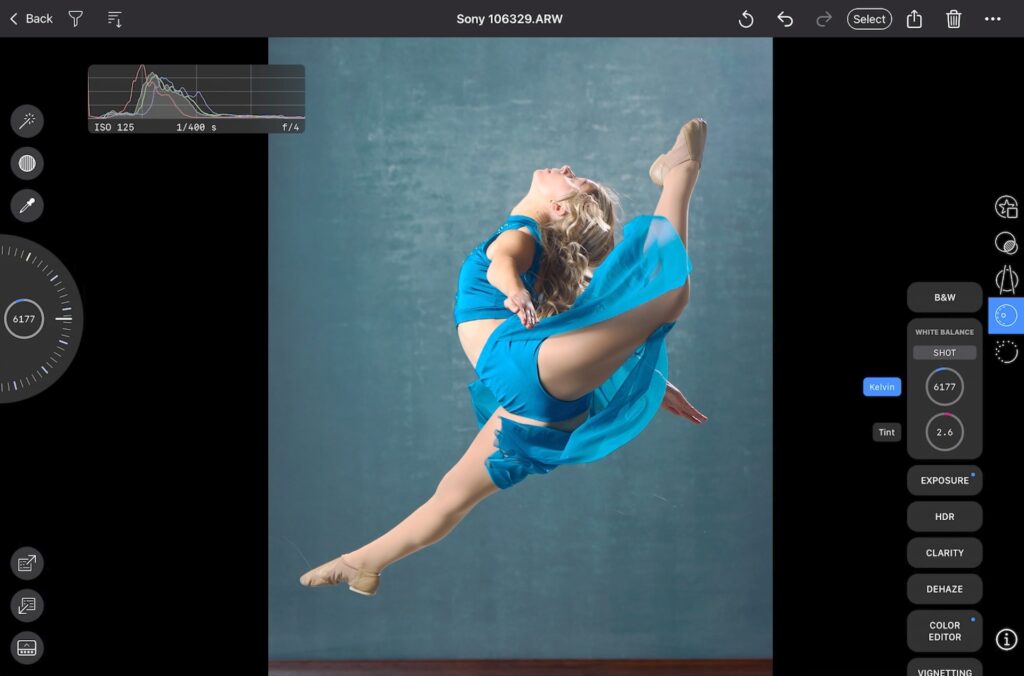
Nina Zimolong
On assignments for high-profile brands, fashion and lifestyle photographer Nina Zimolong doesn’t waste any time on unnecessary steps. Keeping a well-thought-out, simple yet efficient workflow is what makes her able to deliver at a speed that amazes her clients.
What is the most important thing to think of before a shoot?
When planning a shoot, I need to be super organized. I like to have everything planned down to a T. I’ve been on many sets where things are not planned properly and it’s always those shoots that take the most amount of time and I can see the frustration in the entire team. So, I like to come prepared. Always be one step ahead. I like to have my mood boards in front of me at all times, and also, I like to chat with the client before the shoot to understand what they expect from it.
What does your workflow look like today?
I like to base my workflow on the “coming in first and going out first” thing. I do not like to hang around on client shoots. So as soon as I shoot, I make it my mission to get it to the client asap. I think it is one reason why I stand out to my clients. They are always amazed at how quickly they get their photographs. I like to plan my workflow ahead of time and make sure I always give myself enough time for editing.
How have you changed your workflow over time to be more efficient?
I have tried many, many programs to see what works for me and what makes my life easier. Sometimes I shoot like a crazy person, and I have hundreds of pics to go through.
Culling is the most time-consuming thing known to photographers. On important shoots, I always rate my images as I shoot or tell my assistant to rate the pics. It is a way that makes culling easier for me.
I also like to have my client with me on set; I know many photographers hate it, but I prefer it. I like them to rate images with me and my assistant as I go as this saves soooo much time.
What is your favorite tool/feature in Capture One Pro?
For me, from day one, it has been the tethering. I can’t live without it. But as of late, my assistant also has shown me how insane the colors are in Capture One. And it’s something I just can’t seem to replicate in Photoshop.
What is your best time-saving tip for editing or culling?
A new feature that is an absolute game-changer is AI editing!! It will fix the Exposure for you just the way you like it but for all images, even if they are in different light settings. It thinks for you. Before, this took me so long to do; now it is just super quick. I really am making good use of it, and I won’t look back!

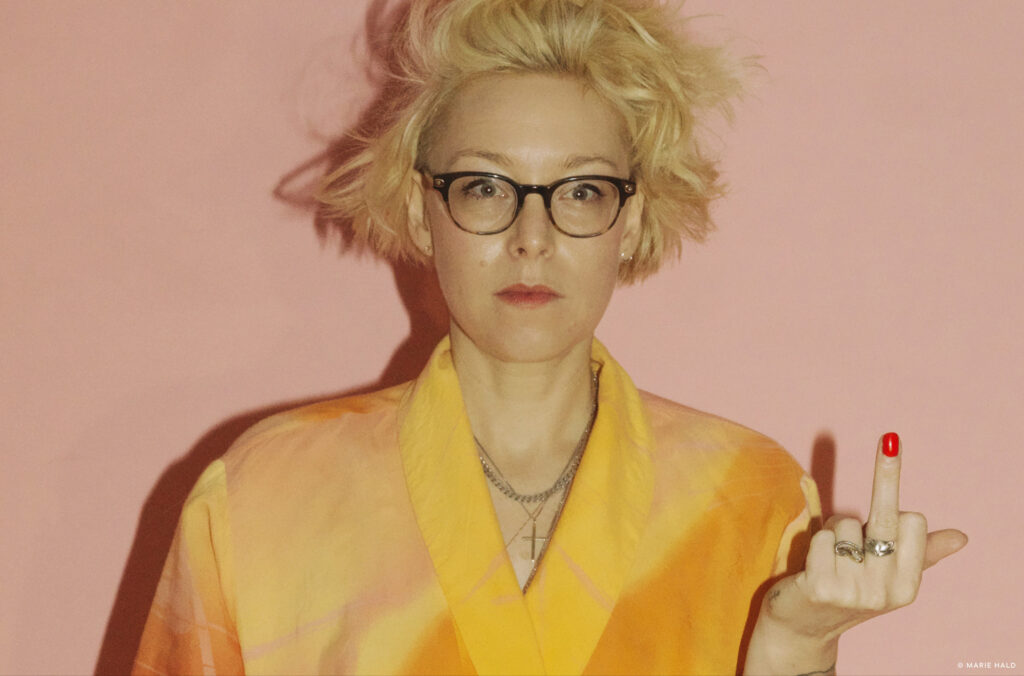
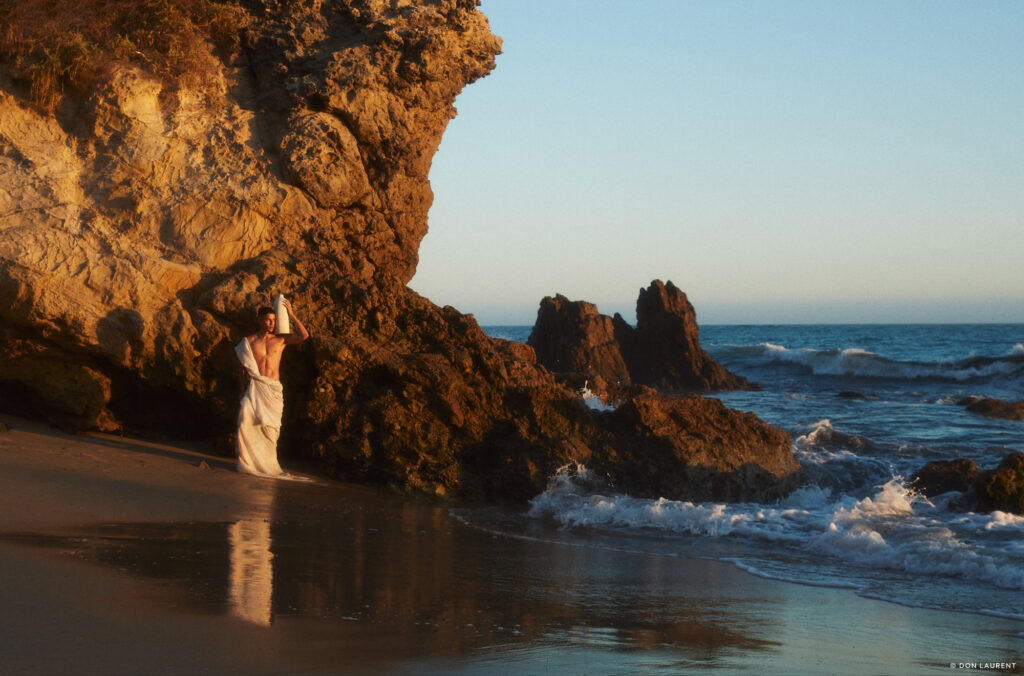
Don Laurent
LA-based fashion photographer, Don Laurent likes to give his images the attention they deserve to bring out the emotion he wants. To have the time he needs to perfect his photos, he has honed his workflow to make sure he is purposeful in the steps he takes and is always working from a good starting point.
What is the most important thing to think about before a shoot?
Intention. Initially, I was going to say location or lighting but I recognize that these are all details set around the question of, what is your intention with this shoot? In other words what emotions are you trying to evoke or what are you trying to say? After you figure that out, you can map out: model, lighting, clothing, props, location, and a team that can help bring the story to life.
What does your workflow look like today?
I begin by importing my images into Capture One Pro and culling them with the star-rating system. Five stars are for immediate “wows” and for images that will make it to the final editing process. Fours and threes I’ll come back to and cull through even further until I’m happy with my choices. After getting a solid selection (which can range from 10-20ish) depending on the shoot, I will do photo corrections such as cropping, exposure correction, curve/level adjustments, adding grain, and building in the foundation for my color grading.
This is perhaps the most important part of my process because, from this point, I can start getting an idea of how I feel about the image and if it’s still as strong as I believed during the culling process. By this point, I have a very strong foundation of an image that I can export and further work within Photoshop for skin retouching and refining. I like that the bulk of what I need to do can be done in Capture One, from culling to color grading.
How have you changed your workflow over time to be more efficient?
Prior to 2016 I was using Lightroom solely for imports and doing everything else in Photoshop. I switched over to Capture One Pro and loved that I could practically do all editing “in-house” before exporting to Photoshop. I owe a lot of time-saving and organization to Capture One and how it streamlined my workflow.
What is your favorite tool/feature in Capture One Pro?
Easily the Color Balance tool. It grants a level of control over colors in my work that eclipses programs I’ve used in the past. I’m also an extremely visual person, so being able to see the color wheel and interpret how it will affect highlights, mid-tones, and shadows is super important to me. I would say that color is the “heartbeat” of my imagery, so having access to a tool this precise is something I am thankful for.
What is your best time-saving time tip for editing or culling?
The best tip is to try to get everything done as best you can in-camera to save time when it comes to culling or editing. It has been said many times over but it’s truly that powerful of a tip. You will find that you pay attention to every minute detail possible when shooting, which effectively changes how you set up a shot.
It may sound cliche but really trust your gut when culling through images. Does it speak to you or wow you when you first see the image? If so, that belongs in your “top picks” list; for others that seem good but require a bit of work to get the image there, they can be in your next tier. From that point, you decide which ones require the least work to get to the same destination or are worth the extra work in general.
Discover more of Don’s work here

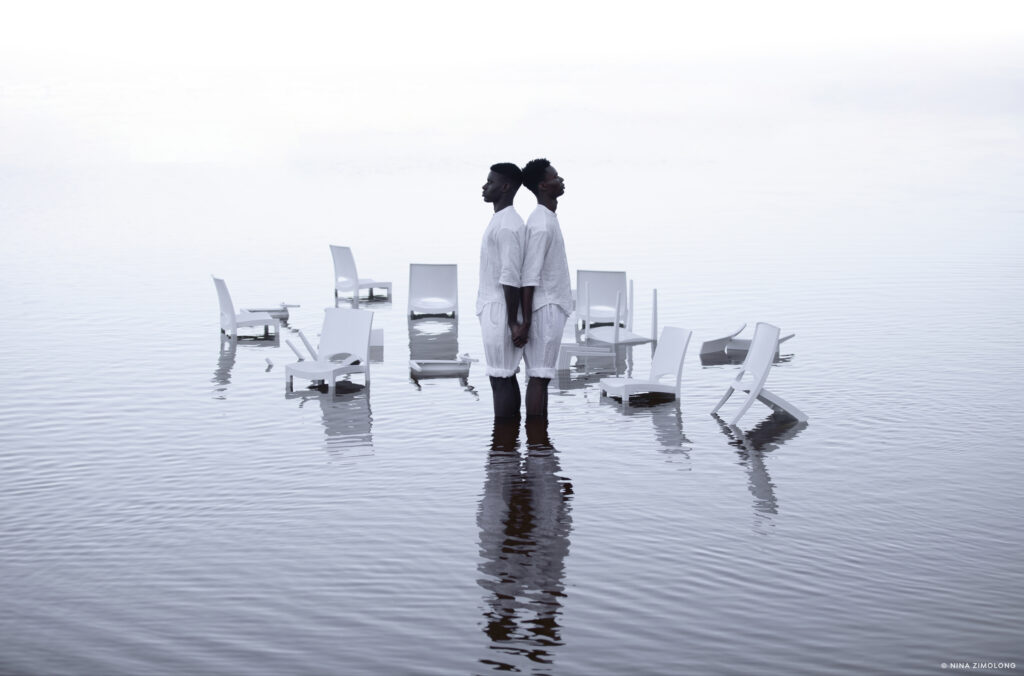
Alessandro Galatoli
For high-volume shooters like wedding photographer Alessandro Galatoli, having a strategy for culling and editing is essential. With upwards of 6000 images to sort through from a single job, the Florence-based photographer and educator has refined his workflow to make sure he can deliver high-quality images fast and make his clients’ big day even more special.
What is the most important thing to think of before a shoot?
It definitely depends on the type of shoot. My “to-do list” can be slightly different but there are a few things that are always the same. First, I start with the basics, so gear check. The second thing is always thinking about the results I want to get; it could be a mood board to get inspiration or a face book to know who the VIPs are that I need to photograph.
However, I think the most important thing across all shoots is always to get the right mood and attitude. I know it seems silly but the right mood and the right attitude, especially with people, is what makes the difference, what gets you the right shots even. For me, this is definitely what allows me to be aware, to be present, and to prepare to perform my best during the shoot.
What does your workflow look like today?
Compared to just three years ago, it is much lighter and faster. I was one of those photographers who would bring 10 lenses, adapters, filters, and lots and lots of stuff I would never use. Also, in editing, I used to move from one software to another and work on so many adjustments – it was time-consuming and frankly useless.
My workflow is now much faster and smoother, bringing just what I know I will need on the shoot and using basically only Capture One Pro for editing. After sorting my pictures with color flags, I start my standard editing workflow– Exposure and details adjustments, perspective corrections, then White Balance and color wheels for the color grading, adjusting the Luma Curve if needed and, basically, that’s it. Then I flag all the pictures ready to be exported as green and create the collections I need based on the different use.
Since trying out the new Capture One Pro 23 Beta, my workflow has been boosted in an unbelievable way. Features like the Smart Adjustments and the new culling tools are literally saving me hours each day of editing. I can now basically be more productive or just get more time to spend with my family.

How have you changed your workflow over time to be more efficient?
The biggest change I have made is in the sorting phase. It used to take me twice as long as today.
Now, I color flag the good ones and then leave the rest without even looking at them. A very big change in my workflow came when I started using Capture One Pro and it happened thanks to Recipes that allowed me to save time while exporting files.
I now just batch the export of different versions of my pictures for different purposes through Recipes and this is a big time-saver. Also, the quality of my editing changed with Capture One Pro, allowing me to use some tools, like Clarity, that I never used before due to the disruptive and cheesy effect that it had in other software, but that works amazingly in Capture One Pro.
What is your favorite tool/feature in Capture One?
A couple of weeks ago I would have answered the color wheels and the Styles allowing me to customize and create my very own personal touch using Levels for Styles and the amazing tools for skin tone.
After trying Capture One Pro 23, my life will never be the same. I mean, the AI behind Smart Adjustments feature is crazy. It is by far my favorite feature. It allows me to have consistency between different lighting situations at a speed that I would never have dreamed of.
What is your best time-saving tip for editing or culling?
Well, with the new culling “feature” in Capture One Pro 23, my tip is just to USE IT! It is amazing and has already saved me hours.
Other than that, use the color flags to just select the “needs editing” pictures. Then move to edit individually or batch, and in the end, color flag the “ready to export” images with a different color. This way, you will have control over everything, and you’ll be visually aware of the work you still need to do and what you already have that is ready to deliver to your customers.
Also, I often use stars in addition to colors when sharing my set with clients through Capture One Live. Then they can quickly select the pictures they want to be edited but just among the color-tagged ones I choose as my wide selection. All of this is literally live – I often do it while on the phone or on a video call with clients in other cities.
Find more of Alessandro’s work on his Instagram
Have you tried Capture One Pro 23 yet? Download it here