The Lens Tool in Capture One 7 has the ability to apply automatic lens correction for a large number of cameras and lens combinations, and will automatically adjust for a number of lens artifacts like distortion, light falloff and chromatic aberration.
In order to do lens correction for a specific lens, Phase One has to measure the lens and extracted data that describes how the different lens parameters behave. These measurements are done at typical focus distances and describe very well the performance of the lens at focusing distances from normal close-ups to infinity.
However, when using a lens for macro photography the focusing distances can be quite far from those used when the lens was measured for analysis. Sometimes you can achieve better results by doing a manual chromatic aberration analysis on the individual image in the Lens Tool.
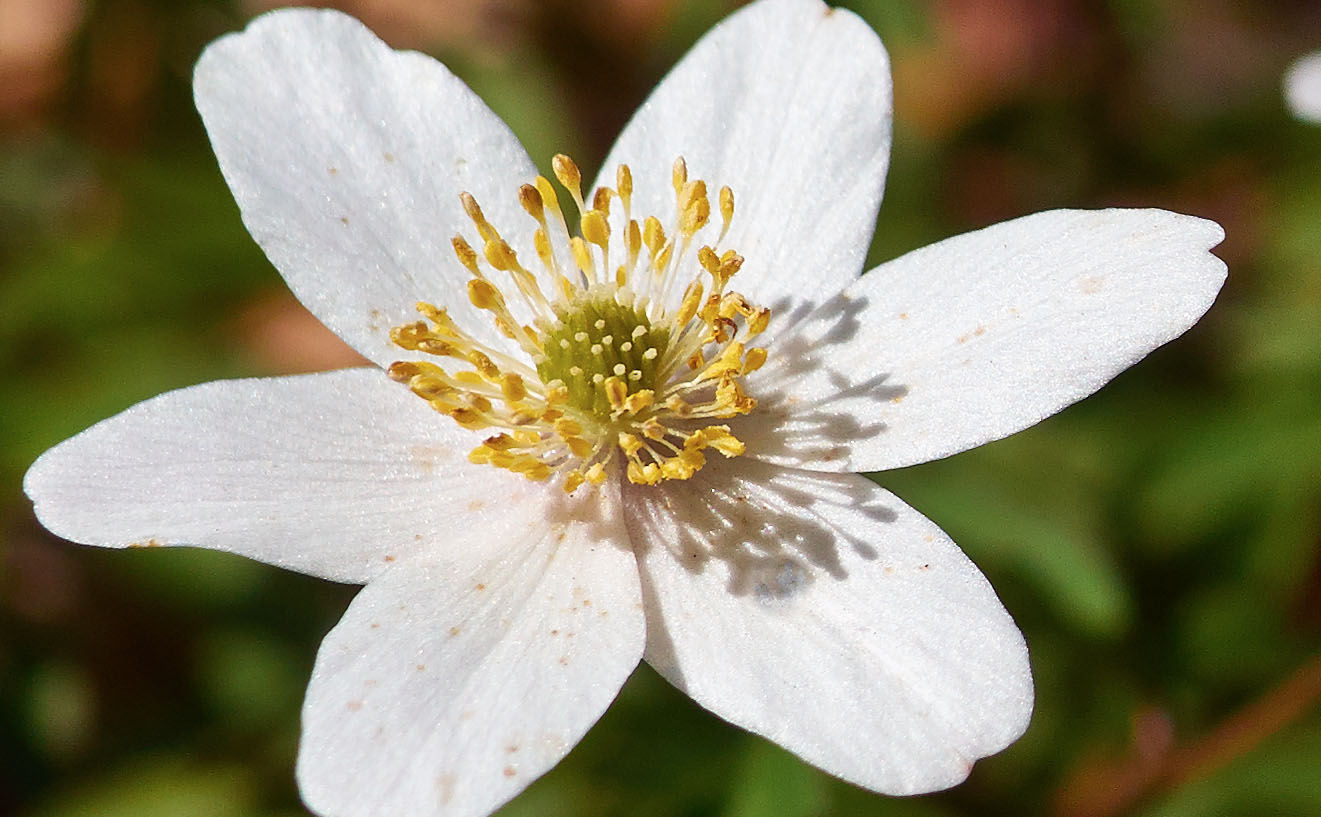
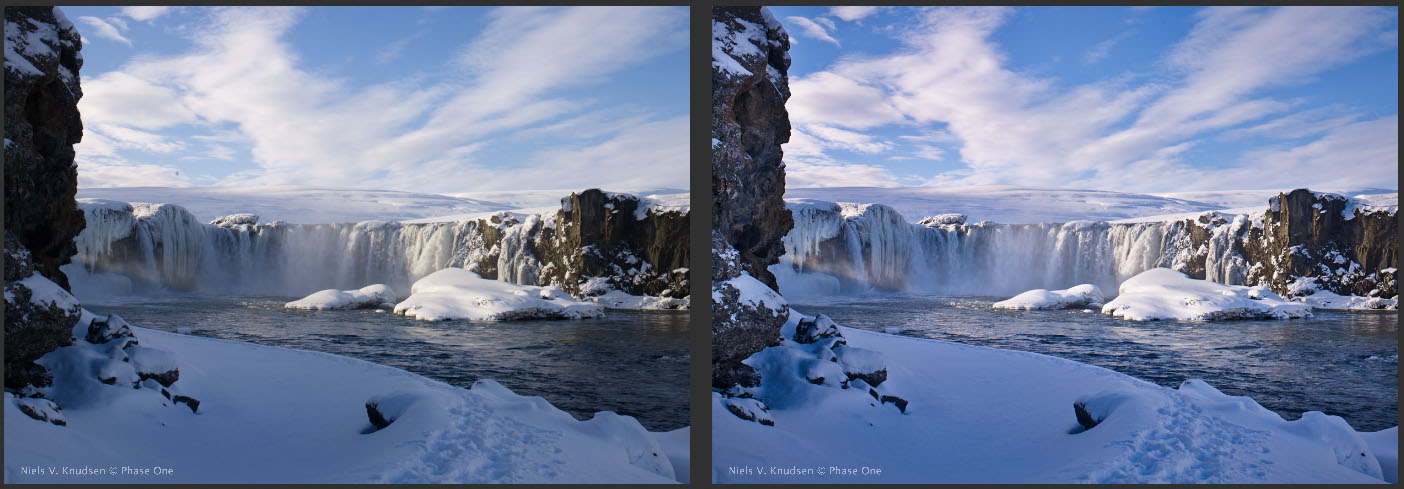
If we zoom into this macro image and look at the slightly out of focus high contrast edge, we see a strong blue color caused by the chromatic aberration in the lens.
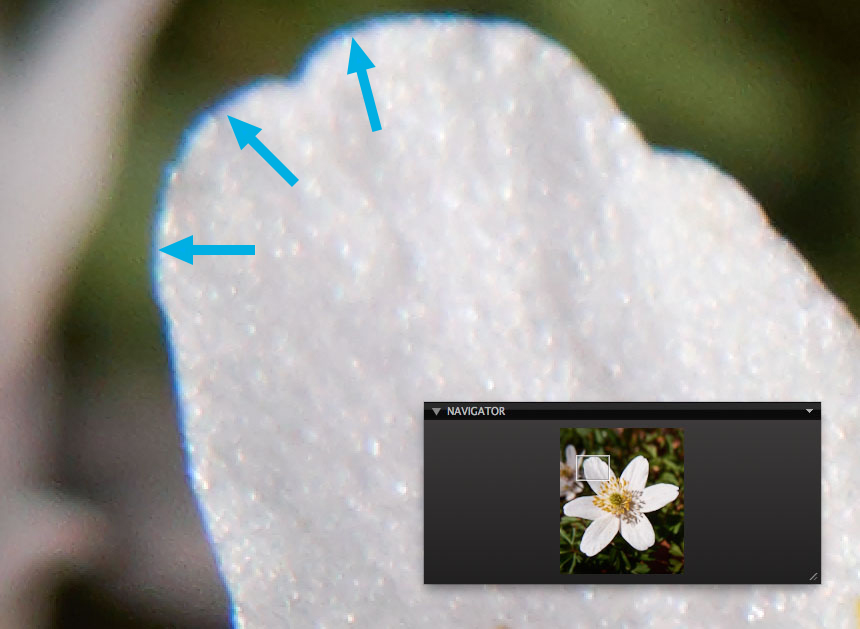
Because this is a macro image, the automatic lens corrections does not efficiently remove the chromatic aberration.
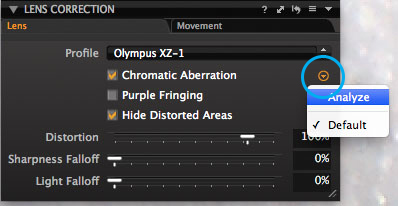
In the Lens Tool you have the option to perform an individual Chromatic Aberration analysis on the selected image. Click on the orange arrow to the right of the tool and you will access a dropdown menu with the option “Analyze”.
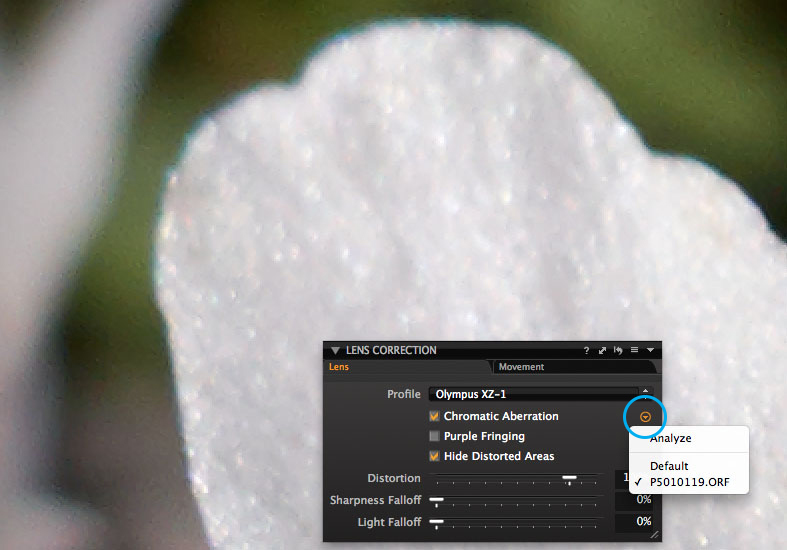
Click “Analyze” and after a few seconds a new Chromatic Aberration correction will be calculated based on the selected image. We now see that the previous strong blue color on the edge of the flower has been corrected. If you click on the orange arrow, you will see a check mark next to the file name. This check mark now indicates that the chromatic aberration reduction is based on data retrieved from this specific image.
So, for this macro image, it’s possible to achieve a much better chromatic aberration correction by making an analysis on the image instead of using the “Default” correction for the lens.
All the best,
Niels