
NOTE: This article discusses an outdated version of Capture One. To learn more about our latest version, click here.
While there’s minimal work involved in turning a color image into black and white, there’s a few more steps to creating stunning black and white photography. Brand Ambassador Martin Bailey shares his workflow on one of his images, showing his process to emphasize the level of control you have in Capture One. Watch the step-by-step video tutorial that accompanies this blog post to see Martin’s edits in action.
If you don’t already have Capture One – make sure to download a 30-day free trial here.
Each year, I travel to Hokkaido, the northern-most island of Japan, to lead my minimalist winter landscape photography tour. Much of the work I make from the locations we visit is converted to black and white, and Capture One enables me to create beautifully toned black and white images without the need for third party plugins. Being able to work directly on my raw files affords me a number of important benefits. I can save on disk space, because I don’t have to save large PSD or TIFF files. I can also revisit and tweak my processing without having to completely reprocess it in a third-party application. And I get to reap the benefits of the ever-improving processing engine as Capture One is upgraded over the years.
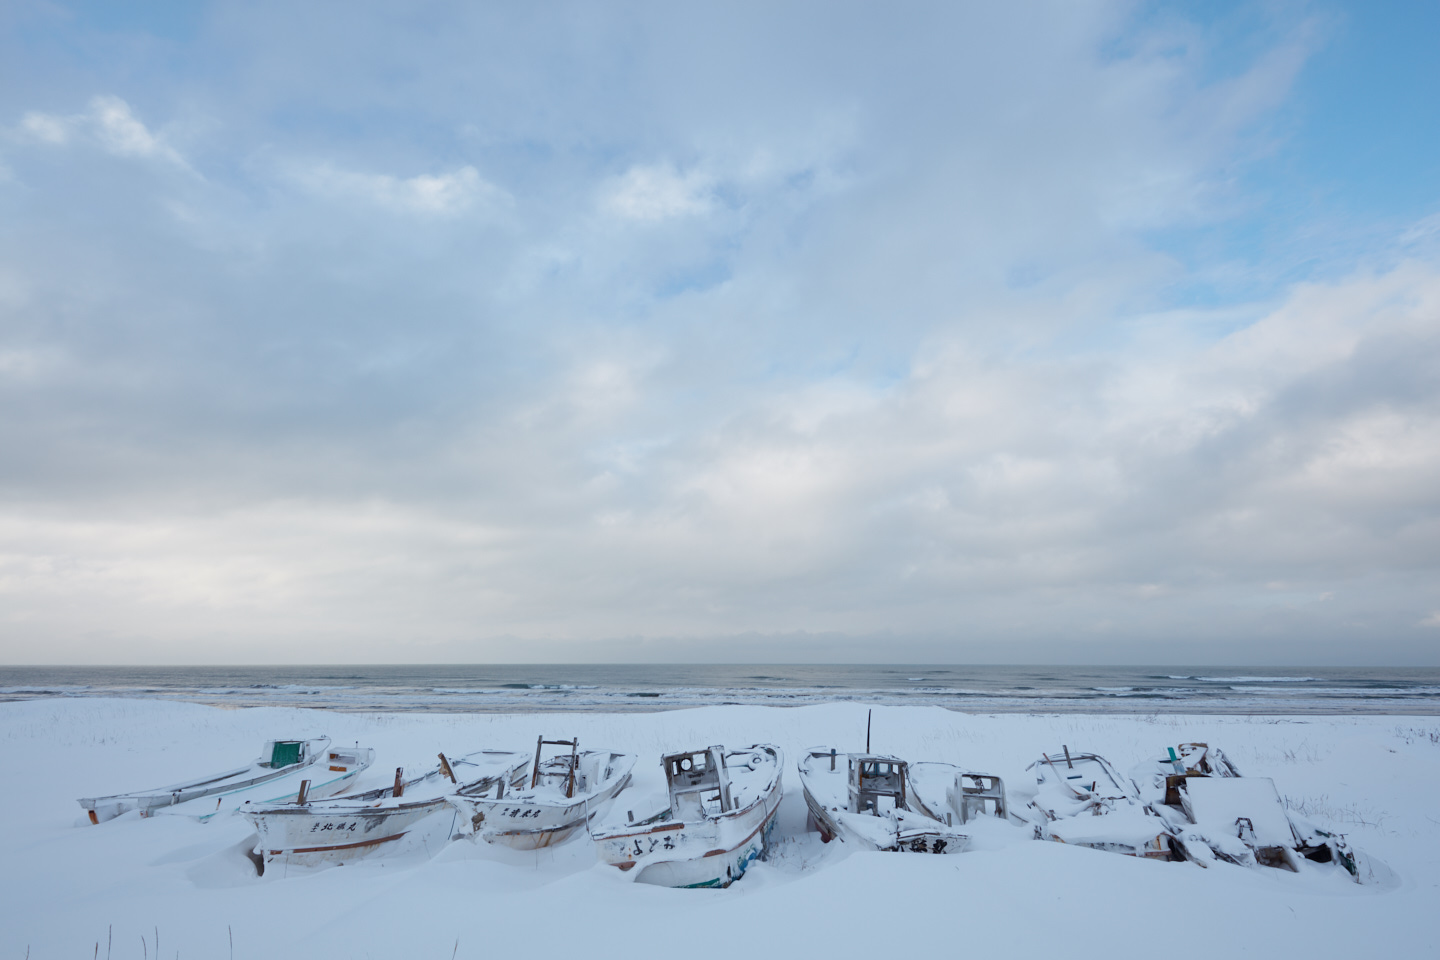
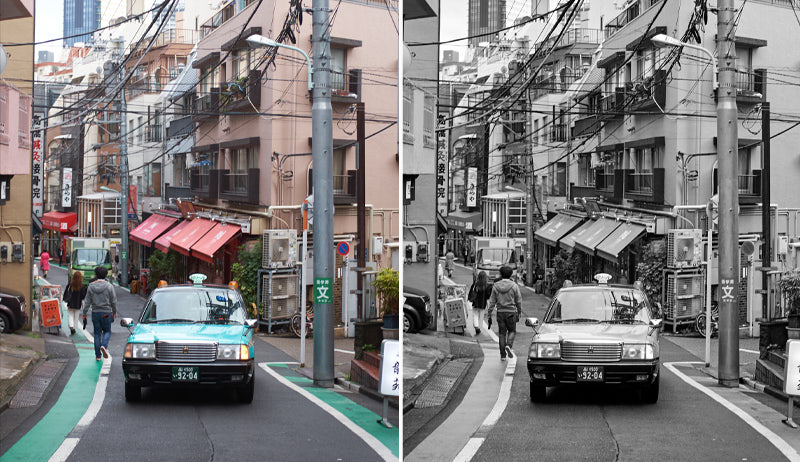
Today we’re going to take this image, straight out of the camera:
And convert it to this black and white image:
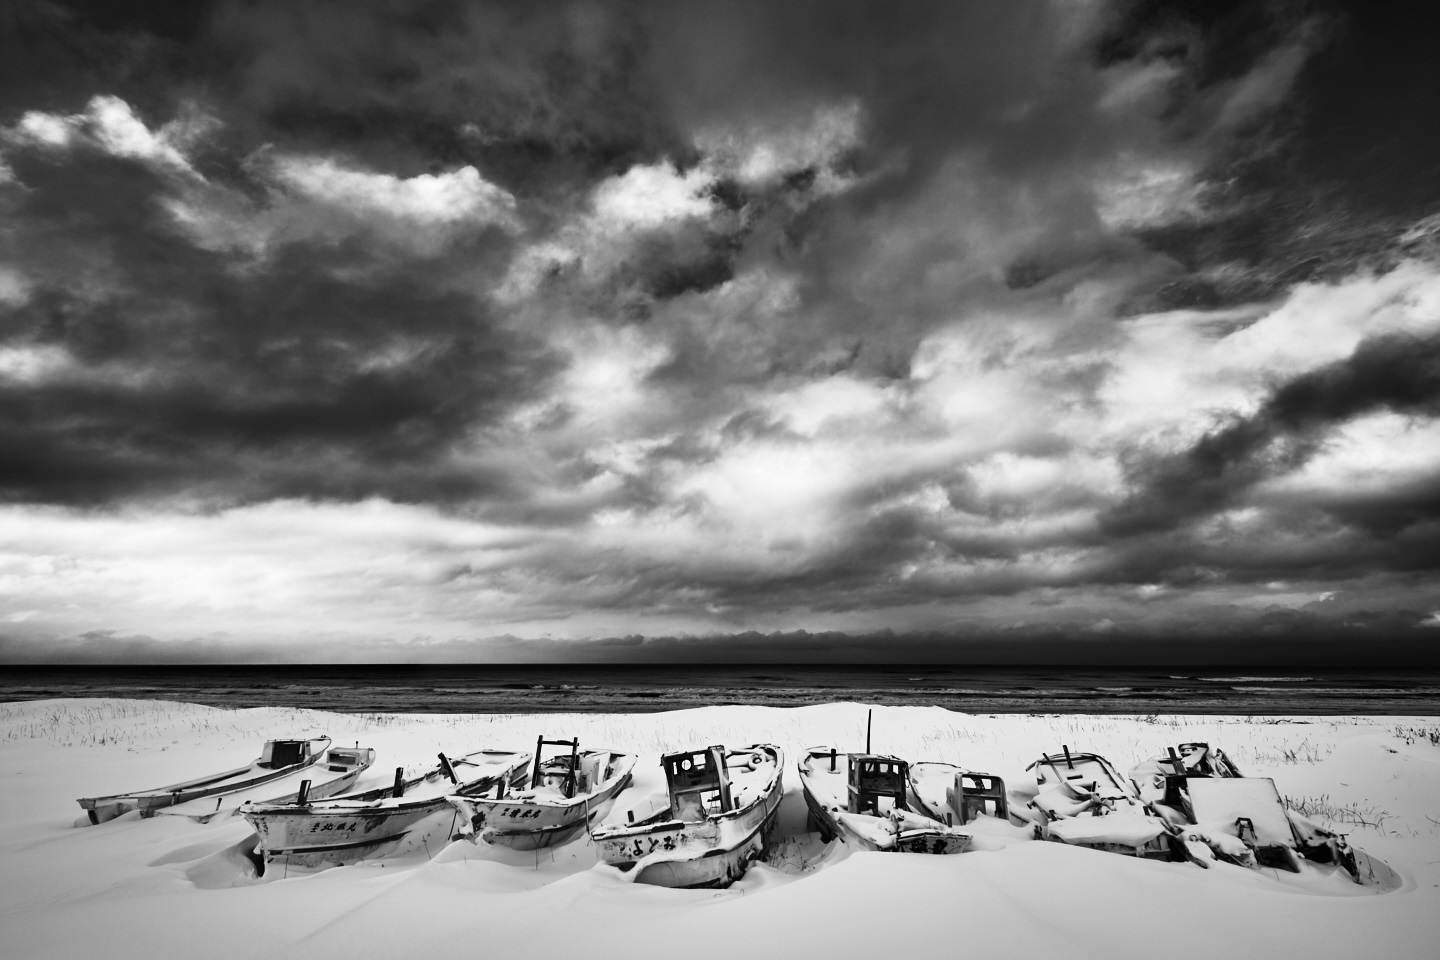
Here are the steps that I follow to create my high contrast black and white image of what I call “The Boat Graveyard” in Hokkaido, Japan. Some of the shortcuts I use are custom shortcuts, that may be different to yours, but this is another one of the many things that I love about Capture One. We can customize it to suit and speed up our workflow, enabling us to quickly work through our images.
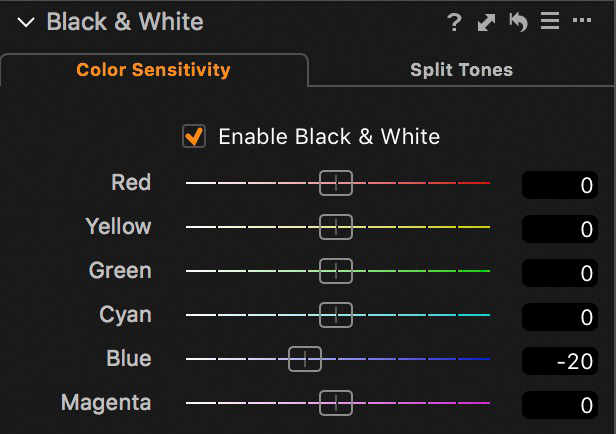
First, let’s enable Black and White and reduce the Blue channel to -20, to darken the blue in the sky a little.
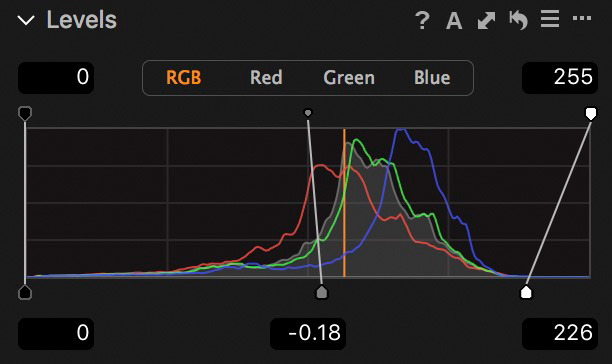
Then, on the Background layer (as opposed to creating a layer) let’s adjust the Levels to brighten the whites by moving the white point to -226, to open up the whites in the image, and move the midpoint to -0.18 to increase the contrast a little.
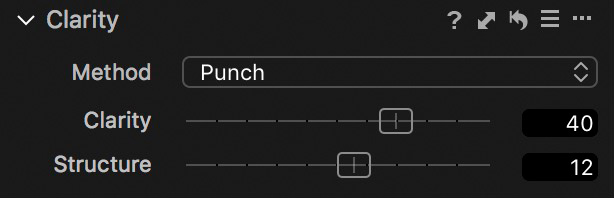
Let’s also add 40 Clarity in Punch mode and 12 Structure.
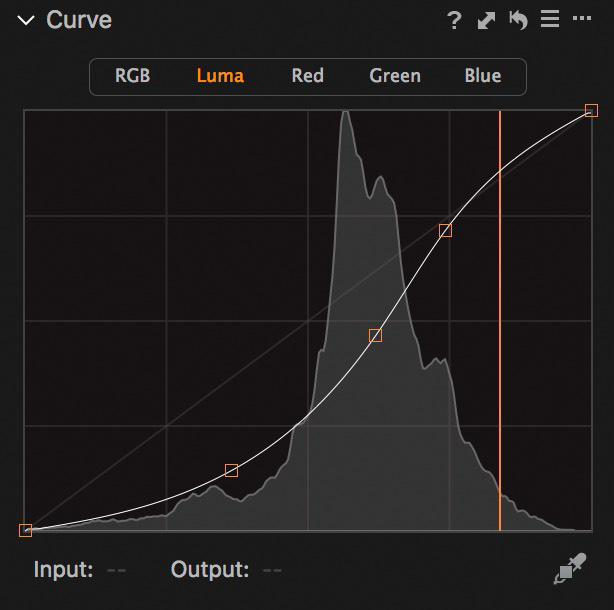
And we can increase the contrast more by applying a somewhat aggressive Luma Curve to darken the shadows and mid-tones, and lighten the highlights slightly. It’s a good idea to also turn on Exposure Warnings, so that you can see if you start to push it too far. We don’t want the whites to get too bright, or the shadows to get too deep.
I also increase the High Dynamic Range Highlight slider to 38 to reduce the highlights and increase contrast further.

We can use the Gradient tool with the SHIFT key to draw a mask over the horizon line and apply another pretty aggressive Luma Curve to the sky, with a strong S curve. The Luma curve works mainly on the luminosity or brightness of the image. We can also add a very subtle S curve to the RGB curve, to slightly darken the blue in the sky at the same time as adding more contrast.
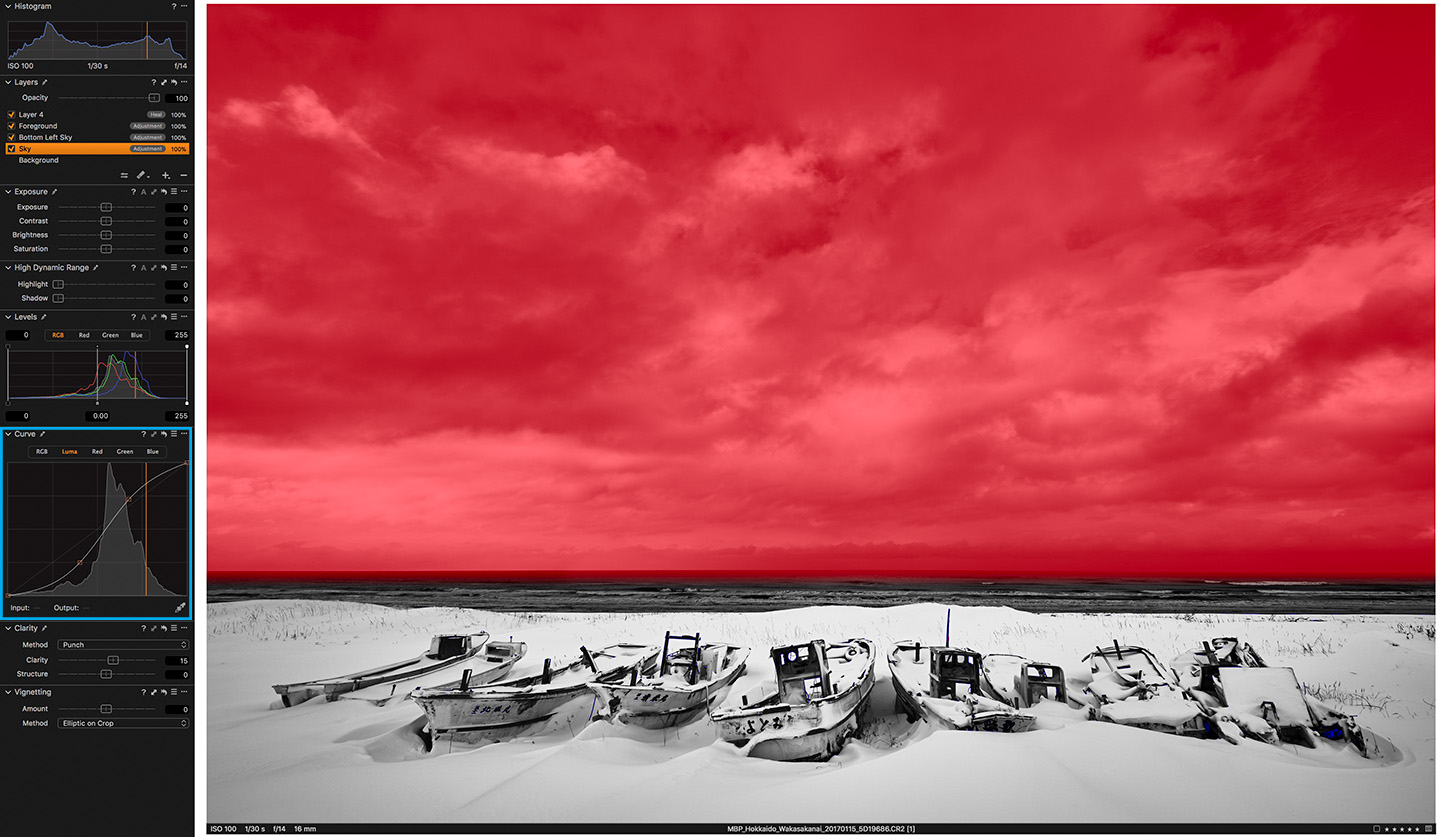
As we bring out contrast in the sky, the dust spots from the sensor start to become prominent, so we can use the dust removal tool to remove them. And finally, for this layer, let’s increase the Clarity a little further, to around 15.
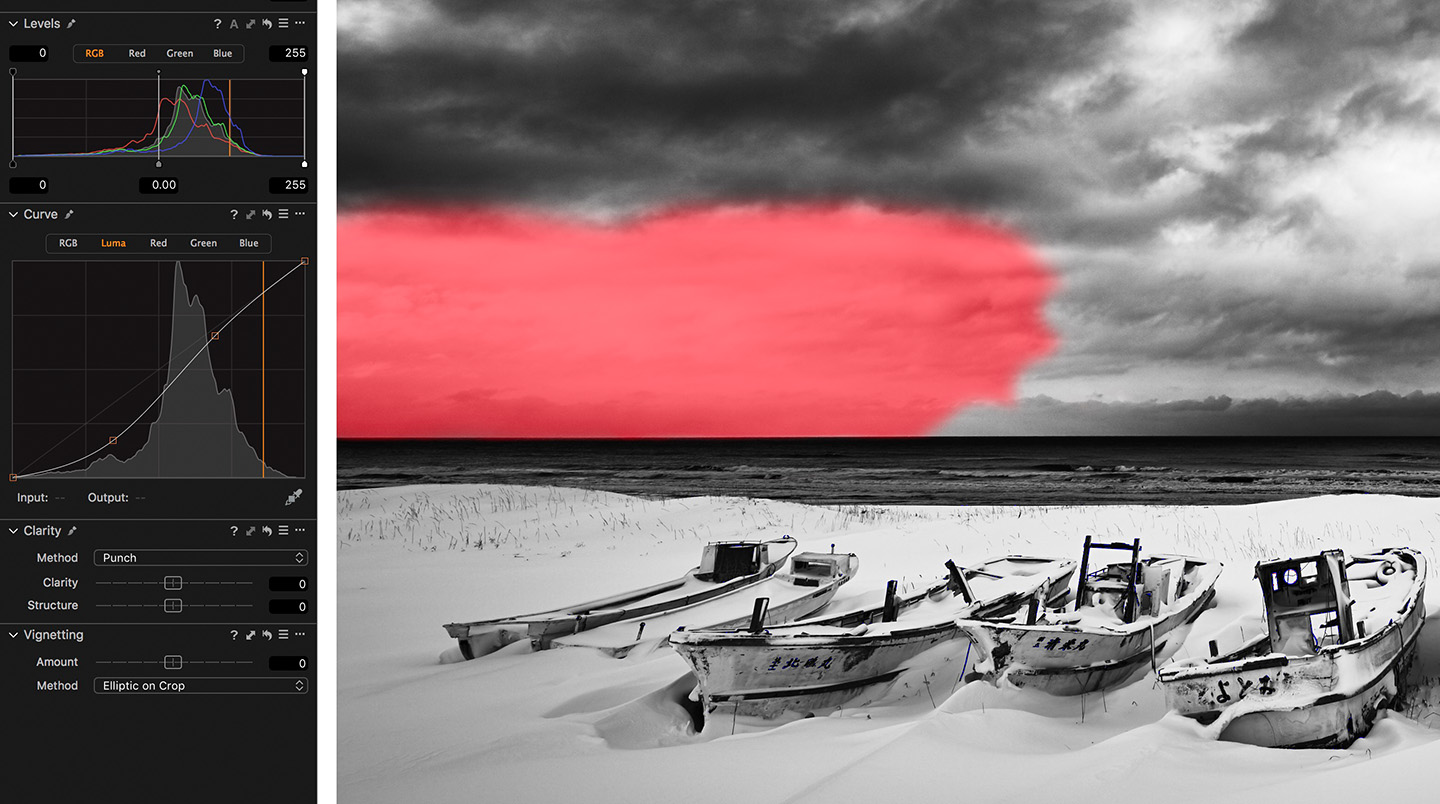
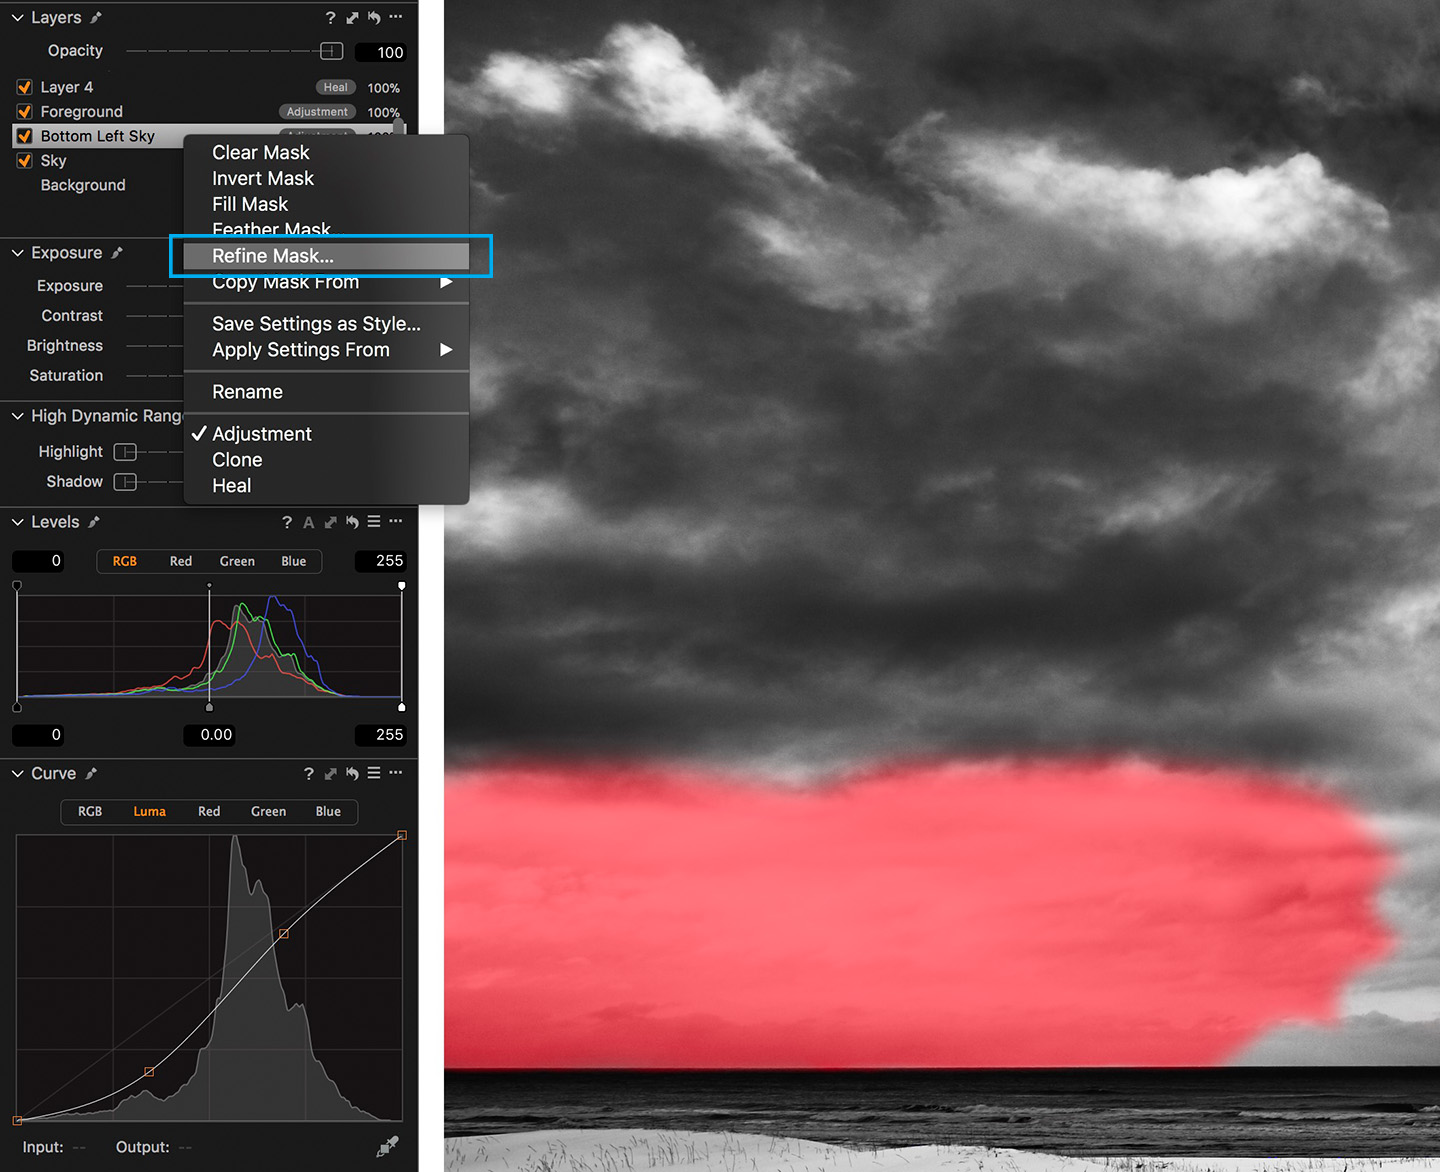
To bring down the bright patch in the bottom left of the sky, let’s add another Adjustment layer and paint in a feathered mask to darken down the shadows a little with a Luma Curve.
Now we’ll create a new Adjustments layer, and paint in a new mask over the foreground, and use the new Refine Mask feature to fine tune this along the ridge of the snow, then delete what’s left over the sea with the Erase brush. Once we have all of the foreground snow and boats selected with our mask, let’s add a Luma curve and a bit of an RGB curve, as well as a slight increase in the High Dynamic Range Shadows slider, all to brighten the mid-tones and highlights in the snow.
Finally, we use a number of Heal layers to clone out the bits of grass in the foreground to add the finishing touches.
Another thing that really helps me to speed up my workflow, is that once I’ve made my changes to an image like this, I often copy my adjustments to the clipboard, and apply them to other images with just a few keystrokes. Of course, if I’ve been using masks, I have to adjust them to match the content of the new image, but it’s still a lot faster than doing everything from scratch on each image.
I used to spend a lot of time after returning from my tours just to get through my initial edits so that I can start to blog about my adventures and use the images to market future tours. Now that I’m using Capture One, my workflow is so streamlined that I am able to keep up with my processing each evening, and come home with most if not all of my work processed. This is a huge time saver and reduces the stress as I try to catch up with business after my tours.

Martin Bailey
Martin Bailey is a nature and wildlife photographer based in Tokyo. He’s a pioneering Podcaster and blogger, Craft & Vision author, Capture One Brand Ambassador and X-Rite Coloratti member. Fueled by his passion for nature and travel, and a tireless desire to share his knowledge and artistic vision, Martin is a popular international tour and workshop leader, helping photographers from around the world to experience and capture the wonders of this awesome planet we call home.


Very helpful. Have you figured out how to make a Smart Album to find all your B&W images?
Thanks Monica!
I hadn’t tried, but I just had a look and couldn’t find a way to do that. Maybe the Phase One team have a suggestion.
Failing that, to filter out black and white images you could add a keyword like B&W to all of your black and white images, and then just search for B&W or create a smart album to display all images with a keyword that equals B&W. This would require a bit of effort to tag your images but it works.
Most helpful Martin!