Imagine you’re in a situation where a lot of bokeh and negative space would benefit the look you’re aiming to create with your image. Typically negative space and bokeh are hard to achieve because both features negatively affect each other. Why? In short, to achieve a short depth of field, one needs a long focal length combined with a short focus distance. Conversely, creating negative space requires less focal length and more focus distance, resulting in less bokeh.
So how do you attain both negative space and bokeh? For starters, a special technique is required, so that photographer can get close to its subject without sacrificing focal length. Usually, this approach results in a very tight frame with almost no negative space. But if a panorama technique is implemented, negative space can be created by stitching the images together in post. That way, one can create an image that boasts excellent bokeh and plenty of negative space. And that’s what’s referred to as the ‘Brenizer Method,’ also sometimes referred to as ‘Bokeh Panorama.
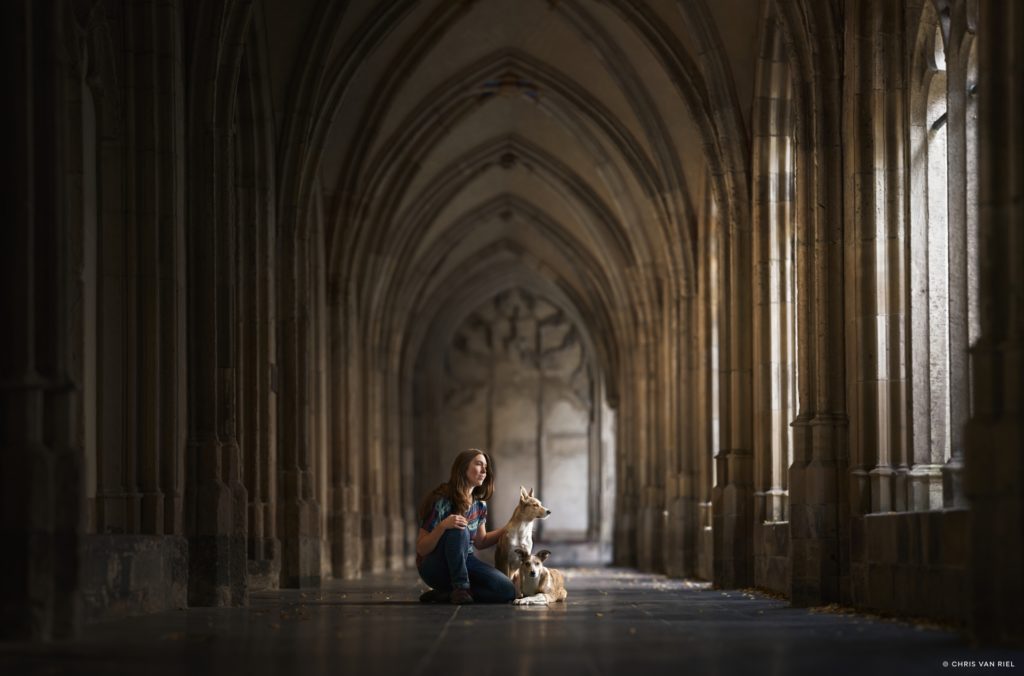
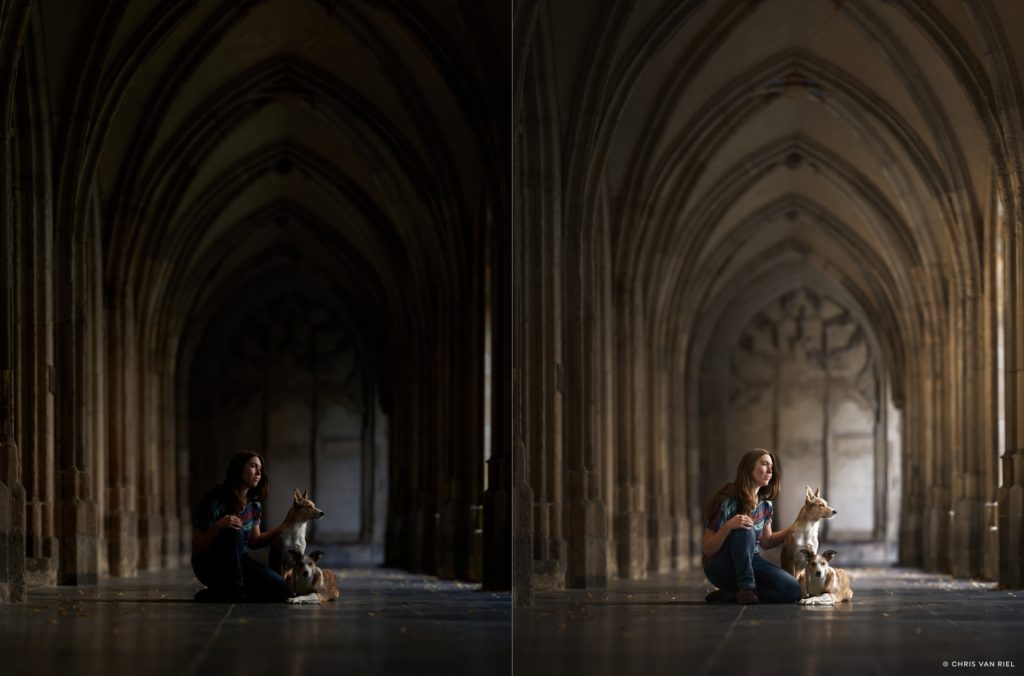
For those unfamiliar with the Brenizer, it’s a technique that can deliver incredible results when used to subtly illustrate the setting of an image and how the subject of said image connects to their surrounding. For example, the image of the girl and her dogs basking quietly in the sunlight that enters this church.
How to Employ the Brenizer Method
Equipment needed:
– Camera with a long focal length lens (85mm or more).
– Tripod, ideally also an extension plate (both optional).
– Capture One software that can assemble panoramas.
Settings:
– Camera set to manual (M) mode.
– NO automatic exposure.
– Aperture wide open.
Set your camera to the settings listed above. If you’re working with a zoom lens, zoom it in as far as you can.
Start with a tightly composed shot of the subject. After the first shot, start photographing the scene around the subject. Precisely recompose every image to slighty overlap the images you shot before. 1/4th overlap is enough. Keep shooting like this until you think your panorama is big enough. While photographing the panorama keep the following rules in mind:
– Do NOT re-focus for the following shots! Whole images being totally out of focus is exactly what you want.
– Do NOT change the exposure, focal length or aperture throughout the process.
– Do NOT move the body from its position after the first shot, only rotate. A tripod does help for this, but it’s not impossible to freehand.
Things to Keep in Mind:
– This process only works when the environment is perfectly still. Avoid things like moving water, trees on windy days, traffic, etc.
– It’s far more effective if you get closer to the subject. A short focus distance while maintaining a long focal length makes for a short depth of field, which creates blur. In doing this, you will also need to stitch more images together to create the same space.
– Longer focal length lenses are easier to work with because they make ‘flatter’ images with no distortion, making for better stitching.
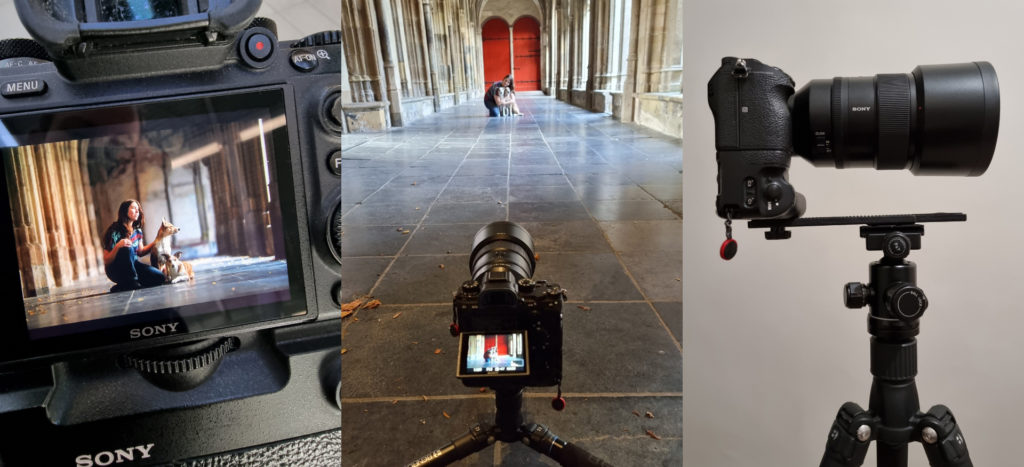
– When working too close to the floor to create a foreground (as seen in the example below), a tripod becomes mandatory. The surfaces close to the front of the lens tend to misalign when the camera isn’t perfectly stationary when recomposing the panorama photos.
Also, with long lenses like mine, the swinging of the lens can cause misalignments. By bringing the axis of rotation closer to the frontal glass, the element will help eliminate parallax effects. This can be done with an extension plate.
Post processing
Before the images can be merged together, you need to make sure they are free of vignetting.
To remove vignetting, find the ‘Lens correction’ tab and use the ‘Light fall-off’ slider to remove any vignetting. Upon completion, the image should have an even exposure across the whole frame. Repeat this process for every image.
After these preparations the images can be merged together. Select all images that you plan to merge together, and hit the right mouse button on one of them. A menu appears, find the line ‘stitch panorama’ and select it.
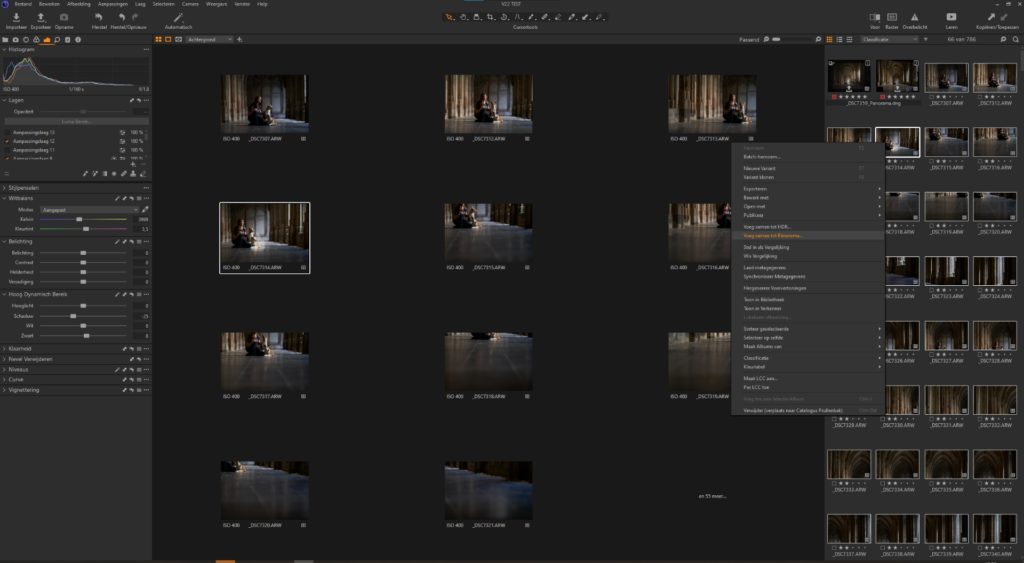
The new Panorama feature will appear on your screen shortly.
As shown in the left column there is a few scaling options. Merging dozens of photos together can result in monstrously big files, mainly if a high megapixel camera was used. A resulting image of over 500 megapixels isn’t uncommon. Files like this can cripple your computer, so consider using the scaling option to size it down to a more manageble format.
If the photos were taken correctly, no artifacts should occur in the result.
If it does occur use the cloning tool to get rid of it.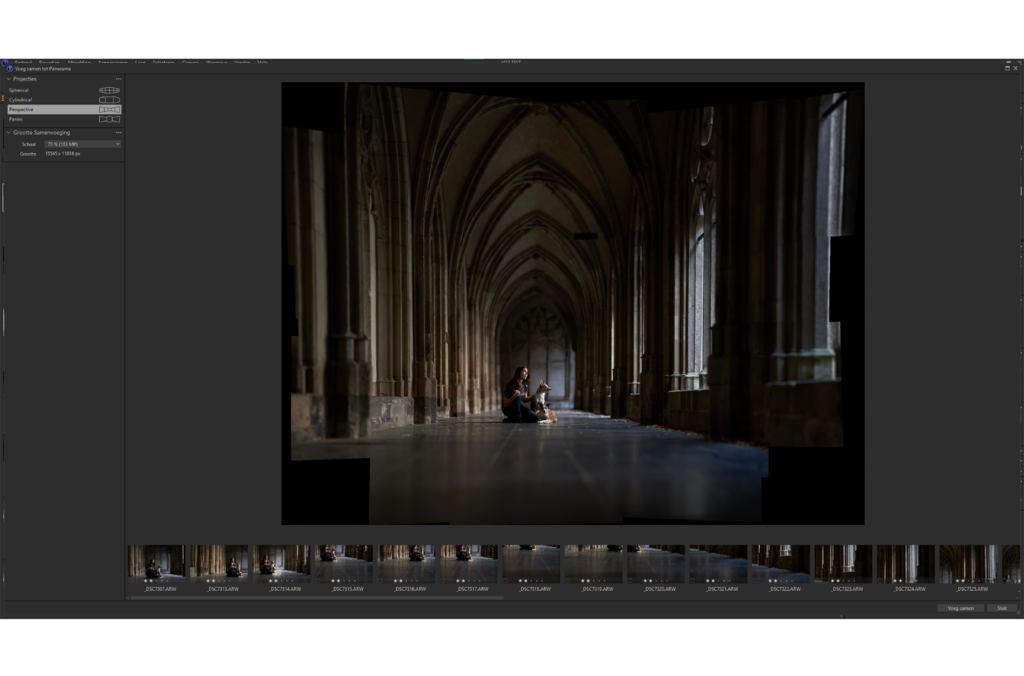
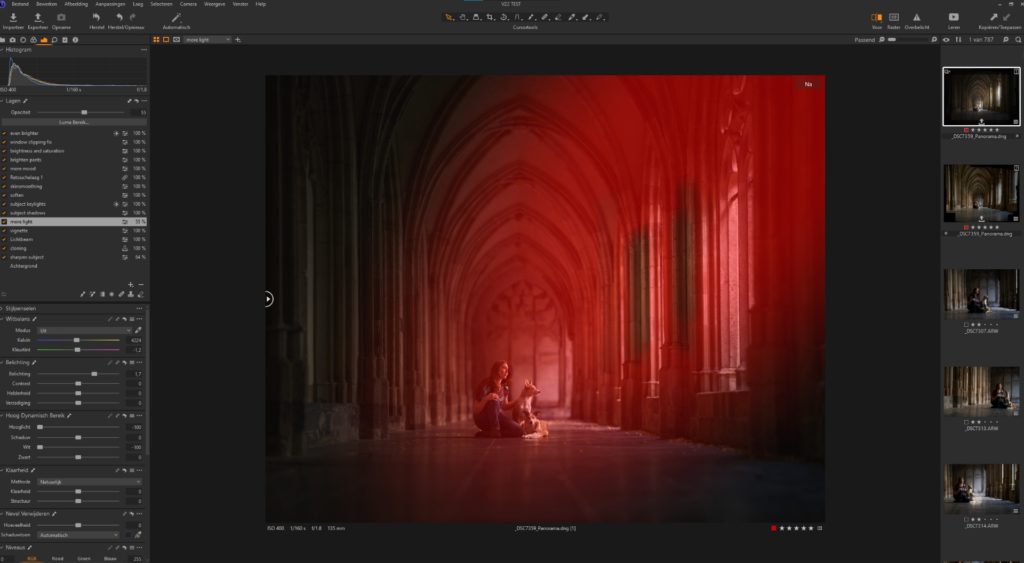
Mood and Light flow
Start making layers with radial gradient masks and make them originate from the scenery’s natural light source. The inside gradient will be light and the outside will be dark. Like a vignette. This will create a dreamy and dramatic touch. Feather both gradients out a lot, the transition from light to dark should be as smooth as possible! If done properly it should give a sense of ‘flow’ of light troughout the scene.
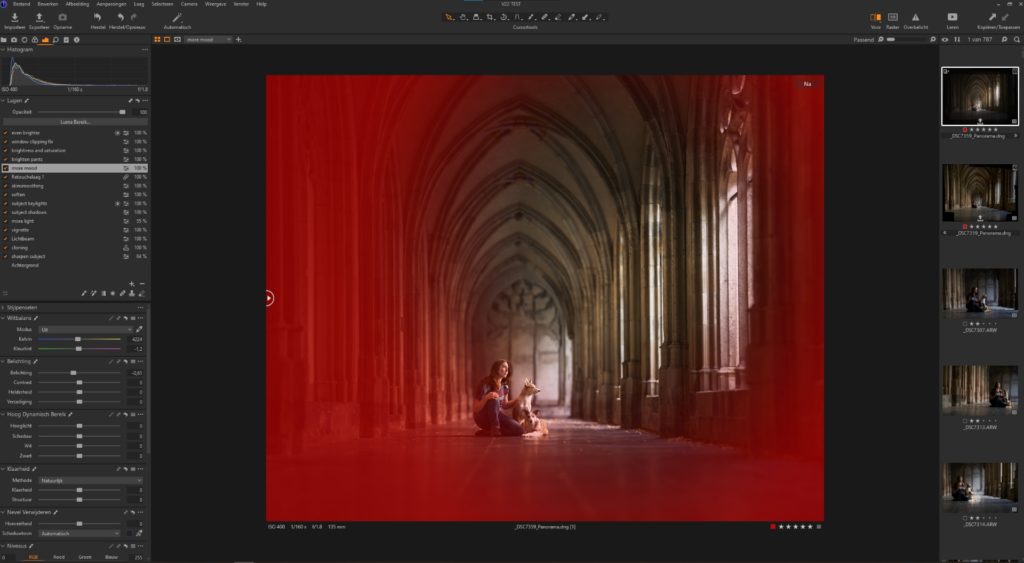
I masked out two of the window frames, the light-gradient caused it to clip. The devil is in the details…
Pay attention to the sharpness of the subjects. What is important with this technique is to make sure nothing gets clipped by the light-gradient. Tone down highlights if necessary, sharpen gently and retouch if you have to.
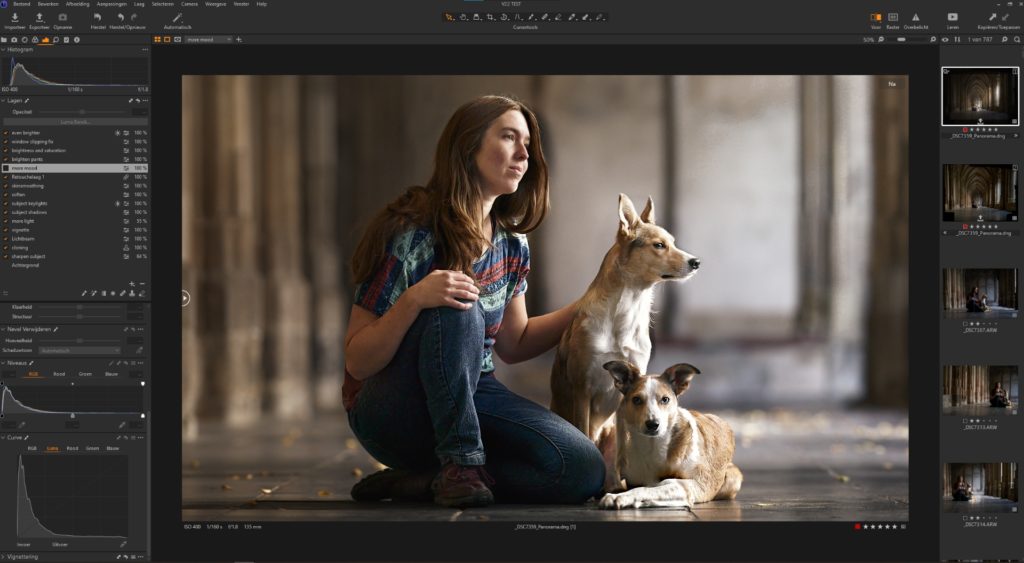
Amazing how sharp these subjects are isn’t it? This picture is huge! Another benefit of the Brenizer method.
Once the image looks nice and clean, the Brenizer process is finally complete. Finish it off with an edit of your own style.
Good luck fellow photographers!
Chris van Riel
Award-winning photographer from The Netherlands, specialist in dog-action photography and dramatic editing. After starting photography two years ago as an enthusiast, he set himself to the challenge of photographing dogs soaring through the sky as they ferociously grasp the frisbee between their teeth. Stopping time with his right index finger, he’s known for capturing moments that happen so fast, one can barely see it with his own eyes. The characteristics of his images can be recognised often from the intense facial expressions, sharpness, super-soft bokeh and editing. Becoming an established pet-photographer he sees his career now unfolding into a professional that’s about inspiring and educating other photographers about dog-action photography, editing, and pet-photography in general.