Capture One Pro 6 includes a powerful tool for fixing color moiré. It can be used both globally on an image and in a local adjustments layer.
Many cameras will, once in a while, show color moiré if high frequency patterns are part of the image.
Most DSLR and Micro Four Thirds cameras use antialiasing filters to avoid or minimize the appearance of moiré. However, many new cameras use lower strength antialiasing filters, or have no antialiasing filter at all in order to prioritize sharpness.
When using these cameras with the kit lens, typically you would hardly ever experience problems with moiré because these lenses are not sharp enough to provoke moiré on high frequency patterns.
But, if you use high quality primes to achieve really sharp images, you also run the risk of getting moiré.
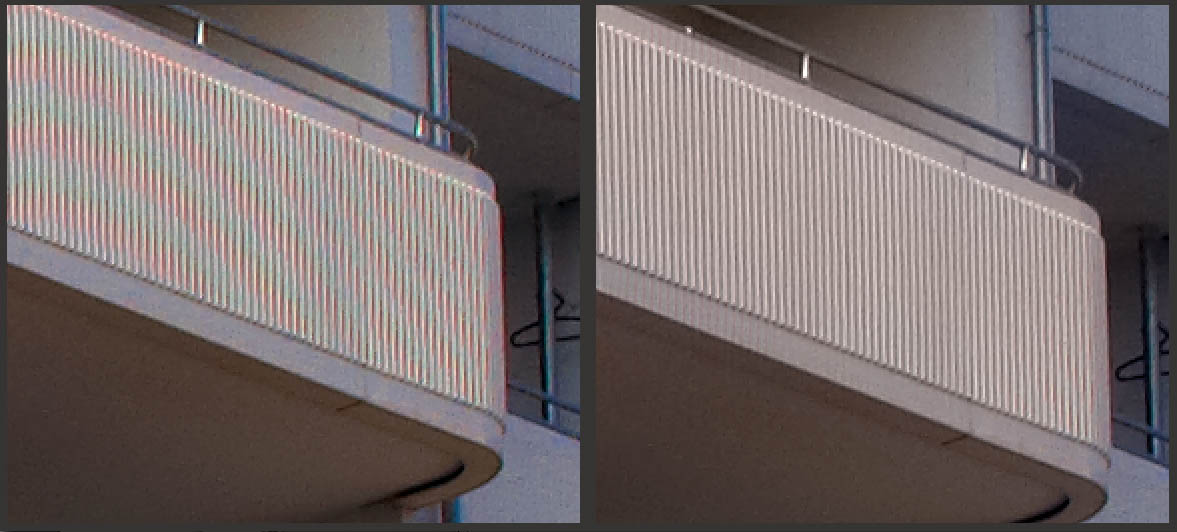
The image on the left is shot with a mirrorless camera using a sharp prime lens. The high frequency pattern on the balcony fence shows strong color moiré. The image on the right is after fixing the color moiré in Capture One Pro 6.
When you suspect a moiré problem in one of your images, you need to zoom to 100% in Capture One’s viewer to verify that there is a real moiré problem – sometimes it is only the low-resolution preview that shows moiré.
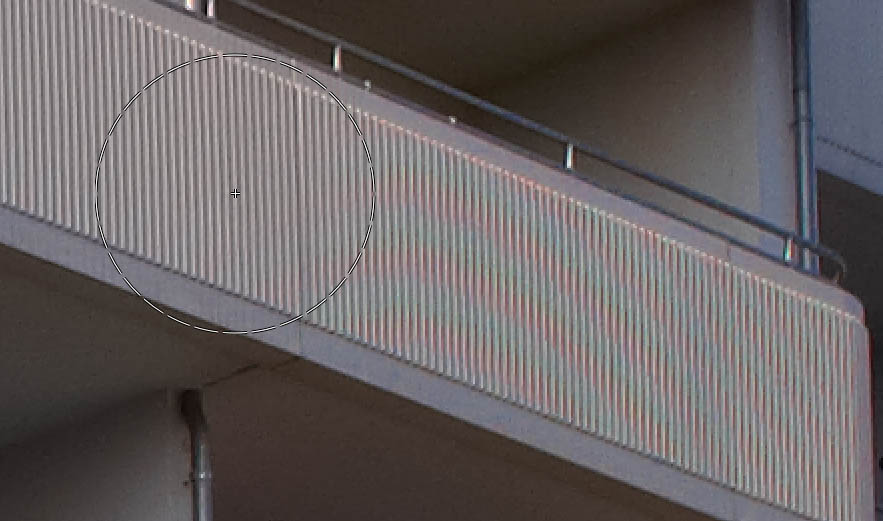
Once you have located a real color moiré problem, like in the example below, select the Detail Tool Tab where the Moiré Tool is located.
Color moiré can be removed globally from an image but when you remove color moiré, you risk color bleeding in other parts of the image that you may not pay attention to. Therefore, it is better to apply the color moiré correction in a Local Adjustments Layer.
Step by step guide to remove color moiré:
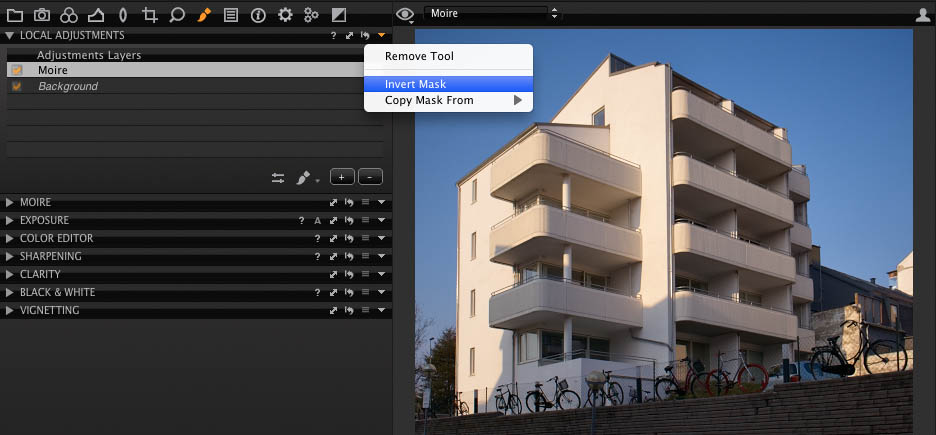
1. Add a new Local Adjustments Layer
2. Inverse the mask. This is only an intermediate state. By inverting the mask, we work on the whole image which is necessary when setting up the parameters for the Moiré Tool.
3. Set the pattern size to maximum to make sure that the color moiré filter covers a whole period of false colors.
4. Now drag the amount slider until the color moiré disappears. You should use as low a value as possible to remove the moiré.
5. Reduce the pattern size to the minimum size that still fully removes the moiré. Now we have found the minimum values required to remove the moiré. This is important, as it will minimize the risk of unwanted color bleeding.
6. We only want to use the values locally, so invert the mask again.
7. Select a suitable bush size and brush away the color moiré.

The Image Quality Professor
The digital pioneer, Niels V. Knudsen, is Phase One’s Image Quality Professor and founder of the IQP blog. Moreover, he is responsible for breakthrough advancements in image quality both in Phase One’s medium format camera systems and in Capture One Pro.


The Image Quality Professor’s Blog is one of the best technical information sites I have read on PhaseOne Capture Pro tips and techniques. I have been reading these for more than a year and it is the one site that allows me to quickly learn about new techniques and refresh on some old techniques that I can use for my work. The quality of the writing and the images are excellent. If this blog were not available, I probably would not use Capture One as there is not enough time to learn to use the software. We have lost many of our graphics people and now the engineering staff has to prepare all graphics for highly technical reports. Your blog allows me to do better quality work and I am considering the purchase of a “five seat” license.
Yes its a nice Tool. But if you look really close you find new structures below and above. This happened every time you use this tool. It is not very easy to handle the masking tool. Maybe your next step in this fantastic program is to invert a selection tool.
I use Capture one for more than 8 years nearly every day and save a lot of time with it.
I am really exited what´s coming next.
I stumbled across another slightly offbeat use for this tool a couple of days ago.
In some very adverse light conditions (almost dark, clouds shooting high speed action) I was at 3200 ISO and underexposed which makes recovery work challenging but not completely impossible for web use images.
The one strong problem was that a lot of grey tarmac road surface was showing extreme colour noise and would not shift. Then I test the use of a very small amount of moire correction for something else and noticed that the tarmac noise disappeared. It worked across the images even without restricting it using a local adjustment – did not seem to interfere with anything else (in my omages) as far as I could tell.
I thought it might be worth mentioning so taht other could try it too.