NOTE: This article discusses an older version of Capture One Pro. To learn more about our latest version, click here.
When I told my friends that I would be switching my wedding workflow from Lightroom to photo editing software Capture One Pro, some said I was crazy – why change something that works fine?
For me, the question was more – why wouldn’t I change? I have been using Lightroom as a photo editor for as long as I can remember, and it has always been good to me. But was it actually the ideal image editing software, or did I simply not have alternatives?
Maybe I was too scared to look for alternatives. I had an established photography and preset business built on Lightroom. But that didn’t stop me from trying out the latest version of Capture One Pro. It was interesting to suddenly feel like a newbie after years of working with a different RAW editor – but I quickly went from feeling overwhelmed to amazed by all I could do.
I played around with the photo editing tools to get the hang of Capture One, plus the Learning Hub is packed with free learning resources so I could watch tutorials and read blogs highlighting the best and most efficient ways to use Capture One.
Capture One’s customizable workspace was immediately useful – it allowed me to reconfigure the workspace and move tools around any way I wanted. That means I could simply mimic my Lightroom workspace and put tools in the same position to make the transition period smoother and faster.
Better results with Capture One
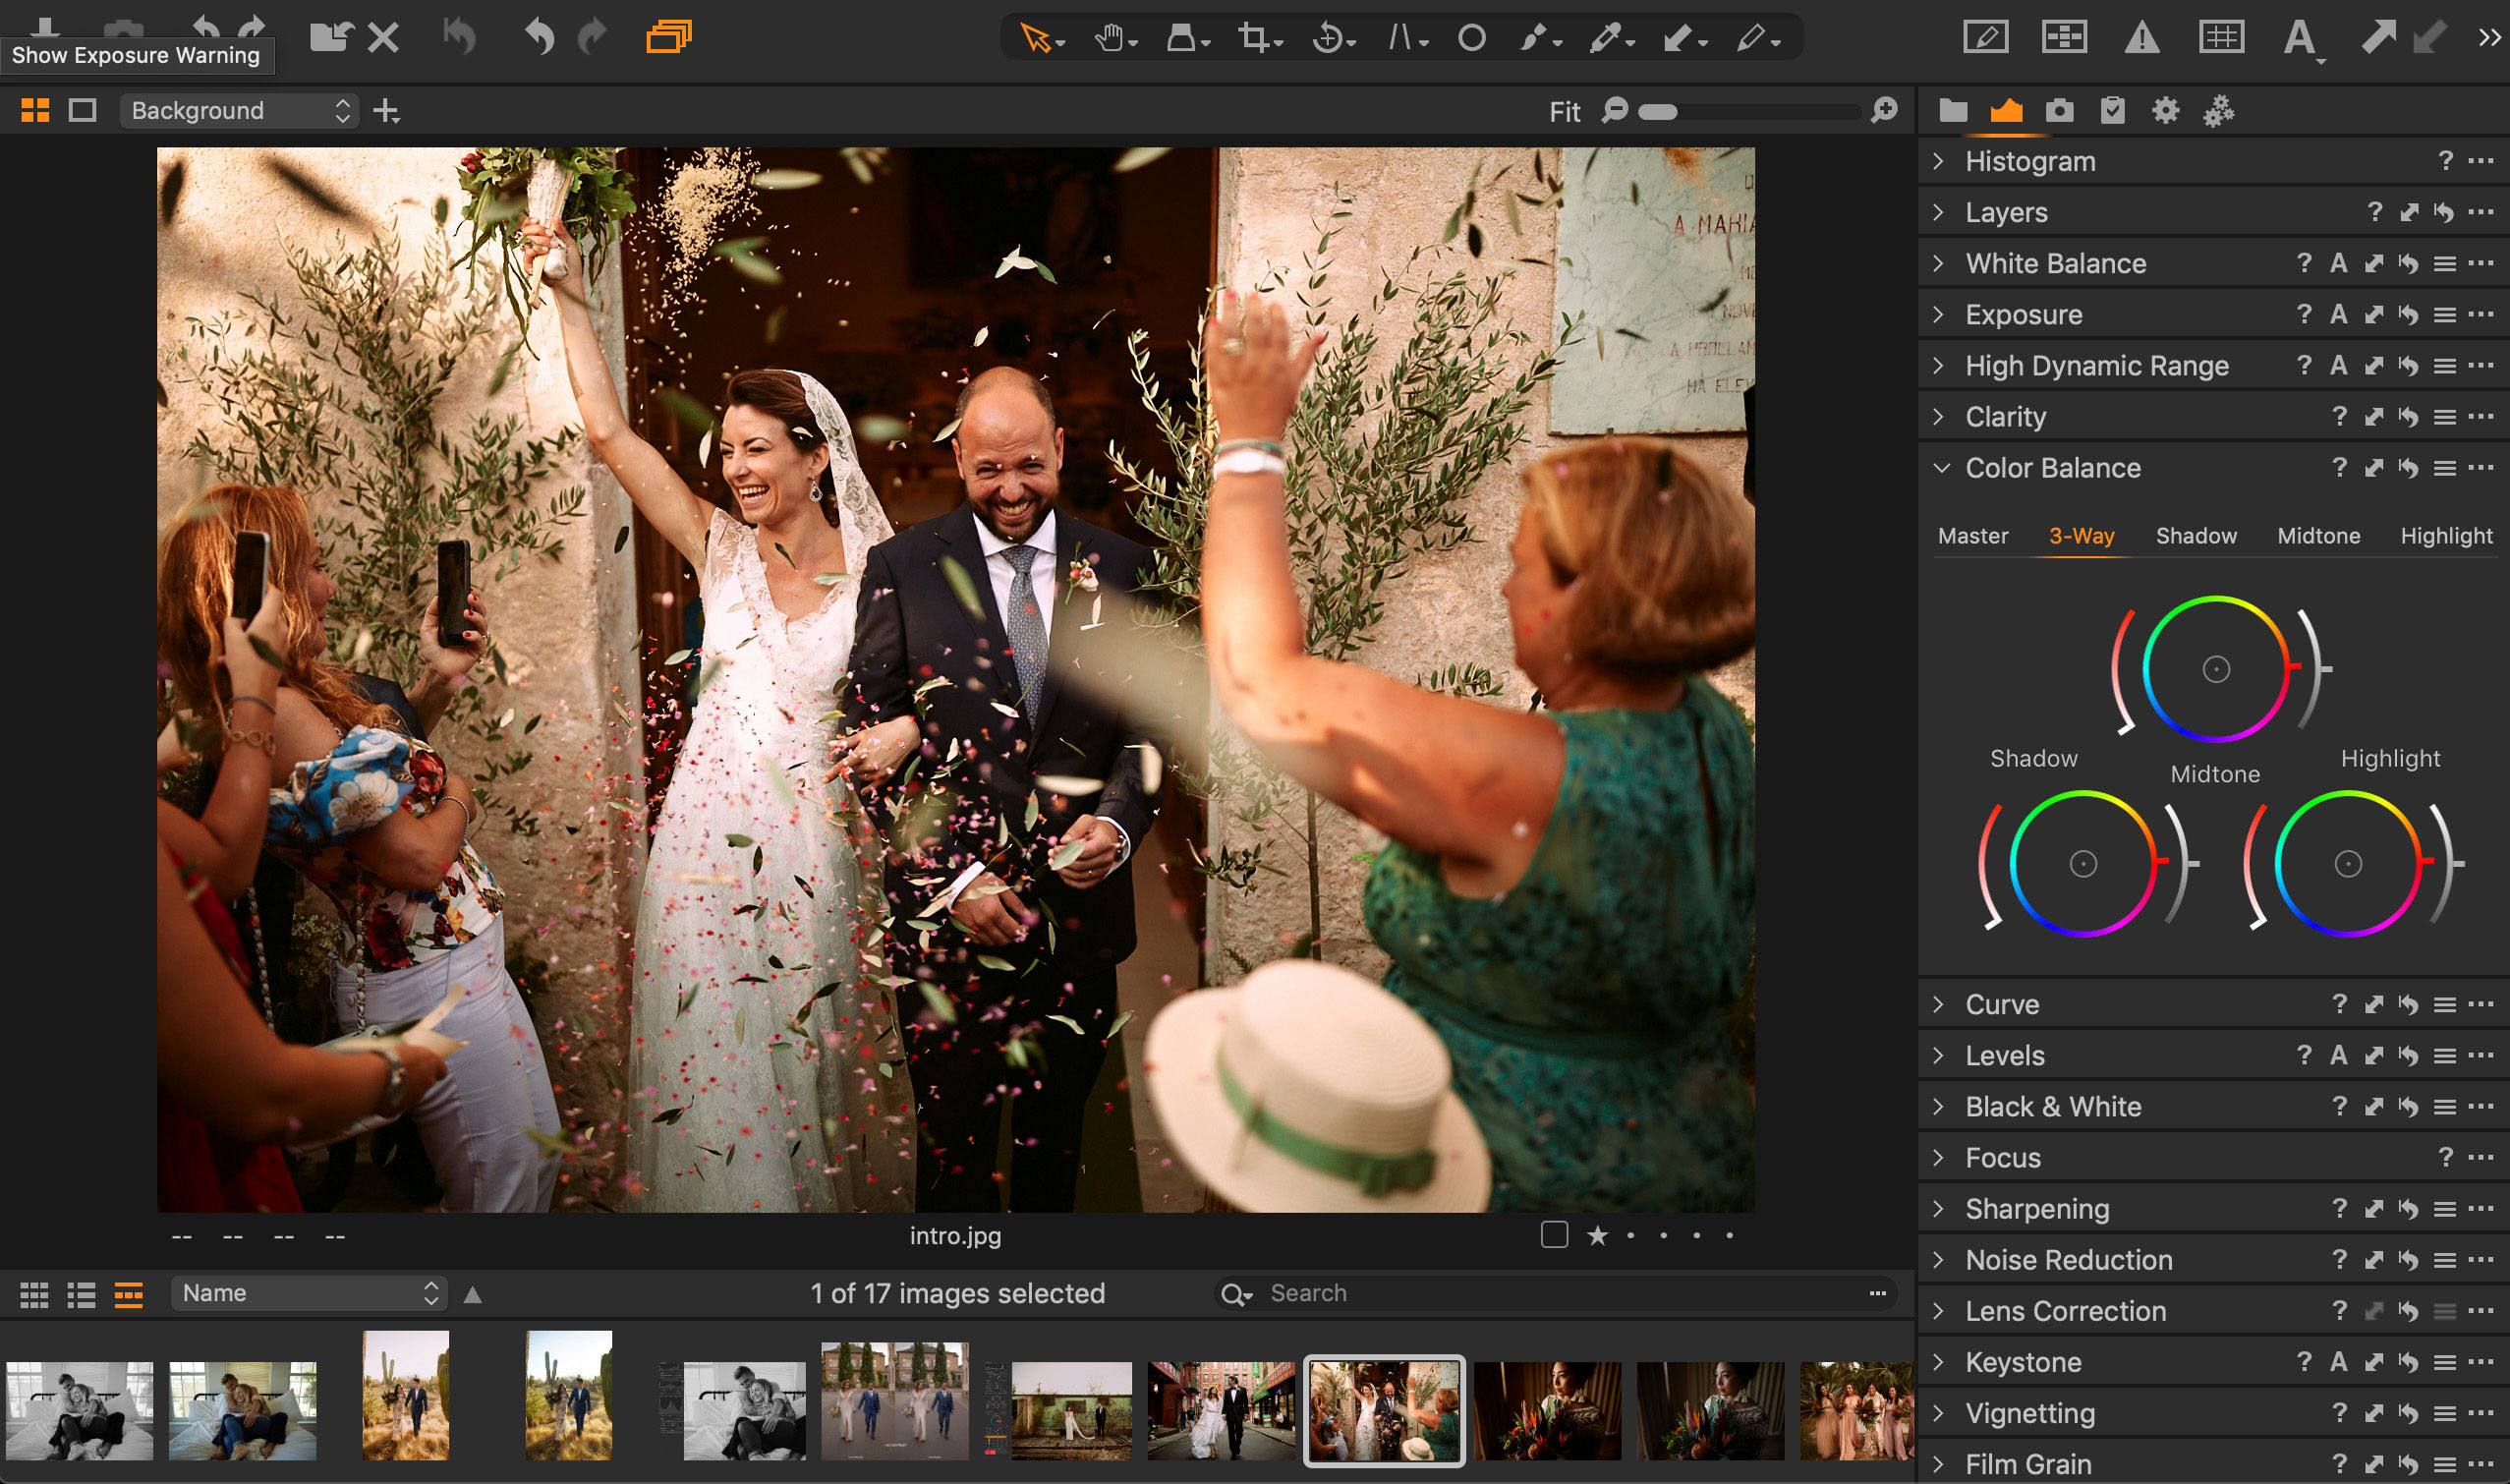
One of the most interesting parts of my switch to Capture One was discovering how much better my final photo could look. Right away, I noticed that my RAW files looked different. There is simply more life to my RAW files in Capture One than in Lightroom. The files look more vivid, sharper and are just generally nicer to look at. The viewing experience is also better, because the customizable workspace lets me see the images on my screen bigger than ever before.
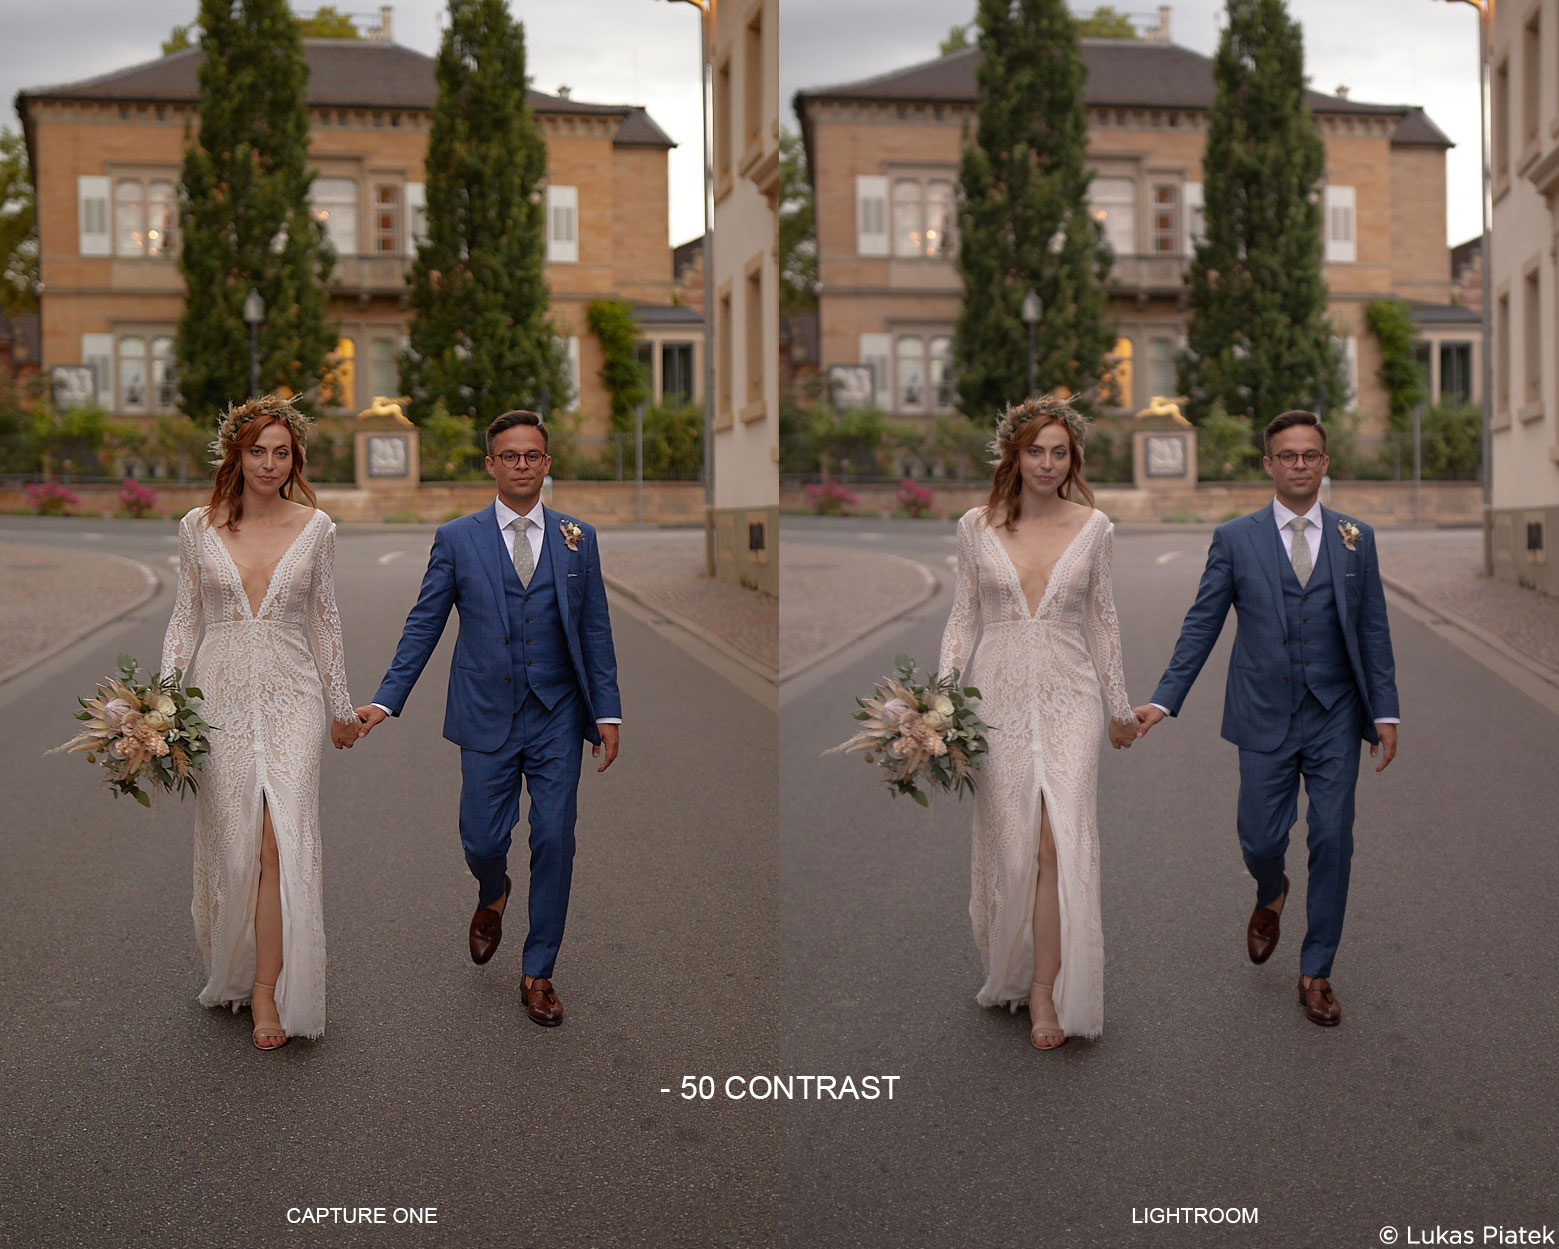
While tools like white balance, contrast and curves are found in both software, they behave differently across the two programs and are far superior in Capture One.
I’ll use the contrast slider as an example. Whenever I edited contrast in Lightroom, I had to adjust the skin tones because they got either too saturated or too desaturated. Meanwhile, the contrast slider in Capture One Pro does not change my skin tones and this makes a huge difference to my workflow. You can see what I mean in the comparison that I have created. The Lightroom result looks muddy and desaturated.
There is so much more I could discuss, but my favorite newfound feature in Capture One Pro is probably the Advanced Color Editor. This was the one tool that I have always missed in my Lightroom workflow. I can finally select any color in my image and edit it like never before.

Lightroom only allowed me to select basic colors – for example, red – and change its hue, saturation and luminance. This means I could never quite get the result I wanted. Using the Advanced Color Editor in Capture One, I can select multiple ranges of red (or any other color) and change them however I want. I can even add multiple layers and mask certain areas, for even greater control of my images.
If you don’t already have Capture One, download a 30 day trial and try it out.
Eager to learn? Access webinars, tutorials and expert help in the Learning Hub – completely free.

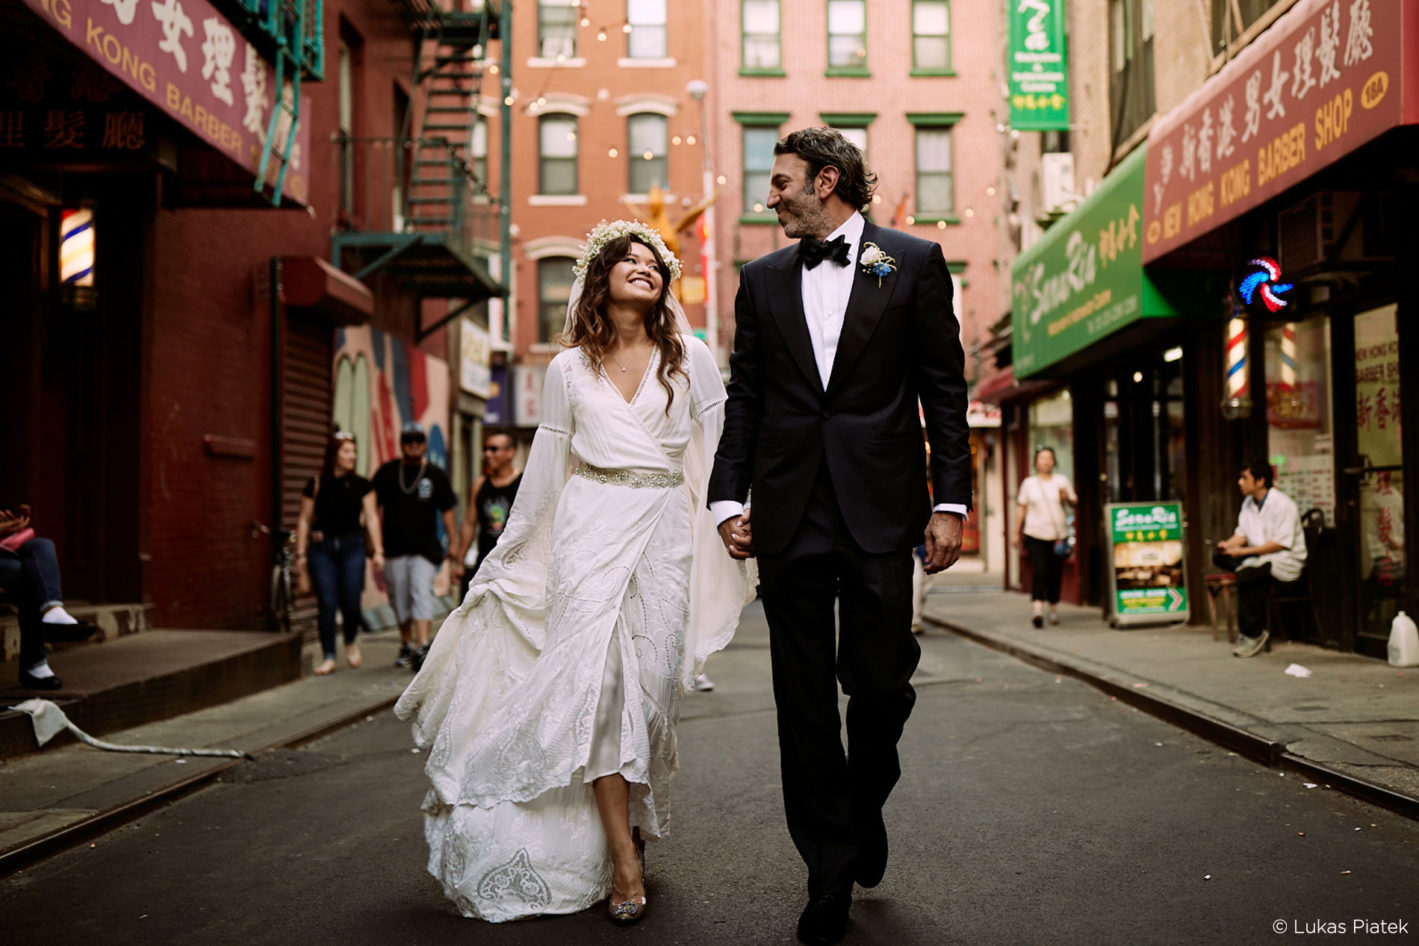
Lukas Piatek
My name is Lukas Piatek, and I am the founder of LOOKSLIKEFILM. We are a group of nearly 50K photographers that share fantastic work every single day: wedding images, family photos, boudoir sessions, even birth images. We support photographers from all fields, and this is why you can see everything in our group.


I don’t use sliders. I use the adjustment brush to edit images. That is the best technique of all. You only edit where it is needed, You can create any brush you want and have it do more than add contrast, you can have it lighten, sharpen and add vibrance all at once because the brush creates a mask that you can return to and edit again including subtracting and adding where the edit is to be applied. If you need to apply some lightning to the arm and not the face or other areas, you simply apply it to where you need it. Good photographers edit locally, not globally.