NOTE: This article discusses an outdated version of Capture One. To learn more about our latest version, click here.
Hi everyone, It’s Kirk Mastin from Mastin Labs!
As you may have heard, Mastin Labs is bringing our well-known film looks to Capture One – starting with the Kodak Everyday Style Pack. In this post, I’ll be sharing my optimal editing workflow for Capture One.
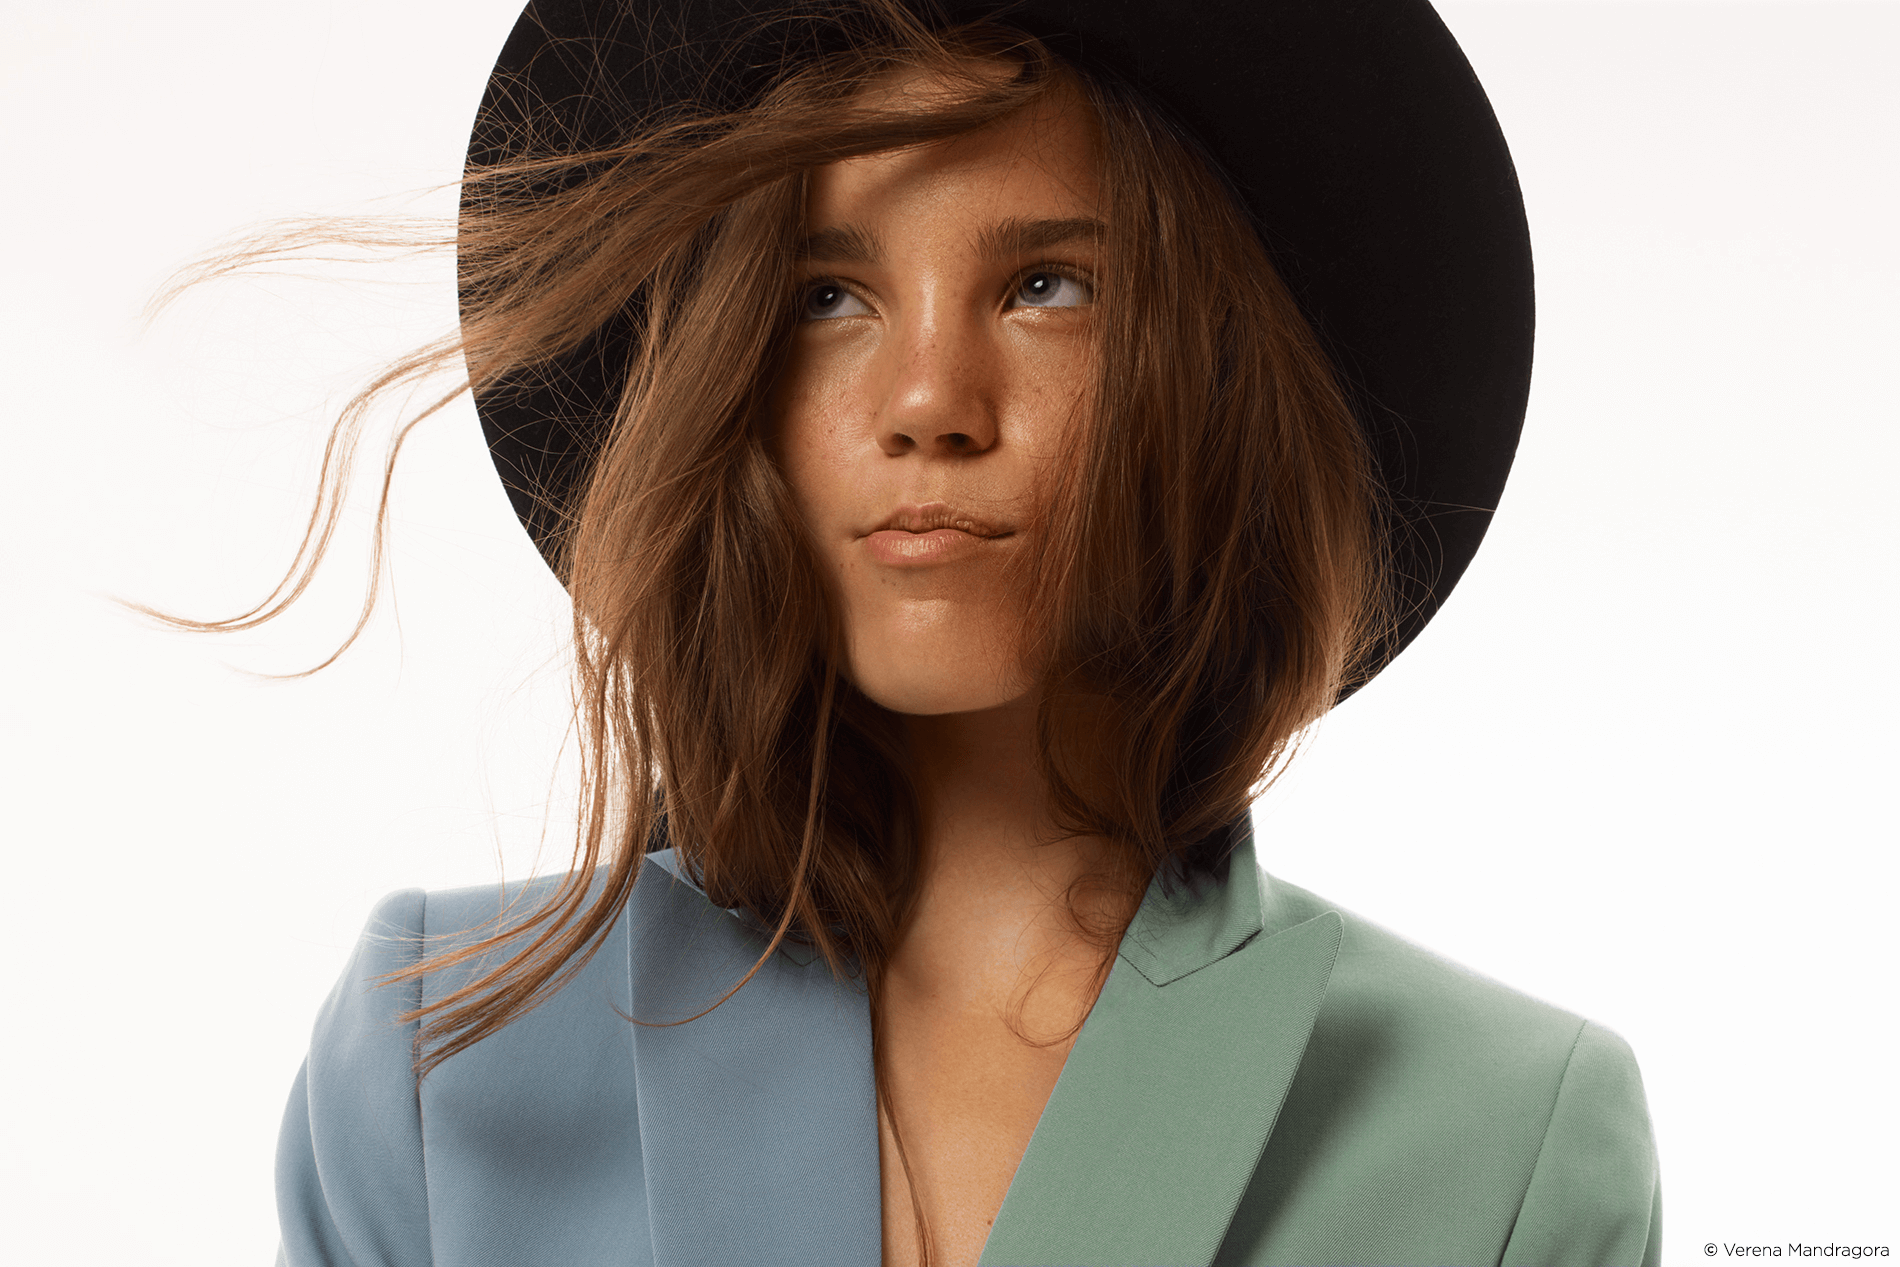
Our Kodak Everyday Style Pack is ideal for tropical landscapes, road trips off the beaten path, authentic moments with your friends, and anywhere life takes you on your everyday journey. In our community, we’re seeing the Kodak Everyday Style Pack used for wedding, family and portrait photography. This style pack is one of the most versatile packs we’ve ever created.
The Kodak Everyday Styles pack has three distinct looks, Kodak Ektar 100 is bright and vivid. This film was originally made for colorful lush landscapes. Kodak Gold 200 will give you instant feelings of nostalgia with the warm tones of this widely used film. Kodak Tri-X 400 is a grittier black and white film with roots in photojournalism.
Now that you are more familiar with this pack, let’s get started!
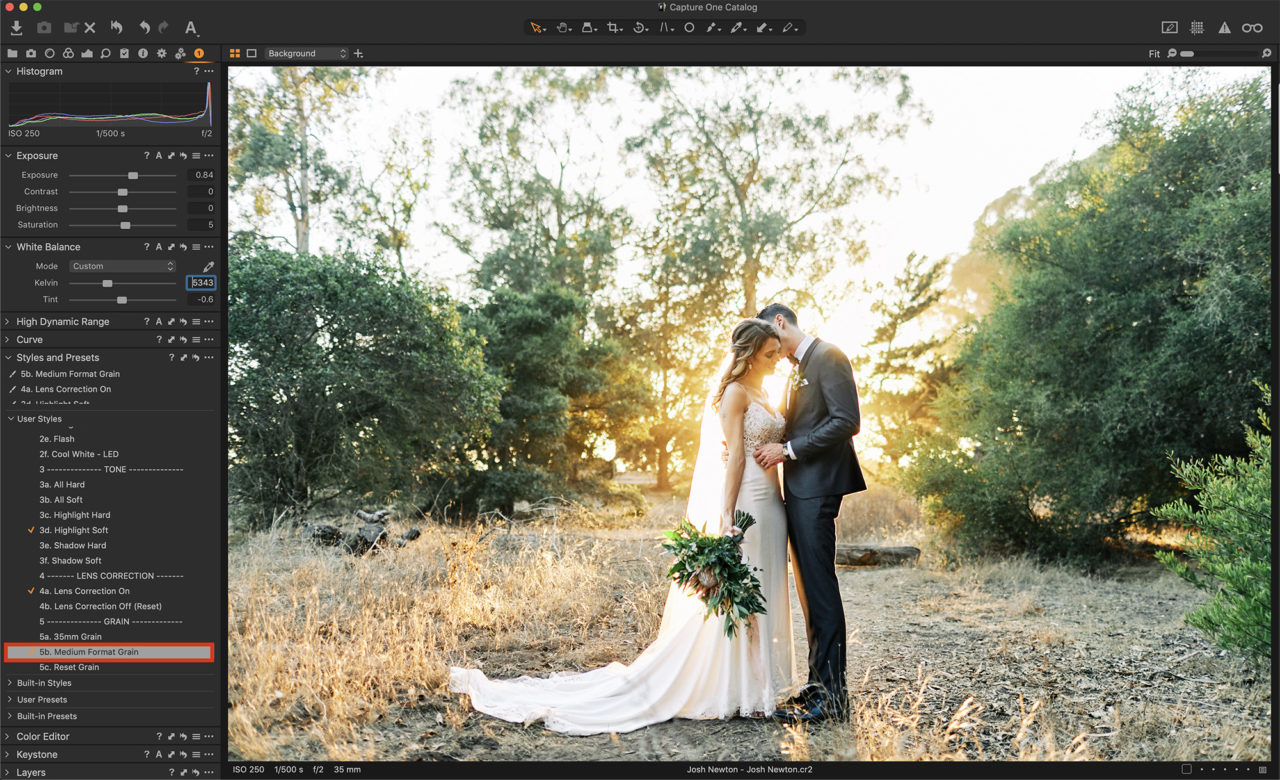
Installing a Style Pack in Capture One is easy. Just double click on the Style Pack icon and it will self-install into Capture One. You may need to restart Capture One after installation for the new Style Pack to appear in your Styles panel. We’ve created an optional Mastin Labs workspace that you can install into Capture One that provides you with only the tools you need to get a consistently beautiful edit, organized in a logical and easy-to-follow layout. Now that you’ve installed the Style Pack and Mastin Labs workspace, you’re ready to edit your first image.
Our styles work in an efficient system that will get you a film look in very few steps. In the styles section, you will see Film, White Balance, Tone, Lens Correction, and Grain. To get the best edit, just work your way down this list from top to bottom, adding what you like to get the look that you love.
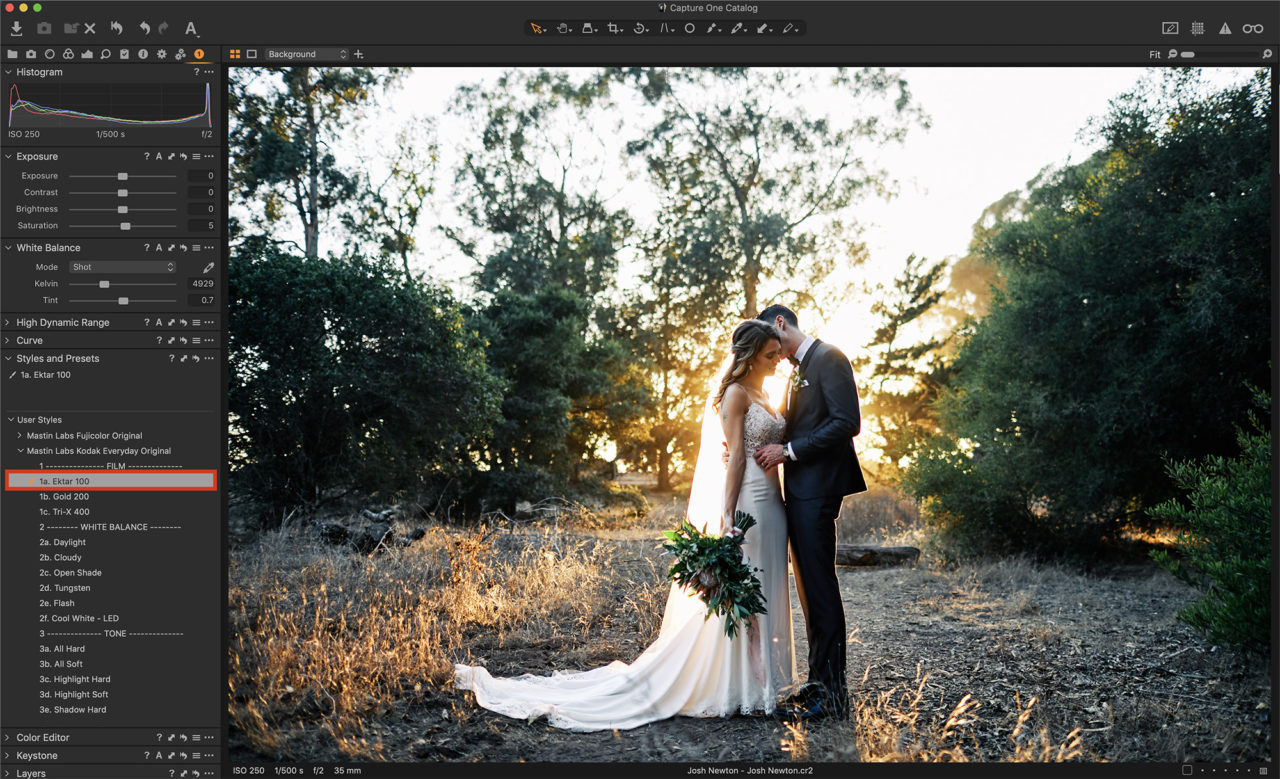
Film
This is where you choose the film look for your image. In many cases, this is the only selection you need to get a beautiful edit. The following settings are meant to enhance this base film look.
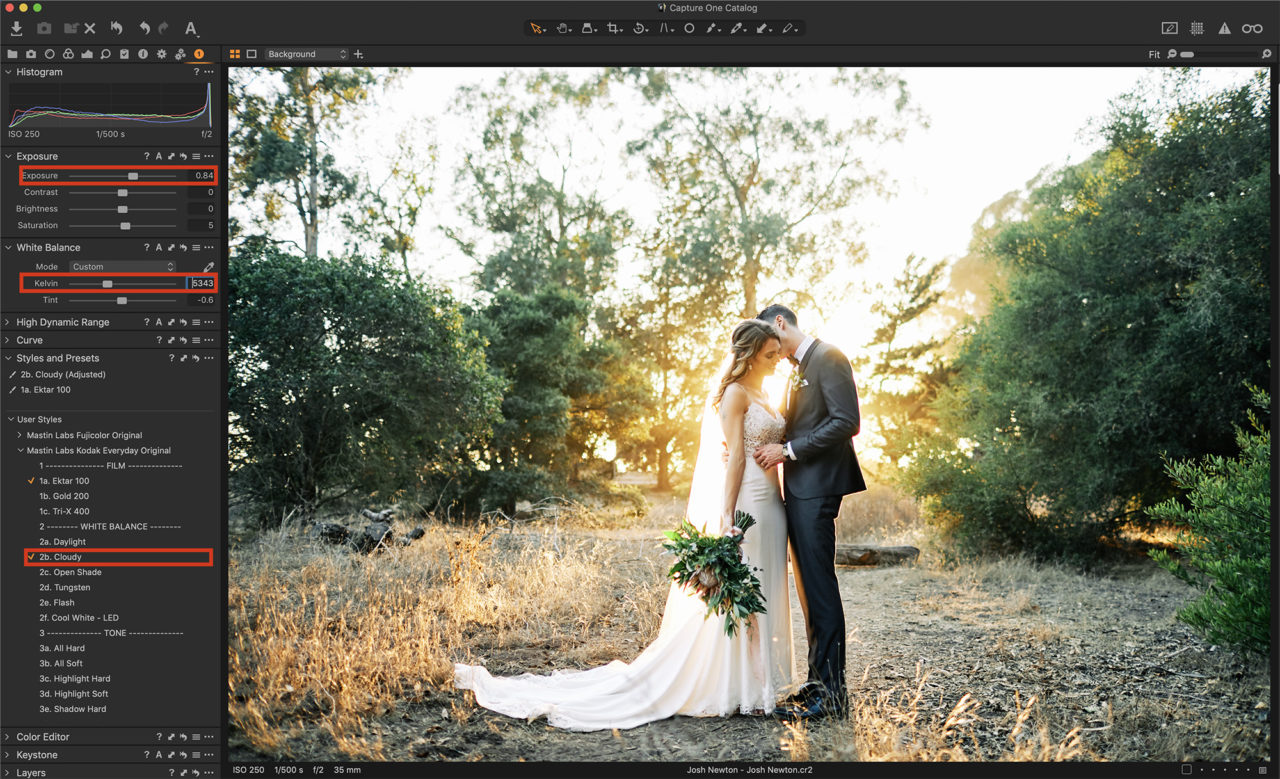
White Balance
We’ve included several white balance settings that will get you in the ballpark of correct temperature and tint. Since the color of light can vary from environment to environment so much, these settings will not always provide you with a perfect color balance.
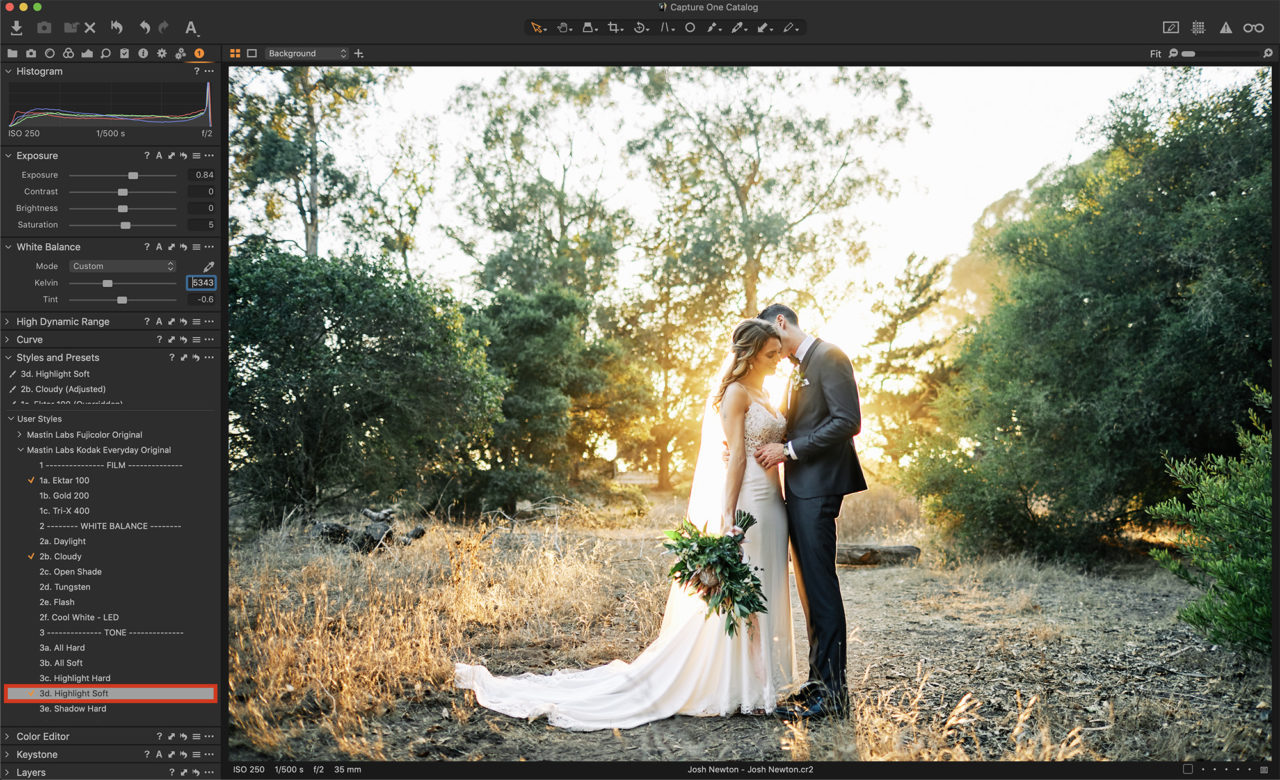
Tone
These settings mimic the highlight and shadow retention settings of the Fuji Frontier SP3000 film scanner from which these styles were emulated from. Highlight Soft, for example, will recover highlight detail without affecting the rest of the image. Highlight hard, on the other hand, will increase contrast in the highlights for a punchier look. The same applies to shadow controls such as Shadow Hard and Shadow Soft. These Tone settings are a great way to solve tricky lighting situations such as high contrast lighting, or to dial in a personal look.
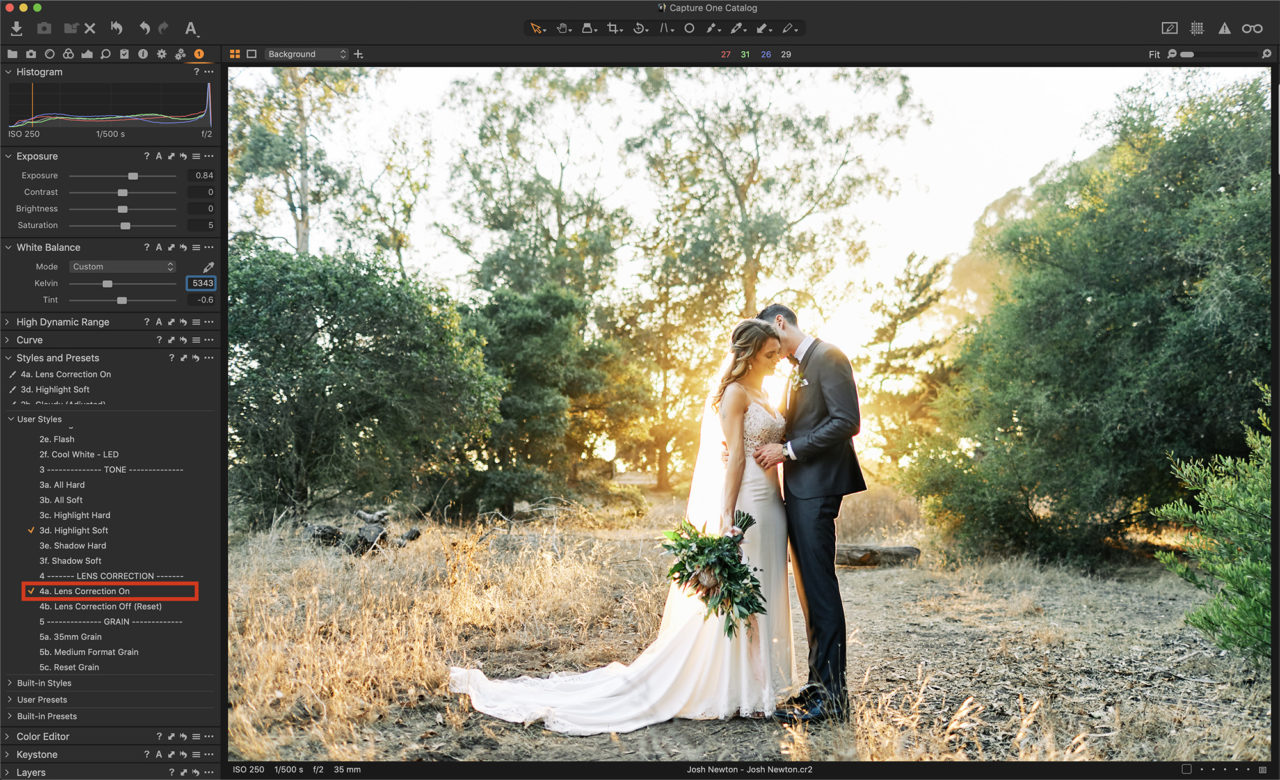
Lens Correction
Many lenses, when shot at very wide apertures such as f1.8 and f2 exhibit strong vignetting. If the lens is a wide angle it will also have noticeable distortion. Lens Correction fixes these issues and gives you an image with even lighting across the frame and no distortion. This tool is not necessary for a film look, but I added it because it made matching my digital images to my medium format film images much easier. Many of the lenses I use for my medium format film cameras are better corrected than 35mm camera lenses, so by using lens correction, I can get a better match to what I am used to with medium format film.
Grain
The last optional step is to add film grain. Capture One has incredible grain simulation options and I really love simulating authentic–looking film grain for this style pack. Kodak Gold and Ektar do not have grain built into the base preset, as many users do not like grain at all. But if you do want to add the character of real film grain to your images, you have two choices: 35mm sized grain and medium format sized grain (which is based on a 645 ration medium format 120/220mm film size.)
The Tri-X style has grain built in, as grain is a fundamental character of black and white film, and there it is attached to the style.
Outside of these settings, the only tools you will need in Capture One are Exposure, Kelvin (temperature), and Tint. Since no film style can determine the amount or temperature of light you are shooting in, these settings must be set by the user, and usually involve a little tweaking to set correctly, just as you would in any edit.
My editing process
A typical edit for me goes as follows:
- Select Ektar as my film base.
- Adjust Exposure, Kelvin, and Tint as needed. (I may select a White Balance style as a starting point.)
- Add a tone profile to enhace my image or to fix a lighting issue.
- Select Lens Correction if I am going for a evenly lit, medium format look.
- Medium Format grain. (This is my personal favorite grain size.)
- Crop to 4X5 if the frame is vertical. (This goes back to my medium format film backgrounds and it’s a personal favorite aspect ratio for vertical shots.)
- Export edited image as JPG.
I really love the power and simplicity of Capture One and with our optional Mastin Labs workspace, you have just the tools you need and nothing more, making the editing experience fun and easy!
Want more tips on editing your first image with Mastin Labs Capture One Styles? Watch this short video.
If you dont already have Capture One, you can download a free 30 day trial and try it out.

