
The first blog post I did was about converting a fairly simple image (processing wise) into a nice Black & White image.
This second post is based on a more complex image requiring more input and manipulation at the processing stage to achieve a beautiful result.
“If you don’t like the weather, wait 20 minutes”
I am known as a landscape photographer but a lot of the time I’m really a skyscape photographer. Frequently I look for dramatic skies and then find a suitable landscape to go underneath it. Perhaps it’s because I’m based in the UK and although we curse the changeable weather we experience, it does bring with it some wonderfully dramatic cloud formations. And nowhere is this more true than in Scotland (where the common saying is ‘if you don’t like the weather, then wait 20 minutes because it’ll change”!).
A passion for the Scottish Highlands
I love photographing in the Scottish Highlands. It’s a rugged landscape characterised by craggy mountains, open moorland and picturesque lochs. And one of my favourite locations is the Glencoe area. I try to visit two or three times a year, preferring the unpredictable weather and the sometimes theatrical light that occurs in the spring, autumn and winter months.
Great conditions
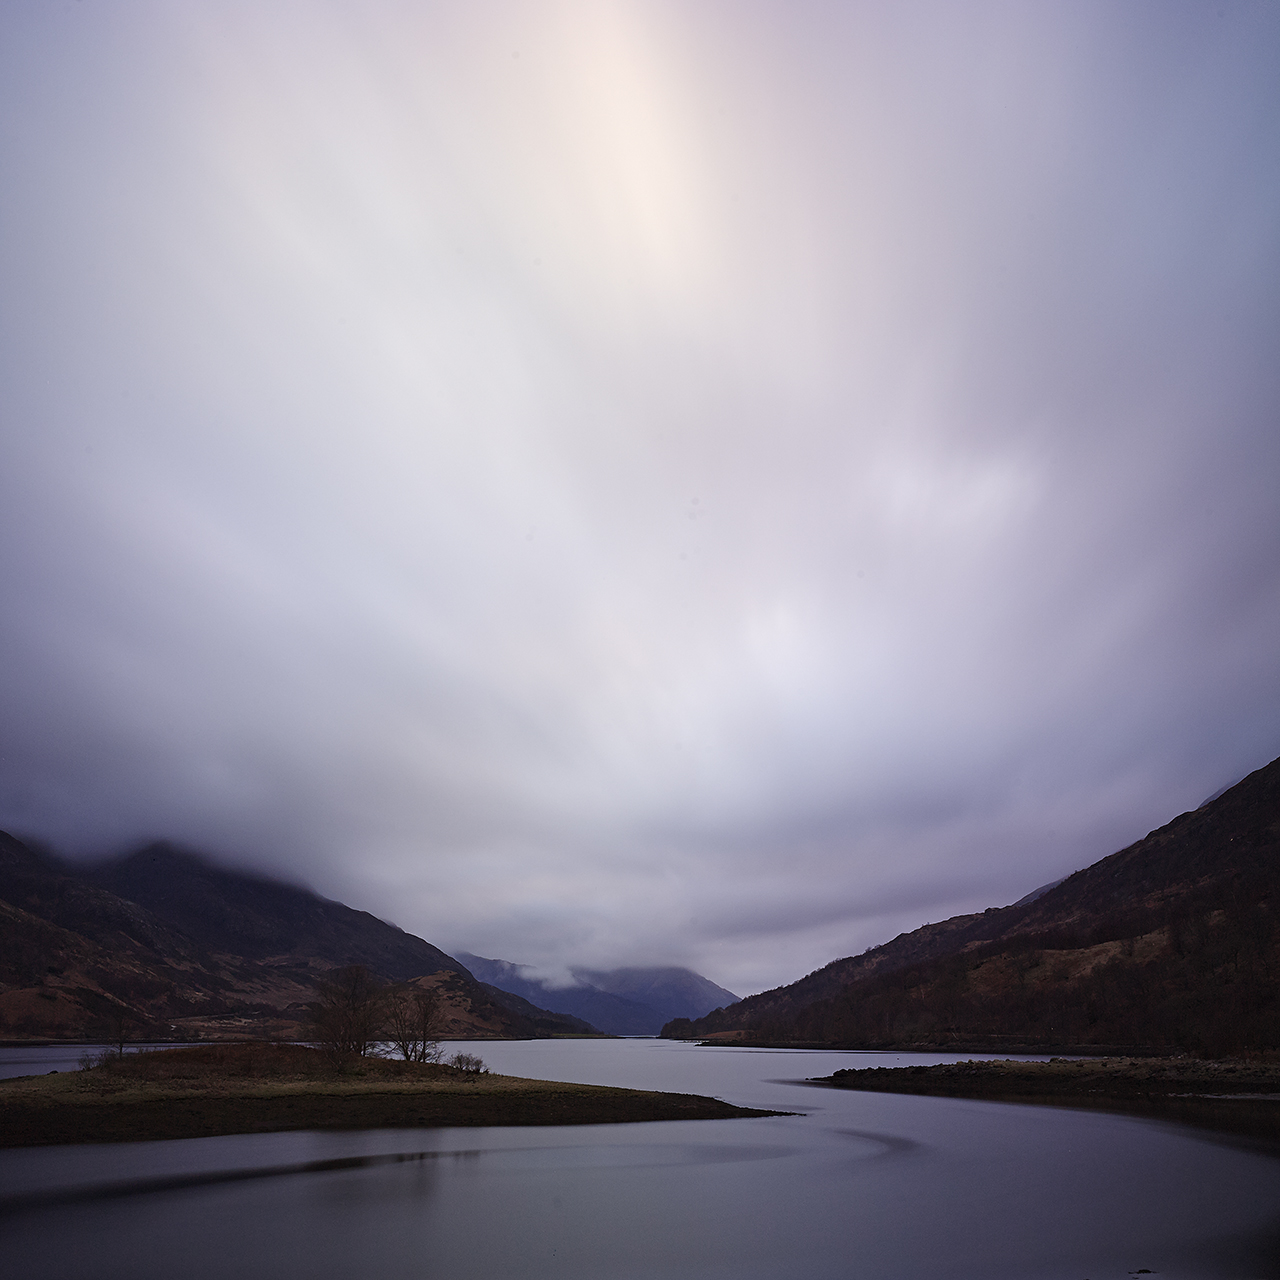
This photograph was taken in March at the side of Loch Leven facing towards the magnificently named ‘Pap of Glencoe’ (not that it can be seen in this image as it was shrouded in low hanging clouds). It was dusk, the light was fading fast and a strong, cold wind made the clouds sweep across the sky: Just the sort of conditions that I love to work in.
Looking for movement and dynamism
I decided to make the most of the scudding clouds so I fitted a 10 stop ND filter to my lens and selected an aperture of f16. This combination resulted in an exposure of just over 2 minutes – I knew from experience that this would add to the drama in the sky. I use long exposures a lot in my landscape work – I like the sense of movement and dynamism it can add to an image like this.
When I’m intending to convert to Black & White I like to start with a relatively flat original and add the drama at the processing and printing stage.

My aim is to ensure that I record the whole range of tones in the final file so the histogram is a much-used feature on my camera.
In the fading light I didn’t get time for more than 3 exposures but chose this one to work on because the swirl in the water added some interest and echoed the movement in the sky.
Getting the best starting point
Before converting the image to Black & White I always prefer to make basic adjustments to get the best colour image I can as starting point. In this case that involved:
- cropping (I removed the foreground shoreline to emphasise the swirling water)
- adjusting exposure to lighten the image by adjusting the levels and using the HDR Tool to protect highlights and shadow detail
- increasing contrast using the Exposure Tool.
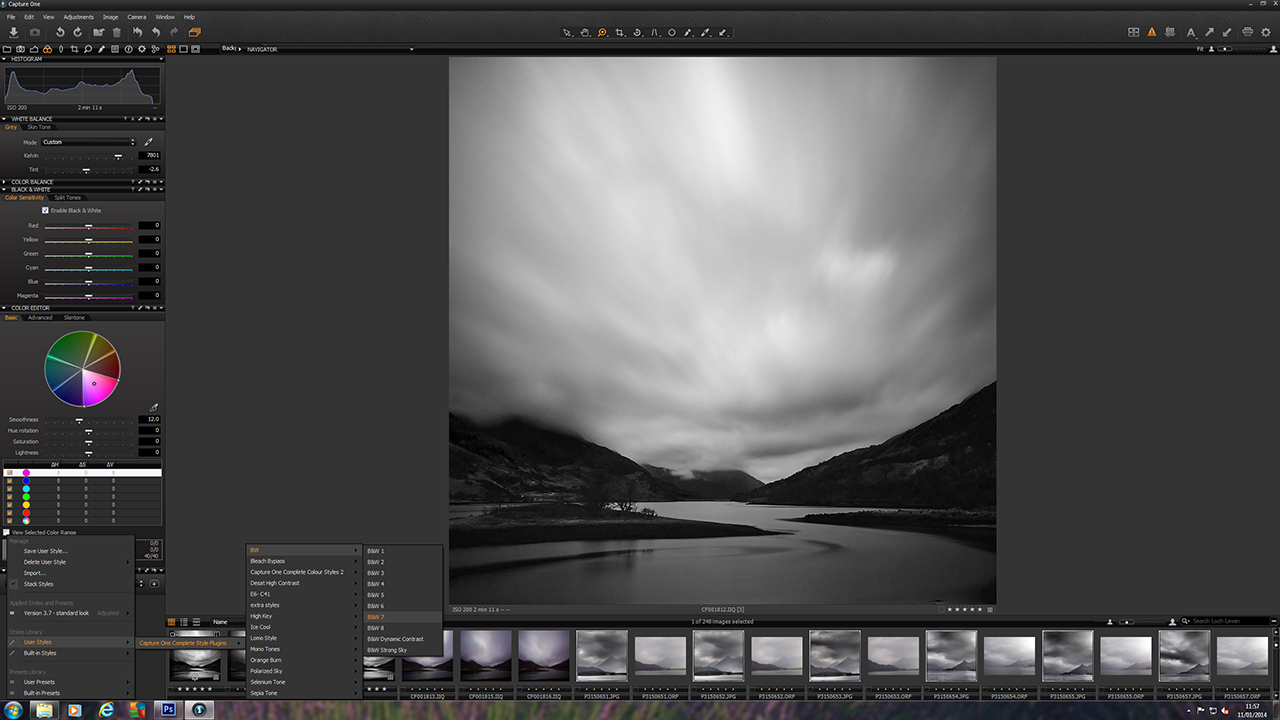
For this image I used one of the presets available as a download for Capture One Pro 7 from Capture One Complete (see http://www.captureonecomplete.com/uk/ ). I often use the available Styles and Presets as a starting point and then I fine-tune the result to suit my style and each individual image (I’m not a fan of taking the same approach to the processing of every image).
I used ‘B&W Style 7’ as my first step.
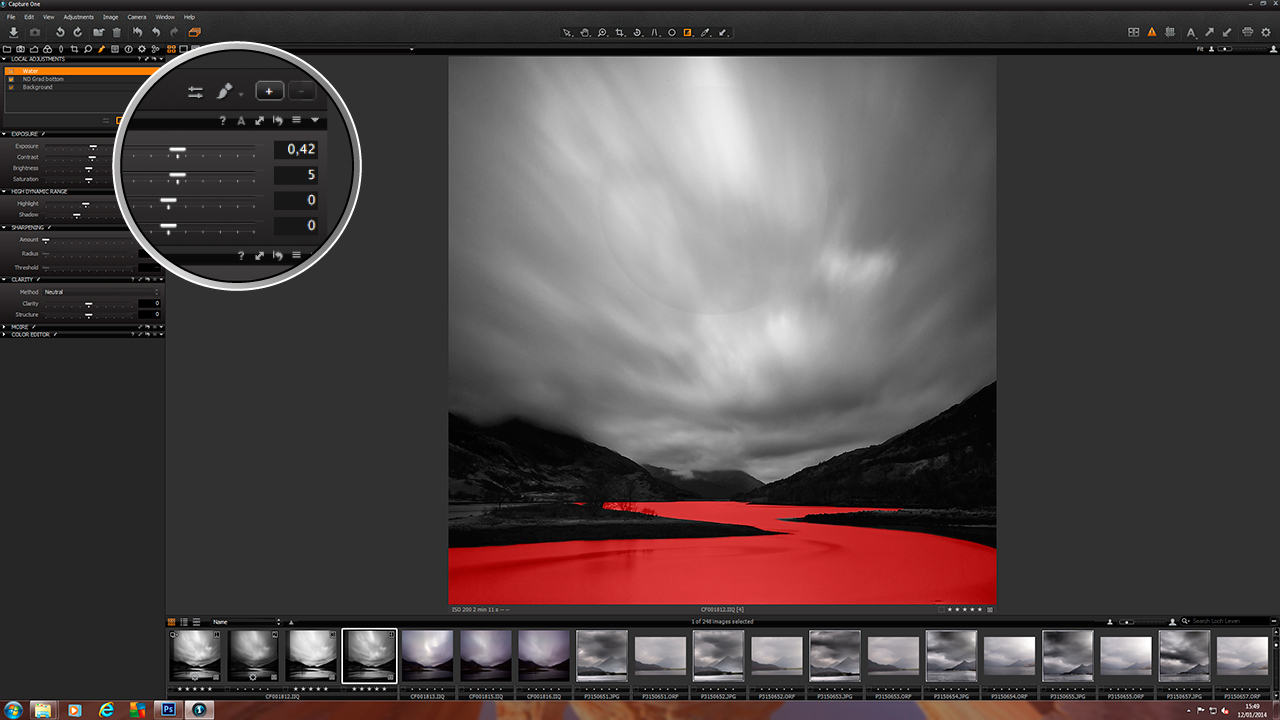
I then added Local Adjustments. I really like that feature and the ability to make selections in Capture One Pro 7:
- I created a graduated Local Adjustment Layer over the water area at the bottom of the photo and increased the exposure to +0.93 to lighten this area.

- Finally I spent some time carefully selecting the water with the Brush Tool before lightening it and increasing the contrast.
For the final stages I added a slight exposure vignette to darken the corners, cloned out any dust marks and sharpened prior to printing.
All the best,
Steve
Steve Gosling
Steve Gosling is an award-winning British based professional landscape photographer, specializing in black and white photography. His work has been published internationally and exhibited in the UK.


I love your work. Very helpful comments on how to better your picture 2. My website is not in any way up to date….I am now a garden/landscape photographer.
Thanks for your kind comment Claire – glad you found the post useful.
Great work Steve and good to see you taking the time on post, which I believe is the most crucial part of photography.
Thanks David. Like Ansel Adams said about the negative being the musical score and the print the orchestras performance I think it’s at the processing stage where I can really bring out how I felt about the landscape when I took the photograph.
Your work is absolutely amazimg, you’re one of my favourite photographers! Im only starting out mainly as a hobby…..LOVE LOVE LOVE YOUR WORK!!!!!
Thanks Kelly – your very positive response to my work is much appreciated; it’s always good to know that someone likes what I’m doing! Good luck with your own photography – and watch out because once the bug really bites you’ll become another ‘photographic anorak’ (my wife’s description) just like me! Seriously its a passion that has taught me so much about life, the landscape and me. I hope it becomes as rewarding for you too.
Thanks Steve, I’m really enjoying your posts. It’s great to see your use of C1 to produce a close to finished image.
Cheers,
Jeff