
Last week someone asked me what has been the biggest improvement to my workflow in the past year. I didn’t have to think for very long. In the beginning of 2015 I started using Capture One, after many years of using Aperture, because I was shooting an assignment with Phase One cameras. Like many Aperture users, I had long given up hope of Apple ever providing a professional solution.
Recent convert from Aperture
Sure, I could have chosen other image processing programs, but I soon realized Capture One Pro 8 allowed me to directly import my Aperture libraries. But it was when I started processing images that I really began to understand the real power of Capture One. Here was a processing engine that allowed me to deliver exceptional images even after a difficult day’s shoot.
Capture One helps me deliver my promise
But what are the real benefits of Capture One Pro 8 and how has it helped me to deliver consistently high quality images?
Virtually all my work is shot outdoors in all types of weather, from the grey, murky light of northern Scotland to the harsh light of the Middle East. One of greatest challenges for outdoor photographers is to be able to guarantee clients receive the very highest quality work no matter what the conditions are.
I have built my reputation on this promise, and Capture One Pro 8 is a big part of this promise.
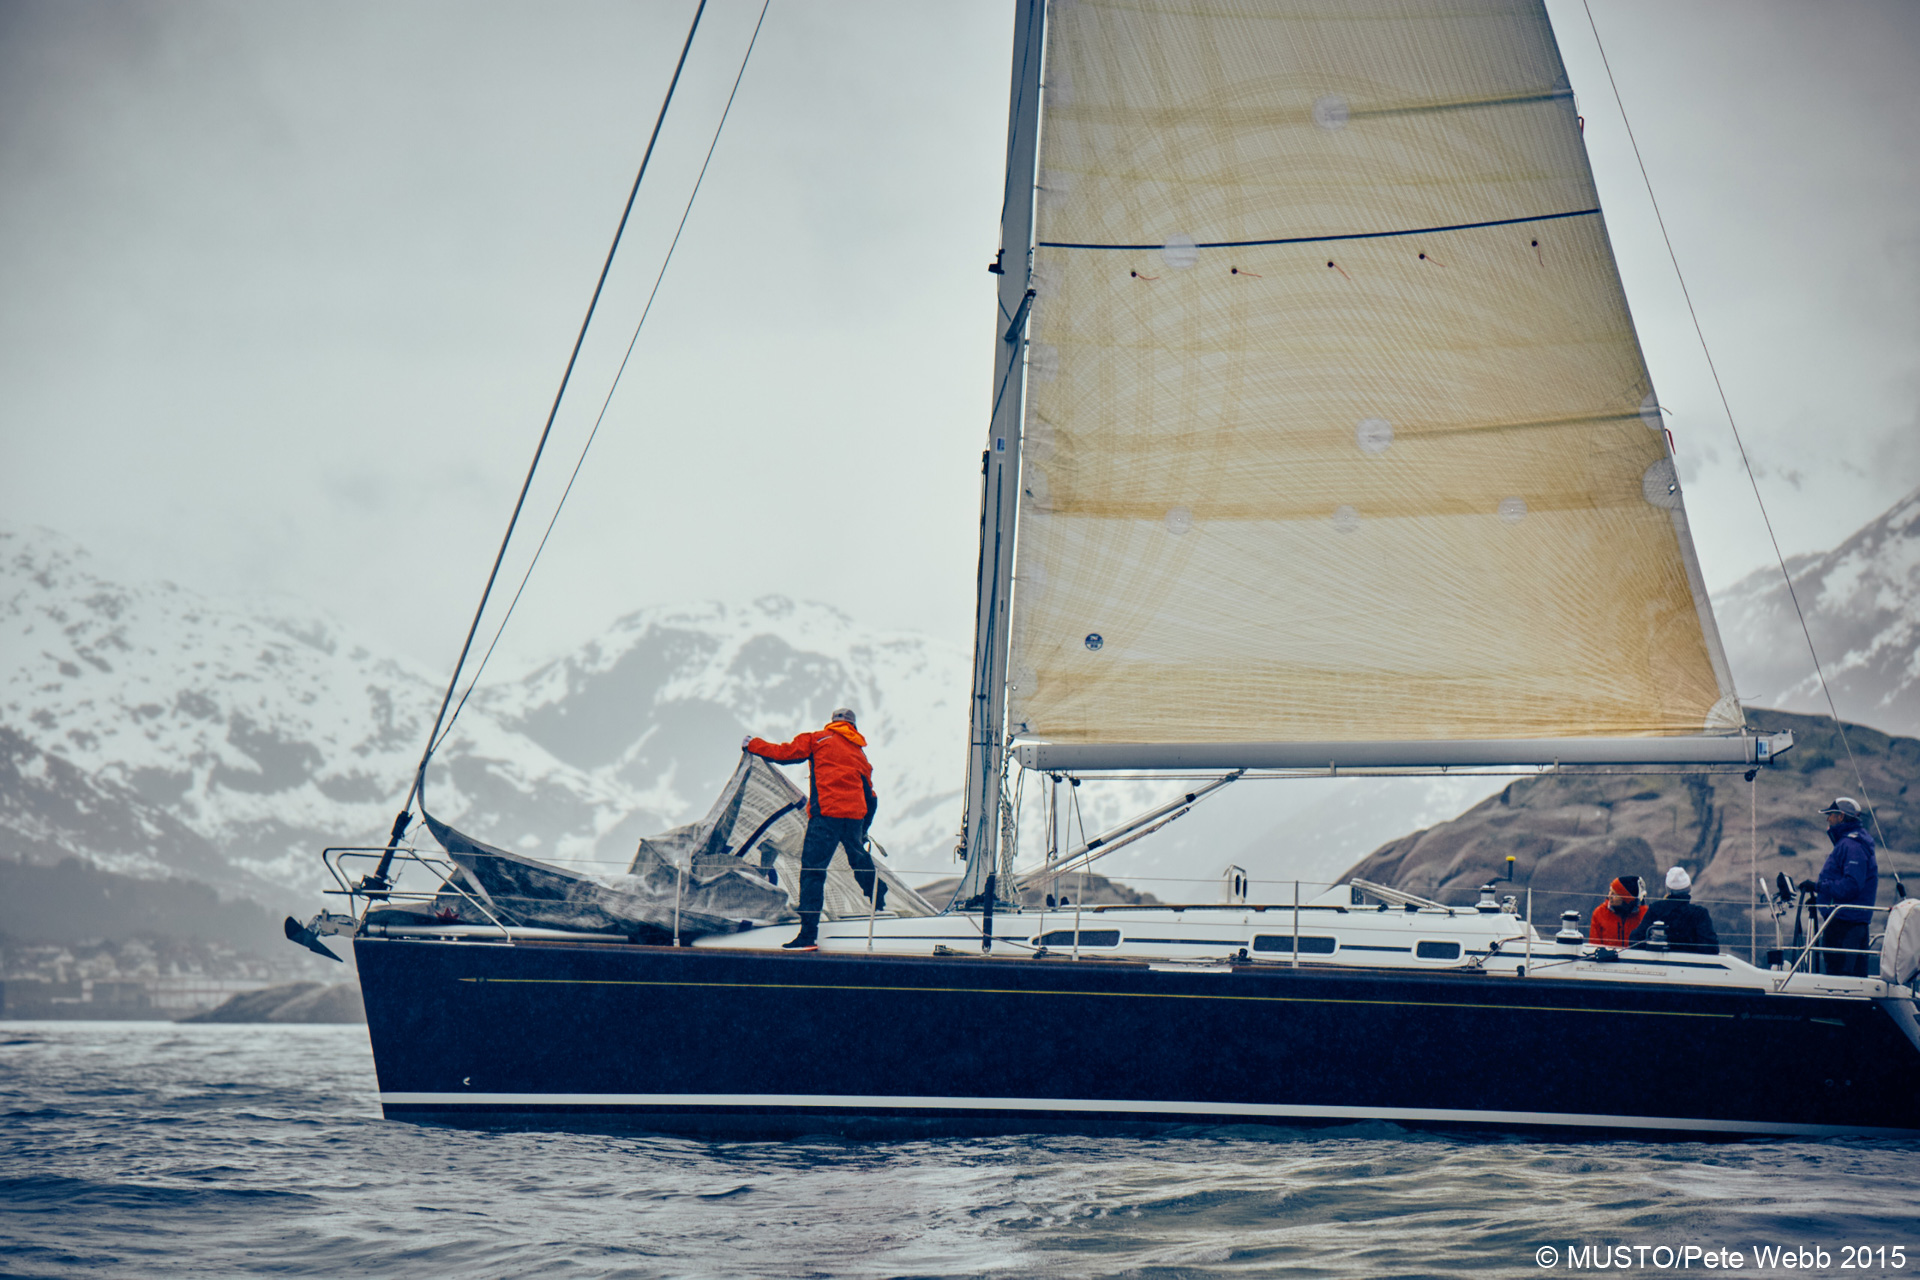 Shot is torrential rain from a rib
In addition, a key part of my photographic style is the way I grade pictures. To do so successfully across a whole shoot in such varied lighting conditions, it is vital that I’m able to compare and adjust images in the same window. Capture One Pro 8 provides this tool. Many other applications don’t.
“I now color grade on the RAW file”
As visitors to the Capture One website might have read, I tested a beta version of 8 earlier this year and was amazed by how effective the 3-way Color Balance tool was. Several months on, I can honestly say it has become one of the most important aspects of my workflow. I can now color grade on the RAW file rather than having to ‘round trip’ to another piece of software.
My workflow in Capture One:
To give the user an idea of how I work through these steps, I will walk you through my workflow:
The first thing I have to do is get a set of low-res JPG’s to the client. This is done without a color grade on the images.
I would initially do an edit to remove any out-of-focus/test shots that were captured and then select all the remaining images. In the Exposure window I would hit the A button to put a simple automated exposure across the low-res images.
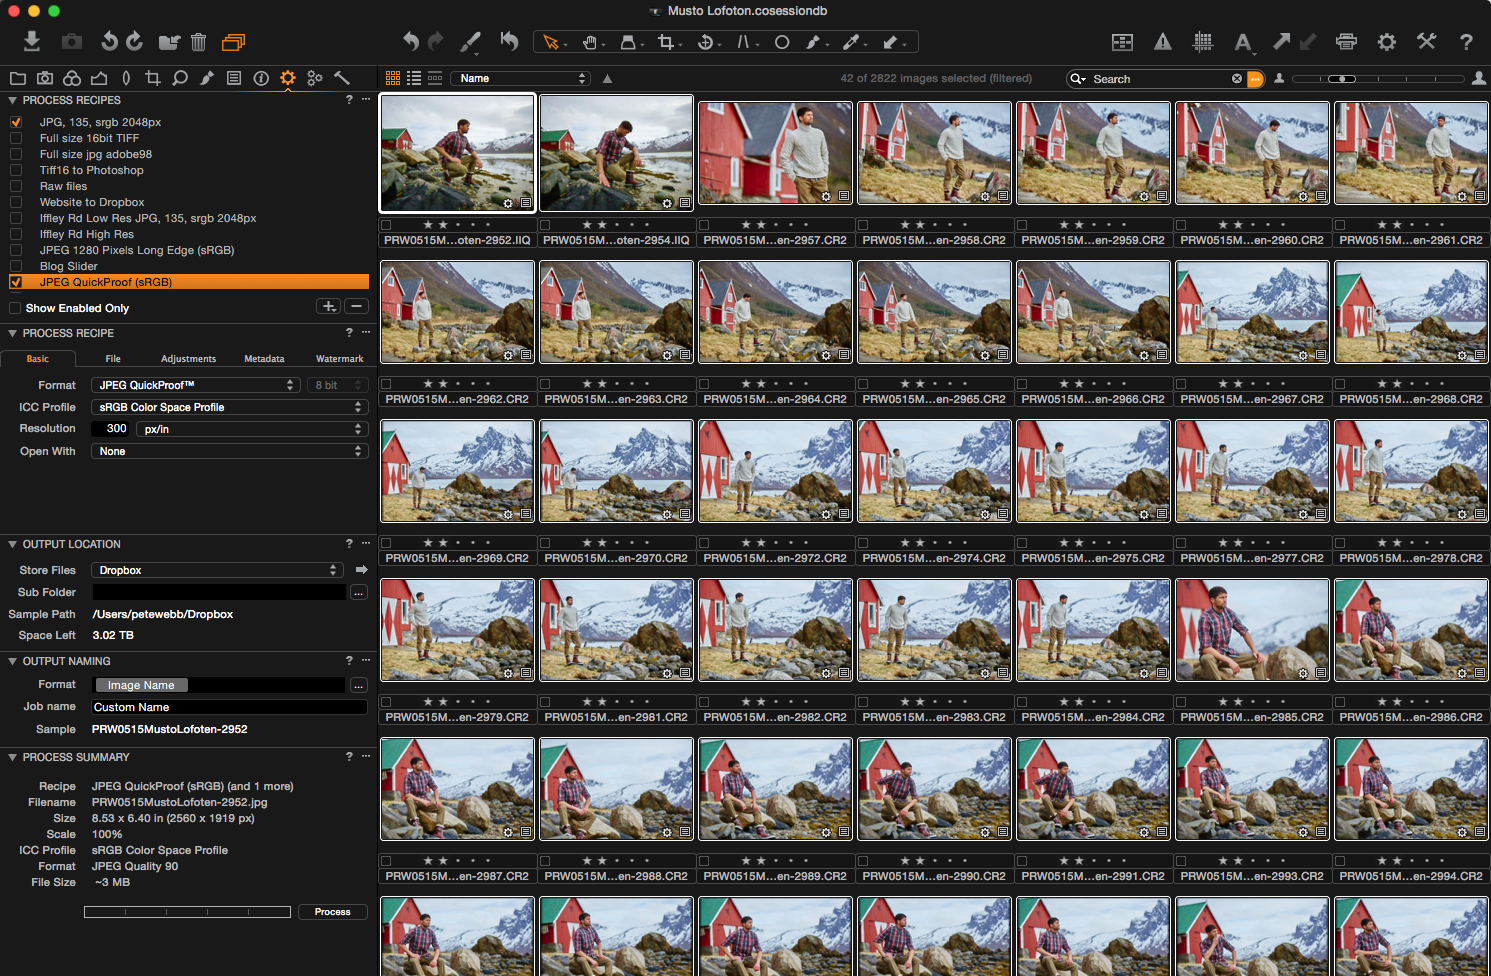
With all the images still selected, I would then go to the output tool and check the box for JPG Quickproof (srgb) and then output to Dropbox a set of low-res images for the client.
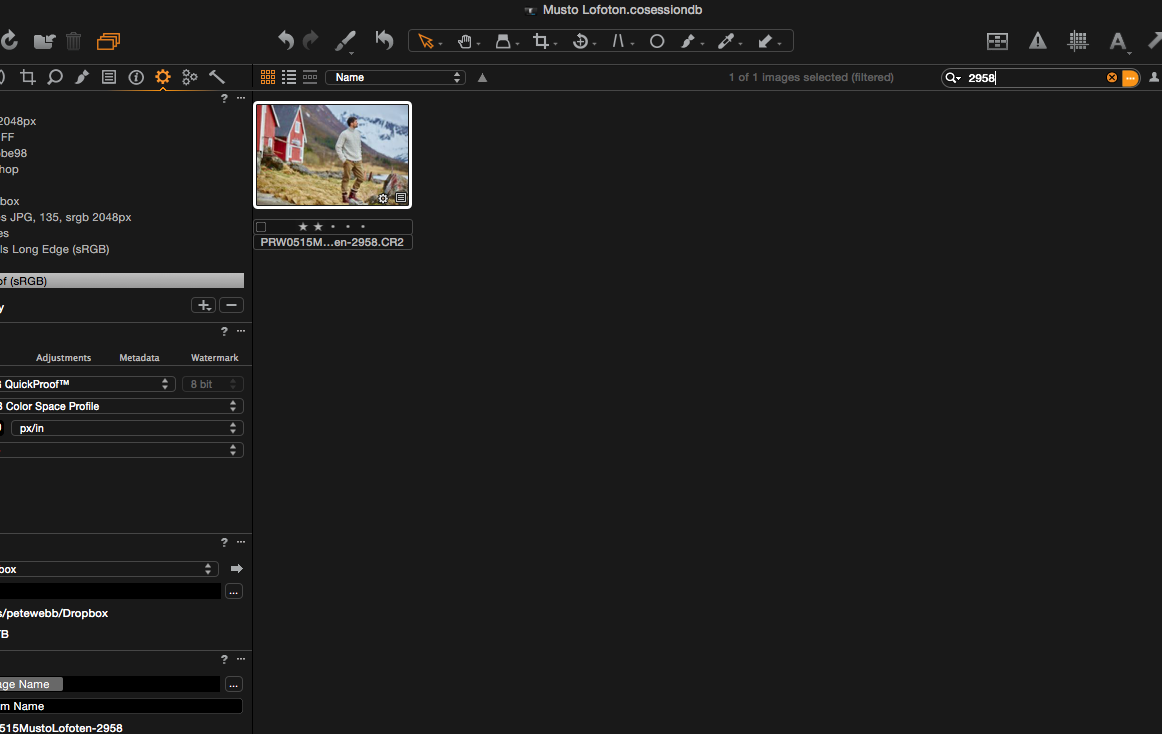
The client will then give me a list of image file names that I then type into the search bar and as each image loads, I rate it as one of their selects. Sometimes this can take half a day!
In the rating filter I bring up all of the selected images and reset them to the original RAW file, so I am removing the A auto setting I put on them for the low-res output.
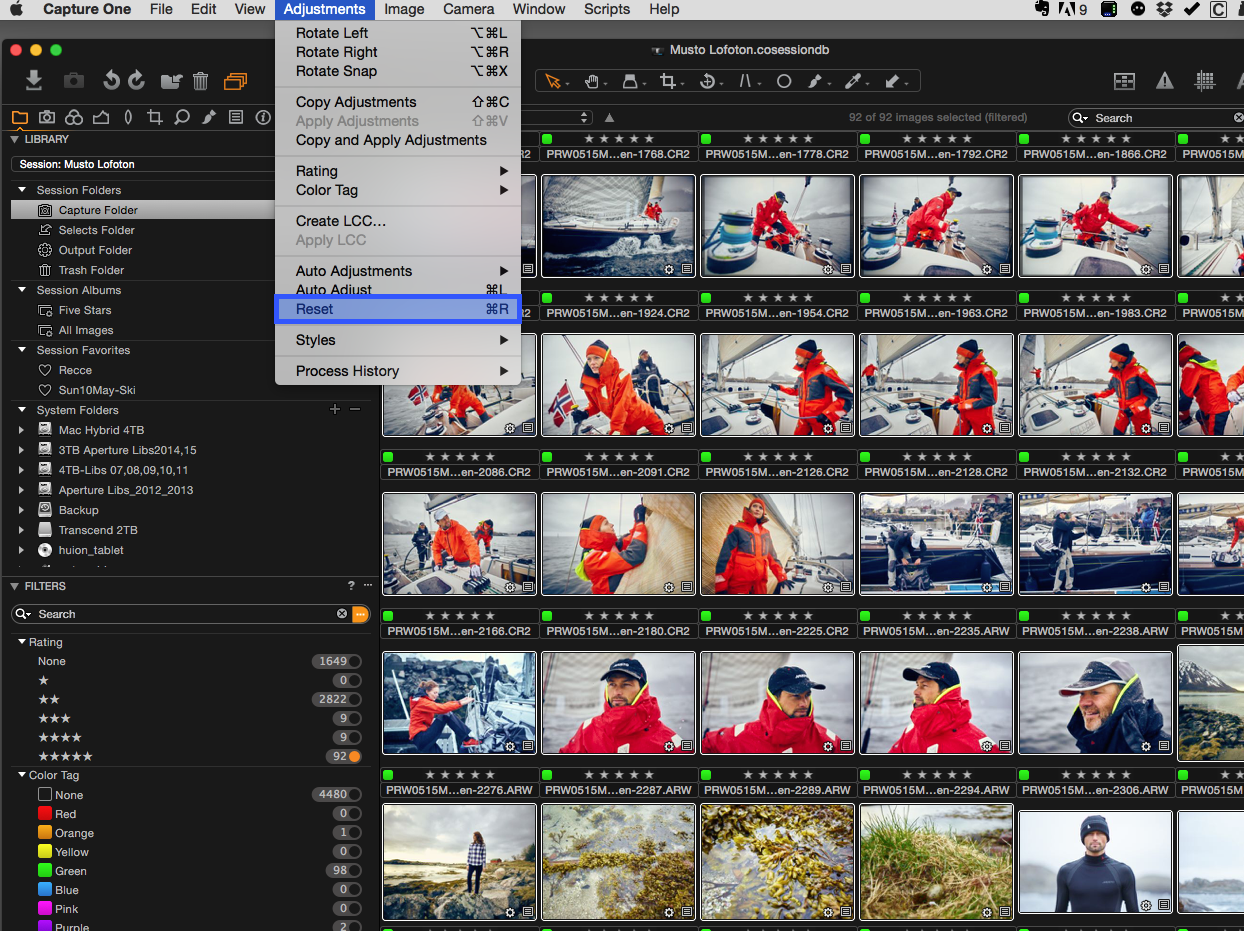
I would then do a selection of my own that feature images across the shoot under different lighting conditions. I do this because as I work on the color grading I need to see how it effects different images shot on different days under different light.
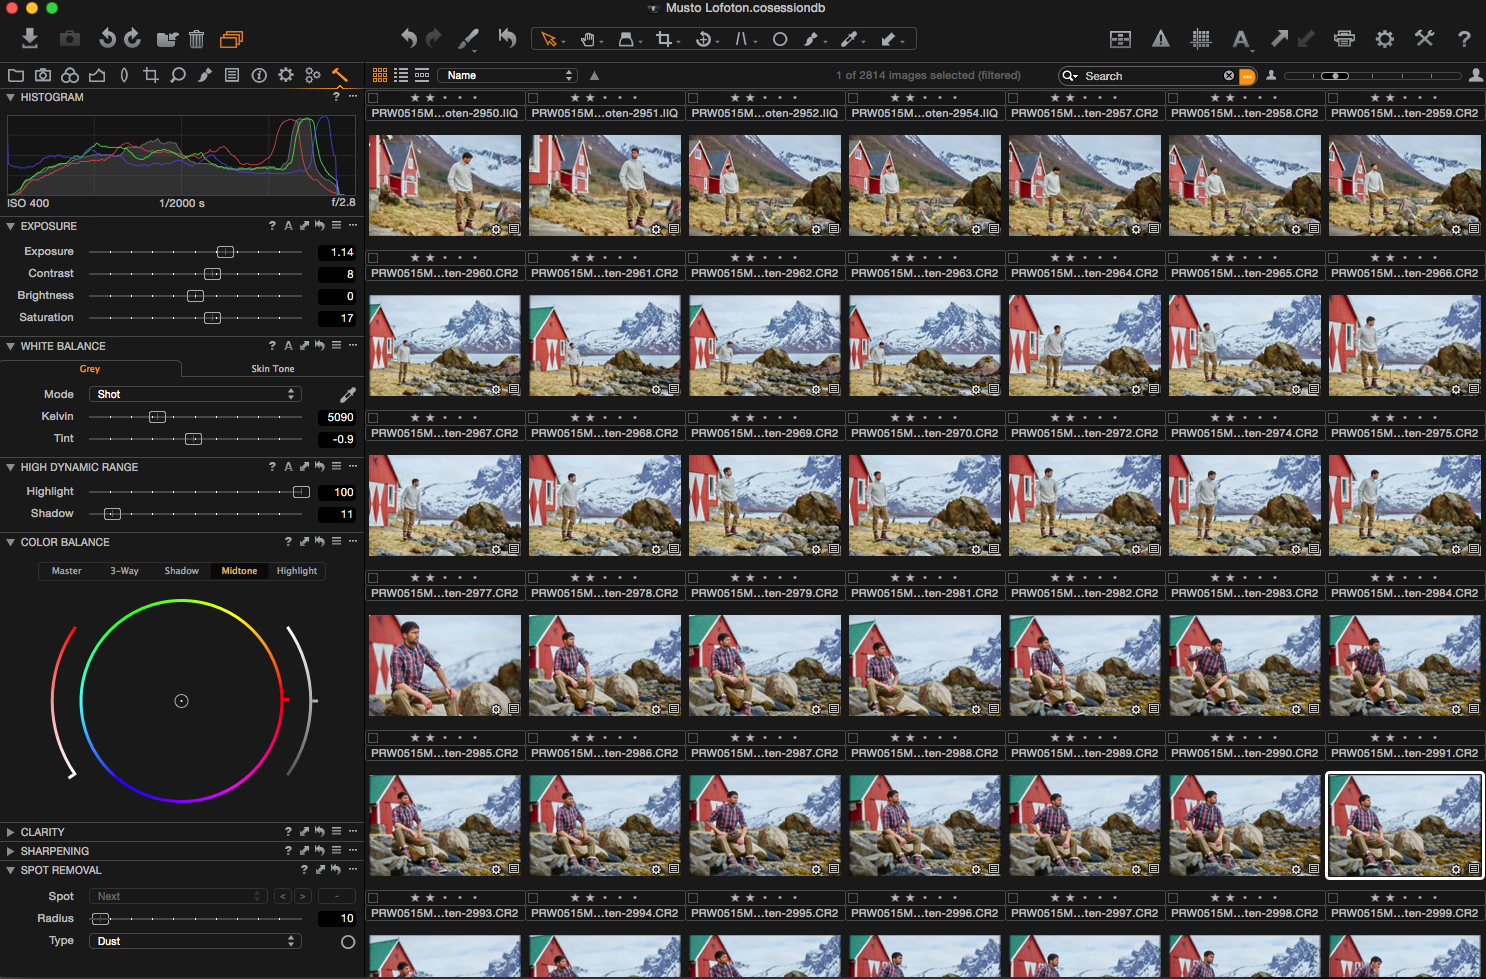
I have created my own Tool Tab, which is where I start to grade the first images. This Tool Tab has in this order: Histogram, Exposure, HDR, White Balance, Color Balance, Clarity , Sharpening, Vignetting and Spot removal.
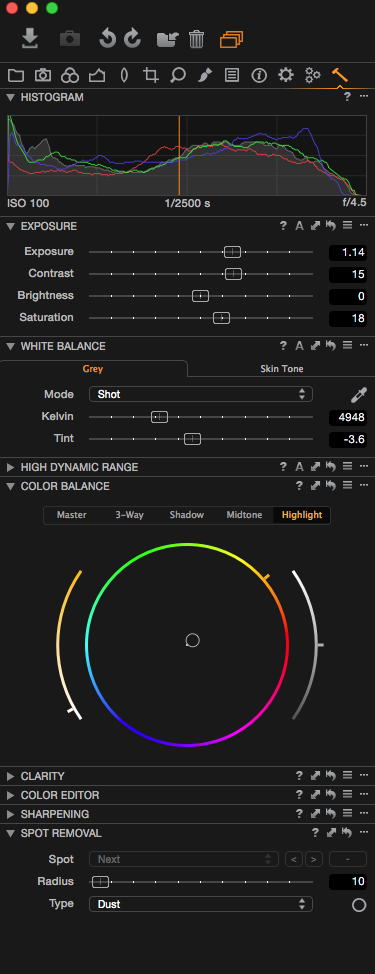
The first four tools I use to get the style of the image and these are the one’s that normally need tweaking across different lighting conditions.
Initially I would have something like six images to compare against, so once I have copied across a style that I save under Adjustments/ Styles/User Styles to an image, I would bring them all up next to each other in the Viewer and use my Tool Tab to get the grade balanced across the initial few images. Being able to do this is vital to color grading an entire shoot else making the images balance is impossible.
I would now have say six versions of my style on six images; from here I can copy the adjustment to batches of images shot under the same lighting conditions.
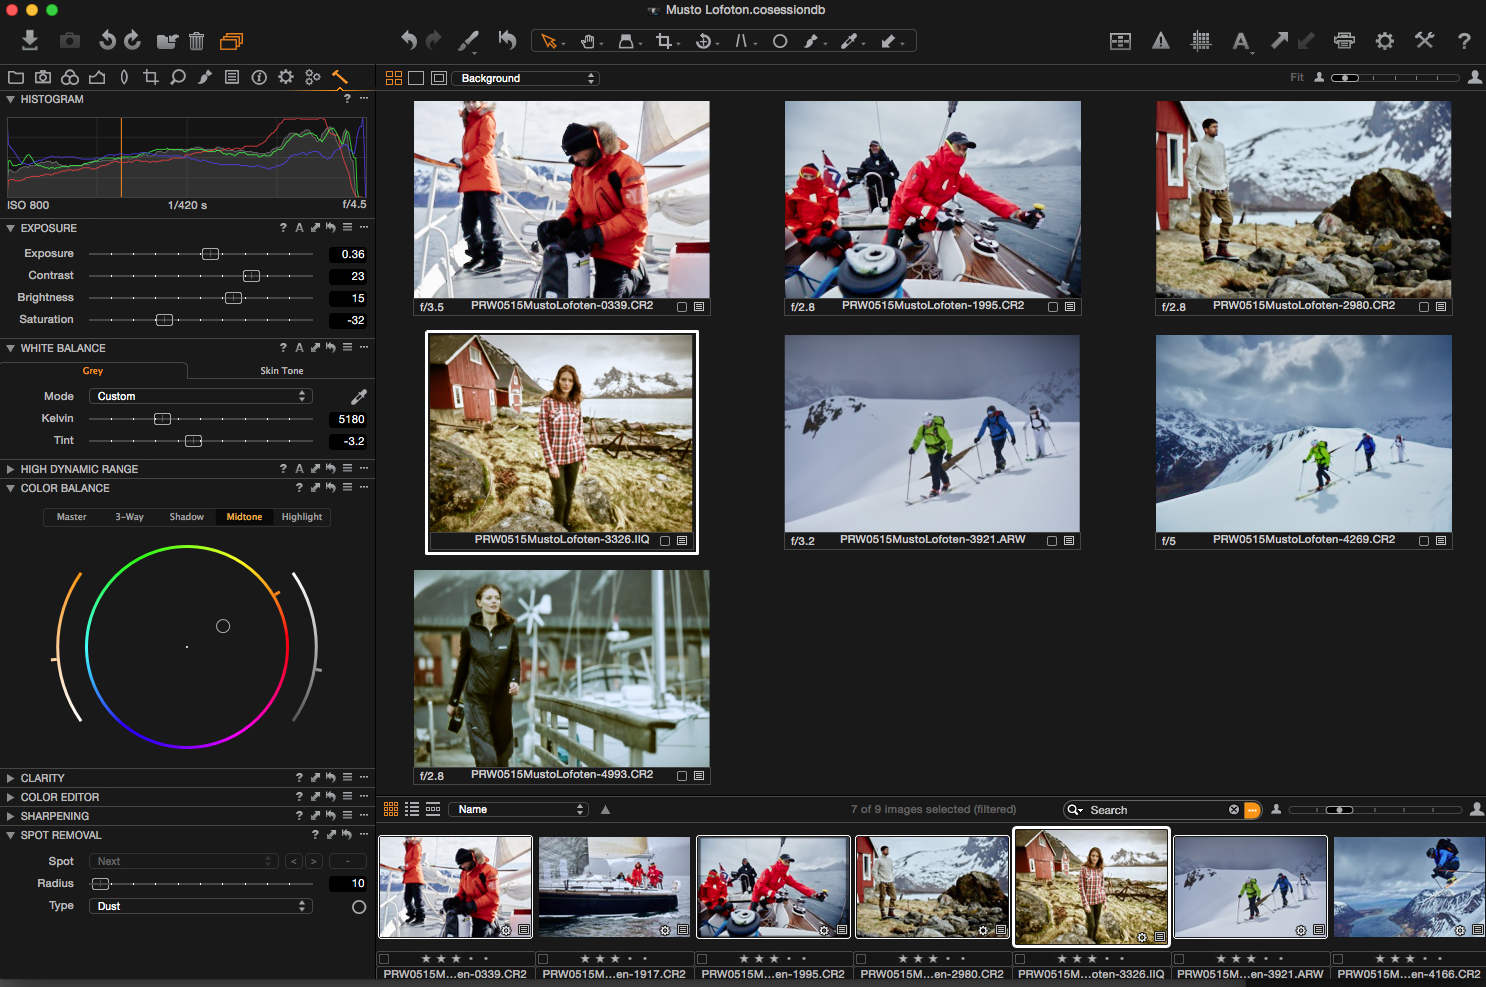
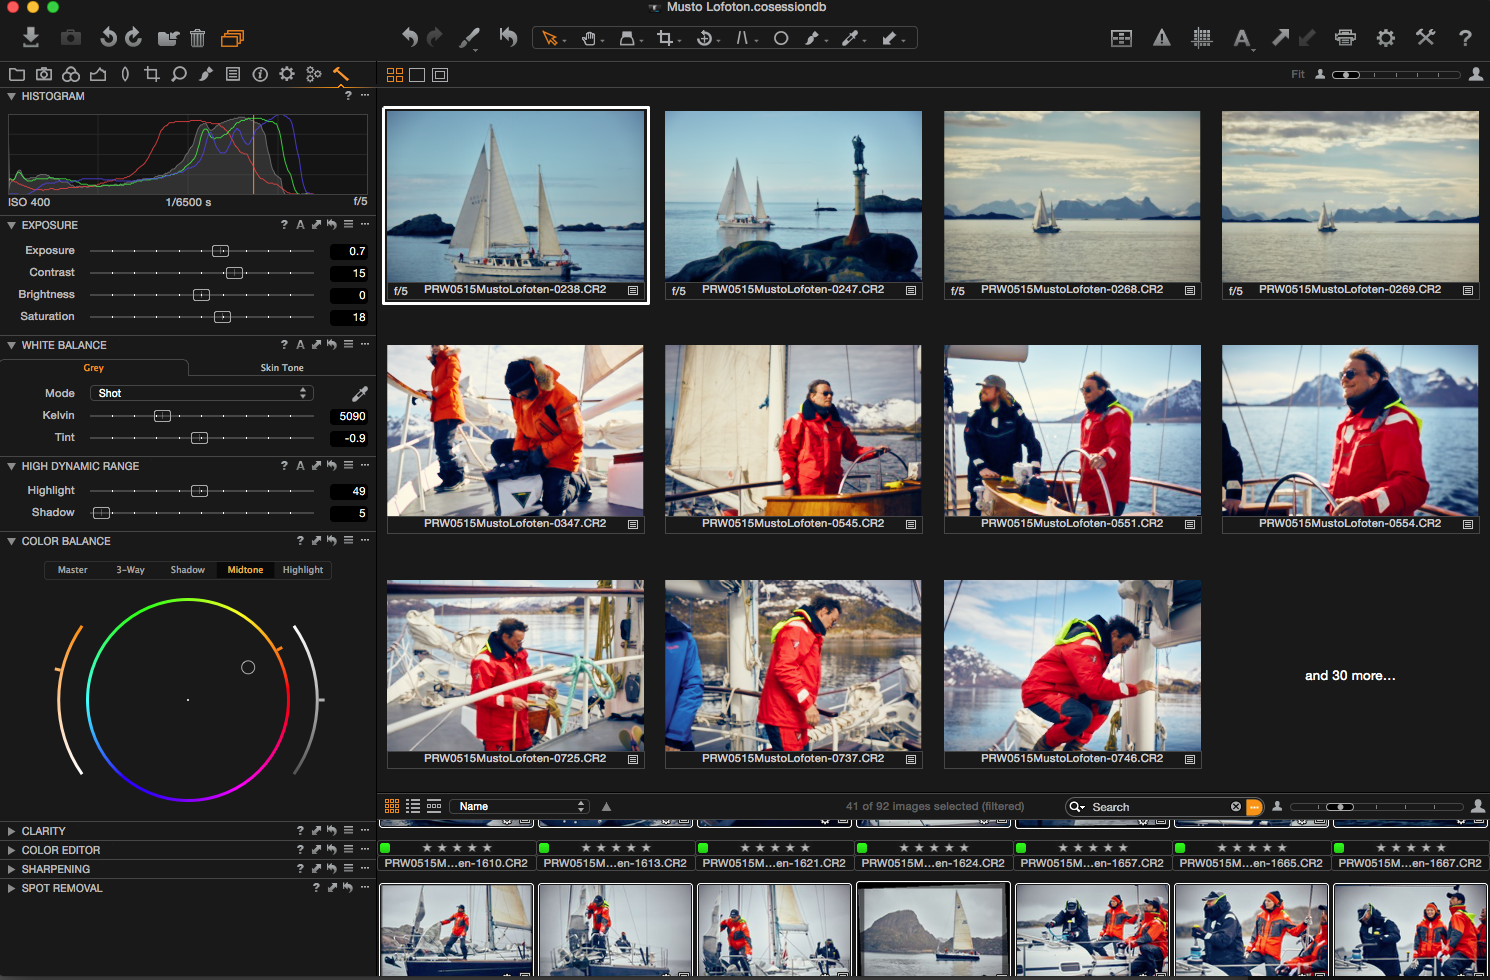
Once all the images have a color grade, I can then start to look at the entire set in the Viewer in multi view mode to make sure the whole set sit together and look like they are part of the same set making any adjustments as I compare.
All of this process used to take place outside of my RAW processor with a round trip to a third party piece of software, but now all the grading can take place in Capture One Pro 8 and only a trip to Photoshop is needed for retouching, which is a process that takes place after color grading and initial delivery.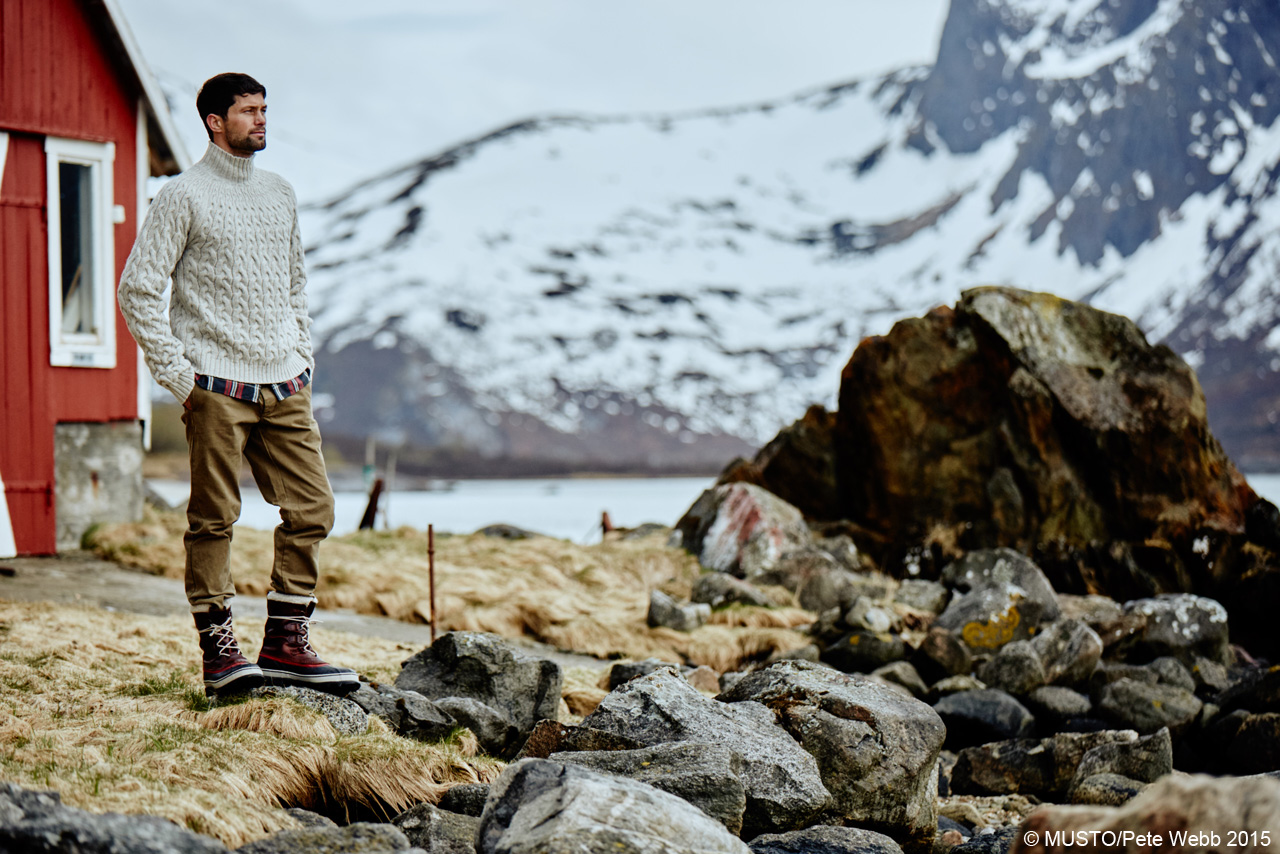 Shot on a completely overcast day with no directional light. Using the building as a flag.
All in all, if there was one tool in my workflow that allows me to deliver no matter what is thrown at me, it would be Capture One Pro 8. I would advise any photographer to give it I try.
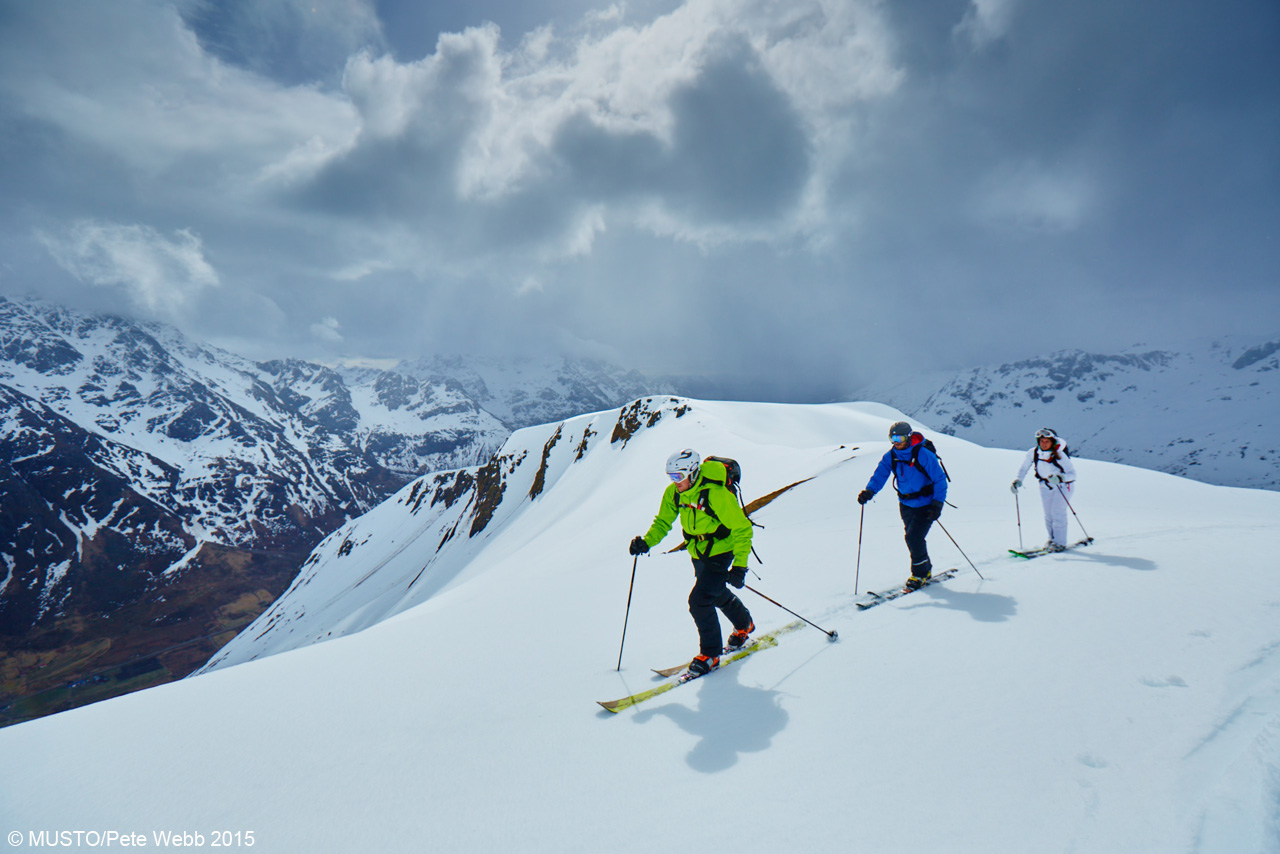
A very brief break in torrential rain and up here snow, but wait it out and the changing weather can deliver the best images.
Best regards,
Pete
Pete Webb
Pete Webb is one of Europe’s leading adventure, sport and lifestyle photographers. 25 years of working with the best athletes in challenging places and the ability to tell a story in pictures is why his work is sought after by the most discerning of clients.


Hello Pete,
I have to save you from what you stated sometimes can take a half a day… and that is getting your clients ratings back to you.
There is a really Wonderful.. and unique to Capture One Pro.
Its is detailed here:
https://blog.captureone.com/let-your-clients-approve-your-images-anywhere-in-the-world/
Basically you set up Capture One to be a file host and let your client browse and RATE the images remotely.
Viola!
I hope it helps.
Enjoyed your work. I hope you’ll enjoy mine.
Cheers,
~jj
Founder of
http://www.SixBeatsOfSeparation.com
I would like a booklet on capture one pro, as i cannot operate the capture one application as yet.
My photos from x100 m3 seem to be goint directly into my nikon nx-1 software. where am i going wron?.
thanks
S Z
Hi Stanley,
You can download a PDF written manual from help.phaseone.com
Or you could watch the tutorial videos..
David
You said sometimes it could take 1/2 a day to select images that your clients send you. I also use C1 for all my RAW processing, but I do keep Lightroom around for 2 things. One is printing, and the other is exactly what you’re doing. Selecting 30-40 images out of 100 (or more). I use a $5 plugin called photo list importer, http://www.photographers-toolbox.com/products/lightroomstatistics/photolistimporter/. You just copy the list your clients sends you into the importer screen, hit enter, and all the selected images are put in a smart collection. I then select all the images and move them to the Select folder and then go back into C1 to work on them some more! Takes just a few minutes!!
Just thought I’d throw that out there to help w/your workflow!
Warm Regards,
Lisa Schaaf