
Capture One Pro 7 has a remarkable tool for correcting perspective errors. In addition to complete manual control, Capture One Pro 7 gives you a unique and convenient tool that you can use to rectify the keystone error of an image. Keystone corrections in Capture One simulate a true optical keystone correction, similar to what you can achieve with a technical camera. Once the tool is applied in Capture One Pro 7, perspective errors will be corrected perfectly.
Both vertical and horizontal keystone can be corrected. These corrections can be applied at the same time or independently from one another.
Using the Keystone Tool in Capture One
By default, the Keystone Tool is located in the Composition Tool tab.

By dragging the Vertical, Horizontal, Amount and Aspect sliders you can control the keystone effects in an image. While dragging any slider, a grid is automatically placed over the image to help you align horizontal and vertical aspects.
 However, for a faster and extremely accurate correction it makes sense to use the Keystone Cursor tools. These can be selected at the bottom of the Keystone Tool, or from the cursor toolbar. When using the Keystone Cursor Tools we not only correct the keystone but we also correct for any horizontal misalignments of the camera.

The Keystone Tool can correct either vertical keystone, horizontal keystone or a combination of both. On our sample image we need to correct only for vertical keystone, but the principle is the same for images requiring horizontal keystone too.
Begin by selecting the appropriate keystone cursor. You will see vertical lines, horizontal lines or a combination of both imposed over the image depending on which cursor you choose. As I am correcting only for vertical keystone in the example below, we see only vertical lines.
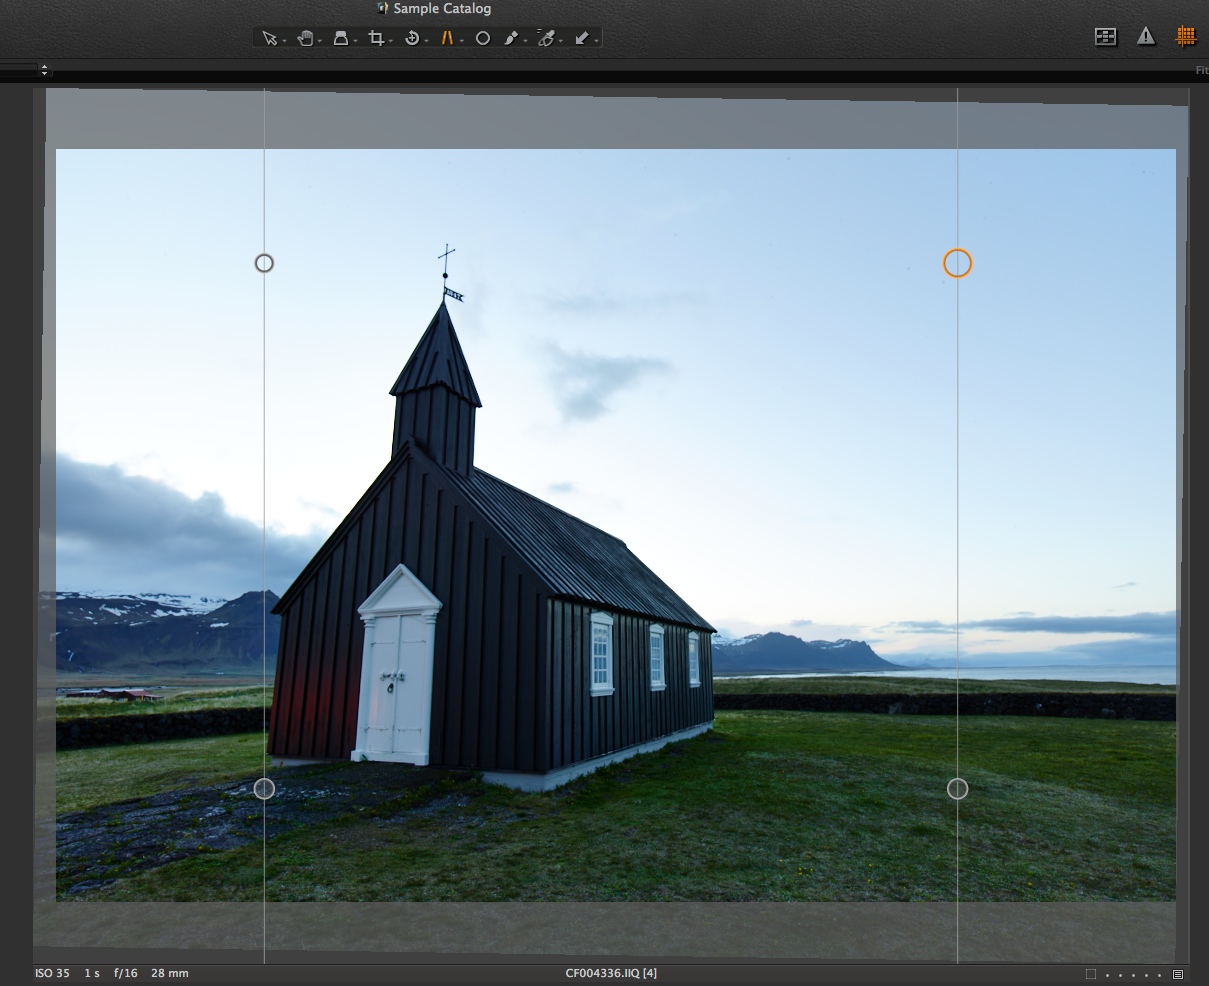 Once selected, simply align the two lines against the sides of the object to be corrected. Like this:
 Notice that the ‘Apply’ button has appeared in the centre of the screen. Click this to complete the correction.
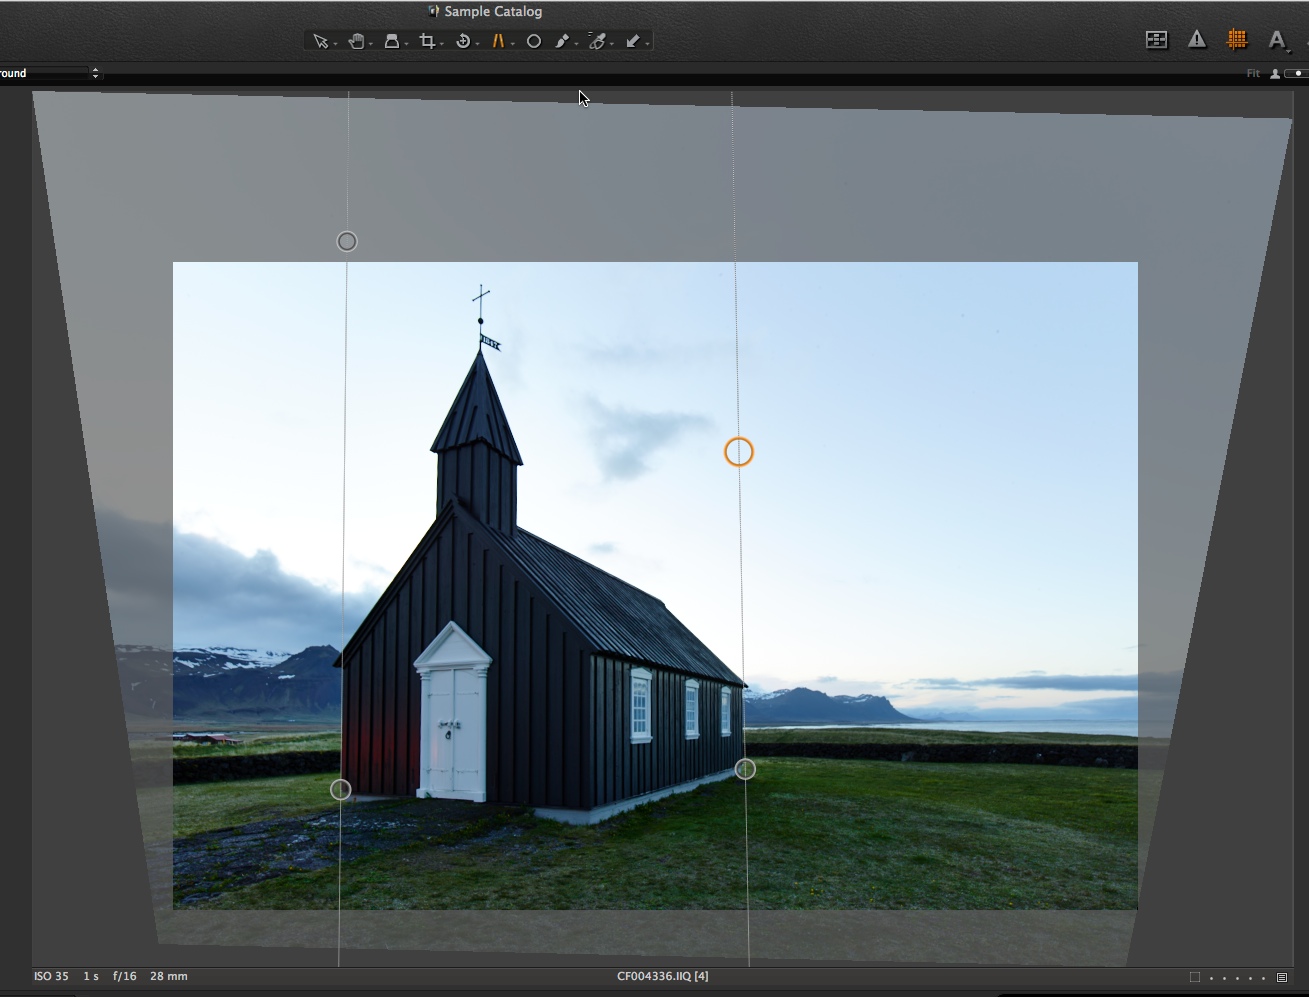 In a snap, we have an excellent correction of the vertical keystone.
If we examine the Keystone Tool once more, we can see that values have been calculated for the Vertical and Horizontal fields. By default the ‘Amount’ field is always set to 80% when using the Keystone Cursor Tool for vertical corrections as this gives a more natural looking correction than the ‘perfect’ 100% correction. However, you can adjust this amount to your taste.
If you think the correction has changed the appearance of the aspect ratio a little too much, you can use the Aspect slider to edit the effects.
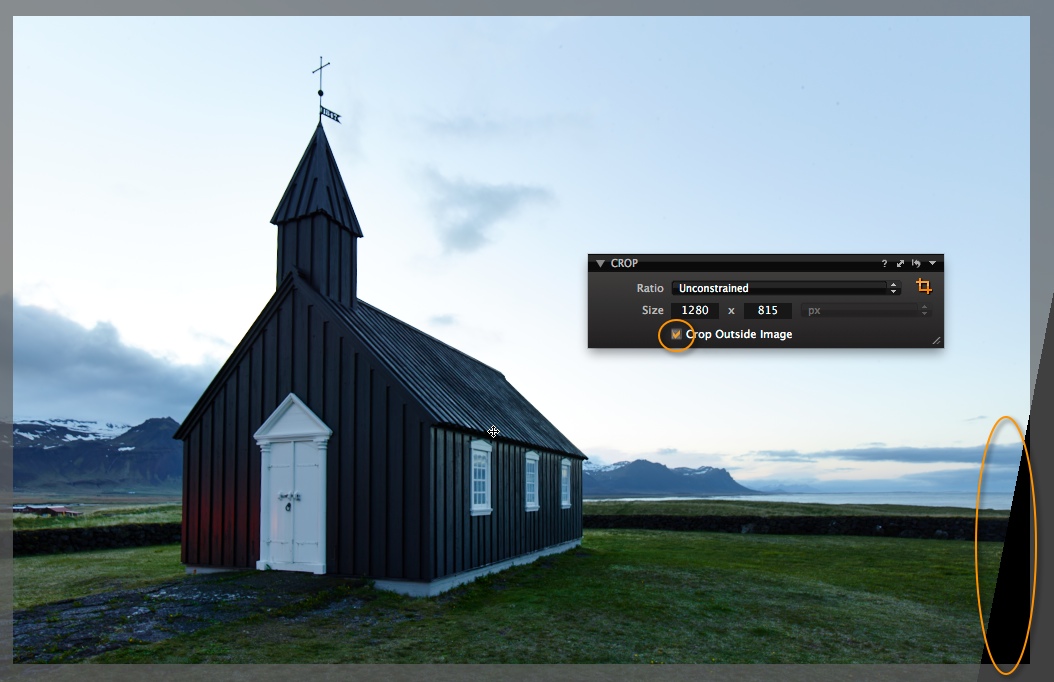
If the correction needs to be quite strong, you may find the option ‘Crop Outside Image’ useful in the Crop Tool. This will allow you to drag the crop beyond the boundaries of the image area, in case you want to use something like Content Aware in Photoshop to add more to the image.
All the best,
Niels

The Image Quality Professor
The digital pioneer, Niels V. Knudsen, is Phase One’s Image Quality Professor and founder of the IQP blog. Moreover, he is responsible for breakthrough advancements in image quality both in Phase One’s medium format camera systems and in Capture One Pro.


