NOTE: This article discusses an older version of Capture One Pro. To learn more about our latest version, click here.
Photographer Paul Reiffer walks us through 4 key updates in the newest Capture One 21 release, and how they’ve elevated his workflow.
It’s time to say hello to the very newest version of Capture One photo editing software –Capture One 21.
2020 will be an unforgettable year for many reasons – as photographers, many of us have finally found the time to go through old images, and looked to editing them once again with fresh eyes and the latest tools.
So given the extra advances that already hit our screens in in version 20.1 earlier this year, it’s great to see the team at Capture One continuing to improve the photo editing system that gives me the best possible output from my efforts to capture the world.
With version 21, the team have presented four main updates:
- Dehaze
- Speed Edit
- ProStandard ICC Profiles
- Catalog & Import improvements
In this post, we’re going to explore each of these, and how they will transform your photo editing workflow going forward.
Dehaze
Haze comes in many forms, from pollution, to marine fog, to city glare and many more, and for that reason we often need to use different tools to deal with each haze situation.
So, I’ll admit I was skeptical about the capabilities of a new one-slider “dehaze” feature. However, I’ve found the Dehaze tool can be a really useful addition to our toolbox of editing functions.
- What the Dehaze tool is not: A one-click magic wand that delivers perfect results from an image shot in less–than–perfect conditions.
- What the Dehaze tool is: A fast and efficient way of reducing different types of haze by a reasonable amount, allowing you to make fine adjustments with other tools for tuning and refinement.
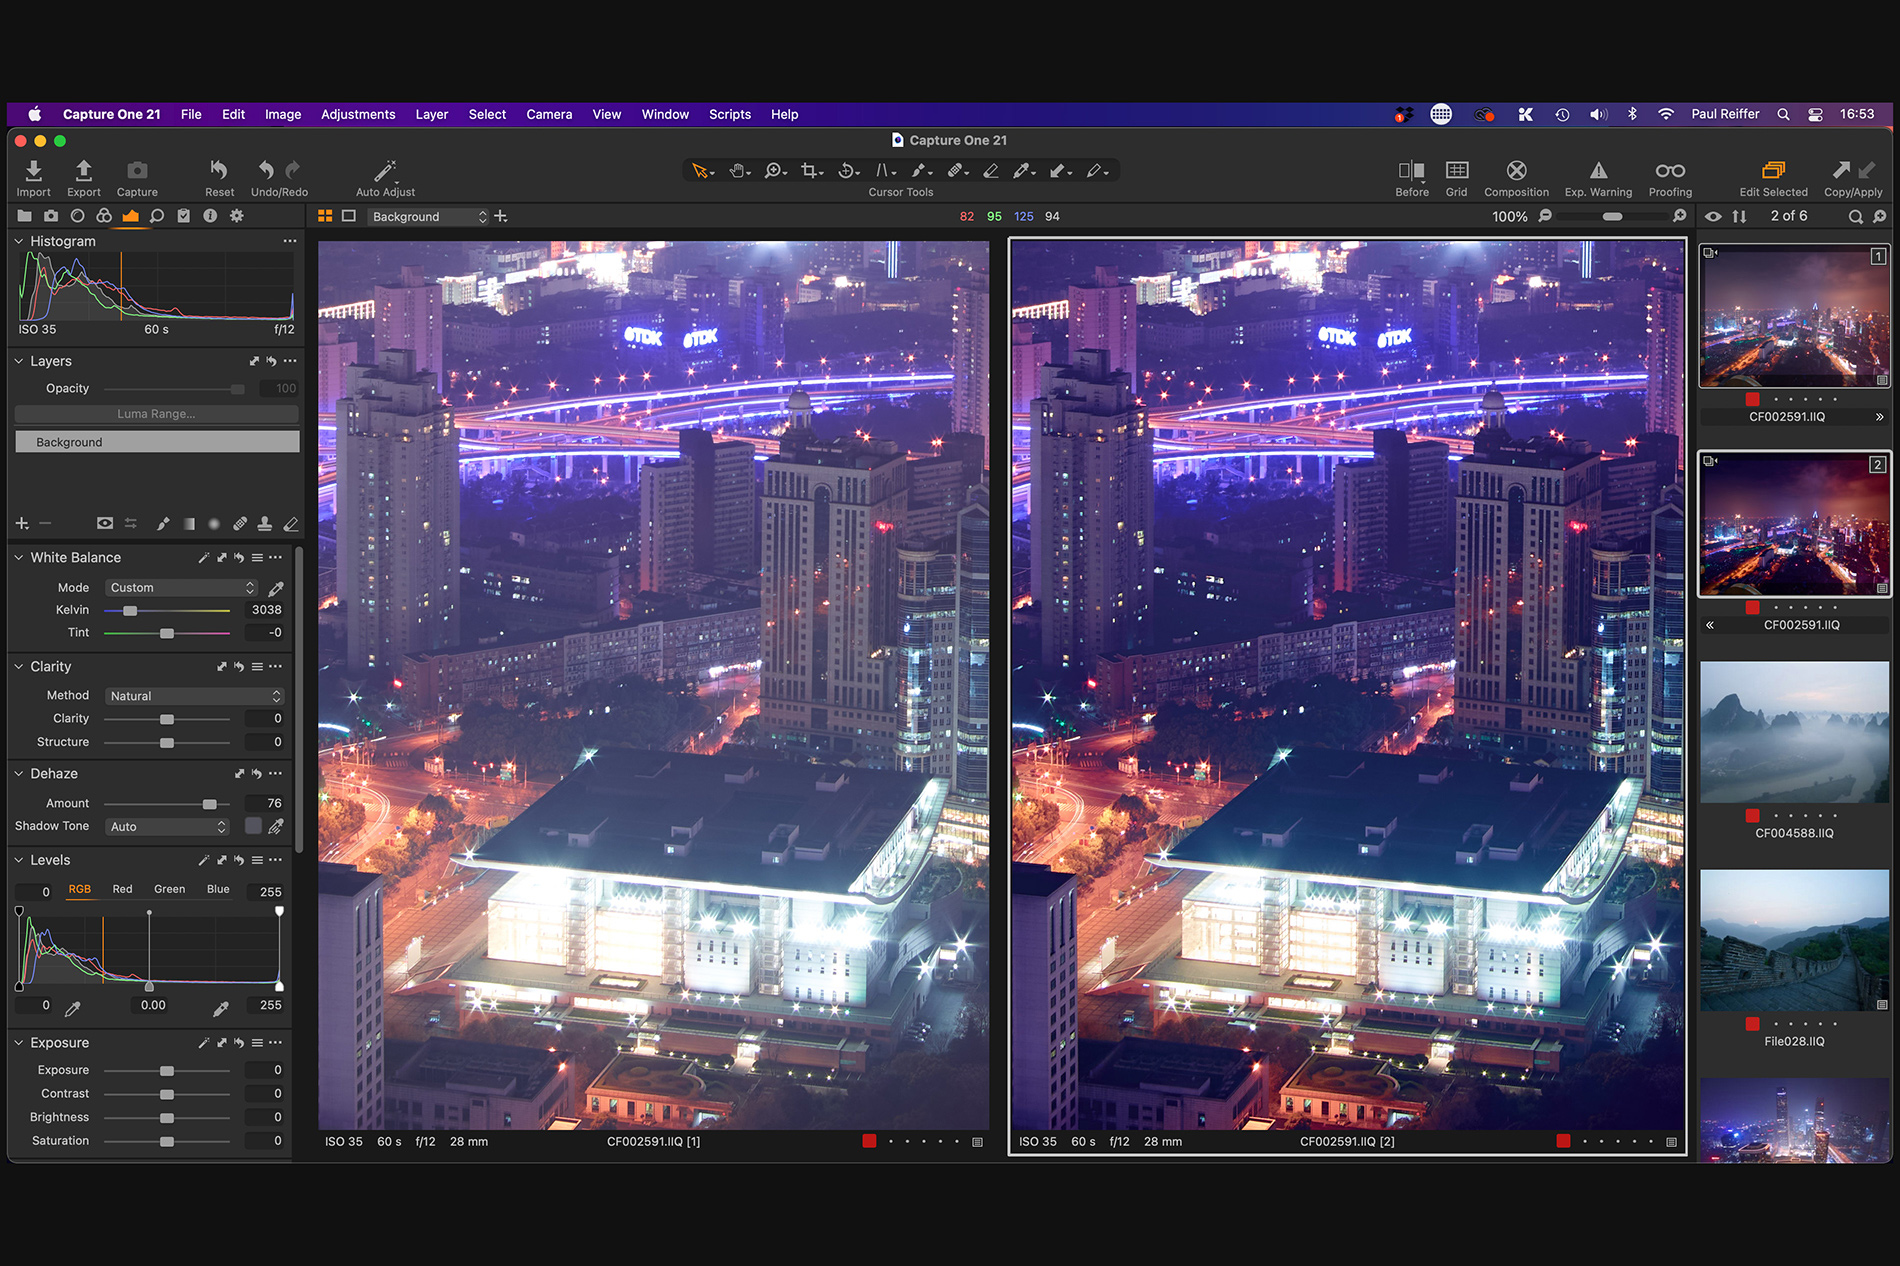
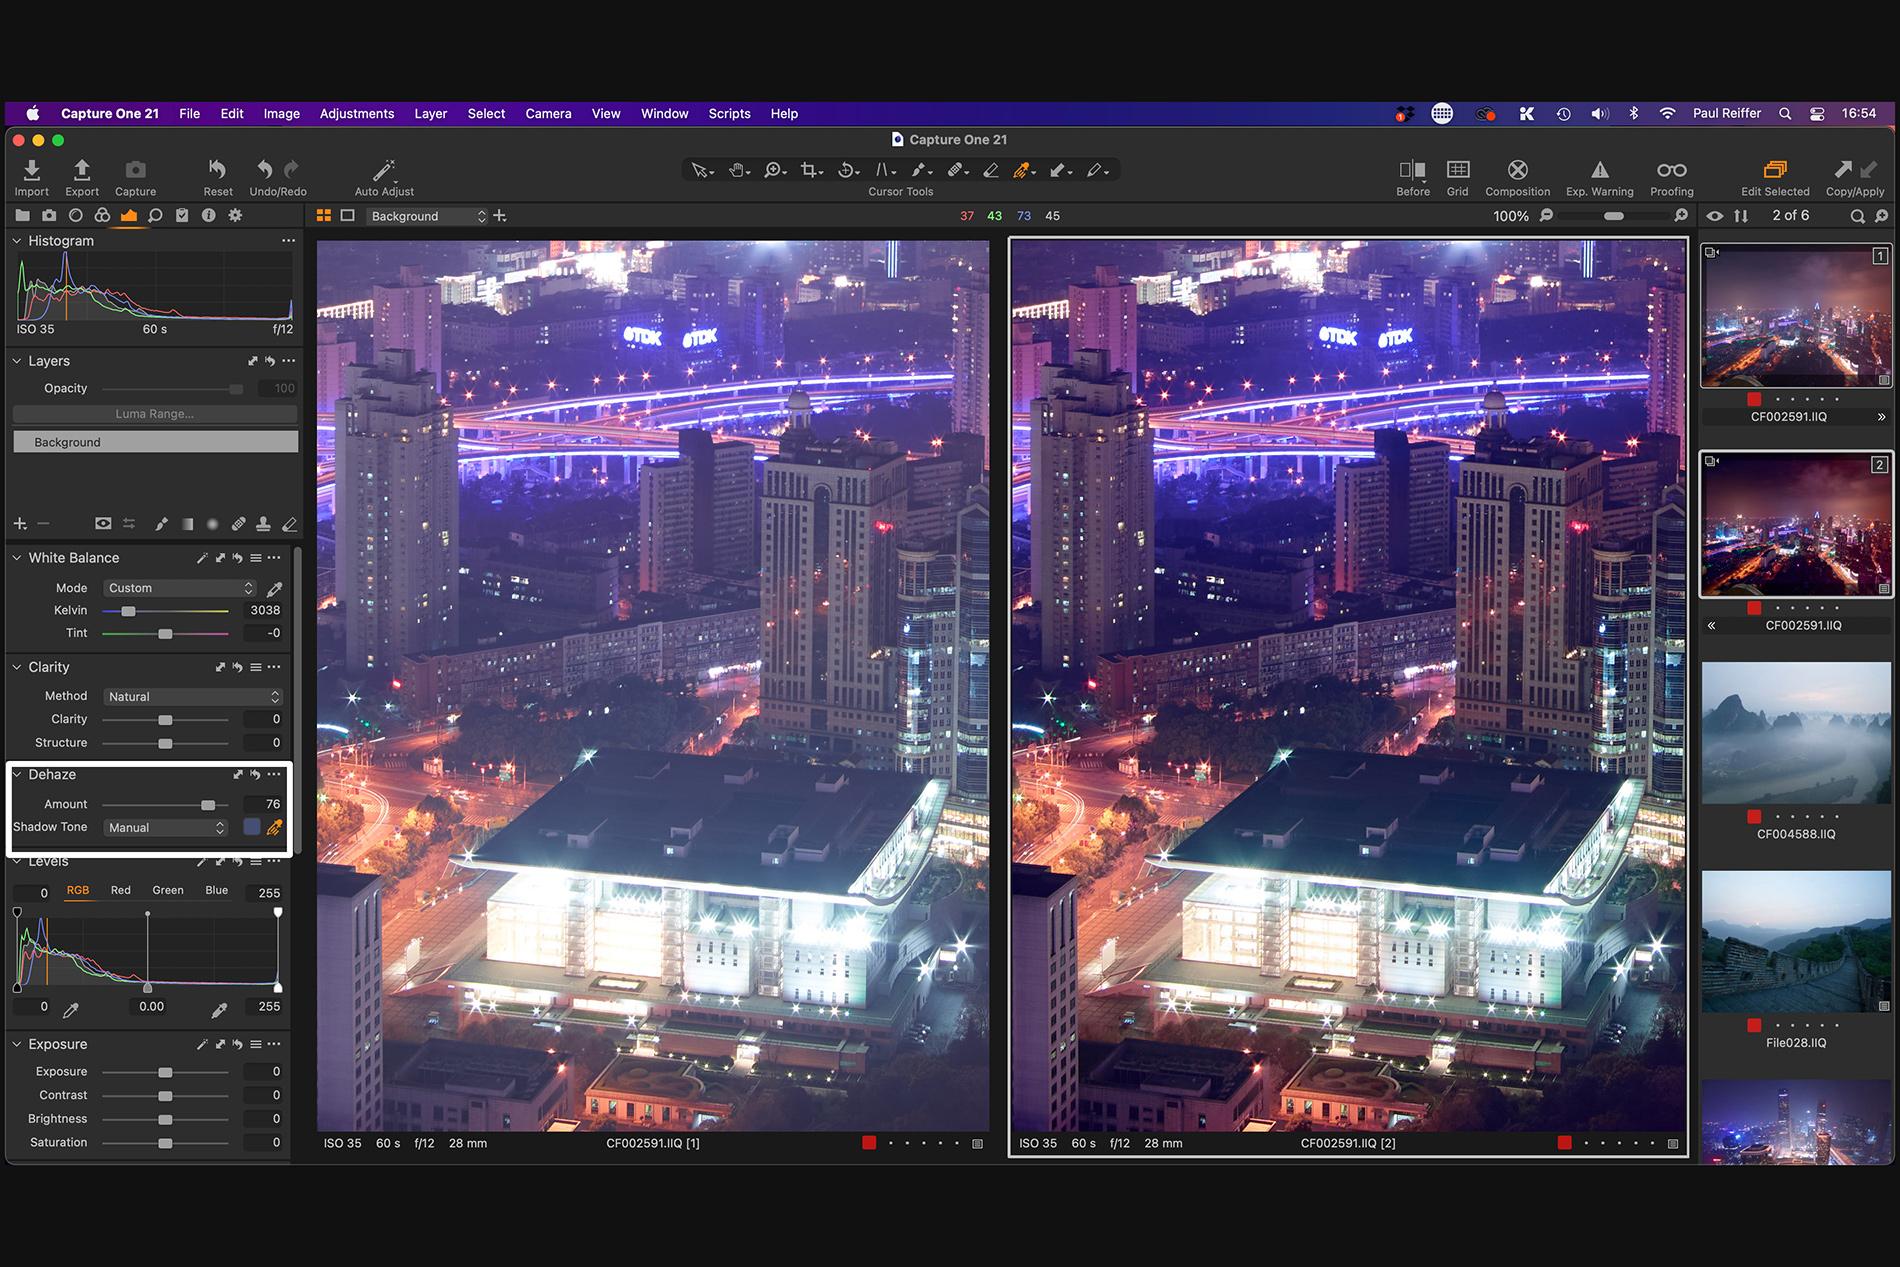
One really exciting aspect of the new Dehaze tool is the “Shadow Tone” picker.
Sure, you can use the “Auto” setup and slide the numbers along to see the difference, but if you look closely in any complex scene, you’ll notice that while it’s cutting out the unwanted haze, it might also be cutting out some of the details too.
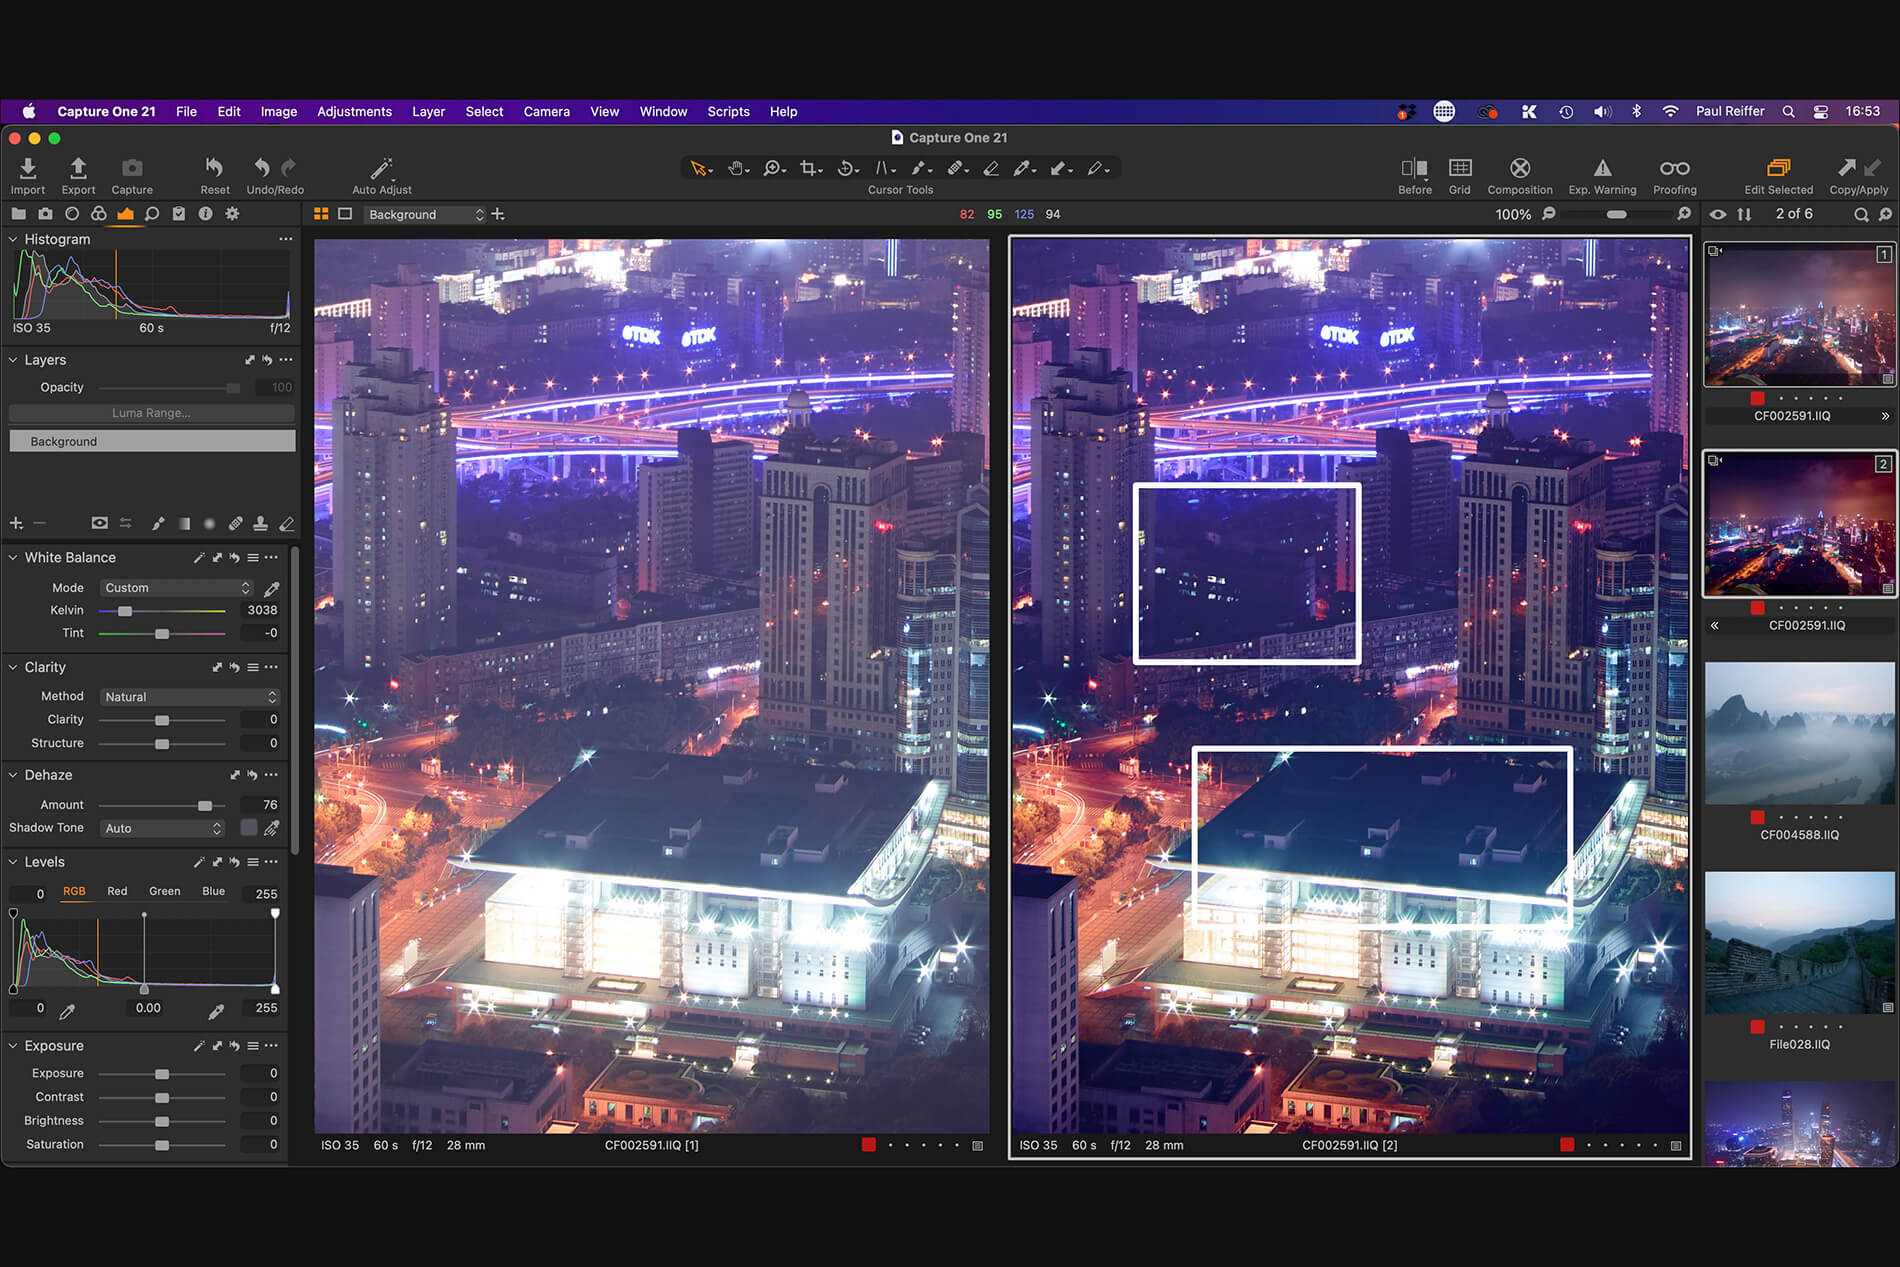 However, by using the Shadow Tone picker we can tell Capture One to focus its efforts on reducing a particular tone of haze, delivering far superior results.
It’s quick to get the hang of – just select an area in the shadows which has been affected by the haze you’re trying to remove, and you’ll see results which are better tuned to your specific image, especially if there is quite a variance in the brightness of different areas:
 Now of course, if we want to get the very best out of that shot, we might also consider adding some Clarity and HDR recovery to really help it “pop”, but with a few simple clicks, we’ve improved the image significantly, without touching Curves or Levels even once.
 It’s that Shadow Tone Picker that really comes into its own when dealing with the different scenarios that we shoot over time.
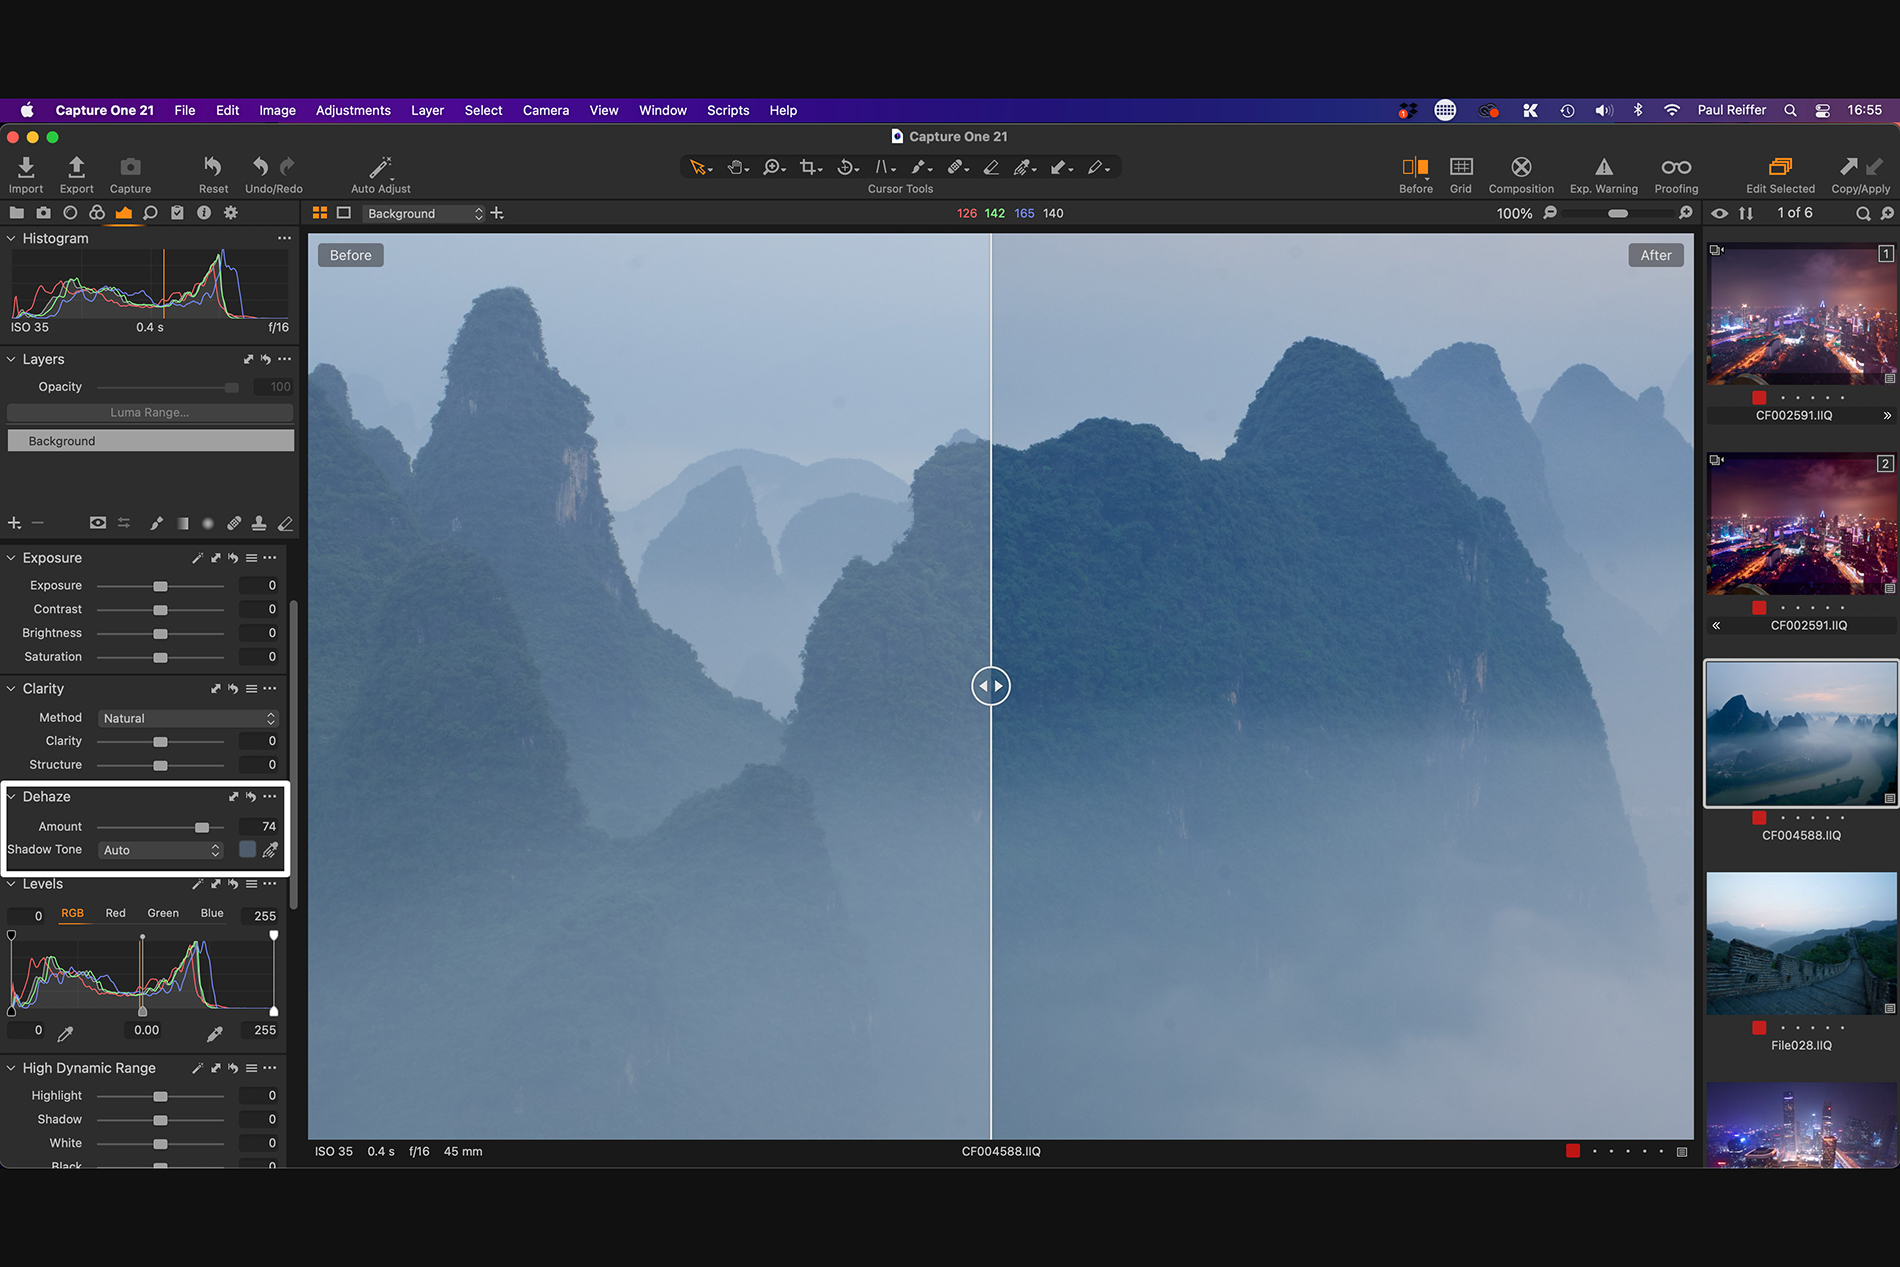
In a city, you might find the resulting image is a little darker than you expected – mostly because the haze was also brightening up the scene. In the mountains, you may find a slight colour-cast creeping in if left to decide for you in “auto” mode:
 But in each and every case, if you’re not happy with the auto result, a quick click onto the shadow area in your shot will bring you right back to a clearer image as a starting point, having used only the Dehaze tool to get going.
 And of course, a final touch of clarity will also help boost any areas you feel could use a little more contrast too:
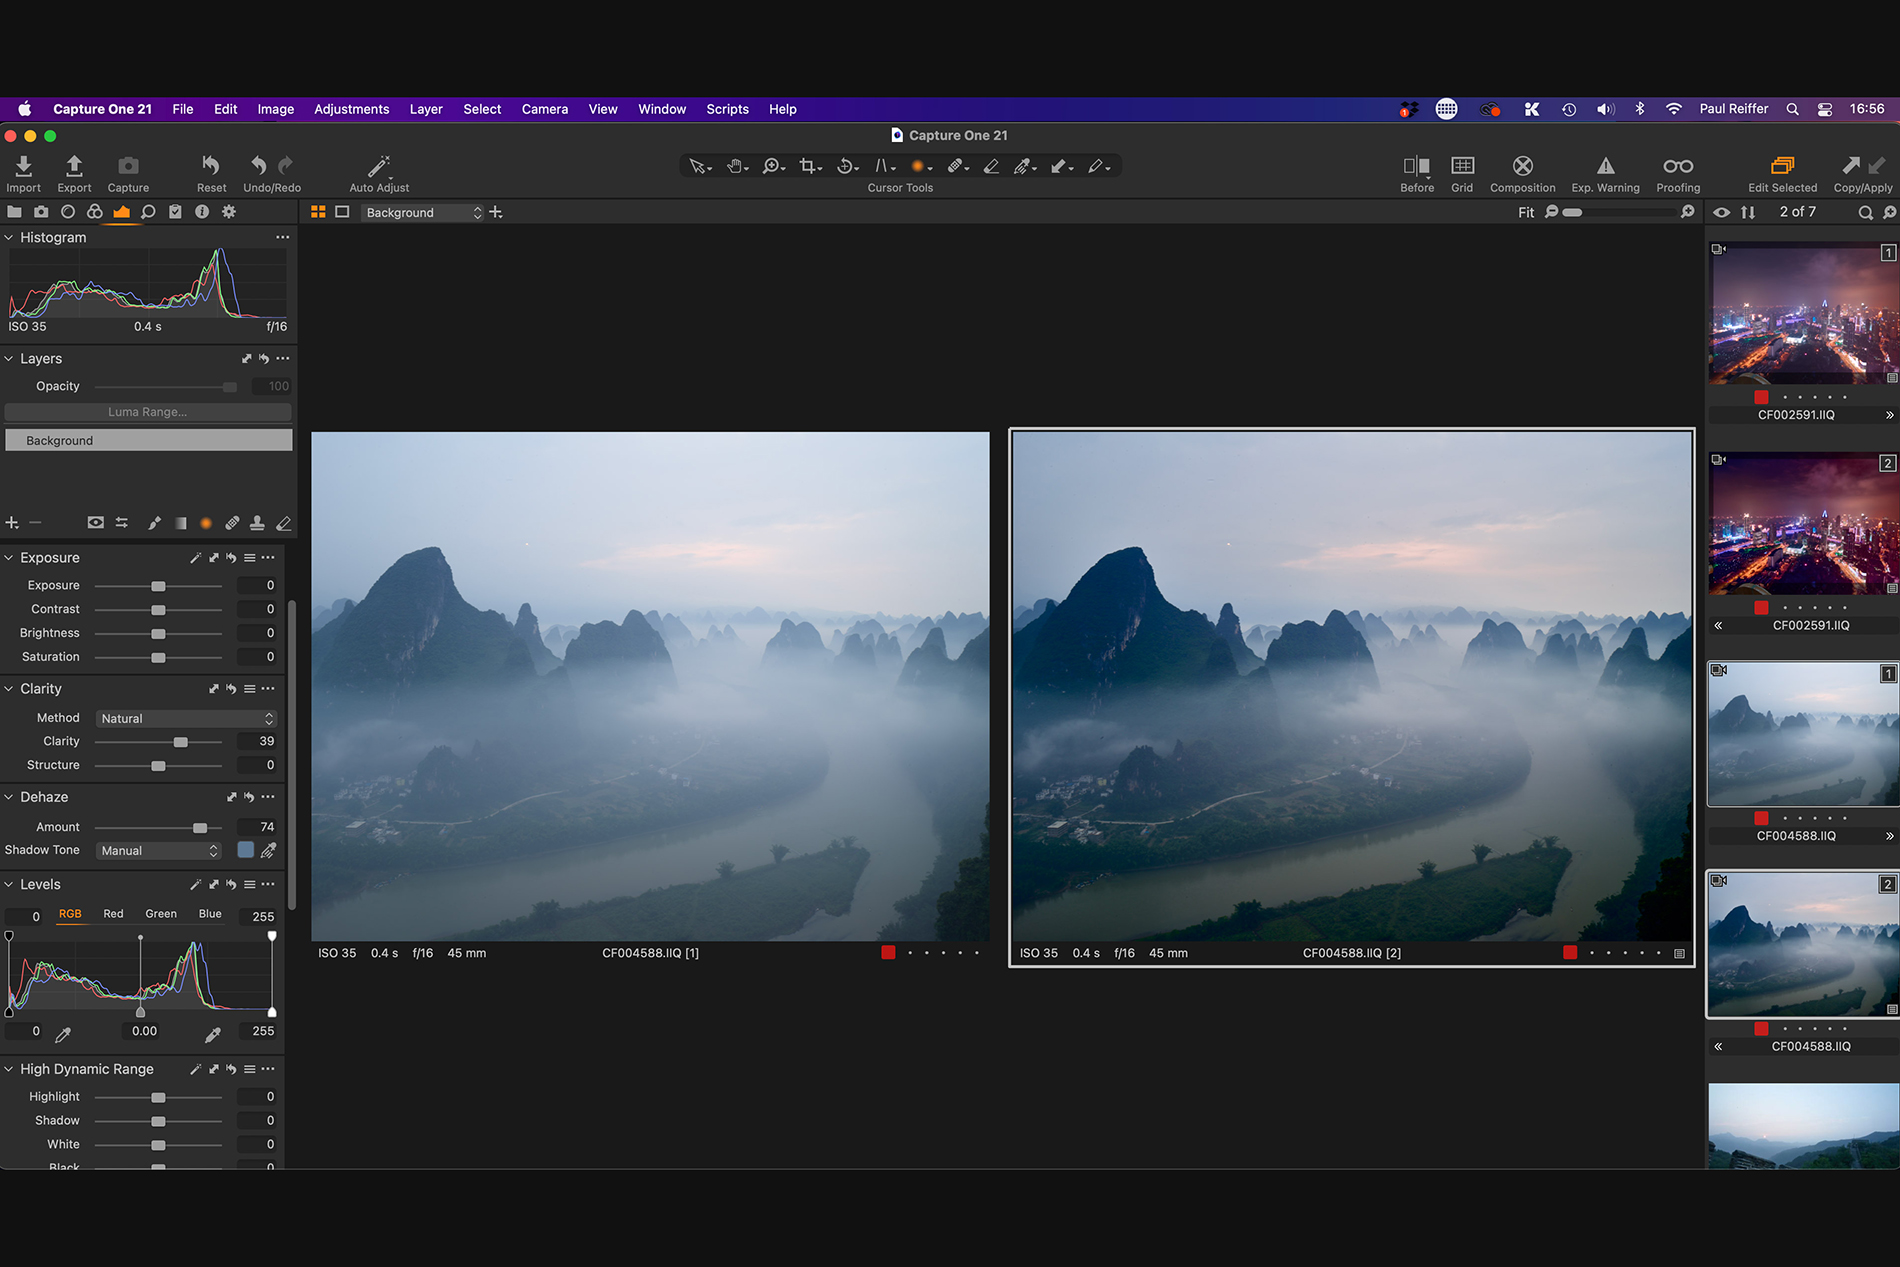 Now that’s all good for removing haze – but what if we want to add even more to a scene?
Well, those with a keen eye will have noticed that this is one of the midpoint slider tools in Capture One, meaning it can go to positive and negative values.
 Add a new layer, paint a mask, set that layer to a negative Dehaze amount and the results can be quite impressive indeed. (Yes, we’ve just “painted in” extra fog…!)
![]() Let’s just all go a little easy on the effects though, right? After all, the goal is always to get us back to what we actually saw!
Let’s just all go a little easy on the effects though, right? After all, the goal is always to get us back to what we actually saw!
Speed Edit
Speed Edit truly is a game-changer for photographers who edit large volumes of images, but I’ve also found it really useful for my own workflow, which involves selecting just a few images from any one shoot and editing 1 or 2.
The longer I’ve have Speed Edit available, the more and more I find myself using it. Not only is Speed Edit handy for editing multiple images in something like a time-lapse series, but I’ve found myself using it to allow me to make minor adjustments without having to take my eyes off the image or screen itself.
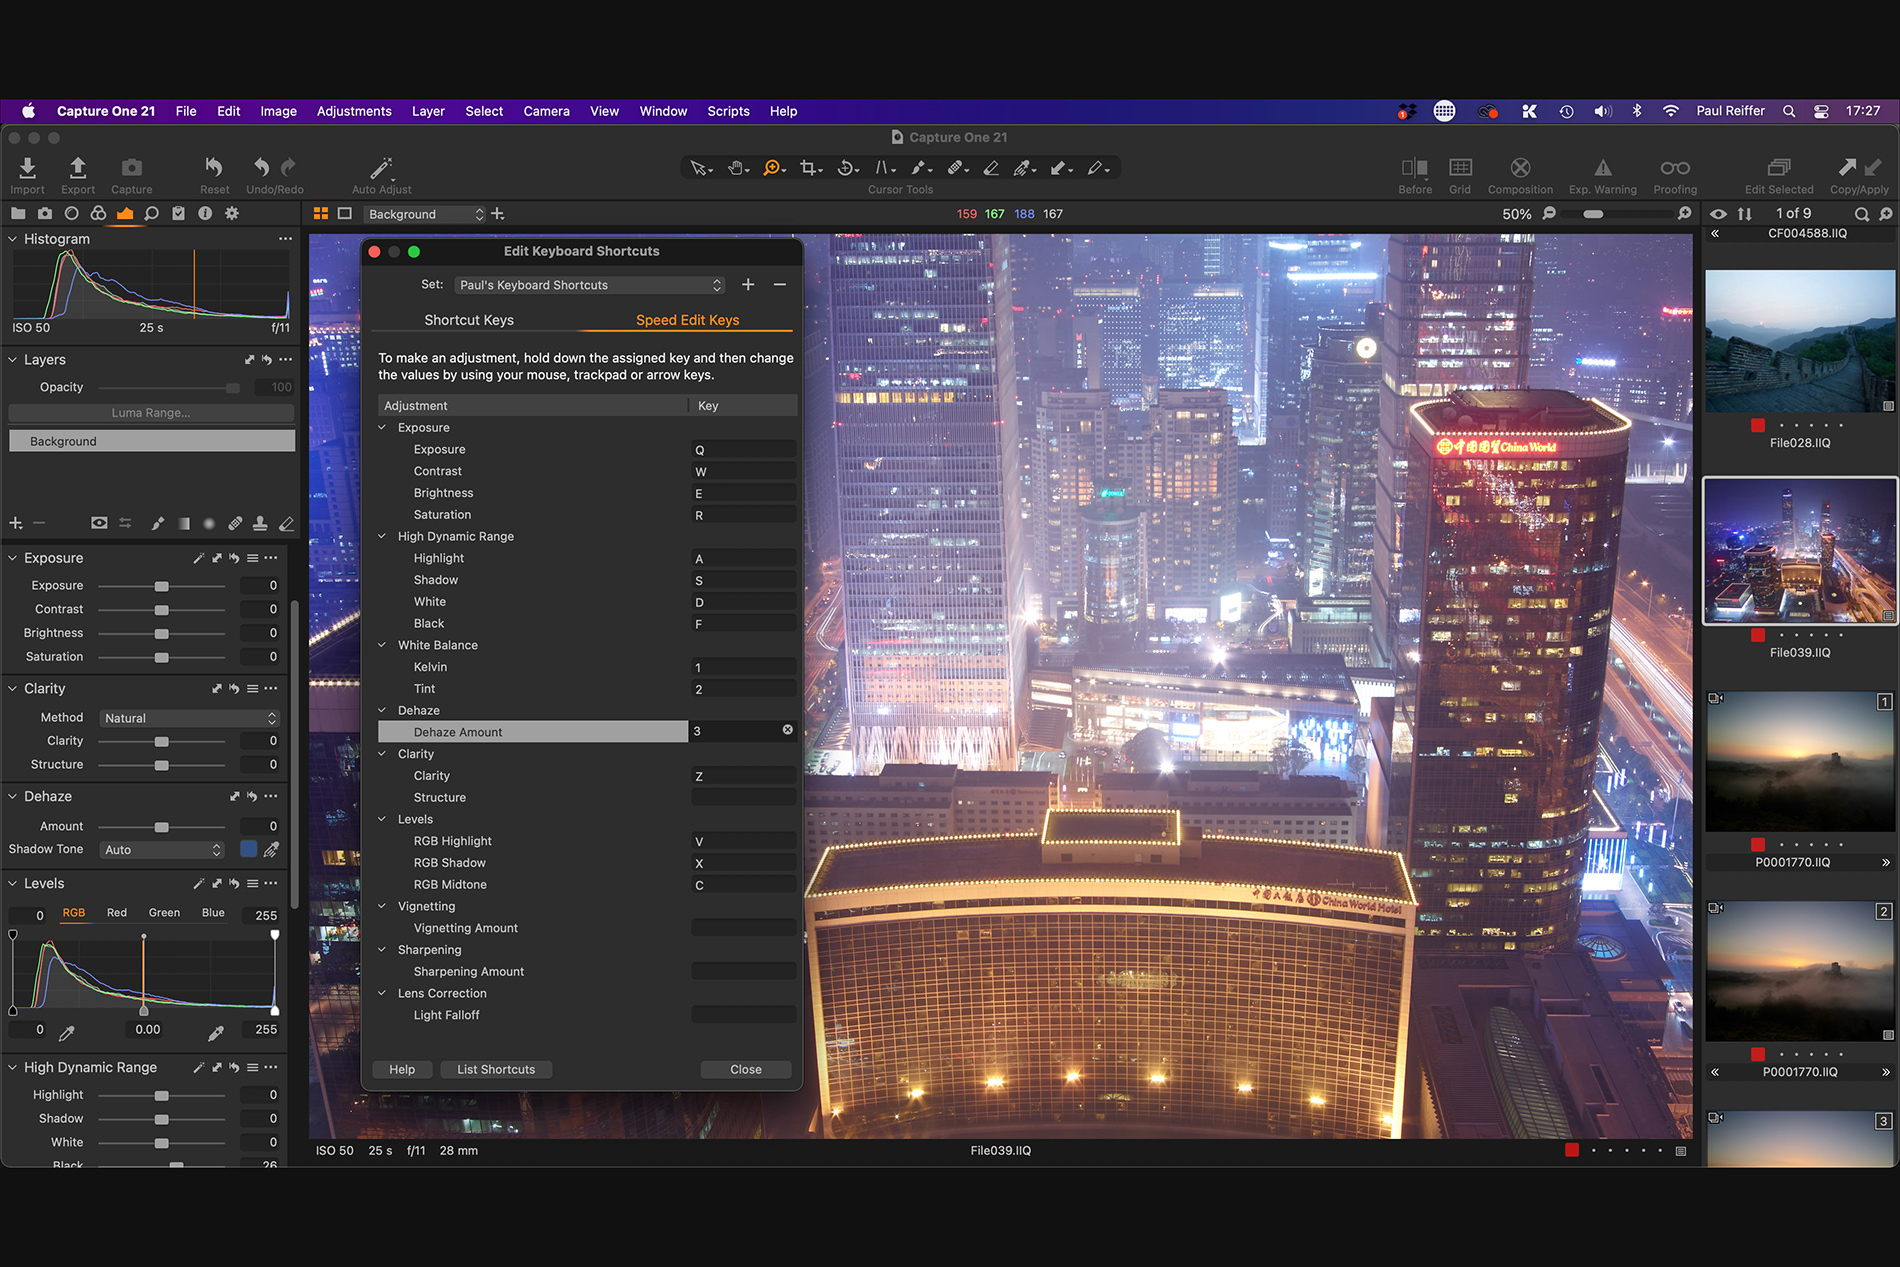
 The tool allows you to hold down pre-defined keys, which trigger different sliders. You then adjust those specific sliders by scrolling with your mouse, trackpad or cursor keys. That means you no longer need to hover your cursor over the interface to adjust a slider.
For example: Hold down Q and scroll to adjust exposure, W for contrast, E for Brightness, R for saturation and so on.
If you have multiple images selected, (and have “Edit Selected” enabled), the adjustment or action will apply on every shot you’ve selected – meaning you can now adjust multiple photos at once!
You can also set up your own slider shortcuts in a custom keyboard setup of your choice.
 It can take a little time to get used to the keys (which can all be changed around if you wish), but they do make sense as-is, after a little practice!
So, what about the features that are less talked about, but just as important to us photographers when it comes to image quality and our workflow?
ProStandard ICC Profiles
Capture One 21 has also introduced a fresh set of re-engineered ICC profiles for the most popular camera models out there. More will be added in the months ahead, but at launch they’ve already managed to cover a huge amount of camera systems.
What does that mean to me, as a photographer?
Well, to be honest, a lot less “correcting” and a lot of time saved!
The standard ICC profiles are great (and a lot of fun can be had applying a profile from a completely different camera to the one you used to take the shot you’re editing) but having had time to play with the new ProStandard profiles for my kit, the improvement in color and tone rendition is very significant.
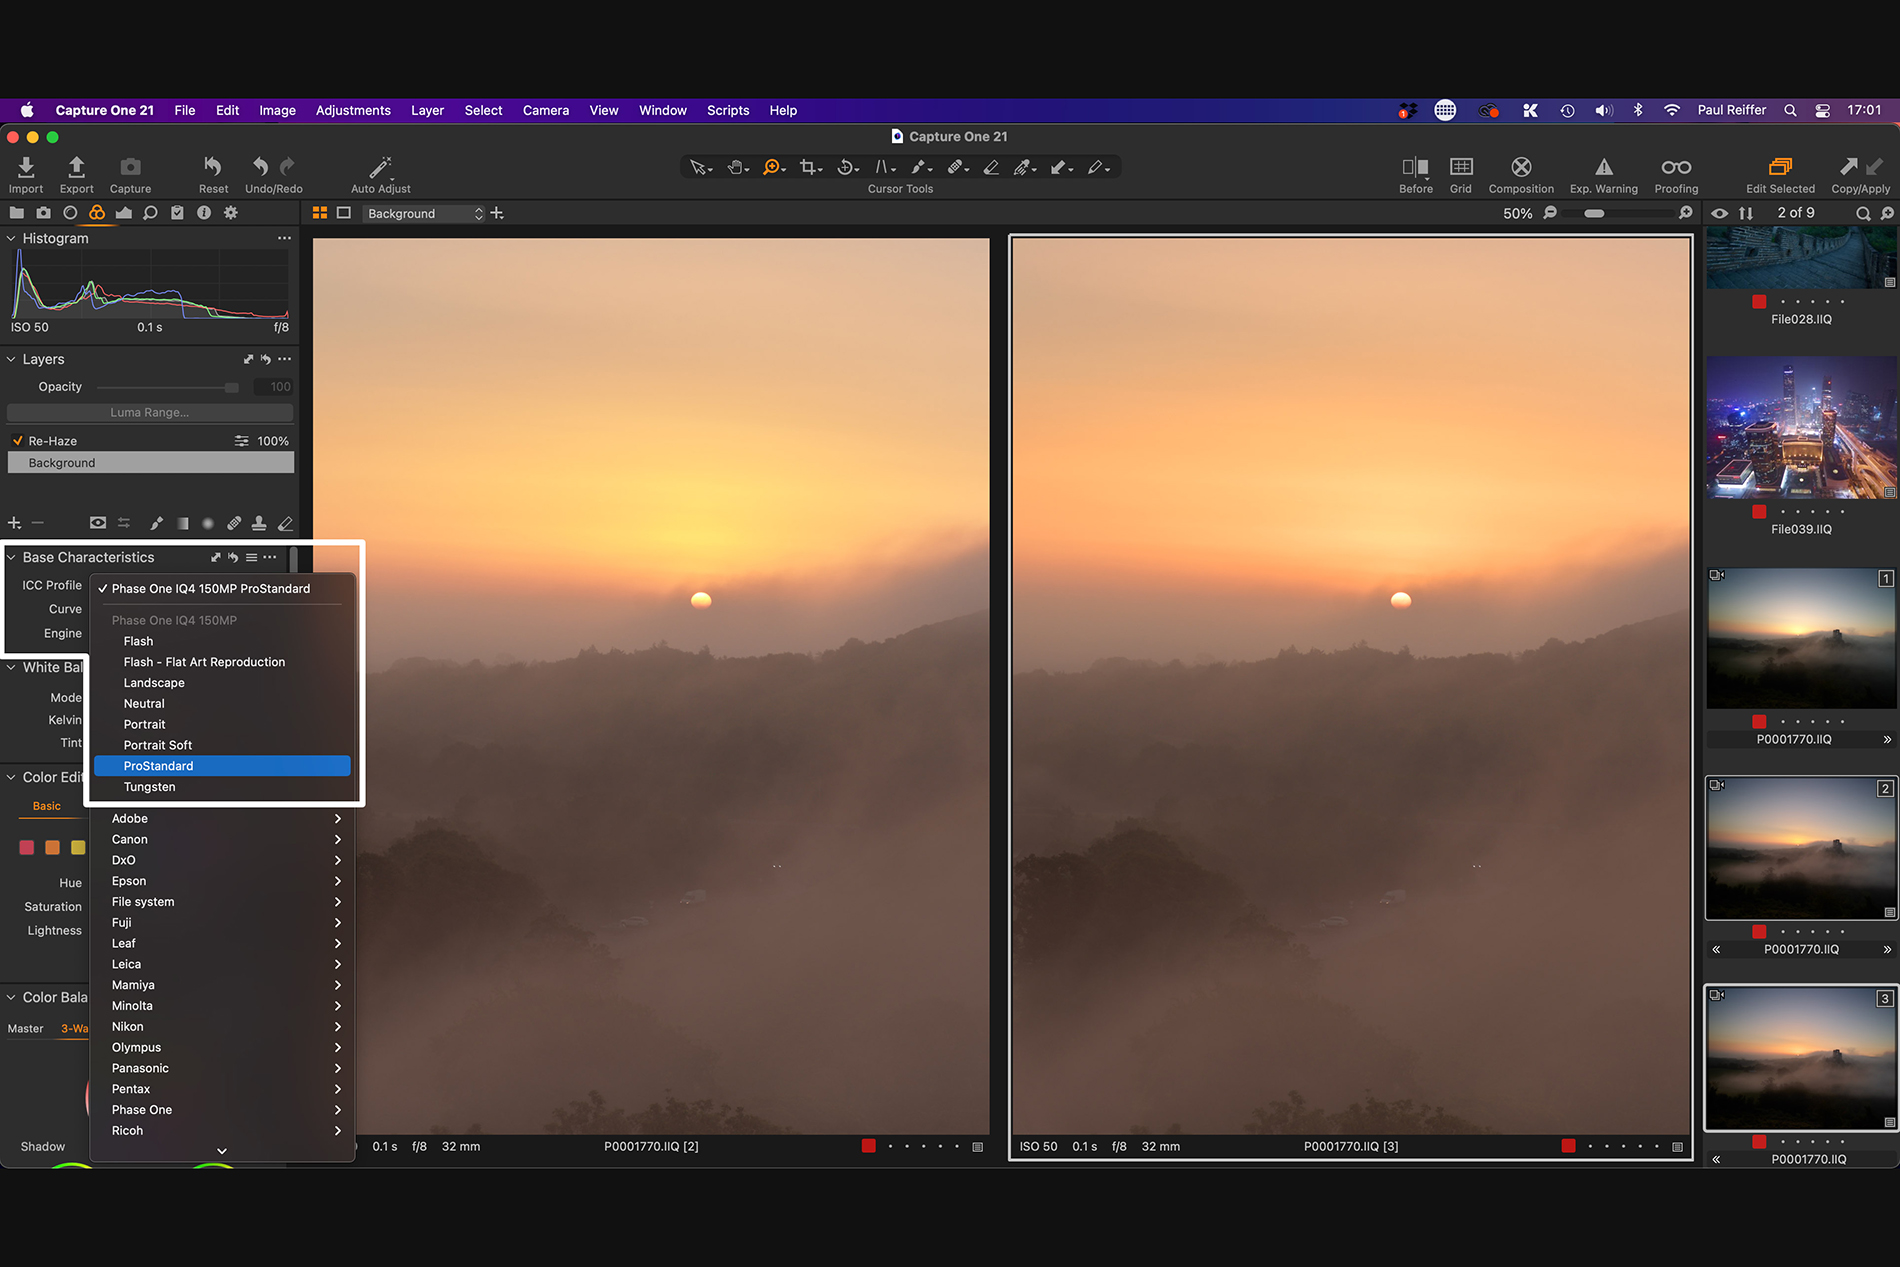 Essentially, the Capture One team have gone back to the drawing board and created richer, more accurate, profiles for our cameras. This means the software delivers better “out of the box” results when you import the image.
These can be set as default on import (I’ve already done this!) – and it’s quite incredible how much time I’m finding I save by not having to fix the “harsh yellows” or “flat blues” that I’d sometimes see on-screen.
And finally, while we’re talking about saving time…
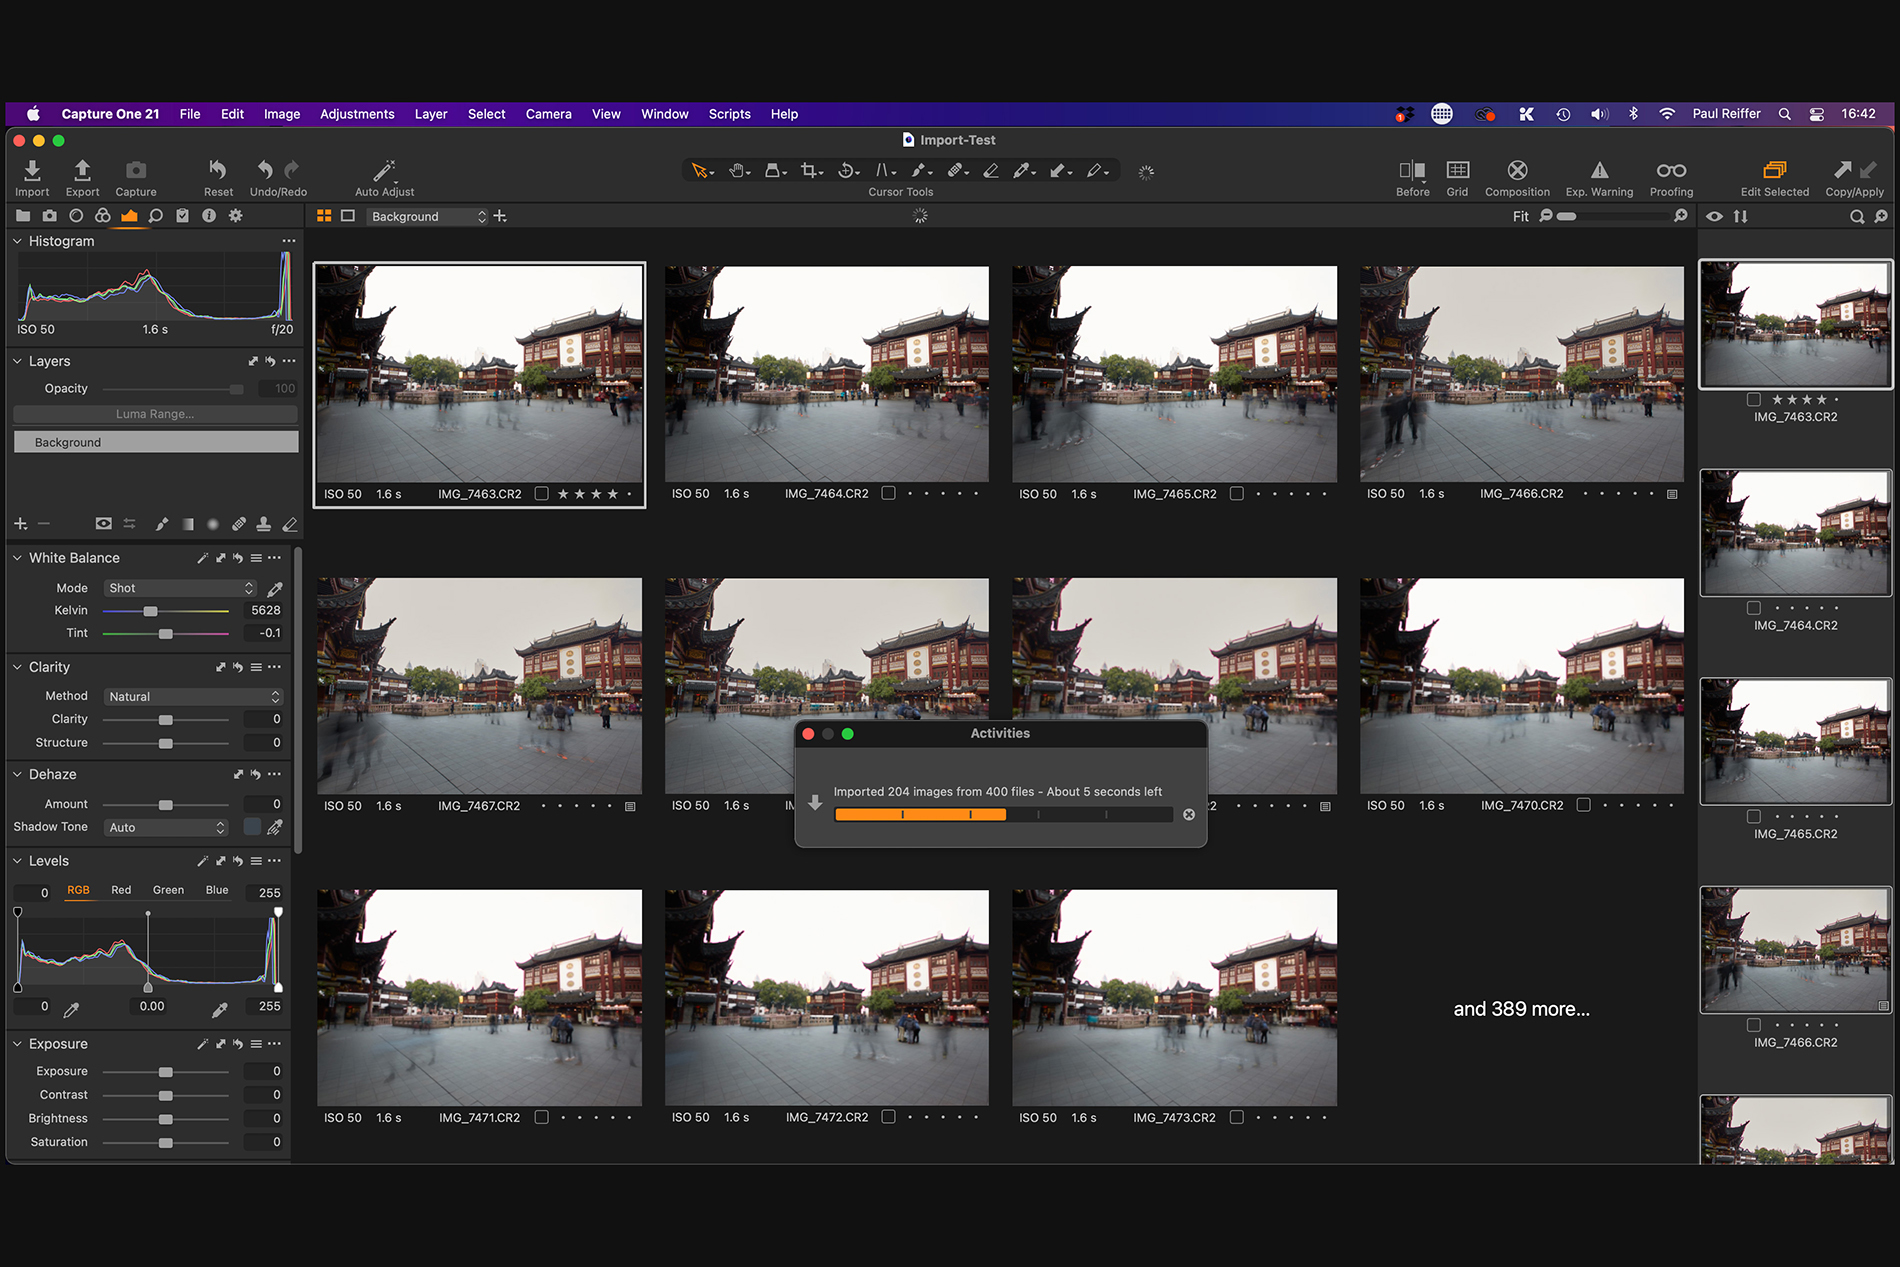
Catalog & Import Improvements
I’m not a wedding photographer, nor do I shoot products in their hundreds or thousands, but I still need to be able to import and find images in my Catalogs very quickly.
Capture One 21 has added some pretty impressive speed improvements to this release, not least of which are during import.
Let’s start at the new dialog box, with standardized messaging as to whether you’re simply adding an existing file to the Catalog, or if you want to physically copy it into the Catalog itself.
 Selecting and de-selecting has also got a lot easier with the spacebar and P/X keys, rather than having to hand-pick each image with the mouse.
But it’s what happens when you hit the orange “import” button that makes all the difference – the import process has been reduced by 20, 25, 30% from my testing with different file types, meaning I can get to the important stuff – editing – a lot quicker than before.
 Beyond the import process, using the Catalogs themselves – such as finding images, filtering, loading previews – are all faster in Capture One 21 than Capture One 20.
And finally, for those who move things around outside the Catalog (it’s OK, we all do it sometimes!) – the “Locate…” function has also been made a lot quicker at sorting out and re-indexing files once you tell it where to look.
Smaller updates that make a bid difference
There are also some other smaller updates that will make a difference to any photographer’s workflow:
The brush adjustments have been made easier through key combinations, we can now import HEIF files, the Tool Tips now have video guides, and the White Balance sliders now have coloured gradients to help you visualize the changes being made.
A winning upgrade
All in all, I find that Capture One 21 delivers a mix of some new functions which I’m finding so much more useful than I even originally expected, along with the key under-the-hood improvements in speed, workflow and image quality which are the things I really look forward to with each release. It’s always great to get new tools – but at the end of the day, I use Capture One to help me get the very best out of my images, as efficiently and naturally as possible.
Thankfully, with version 21, the team at Capture One have managed to do it once again.
If you don’t already have Capture One, download a 30 day trial and try it out.
Paul Reiffer
Paul Reiffer is an award-winning photographer and landscape artist. Specialising in grand vistas, electrifying cityscapes and iconic views; his images have been published all around the world in well-known books, newspapers and magazines as well as supporting global travel and hospitality brands to reach and excite their audiences.
His technical expertise is regularly called upon for editorial features, and through his luxury workshop programme as well as online channels, he’s carved out a unique style of teaching that is now appreciated by thousands worldwide. Shooting with ultra-high-resolution Phase One cameras, his limited edition fine art prints are designed to wow customers and designers when placed into bespoke spaces, while his work is used commercially by clients ranging from National Geographic, British Airways, Marriott and many more.