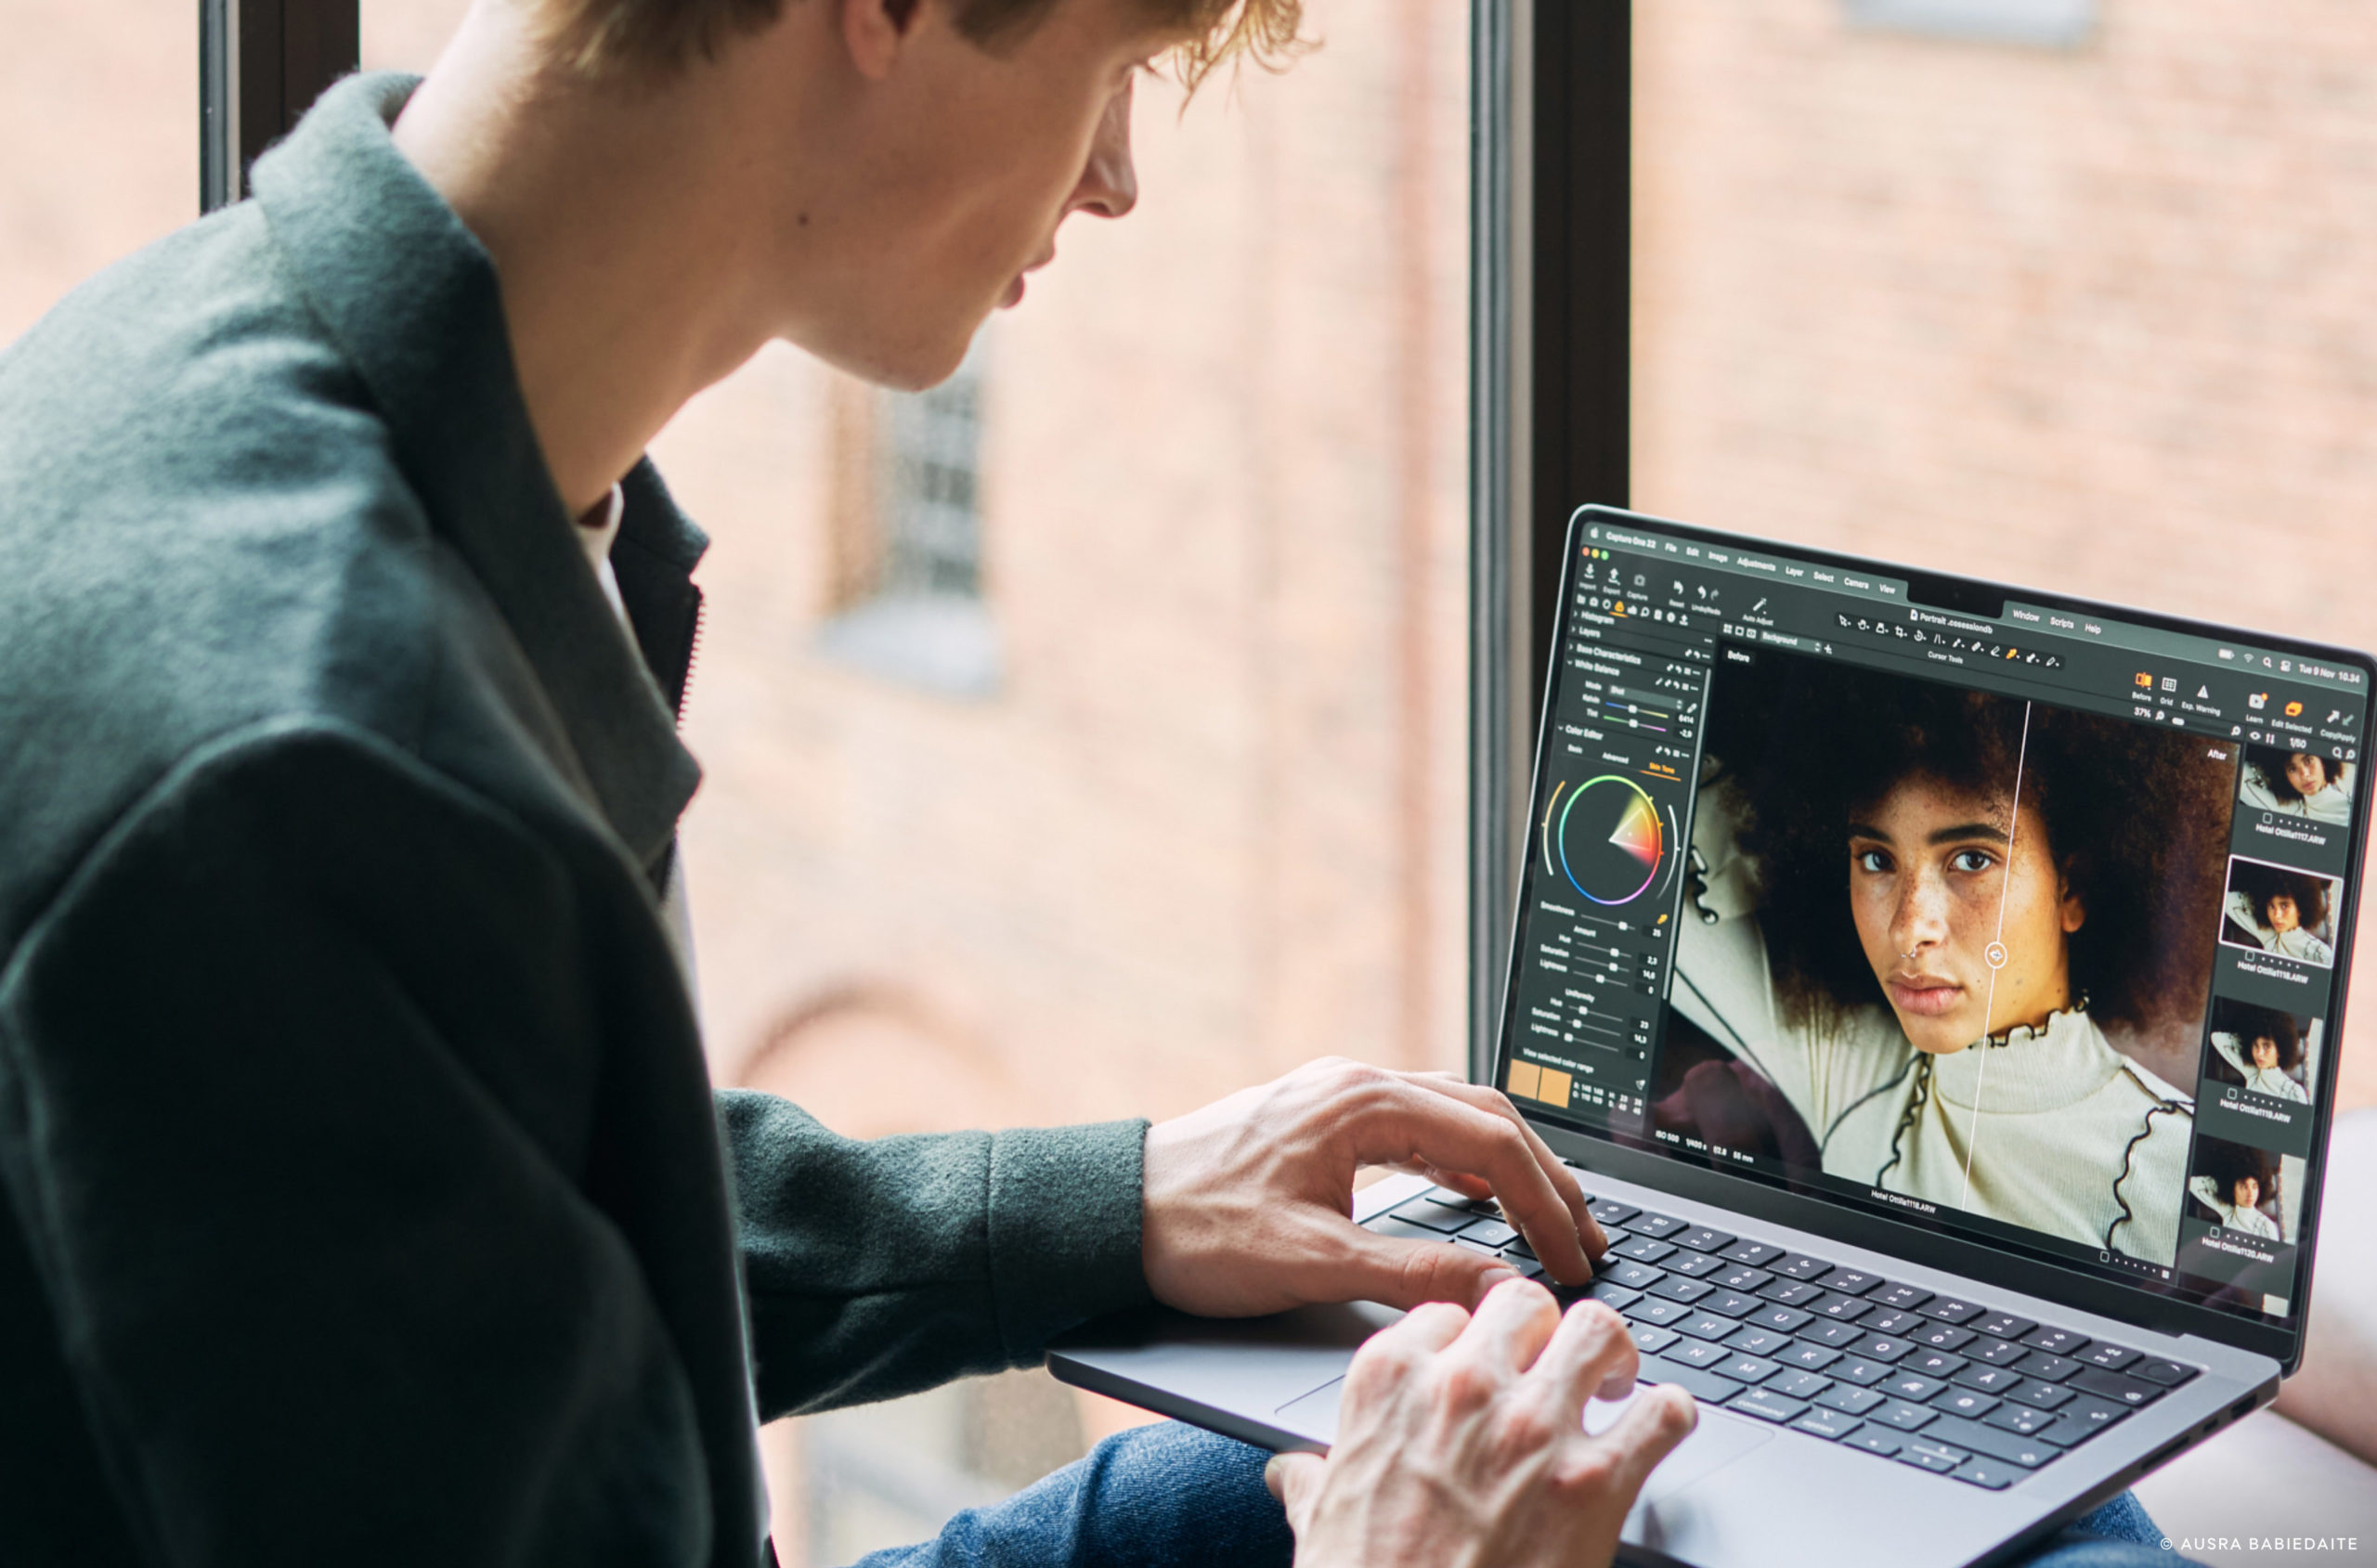
Getting used to new software is rarely easy – but it doesn’t have to be frustrating. If you are considering switching from Lightroom to Capture One, here are 1o tips for making the transition easy.
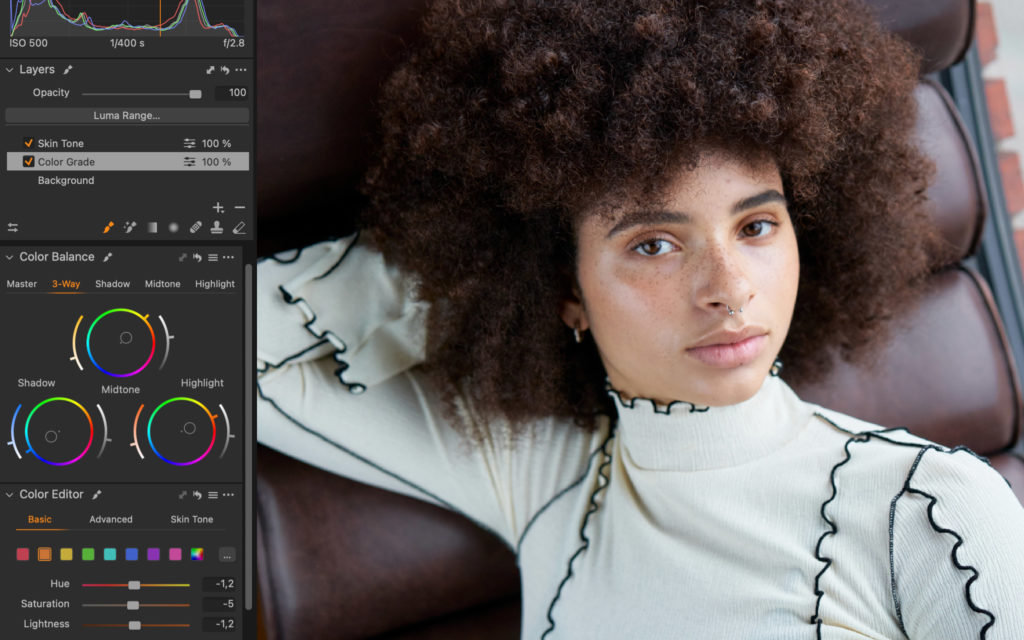
1. Interface
There are a few things to take notes of when switching from Lightroom to Capture One:
- The default layout has tools to the left and browser to the right of the viewer.
- To choose a layout more similar to Lightroom, simply select ‘Window > Workspace > Migration’. This will provide a workspace that more closely resembles Lightroom’s layout.
- Most tools in Capture One can be re-organized, moved freely around between Tool Tabs, and even scaled when pulled out of the Tool Tab, by simply clicking the Tool Title and dragging. Parts of the interface can also be hidden. For an easy overview, use the View menu.
- Tools can be distributed between a scrollable part and a pinned part within the Tool Tabs. The pinned part is always at the top, making it easy to pin the tools you need to have instant access to.
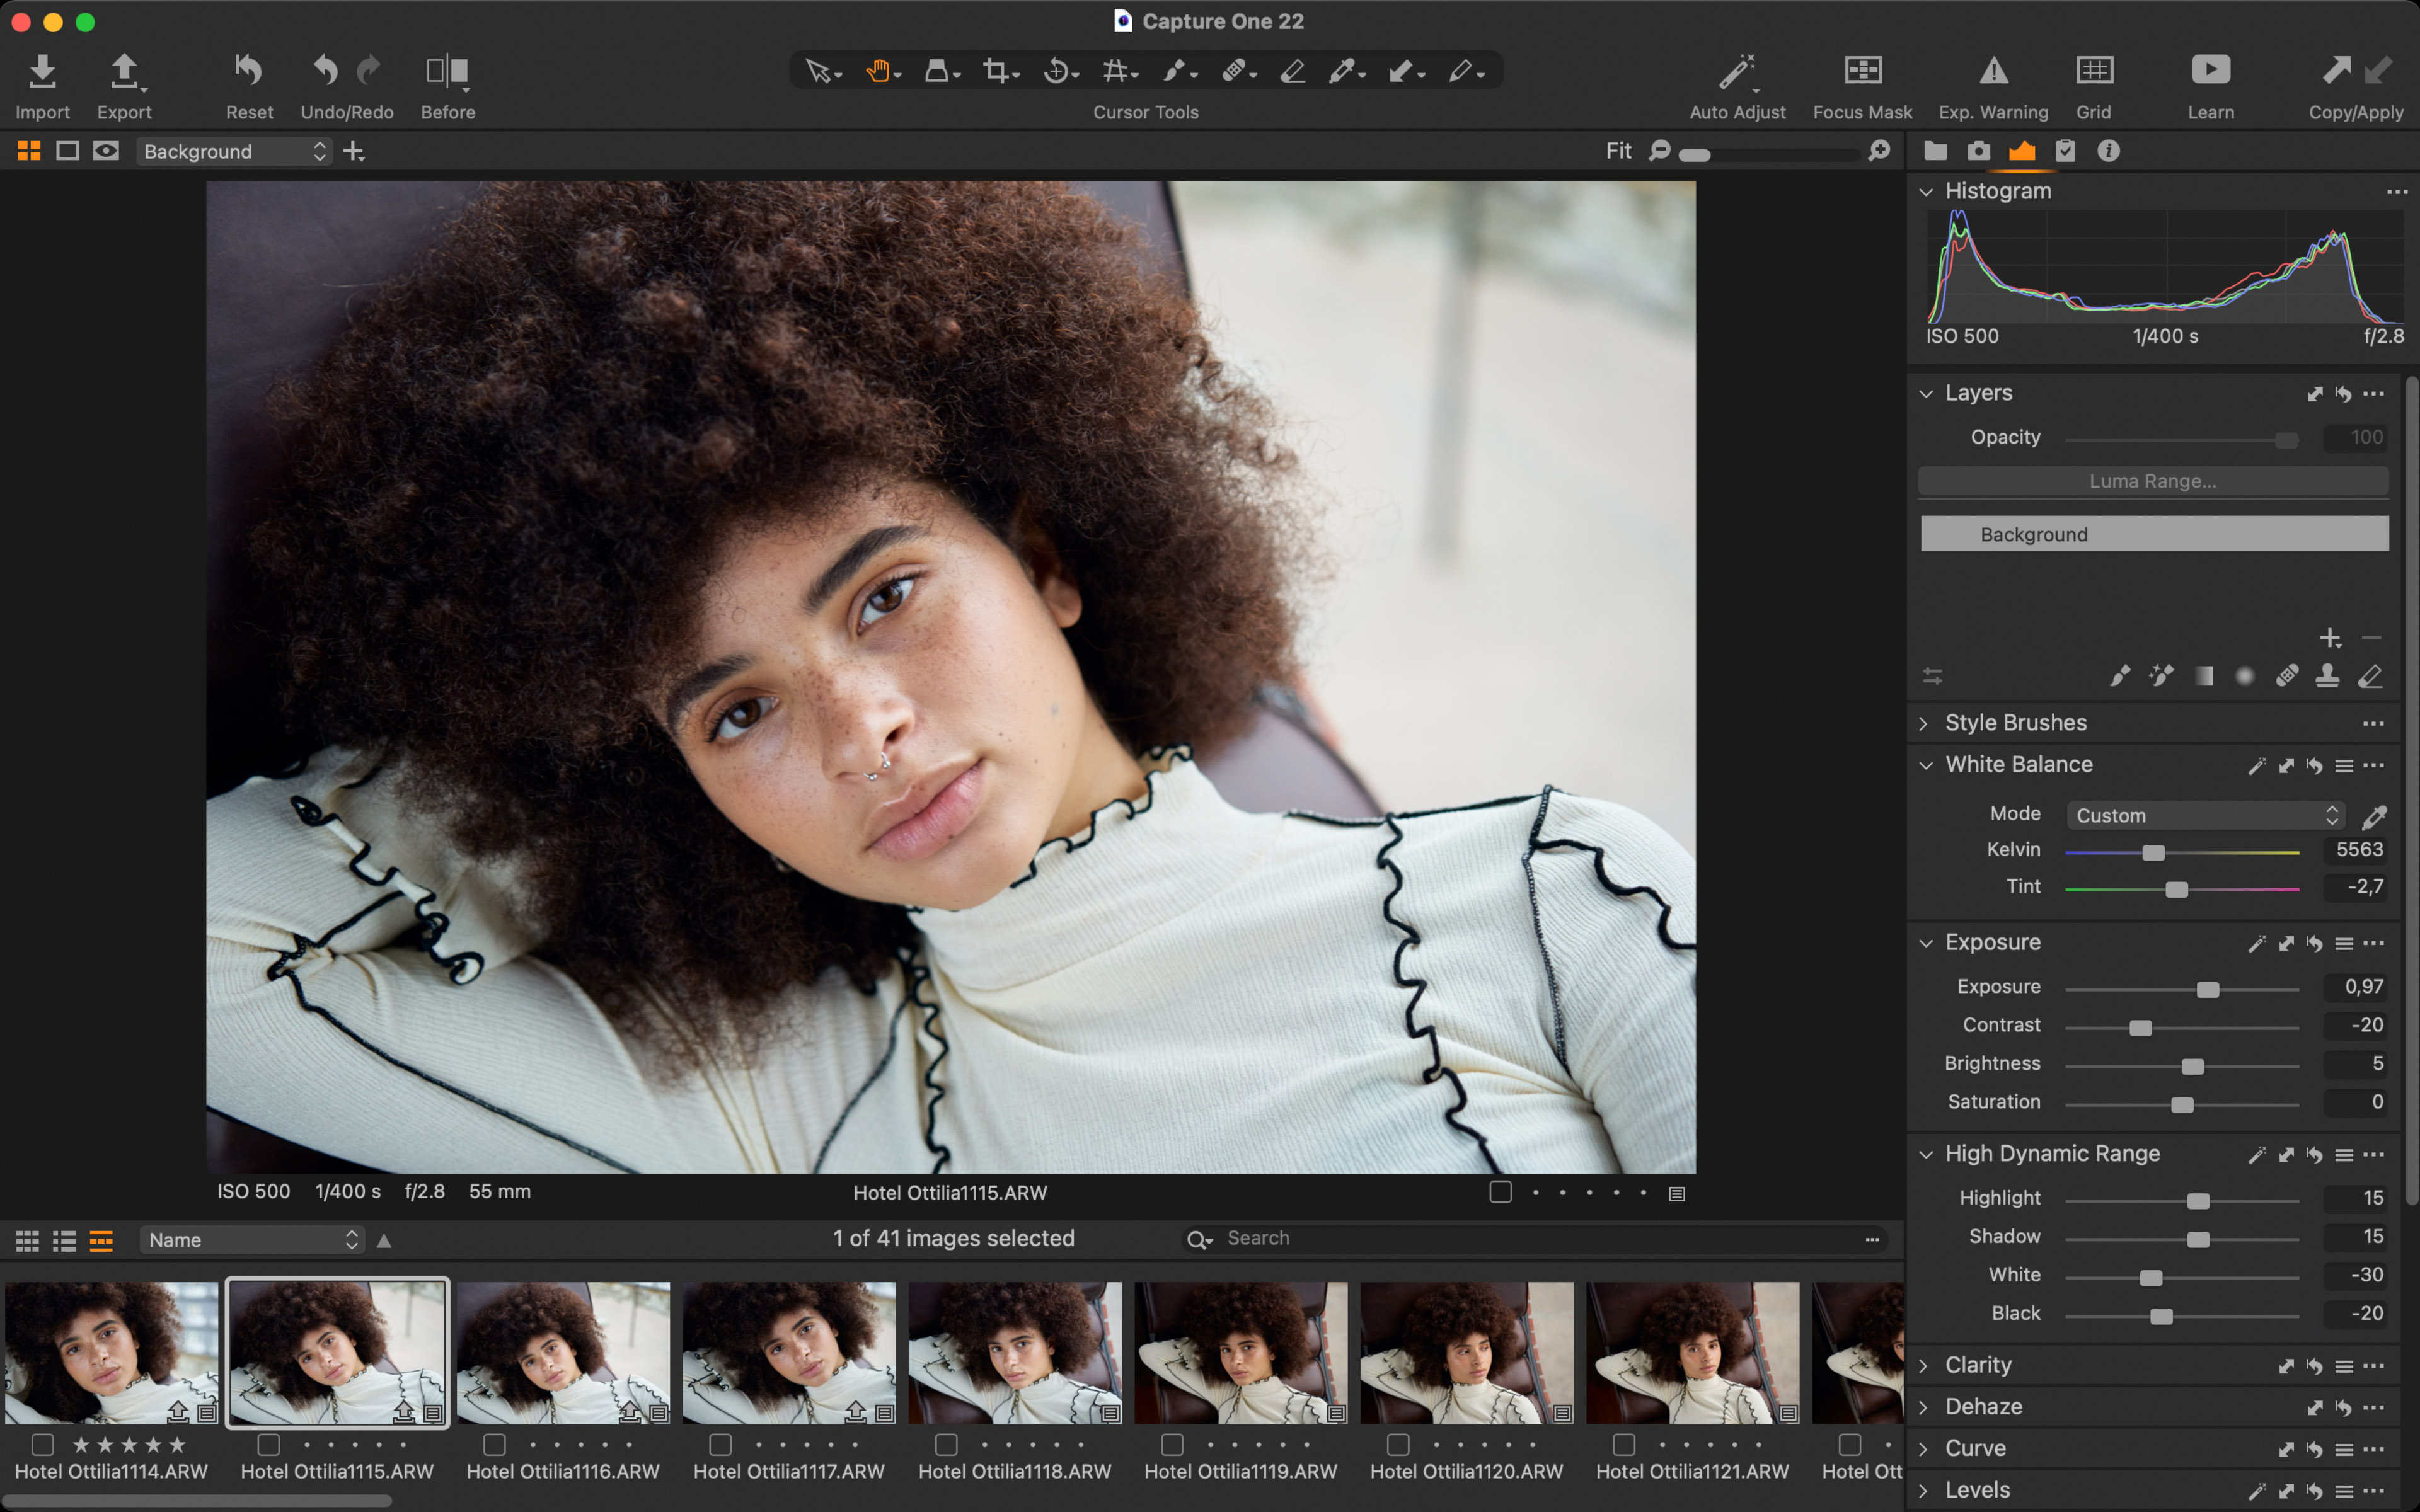
Capture One has a customizable interface. Set up the workspace how you like
2. Catalog or Session?
Capture One offers two ways of organizing your images. Catalogs and Sessions. What are they?
Catalog
Just like Lightroom, you can import your images to a Capture One Catalog. You can choose to keep your images in their current location or copy them inside the Catalog. A Catalog is a database that contains information about metadata, keywords, ratings, etc. for each image.
When importing, organizing, or editing your images, Capture One updates the database with this information. This is a very useful way of working with larger image collections.
You can even import your Lightroom Catalog directly into Capture One.
Session
A Session provides a simpler, folder-based workflow with a predefined structure of ready-to-use folders and the ability to browse any other folder on your computer without having to import. Adjustments are placed in a subfolder next to the images. Sessions are suitable for tethered shooting, individual jobs, etc.
You can use one or the other – or both!
3. Presets = Styles
What’s called presets in Lightroom is called Styles in Capture One. They work in a similar way and are easily adjusted after applying. Capture One also features Presets, which only includes one tool, making them accessible from within the tool they use. To summarize:
Style: Pre-defined adjustments including multiple tools.
Preset: Pre-defined adjustments including only one tool.
To learn more about Styles and Presets when switching from Lightroom to Capture One, watch this tutorial (5 minutes).
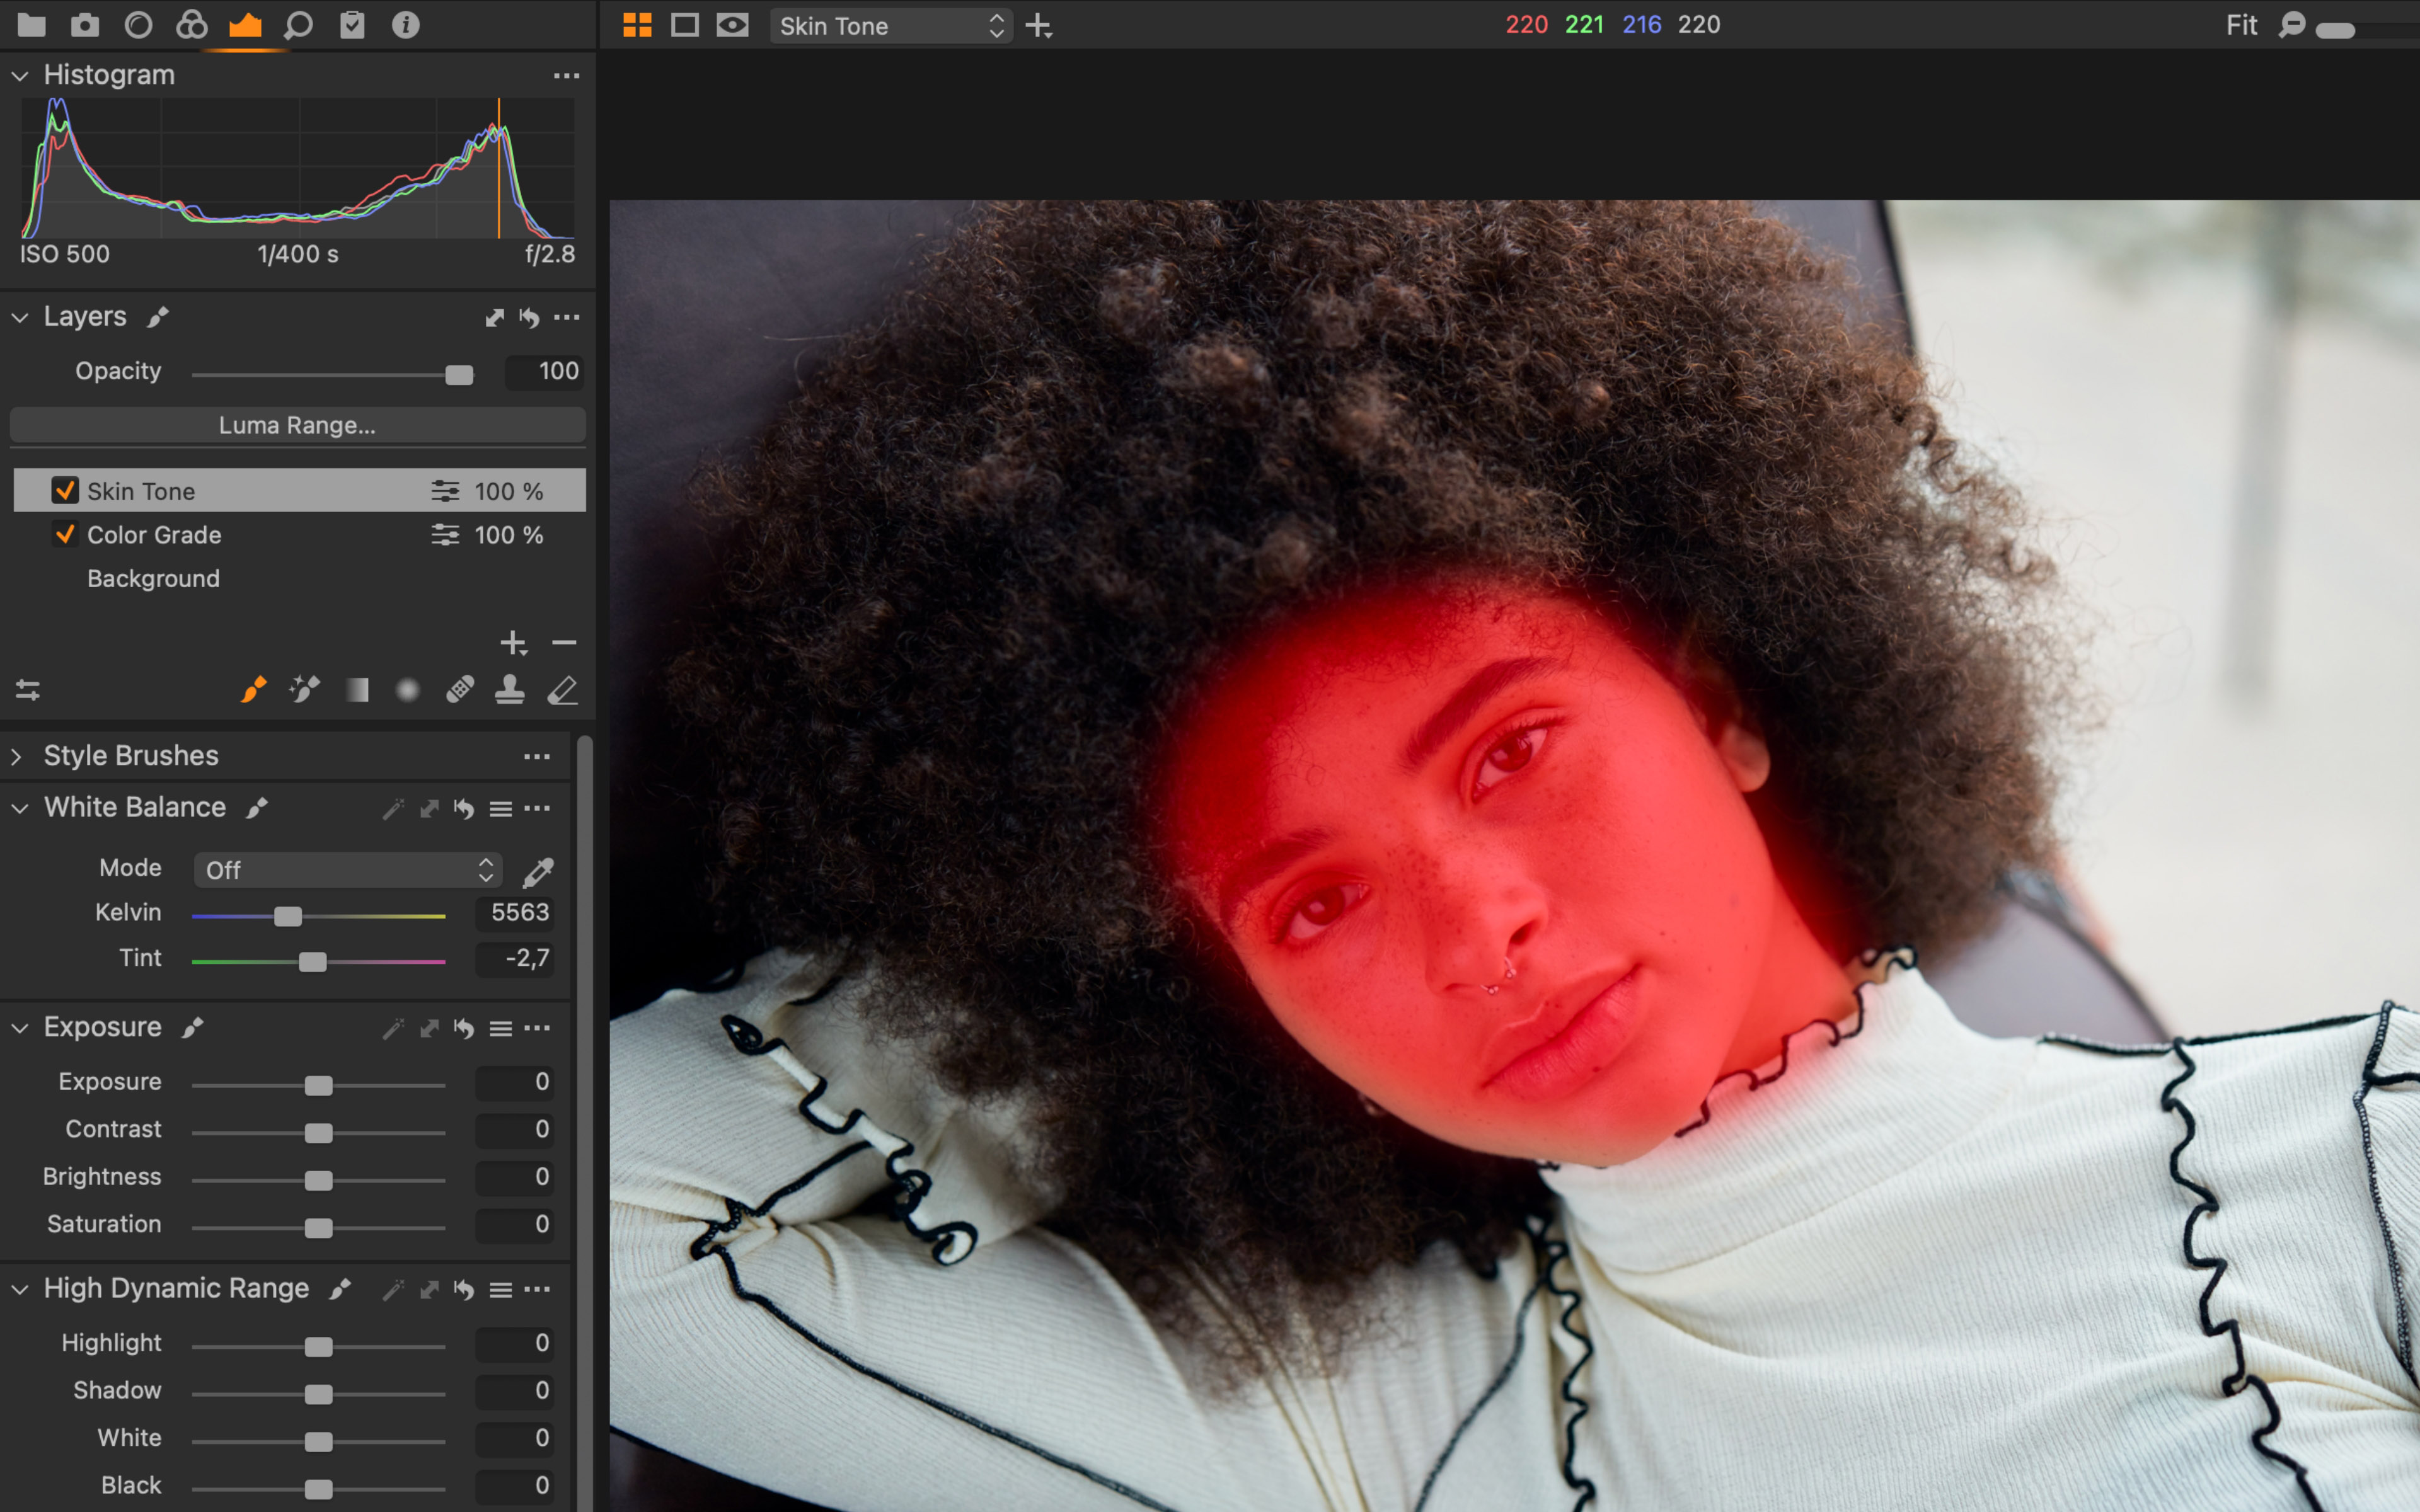
4. Layers
Layers in Capture One provide similar functionality as Brushes in Lightroom. However, they work more as Layers work in Photoshop, where each layer has a mask. If we stick to Adjustment Layers, you have two initial options:
- New Empty Layer – The default option when clicking the plus-icon in the tool. This will create a new layer without a mask on it. To see the effect of any adjustments applied to the Layer, you need to mask the desired area with the brush.
- New Filled Layer – By long-pressing the plus-icon, you can choose this option. This will create a new layer with a solid mask on it. Any adjustments will show on the entire image, but you have the option to erase parts of the mask or decrease the opacity of the whole layer.
5. Speed Edit
You can edit your images in Capture One in many ways. One of them is Speed Edit, which is a functionality that allows you to edit your images without having to pull any sliders.
Speed Edit works by holding down an assigned key on the keyboard and its corresponding slider will temporarily show at the bottom of the viewer. While holding down the key, simply scroll your mouse wheel or trackpad, click-and-drag anywhere in the interface, or press the arrow keys on your keyboard to adjust the slider.
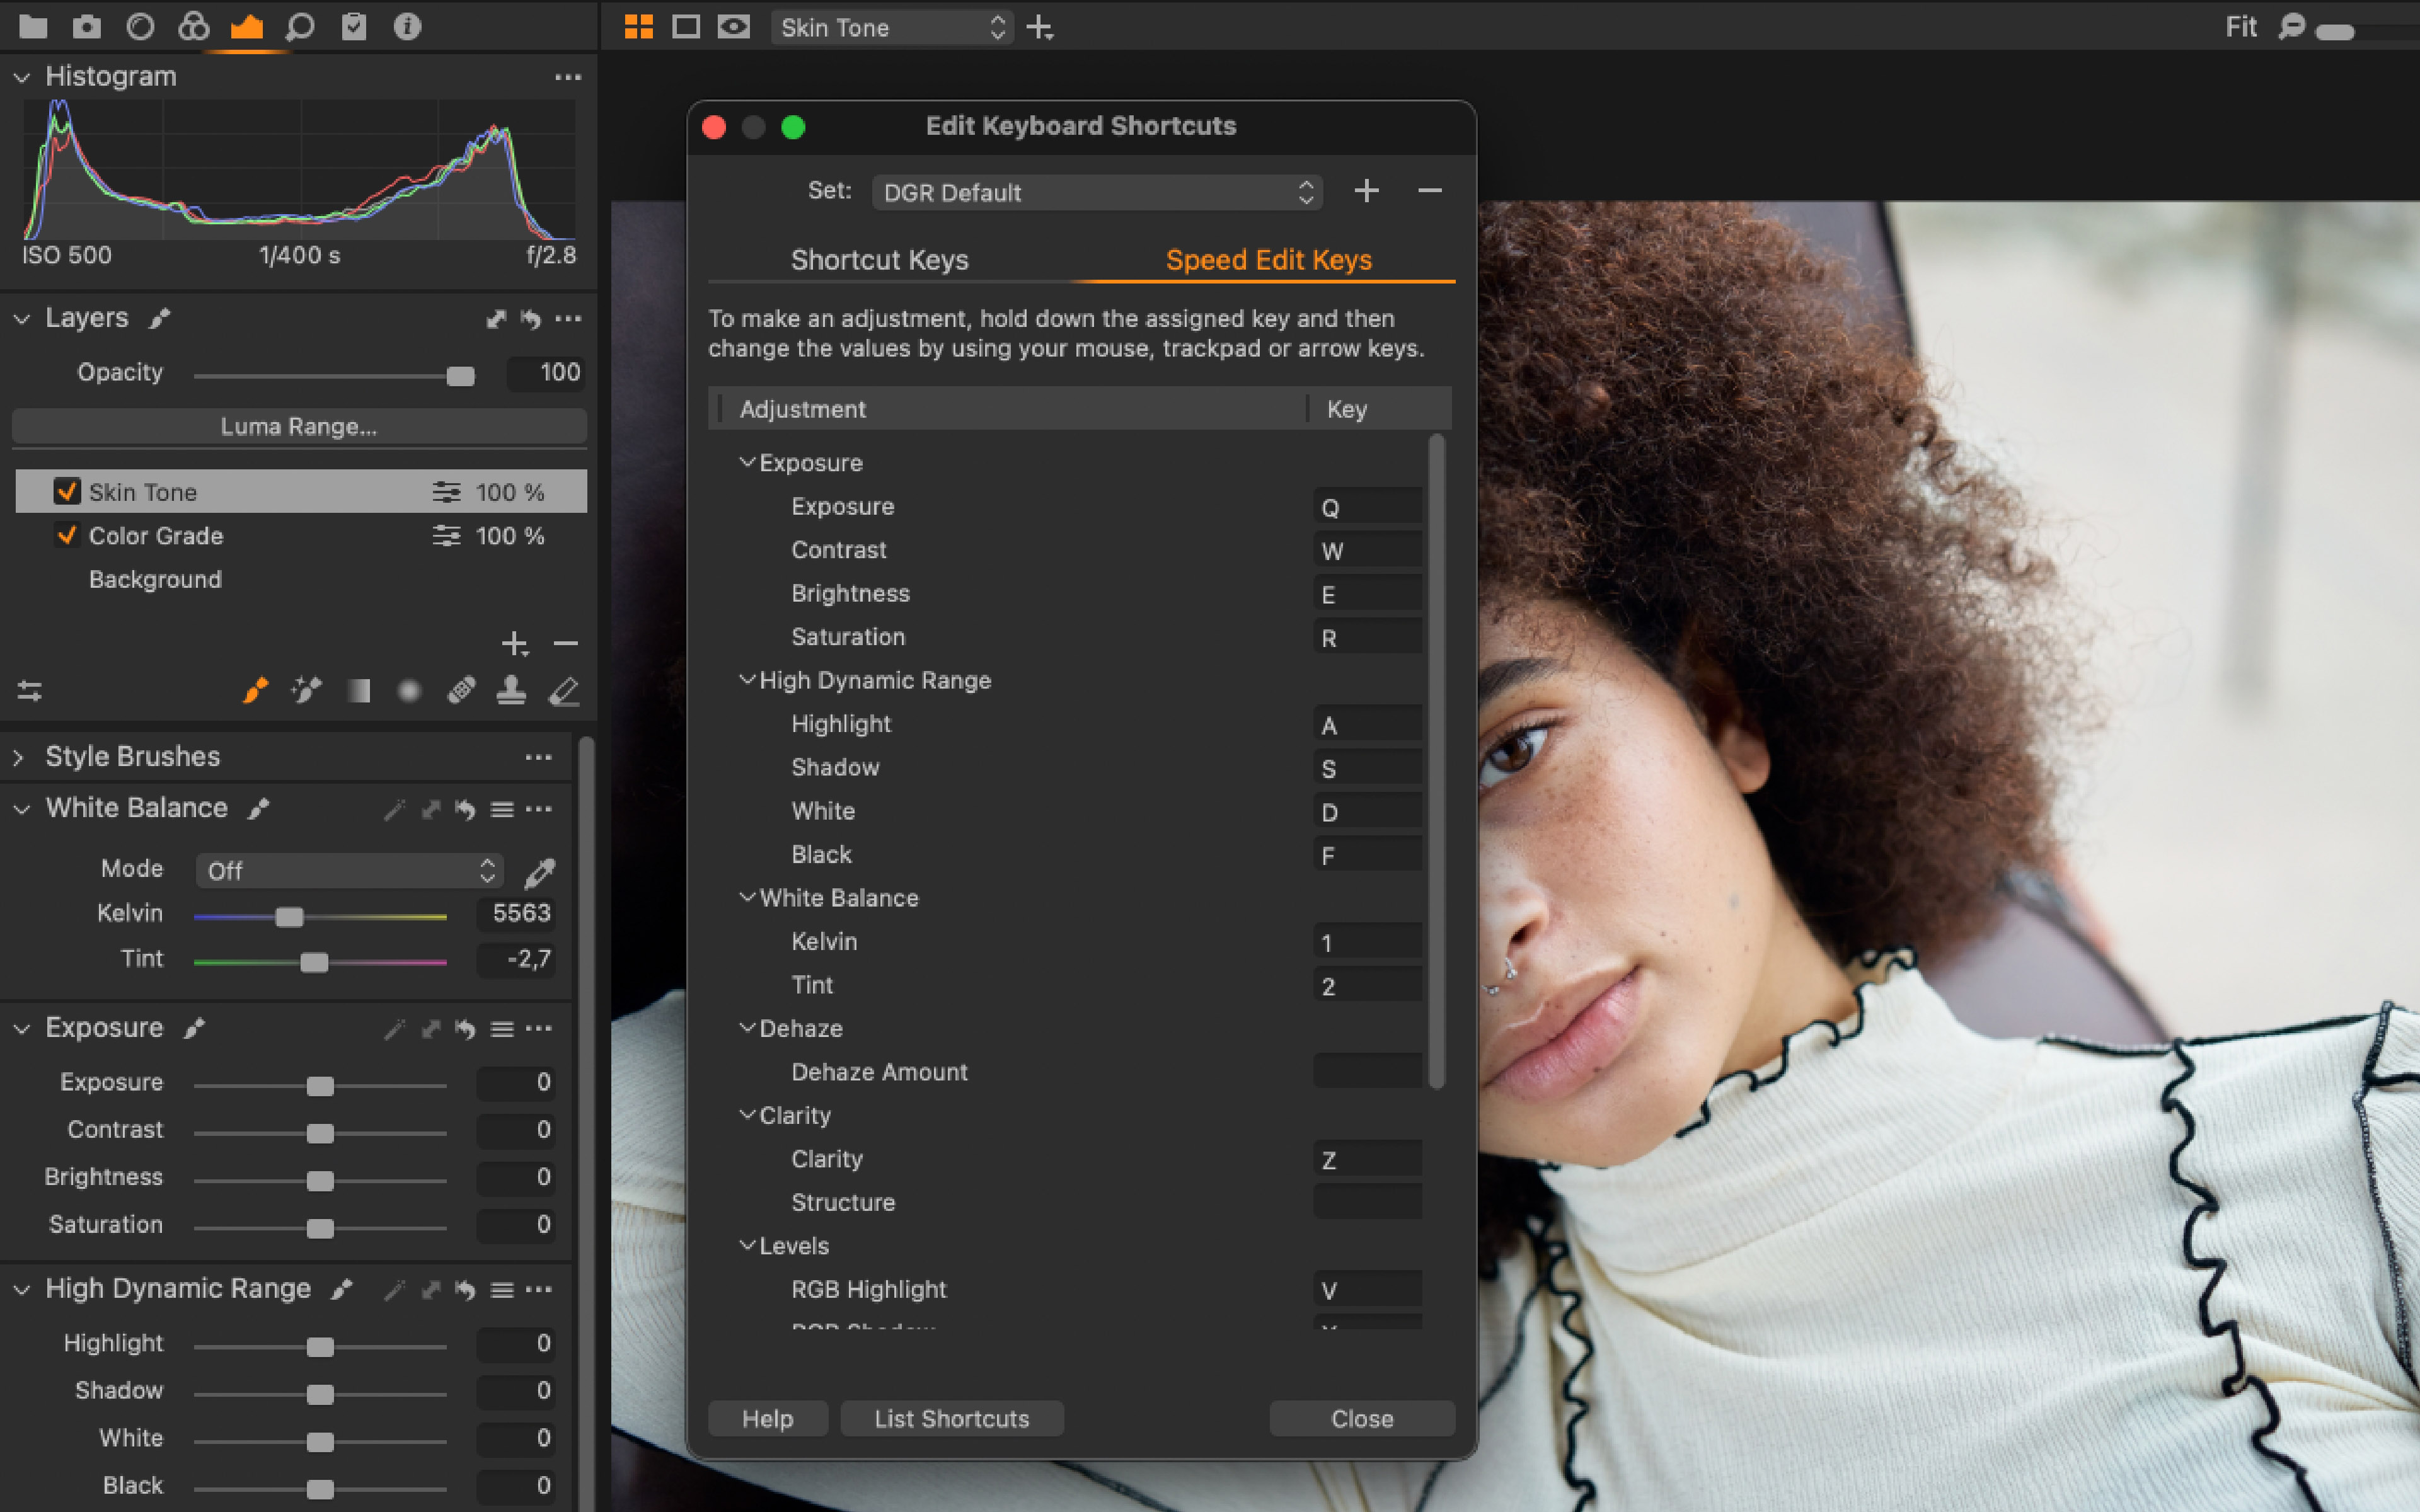
Which keys are assigned to what sliders can be viewed and even customized in the Keyboard Preferences section.
Pro tip: Speed Edit works on batches of images. You can for example warm up 500 images with the same amount, and at the same time, by tweaking the Kelvin using Speed Edit.
6. Copy adjustments
To copy adjustments from one image to others, click the arrow-up icon in the top right corner. Capture One automatically detects changed adjustments and puts them in the Adjustments Clipboard Tool. Control which adjustments you want to be copied from the clipboard, and click the arrow-down icon to apply these adjustments to the selected images. The process of copying adjustments makes your transition easier when switching from Lightroom to Capture One.
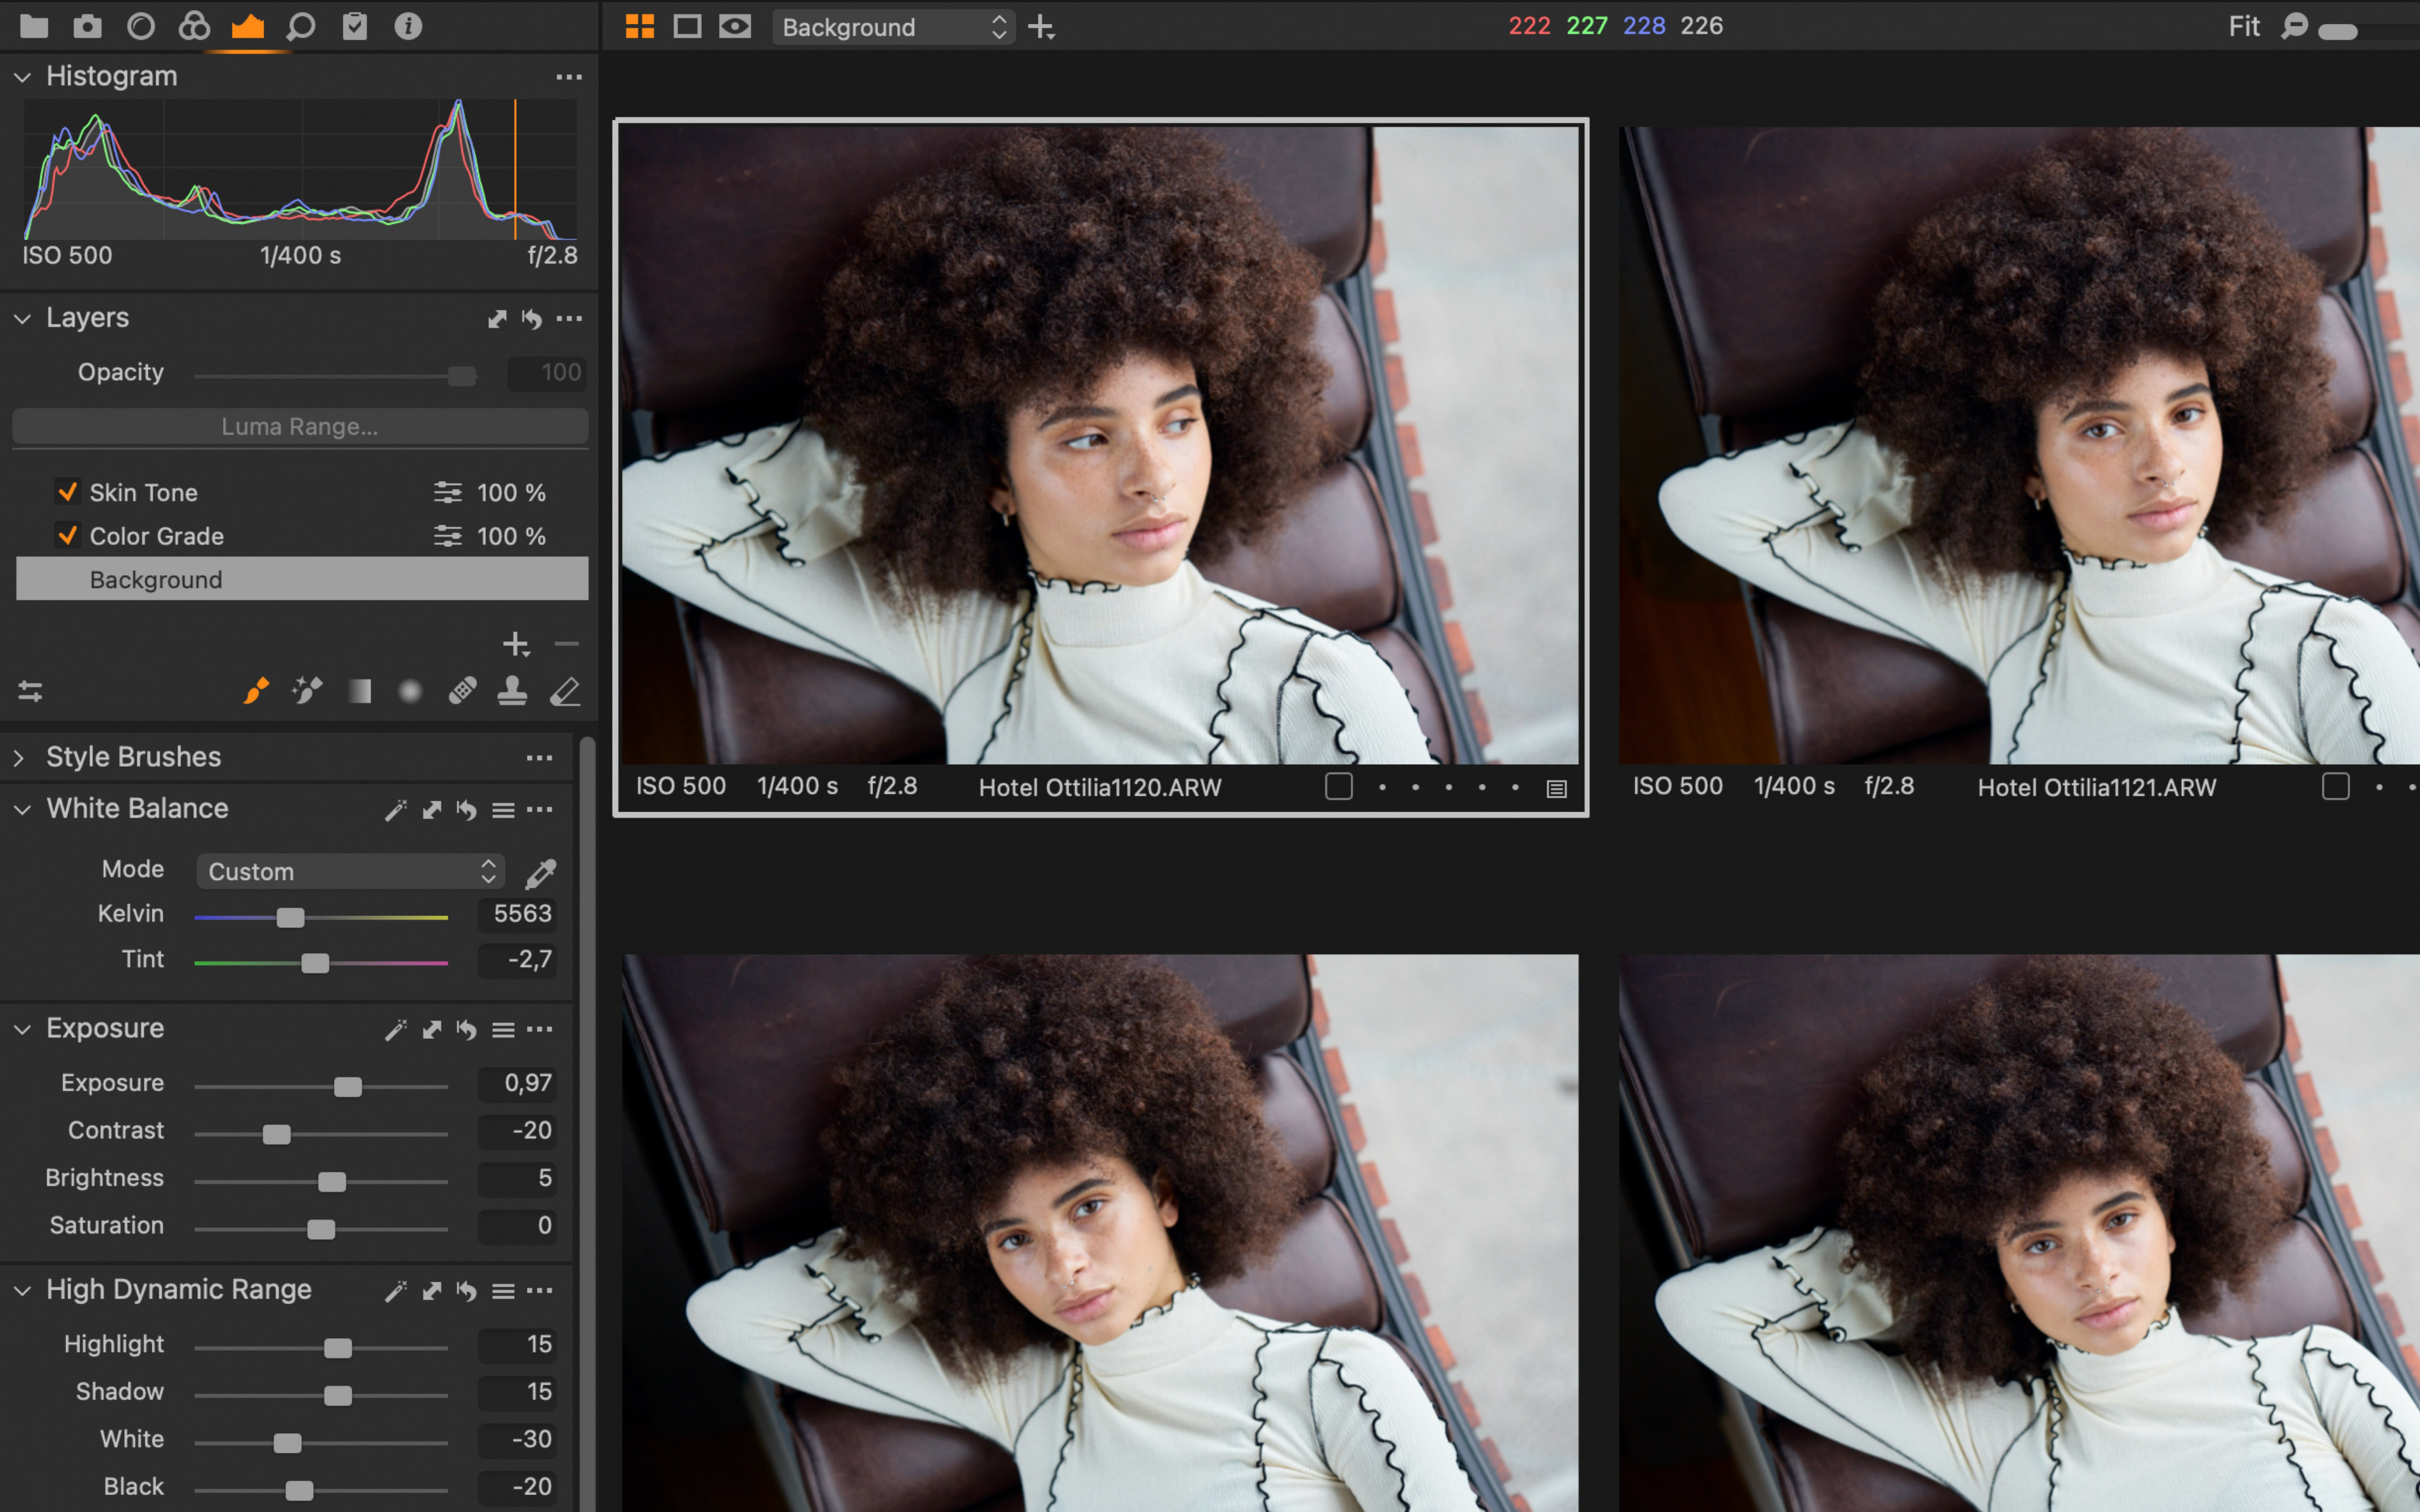
7. Color Balance
The Color Balance Tool will make color grading easy and fast. It’s like Split Toning, but with more options.
The Master channel works as an overall visual White Balance tweaker; the whole image will be affected. Shadow, Midtone, and Highlight will tone each part of your image with the hue and saturation of your choosing.
The luminosity slider to the right provides additional control of the contrast of the image while color grading.
8. Edit All Selected Variants
When exporting, deleting, or adjusting multiple images at a time, make sure to enable ‘Edit > Edit All Selected Variants…’. Otherwise, you will only export/delete/adjust the highlighted image in your selection.
You might think “why would anyone need to disable this?!” – but there are surprisingly many instances where it’s useful.
9. Shortcuts
In any software, shortcuts make lives easier. This is no different in Capture One. In addition to an extensive default list of shortcuts, you have the option to add shortcuts for almost anything. Including changing all the default shortcuts.
Go to ‘Edit > Edit Keyboard Shortcuts…’. The first step is to duplicate the default and create your own list. Then you can edit away.
10. Instant tethered capture
Capture One was initially designed 20 years ago as a tethering software, meaning it would transfer an image from a connected camera to the computer, and show it on the screen.
For an industry-leading tethered workflow, simply create a new Session, connect a supported camera and start shooting.
If you don’t already own Capture One, you can download a 30-day trial and discover its power.


Capture One is an amazing tool! 90% better than LR, but I´m missing the function of calibration in the Develop-Modul.
In LR I use the radial brush to make quick local adjustments. Is there something like that in C1? Also, is there a way to refine masks based on color and/or luminosity? Or are there recommendations on how to restructure that work flow for C1?
Hi I have been using. Capture one for some time now and really loves it I have a variety of cameras and brands used for different shoots I was wondering if you are going to add support for fujifilm gfx 50 in capture one
Daniel
Hi Daniel,
Thanks, that’s great to hear! Unfortunately, we cannot comment on future developments or features of our products.
Alex
What I am finding most missing is a spot removal tool with sophistication at least equal to LR now. It is like going back to LR 1! Not practical to edit portraits without going into Photoshop… and then you lose the C! engine and re interpret raw as per Adobe (unless I am missing a step in the roundtrip process?)
Hi Vic,
You can either use the Spot Removal Tool or a Healing Layer, which is both more powerful but also a bit more complicated to use for extensive skin retouch. You don’t lose the Capture One engine when doing skin retouch in Photoshop, as Photoshop requires a processed file (TIFF, JPG, PSD etc.). If you open a RAW file in Photoshop, it will automatically open in Camera RAW, and you don’t get the Capture One processing, correct. But the best way to do it would be to make all adjustments needed except skin retouch, process to a 16-bit TIFF or PSD with ‘right click > Edit With…’, do skin retouch in Photoshop, and then you have your final file back in Capture One. That way you get the RAW processing of Capture One and the retouch capabilities of Photoshop.
You can read more about this process in this blogpost: https://blog.captureone.com/achieving-perfect-skin-tones-using-capture-one/
Alex
Hi,
I tried to import my LR catalogue to CO. That worked pretty good with the exception that it does not take the colours. That’s odd but manageable – just putting all marked pics in a collection… Perhaps because I am putting all information in an XMP file beside the image. Since when I am importing through the file system, the colour markings and such are there.
What I find more annoying is the import of the hierarchical tags. I have imported the tags as the very first step from a text file. Now I imported the catalogue. But I have nearly all tags in flat mode ADDITIONAL to the ones in hierarchical mode…
Maybe because LR is not checking all levels of tags…
Motive | Persons | Family | Me
In LR I have just marked “Me”, the rest LR would export automatically… CO is not working like that.
For me, it is a big effort to get the change.
Either I have to re-tag all pics and need to reorganise the colours and collections, or I have to re-do all tagging to get it back to my order…
I am wondering, and this is honest if professional photographers are not using tags that much.
The tag thing is better in LR – synonyms, hierarchy, and the “do not export” option.
Best,
david
Hi David,
Thanks for your feedback. Regarding the import of hierarchical keywords from a LR catalogue to Capture One, it works like I would expect on my side. I just tried a quick test with keywords assigned in Lightroom both as separate and hierarchical keywords, and they all import correctly.
Make sure that you check both the Keywords tool as well as the Keyword Library tool as only the last one will show you the hierarchical structure of the assigned keywords.
You mention that you have imported the keywords (tags) as the very first step from a text file. These will be populated in the Keyword Library tool as a catalog wide list, which is probably what you wanted. If you want to import hierarchy keywords, you would need to hit tab once for each keyword that should go under a parent keyword, otherwise you lose the hierarchical structure.
If you want to make sure that assigned keywords are not exported with an image, you need to go to the Process Recipe tool, select the Metadata tool tab, and select None from the Keywords drop-down menu.
I hope this helps. If you need further help, remember that you can always get assistance from our excellent support staff at http://www.phaseone.com/support.
All the best, Nils
I bought your tool, but will switch back to LR. LR makes it so easy to just connect my D850 and transfer images from the camera directly into the application. I thought this is a basic functionality. But seems no.
Hi Peter,
That is most definitely possible. Which issues are you facing? Are the images not popping up? Have you been in contact with technical support about this?
I always recommend using a card reader and leaving the camera out of the import process as it will be a bottle neck in speed and require battery power.
– Alex
Images are not popping up neither can I see the Camera as source in the “Import from” dialogue. The camera however is connected as I can see it in the menu and I can take pictures via tethering.
-P
Hi Peter,
Your camera is probably set to ‘Camera Control’ instead of ‘FTP upload/Image Transfer’. In this mode, Capture One will “take over” the camera to use it for tethered capture. Try changing the connection mode and open Capture One again.
– Alex
I use the radial layer in Lightroom a lot. Mostly to create a vignette or to do selective exposure adjustments. Such layers can be moved around easily.
I don’t find a similar tool in Capture One, except for the Masks which are by far not as easy to create and more difficult to change.
I think in Capture One there should be a vector layer usable as a mask.
Hi Julian,
Thank you for the feedback. We appreciate users sharing their needs for future development!
Alex
I use trial version now, with transision from lightroom in mind, unfortunately missing some features I use a lot: stacking photos for hdr and noise reduction, retouch features such as clone / healing, panorama stiching, geotaging,
Also the UI interface is a bit complex, not easy to find what I want, lots of super tiny icons. Cannot change font of the tool windows, I would like to have them a bit larger, and icons a bit larger, everything has the same color what makes i difficult to find.
Photo miniatures after crop always show full images, missing history of applied changes.
Hi Piotr,
Thank you for the comment! Capture One does indeed have clone and heal functions. They are available within the Layers tool. Have a look at http://learn.phaseone.com for more information.
Regarding the interface, yes, it is a different software with more features. If you expect it to be exactly like Lightroom, you will indeed have some challenges, but I highly suggest looking at video tutorials to get up to speed!
– Alex
Hi Allex,
I would like to switch, because of subscriptions and slow operations, I do not expect to be exactly the same of course 🙂
Thank you for the tip, just found some videos about cloning and healing, yes it helps a lot, as it looks on videos works quite good.
Missing photo stacking and panorama stitching is serious drawback.
Other issue I had with capture one, that brush Auto Mask does not work very well, not possible to adjust sensitivity of this feature, I had a case when very different area was selected.
Also detected some software bugs while using masking. Masking brush stopped working, I was not able to paint (draw with brush) more areas until I restarted the Capture One (Version 11.2.1).
Hi Piotr,
Thanks for the reply! Regarding the Auto Mask, it does indeed have its limitations in some use cases. Have you tried refining the mask after drawing it? You can learn more about it here: https://learn.phaseone.com/capture-one/image-editing/advanced-layer-masks
Try updating to Capture One 11.3. If you still experience any bugs, please report them to us at http://www.phaseone.com/support so we can fix them quickly! 🙂
– Alex
Hi – I’m looking to be convinced to jump from Lightroom to Capture One. There seems to be a few time-saving things that Lightroom can do, which Capture can’t. Correct me if I’m wrong!
Firstly, there’s the things that connect LR with Photoshop, like the ability to select multiple images & then “Open as layers in Photoshop” and “Merge to Panorama”, the ability to import PSD’s, etc.
The two main things I’m missing & which I’m really finding a pain to be without are the following – Firstly, there seems to be no way that I can see a “History” list of changes that I’ve made to an individual image file. Is this hidden somewhere that I can’t see. the other thing is a grid for the Live View mode. Again, am I missing something?
Thanks,
Craig
Hi Craig,
Thanks for the comment!
Currently you cannot open multiple images as layers in the same PSD file, correct. There is no history in Capture One, also correct. Regarding grids in Live View, you can add grids and guides from the ‘View’ menu. I hope that helps a bit!
– Alex
Thanks Alex. Does anyone else who has jumped from LR to Capture miss the History list in LR? This is a deal breaker for me unfortunately. I think it’s important to be able to come back to an image & see what changes have been made. I’ll revisit moving to Capture if this feature is added to a later version.
Craig
Hi Craig,
All adjustments are visible in their respective tools at any time. There is no history in list form, but you can simply check which sliders are changed.
– Alex
You can always see what changes you have, there’s just not a history stack. I thought I would miss it, but since you can temporarily disabled a moduel to see it’s effects, it’s been fine. I’ve also started to use layers for when I want a before/after look with the benefit of being able to reduce the opacity.
In the end, it’s still nondestructive editing
I fully agree with Craig regarding changes History, recently I even had a small argument regarding any changes are applied or image is ‘untouched’ after import, and it is hard to go trough all sliders that look very similarly in Capture One UI to determine what was changed.
Thanks Alex & Adam! I’ll investigate.
piotr – if you need to know if the image has been edited, then do a search and change the search criteria to “Adjusted”. There is also an icon to the right of the star rankings that let you know the image was edited too.
If you want to know what changes we’re done, the easiest thing I can think of is go to the Adjustments tab and look for “Adjustments Clipboard”. Next do a “Copy Adjustments” and then all of the Adjustments will be shown in the clipboard. Just look for the ones with a check mark to know what was done. Not the smoothest, but it works
Adam, yes I notticed that icon, but personally I find it useless, the same problem I have in lightroom, just lens corrections makes images edited, and icon is everywhere.
So, am I crazy or is there literally no way to view photos in a folder including the sub-folders? I use YYYY/MM/DD folder structure. I have to click every single day to get to its photos?
Hi Bill,
You’re not crazy! Currently Capture One cannot show the content of physical subfolders on your hard drive. You will need to import them into a Catalog and use Projects and Albums to get something similar. Otherwise you can use the filters on ‘All Images’ and sort by year, month or date.
– Alex
I go to “All Images” and then I filter by year, or by year/month. It should mirror your folder structure exactly.
The one downside of “All Images” is that for Windows users, the first time you go to “All Images”, it takes Capture One a while to re-sync the metadata. You’re see this orange progress chart next to the total images in the Catalog. Once that’s done, searching works. Fun fact – this isn’t an issue for Mac when I used C1 on a Mac.
Yeah, I agree, that’s one of the features I really miss about Lightroom – clicking on a parent folder & being able to see everything in it’s sub folders. Hopefully Phase One are listening & compiling all these LR features that are missing in C1! All in all, I agree that C1 is a more powerful tool & I’ll probably never go back to LR, but C1 could be so much better than it is!
Thank you for the comment, Craig!
– Alex
Another issue I’ve now come across. When processing & exporting files from Lightroom I am given the option of limiting the file size. I can’t see anywhere in C1 where you can do that? Pretty annoying if you can’t… It’s a pretty useful feature when you’re uploading images to a website that has a limit on the file size you can upload. I use it quite often in LR. Anyone?
I like Capture One, but I miss Tethering for my Pentax K1. Is there a chance to get this work in near future?
Hi Pid,
Thanks for the comment! I’m not aware of which models will be included, but you can always contact our support department and request tethered support of the camera. They log everything which helps getting a clear picture of the demand for certain camera models.
http://www.phaseone.com/support
– Alex
A history list of edits
Hi Alexander, one of the big issues with moving over completely is the LR Camera Calibration tool. I have not yet found a way to recreate the subtle but very effective effects of the saturation sliders (especially the blue one) in C1. Would you know of anyone who could help me with this? I’m sure it can be done, but I don’t know where to start. The one other thing I don’t like is the linear keyword table, while LR has a nested one. But this seems to make LR as a DAM, haven’t seen another tool yet to deliver this functionality. How do you get around with a flat table? Am I doing something wrong that I value the nested table so much to properly categorize my pictures? At this moment I use C1 as my RAW processor and then LR as my DAM… Any help would be greatly appreciated!
I’ve moved from LR (something I’ve been using extensively since LR 2.3) to Capture One 12 in the last month. The only reason I’m using C1 is because I absolutely love the quality of the adjustment tools and final look. But goodness me, it really does need to improve in terms of workflow. There are so many simple things which are frustrating me at the moment. Even the process of clicking through images and marking some for rejection (so they can be group deleted) requires you to set up a Smart Folder with some customized indicator as to what will represent ‘rejected’, e.g. Blue flag and then go into that folder, select all and then do a delete. That’s like 15-20 clicks more than anything I’d have to do in LR and yet is the very first thing I do after an import.
Some ideas for improvement, which would make attracting LR users using the trial version of C1 a more likely prospect are:
Icons + Text for the cursor tools as well. These tools are confusing when migrating from LR and they are important because they relate to local adjustments.
Turning off a preset/adjustment requires a completely non-intuitive Option+Back-Arrow and can only be done per adjustment. If I want to disable two, or more of my adjustments temporarily I am unable to toggle a switch on each of those to do so. I didn’t realise how often I did this until I started using C1. While writing this I just thought that technically I could create a layer for each adjustment and turn them off that way, but that’s unwieldy and would lead to lots of layers.
Sub-folder parsing – I couldn’t believe this didn’t exist. I thought it was me being stupid and not grasping a basic concept. But no, for some bizarre reason you cannot have C1 show in the browser all the images in the current, plus sub-folders. It’s incredibly frustrating at the moment to have to create an album just do that. How is that a streamlined workflow?
It does feel sometimes that C1 is attempting to coerce photographers into its way of thinking. I want the flexibility to implement a workflow that works for me, not one that C1 thinks I should adopt.
Pros of C1
– Quality of process – C1 all the way
– Best colour editing and grading tools I’ve used – really excellent
– Lumo masking – I absolutely love it
– Export Process Recipes – one of the best exporting tools ever. Wonderful addition to my workflow!
– No modules! I’ve always hated those in LR
– Great quality styles. Almost all are usable
– Love the look of my D850 RAW images upon import
Cons:
– Consumability and ease of use – LR wins by a long way.
– Cluttered interface with tiny fonts and icons
– Importing, rating, rejecting and comparing images side-by-side, so much easier and intuitive in LR
– Not many free presets (hopefully this will increase over time)
– Commercial Styles are much more expensive than most LR commercial presets
– No ability to add keywords at import (just something I’ve always done)
Hi LJR69,
Thanks a lot for your elaborate comment! We highly appreciate feedback like this, especially when it’s this constructive.
If I can reply to one of your cons, the points about Styles, it’s hard to compare. Styles for Capture One are competing against thousands and thousands of third-party Lightroom presets. We can only hope these preset vendors will consider making Capture One Styles as well! That would really benefit everyone.
Alex
I completely agree. That ‘con’ wasn’t one specifically aimed at PhaseOne, but just a general observation. As C1 adoption grows I believe there will be a natural increase in Style developers. In fact pixafoto has some great styles already.
This is the killer time for C1 to be targeting LR. Many users are jaded with the speed of LR as well as some of the harshness around some of the tool adjustments (clarity in LR is awful imo) and lack of layers without round tripping to PS. LR has the market share of photographers and is therefore your greatest market opportunity in my opinion. Nobody expects C1 to ‘be LR just with greater processing’, but some of the workflow needs to work its way into your tool. I don’t care if it’s not implemented in the same way, just that the features have to exist (reject photos is a classic example).
I’m definitely staying with C1, but it took me an entire month, right up to the last day, to pull the trigger and even then I was on the fence a bit. In my first week of the trial I stopped using it because of the workflow.
Good luck (and well done so far) to the PhaseOne C1 team though. It’s an amazing processor!
Please, make confirmation of renaming files at export from capture one to save space on HDD!.
Hi Mikhail,
I’m not quite sure what you’re asking. Would you need a confirmation when the export is complete? Or when a batch rename is complete? And how is this related to saving space on your hard drive? Could you elaborate a bit?
– Alex
I mean that when exporting photos again to the same folder, you could choose to write instead of or like new files
In urgent need to know how to work between Capture one and Photoshop and preserve all layers when returning to Capture one. I have done two trial and the image comes back to Capture One without layers. I have used the “edit with” option.
Frustrated new user.
Hi Anna,
Layers in Photoshop does not work in the same way as layers in Capture One, so it’s currently impossible to see the Photoshop layers as objects within Capture One. What you see is the ‘final’ image with all layers from Photoshop, but it behaves as a merged file. However, the .psd file still retains all layers should you need to change anything in Photoshop.
I hope I understood your question correctly. If not, please let me know!
– Alex
Hey,
So can you find a way to make HSL preset an auto function in the program that doesn’t effect the styles tool and is a added way to view the color editor tool for those of us that like HSL better. But also want to apply our styles and then control how it looks after. Also if we could finally get a Before & After short cut and also hover over tool to effect the B&A shortcut to quick preview what changes we made without clicking the screen. Lastly a way to pin our floating tool panels to other parts of the screen for different workspaces, like maybe color balance or editor under the preview window, or other settings on the left of the image and remainder on the right of the image that is scalable. Thanks.
Hi Dante,
All great input, thank you! I’ll see what I can do. 😉
– Alex
I would love to see a fonction like in LR with the flags, to auto switch the next picture after flagging (or giving a green tag for exemple) to save time when selecting pictures. Also Having the settings modules expanded all at the same time would be great instead of all the time having to expand the one you want to use each after another. Unfortunately Capture one didn’t convince me for those details which are important in my way to work as It saves me a lot of time in edition.
Thank you for the feedback, Jonathan!
Does Nik Silver Efex plug-in system work with C1 ?
I’m about to get Lr which is compatible but have paused as I hope C1 is a better, less hegemonic, alternative/replacement.
Hi Howard,
If you use ‘Edit With…’ you can export a high quality 16 bit TIFF file to Nik Silver Efex, edit to your liking, save, and have the edited TIFF file back inside Capture One for further processing.
– Alex
Your request (24197) has been received and is being reviewed by our support staff.
Hi
I still never received a response waiting over a week now? I am using a Canon EOS R, when I use the noise reduction luminance slider it does nothing to the picture, only if you zoom in to 100% or more on the photo does the picture change when you move the slider. However when I export the photos the change I have done on the slider does come out on the finished photo, the problem is when editing the photo it does not change and you need to zoom in to see what change has occurred, weird but very frustrating. At regular photo viewing or zoomed 67% nothing changes. Can someone please review and fix this, it must be just on a Canon R or something as others would have complained by now if it is was more cameras.
Regards
Kevin
I’m using only the free demo version of Capture One, so I know I’m missing a lot of features, like brushes. One thing I’m curious about, does the full C1 version have a way to filter the library by metadata as Lightroom does? I can send a screenshot of what I’m talking about too. I find it INCREDIBLY useful to see what lenses and what apertures I’m shooting at. I regularly go through my full catalog (10,000+ images) to compare which lenses are my keepers and which aren’t getting love. So far, I haven’t found anything like that. Is it or something similar to the full version by chance?