We recently attended the postgraduate photography show at LCC to present our RAW Talent Award to three creatives. During the event, we met Benjimen Green and presented him with one of the awards. His photography mainly focuses on people, telling stories that are often overlooked. He believes everyone has a unique story to tell, even if it is not the most prominent one in the room.
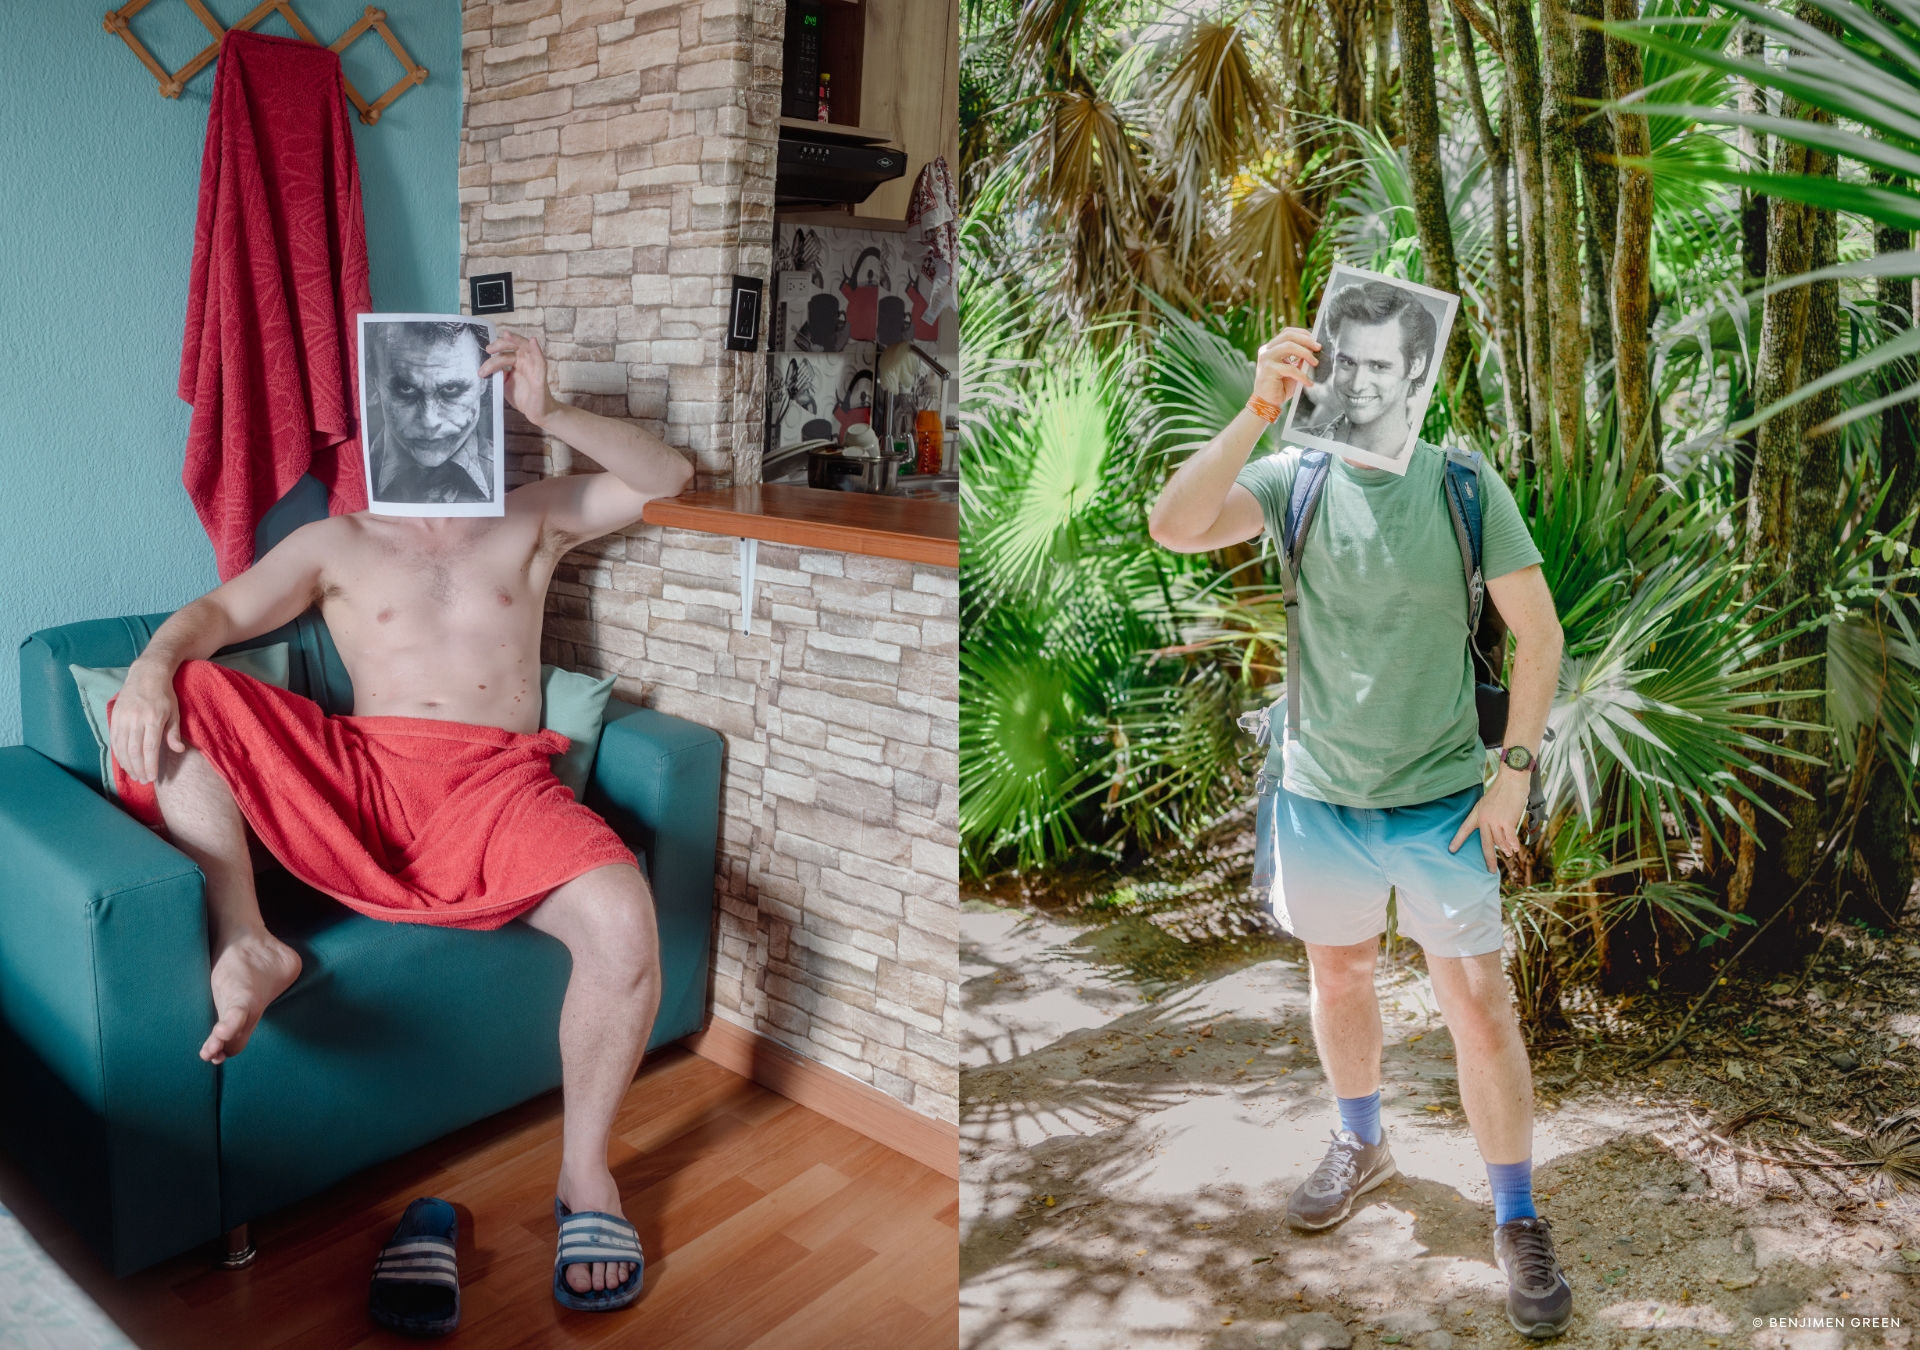
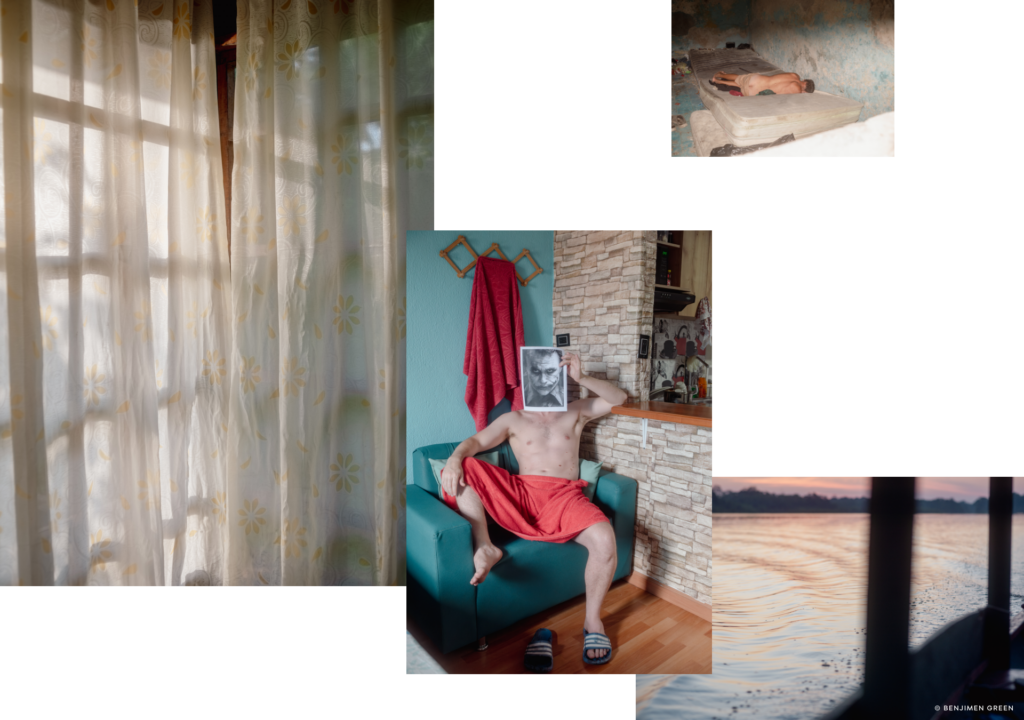
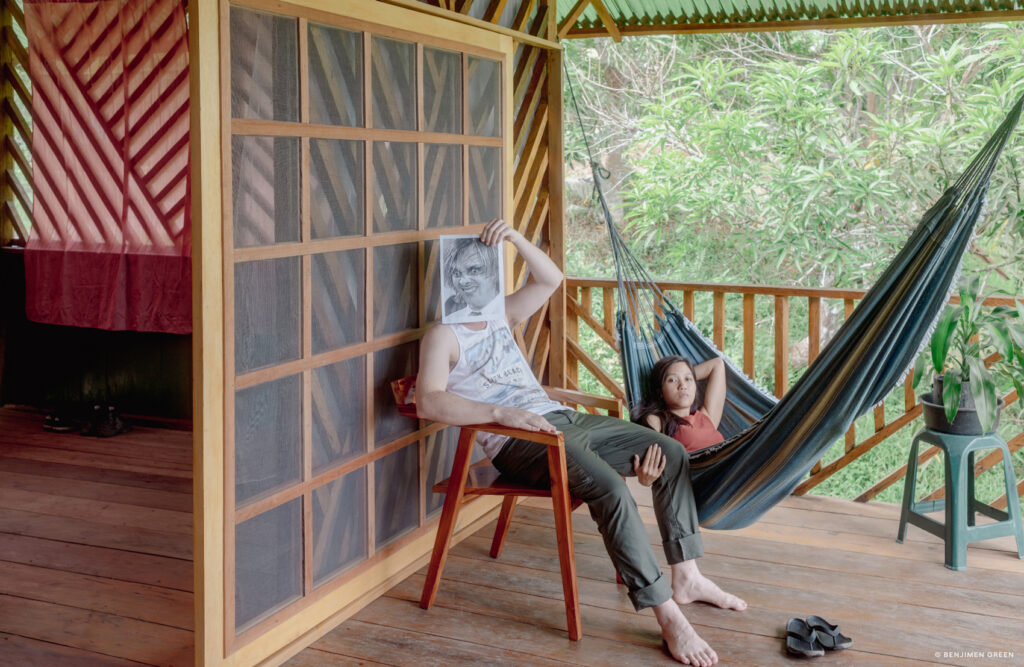
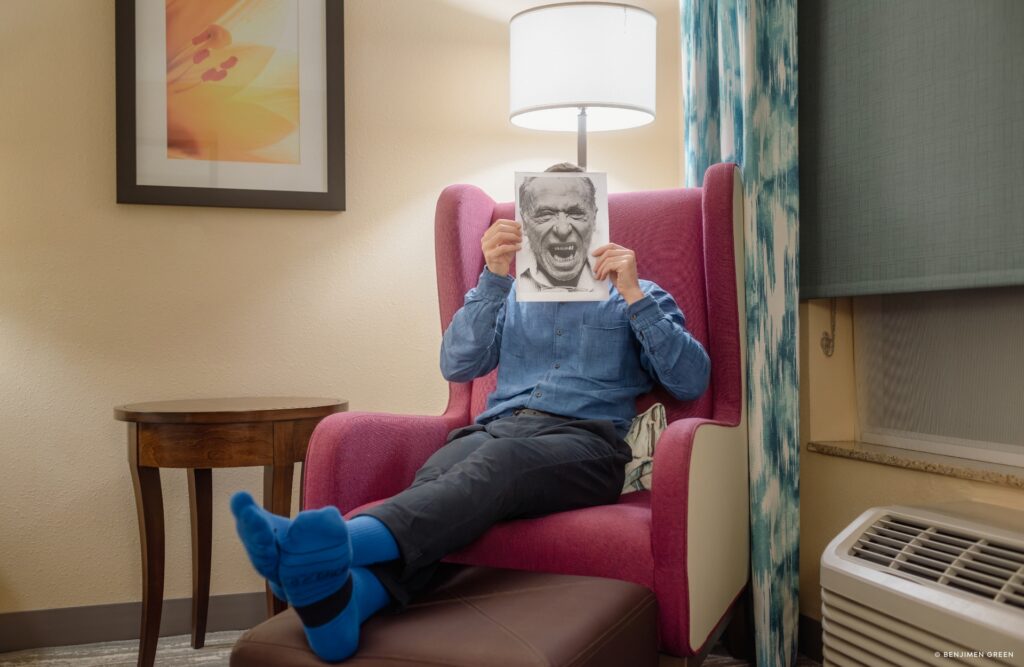
With his project, he shared his personal story of being diagnosed with autism spectrum disorder (ASD). Benjimen’s portrayal of masks in his images aims to break mainstream autism stereotypes and encourages individuals to embrace their unique identities without fear or shame.
How did you first get into photography?
In my early years, I stumbled upon my dad’s hidden film camera, which I wasn’t supposed to play with. Spending hours absorbed in its dials and buttons, I found it the coolest thing. However, my serious plunge into photography only happened later. In 2018, I purchased a small Fujifilm camera before relocating to Southeast Asia for work. Initially, it was about capturing moments, but after teaching during the day, I began venturing on evening photo walks, sometimes late into the night. This turned into a fever for documentary photography— and a means to unwind and connect with people. Sharing these pictures with friends back home on Instagram led me to pursue self-guided assignments, which became my outlet for storytelling and ignited my passion for photography.

What type of photography do you like to shoot the most?
I am particularly drawn to portraiture as it enables me to connect with people uniquely. The dynamic interaction between the subject and the photographer goes beyond merely capturing an image; portraiture involves a fascinating psychological dimension. Additionally, I have a keen interest in fine art documentary photography. The energy of capturing genuine moments and the inherent randomness of everyday life excites me. It presents an opportunity to organize chaos and immortalize moments that will never happen again.
Congratulations on your project. How did you come up with the idea for it?
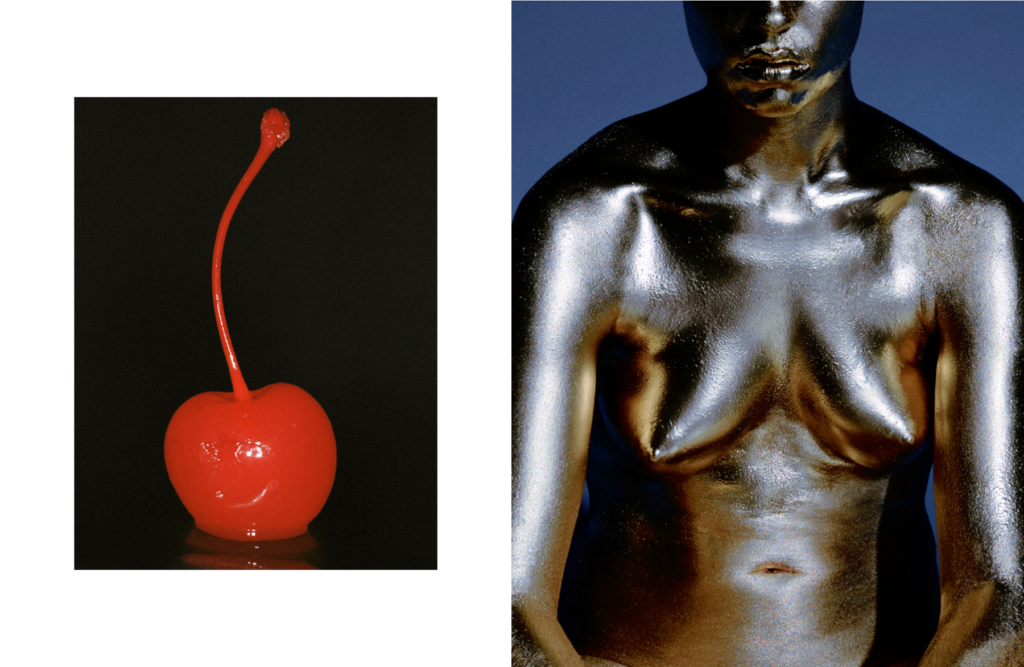
Thank you for your congratulations! The inspiration for this project stemmed from my personal experience of receiving a late diagnosis for Autism Spectrum Disorder (ASD). I felt compelled to address this topic freshly and innovatively, aiming to disrupt the false stereotypes prevalent in mainstream culture. Unfortunately, autistic individuals are frequently stigmatised, pushing them to the margins of society. This societal marginalisation often results in health challenges as individuals attempt to mask their authentic selves, striving to assimilate and conform to societal expectations.
What did you enjoy the most when working on the project?
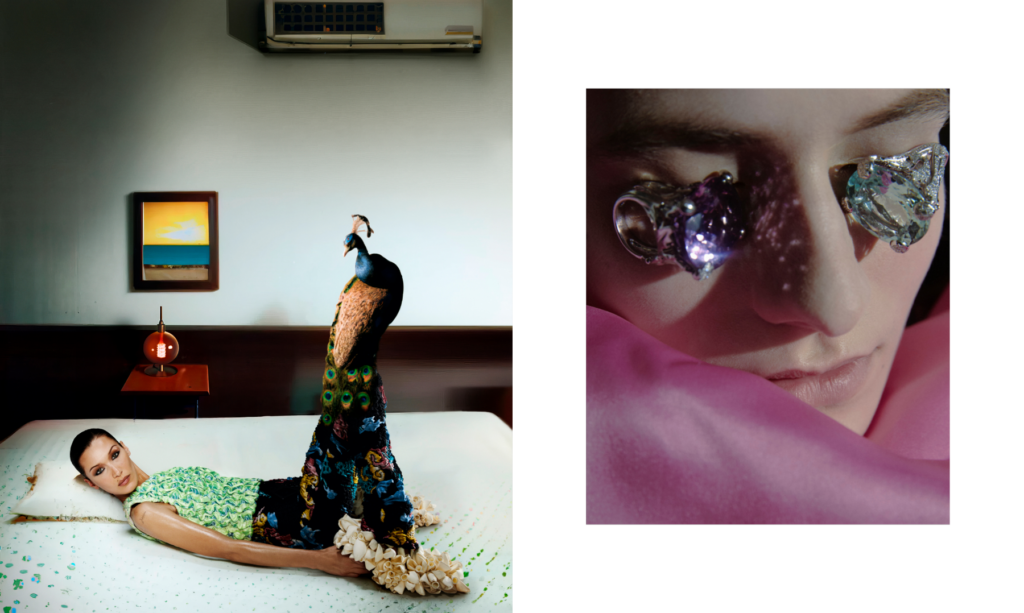
I derived immense satisfaction from employing lateral thinking to address complex issues, especially exploring challenging subjects like autism. Contributing something valuable to the conversation was the most gratifying aspect, aiming to assist people confronting similar struggles by sharing a relatable story. Additionally, the experience of traveling through South America during the project added a unique dimension. The most challenging part involved using myself as the subject for the self-portraits. As a very reserved person, presenting myself in such a public manner was daunting. Nevertheless, it aligned with my objective of inspiring neurodiverse people to be bold and open about their conditions, symbolising the act of public unmasking.
Can you share your experience of capturing these photos?
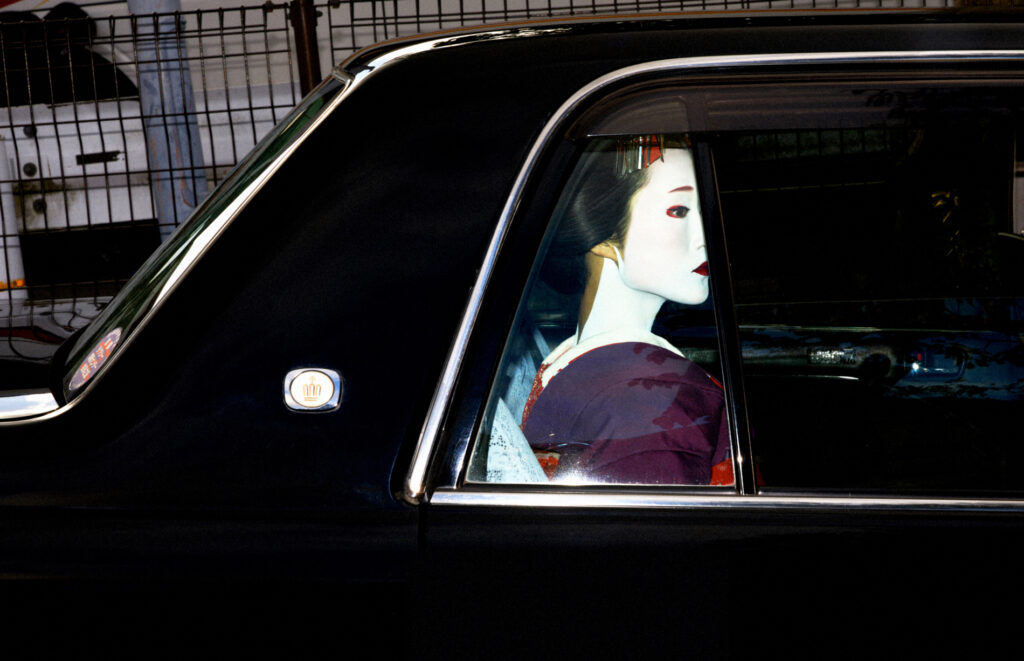
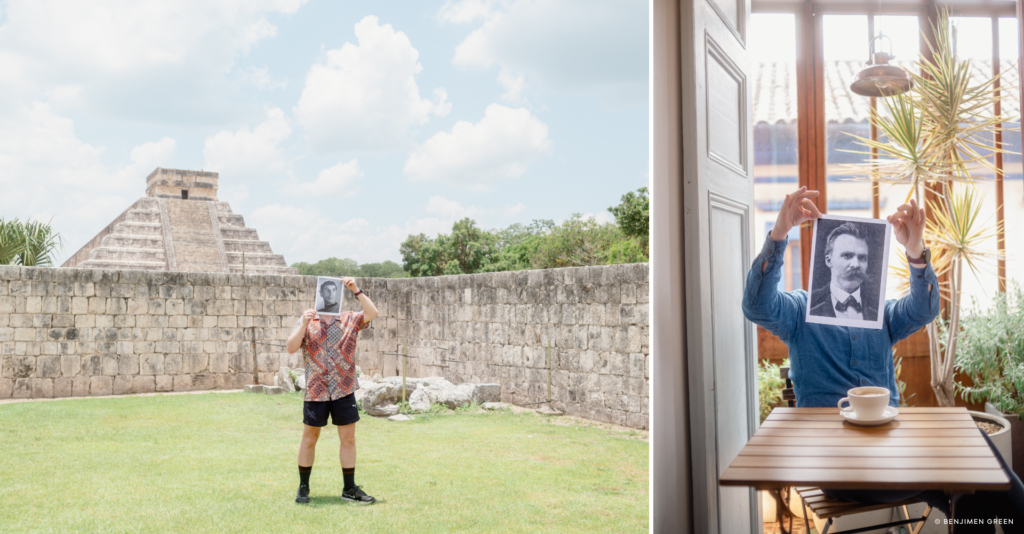
Documenting my journey through South America from a deeply personal perspective was a profound experience with challenges and rewarding moments. Despite facing adversity, such as falling seriously ill with yellow fever in the Amazon and facing a life-threatening situation, I discovered that some of my most compelling photographs emerged during these difficult times. The vulnerability I felt added an unexpected, deeper layer to the project. There were also some amusing moments, like when I visited the pyramids in Mexico. While capturing images of myself holding masks in front of my face, the cultural history of masks in Mexico drew the curiosity of onlookers. A crowd gathered, fascinated by my creative process, and many took pictures of me. Some even approached me who were curious about my work. This created a few interesting conversations.
How did you develop this approach of using satirical humour in your images?
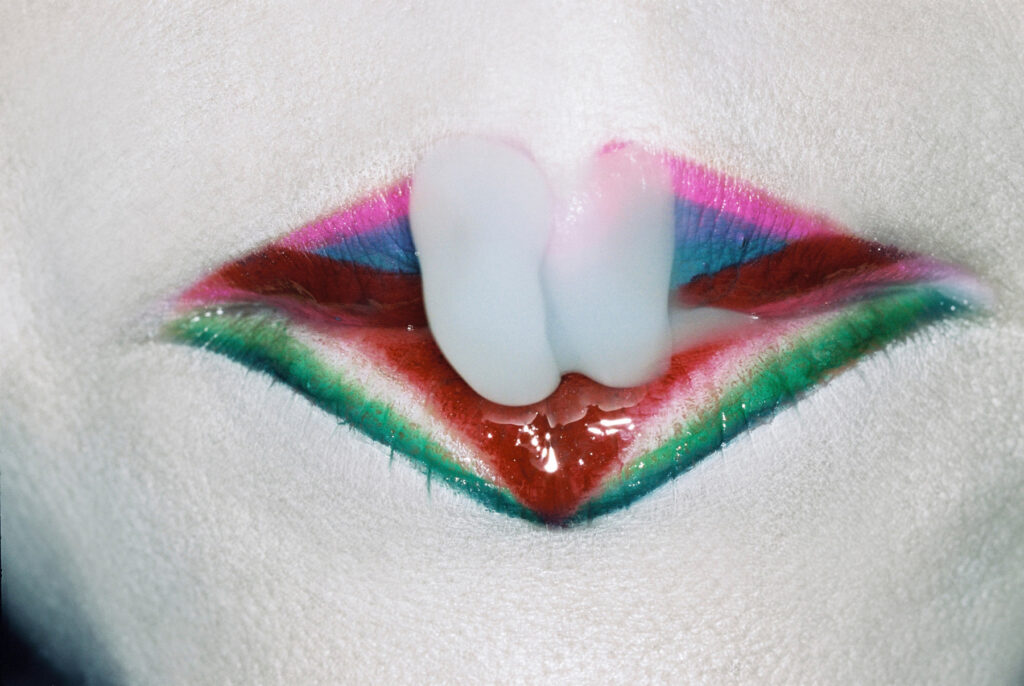
The self-portraits created for Masquerade actively confront the misrepresentation of Autism Spectrum Disorder (ASD) in mainstream culture. Drawing inspiration from the situationist writer Guy Debord’s “Society of the Spectacle,” where strategies like humour and détournement are discussed for disrupting harmful social constructs, my approach aimed to challenge prevailing norms. Researching existing portrayals of neurodiverse communities highlighted inaccuracies and often disheartening depictions, fostering a negative image. Many narratives portray individuals with ASD as odd or as victims, overlooking their significant contributions in different fields such as science, art, math, and technology. By incorporating humour, I intended to maintain a light tone, engaging audiences while subverting misrepresentations.
How would you describe your photographic voice?
My curiosity about people has always been my driving force, leading me to discover my photographic voice. This inquisitiveness centers around uncovering the concealed stories of individuals often overlooked and hidden in less frequented corners of society. Despite being deemed uninteresting by mainstream media, everyone possesses a unique story, valuable even if spoken quietly. I am dedicated to bringing these human experiences to light through photography, shedding insight onto these compelling yet underestimated stories.
Can you tell us about a unique moment that shaped your style or approach?
A pivotal moment in shaping my artistic approach occurred while reading Susan Sontag’s work, particularly “Regarding the Pain of Others.” Sontag illuminated the dual nature of photography, akin to speech, capable of both positive and negative impacts. Her perspectives underscored the responsibility photographers bear in shaping narratives. In today’s image-saturated era, it’s crucial to consider our contribution thoughtfully. This realisation has significantly influenced my conscientious approach and given me a greater awareness of the narratives I choose to perpetuate. I approach each idea flexibly in terms of aesthetic style, allowing its nature to dictate the appropriate visual language. I am not rigid about a specific style, as I believe in tailoring the aesthetics to suit the unique demands of each project.
How did the education at LCC impact and help your journey as a photographer?
The education at LCC profoundly impacted me because I was surrounded by a network of talented peers and knowledgeable teachers. I gained fresh perspectives that enhanced my approach to photography. This environment nurtured my confidence, allowing me to express my ideas through my work. The support from LCC empowered me to contribute to the broader conversation, helping me better understand where I fit into this dialogue. Additionally, my teachers instilled in me a deep contextual understanding of ethics, which will elevate my practice to a new level in the future.
What are some of the photographers you look up to?
There are so many, but some that spring to mind are Mary Ellen Mark, Paul Graham, Robert Adams, Alec Soth, and my mentors Christopher Matthews, Edmund Clark, and Max Houghton, who have all carefully guided my development as a photographer over the past few years.
What are your plans for the near future?
My MA was an intense experience that was hard to process in such a short time. I want to take a moment to breathe and think about everything I have just learned. Photography-wise, I plan to work on something light and fun, where I can enjoy making pictures again. So, I’m heading to Indonesia in the coming months for a holiday and some travel documentary photography.
What do you wish someone told you when you decided on your career?
Be confident! I wish someone had told me early on that, as a sensitive person with a history of trauma, it’s okay to speak up and share my unique perspective. Permitting myself to be heard was crucial in finding the confidence to contribute to the photography conversation. Not everyone seeks the spotlight, but reserved individuals often have valuable insights. Realising this can be challenging, and building confidence takes time, so be patient with yourself. Although my photography work may not resonate with everyone, there is a group for whom it matters. Navigating a creative career is undeniably challenging, but expressing something meaningful brings unparalleled fulfillment.
See more of Benjimen’s work on his Instagram.