
Capture One has a High Dynamic Range tool designed to optimize images with a large dynamic range normally leading to loss of detail and colors in highlights and shadows.
In Capture One Pro 8 the High Dynamic Range tool has been improved in such a way that it is easier to recover detail in both shadows and highlights in a natural way.
Avoid the “HDR look”
The design goals have been to achieve a more natural and realistic look when doing strong correction. With the new High Dynamic Range tool in version 8 you are now able to do strong corrections without getting the artificial HDR look.
The High Dynamic Range tool is now also available in Local Adjustments Layers. So if you need super strong corrections you can now simply add an extra layer and apply more Shadow or Highlight recovery from the High Dynamic Range tool.
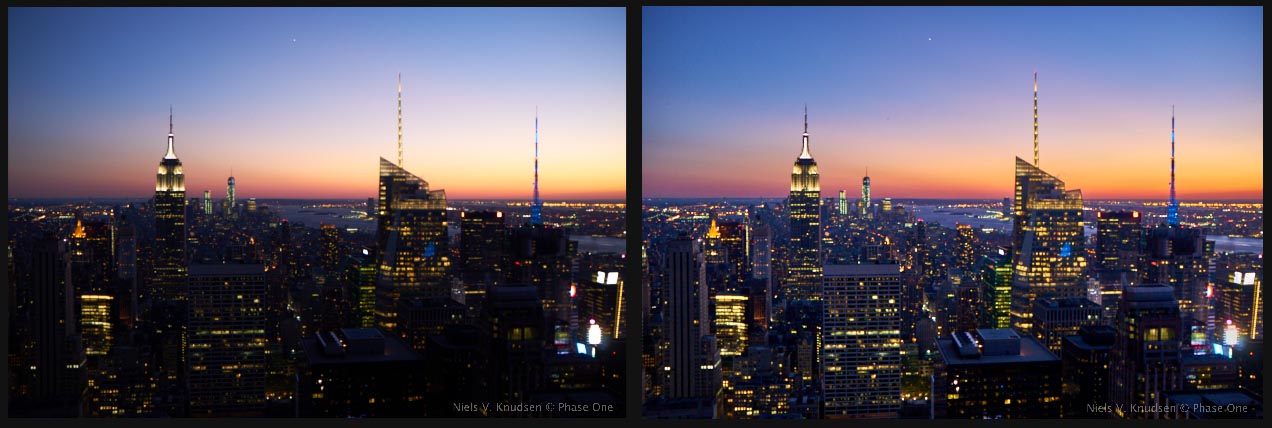
Before After
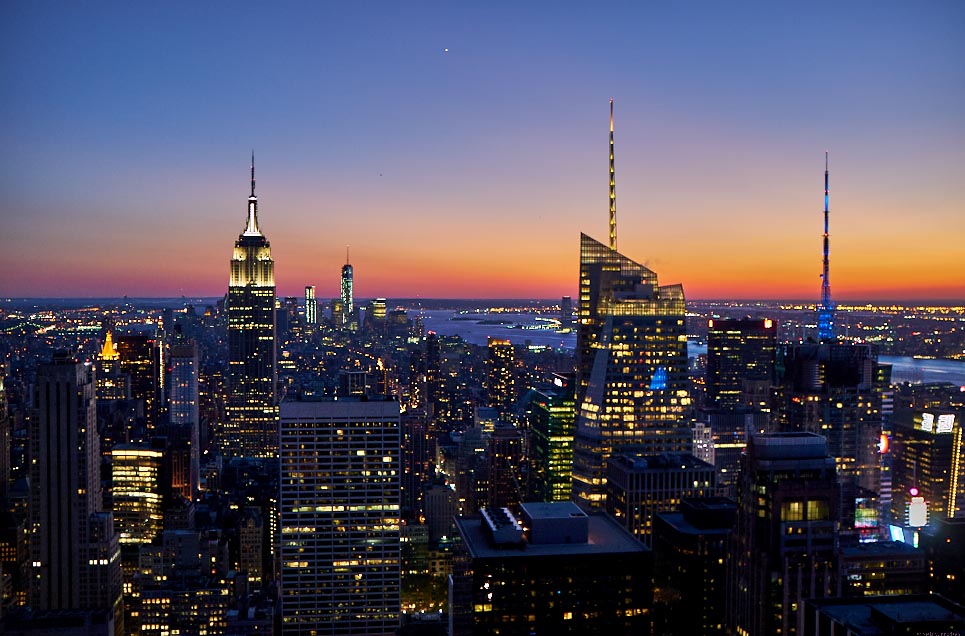
The image to the left is straight out of the camera. The image has been exposed with just a bit of clipping in the brightest part of the sky.
The image to the right is after it has been optimized in Capture One Pro 8 primarily by using the improved High Dynamic Range tool.
The improvements in Capture One Pro 8
To show how the HDR tool has been improved I will use the image from above.
In order to compare version 7 against version 8 I will start by looking at the image in Capture One Pro 7. By first using version 7 the image will get image settings from this version, which will be maintained when you look at the image in version 8. If you look at the Base Characteristics tool you will see that the processing engine “Capture One 7” is used for the image. If I make a new variant of the image (F2 on Mac/F7 on Windows) the new image will, by default, be using the new engine “Capture One 8”.
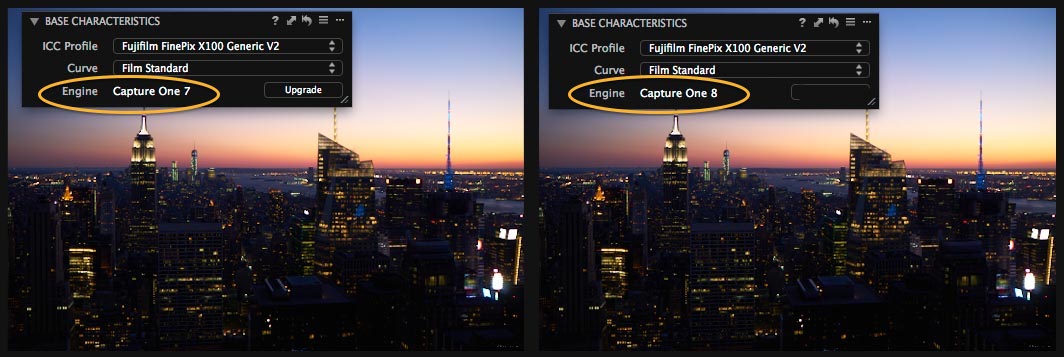
Two variants of the same image. The variant to the left is using Capture One 7 engine as it has been opened in Capture One 7. The variant to the right is using the Capture One 8 engine.
If I now apply maximum values for the Highlight and Shadow sliders in the High Dynamic Range tool, which is something that I would hardly ever do, then it becomes much easier to see what I mean by saying that the new version looks more natural and realistic.
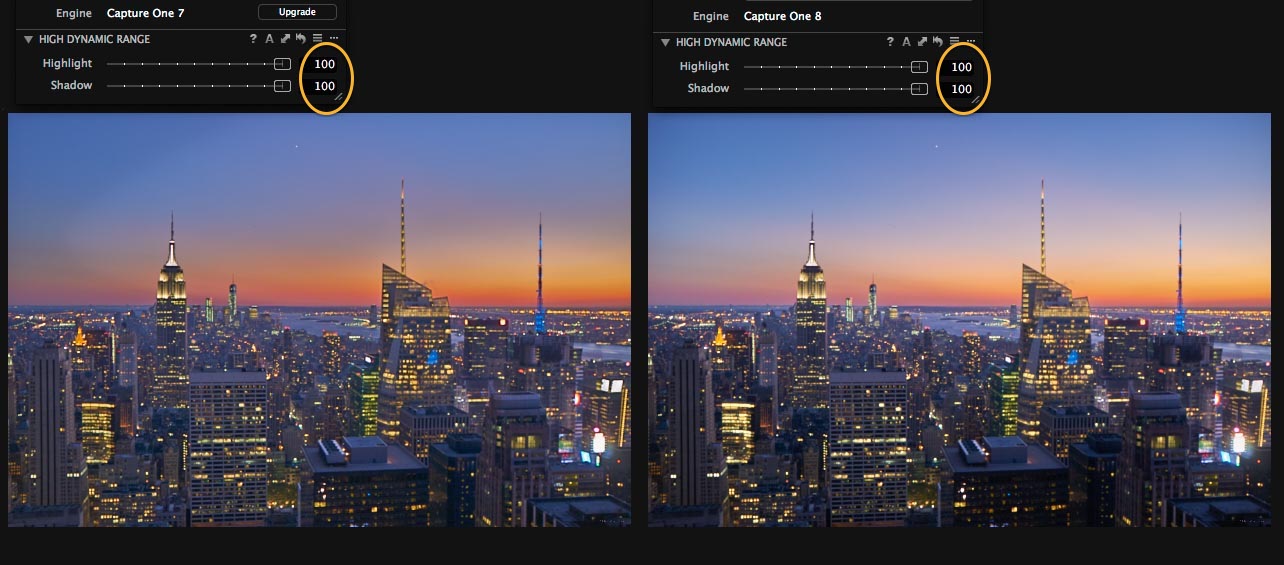
Capture One Pro 7 Capture One Pro 8
For both variants maximum values for Highlight and Shadow corrections have been applied in the High Dynamic Range tool. When looking at the version 7 variant it is easy to see that the image has become unrealistic with a grayish low contrast look. The tone transitions in the sky also break up a little bit.
When looking at the Capture One 8 variant the overall appearance is a much more natural and realistic look. The sky is also showing a nice and smooth tone transition from the orange highlights to the darker corners.
Applying High Dynamic Range tool in an Adjustments Layer
When comparing the two versions of the software, it is obvious that version 8 gives a more realistic look. But what if you like the deeper orange sky from the version 7? In Capture One Pro 8 you have the ability to apply the High Dynamic Range tool in a Local Adjustments Layer. So if you need even more highlight recovery you can simply add more in a Local adjustments Layer.
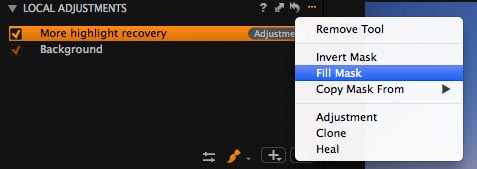
In this case I simply added another Local Adjustments Layer and used the Fill Mask feature to apply the extra Highlight recovery on the whole image.
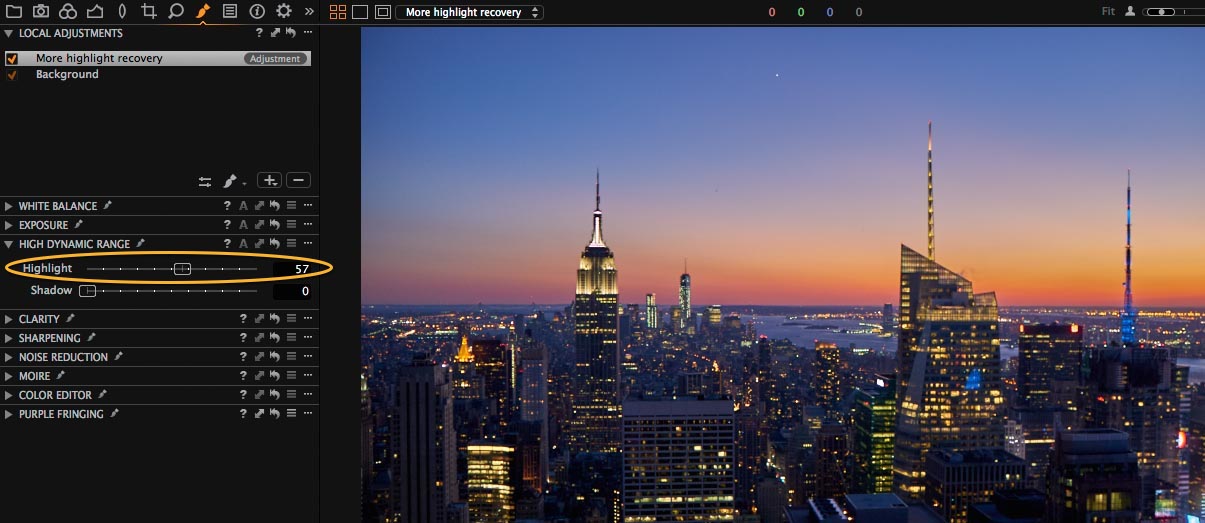
A deeper orange sky has been achieved by adding more highlight recovery in a Local Adjustments Layer covering the whole image. I have also reduced the Shadow correction to around 55, which I find works better for this image.
To finish up the image I would typically add some Clarity and Structure with the Clarity tool. This brings back more local contrast to the image, which I often find pleasing when very strong corrections have been made in the High Dynamic Range tool.
Final image after applying Shadow and highlight recovery with the High Dynamic Range tool as well as adding some Clarity and Structure in the Clarity tool.
Will settings in Capture One 7 give same results as in Capture One Pro 8?
In the process of enhancing the High Dynamic Range tool we have made some changes around how we split shadows, mid-tones and highlights and how we weigh the different colors in an image. This is all part of why the improved tool works in a more realistic and natural way.
These changes will have an effect and the slider settings for the High Dynamic Range tool made in Capture One 7 will not give the same look as in version 8. Capture One Pro 8 respects all settings made in version 7 and an image adjusted in version 7 will look exactly the same in version 8, as long as you don’t upgrade the engine for the image.
If you want to see how the image will look using the Capture One Pro 8 engine without loosing your version 7 variant, the safest way is to create a new variant, which by default will be using engine “Capture One 8”, and then simply make a Copy and Paste of all settings from the first variant. This way you can compare the engine 7 and 8 and do whatever tweaking you need with the Capture One 8 variant to make it look as good or better than the version 7 variant.
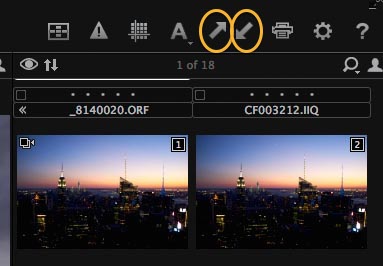
Use the copy and paste icons to move settings from a variant using Capture One Pro 7 engine to a variant using Capture One Pro 8 engine.
All the best,
Niels

The Image Quality Professor
The digital pioneer, Niels V. Knudsen, is Phase One’s Image Quality Professor and founder of the IQP blog. Moreover, he is responsible for breakthrough advancements in image quality both in Phase One’s medium format camera systems and in Capture One Pro.


Hi there,
Thanks foe explaining above. I have been testing adjusment layers and masks and this clarified some of my questions.
There is on thing I like to express what I am grasping with: in gradient mask it works in the way/order which feels to me opposite to first expectation and I ended up using “invert” before achieving what I tried to get.
B.r: Markku
Hi Markku,
I am happy that the post was helpful. Thanks for all your input!
All the best,
Niels
Hi.
Inspiring article. Thank you :-). Are you going to cover local adjustment of white balance som time?
Oh, yes, the local white balance adjustments … I have been waiting for those since first seen the local adjustments functionality. No blue shadows on sunny days, not anymore! 🙂
Hi there,
Good to hear that you are happy about the White Balance in Local Adjustments. I will also do a blog post about it soon.
All the best,
Niels
Hi Allan,
Thank you. Good to hear that it was inspiring. Yes, I will definitely write a post about the local White Balance adjustments!
All the best,
Niels
Hi Niels, how are you?
Just looking at the images you provided side by side, it looks like Capture 8 has less highlight recovery (Looking at the windows of the building on the left, which still looks burned out) and less shadow recovery (Looking at the top of the nearest building). Is that fair?
If so, is a local adjustment the only method of adding extra recovery?
I used to find in Capture 7 that anything more than a minor highlight correction resulted in odd highlights, and a far more pleasing result could be achieved by pulling the output values on the histogram in to 245 or so. Is that still the case?
Also, on a related note, I’ve always wondered, if I need to (for example) increase global exposure by 1 stop, but then reduce part of the exposure back down to it’s original exposure, how does Capture One handle that? Will that area look the same as it did before? Or does it get changed twice, and end up looking different somehow? (If it’s the latter, how do I avoid that?)
Thanks!
Hi Ben,
Thanks for your questions. To answer them:
1) Yes, a Local Adjustment Layer is the only way of adding extra recovery.
2) You still have the same option for pulling the output values of the histogram.
3) In shadow ares and mid tones you will end up getting the same result, if you globally push one and locally bring it back.
In highlights areas, there is a slight difference between the exposure in a base layer and in a local layer, as they have two different approaches for preventing clipping when pushing the exposure.
All the best,
Niels
Hi Niels
Very pleased to see the additional HDR facility in the local adjustment layer, also the mast cloning.
For those of us who use the masks extensively, would be great to have the photoshop facility to set a straight line in a mask between two points by holding holding the shift key down.
all the best
rob
Hi Rob,
I see your point and thanks for your feedback.
All the best,
Niels